1
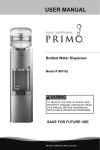
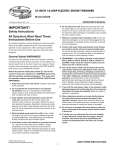
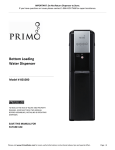
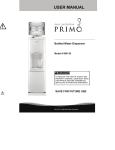
PROFESSIONAL
HEAVIER USE BOTTLED WATER DISPENSER
Owner’s Manual
#601177
1
TABLE OF CONTENTS
1
p.
Welcome
4
p.
Dispensing Water
2
2
3
p.
p.
Features and Functions
Safety Precautions
Getting Started
5
p.
Maintenance
Troubleshooting
6
p.
Limited Warranty
Welcome to the Primo family! Our mission is to provide you with pure water to help
ensure a healthy home, family and future. We’re committed to creating happy, healthful
communities by giving customers like you an easy way to stay hydrated — and saving
you money in the process.
Keeping your home stocked with Primo water is easy and inexpensive. Our exchange
program allows you to grab a new bottle and recycle your old one whenever you’re ready,
or you can replenish your empty bottle at one of our convenient refill machines.
We want to you to be completely satisfied with Primo’s water and your new Primo Professional
water dispenser. So if you have any questions or feedback, or if you just want to find the
closest Primo water retailer in your area, please call us at 866-429-7566 or find us online at
PrimoWater.com. Be sure to ask how you can save even more by joining Club Primo.
Live well,
Billy D. Prim
CEO
Primo Water Corporation
1
FEATURES & FUNCTIONS
SAFETY PRECAUTIONS
Cold Control – Depress control to dispense. Release to stop.
m CAUTION
Hot Control with Child Safety Feature – Slide red button away from you and depress control to dispense. Release to stop.
PROFESSIONAL
HEAVIER USE BOTTLED
WATER DISPENSER
_____
Model #601177
mWARNING
To reduce the risk of injury
and property damage, user must
read this manual before assembling,
installing & operating dispenser.
SAVE THIS MANUAL
FOR FURTHER USE.
Function Lights – Green ON icon indicates the dispenser is plugged in. Green snowflake icon indicates the dispenser is cooling water. Green wavy lines icon indicates
the dispenser is heating water. Blinking red bottle icon indicates the bottle is empty.
• Do NOT use dispenser if cord becomes frayed or otherwise damaged.
To reduce risk of injury and property damage, user must read this
entire guide before assembling, installing & operating dispenser.
• To protect against electric shock, do NOT immerse cord, plug, or
any other part of dispenser in water or other liquids.
Failure to execute the instructions in this manual can cause
personal injury or property damage.
• Ensure dispenser is unplugged prior to cleaning.
Bottle Support – Helps align sports bottles and glasses with spout to eliminate spills.
This product dispenses water at very high temperatures. Failure to
use properly can cause personal injury.
• Never allow children to dispense hot water without proper and
direct supervision. Unplug unit to prevent unsupervised use by
children.
Spouts
• Hot water comes out here.
• Cold water comes out here.
When operating this dispenser, always exercise basic safety
precautions, including the following:
• Do not dispense hot water if water bottle is empty.
LED Nightlight – Located between spouts. Helps in low light situations.
Straw Assembly – Located inside cabinet. Connects to bottle to allow water to be
pumped into hot and cold tanks.
Straw Hanger – Located inside door at top. To keep straw assembly clean
when changing bottles, rest it here.
Drip Tray & Grid and Full Indicator – Dishwasher safe. Snaps in and out. Red full
indicator in tray rises when tray becomes full of water. For cold water center glass
over right hole. For hot water center glass over left hole.
Water Bottle – Not included. Uses 3, 4 or 5 gallon bottles. Go to www.PrimoWater.
com to find 99.99% pure Primo Water at a store near you.
Energy Saver – Located on back. Press red control to off to stop heating.
Press green control to off to stop cooling.
Nightlight – Located on back. Allows you to choose to have the nightlight
ON or OFF.
Adjustable feet – Twist to provide stability on uneven surfaces.
2
• Always grasp plug and pull straight out from outlet. Never unplug
by pulling on power cord.
• Prior to use, this dispenser must be properly assembled and
installed in accordance with this manual.
• This dispenser is intended for water dispensing only. Do NOT use
other liquids. Do NOT use for other purposes. Never use any other
liquid in the dispenser other than known and microbiologically safe
bottled water.
• For indoor use only. Keep water dispenser in a dry place away from
direct sunlight. Do NOT use outdoors.
• Install and use only on a hard, flat and level surface.
• Do NOT place dispenser into an enclosed space or cabinet.
• Do NOT operate dispenser in the presence of explosive fumes.
• Position back of dispenser no closer than 4 inches from wall and
permit free airflow between wall and dispenser. There must be
at least 4 inches clearance on the sides of the dispenser to
permit airflow.
• Use only properly grounded outlets.
• Do not use an extension cord with your water dispenser.
• Service should be performed only by a certified technician. Please
contact us at 866-429-7566 for assistance.
IMPORTANT: Do Not Return Dispenser to Store.
If you have questions or issues please contact
1-866-429-7566 for expert assistance.
GETTING STARTED
Do Not Insert Plug Into Outlet Until Instructed.
Register Online
Please register your dispenser. This will be helpful should you need
customer service assistance in the future. Go to www.PrimoWater.
com and click on Customer Care.
Please write your serial number (located on the back of your dispenser)
on this line. Attach receipt to manual for safe keeping.
Serial Number:_____________________________________________________________
3
Locate Dispenser
1. Place dispenser upright.
2. Locate dispenser on a hard and level surface in a cool shaded
location near a grounded wall outlet. Twist the feet to
adjust the height if surface is not completely level.
Notice: Do NOT plug in power cord yet.
3. Position dispenser so the back is at least
4 inches from wall and there are at least
4 inches of clearance on both sides.
Activate Heating & Cooling
Notice: This unit will not dispense hot or cold water until
the Energy Saver controls are activated.
To activate, press top side of Energy Saver controls in to start heating
and cooling water.
• If you do not want to heat water, press bottom side of red Energy
Saver control in.
Assemble
1. Remove drip tray from door and place the grid on top.
2. Snap drip tray and grid assembly into door.
• If you do not want to cool water, press bottom side of green Energy
Saver control in.
Install Water Bottle
Activate Nightlight
1. Open dispenser door.
5 Gallon Bottle
2. Place straw assembly on hanger.
Head
3. Place fresh bottle outside of cabinet.
Collar
Press top side of blue control in to turn light on.
Press bottom side in to turn light off.
DISPENSING WATER
4. Remove entire plastic cap from top of
bottle.
5. Clean outside of new bottle with a cloth.
6. Place straw into bottle.
7 Slide collar down until it clicks in place.
8. Push head down until tube hits bottom of
bottle.
3 Gallon
Bottle
Head
Collar
9. Slide bottle into cabinet and close door.
Provide Electricity
Plug cord into a properly grounded wall outlet.
At this time the pump will begin to move water from the bottle to the
4
hot and cold tanks. It will take up to 12 minutes to fill the tanks for the
first time. During this period the pump will run continuously. This is
normal.
This unit has been tested and sanitized prior to packing and
shipping. During transit dust and odors can accumulate in the tank
and lines. Dispense and dispose at least one quart of water prior to
drinking any water.
Dispensing Cold Water (37°F – 50°F)
After setup, it will take up to 1 hour to get water to maximum
cold temperature. During this time the compressor could run
continuously. This is normal.
1. Position bottle, glass, pitcher or cooking pot below right spout.
2. Depress cold water control downward to start cold water flow.
3. Release control once desired fill level is achieved.
Dispensing Hot Water (185°F – 210°F)
m CAUTION
This unit dispenses water at temperatures that can cause severe
burns. Avoid direct contact with hot water. Keep children and
pets away from unit while dispensing Never allow children to dispense hot water without proper and direct supervision. Unplug
unit to prevent unsupervised use by children.
After setup, hot water will be available in 15-20 minutes.
(indicator light will turn off when heating is complete)
1. Position bottle, glass, pitcher or cooking pot below left spout.
2. Slide red button away from you and depress hot water control
downward to start hot water flow.
3. Release control once desired fill level is achieved.
Changing Bottles
MAINTENANCE
For best taste, performance and hygiene:
• Clean your cabinet, controls, bottle straw and spout each time you
change your water bottle. Use a clean soft cloth and a food grade
sanitizer or bleach.
• Empty and clean drip tray, grid and float as needed.
• To minimize mineral deposits which can clog lines and imparts odors
and off-tastes, use only high quality Primo purified bottled water.
• The tip of each spout is removable for cleaning. To remove,
gently pull down. Clean with soap and water, rinse, then place
back onto spout.
• For further cleaning instructions, visit primowater.com/customercare.
TROUBLESHOOTING
A flashing red light on your function lights alerts you when your bottle
is empty. Replace the bottle as soon as possible.
Water is leaking.
NOTE: The unit will not heat or cool water if the bottle light
is flashing. This is a safety feature.
1. Open dispenser door.
2. Slide empty bottle out of cabinet.
3. Remove straw assembly from empty bottle. Place straw assembly
on hanger.
4. Set empty bottle aside.
5. Place fresh bottle outside of cabinet. Remove entire plastic cap
from top of bottle. Clean outside of new bottle with a cloth.
6. Place straw into bottle. Slide collar down until it clicks in place. Push
head down until tube hits bottom of bottle.
7. Slide bottle into cabinet and close door.
No water is coming from the spout.
• Unplug dispenser, remove bottle and call 866-429-7566 for assistance.
• Make sure the bottle is not empty. If empty, replace it.
• Make sure to completely depress the controls.
Cold water is not cold.
• It takes up to one hour after setup to dispense cold water.
• Make sure the power cord is properly connected to a working outlet.
• Make sure the back of the dispenser is at least 4 inches from
a wall and there is free airflow on all 4 sides of the dispenser.
• Make sure green Energy Saver control on back of dispenser is ON.
• If water still isn’t cold, please call 866-429-7566 for assistance.
5
Hot water is not hot.
• It takes 15-20 minutes after setup to dispense hot water.
• Make sure the power cord is properly connected to a working outlet.
• Make sure red Energy Saver control on back of dispenser is ON.
Nightlight Isn’t Working
• Make sure the power cord is properly connected to a working outlet.
• Make sure blue control on back of dispenser is ON.
Dispenser Is Noisy
• Make sure the dispenser is positioned on a level surface.
If you have any further issues, please contact us at 866-429-7566.
LIMITED WARRANTY
Primo Water Corporation, (“Vendor”) warrants to the original purchaser
of this dispenser, and to no other person, that if this dispenser is
assembled and operated in accordance with the printed instructions
accompanying it, then for a period of two (2) years from the date of
purchase, all parts in such dispenser shall be free from defects in material and workmanship. Vendor may require reasonable proof of your
date of purchase from an authorized retailer or distributor. Therefore,
you should retain your sales slip or invoice. The Limited Warranty
shall be limited to repair or replacement of parts, which prove defective
under normal use and service and which Vendor shall determine in its
reasonable discretion upon examination to be defective. Before
returning any parts, you should contact Vendor’s Customer Service
Department using the contact information listed below. If Vendor
confirms, after examination, a defect covered by this Limited Warranty
in any returned part, and if Vendor approves claim, Vendor will
replace such defective part without charge. If you return defective
parts, transportation charges must be prepaid by you. Vendor will
return replacement parts to original purchaser, freight or postage
prepaid.
The Limited Warranty does not cover any failures or operating
difficulties due to accident, abuse, misuse, alteration, misapplication,
improper installation or improper maintenance or service by you or
any third party, or failure to perform normal and routine maintenance
on the dispenser, as set out in the User’s Manual. In addition, the
Limited Warranty does not cover damages to the finish, such as
scratches, dents, discoloration or rust after purchase.
The Limited Warranty is in lieu of all other express warranties. Vendor
disclaims all warranties for products that are purchased from seller
other than authorized retailers or distributors. AFTER THE PERIOD
OF THE TWO (2) YEAR EXPRESS WARRANTY, VENDOR DISCLAIMS
ANY AND ALL IMPLIED WARRANTIES, INCLUDING WITHOUT
LIMITATION THE IMPLIED WARRANTIES OF MERCHANTABILITY
AND FITNESS FOR A PARTICULAR PURPOSE. FURTHER, VENDOR
SHALL HAVE NO LIABILITY WHATSOEVER TO PURCHASER OR ANY
THIRD PARTY FOR ANY SPECIAL, INDIRECT, PUNITIVE,
INCIDENTAL, OR CONSEQUENTIAL DAMAGES. Vendor assumes
no responsibility for any defects caused by third parties. This Limited
Warranty gives the purchaser specific legal rights; a purchaser may
have other rights depending upon where he or she lives. Some
jurisdictions do not allow exclusion or limitation of special, incidental
or consequential damages, or limitations on how long a warranty
lasts, so the above exclusion and limitations may not apply to you.
Primo Water Corporation
104 Cambridge Plaza Drive
Winston-Salem, NC 27104
866-429-7566
www.PrimoWater.com
PN-O084 ©Primo Water Corporation
6