1
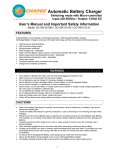
BS80, BS160, BS210 BATTERY CHARGER For lead-acid batteries User Manual and Guide to professional battery charging for Starter and Deep Cycle batteries. THIS MANUAL CONTAINS IMPORTANT SAFETY AND OPERATING INSTRUCTIONS FOR 12V BATTERY CHARGERS: BS80, BS160 & BS210 [ENGLISH] 1 IMPORTANT SAFETY INSTRUCTIONS Please read this manual and follow the instructions carefully before using the charger. WARNING These chargers are designed to charge 12V lead-acid batteries. (Please refer to Battery Types & Capacity for details) We always recommend that you check the Battery Manufacturers specifications before using this charger. Explosive gases may escape from the battery during charging. Provide ventilation to prevent flames and sparks. For indoor use. Do not expose charger to rain, snow or liquids. For charging lead-acid batteries ONLY. (of the size & voltage indicated in the specifications table) Please ensure the correct Battery Type is selected. Do not charge using incorrect Battery Type Setting. (For example, do not charge a Gel Battery while Calcium mode Battery is activated: It will damage the battery. Disconnect the 240V mains supply before making or breaking the connections to the battery. Connection to supply mains has to be in accordance with National wiring rules. Battery acid is corrosive. Rinse immediately with water if acid comes into contact with skin or eyes. The charger should be used on a flat surface. Never charge a frozen battery. Never charge a damaged battery. Never place the charger on the battery while charging. Be extra cautious to reduce risk of dropping a metal tool onto battery. It might spark or shortcircuit battery or other electrical part that may cause explosion. When working with a lead-acid battery, remove personal metal items such as rings, bracelets, necklaces, watches… NEVER smoke or allow a spark or flame in vicinity of battery or engine. Do not charge non-rechargeable batteries. In order to reduce risk of electric shock, unplug charger from AC outlet before doing any maintenance or cleaning. Turn off controls will reduce risk. The kit is not supposed to be used by children or by people who are not able to understand the manual, unless they are supervised by a responsible person who ensures the proper use of the kit. 2 MAIN FEATURES: Automatic / 12V-7 Stage Switching Mode Battery Charger. Easy to Use: The Battery Charger is easy to operate and requires no technical experience. Fully controlled by Microprocessor Calcium Mode: Ideal for Calcium batteries that have been deeply discharged and require an equalization charge to restore full electrolyte reading & full capacity. Rejuvenation Mode: Revitalizes Tired Batteries & Increase Battery Life & Performance High Frequency Switching mode Full time pulse charge output Charging Time Management Multi charging rate – Selectable (2A,4A,8A) or (2A,8A,16A) or (2A,10A,21A) Suits Lead Acid Battery Types – Selectable (Calcium, Conventional, Sealed, Wet, Gel) Safe & Easy: Fully Automatic & Spark Free Automatic Charge: On power up, the charger will automatically go to charging system, then could be left unattended and never overcharge your batteries BS’s Pro Smart Chargers are suitable for most 12V automotive, marine and deep cycle batteries: They could help to restore drained or sulphated batteries. Short circuit protection: The charger will automatically turn off when the output short circuit occurred and prevents any damage Reverse polarity protection : The charger can automatically shut off when the output polarity reversed and without damage Never overcharge your battery Heavy-Duty cables Corrosion-resistant output connectors Output clips and ring terminals provided: It comes with a quick connect fly lead and 2 different kinds of connectors, crocodile clips and a ring terminals. The ring terminals are perfect for permanent connection to your battery. You can connect the lead to the battery and tuck the lead away while you are using your vehicle and when you get back to your garage simply plug the lead back into the charger AUTOMATIC 7 STAGES CHARGING: The 7 Stages Charge are: o Rejuvenation: Rejuvenates sulphated batteries with a high frequency pulse o Soft Start: Increases battery life by gently starting to charge the battery. o Bulk Charge: Reduces charging time by delivering maximum charge to set voltage. o Absorption: Ensures a full charge to the battery without overcharging. o Equalisation (Calcium Mode Only): Returns a full hydrometer reading to calcium batteries by removing acid stratification. o Battery Test: Tests the battery to ensure fully charged. o Float: Float charge maintains the battery at 100% charge. 3 TEMPERATURE & SAFETY PROTECTION: The charger contains 4 safety protections: INTERNAL OVERHEAT PROTECTION: The BS80, BS160, BS210 are built-in with overheat and overload electronic circuit. When the charger is overheated, the charger will shut down shortly. If temperature is decreased, the charger will resume to normal charging. OVERLOAD PROTECTION: The charger employs the use of a‘Solid State Circuit Interrupter’ that opens under severe overload. This condition may occur if attempting to charge any severely discharged or heavily sulfated battery. Once the Interrupter opens, the charger will stop charging for a short period and then resume charging automatically and the Charging LED will be OFF, until resume charging. Overloading could be due to an external load, remove the load condition prior to attempting to recharge the battery. REVERSE POLARITY: The charger has reverse battery and short circuit protection. If a reverse battery or charger output lead short condition exists (Red LED flashes, while output leads are connected backwards), simply unplug charger from AC power and properly remake the connections as described in this manual. SHORT CIRCUIT PROTECTION: The charger has reverse battery and short circuit protection. If a reverse battery or charger output lead short condition exists (Red LED flashes, while output leads are connected backwards), simply unplug charger from AC power and properly remake the connections as described in this manual. The charger employs the use of solid state circuit protectors on both the input and output sections (as compared to unreliable bimetallic automatic breakers), that will permanently open during a catastrophic failure like the shorting of output leads while charging or lightening strikes etc. BATTERY TYPES & CAPACITY: Suits Lead Acid Battery Types – Selectable (Calcium, Conventional, Sealed, Wet, Gel) Able to charge either CALCIUM, AGM/WET or GEL batteries o Before you plug in AC power and connect battery clamp to the battery, you must press to select the Battery Type 12 Volt Output Battery Capacity: o The following maximum AH capacities are to be used as a general guide only: some batteries maybe able to handle a higher Charge Current. Check with the battery Manufacturer when charging batteries with small capacity. Charge Current Charging Maintaining 2A 4A 8A 10A 16A 21A 4-80AH 8-140AH 16-250AH 20-310AH 32-340AH 4-450AH 4-120 AH 8-210AH 16-375AH 20-450 AH 32-500AH 4-650AH 4 ELECTRICAL PARTS: BS80 Delivered with: Input Connector: o 6 feet with 2PIN plug Output Cord: o 4 feet with Quick Connector Extend Cord: o 2 feet with Battery Clip BS160& BS210 Delivered with: Input Connector: o 6 feet with 2PIN plug Output Cord: o 6 feet with Battery Clip Extend Cord: o OPT ENVIRONMENTAL CHARACTERISTICS: Operating Temperature: 0 to 40° C Storage Temperature: -25 to 85°C Operating Humidity Range: 0 to 90% RH TECHNICAL SPECIFICATIONS: Part Number BS80 BS160 BS210 Type Pro-Smart Pro-Smart Pro-Smart Input Voltage Range 220-240V 220-240V 220-240V 50/60Hz 50/60Hz 50/60Hz 2A,4A,8A 2A,8A,16A 2A,10A,21A Input Frequency Output Types of Lead-Acid Battery GEL, AGM&WET, CALCIUM Charging Starting Condition >1.5V >1.5V >1.5V Rated Output 13.5V 13.5V 13.5V Absorption-Charging Output Voltage 14.1/ 14.4/ 14.7V Gel/ AGM&WET /Calcium Automatic EqualisationCharging Output Voltage 15.5V for AGM&WET batteries 16.2V for Calcium batteries 13.4/ 13.5/ 13.6V Gel/ AGM&WET /Calcium Float Output Voltage Manual EqualisationCharging Output Voltage Size (L*W*H) in mm 15.5V for AGM&WET batteries 190*92*55 230.8*131*76 16-375AH 5 Weight Approvals 0.86Kg 1.3Kg 1.3Kg CE, UL/cUL, Mzs, As CHARGING INSTRUCTIONS: STEP 1 - Pre Charge Check & Electrolyte Level Check Check the Battery Electrolyte level (Not required on sealed & Maintenance Free Batteries). If necessary, remove the vent caps and add distilled water so the levels are halfway between the upper and lower fill lines. Check the Voltage Output Switch on the charger and make sure it‟s on the correct voltage STEP 2 - Connecting the Battery charger to your Battery If the Battery is out of the vehicle: o Connect the Red lead from the charger to the positive (+) battery terminal. o Connect the Black lead from the charger to the negative (-) battery terminal If the Battery is still in the vehicle, determine if the vehicle is positively (+) or negatively (-) earthed. o If Negatively Earthed (Most Common) – FIRST Connect the Red (+) battery charger lead to the positive (+) Battery post and then connect the Black (-) battery charger lead to the vehicle‟s chassis and away from the fuel line. 6 o If Positively Earthed – FIRST Connect the Black (-) battery charger lead to the Negative (-) battery post and then connect the Red (+) battery charger lead to the Vehicle‟s chassis and far away from the fuel line. STEP 3 - Connect the battery charger to Mains Power (240Vac) Connect the battery charger to a 240VAC Mains Powered socket. The Charger will automatically start when AC power is connected and switched on. (Note: If the Fault Indicator LED illuminates Red, please check your connections as it‟s likely that the Positive and Negative Leads are reversed. Refer to Trouble Shooting Page for further information) Select the desired charge rate: o 2A & 4A for small batteries o 8A & 10A for medium or deep cycle batteries o 16A & 21A for large or heavy duty deep cycle batteries Select the correct Battery Type: o Calcium type is the new generation battery type: Sealed Type (VRLA) Lead Acid Battery with Calcium Content (Automotive or Deep Cycle) o Sealed/Wet type is the most common battery type also known as WET (Flooded) or AGM (Absorbed Glass Mat) Sealed-valve regulated Lead Acid (VRLA) Batteries (Automotive or Deep Cycle) o GEL type is the Sealed type (VRLA) with a jellified electrolyte (Automotive, Aviation , Solar, Deep Cycle) WARNING: Please ensure the correct Battery Type is selected. Do not charge using an incorrect Battery Type Setting. (Do not charge a Gel Battery with Calcium Battery selection as this may damage your battery) Note: The charger will automatically memorise your charging rate setting and battery type setting. The next time you use the charger it will automatically start with the last settings. We strongly recommend that you refer to the battery manufacture‟s specifications when selecting the charge rate and battery type. 7 THE CHARGING PROCESS: The charging stages are as follows: ●Soft start: Charge the battery using half the maximum current until the battery voltage is over 10.5V. (Soft Start occurs if the initial voltage is less than 10.5V due to deep discharge)Indicated by the Blue Bulk LED Flashing ●Bulk Charge: Charge using a constant maximum current until the battery rises to the absorption level.Indicated by the Blue Bulk LED ON ●Absorption: This stage charges the battery using a constant voltage providing that the Battery voltage is over 85%. The Charging Voltage for this stage is determined by the Battery type selection: GEL: 14.1V, AGM/WET: 14.4V, Calcium: 14.7V.Indicated by the Absorption Green LED ON ●Equalizing: This stage begins automatically if the Calcium Battery type has been selected. This cycle pushes the charge voltage up to an equalizing level of 16.2V.Indicated by the Absorption Green LED Flashing ●Analysis: This stage diagnoses the battery condition within ten minutes. If the Full LED is flashing, this indicates that the battery is still less than 12.5V after the absorption mode and that there is a fault with the battery. Indicated by the Green Full LED Flashing 8 ●Full / Float: Battery is fully charged and is ready for use. It will be maintained at a safe constant voltage. Battery type selection: GEL: 13.4V AGM/WET: 13.5V Calcium: 13.6V Indicated by the GREEN Full LED ON REJUVENATION PROCESS (EXTEND YOUR BATTERY LIFE) Your Battery Charger provides a battery rejuvenation function. What does this feature do? Rejuvenation has been proven to break down the crystalline form of lead sulphate within the battery cells which helps extend your battery life. We recommend that you periodically use this rejuvenation (De-Sulphate) feature to ensure you get the maximum life out of your battery. To activate this rejuvenation feature, simply press and hold the „Select‟ Button for 3 Seconds until the Rejuvenation LED begins flashing (YELLOW). Once the charger has entered the rejuvenation (de-sulphate) charging stage, the process will automatically time out after 24 hours or you can manually stop this process at any time by pressing and holding down the „Select‟ Button for 3 seconds. EQUALISATION PROCESS (For Calcium & AGM/WET Batteries Only) Your Battery Charger also provides a battery equalisation function. What does this feature do? Equalisation helps to maintain and balance your battery cells by reversing the high concentration of electrolytes from the bottom of your battery. This allows all the cells to charge evenly and makes you get the most out of your battery. You can activate this feature weekly to ensure your battery is always well maintained. 9 Note: If you select the Calcium battery type, the charger will automatically run the equalisation stage during the charging cycle. The Equalisation process does not occur for GEL Batteries. Depending on the charge rate selected, this process will time out after 1 to 3 hours. To manually activate this equalization feature, simply press and release the “Select” Button and the Equalisation LED will turn ON (RED). Depending on the charge rate selected, this process will time out after 2 to 6 hours. Equalising voltage is set to 16.2V for Calcium batteries and 15.5V for AGM/WET batteries. To Manually exit the “Equalisation” mode, simply press and release the “Select” button again and the Equalisation RED LED will turn off. For manual equalization, always refer to your battery manufacturer‟s recommendations/specifications. STEP 4 - Disconnecting the Battery charger from Battery If the Battery is out of the vehicle. o Switch OFF and Remove the AC Power Socket from the outlet. o Remove the Black lead and then the Red lead. o Check electrolyte levels if possible. (As they may need topping up with distilled water after charging) If the Battery is in the vehicle. o Switch OFF and Remove the AC Power Socket from the outlet. o Remove the lead from the vehicle chassis. o Remove the lead from the battery. o Check electrolyte levels if possible. (As they may need topping up with distilled water after charging) LED STATUS INIDICATOR TABLE: 1. Charging Rate Selection Button: Press “Mode” to Select the Current Charge Rate. 2. Charging Current LED Display: o LED indicates the selected charging current: 2A or 4A or 8A for BS80 o LED indicates the selected charging current: 2A or 8A or 16A for BS160 10 3. 4. 5. 6. 7. 8. 9. o LED indicates the selected charging current: 2A or 10A or 21A for BS210 Battery Type Selection Button: Press “Battery Type" to select the Battery Type. (Calcium, AGM/WET or GEL Batteries) Battery Type LED Display: LED indicates the selected Battery Type. Charging Status Display LED: o Bulk LED - Blue: Indicates the charger is at a maximum charging rate. o Absorption LED – Green: indicates that the battery is approaching full rate. o Absorption LED – Blinking Green: Indicates equalisation stage for Calcium, AGM/WET Battery. Charging Error LED Display: See trouble shooting for further details. Rejuvenation Stage LED Display: Yellow Blinking LED Indicates the Rejuvenation Charge. Equalisation/Rejuvenation Selection Button: o Press “Select” once to select Equalisation for extending equalization time. o Press and hold this “Select” for 3 seconds to start the Rejuvenation Stage. Equalisation Stage LED Display: Red LED on indicates the Equalisation Charge Stage. LED CHARGE INDICATION: Bulk Absorption Full Charge Rejuvenation Error (Blue) (Green) (Green) (Yellow) (Red) A.C. Power connected, battery disconnected OFF OFF OFF OFF OFF Manual Rejuvenation charging Soft Start charging OFF OFF OFF FLASH OFF FLASH OFF OFF OFF OFF Bulk charging ON OFF OFF OFF OFF Absorption charging OFF ON OFF OFF OFF Equalization charging OFF FLASH ON OFF OFF Analysis mode OFF OFF ON OFF OFF Float charging with Battery analyze is over 12,5V Float charging with Battery analyze is below 12,5V Output Clip shorted or battery Reserve Battery Condition check, Battery is defective Soft Start charging 6 hours timed-out Bulk Charging 24 Hours timed-out Charger over-temperature protected OFF OFF FLASH OFF OFF OFF OFF OFF OFF OFF OFF OFF OFF OFF ON OFF OFF OFF OFF FLASH FLASH OFF OFF OFF FLASH ON OFF OFF OFF FLASH OFF OFF OFF OFF FLASH 11 CHARGING CURVE (VOLTAGE): TROUBLE SHOOTING Types of Problems Indication Possible Causes Suggested Solution Charger does not work? No Indicator lights on - No AC power - Check AC connections and make sure Power Point is switched ON Charger has no DC output? Fault LED is On. - Output is short circuited - Reverse polarity connection to Battery - Check DC connection between charger and battery and make sure they are not short circuiting. - Check that the crocodile clips haven‟t fallen off the battery. - Check that the crocodile clips / ring terminals are connected to the correct polarity. No Charging Current? Fault LED is ON - Battery is severely sulphated - Battery has a damaged cell - Overheat protection mode Long charging time, Full light does not come on? Fault LED is ON - Check the Battery condition, age etc. - Battery may need replacement. - Move battery & Charger to cooler environment - Check the charger specification matches the battery capacity. - Battery cannot be charged and must be replaced. - Battery capacity too large - Battery is defective MAINTENANCE The charger is maintenance free. If the power cord is damaged, the charger must be left to the reseller for maintenance. The case should be cleaned occasionally. The charger should be disconnected from the power while cleaning. 12