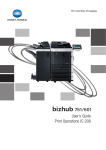
1
131f/190f
User Manual (PCL)
Contents
1
Getting ready
1.1
2
Installation
2.1
Local install: Windows USB port .................................................2-3
2.1.1
For Windows 98SE and Me users.............................................. 2-5
2.1.2
For Windows 2000 professional users....................................... 2-7
2.1.3
For Windows XP and Windows Server 2003 users.................... 2-9
2.1.4
For Windows Vista users .........................................................2-11
2.1.5
Installing both PCL5e and PCL6 drivers ..................................2-13
2.2
2.2.1
2.2.2
3
System Requirements (Local) .....................................................1-3
Local install: Windows Parallel port (option)............................2-16
Parallel port connection ...........................................................2-17
Installing the driver ...................................................................2-17
2.3
Network install: TCP/IP (option) ................................................2-18
2.4
Uninstalling the driver ................................................................2-19
Configuring printer driver settings
3.1
Open the printer properties .........................................................3-3
3.1.1
From the application software ................................................... 3-3
3.1.2
From the printer folder ............................................................... 3-4
3.2
Paper tab .......................................................................................3-4
3.2.1
Zoom.......................................................................................... 3-5
3.2.2
Copies ........................................................................................ 3-5
3.2.3
Paper Size .................................................................................. 3-6
3.2.4
Paper Source ............................................................................. 3-7
3.2.5
Paper Type................................................................................. 3-8
3.2.6
Sort............................................................................................. 3-8
3.3
Page Layout tab ............................................................................3-8
3.3.1
Duplex ........................................................................................ 3-8
3.3.2
Combine..................................................................................... 3-9
131f/190f PCL driver
Contents-1
3.3.3
Booklet..................................................................................... 3-10
3.3.4
Watermark ............................................................................... 3-10
3.4
Toner Saving ............................................................................ 3-11
3.4.2
Resolution ................................................................................ 3-12
3.4.3
True Type Mode....................................................................... 3-12
3.4.4
3.5
3.5.1
4
5
Print Density............................................................................. 3-12
Device Option tab ....................................................................... 3-13
Using the device(s)................................................................... 3-13
Cancelling a print job
4.1
Canceling on Windows ................................................................ 4-3
4.2
Canceling on the machine ........................................................... 4-3
Troubleshooting
5.1
6
Quality tab ................................................................................... 3-11
3.4.1
Error Messages ............................................................................ 5-3
Specifications
6.1
Printer ............................................................................................ 6-3
6.2
Acceptable paper size.................................................................. 6-3
6.3
The printable area ........................................................................ 6-4
Contents-2
131f/190f PCL driver
1
Getting ready
Getting ready
1
1
Getting ready
1.1
System Requirements (Local)
The following operating environment is required in order to use the printer
driver.
Item
Requirements
Operating System
•
•
•
•
•
•
•
•
•
•
•
•
•
•
•
•
CPU and Memory
Depends on the operating system
Disk space
10 MB for driver install
Interface port
USB Revision 2.0
• or an optional IEEE 1284 (ECP/Nibble-compatible)
• or an optional network port (10/100 base-Tx)
CD-ROM
CD-ROM drive
Windows Vista Ultimate
Windows Vista Ultimate 64-bit edition
Windows Vista Enterprise
Windows Vista Enterprise 64-bit edition
Windows Vista Business
Windows Vista Business 64-bit edition
Windows Vista Home Premium
Windows Vista Home Premium 64-bit edition
Windows Vista Home Basic
Windows Vista Home Basic 64-bit edition
Windows Server 2003
Windows XP Professional
Windows XP Home Edition
Windows 2000 Professional
Windows Me
Windows 98 Second Edition (SE)
2
Note
Windows NT 4.0 workstation is available only when using an optional network interface or a parallel interface.
Windows 2000 professional, Windows XP, Windows Server 2003 and
Windows Vista are available only when using an USB or optional Network
interface.
For the network connection, refer to the "Network interface Card" manual.
131f/190f PCL driver
1-3
1
1-4
Getting ready
131f/190f PCL driver
2
Installation
Installation
2
2
Installation
2.1
Local install: Windows USB port
2
Note
A USB interface will only operate on Windows 98SE/Me/2000/XP/Server
2003/Vista. Windows NT4.0 does not support USB connection.
For Windows 2000/XP/Server 2003/Vista, you need to log on as an administrator.
If you have previously installed the "KONICA MINOLTA 131f/190f PCL
Printer/Scanner Driver", you will first have to uninstall it (see page 2-19).
1
Turn on your computer, but do not connect your machine to the USB
port yet.
2
Insert the supplied CD into your CD-ROM drive.
-
For Windows Vista users:
1. If the "AutoPlay" dialog box appears, click [Run Setup.exe].
2. When the "User Account Control" dialog box appears, click [Allow] to allow the driver software installation.
The driver installation window will appear automatically.
If it doesn’t appear, run the "setup.exe" located on the root directory of
the supplied CD-ROM.
3
Choose your language, then click [Next].
4
On the next screen, click [Next].
5
The "Software License Agreement" appears. After reading and accepting the contents, click [Yes].
6
Select your machine and click [Next].
7
Select "USB", and then click [Next].
8
The destination folder window appears. Confirm the location and click
[Next].
* If you need to select your desired destination, click [Browse] and select another folder.
131f/190f PCL driver
2-3
Installation
2
9
Select the driver you want to install, then click [Next].
10 The current settings will be displayed. Confirm the contents, then click
[Next] to start installing on your computer.
2
Note
For Windows Vista users:
During the driver installation, the "Windows Security" dialog box will appear two times. Please click [Install this driver software anyway].
2
Note
Both PCL5e and PCL6 drivers cannot be installed simultaneously.
If you want to install both drivers, first finish the installation of one driver
and go to the other through "Add New Printer Wizard" (See “Installing
both PCL5e and PCL6 drivers” on page 2-13).
11 Follow the instructions that appear on the window until you can click
[Finish].
Windows 98SE /Me users % Go to page 2-5
Windows 2000 professional users % Go to page 2-7
Windows XP and Server 2003 users % Go to page 2-9
Windows Vista % Go to page 2-11
2-4
131f/190f PCL driver
Installation
2.1.1
2
For Windows 98SE and Me users
2
Note
Make sure that you followed the installation steps 1 to 11 described on
page 2-3.
1
Plug the USB cable to your machine and then connect it to your computer.
2
Note
Be sure to use a shielded USB cable. Use of an unshielded cable may result in radio interference.
2
Turn on your machine and computer.
3
The "Add New Hardware Wizard" will appear.
In Windows 98SE, click [Next]. Then select "Search for the best driver
for your device. (Recommended)" and click [Next].
In Windows Me, select "Specify the location of the driver (Advanced)"
and click [Next].
4
In Windows 98SE, select "Specify a location" and clear any other
choices.
In Windows Me, select "Search for the best driver for your device" and
"Specify a location".
5
Click [Browse] to navigate your hard disk:
"C:\KONICA_MINOLTA_131f (or 190f)\PCL", and click [OK].
131f/190f PCL driver
2-5
Installation
2
6
Follow the instructions that appear on the window until you can click
[Finish].
7
The "Add New Hardware Wizard" appears again, repeat the same procedures from steps 3 to 6 three more times. This will complete the installation.
2
Note
After the driver installation, you need to configure the "Device Option"
setting to activate either or both the 2nd Paper Cassette or/and Duplex
Unit. (The Duplex Unit is available only for 190f.) See “Activating your device option(s)” on page 2-6 for instructions on how to do this.
Activating your device option(s)
If your machine has device options, you must open the printer properties and
activate them.
To activate the device option(s):
1
Click [Start] % [Setting] % [Printers].
2
Right click the KONICA MINOLTA PCL icon, then click [Properties].
3
Click the [Device Option] tab.
4
Select the device(s) installed on your machine.
5
Click [OK], then close the printer properties.
2
Note
The duplex unit is available only for 190f.
2-6
131f/190f PCL driver
Installation
2.1.2
2
For Windows 2000 professional users
2
Note
Make sure that you followed the installation steps 1 to 11 described on
page 2-3.
1
Plug the USB cable to your machine and then connect it to your computer.
2
Note
Be sure to use a shielded USB cable. Use of an unshielded cable may result in radio interference.
2
Turn your machine on.
3
The "Found New Hardware Wizard" will appear. Click [Next].
4
Select "Search for a suitable driver for my device (recommended)" and
click [Next].
The "Locate Driver Files" dialogue box appears.
5
Select "Specify a location" and clear any other choices, then click
[Next].
6
Click [Browse] to navigate your hard disk: C:\KONICA_MINOLTA_131f
(or 190f)\PCL, and then click [OK].
7
Click [Next]. If the "Digital Signature Not Found" dialogue box appears,
click [Yes] to install the driver.
131f/190f PCL driver
2-7
Installation
2
8
Follow the instructions that appear on the window until you can click
[Finish].
9
The "Add New Hardware Wizard" appears again. Repeat the same procedures from steps 3 to 8.
This will complete the installation.
2
Note
After the driver installation, you need to configure the "Device Option"
setting to activate either or both the 2nd Paper Cassette or/and Duplex
Unit (The Duplex Unit is available only for 190f.) See “Activating your device option(s)” on page 2-8 for instructions on how to do this.
Activating your device option(s)
If your machine has device options, you must open the printer preferences
and activate them.
To activate the device option(s):
1
Click [Start] % [Settings] % [Printers].
2
Right click the KONICA MINOLTA PCL icon, then click [Printing Preferences...].
3
Click the [Device Option] tab.
4
Select the device(s) installed on your machine.
5
Click [OK], then close the printing preference.
2
Note
The duplex unit is available only for 190f.
2-8
131f/190f PCL driver
Installation
2.1.3
2
For Windows XP and Windows Server 2003 users
2
Note
Make sure that you followed the installation steps 1 to 11 described on
page 2-3.
1
Plug the USB cable to your machine and then connect it to your computer.
2
Note
Be sure to use a shielded USB cable. Use of an unshielded cable may result in radio interference.
2
Turn your machine on.
3
The "Found New Hardware Wizard" will appear.
When the Wizard ask you "Can Windows connect to Windows Update
to search for software?", select "No, not this time." Then click [Next].
4
Select "Install from a list or specific location (Advanced)" and click
[Next].
5
Select "Include this location in the search:" and clear any other choices. Click [Browse] to navigate your hard disk:
C:\KONICA_MINOLTA_131f (or 190f)\PCL, and then click [OK].
6
Click [Next]. If the "Windows Logo testing" dialogue box appears, click
[Continue Anyway] to install the driver.
7
Click [Finish].
131f/190f PCL driver
2-9
Installation
2
8
The "Found New Hardware Wizard" appears again. Repeat the same
procedures from steps 3 to 7. This will complete the installation.
2
Note
After the driver installation, you need to configure the "Device Option"
setting to activate either or both the 2nd Paper Cassette or/and Duplex
Unit (The Duplex Unit is available only for 190f.) See “Activating your device option(s)” on page 2-10 for instructions on how to do this.
Activating your device option(s)
If your machine has device options, you must open the printing preferences
and activate them.
To activate the device option(s):
1
Click [Start] % [Printers and Faxes].
2
Right click the KONICA MINOLTA PCL printer icon, then click [Printing
Preferences...].
3
Click the [Device Option] tab.
4
Select the device(s) installed on your machine.
5
Click [OK], then close the printing preferences.
2
Note
The duplex unit is available only for 190f.
2-10
131f/190f PCL driver
Installation
2.1.4
2
For Windows Vista users
2
Note
Make sure that you followed the installation steps 1 to 11 on page 2-3.
1
Plug the USB cable into your machine and then connect it to your computer.
2
Note
Be sure to use a shielded USB cable. Use of an unshielded cable may result in radio interference.
2
Turn your machine on.
3
The driver software will be installed automatically.
4
When the drivers have been installed correctly, the message "Your devices are ready to use" will appear.
2
Note
After the driver installation, you need to configure the "Device Option"
setting to activate either or both the 2nd Paper Cassette or/and Duplex
Unit (The Duplex Unit is available only for 190f.) See “Activating your device option(s)” on page 2-12 for instructions on how to do this.
131f/190f PCL driver
2-11
Installation
2
Activating your device option(s)
If your machine has device options, you must open the printing preferences
and activate them.
To activate the device option(s):
1
Click [Start] % [Control Panel].
2
Click [Hardware and Sound].
3
Click [Printers].
4
Right-click the KONICA MINOLTA PCL printer icon, then click [Printing
Preferences...].
5
Click the [Device Option] tab.
6
Select the device(s) installed on your machine.
7
Click [OK] and close the printing preferences.
2
Note
The duplex unit is available only for 190f.
2-12
131f/190f PCL driver
Installation
2.1.5
2
Installing both PCL5e and PCL6 drivers
If you want to install both drivers connecting with the USB interface, first finish installation of one driver and then go to the other through "Add New Printer Wizard".
2
Note
For Windows 2000/XP/Server 2003/Vista, you need to log on as an administrator.
For Vista users
1
Click [Start] % [Control Panel] % [Hardware and Sound] % [Printers].
2
Select "Add a printer" from the menu and select [Add a local printer].
3
Select the USB port for printer and click [Next].
4
Click [Have Disk.....].
5
Insert the supplied PCL printer driver CD into your CD-ROM drive, then
click [Browse].
6
Browse to your choice of one of the following locations on the CD, and
then click [Open] % [OK] % [Next]
-
-
To install PCL5e driver, browse to:
"WinVista\Win_x86\Language\131f (or 190f) PCL\WinVista_x86\PCL5e"
"WinVista\Win_x64\Language\131f (or 190f) PCL\WinVista_x64\PCL5e"
To install PCL6 driver, browse to:
"WinVista\Win_x86r\Language\131f (or 190f) PCL\WinVista_x86\PCL6"
"WinVista\Win_x64\Language\131f (or 190f) PCL\WinVista_x64\PCL6"
2
Note
Win_x86 is for the 32 bit, and Win_x64 is for the 64 bit PC operating system. To confirm your PC system type, click [Start] % [Control Panel] %
[System and Maintenance] % [System].
7
Confirm the printer name that you have selected and click [Next].
8
Follow the instructions that appear on the window until you can click
[Finish].
131f/190f PCL driver
2-13
Installation
2
2
Note
If the "User Account Control" window appears, click [Continue]. If the
"Window Security" window appears, click [Install this driver software anyway].
9
After installation finishes, the printer icon can be found on the "Printers" window.
For Windows XP and Windows Server 2003 users
1
Click [Start] % [Printers and Faxes].
In Windows XP Home Edition, click [Start] % [Control Panel] % [Printers
and other Hardware] % [Printers and Faxes].
2
Select [Add Printer] from [File] menu to start the "Add New Printer Wizard" and on the first window click [Next].
3
Select "Local printer attached to this computer" and clear the check
box for "Automatically detect and install my plug and play printer", then
click [Next].
4
Select [USB port] for printer and click [Next].
5
Click [Have Disk].
6
Insert the supplied PCL printer driver CD into your CD-ROM drive, then
click [Browse].
7
Browse to your choice of one of the following locations on the CD, and
then click [OK].
-
-
2-14
To install PCL5e driver, browse to:
"LegacyOS\Win_x86\Language\131f (or 190f) PCL\WinXP\PCL5e"
for Windows XP.
"LegacyOS\Win_x86\Language\131f (or 190f) PCL\Win2003\PCL5e"
for Windows Server 2003.
To install PCL6 driver, browse to:
"LegacyOS\Win_x86\Language\131f (or 190f) PCL\WinXP\PCL6"
for Windows XP.
"LegacyOS\Win_x86\Language\131f (or 190f) PCL\Win2003\PCL6"
for Windows Server 2003.
131f/190f PCL driver
Installation
8
2
Follow the instructions that appear on the window until you can click
[Finish].
2
Note
When the Windows Logo testing window appears, click [Continue Anyway].
For Windows 2000 users
1
Click [Start] % [Settings] % [Printers].
2
Double-click [Add Printer].
3
Click [Next].
4
Select "Local printer" and clear the check box for "Automatically detect
and install my Plug and Play printer", then click [Next].
5
Select [USB port] for printer and click [Next].
6
Click [Have Disk].
7
Insert the supplied PCL printer driver CD into your CD-ROM drive, then
click [Browse].
8
Browse to your choice of one of the following locations on the CD, and
then click [OK].
-
9
To install PCL5e driver, browse to:
"LegacyOS\Win_x86\Language\131f (or 190f) PCL\Win2000\PCL5e"
To install PCL6 driver, browse to:
"LegacyOS\Win_x86\Language\131f (or 190f) PCL\Win2000\PCL6"
Follow the instructions that appear on the window until you can click
[Finish].
2
Note
When the Digital Signature Not Found window appears, click [Yes].
131f/190f PCL driver
2-15
Installation
2
For Windows 98SE/Me users
1
Click [Start] % [Settings] % [Printers].
2
Double-click [Add Printer].
3
Click [Next].
4
Select "Local Printer" and click [Next].
5
Click [Have Disk].
6
Insert the supplied PCL printer driver CD into your CD-ROM drive, then
click [Browse].
7
Browse to your choice of one of the following locations on the CD, and
then click [OK].
-
To install PCL5e driver, browse to:
"LegacyOS\Win_x86\Language\131f (or 190f) PCL\Win9x_Me\PCL5e"
To install PCL6 driver, browse to:
"LegacyOS\Win_x86\Language\131f (or 190f) PCL\Win9x_Me\PCL6"
8
Click [Next].
9
Select [USB port] for printer and click [Next].
10 Follow the instructions that appear on the window until you can click
[Finish].
2.2
Local install: Windows Parallel port (option)
2
Note
* The optional parallel interface is required.
* A parallel interface available only for using Windrows 98SE/ME/NT4.0.
If you are using Windows 2000/XP/Server 2003/Vista, please use a USB
or an optional network interface.
* For Windows NT4.0, you need to log on as an administrator.
2-16
131f/190f PCL driver
Installation
2.2.1
2
Parallel port connection
2
Note
Be sure to use a shielded parallel cable. Use of an unshielded cable may
result in radio interference.
2.2.2
1
Turn off both the machine and your computer.
2
Connect a standard IEEE-1284 parallel cable to the parallel port on
your machine, securing it with the clips.
3
Connect the other end to the parallel port on your computer and secure
it in place with the screws.
Installing the driver
2
Note
If you have previously installed the "KONICA MINOLTA 131f/190f PCL
Printer/Scanner Driver", you can update it by simply clicking the [Update]
button on the maintenance window.
1
Turn on your computer.
2
Insert the supplied CD into your CD-ROM drive.
The driver installation window will appear automatically.
If doesn’t appear, run the "setup.exe" located on the root directory of
the supplied CD-ROM.
3
Choose your language, then click [Next].
4
On the next window, click [Next].
131f/190f PCL driver
2-17
Installation
2
5
The "Software License Agreement" appears. After reading and accepting the contents, click [Yes].
6
Select your machine and click [Next].
7
Select "Parallel" and click [Next].
8
Follow the instructions that appear on your screen until you can click
[Finish].
The driver installation is completed.
Activating your device option(s)
After the driver installation, you need to configure the "Device Option" setting
to activate either or both the 2nd Paper Cassette or/and Duplex Unit. (The
Duplex Unit is available only for 190f.)
To activate the device option(s):
2.3
1
Click [Start] % [Settings] % [Printers].
2
Right click the KONICA MINOLTA PCL printer icon, then click [Properties] (Windows 98SE/Me), or [Document Defaults...] (Windows NT4.0).
3
Click the [Device Option] tab.
4
Select the device(s) installed on your machine.
5
Click [OK], then close the window.
Network install: TCP/IP (option)
2
Note
The optional network interface card is required.
Refer to the "Network Interface Card" manual.
2-18
131f/190f PCL driver
Installation
2.4
2
Uninstalling the driver
Uninstall is required if you are upgrading the software or if your installation
fails.
2
Note
For Windows NT4.0/2000/XP/Server 2003/Vista, you need to log on as an
administrator.
For Windows 98/98SE and Windows Me
1
Select [Start], [Settings], [Control Panel], [Add/Remove Programs] and
the [Install/Uninstall] tab.
2
Select "KONICA MINOLTA 131f/190f PCL Printer/Scanner Driver" and
click the [Add/Remove] button.
3
Follow the instructions that appear on the window.
For Windows 2000 Professional
1
Select [Start], [Settings], [Control Panel] and [Add/Remove Programs]
and [Change or Remove Programs] icon.
2
Select "KONICA MINOLTA 131f/190f PCL Printer/Scanner Driver" and
click the [Change/Remove] button.
3
Follow the instructions that appear on the window.
For Windows XP and Windows Server 2003
1
Select [Start], [Control Panel], [Add or Remove Programs] and the
[Change or Remove Programs] icon.
2
Select "KONICA MINOLTA 131f/190f PCL Printer/Scanner Driver" and
click the [Change/Remove] button.
3
Follow the instructions that appear on the window.
131f/190f PCL driver
2-19
Installation
2
For Windows Vista
2-20
1
Select [Start], [Control Panel], [Programs], [Programs and Features].
2
Select "KONICA MINOLTA 131f/190f PCL Printer/Scanner Driver" and
click the [Uninstall] button.
3
Follow the instructions that appear on the window.
131f/190f PCL driver
3
Configuring printer driver
settings
Configuring printer driver settings
3
Configuring printer driver settings
3.1
Open the printer properties
3
There are two ways to open the printer properties:
-
From your application software
From the printer folder
2
Note
* When you change the printer properties from application software, the
settings will be available only for the current print job.
* To change the printer default settings, change them from the "Printers"
folder. This change can affect every user who shares the same printer.
3.1.1
From the application software
Opening the printer properties from application software vary on the type of
application software you use. See your application software’s manual for details. The following example utilizes Microsoft Word 2000.
1
Select "Print" from the File menu.
2
The Print dialogue box will appear. In Name field, select your KONICA
MINOLTA PCL printer, then click [Properties].
3
The printer properties window will appear. For descriptions of the printer driver settings, see “Paper tab” on page 3-4.
131f/190f PCL driver
3-3
Configuring printer driver settings
3
3.1.2
From the printer folder
2
Note
For Windows NT4.0/2000/XP/Server 2003/Vista, you need to log on as an
administrator.
1
Click [Start] % [Settings] % [Printers].
-
3.2
Windows Vista, click [Start] % [Control Panel] % [Hardware and
Sound] % [Printers].
Windows XP Professional and Windows Server 2003, click [Start] %
[Printers and Faxes].
Windows XP Home edition, click [Start] % [Control Panel] % [Printers and other Hardware] % [Printers and Faxes].
2
Right-click the KONICA MINOLTA PCL icon, and then click [Properties]
(Windows 98SE/Me), [Document Defaults...] (Windows NT4.0), or
[Printing Preferences] (Windows 2000/XP/Server 2003/Vista).
3
The printer properties window will appear. For descriptions of the printer driver settings, see page 3-4.
Paper tab
Paper tab is used for setting paper destination and printing.
3-4
131f/190f PCL driver
Configuring printer driver settings
3.2.1
3
Zoom
You can zoom (Enlarging and scaling-down) data in the following 2 methods.
2
Note
"Zoom" settings are not available whenever the "Combine" setting on the
"Page Layout" tab is anything besides "Off ".
Fit to Paper
Choose this option to scale your print job to any selected paper size regardless of the logical document size. If you want your document to be fitted to
the selected paper size, check on the "Scale to fit".
2
Note
When "Scaling" is set for other than 100% or the same paper size as "Paper size" is selected, "Scale to fit" is not available.
Scaling(%)
You can enlarge or reduce the document in 1 percentage increments, from
25% to 400%.
2
Note
"Scaling (%)" is not available while the "Fit to paper" is selected.
3.2.2
Copies
Specifies the number of copies for printing, ranging from 1 to 999.
131f/190f PCL driver
3-5
Configuring printer driver settings
3
3.2.3
Paper Size
Select the paper size from the drop list, which shows the paper supported in
the printer driver’s current setting. Paper sizes shown on the drop list are
constrained by the "Paper Source" and "Combine" settings. If you cannot
find the objective size in the list, change the settings of paper source.
Orientation
Portrait orients the print vertically. Landscape orients the print horizontally.
Edit Custom
Click this button when you want to add, change or delete your custom paper
size. You can add up to 50 custom paper sizes.
2
Note
The "Edit Custom" is not available when either of the following conditions
exists.
The "Paper Source" setting is anything other than "Bypass Tray" or "Auto"
The "Combine" setting on the "Page Layout" tab is anything other than
"Off ".
3-6
131f/190f PCL driver
Configuring printer driver settings
3
To add a custom paper size
1
Click [Edit Custom].
2
Click [Add].
3
Enter the name that identifies your custom paper. You can enter up to
20 characters.
4
Specifies the width and length of your custom paper size.
5
Click [OK].
To delete a custom paper size
3.2.4
1
Select the paper name that you want to delete.
2
Click [Delete].
Paper Source
Specifies paper cassette or bypass tray for printing.
131f/190f PCL driver
3-7
Configuring printer driver settings
3
3.2.5
Paper Type
Select the paper type to be used for printing. If paper cassette is selected in
the "Paper Source" box, the paper type setting cannot be changed.
3.2.6
Sort
When you select "On" to enable Sort, multi-page job will be printed in collated sets. When "Off " is selected, it will be printed on a page-by-page basis.
3.3
Page Layout tab
The "Page Layout" tab contains settings for "Combine" and "Watermark".
.
3.3.1
Duplex
2
Note
The duplex copy function is available only for bizhub 190f.
Print on Both Sides
You can print on both sides of the paper. The binding position must be
specified for duplex printing. To unify the orientation of both sides (book),
select "Left Binding" or "Right Binding". To reverse the orientation (flipchart), select "Upper Binding".
Setting of Duplex
Select this button to adjust the binding margin.
3-8
131f/190f PCL driver
Configuring printer driver settings
3.3.2
3
Combine
Configure how multiple pages of the document should be printed on a single
sheet of paper. Select the number of document pages that should be printed
on each sheet of paper. Selecting "Off " prints one document page per paper.
2
Note
The "Combine" settings are not available when either of the following
conditions exists.
The "Fit to Paper" on the "Paper" tab is selected.
The "Scaling" setting on the "Paper" tab is anything other than "100%".
Once the "Combine" is set, the scaling will be determined automatically and
it cannot be changed manually.
Print Separator Line
.
Select this to print a border around each page when printing more than one
document page on each sheet of paper.
Detail of Combine
Click this button to open the Detail of Combine dialogue in which you can
specify the order of combined pages on the paper.
131f/190f PCL driver
3-9
Configuring printer driver settings
3
3.3.3
Booklet
2
Note
The "Booklet" function is available only for 190f with duplex unit.
You can print several pages to form a booklet, when the paper is half center
folded and overlapped.
To set up this function, check the box for "Print on Both Side" and select "2up" for "Combine".
Booklet Printing
The binding position can be set for booklet.
The binding position you specify varies depending on the print orientation
specified in "Orientation" in the "Paper" tab. When "Portrait" is selected,
"Left" or "Right" can be specified for the binding position, and when "Landscape" is selected, "Upper" or "Lower" can be specified.
3.3.4
Watermark
You can print Watermark text (such as "Confidential" and "Sample") over
document. Choose the desirable watermark from the drop down list.
First Page Only
Select this check box when you want the watermark to be printed on the first
page only. Clear the check box to print the watermark on all pages.
Edit Watermark
Click [Edit Watermark] to display the "Watermark" dialogue box
.
3-10
131f/190f PCL driver
Configuring printer driver settings
3
To edit a watermark
Select the applicable watermark name in the list. Then make any settings you
want.
To create a new watermark
You can register up to 20 different watermarks in this dialogue. (The 11 types
of watermark have already been registered.)
3.4
1
Click [Add].
2
Type a name of the new watermark. You can enter up to 30 characters.
3
Type the watermark text you want to use. You can enter up to 30 characters.
4
Make a setting for your new watermark. If you need help, click [Help].
5
Click [OK] to save it.
Quality tab
Use the settings on this tab to control the quality of the printed output.
3.4.1
Toner Saving
Select toner saving to on to conserve the toner, but it will reduce print quality.
131f/190f PCL driver
3-11
Configuring printer driver settings
3
3.4.2
Resolution
Select either "600 × 600 dpi" or "300 × 300 dpi" as the printing resolution.
2
Note
"600 × 600" provides better quality, but it also takes longer to print at
this setting than at "300 × 300".
3.4.3
True Type Mode
Automatic
When the font in the document is a printer-resident font, the printer uses
it to printout. When the printer does not have the font, the font data will be
transferred to the printer as outline data.
Download as Outline
All the font data in the document will be transferred to the printer as outline
data.
Download as Bitmap
All the font data in the document will be transferred to the printer as bitmap
data.
Select this mode if letters are not printed properly as the computer window.
Note that the printing speed may decrease in this mode than in "Automatic"
or "Download as Outline" mode.
When you set zoom in or out, always select "Automatic" or "Download as
Outline" as True Type Mode.
Download as Graphics (Windows 98/98SE/Me only)
All the font data and graphic data in the document will be transferred to the
printer as Raster image.
Select this mode if graphics are not printed properly as the computer window. Note that the printing speed may decrease in this mode than the
former three.
When you set zoom in or out, always select "Automatic" or "Download as
Outline" as True Type Mode
3.4.4
Print Density
Specify the density level between -50 and +50.
When setting "+50" outputs are the darkest, and inversely when setting
"-50" they are the lightest.
3-12
131f/190f PCL driver
Configuring printer driver settings
3.5
3
Device Option tab
Click the device(s) installed in the machine.
2
Note
The duplex unit is available only for 190f.
.
3.5.1
Using the device(s)
To activate the 2nd Paper Cassette and/or the Duplex Unit device(s), check
the corresponding box in the "Device Option" window.
131f/190f PCL driver
3-13
3
3-14
Configuring printer driver settings
131f/190f PCL driver
4
Cancelling a print job
Cancelling a print job
4
Cancelling a print job
4.1
Canceling on Windows
4
The following is an example in using Microsoft Windows XP Professional.
Operation could vary depending on your Windows version.
1
Click [Start] % [Printers and Faxes].
2
Double click "KONICA MINOLTA 131f/190f PCL6 (or PCL5e)".
The print queue is displayed.
3
Right-click a document name for which printing should be canceled.
Then select "Cancel" from pop-up menu.
Document printing can be canceled by pressing Delete key on the
computer’s keyboard after clicking document name.
4.2
Canceling on the machine
During PC printing, the machine shows the
following display on the LCD.
If you want to cancel the current printing
job, follow the instructions below:
4
Press [Advanced Functions] and
press [+] until "Online" appears on
the LCD, then press enter. Press [,]
or [+] to select "Off ".
5
The machine will show the following display:
6
To cancel the current PC printing, press [Enter].
If you do not wish to cancel the current PC printing, press [Cancel].
131f/190f PCL driver
4-3
4
Cancelling a print job
4-4
131f/190f PCL driver
5
Troubleshooting
Troubleshooting
5
5
Troubleshooting
5.1
Error Messages
The table below describes the main error messages that may appear during
PC print mode operations.
Error Message
What it means
What to do
Memory Overflow Press
Stop
The machine received data
more than it can fit in memory.
Press [Stop] to cancel the printing
job. Either delete unnecessary
documents, retry after more
memory becomes available, or
split the printing into more than
one operation.
Paper Mismatch
Press Stop
The paper size specif ied with
the printer driver differs from
the size of paper that is loaded.
Press [Stop] to cancel a print job.
Then load the correct size of paper and try printing again.
The direction of A5-sized paper
on the bypass tray is wrong.
A5 is not available for PC printing.
Set the A5 on the bypass tray.
Please Supply Paper
The paper cassette or bypass
tray is out of paper.
Supply paper to the cassette and/
or the bypass tray.
Unable to Sort Start/
Stop
The data is too large to sorting.
Press [Start] and the machine
makes a print without collation.
Press [Stop] and the current PC
printing job will be cancelled.
Set XXX paper
Press Stop
(These messages are
displayed alternately.)
Paper Mismatch
Press Stop
Rotate the paper
Press Stop
(These messages are
displayed alternately.)
131f/190f PCL driver
5-3
5
5-4
Troubleshooting
131f/190f PCL driver
6
Specifications
Specifications
6
6
Specifications
6.1
Printer
Specifications
6.2
Print speed
13 pages/min for 131f, 19 pages/min for 190f. (using A4 paper
from 1st cassette)
Print resolution
600 dpi/300 dpi (Default: 600dpi)
Color/Mono
Monochrome
RAM
Share with the machine.
Interface
• USB 2.0 (full speed), except for Windows NT 4.0
• Ethernet port (option)
• IEEE-1284 parallel port (option), except for Windows 2000,
Windows XP, Windows Server 2003 and Windows Vista
Printer Language
PCL6, PCL5e
Scanner resolution
600/400/300/200 dpi (Default: 200 dpi)
Supported Operating
Systems
Refer to page 1-3.
Acceptable paper size
Paper cassette
Paper type
Paper size
Quantity
Plain paper
(weight: 60–90 g/m²)
A4, A5 š, F4
500 sheets
(weight: 80 g/m²)
Paper type
Paper size
Quantity
Plain paper
(weight: 60–120 g/m²)
A4, A5 š, A6, F4, Letter, Legal, Halfletter š, Executive
50 sheets
(weight: 80 g/m²)
Custom size Width: 97 to 216 mm
Length: 140 to 356 mm
1 sheet
Envelopes
DL (110 × 220 mm)
Com#10 (4.125 in. × 9.5 in.)
Monarch (3.875 in × 7.5 in.)
1 envelope
Postcard
100 × 148 mm
20 sheets
Transparency
A4 or Letter
20 sheets
Bypass Tray
131f/190f PCL driver
6-3
Specifications
6
-
6.3
Do not use envelopes with double flaps or pressure seals as these do ot
feed properly.
If using a transparency (OHP) film, be sure that the film does not have
a paper backing and/or a leading strip. If it does, remove the paper backing and/or strip before loading. Only film should go in, not film with any
backing or strip.
The printable area
4 mm (0.16’’)
4 mm (0.16’’)
4 mm (0.16’’)
6-4
4 mm (0.16’’)
Printable area
131f/190f PCL driver
1
Getting ready
1.1
2
Installation
2.1
Local install: Windows USB port .................................................2-3
2.1.1
For Windows 98SE and Me users..............................................2-5
2.1.2
For Windows 2000 professional users.......................................2-7
2.1.3
For Windows XP and Windows Server 2003 users....................2-9
2.1.4
For Windows Vista users .........................................................2-11
2.1.5
Installing both PCL5e and PCL6 drivers ..................................2-13
2.2
3
System Requirements (Local)......................................................1-3
Local install: Windows Parallel port (option)............................2-16
2.2.1
Parallel port connection ...........................................................2-17
2.2.2
Installing the driver ...................................................................2-17
2.3
Network install: TCP/IP (option) ................................................2-18
2.4
Uninstalling the driver ................................................................2-19
Configuring printer driver settings
3.1
Open the printer properties .........................................................3-3
3.1.1
From the application software ...................................................3-3
3.1.2
From the printer folder ...............................................................3-4
3.2
Paper tab .......................................................................................3-4
3.2.1
Zoom..........................................................................................3-5
3.2.2
Copies ........................................................................................3-5
3.2.3
Paper Size ..................................................................................3-6
3.2.4
Paper Source .............................................................................3-7
3.2.5
Paper Type.................................................................................3-8
3.2.6
3.3
Sort.............................................................................................3-8
Page Layout tab ............................................................................3-8
3.3.1
Duplex ........................................................................................3-8
3.3.2
Combine.....................................................................................3-9
131f/190f PCL driver
-1
3.3.3
Booklet..................................................................................... 3-10
3.3.4
Watermark ............................................................................... 3-10
3.4
Toner Saving ............................................................................ 3-11
3.4.2
Resolution ................................................................................ 3-12
3.4.3
True Type Mode....................................................................... 3-12
3.4.4
3.5
3.5.1
4
5
-2
Print Density............................................................................. 3-12
Device Option tab ....................................................................... 3-13
Using the device(s)................................................................... 3-13
Cancelling a print job
4.1
Canceling on Windows ................................................................ 4-3
4.2
Canceling on the machine ........................................................... 4-3
Troubleshooting
5.1
6
Quality tab ................................................................................... 3-11
3.4.1
Error Messages ............................................................................ 5-3
Specifications
6.1
Printer ............................................................................................ 6-3
6.2
Acceptable paper size.................................................................. 6-3
6.3
The printable area ........................................................................ 6-4
131f/190f PCL driver