1
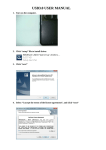
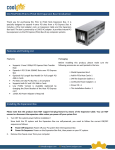
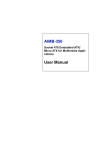
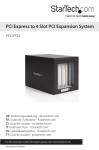
CG-34EXPCI22 Express Card to PCIx2 + PCIex2 Slot Expansion Box User Manual Thank you for purchasing this ExpressCard to PCIx2+PCIex2 Slots Expansion Box. It is specially designed to expand extra 2 PCI and 2 PCIe slots from an ExpressCard Slot. It includes an ExpressCard host adapter card, an Expansion Cable and the Expansion Box itself. The box is powered by a 12VDC AC adapter. It provides instant PCI and PCIe bus expansion via the ExpressCard Bus of any Notebook computer systems. Features and Packing List Features Packaging Before installing this product, please make sure the Supports 1-lane 2.5Gb/s ExpressCard Data Transfer following accessories are well packed in the box: Rate Expands 2 PCI 32-bit 33MHZ and 2 PCIe 1-Lane Slots □ Metal Expansion Box 1 over PCI Express Slot □ Add-in 34mm ExpressCard Host Card x 1 PCI Slots are fully PCI Bus Rev. 2.3 Compliant Supports both 5V and 3.3V PCI Add-in Cards □ DVI like Expansion Cable x 1 12VDC AC Power Adapter is Required □ 12VDC/AC Power Adapter x 1 • • • • • □ Driver CD × 1 □ This Installation Guide × 1 Installing the Expansion Box Please note that this product does NOT support hot-plug feature by means of the Expansion Cable. You can NOT connect or disconnect the expansion cable unless you power off your system first. 1. Turn OFF the system power before installation! Since both the PC system and the Expansion Box are self-powered, you need to follow the correct ON/OFF sequence as follows: Power Off Sequence: Power off (or unplug the ExpressCard host card) your Notebook PC system then the Expansion Box Power On Sequence: Power on the Expansion Box first, then power on your PC system. [email protected] http://www.coolgear.com 2. Then we are installing the PCI and PCIe add-in cards in the Expansion Box: Open the top cover (by removing the screws) of the Expansion Box, there are 2 PCI and 2 PCIe slots in the Expansion Box. Find an unused slot, remove the “blank” PCI/PCIe card bracket that was pre-installed from the factory. Plug in your PCI or PCIe add-in card (s). Put the top cover back on your Expansion Box. 3. Install the connector of the expansion cable to the expansion Box’s. DVI Waring!! The Expansion Cable’s connector has the same form factor as the standard DVI connector, however, their signals are different; please do NOT connect the Expansion Cable to neither your LCD monitor nor your Video Graphic cards. 4. Connect the AC power Adapter’s cable to the Expansion Box. 5. Turn on the Expansion Box power by means of its power switch next to the Expansion Cable, then power on the Notebook PC system. 6. Plug the ExpressCard Host Adapter Card into the unused ExpressCard expansion slot of your Notebook PC. 7. Proceed with Software Driver Installation if required. [email protected] http://www.coolgear.com Installing the ExpressBooster Software In some cases, if the write performance of your PCI Card is not good. Please install the ExpressBooster software supplied with your card. 1. To install the software, find the setup.exe file in the following folder on the driver CD: (assume your CD is in the drive E:), double click the file to run the setup. E:\Utility\ExpressBooster 2. Follow the setup on-screen instructions, you will be asked to check the Express Card item (please un-check the PCI Express Card item). Then proceed with the rest on-screen instructions to complete the installation. [email protected] http://www.coolgear.com