1
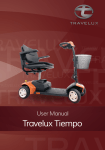
User Manual
Excel
Excite 3
Read instructions before use
User Manual
Excel Extice
Welcome aboard your new Excite scooter!
We wish to thank you for letting us improve your freedom and independence. This model has been
designed with your practical needs in mind. It is equipped with modern high tech electronics and
special features for a more comfortable ride. Its safety and performance will provide you with years of
excellent service and pleasure!
It is from the utmost importance to read this manual very well before using the Excel Excite scooter.
The manual contains important information concerning the use and small maintenance of the Excite.
Safe use of the Excite is a following issue. This manual should be stored very well. It contains
information that might come in handy later!
The italic printed parts in this manual are from extra importance. They supply important information
concerning safe use of you mobility scooter.
The intended use of the Excel Excite is for people of all ages, who have trouble with walking far
distances or walking for a longer time.
The Excite is an outdoor use scooter. The seat can be adjusted by the user. The seat height can also
be adjusted to lower leg length. The seat is able to turn and the flip backward armrests can be used for
an easy transfer. The maximum speed of the Excite is about 15 km/h and at a normal daily use the
range is up to 50 km (in combination with 73Ah batteries). The Excite can be loaded up to about 220
kg. The electric engine is controlled by a control unit with micro processor. The electronic driving
characteristics can be adjusted to your wishes within certain limits. Please contact your dealer in this
case.
ATTENTION! INDIVIDUAL ADJUSTMENTS TO THIS PRODUCT NEED TO BE DONE WITH THE
MANUFACTURERS WRITTEN APPROVAL.
Pagina 1
User Manual
Excel Extice
Contents
Introduction
General safety precautions
Driving inclines
Transport
Freewheel mode
Electro Magnetic Compatibility
Fixation belt (optional)
Responsibility
First use
Learning the scooter
Control units
The control lever (gas lever)
Battery indicator
Warning lights
Indicators
Horn
Speed adjustment
Statusindicator
Charging plug
Making a transfer
Driving
Driving on an incline
Obstacles and thresholds
Brakes
Battery safety
Freewheel
The Excite chair
Adjust backrest angle
Armrest adjustment
Adjust head rest (option)
Removing the Excite chair
Adjust tiller
Moving the Excite manually
Fault by engaged freewheel
Charging the batteries
Battery charger specifications
Opening battery space
Storage
Upholstery
Chassis and plastic parts
Tires
Other maintenance
Replacement parts
Maintenance frequency
Faults
Range
Standard programmed driving parameters
Warranty precautions
1
2
2
3
3
3
4
4
4
5
10
10
10
11
11
11
11
11
12
12
12
13
13
14
14
14
15
15
16
16
16
16
17
17
17
18
19
19
19
19
19
19
20
20
21
21
22
22
Pagina 2
User Manual
Excel Extice
General safety precautions
The Excite is designed to be safe in use. This can be noticed on the scooter directly in the below
features:
• When charging the scooter it cannot be driven electrically
• At too high engine and controller unit (Dynamic Rhino) the Excite will drive at half power
• With the freewheel function engaged the scooter cannot be driven electrically
• If the control lever is in neutral position the scooter cannot be driven.
• Scooter parts where might be body parts clamped between are fully covered
The Excite is meant to be used by one person. Placing a second person on the scooter is not allowed.
The driving characteristics will be influenced badly by this and the Excite will damage.
Inside the control unit (Dynamic Rhino) is a function build who prevents deep de-charge of the
batteries. The control unit reduces the speed eminently.
Please make sure when driving the scooter and performing small maintenance to the Excite there can
be no fingers injured in the space between the covers and the wheels.
Driving inclines
A very safe control feature when driving inclines is the following: if the Excite is able to drive an
incline, the incline can also be descent with reduced speed. Always drive a steep incline up first and
make sure the Excite is not too heavily loaded.
Turning the Excite on an incline is not recommended. The scooter can easily tip over.
Never drive from a pavement or incline diagonal. The scooter may tip over. Always drive off a
pavement or incline at low speed.
In areas with pedestrians it is recommended to adjust the maximum speed to a lower standard for your
and other persons safety.
Transport
Transporting the Excite inside a vehicle can be done by making the scooter as small as possible. In
this case, you dismount the chair and fold the tiller down. Always check if the scooter is not in
freewheel mode and fixate it firmly to the floor.
It is recommended to not sit in the scooter during transport. The scooter should always be lifted by two
persons, one at the front (front bumper) and one at the back of the scooter (rear bumper). Van Os
Medical accepts no responsibility for any eventual consequences.
Freewheel mode
On freewheel engagement the brakes of the Excite are not working. By disengaging the freewheel
lever the brakes will be in work again. Look at page 17 for further freewheel explanation.
Never use the freewheel mode when standing on an incline. This may cause the scooter drive by
itself.
Electro Magnetic Compatibility
A couple of European standards have been set in the field of electro magnetic interference on electric
devices. The Excite complies to these demands. In an extreme case the Excite might be sensitive to
very powerful transmitters. This may cause unexplainable faults. In this case you best turn to your
dealer.
Pagina 3
User Manual
Excel Extice
When using transmitters nearby the Excite, we recommend to first shut down the scooter before using
a device. Examples of transmitters can be mobile phones, walkie talkies or a 27 MC transmitter. The
Excite itself also transmits electric waves. These are within the applying standards. There might be,
however, certain unintended events, like a shop alarm going off.
Fixation belt (optional)
An optional fixtion belt can be mounted to fix the seat position (picture 1). The two parts of the belt can
be mounted below the seat with screws. The screws fixate the belt to the ground plate of the seat. By
use of a click buckle the belt can be fixated.
Picture 1
The fixation belt can only be used on the chair. During transport in a wheelchair taxi the fixation belt
may not be used as a safety belt.
Responsibility
Van Os Medical B.V. can not be held responsible for unsafe situations, accidents or damages, as a
result from:
• use for other purposes or under other circumstances than indicated in this manual. This also
contains applying other than the original replacement parts and changing the programming
adjustments of the Rhino controller
• ignoring warnings or precautions noted in this manual
• improper or insufficient maintenance
First use
Find an open area such as a park and make sure you have an assistant to help you excersize with the
scooter (picture 2).
Not following these safety guidelines may result in damage to the scooter or personal injury
Picture 2
Pagina 4
User Manual
Excel Extice
Make sure the scooter is off before getting in or out of it. Set the speed control knob according to your
driving ability. We recommend that you keep the speed at the slowest position (fully counterclockwise) until you are familiar with the driving characteristics of this vehicle.
Picture 3
Learning the scooter
Now, practice moving forward by pulling the right lever. Be sure to set the speed to the lowest
setting (1).
Picture 4
After becoming familiar with moving forward, practice making ‘S’ turns (picure 4).
Picture 5
Once you are familiar with ‘S’ turns, practice moving in reverse. When driving backward the scooter
already drives slower than forward, but for your safety we recommend to put the setting to the lowest
level (1).
Pagina 5
User Manual
Excel Extice
Pay attention to the following warnings:
Picture 6
Picture 7
Do not carry any passengers (picture 6)!
Do not drive across a slope (picture 7)
Picture 8
Picture 9
Never drink and drive (picture 8)!
Do not tow a trailer (picture 9)
Picture 10
Do not turn on or use hand-held personal communications devices such as citizens band (CB) radios
and cellular phones.
Pay attention to the following warnings!
When driving on the road, pay attention to the following:
Pagina 6
User Manual
Excel Extice
Picture 11
Picture 12
Do not drive in heavy traffic (picture 11)
Do not drive beside a river, port or lake
without a fence or railing (picture 12)
Picture 13
Do not drive during the rain
(picture 13)
Picture 14
Do not drive during or on snow
(picture 14)
Picture 15
Picture 16
Do not drive off-road or on any
Be sure to use headlights when
uneven surfaced roads (picture 15)
driving at night (picture 16)
When driving on the road, pay attention to the following:
Pagina 7
User Manual
Excel Extice
Picture 17
Picture 18
Make sure that there are no obstacles
behind you when driving in reverse
We recommend to set the speed
knob at the lowest speed (1) when
driving back (picture 17)
Do not make sudden stops, weave
erratically, or make sharp turns (picture 18)
Picture 19
Picture 20
Keep your hands on or inside the
armrests and foots on the footplate
(picture 19)
Do not attempt to climb curbs greater
than 5 cm (picture 20)
Picture 21
Picture 22
Do not attempt to cross over a gap
greater than 10 cm (picture 21)
Do not attempt to climb a hill greater
than 10° (picture 22)
Pagina 8
User Manual
Excel Extice
Picture 23
Picture 24
Do not reverse while driving up a hill
Forward only. If you reverse while moving
Uphill, it may cause the vehicle to tip over
(picture 23)
Use caution when driving over soft,
uneven or unprotected surfaces
such as grass, gravel and decks
(picture 24)
Picture 25
Picture 26
Use low speed while driving downhill.
When going downhill, the tiller will
become harder to reach and handle.
When braking while moving downhill
the scooter will take longer to come to
a complete stop (picture 25)
Do not get in and out on a hill
Always stop on the level surface to
get in and out of the vehicle (picture 26)
Picture 27
Always climb or descend gradients
perpendicular to the slope or ramp
(picture 27)
Picture 28
Do not load or carry heavy items in
the basket while driving downhill
(picture 28)
Pagina 9
User Manual
Excel Extice
Control units
The control units of the Excite are very clearly arranged on the dashboard (picture 29). The charging
plug is located on the tiller, the freewheel lever on the rear right side of the scooter. The status
indicator is located on the dashboard. See the below picture for a survey of all control units.
Battery indicator
Status indicator
Illumination
Speed adjustment
Indicator control right
Indicator control left
Picture 29
Horn button left
Horn button right
The control lever (gas lever, picture 30)
Pull the left lever to drive backward.
Pull the right lever to drive forward.
Picture 30
Battery indicator
This indicates the battery charging amount (picture 31). This also affects the range at the time. The
indication is divided as below:
Full range
(90% - 100% capacity available)
Decreasing range
(60-70% capacity available)
Limited range
(20-30% capacity available)
Picture 31
Pagina 10
User Manual
Excel Extice
Warning lights
Warning lights can be powered by pushing the button. By pressing it again, the warning lights will go
off.
Indicators
The switches can be pushed to engage the indicators. They can be operated both left and right
handed.
Horn
Pressing the button engages the horn.
Speed adjustment
This knob adjusts desired maximum speed. You turn the knov right for a higher maximum speed and
left for a lower. Speed can be adjusted in 6 steps.
Status indicator
When scooter is powered and no technical problems are at hand, the indicator will lit up. If a specific
part of the electronics need maintenance or attention the indicator will blink a certain amount of times.
See the reference list below for the different code meanings.
Pagina 11
User Manual
Number of blinks
Excel Extice
Fault
Scooter condition
Charge battery
1
Remarks
Driving possible
Battery voltage lowered to less than 23.3
V, charge batteries soon
2
Battery voltage too low
Driving not possible
Battery voltage lowered to less than 16.5
V, charge batteries immediately
3
Battery voltage too low
Driving not possible
Battery voltage increased higher than 32 V.
Probably defect charger.
4
Current limit time out
Driving not possible
Detector detected shortcut in the motor.
Warn dealer.
5
Brake fault
Driving not possible
Check if freewheel is connected
6
Gas pot not in neutral at power up
Driving not possible
Contact dealer
7
Speed pot error
Driving not possible
Contact dealer
8
Motor volts error
Driving not possible
Contact dealer
9
Other internal error
Driving not possible
Contact dealer
10
Push too fast fault
Driving not possible
Turn off the scooter and restart
Number of blinks Fault Scooter condition Remarks
Charging plug
To charge the batteries use a charger which guards the process and is convenient to charge the fitted
batteries. Your battery charger should be equipped with a 3-pole plug which fits into the charging plug
in the tiller.
Making a transfer
Make sure the Excite is always turned off and in freewheel position before making a transfer.
• move the rotion lever upwards to unlock the chair (picture 32)
• next, turn the chair 90º left or right. The chair will automatically lock on every 45º if you release
the rotation lever (picture 32)
take place on the chair and turn it back to the starting position. The chair is fitted with flipbackward
armrests. These can be flipped away to be able to make an easy side transfer. Always make sure to
flip the armrests back in the original position when seated.
Picture 32
Driving
The Naviagor can be powered up with the ignition key on the right side of the tiller. After a brief selftest
the Excite is ready to drive. By pulling the right side of the gas lever (at thumb control pushing), the
Excite moves forward. The closer you pull the lever towards you, the faster the scooter will drive. If
you release the lever the Excite will stop. For reversing please stop the scooter first. Now pull the left
side of the gas lever (a thumb control push).
Pagina 12
User Manual
Excel Extice
The Excite now will drive backwards, with reduced speed.
• Before you drive, first check if the chair is properly fixated.
• Make sure the tires are always on the right pressure (see technical specifications).
• Make sure the batteries are always sufficiently charged. The pointer of the battery indicator
should be in the green area.
• Should the gas lever not be in neutral position when the Excite is powered up, it will not drive.
Only after the control lever has been placed in neutral position, the Excite is ready to drive.
The neutral position is when the gas lever is not operated.
• Never take sharp turns while driving at full speed. We recommend to slow down before
making a sharp turn. We strongly recommend to avoid dangerous driving in corners.
• Always think of your own safety if you drive from the even road with the Excite. Adjust your
speed. Never drive through deep holes, water etc.
• The ideal stability and weight balance can be achieved when taking the following points into
consideration: always sit straight on the chair and place your feet as far to the front as
possible. Do not lean left or right while driving.
Driving on an incline
A very safe control feature when driving inclines is the following: if the Excite is able to drive an
incline, the incline can also be descent with reduced speed. Always drive a steep incline up first and
make sure the Excite is not too heavily loaded.
Picture 33
Driving up a hill: lean a little forward and drive as constant as possible in a straight line up (picture
33). To stop and restart driving costs extra energy.
Driving off a hill: lean a littly backward and drive carefully with low speed down the hill.
A will which is difficult to climb for the Excite needs to be avoided. When climbing very steep inclines
(over 12°) is dangerous. At sudden braking the scooter might tip over to the front or the back.
Obstacles and thresholds
Driving obstacles should be done very carefully. When driving an obstacle which is too high the Excite
might get stuck. For maximum ground clearance please see the chapter ‘Technical data’.
Picture 34
Pagina 13
User Manual
Excel Extice
Driving up thresholds: drive towards the threshold until the front wheel is approximately 20-50 cm
before the threshold. Now carefully drive forward and approach the threshold. As soon as the front
wheel is on the threshold you can slowly drive further until the rear wheels are also on or over the
threshold (picture 34). If this does not succeed or very difficult, please choose another route.
Driving off thresholds: drive to the threshold until the front wheel is before it. Drive off the threshold
carefully and with low speed.
Brakes
Braking can be done in different ways:
• you can slowly move the gas lever into the neutral position, to make the Excite slow down
easily
• you can just let the gas lever go, so the Excite will come to a full stop
• the Excite is also fitted with a disk brake rear with the lever on the tiller. This may be used on
eventual emergency stops
If driving down a hill the Excite might drive faster than the maximum speed possible. In this case the
control unit will slow the Excite down to reach the programmed maximum speed.
If the gas lever of the Excite is in neutral position the scooter is braked. The motor brake power is
enough to stop the scooter and keep on its place on the maximum possible incline angle (12 degrees).
At rain, snow or other slippery road conditions, please brake gently to provide sliding danger.
Battery safety
When driving on low or empty batteries, to be seen on your battery indicator, the battery safety feature
will be engaged. This provides battery damage through deep decharge. The engagement of this
feature can be noticed by the decreasing maximum speed. Drive as little as possible in this condition.
After thy system being engaged the batteries should be charged as soon as possible.
Freewheel
The Excite is equipped with a so-called freewheel function. This allows the Excite to be moved
without using the engine. Push the backrest to move the scooter. In this freewheel position the scooter
can not be driven electrically. You can engage the freewheel function by the freewheel lever on the
rear side of the scooter, just below the cover (picture 35).
Picture 35
It is important to first fully turn off the power before engaging the freewheel lever. The power needed
to push the scooter is mimimal. The brakes of the Excite are not in use during freewheel engagement.
This can be reversed by turning the freewheel function off.
Pagina 14
User Manual
Excel Extice
Fault by engaged freewheel
If the Excite is powered when you engage the freewheel lever, the status indicator will indicate fault
code 5. To erase the fault code and drive electrically please proceed as follows:
• first disengage the freewheel function (push te freewheel lever down)
• then, power off the system (this erases the fault)
• when the system is powered up the scooter is able to drive again
The Excite chair
The chair of the Excite is equipped with a number of adjustment possibilities which improves your seat
and driving comfort considerably. The entire chair can be height adjusted in a range of 10 cm in 4 teps
of 2,5 cm. This adjustment can be done by your dealer.
Adjust backrest angle
The backrest angle is stepless adjustable in a sitting position up to standard 105 degrees (picture 36).
By replacing the hex bolt on the turning point this can be increased up to 135 degrees. The backrest
can also be fully flipped forward to ease transport. On the right side of the chair (left shown on picture
36) is a lever. Pull it up and lean forward or rearward to adjust the desired backrest angle (picture 36).
As soon as you reached it you release the lever> The backrest will fixate in your position.
Picture 36
Never operate the lever when you are not in the chair. The backrest will come forward with strength.
Armrest adjustment
The armrests can be fully flipped up (picture 37). Also the angle and the armrest height are adjustable.
The armrests are fully flipped up by moving them up. he armrest angle is adjustable by the bolt on the
inner side of the armrest. You can turn this bolt further out by hand (the arm rest angle will go down) or
further in (the arm rest angle will go up). On the rear side of the arm rest tube is a turning knob. Turn it
loose and adjust the arm rest to the desired height. Fasten the knob securely.
Picture 37
Pagina 15
User Manual
Excel Extice
Adjust head rest (option)
The head rest is adjustable in three height positions.
Removing the Excite chair
Unlock the turning system of the chair as shown on the picture below (picture 38). You can pull the
chair straight up and eventually move it around a little. Flipping back the armrests and folding down
the backrest eases the removal.
Picture 38
The chair of the Excite weights around 16 kg. Please remember this when removing the chair. The
chair can be lifted by putting your one arm around the backrest and grip firmly and the other arm under
the seat. Folding the armrests and the backrest can ease the lifting.
Adjust tiller
You can adjust the tiller angle as follows (picture 39):
1. pull the small lever on the left side of the tiller
2. you can adjust the tiller with two hands by lowering or lifting it in the desired position
3. when you release the lever the tiller will fixate in the current position
4. the tiller can be fully folded down to ease transport
Picture 39
Moving the Excite manually
Manual movement of the Excite can be done by first engaging the freewheel mode and the power off.
If this is not done the Excite can only be moved with great strength.
• put the freewheel lever in the up position. This engages the freewheel mode
• the Excite can now be moved freely by pushing the backrest
• after returning the freewheel lever and powering up the control unit the Excite is able to drive
again.
The brakes of the Excite are not in use during freewheel engagement. This can be reversed by
turning the freewheel function off.
Pagina 16
User Manual
Excel Extice
Fault by engaged freewheel
If the Excite is powered when you engage the freewheel lever, the status indicator will indicate fault
code 5. To erase the fault code and drive electrically please proceed as follows:
• first disengage the freewheel function (push te freewheel lever down)
• then, power off the system (this erases the fault)
• when the system is powered up the scooter is able to drive again
Charging the batteries
The Excite can be equipped with two dry 12 Volt batteries of maximum 73Ah. At daily use the dry
batteries need no other maintenance than regular charge. The capacity of the batteries at 5 hours
discharge is 70 Ah, at 20 hours discharge 75Ah. The scooter is equipped with 2 Trojan type SG 70 B
batteries. The battery connector type on the cable is Alex PVC, dimensions 40 x 20 mm.
Because the batteries are probably empty or partly charged when they arrive, it is of great importance
to first fully charge the batteries. The scooter is fitted with a charger, standard delivered. If the
batteries are charged using the below procedure, you will gain maximum lifetime, power and reach of
the batteries.
1.
2.
3.
4.
Turn off the power of your scooter
Put the power support cable in a wall socket
Put the battery charge cable into the tiller (turn away the round cover) (picture 40).
When the battery charger is turned on the scooter will be charged. During charge the progress
indicator will blink. A RED light means the charger is in use, a WHITE light means the scooter
is being charged and a GREEN light means the scooter is fully charged.
The Excite can not be driven electrically with a plug in the charge socket. If the range of the Excite is
strongly decreasing, the batteries need replacement. In this case you need to contact your dealer. It is
not allowed to replace the batteries yourself. When a battery is leaking contact dealer immediately!
Please consider the following when changing batteries: see that the connectors do not contact with
each other. Make sure when connecting the batteries the connectors are correctly poled (++ and --).
The Excite comes with a battery charger. If any problems occur please contact your dealer. It is not
allowed to open the charger. The charge socket is indicated with a symbol on the tiller (picture 40a).
The charger connection is indicated on the charger with a symbol (picture 40b):
Picture 40a
Picture 40
Picture 40b
Pagina 17
User Manual
Excel Extice
Picture 40c
Battery charger specifications:
•
•
•
•
appropriate for the fitted batteries
maximum nominal charge current: 24 Volt
maximum nominal charge power: 6 Ampère
suitable for unguarded use
Opening battery space
The batteries of the Excite can be reached by removing the rear cover. First remove the chair as
described on page 16. The rear cover can be removed. Replacement in reverse order. The batteries
should be lifted on the lower side.
Storage
If the Excite is not be used for longer time, please consider the below remarks. The Excite needs to
be stored with fully charged batteries in a dry and freeze free environment, in regard to freezing
danger of the batteries. Always turn the Excite off during storage.
The charge condition of the batteries should be checked regularly when the Excite is not used for a
long time. If necessary the batteries must be recharged.
The Excite should never be left unnecessary in the bright sunlight. Parts like the upholstery or metal
parts might get very hot. This also might shorten the tyres lifetime.
Upholstery
The scooters upholstery should be cleaned with a mild cleanser. Weep the upholstery should with a
moist cloth after cleaning.
Chassis and plastic parts
The chassis and the plastic parts, including the control panel, should only be cleaned with a light moist
cloth. Dry the parts after that with a dry cloth.
It is not allowed to clean the Excite with a high pressure hose or otherwise using too much water.
All the maintenance that can be done by the user is described in this chapter. If the Excite needs
additional maintenance or repair you need to contact your dealer. It is not allowed to perform any
other than the herein described tasks on the Excite.
Pagina 18
User Manual
Excel Extice
Charging the batteries
Always charge the batteries regularly and on time. This preserves the maximum charge capacity and
increases the lifetime of the batteries. For charging instructions see page 17.
Tires
It is very important to check the tire pressure or tire damage regularly. When any damage might occur
(for instance caused by a nail or glass), contact your dealer immediately.
The scooter tires should always be on the prescribed pressure (see chapter technical data). Driving
with low pressure tires causes bad driving and steering characteristics.
The tires should never be inflated over the maximum tire pressure. The tire might get off the rim or
explode.
Other maintenance
Please leave any other maintenance to your dealer. Adapt the needed maintenance to your scooter
together with your dealer.
If any lubricant should leak, for instance from the gear box, please contact your dealer immediately
and don’t drive the scooter again.
Replacement parts
All Excite parts, including electronic components, are securely adapted to each other and tested. This
results in a quality scooter with a long lifetime. This quality, safety and lifetime can only be preserved
by using only original replacement parts.
Not using original parts could result in decreased liability from the Excite and reduced safety. Also due
of the warranty.
All replacement parts can be ordered by your dealer at Van Os Medical B.V..
Maintenance frequency
This schedule has been made to give you a survey of the maintenance that should be done to the
Excite. The yearly maintenance should be done by your dealer.
Check
Battery charger connection
Bolts and nuts
Tire wear
Tire pressure
Wiring and connections
Clean upholstery
Illumination and indicators
Bearings
Engine
Battery poles
Clean chassis parts and covers
Driving program
Suspension
Freewheel and parking brake
Weekly
Monthly
Yearly
By whom
Dealer
Dealer
User
User
Dealer
User
User
Dealer
Dealer
Dealer
User
Dealer
Dealer
Dealer
Pagina 19
User Manual
Excel Extice
Faults
The dashboard contains a status indicator. If this lights up green without blinking the Excite is ignited
and there are no problems. In case of a fault the status indicator indicates a fault by blinking codes. If
the status indicator shows a fault, the first thing to do is turn off the power of the Excite and ignite
again.
If the indicator shows another fault, please count the blinks. These show a code which indicates a
fault. The flash code list below shows all the meanings of the flashes. The list also containt possible
causes and an eventual solution of the problem. If you are unable to solve the problem with help of
this list, please contact your dealer.
Number of blinks
Number of blinks
1
Fault
Scooter condition
Charge battery
Remarks
Driving possible
Battery voltage lowered to less than 23.3
V, charge batteries soon
2
Battery voltage too low
Driving not possible
Battery voltage lowered to less than 16.5
V, charge batteries immediately
3
Battery voltage too low
Driving not possible
Battery voltage increased higher than 32 V.
Probably defect charger.
4
Current limit time out
Driving not possible
Detector detected shortcut in the motor.
Warn dealer.
5
Brake fault
Driving not possible
Check if freewheel is connected
6
Gas pot not in neutral at power up
Driving not possible
Contact dealer
7
Speed pot error
Driving not possible
Contact dealer
8
Motor volts error
Driving not possible
Contact dealer
9
Other internal error
Driving not possible
Contact dealer
10
Push too fast fault
Driving not possible
Turn off the scooter and restart
All Van Os Medical products are built for a long and durable lifetime. However, during time reparation
and maintenance to your Excite will not be renumerative any more. Your dealer will contact you in
time for this. When recycling the Excite your should consided the below points:
• at scooter recycling the current or local precautions should always be followed
• the Excite only contains known materials. A couple of this materials, if collected separately,
can be recyled
• at development and build of the Excite for all used materials were known waste disposal
possibilities and no risks were known for recycling persons, not containing the batteries
Make sure during recycle of the Excite the batteries do not get damaged. They should be offered to a
certified instance or company for further disposal. When dealing with batteries always take the needed
precautions for protection of yourself and the environment.
Range
The range of the Excite (± 60 km) depends on the following factors:
• condition of the batteries
• weight on the chair (user, luggage etc)
• average driving speed
• driving style
• surface
• environment temperature
• driving conditions (hilly or flat, gravel or smoot asfalt)
Pagina 20
User Manual
Excel Extice
Standard programmed driving parameters
The Excite controller is equipped with a microprocessor. This can be indicated as the ‘brain’ of the
scooter. Inside this microprocessor a number of parameters can be adjusted. Some of these
parameters have consequences for the driving characteristics of the Excite. Van Os Medical B.V.
equipped the Excite with a standard program. If this program does not satisfy you, it can be adjusted
by use of a programmer box to adjust all parameters to your desires.
The values of the parameters have been carefully chosen. Extreme altering of the parameter data
could result in unstable driving habit. Small changes of the parameters are allowed.
Warranty precautions
These warranty precautions are in accordance with all other product specific warranties and are just
applicable to the first owner. If a none specified, to the product belonging warranty claim will appear,
this claim will judged by Van Os Medical B.V. during the warranty period. During the warranty period
the replacement parts can only be guaranteed until the end of the regular warranty period. All
appearing warranty will be limited to the replacement or reparation of the defect parts. Van Os Medical
B.V. can never be held responsible for any consequence such as damage or incidental damage, in
what way ever.
Van Os Medical B.V. only guarantees replacement parts.
This warranty gives you specific lawful rights. You must be aware of the fact that these rights can
change from country to country. Some lands do not accept a limited warranty concerning incidental or
consequential damage, or the time limit of the warranty. In that case the warranty period and / or the
exception of the warranty will be adjusted. For warranty and service you need to contact the
authorised Travelux® dealer, who supplied the Travelux®. If during a warranty period reparations are
done by another company than Van Os Medical B.V. or a not by Van Os Medical B.V. approved
company, every right on warranty comes to an end. In case of service and warranty is not given to
satisfaction by your dealer, please contact Van Os Medical B.V. We will try to get to a satisfying
solution for both parties.
Pagina 21
User Manual
Excel Extice
MANUFACTURERS DECLARATION OF CONFORMITY
For
Product identification
Product
Brand
Model/type
Version
: Electrically propelled scooter
: Excel
: Excite 3
:A
Manufacturer
:
Name
Van Os Medical BV
Address
Koperslagerij 9
4651 SK STEENBERGEN
EU representative
Technical constructed file
Prepared by
:
Function
:
Date
:
TCF
:
Country
The Netherlands
Name
Address
Van Os Medical BV
W. Van Os
Koperslagerij 9
4651 SK Steenbergen
Country
The Netherlands
Function:
Director
Name
P. van Os
research and development
01-10-2006
01-10-2006
Means of conformity
The product is in conformity with Directive 93/42/EEG based on the use of a Technical construction file
in accordance with Article 9 (Class I products) of the Directive
Signature of EU representative :
Place
: Steenbergen
Date
: 01-10-2006
Number
: VOS.TCF.EX.01
Pagina 22
User Manual
Excel Extice
Van Os Medical B.V.
The Netherlands
Koperslagerij 9
4651 SK Steenbergen NB
Tel: +31 (0) 167 57 3020
Fax: +31 (0) 167 57 3381
[email protected]
www.vanosmedical.com
Dealer:
Pagina 23
www.vanosmedical.com