1
ÊÊiVÌÀVÊ/i«>Ìi\Ê>Õ>Ê
ÛiÀ]Ê6iÀÃÊ{°äÊÊÊÊÊÊÊÊÊÊ"
äääxÈÎÊ,iÛÊä®
iÊ>i\Ê/*Ú*-Ó>Õ>
ÛiÀ°i«Ã
ÀÊÕÃÌÀ>ÌÊ«ÕÀ«ÃiÊÞ°Ê1ÃiÊiiVÌÀVÊÌi«>ÌiÊvÀÊëiVvV>Ìð
ÊÌÊ>ÌiÀ]ÊV
>}iÊÀÊÛiÊÌiÃÊÊÌi«>ÌiÊÕiÃÃÊëiVvV>ÞÊÌi`ÊÌÊ`Êð
"/\Ê/ÕÀÊvvʺ ÌiûÊ>`ʺi>ÃÕÀiiÌûÊ>ÞiÀÃÊÜ
iÊ«ÀÌ}°
£Én¸ÊÊ<" ,iÛÊÉäÎ
6,Ê1-ʺ*-»Ê9Ê""",Ê*9-//" ÊÓÊ""/9*
" Ê 1Ê
"6,°
>VÊ*>i
ÀÌÊ*>i
Capcom Entertainment, Inc.
475 Oakmead Parkway, Sunnyvale, CA 94085
www.ResidentEvil.com
{°x¸
{°x¸
°ä¸
/ÊÕÃiÊ>««À«À>ÌiÊ-,ÊVÊ
ÌÕÀÊÊ>««À«À>ÌiÊ>ÞiÀ°
Ç°£nÇx¸
£É£È¸Ê-/9Ê<" re4 ps2 final
9/13/05
12:03 PM
Page ii
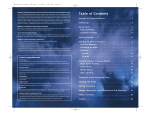
CONTENTS
WARNING: READ BEFORE USING YOUR PLAYSTATION ®2
COMPUTER ENTERTAINMENT SYSTEM.
A very small percentage of individuals may experience epileptic seizures when
exposed to certain light patterns or flashing lights. Exposure to certain patterns
or backgrounds on a television screen or while playing video games, including
games played on the PlayStation 2 console, may induce an epileptic seizure
in these individuals. Certain conditions may induce previously undetected
epileptic symptoms even in persons who have no history of prior seizures
or epilepsy. If you, or anyone in your family, has an epileptic condition,
consult your physician prior to playing. If you experience any of the following
symptoms while playing a video game – dizziness, altered vision, eye or
muscle twitches, loss of awareness, disorientation, any involuntary movement,
or convulsions – IMMEDIATELY discontinue use and consult your physician
before resuming play.
GETTING STARTED . . . . . . . . . . . 2
CONTROLLER . . . . . . . . . . . . . . . . . 3
PROLOGUE . . . . . . . . . . . . . . . . . . . . 4
CHARACTERS . . . . . . . . . . . . . . . . . 5
GETTING INTO THE GAME . . . . . 6
OPTIONS SCREEN . . . . . . . . . . . . . 7
CONTROLS . . . . . . . . . . . . . . . . . . . . 8
ACTIONS . . . . . . . . . . . . . . . . . . . . 10
ACTION BUTTON . . . . . . . . . . . . 11
GAME SCREEN . . . . . . . . . . . . . . . 12
SUBSCREEN . . . . . . . . . . . . . . . . . 13
ATTACHE CASE . . . . . . . . . . . . . 14
MAP SCREEN . . . . . . . . . . . . . . . . . 15
ITEM SCREEN . . . . . . . . . . . . . . . . 16
FILE SCREEN . . . . . . . . . . . . . . . . . 17
COMM SCREEN . . . . . . . . . . . . . . . 17
COMBINING ITEMS . . . . . . . . . . . 18
WEAPONS DEALER . . . . . . . . . . . . 19
GAME OVER & CONTINUE . . . . . 20
SAVING & LOADING . . . . . . . . . . . 21
HINTS . . . . . . . . . . . . . . . . . . . . . . 22
WARNING TO OWNERS OF PROJECTION TELEVISIONS:
Do not connect your PlayStation 2 console to a projection TV without first
consulting the user manual for your projection TV, unless it is of the LCD type.
Otherwise, it may permanently damage your TV screen.
USE OF UNAUTHORIZED PRODUCT:
The use of software or peripherals not authorized by Sony Computer
Entertainment America may damage your console and/or invalidate your
warranty. Only official or licensed peripherals should be used in the controller
ports or memory card slots.
HANDLING YOUR PLAYSTATION 2 FORMAT DISC:
• This disc is intended for use only with PlayStation 2 consoles
with the NTSC U/C designation.
• Do not bend it, crush it or submerge it in liquids.
• Do not leave it in direct sunlight or near a radiator or other source
of heat.
• Be sure to take an occasional rest break during extended play.
• Keep this disc clean. Always hold the disc by the edges and
keep it in its protective case when not in use. Clean the disc
with a lint-free, soft, dry cloth, wiping in straight lines from
center to outer edge. Never use solvents or abrasive cleaners.
A SPECIAL MESSAGE FROM
Thank you for selecting RESIDENT EVIL 4 for your PlayStation®2
computer entertainment system. CAPCOM is proud to bring you
this new addition to your video game library.
CAPCOM ENTERTAINMENT, INC.
475 Oakmead Parkway
Sunnyvale, CA 94085
©CAPCOM CO., LTD. 2005 ALL RIGHTS RESERVED. CAPCOM, the
CAPCOM logo and RESIDENT EVIL are registered trademarks of
CAPCOM CO., LTD. Dolby, Pro Logic, and the double-D symbol are
trademarks of Dolby Laboratories. Manufactured under license
from Dolby Laboratories. The ratings icon is a registered
trademark of the Entertainment Software Association. All other
trademarks are the property of their respective owners.
re4 ps2 final
9/13/05
12:03 PM
Page 2
CONTROLLER
GETTING STARTED
*
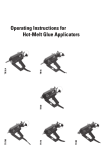
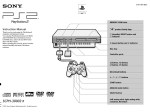
DUALSHOCK 2 analog controller configurations
®
* Note: Illustration may not match all PlayStation 2
console types. For owners of SCPH-70000 series
PlayStation 2 systems, refer to the setup
instructions supplied with your system.
Set up your PlayStation®2 computer entertainment system according to
the instructions in its Instruction Manual. Make sure the MAIN POWER switch
(located on the back of the console) is turned ON. Press the RESET button. When
the power indicator lights up, press the OPEN button and the disc tray will open.
Place the RESIDENT EVIL® 4 disc on the disc tray with the label side facing up.
Press the OPEN button again and the disc tray will close. Attach game controllers
and other peripherals, as appropriate. Follow on-screen instructions and refer
to this manual for information on using the software.
MEMORY CARD (8MB)(for PlayStation 2)
CONNECTING THE CONTROLLER
Before starting play, connect the DUALSHOCK®2 analog controller
to controller port 1. You can turn the controller’s vibration function
on/off in Options Mode (page 7).
®
To save game settings and progress, insert a memory card (8MB) (for
PlayStation®2) into MEMORY CARD slot 1 of your console. You can load saved game
data from the same memory card or from any memory card containing previously
saved games.
•
•
2
You must be using a memory card with at least 127KB of free space in order to
save your game data. If you need more free space than is available, delete older
data from the memory card before starting play.
Do not remove the memory card or turn off the power while saving or loading
game data. Doing so could damage your game data.
MENU CONTROLS
left analog stick 1/2 . . . . . . . Select menu option
left analog stick 4/3 . . . . . . . Change option setting
directional buttons . . . . . . . . . . . . . Same as left analog stick
x button . . . . . . . . . . . . . . . . . . . . . Confirm menu selection
Next menu
s or c button . . . . . . . . . . . . . . . Cancel/Close menu
Previous menu
Button controls used in this manual are defaults. You can change
the button mapping on the Options screen (page 7).
3
re4 ps2 final
9/13/05
12:03 PM
Page 4
CHARACTERS
PROLOGUE
Several years have passed since the destruction of Raccoon City…
Leon is now facing
his ultimate
challenge…
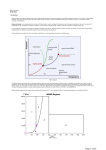
LEON S. KENNEDY
Agent for the U.S. Government. He has been
sent to Europe on a solo mission to rescue
the President’s kidnapped daughter,
Ashley. Leon is one of the few people
who survived the destruction of
Raccoon City six years ago.
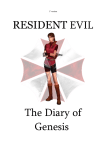
ASHLEY GRAHAM
A mysterious village…
Daughter of the President
of the United States. She was
kidnapped by a mysterious
group on the way home
from her college in
Massachusetts. Allegedly
she has been spotted
in a village in Europe,
but there has been
no sign of her since!
Creatures that defy nature…
Are they human
…or…?
4
5
re4 ps2 final
9/13/05
12:03 PM
Page 6
OPTIONS SCREEN
GETTING INTO THE GAME
STARTING A GAME
Press the w button to skip the
opening movie and display the Mode
Select screen. Use the menu controls
(page 3) to select an option:
•
•
•
START — Start a new game
from the beginning. (After you
complete the game the first time
around, you can select a difficulty level the next time you play.)
LOAD — Load your saved progress
and continue your game. Selecting the last saved file (page 21)
lets you resume the game from where you left off.
OPTIONS — Change various game settings (page 7).
PROGRESSIVE SCAN MODE
This game can be set to display a higher quality picture on TVs that support
progressive mode. In order to enjoy progressive mode, you need a progressive mode
enabled (525p) television with component video inputs, and a PlayStation 2
Component Video Cable (SCPH-10100; sold separately). For instructions on setting
up for progressive mode, see your PlayStation 2 Instruction Manual or the
instructions for the Component Video Cable. If you are unsure about your TV’s
compatibility, refer to the TV’s instruction manual or contact the manufacturer.
To activate progressive mode, press and hold the t and x buttons while
the game is starting up. A message will appear prompting you to switch over
to progressive mode. Select YES to activate the mode. If the picture displays
correctly, select YES again. If the picture does not display correctly, press
the RESET button and use Normal Mode.
6
NOTE: On some TVs, activating progressive mode sets the image to wide screen
(16:9) format.
Select OPTIONS from the Main Menu, or press the q button
in-game to open the Pause/Options menu.
Change various game settings on this screen. Highlight an option
by moving the left analog stick or directional buttons 1/2,
and change the setting by moving it 4/3.
•
•
•
LOAD GAME — Resume a game from your last save point (page 21).
•
•
SCREEN ADJUST — Adjust the brightness of your TV screen (if
(Available from the in-game Pause/Options menu only.)
RETRY FROM A CONTINUE POINT — Restart the game from the last
checkpoint you passed. (Available from the in-game Pause/Options
menu only.)
CONTROLLER SETUP — Set the camera angle and sight control,
toggle INVERTED AIM on/off, switch the CONTROLLER CONFIG
(TYPE I or TYPE II), turn the controller’s vibration feature on/off,
and select your QUICK KNIFE (TYPE I or TYPE II).
available on your TV), and toggle the widescreen display on/off.
AUDIO SETUP — Select STEREO, MONAURAL, or DOLBY® PRO LOGIC® II
depending on your system’s audio setup (see below).
NOTE: Be sure to read the screen hints for further information
when changing settings.
FOR DOLBY® PRO LOGIC® II DECODING:
This game is presented in Dolby Pro Logic II. Connect your game
console to a sound system with Dolby Pro Logic, Dolby Pro Logic II,
or Dolby Pro Logic IIx decoding to experience the excitement
of surround sound. You may also need to select Dolby Pro Logic II
from the Audio Setup menu of the game.
7
re4 ps2 final
9/13/05
12:03 PM
Page 8
CONTROLS
d button
• Communicate with Ashley (toggle between
“Wait!” and “Follow me!”)
l button
• Ready Knife
• Hold l + x Button = Knife Attack
• On the Subscreen, switch to Key
or Treasure screen
r button
• Ready weapon
• Hold r + x button = Fire/Attack
• Hold r + s or c button = Reload
• On the Subscreen, switch to Attache Case
t button
• Open Map
s/c button
• Hold s or c button + 1 = Run
• Hold s or c button + 2 = 180° Turn
• Hold r + s or c button = Reload
x button
• Action
• Hold r + x button = Fire/Attack
w (START) button
• Open Subscreen
right analog stick
• Adjust camera view
q (SELECT) button
• Open Options screen
• Skip movies
left analog stick/directional buttons
• Move forward/back (1/2)
• Rotate left/right (4/3)
• Hold l/r button then move = Aim weapon
8
Button controls used in this manual are defaults. You can change
the button mapping on the Options screen (page 7).
9
re4 ps2 final
9/13/05
12:03 PM
Page 10
ACTIONS
KNIFE ATTACK
AIM AND SHOOT!
•
Hold the r button to ready
your weapon and use the left
analog stick or directional
buttons to aim using your
weapon’s laser sight.
•
Press the x button to shoot (attack).
•
Hold the l button
to switch to the Knife
regardless of your
equipped weapon.
•
While holding the l
button, press the x button
to slash.
ACTION BUTTON
180° TURN
•
While moving backward (left analog stick or directional buttons 2 ),
press the s or c button to do an “about face”!
When you see the Action Button hint on screen, press
the indicated button(s) to perform various awesome actions.
Aim for enemy’s head!
^
^
Get close and press the button!
WEAPON RELOAD
•
•
10
While holding the r
button, press the s or c
button to reload your weapon.
^
Kick!
Some weapons take longer
to reload.
11
re4 ps2 final
9/13/05
12:03 PM
Page 12
SUBSCREEN
GAME SCREEN
Attache Case
Action Button
Hint
Currency
Name of
Selected Item
Health
Remaining Ammo
•
•
•
12
Your Health is vital to your success. If it disappears, your game ends.
Keep up your health by finding power-ups and avoiding enemy attacks
and traps.
Once Ashley joins you, her Health appears here along with yours.
When you run out of ammo, the Remaining Ammo indicator reads
EMPTY. If you have Ammo in your inventory, you need to reload.
If you don’t, you need to switch to another weapon.
Press the w button to open the Subscreen. Here you can:
•
•
•
•
Organize items in your Attache Case (page 14).
Equip weapons, and combine weapon parts to make new weapons.
Use Recovery items.
Combine herbs and other items.
EQUIPPING/USING ITEMS
•
•
Highlight the items you want to equip or use and press
the x button to display commands.
Select EQUIP or USE to perform that command.
13
re4 ps2 final
9/13/05
12:03 PM
Page 14
MAP SCREEN
ATTACHE CASE
Select MAP from the Subscreen, or press the t button
while in-game for quick access to the Map.
^
ORGANIZING ITEMS IN YOUR ATTACHE CASE
•
•
•
•
Highlight the item you want to move, then press the t button.
Destination
Move the cursor to an empty space.
Current Location
Press the t button again to complete the move.
Press the l and r buttons to rotate the selected item.
You can only pick up items if there is free space in your Attache Case.
Manage your items and space so you’re always carrying the most important
items for the tasks ahead.
Temporary Space
SELECT MARKER
TEMPORARY SPACE
When you don’t have enough
space for every item,
you can place extra items
in the Temporary Space.
14
Select the item you want
to see and it will appear
on the Map, showing you
its location.
15
re4 ps2 final
9/13/05
12:03 PM
Page 16
ITEM SCREEN
FILE SCREEN
Key Item
Treasure
View Files acquired during the game.
•
•
Highlight either the Key item or Treasure item and press
the x button to display the list of commands.
Select your command.
COMM SCREEN
Hunnigan will contact you with advice and
warnings at certain times during the game.
16
17
re4 ps2 final
9/13/05
12:03 PM
Page 18
COMBINING ITEMS
WEAPONS DEALER
^
By combining related items, you can free up space in your inventory
and even power up your weapons.
Talk to the Weapons Dealer to buy and sell items. Here you can:
COMBINING HERBS
•
•
•
18
Highlight the herb you want to combine, press the x button
and select COMBINE.
Line it up with the second herb.
•
•
•
BUY — Purchase weapons and parts.
TUNE UP — Increase the firepower, firing speed, capacity
and reload speed of your current weapons.
SELL — Trade in jewels and other treasures for money.
Press the x button to combine the original herbs into a new herb.
NOTE: If you don’t have enough space in your Attache Case,
you may not be able to make purchases.
19
re4 ps2 final
9/13/05
12:03 PM
Page 20
SAVING & LOADING
GAME OVER & CONTINUE
SAVING YOUR PROGRESS
Use typewriters you’ll find
in the game to save your
progress to a memory card.
GAME OVER
Getting attacked by enemies
and falling into enemy traps
depletes your Health Meter.
When the meter reaches
zero, your game is over.
You will also end the game
by failing to complete your
mission requirements.
•
You must have a memory
card inserted in MEMORY
CARD slot 1 in order to
save your progress.
•
•
Each saved game requires
127KB of free space on the memory card. Delete older data
before saving if you need more space.
Protect your data! Do not insert or remove the memory card
while saving game data.
Loading SAVED DATA
CONTINUE
Even if your game is over,
you can choose to continue
the same game. To do
that, select YES on the
Continue screen.
20
Load your saved game progress by
selecting LOAD on the Main Menu,
or LOAD GAME on the Options screen.
(To open the Options screen in midgame, press the q button.)
•
You must have a memory card
containing saved RESIDENT EVIL® 4
game data inserted into MEMORY CARD slot 1 in order
to load a saved game.
•
Protect your data! Do not insert or remove the memory
card while loading saved game data.
21
re4 ps2 final
9/13/05
12:03 PM
Page 22
HINTS
FIGHTING
•
•
Enemies fall down easier if you shoot out their legs and feet.
If you time your Action Button kicks right, they will hit other
enemies around you as well as your target.
SHOOTING THROUGH DOORS
•
You can shoot enemies through wooden doors.
EXPLOSIVES
•
Shoot red barrels and drum cans to make them explode.
Take out multiple enemies with one shot!
WEAPONS DEALER
•
22
You may get more money out of items by combining different
treasures than you would by selling the items individually.
re4 ps2 final
9/13/05
12:03 PM
Page 24
CREDITS
Manual: Hanshaw Ink & Image; Marketing:
Todd Thorson, David Riley, Jack Symon,
Sarah Felbinger, Laili Bosma, Carrie Root,
Robert Johnson, Nate Williams, Rey Jimenez
and Ryuhei Tanabe; Package Design: Michi
Morita, Corey Tran and Scott Baumann;
Translation: Brian Dunn; PR: Melinda
Mongelluzzo, Arne Cual-Pedroso and Alicia
Kim; Customer Service: Philip Navidad,
Robert Hamiter and Frank Filice.
90-DAY LIMITED WARRANTY
CAPCOM ENTERTAINMENT, INC. (“CAPCOM”)
warrants to the original consumer that this
DVD-ROM from CAPCOM shall be free from
defects in material and workmanship for a
period of 90 days from date of purchase.
If a defect covered by this warranty occurs
during this 90-day warranty period, CAPCOM
will replace the DVD-ROM free of charge.
To receive this warranty service:
1. Notify the CAPCOM Consumer Service
Department of the problem requiring
warranty service by calling (408) 7740400. Our Consumer Service Department
is in operation from 8:30 a.m. to 5:00
p.m. Pacific Time, Monday through Friday.
2. If the CAPCOM service technician is unable
to solve the problem by phone, he/she
will instruct you to return the entire
DVD-ROM to CAPCOM freight prepaid
at your own risk of damage or delivery.
We recommend sending your DVD-ROM
certified mail. Please include your sales
slip or similar proof of purchase within
the 90-day warranty period to:
CAPCOM
Consumer Service Department
475 Oakmead Parkway
Sunnyvale, CA 94085
This warranty shall not apply if the DVD-ROM
has been damaged by negligence, accident,
unreasonable use, modification, tampering
or by other causes unrelated to defective
materials or workmanship.
REPAIRS AFTER EXPIRATION
OF WARRANTY
If the DVD-ROM develops a problem
after the 90-day warranty period, you
may contact the CAPCOM Consumer
Service Department at the phone
number noted previously. If the CAPCOM
service technician is unable to solve the
problem by phone, he/she may instruct
you to return the defective DVD-ROM
to CAPCOM freight prepaid at your own
risk of damage or delivery, enclosing
a check or money order for $20.00
(U.S. funds only) payable to CAPCOM.
We recommend sending your DVD-ROM
certified mail. CAPCOM will replace
the DVD-ROM, subject to the conditions
above. If replacement DVD-ROMs are
not available, the defective product
will be returned to you and the $20.00
payment refunded.
WARRANTY LIMITATIONS
ANY EXPRESS OR IMPLIED WARRANTIES,
INCLUDING WARRANTIES OF
MERCHANTABILITY AND FITNESS FOR
A PARTICULAR PURPOSE, ARE HEREBY
DISCLAIMED. IN NO EVENT SHALL
CAPCOM BE LIABLE FOR SPECIAL, INDIRECT,
CONSEQUENTIAL OR INCIDENTAL DAMAGES
RESULTING FROM THE BREACH OF ANY
EXPRESS OR IMPLIED WARRANTIES.
The provisions of this warranty are valid in
the United States and Canada only. Some
states and provinces do not allow limitations
on how long an implied warranty lasts or
exclusions of consequential or incidental
damages, so the above limitations and
exclusions may not apply to you. This
warranty gives you specific legal rights,
and you may have other rights, which vary
from state to state or province to province.
ESRB RATING
This product has been rated by the
Entertainment Software Rating Board.
For information about the ESRB rating,
or to comment about the appropriateness
of the rating, please contact the ESRB at
www.esrb.org.