1
Pool 35 Focus and Pool 35 Wide User Manual
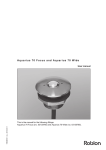
Aquarius 35 Medium and Aquarius 35 Wide
+99080180 rev. 2015.05.11.
User Manual
This manual describes the following products:
Product numbers 0313 0750 and 0313 0755. Aquarius 35 fitting.
Aquarius 35 Medium and Aquarius 35 Wide User Manual
1.1 Product overview and packing list
When opening the box, the following items should be included:
Qty
Description
Position
number
Item Number
Focus
Item Number
Wide
1
1
Lens housing
7
0313 0751
0313 0756
Screw joint
2
4300 2007
4300 2007
1
Fiber mount
4
4300 2008
4300 2008
1
Seal ring
1
4300 2009
4300 2009
1
Nut
3
9100 4213
9100 4213
1
O-ring
6
7100 0065
7100 0065
1
Socket set screw M3
5
9115 0033
9115 0033
1.2 Technical data
Fiber dimensions:
Ø2 – Ø6
Fitting Termination:
Fitting Termination or Compas Termination
Metal Housing:
EN / Din. W no. 1.4436
As recommended by the Danish Association for the Technology of Swimming Pools
Plastic used:
PVC and POM
IP class:
IP68. 1 Bar / 10 m water preassure
Weight:
90 g
1.3 Light Cone Angles
Product Type
Focus
Wide
Fiber Ø
In Air
In Water
2
17 - 36°
13 - 20°
3
18 - 36°
13 - 27°
4.5
19 - 33°
14 - 25°
6
23 - 35°
17 - 26°
2
59°
38°
3
59°
38°
4.5
59°
38°
6
59°
38°
page 2
Aquarius 35 Medium and Aquarius 35 Wide User Manual
2.0 Mounting instructions
Aquarius Ø35 fitting is suitable for plate mounting or embedment.
2.1 Mounting in moulded pools / plate mounting
1.
Placing: Select a level place on the pool wall having a diameter of minimum 35 mm to ensure a level base for the seal ring.
Flatness must be within 0.05 mm, corresponding to a radius of 2500 mm. If no such place can be found, seal using silicone
or a suitable alternative product.
2.
Bore a hole in the pool wall, min. Ø21 mm (max. Ø22 mm). Trim the edges, if necessary.
3.
Mount the seal ring (pos.1) on the screw joint (pos.2) and place the screw joint in the hole made in the pool. Be careful to
clean the hole and the area around it for dust and dirt. Mount the nut (pos.3) from the rear.
3
1
2
4.
Hold the screw joint at the front using tool 0313 0758 (optional) while tightening the nut from the rear. To achieve appropriate
compression of the seal ring, the nut should be tightened until any gap is removed and the approximately 20° further. A
thread locker should be used, e.g. Loctite 222.
5.
Push the fiber through the screw joint and mount the fiber mount (pos.4) on the fiber termination and lock it with the socket
screw (pos.5). Push the fiber mount and the fiber back into the screw joint.
5
6.
4
Place the O-ring (pos.6) in the groove in the screw joint front.
Check that groove and O-ring are clean.
6
7
7.
Screw the lens housing (pos. 7) on the screw joint and tighten it using tool 0313 0758 (optional). Check that the sealing
surface of the lens housing is clean.
To prevent the unintentional dismantling of the fitting, the lens housing thread should be locked with a thread locker, e.g.
Loctite 222.
page 3
Aquarius 35 Medium and Aquarius 35 Wide User Manual
2.2 Embedment
Roblon’s aquarius fittings can be mounted in concrete pools using various methods. Below two methods are described:
direct embedment and retrofitting.
The methods described presuppose that you have bought Roblon’s embedment kit for Aquarius 35 (Item Number 0313
0759):
Qty
Description - Embedment Kit Aquarius 35
Position number
0313 0759
1
Embedment unit
10
(4300 2011)
1
Protective plug
30
(4300 2013)
1
Tape disc
40
(4300 2012)
2
Plastic foam disc
50
(4300 2010)
2.2.1 Direct embedment
1.
Connect the embedment unit (pos.10) to the fiber conduit pipe. Use either Ø20 mm
plain conduit pipe or Ø20 mm fluted pipe. Screw the pipe on the embedment unit while
pressing them together.
50
10
30
40
To ensure a good adhesion in the embedment process, paste the embedment unit holding the fiber conduit
pipe with epoxy and sprinkle it with silica sand. As an additional measure, we recommend to paste the joint
between the embedment unit and the conduit pipe with epoxy to ensure watertightness, which is a must not
only during concreting, but also afterwards as a safeguard against water penetration if a non-waterproof
concrete is used.
page 4
Aquarius 35 Medium and Aquarius 35 Wide User Manual
2.
Use the protective plug delivered (pos. 30) to position and fix the embedment unit and the fiber conduit pipe in
the concrete formwork. Fasten the plug in the formwork in the following way: Bore a Ø4 mm hole in the formwork
and screw in a Ø5 mm wood screw so that it sticks out about 25 mm on the other side. Screw the plug on the
formwork (use the centre hole in the plug and screw holding the plain part). This way it will be easy for example to
line up a number of fittings or to mount them in a pattern.
Note that the direction in which the embedment unit is pointing will decide the direction of the light cone. In some
cases it will be necessary to mount supports for the fiber conduit pipe. Remove the screw holding the plug before
removing the formwork. If the pool wall requires dressing, the plug should not be removed until afterwards.
Remove the plug by means of the front holes.
3.
Mount the screw joint (pos. 2). Pack the thread using for example Loctite 55, and screw the screw joint on the
embedment unit using tool 0313 0758 (optional) just until the flange of the screw joint bears against the pool
wall. Be also careful not to pack the thread too hard. The tightening torque must be kept under 200 Nm. We
recommend moreover the use of a thread locker, e.g. Loctite 222.
4.
Push the fiber through the screw joint. Mount the fiber mount (pos. 4) on the fiber termination and lock it with the
socket set screw (pos. 5). Now push the fiber back into the screw joint.
5.
Place the O-ring (pos. 6) in the groove in the screw joint front. Check that groove and O-ring are clean.
6.
Screw the lens housing (pos. 7) on the screw joint and screw it home using tool 0313 0758 (optional). Check that
the sealing surface of the lens housing is clean.
2
4
5
6
7
To prevent the unintentional dismantling of the fitting, the lens housing thread should be locked with a thread
locker, e.g. Loctite 222.
page 5
Aquarius 35 Medium and Aquarius 35 Wide User Manual
2.2.2 Retrofitting – embedment in bored hole using Epoxy
The moulding material could for example be Sika Floor 156. If necessary, adjust the consistency by adding silica
sand (grain size 0.01) and stone dust.
Bore a hole for the fitting Ø34 – Ø50 mm. Bore moreover an inlet hole and a vent hole at an angle to the
fitting hole.
2.
Connect the embedment unit (pos. 10) to the fiber conduit pipe. Use either Ø20 mm conduit pipe or Ø20 mm
fluted pipe. Screw the pipe on the embedment unit while pressing them
together. 50
10
30
40
30
Ø
1.
15
Ø
Ø34
To ensure a good adhesion in the embedment process, paste the embedment unit holding the fiber conduit
pipe with epoxy and sprinkle it with silica sand. As an additional measure, we recommend to paste the joint
between the embedment unit and the conduit pipe with epoxy.
3.
Place and fix the embedment unit and the fiber conduit pipe in the hole. Mount the plug (pos.
30) to ensure a clean thread, among other things. The embedment kit includes a plastic foam disc (pos. 50)
fitting the fiber conduit pipe and a Ø50 mm hole. This will function as the rear sealing and as a guide for the
conduit. A plate fastened to the pool wall and the plug in the embedment unit will function as front sealing
and at the same time fix the unit firmly.
In a tight fit hole, as shown in the sketch, the foam disc needs to be cut to size to fit in the hole.
The included extra foam disc could, after being cut to size, functions as front sealing and guide when placed
on the embedment unit, flushing the front wall.
Pour the epoxy through the inlet hole until it shows in the vent hole. Note that the direction in which the
embedment unit is pointing will decide the direction of the light cone. Remove the cover plate and dress the
front with epoxy, if required. Mount the tape disc (pos. 40) to protect the front and the thread. Remove the
tape disc and the plug after hardening.
page 6
Aquarius 35 Medium and Aquarius 35 Wide User Manual
4.
Mount the screw joint (pos. 2). Pack the thread using for example Loctite 55, and screw the screw joint on
the embedment unit using tool 0313 0758 (optional) just until the flange of the screw joint bears against the
pool wall. Be careful not to pack the thread too hard. The tightening torque must be kept under 200 Nm. We
recommend moreover the use of a thread locker, e.g. Loctite 222.
5.
Push the fiber through the screw joint. Mount the fiber mount (pos. 4) on the fiber termination and lock it with
the socket set screw (pos. 5). Now push the fiber back into the screw joint.
6.
Place the O-ring (pos. 6) in the groove in the screw joint front. Check that groove and O-ring are clean.
7.
Screw the lens housing (pos. 7) on the screw joint and screw it home using tool 0313 0758 (optional). Check
that the sealing surface of the lens housing is clean.
To prevent the unintentional dismantling of the fitting, the lens housing thread should be locked using a thread
locker, e.g. Loctite 222.
2
4
5
6
7
page 7
Pool 35 Focus and Pool 35 Wide User Manual
Roblon accepts no responsibility for possible errors in printed and electronic material. Roblon reservesthe right to alter or
discontinue products without notice. © 2012, Roblon A/S.