Download EC-F2 Gas Sensor - Honeywell Analytics
Transcript
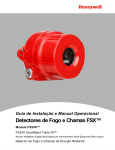
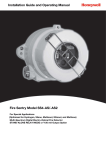
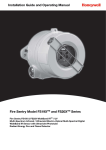
Installation Guide and Operating Manual Multi-Spectral Digital Infrared Electro-Optical Fire Detector Unitized, Two Stage, Quick Response FSC Model Nos. FS10-R & FS10-RN with Wide Band IR FS System 10TM Digital Fire Detection/Process Control System OPERATOR MANUAL // NOTICES AND TRADEMARKS Notices and Trademarks Copyright 2014 by Honeywell International Inc. While this information is presented in good faith and believed to be accurate, Honeywell disclaims the implied warranties of merchantability and fitness for a particular purpose and makes no express warranties except as may be stated in its written agreement with and for its customers. In no event is Honeywell liable to anyone for any indirect, special or consequential damages. The information and specifications in this document are subject to change without notice. The detector must be installed only by qualified professional personnel in accordance with local codes. The protection provided by the gas detector may be impaired if it is used in a manner not specified by Honeywell Analytics. ACCTTL, ALERT-1, ALARM-2, ALERT-1: ALARM 2, ALERT-1: ALARM-2, ATAG, Clean Room Sentry, COP-i, Complete Optical Path Integrity, CM1, CM1-A, DartLogic, FireLogic, Honeywell Analytics VSD-8 Honeywell Analytics VSD-8 Visual Smoke Detection System, VSD-4, VSD-8, Fire Signature Analysis, FireBusI, FireBusII, FirePic, FirePicII, FirePicIII, FirePix, FirePicture, FSC, Honeywell Analytics, Honeywell Analytics, FSX, All FSX Nomenclature Variations (such as: FS2, FS2X, FS3, FS3X, FS4, FS4X, FS5, FS5X, FS6, FS6X, FS7, FS7X, FS8, FS8X, FS9, FS9X, FS10X, FS10X, FS11, FS11X, FS12, FS12X, FS14, FS14X, FS15, FS15X, FS16, FS16X, FS17, FS17X FS18, FS18X, FS19, FS19X, FS20, FS20X, FS24, FS24X, FS24XN, FS26, FS26X, FS26XN), FS7-2173-2RP, FS System 7, FS System 10, FS7-2173, FS7-2173-RP, FS2000, FS System 2000, High Speed Flame & Surveillance Detector, Multi-Spectrum QuadBand Triple IR, Multi-Spectrum TriBand, Multi-Spectrum Tri-Band, Near Band Infrared, Near Band IR, NearBand IR, QuadBand IR, Room Sentry, RS, RS2, SM2, SM3, SS, SS2, SS2X, SS2-A, SS3, SS3-A, SS3X, SS4, SS4-A, SS4X, SnapShot, SLR-BIT, SuperBus, SuperSentry, System 2000, Tri-Mode Plot, QuadBand Triple IR Plus, TriBand, Tri-Band, “FS & FSC triangle logo’s”, WBIR, Wide Band Infrared, WideBand IR, Wide Band IRare registered trademarks of Honeywell International Inc. HONEYWELL 2 OPERATOR MANUAL // NOTICES AND TRADEMARKS Other brand or product names are trademarks of their respective owners. Honeywell Analytics HONEYWELL 3 OPERATOR MANUAL // ABOUT THIS DOCUMENT About This Document Read and understand this manual before installing or operating equipment. No part of this document may be copied or reproduced without the express written permission of Honeywell Analytics. This manual is subject to change without notice. HONEYWELL 4 OPERATOR MANUAL // SYMBOL DEFINITIONS Symbol Definitions The following table lists those symbols used in this document to denote certain conditions. Symbol Definition ATTENTION: Identifies information that requires special consideration. TIP: Identifies advice or hints for the user, often in terms of performing a task. REFERENCE-EXTERNAL: Identifies an additional source of information outside of this booklet. REFERENCE-INTERNAL: Identifies an additional source of information within this booklet. Indicates a situation which, if not avoided, may result in equipment or work (data) on the system being damaged or lost, or may result in the inability to properly operate the process. CAUTION: Indicates a potentially hazardous situation which, if not avoided, may result in minor or moderate injury. It may also be used to alert against unsafe practices. CAUTION: Symbol on the equipment refers the user to the product manual for additional information. The symbol appears next to required information in the manual. HONEYWELL 5 OPERATOR MANUAL // TABLE OF CONTENTS Table of Contents Notices and Trademarks ................................................................. 2 About This Document ..................................................................... 4 Symbol Definitions ........................................................................ 5 Table of Contents .......................................................................... 6 SECTION 1: INTRODUCTION........................................................ 8 1.1 1.2 1.3 1.4 1.5 1.6 Application ....................................................................................... 8 Responses ....................................................................................... 8 Input Power Requirements .............................................................. 8 TM FirePic .......................................................................................... 8 No Silicone Used ............................................................................. 9 FS10-R, -RN Unitized Flame Detectors .......................................... 9 1.6.1 Alert / Early Warning Relay Output ............................... 10 1.6.2 Alarm Relay Output ....................................................... 10 1.6.3 Fault Relay Output......................................................... 10 1.6.4 Physical Description ...................................................... 11 1.6.5 Field of View .................................................................. 11 1.6.6 Environment Range ....................................................... 11 1.6.7 Location ......................................................................... 11 1.6.8 Self-Test ........................................................................ 11 1.6.9 Warranty ........................................................................ 11 SECTION 2: INSTALLATION ....................................................... 12 2.1 2.2 2.3 2.4 Detector Views .............................................................................. 12 Conduit Installation ........................................................................ 13 Power Supply Considerations ....................................................... 14 Mounting the Flame Detectors ...................................................... 14 SECTION 3: OPERATING MODES.............................................. 15 3.1 3.2 3.3 3.4 3.5 3.6 3.7 Normal Operation .......................................................................... 15 Alert / Fire Early Warning .............................................................. 15 Alarm Condition ............................................................................. 15 Fault Condition .............................................................................. 15 Automatic Detector Test ................................................................ 16 Manual Detector Test .................................................................... 16 Advanced System Diagnostics ...................................................... 16 SECTION 4: MAINTENANCE AND REPLACEMENT .................. 17 4.1 4.2 4.3 Detector Faults .............................................................................. 17 Cleaning Detectors Housing Windows .......................................... 17 Detector Module Replacement ...................................................... 18 SECTION 5: PINOUT DATA......................................................... 19 SECTION 6: ACCESSORIES ....................................................... 22 6.1 6.2 6.3 6.4 6.5 6.6 HONEYWELL Detector Heavy Duty Swivel Mount (Part No. SM2) ...................... 22 Test Lamp (Part No. FS-846) ........................................................ 23 Disposable Protective Covers for Detectors (Part No. DPC-12) .. 23 Extension Pole for Disposable Covers (Part No. EXPL-1) ............ 23 Air Shield for Dirty Applications (Part No. DASA1-P) ................... 23 PC Interface Kit (Part No. FS10-IK) .............................................. 24 6 OPERATOR MANUAL // TABLE OF CONTENTS Index............................................................................................. 25 Limited Warranty ......................................................................... 26 Contact Honeywell Analytics ..................................................... 27 Americas ................................................................................................. 27 Europe ................................................................................................... 27 Asia Pacific.............................................................................................. 27 Internet ................................................................................................... 27 Telephone ................................................................................................ 27 HONEYWELL 7 OPERATOR MANUAL // SECTION 1: INTRODUCTION SECTION 1: INTRODUCTION 1.1 Application The Honeywell Analytics Models FS10-R (relay output) are unitized (stand-alone) Flame Detectors designed specifically for detecting and alarming to fires in electrostatic powder or paint spray booths and paint spray lines in industrial and automotive applications. These multi-spectral, digital, electro-optical, patented Flame Detectors are housed in explosion proof enclosures and feature automatic "through-the-lens" self-test. The Detectors may be ordered with dry contact relays for interfacing to approved control panels, and either latching or non-latching outputs. FS10-R Detectors each contain a built-in controller and are unitized versions of the proven, large installed base FS10 Flame Detectors with Card Controllers and FS10 Flame Detectors with WallMounted Controllers. The FS10 line of Detectors is designed primarily for indoor fire detection applications where combustible materials exist. Typical applications include: -Automotive Paint Lines -Aerosol Filling -Paint Kitchens -General Finishing -Curing Ovens -Paint Mixing Rooms -Powder Coating Booths -Warehouse Storage -Compressor Modules -Liquid Paint Spray Lines -Diesel Generators -Internal Storage Tanks 1.2 Responses The FS10-R type Detectors contain Alert / Fire Early Warning, Fire Alarm and Fault signal relays. The Alert/Fire Early Warning and Alarm relays are de-energized, and the Fault relay is energized during normal operation. If a fire occurs, a Fire Alarm is declared in less than 5.0 seconds. 1.3 Input Power Requirements FS10-RTM: The total electrical input power requirement during normal operation for the Flame Detector is 85 milli-Amps (0.085 Amps) at 24 Volt DC (+/-15%). The maximum current required during Alarm is 120 milli-Amps. 1.4 FirePicTM FirePic stores the sensor data of the last six fire events in the Detector’s non-volatile digital memory. FirePic provides the HONEYWELL 8 OPERATOR MANUAL // SECTION 1: INTRODUCTION numerical spectral evidence to postulate the cause of a fire. The Detector records the time and date for each FirePic. The FirePic data includes a graphical display of the relative spectral intensities versus time preceding and during the fire. Note: A PC computer is required to access FirePic. 1.5 No Silicone Used NO silicone based sealant or silicone greases are used in the Flame Detector. 1.6 FS10-R, -RN Unitized Flame Detectors The multi-spectral digital infrared Flame Detector, spanning the Wide Band IRTM, Near Band IRTM, and Visible BandTM spectra, has intelligent, smart computer processing to tell the difference between a real fire and false alarm radiant energy sources. The Detector simultaneously examines these three spectral radiant energy bands that are real-time signal processed by an on-board microprocessor. The Detector is factory set for Alert / Fire Early Warning and Fire Alarm detection range of 15 feet (FS10-R15, -RN15) and 30 feet (FS10-R30, -RN30) to a one square foot Heptane reference pan fire. The Alert response time is factory set to 0.3 second, the Fire Early Warning response time is factory set to 1.0 second, and The Fire Alarm response time is factory set to less than 5.0 seconds. The Detectors are factory set for either latching (FS10-R15, -R30) or non-latching (FS10-RN15, -RN30) as the standard setting. The Alert / Fire Early Warning response is NOT available with either the FS10-R45, or FS10-RN45 versions (45 foot detection range). The Detector features real-world time and date stamped “Event History” files that are stored in non-volatile solid-state memory. HONEYWELL 9 OPERATOR MANUAL // SECTION 1: INTRODUCTION The Detector performs the following output functions (relay contact closure or analog current source depending on model utilized): • Indicates a Fault if trouble occurs. • Energizes Alert / Fire Early Warning and Fire Alarm if a fire occurs. • Turns on the Detector’s LED to indicate Normal Operation, Fire Alarm, or Fault conditions. • Communicates externally to a PC desktop or laptop computer through the built-in RS-485 communication channel, using the optional “windows” PC Interface Kit (refer to Section 6.6). 1.6.1 Alert / Early Warning Relay Output The Detector contains one Alert / Fire Early Warning relay with a contact rating of 1 Amp @ 24 VDC. During Normal Operation the relay is de-energized with open contacts. When an Alert or Fire Early Warning condition occurs, the relay is energized with closed contacts. 1.6.2 Alarm Relay Output The Detector contains one Fire Alarm relay with a contact rating of 1 Amp @ 24 VDC. The relay is de-energized with open contacts during Normal Operation. During a Fire Alarm condition, the relay is energized with closed contacts. Note: The Fire Relay may be ordered configured in a Latching or Non-Latching mode. If Latching mode is configured, the Fire Relay will remain energized until the Detector is reset (Powered down and up). When Non-Latching is configured, the Fire Relay will reset automatically after 5 seconds. This option is software configured and must be set in the factory prior to shipment. The standard factory setting is latching, if an RN version of the Detector is not ordered. 1.6.3 Fault Relay Output The Detector contains one Fault relay with a contact rating of 1 Amp @ 24 VDC. The relay is energized during Normal Operation with closed contacts. When a Fault condition occurs, the relay is de-energized with opened contacts. Examples of Fault conditions include loss of power to the Detector or failure of the Self-Test feature. HONEYWELL 10 OPERATOR MANUAL // SECTION 1: INTRODUCTION 1.6.4 Physical Description The Detector’s electronics and sensors are mounted inside a module which is housed in a water-tight and explosion-proof enclosure with the following ratings: Class I Div. 1, 2, Groups B, C, D; Class II, Div. 1 & 2, Groups E, F, G and Class III; NEMA 3 & 4; tamper-resistant with integral dual 3/4 inch NPT conduit openings; copper-free aluminum (less than 0.4%) with a red powder-coated epoxy finish and a reflector assembly. The Detector’s housing “O” ring material is Dupont Viton that is not affected by paint solvents. The Detector weighs approximately 3.5 pounds. For dimensions, see Figures 1 and 2. 1.6.5 Field of View The Detector’s field-of-view is ninety (90) degrees (+ 45 º horizontal and vertical). 1.6.6 Environment Range The Detector humidity range is 10% to 90% (RH), non-condensing. The operating and storage temperature range of the Detector is – 40 oF to +185 oF (-40 oC to +85 oC). 1.6.7 Location For proper installation, each Detector should be located within the detection distance ordered from the factory (i.e., 15 feet for the FS10-R15, -RN15, -A15, -AN15; 30 feet for the FS10-R30, -RN30, A30, -AN30, and 45 feet for the FS10-R45, -RN45, -A45, -AN45) of the fire threat area and have a clear view of the area being monitored. 1.6.8 Self-Test The Detector activates an ACCTTLTM (Automatic Computer Controlled Through The Lens Test) for checking the Detector’s window lens for contamination. If the Detector’s lens needs cleaning, the Detector’s LED blinks three times in a burst, every 10 seconds. 1.6.9 Warranty Honeywell Analytics warrants the Flame Detector against any defects in material and workmanship for a period of two (2) years from shipment date. HONEYWELL 11 OPERATOR MANUAL // SECTION 2: INSTALLATION SECTION 2: INSTALLATION 2.1 Detector Views The Detector may be mounted directly on the wall, or with the optional SM2 swivel mounting assembly or SM4 Stainless Steel Swivel Mount (refer to Section 6.1 for details). 1.50 4.38 ¾ NPT 0.67 2.09 2.40 1.10 4.66 Figure 3: Fire Detector Housing - Side View HONEYWELL 12 OPERATOR MANUAL // SECTION 2: INSTALLATION Figure 4: Detector Housing - Rear View BE SURE and DOUBLE CHECK that the external AC voltage electrical power is TURNED OFF. With OPTION 1S-GF-120: Connect 120 Volts AC LAST With OPTION 1S-GF-240: Connect 240 Volts AC LAST 2.2 Conduit Installation Detectors should be located to cover the specific “fire threat” areas. When planning the conduit, observe the following recommendations. 1. If only one of the two ¾ inch NPT conduit openings of the Detector enclosure is used, appropriately seal the unused opening with a threaded, tapered plug. 2. In areas where moisture may accumulate, install an approved conduit trap or drain. HONEYWELL 13 OPERATOR MANUAL // SECTION 2: INSTALLATION 2.3 Power Supply Considerations Note: Apply ONLY 24 Volt DC to the Detectors Electrical Input Power Connections. Refer to Section 1.3 for specific input power requirements and Table 2 and 3 for the appropriate pin assignments for the FS10-R and –RN Detector. Make certain the panel’s power supply can handle the load current of the total number Detectors connected to it. For example, if ten (10) Model FS10-R Detectors are used on one panel’s power supply, the panel’s power supply must be able to handle at least 1.20 Amps. This load current must also be considered when calculating the panel requirements for 24-hour backup. 2.4 Mounting the Flame Detectors The Flame Detectors have the ability to see a one square foot heptane pan fire at half of the Detector’s sensitivity off axis out to 45 degrees for a 90 degree Field-of-view (viewing angle). It is recommended the Flame Detectors be positioned with the primary fire threat location aimed in the center of the Detector’s Field-ofView. Since Flame Detectors must “see” the fire in order to detect it, mount the Detectors in locations such as room corners and ceilings to avoid line-of-sight blockage. HONEYWELL 14 OPERATOR MANUAL // SECTION 3: OPERATING MODES SECTION 3: OPERATING MODES 3.1 Normal Operation Apply only EXTERNAL 24 volt DC regulated electrical power. At this time, turn the external power ON and check that the Detector is operating correctly. Verify during initialization that the red LED continuously blinks ON for about 10 seconds and then blink once every 10 seconds during Normal Operation. In Normal Operation, the Detector is ready to detect fires, report Faults, should any occur, and will have the red LED blinking ON every 10 seconds. The Analog type Detector will indicate a 4 mA output current during Normal Operation. 3.2 Alert / Fire Early Warning During an Alert or Fire Early Warning condition, the Detector will: • rapidly blink the red LED continuously. • energize the Alert/Early Warning (energize the relay or indicate a 12 mA output current). • record FirePic in non-volatile memory. • record the event in the Event History file in non-volatile memory. 3.3 Alarm Condition During a Fire Alarm condition, the Detector will: • turn ON the red LED continuously. • Energize the Fire Alarm (energize the relay). • record FirePic in non-volatile memory. • record the event in the Event History file in non-volatile memory. 3.4 Fault Condition During a Fault condition, the Detector will: • blink the red LED as indicated in Table 1, • indicate a fault (de-energize the Fault relay). • record the event in the Event History file. Faults generally occur for the following reasons: • a problem has been encountered, such as a dirty Detector window. • failure in the wiring such as a severed cable, loose terminations. • the Detector’s internal self-checking reported a hardware failure. • power loss at the Detector. HONEYWELL 15 OPERATOR MANUAL // SECTION 3: OPERATING MODES Note: The Fault condition is self-resetting; i.e. if the action causing the Fault is remedied, then the Detector will stop reporting a Fault. 3.5 Automatic Detector Test The Detector performs ACCTTL (Automatic Computer Controlled Through the Lens) tests every 10 minutes (factory set) to check the operation of the Flame Detector. During a fault condition, the Detector will blink the green LED as defined in Table 1 “Detector Fault Codes”. If the Flame Detector detects an inadequate signal reflected back through the viewing window; this may indicate a Detector dirty window lens, which requires cleaning, or a missing or dirty reflector lens guard, such as the Detector’s front cover is not installed. Note: While ACCTTL tests are occurring, the system is still functional and able to alarm to a fire. 3.6 Manual Detector Test WARNING: Responses to the FS10-R Detector relay output must be isolated mechanically (not solely by programming the control panel using software or firmware). This will avoid external alarms and/or suppression discharge when performing the following manual Detector test with a Portable Test Lamp, such as the Honeywell Analytics Model FS-846-B. Test the system “end-to-end” by activating each Detector separately. Note: It is recommended that the Honeywell Analytics Model FS846-B Portable Test Lamp is used to activate the Detectors individually. 3.7 Advanced System Diagnostics The Detector’s FireBusTM connections allow interfacing to a desktop or laptop PC computer, which requires the optional PC “Windows” Interface Kit (Refer to Section 6.6, PC Interface Kit). HONEYWELL 16 OPERATOR MANUAL // SECTION 4: MAINTENANCE AND REPLACEMENT SECTION 4: MAINTENANCE AND REPLACEMENT 4.1 Detector Faults WARNING: Serious injury or death may result if personnel fail to observe safety precautions. If a Detector Fault is observed, the Detector will blink ON the internal red LED every 10 seconds with one of the following Fault Codes. Should remedial action fail to clear a Fault condition, contact FSC Customer Service. Event History File Action Fault CONDITION (1) No LED illumination No power is available at the Detector. Check wiring for broken or crimped cables or loose terminations. Fault CONDITION (3) LED blinks 3 times Flame Detector “through the lens” test failure. Clean the lens and grill. It is important to clean underneath the grill. See Section 3.5. Fault CONDITION (5) LED blinks 5 times Flame Detector temperature ratings have been exceeded. This should clear when the unit is brought back to a standard environment. Fault CONDITION (4) LED blinks 4 times Internal Detector Fault, such as a broken relay coil. If this persists, return the entire Detector to Honeywell Analytics for service. See Section 4.3. Fault CONDITION (6) LED blinks 6 times Internal Detector Fault, such as a memory failure. If this persists, return the entire Detector to Honeywell Analytics for service. See Section 4.3. Table 1: Detector and Detector Faults 4.2 Cleaning Detectors Housing Windows Clean the Detector’s windows and grills immediately; after handling and installation, on a regular or periodic schedule, and whenever a Fault occurs for which that is the recommended action. Use an air HONEYWELL 17 OPERATOR MANUAL // SECTION 4: MAINTENANCE AND REPLACEMENT blast and/or a clean cloth to clean the Detector’s windows. Utilize Honeywell Analytics’ Disposable Protective Covers, Part No. DPC12, to keep the window lens and self-test grill clean. 4.3 Detector Module Replacement To replace an improperly operating Flame Detector Module, do the following: 1. Loosen the hex nut that secures the top windowed cover to the Detector housing base. 2. Next, turn the Detector top cover counter-clockwise until the top cover is removed. 3. Using a screwdriver, turn the three captive screws counterclockwise, that secures the black Flame Detector Module to the housing base, until the Module is free. 4. Gently lift the Flame Detector Module out of the housing base; take care not to touch the sensor windows. 5. Using a small screwdriver, turn the two clamp screws counterclockwise, that secures the ten wire cable plug, so the plug may be removed. 6. Handle the Flame Detector Module with care and do not touch the sensor windows. 7. Carefully wrap the Module in static protection material (if none available, use aluminum foil) and ship to Honeywell Analytics. 8. To install a Detector Module, just reverse the removal steps listed above. THERE ARE NO USER SERVICEABLE PARTS IN A DETECTOR’s MODULE. ANY EVIDENCE OF TAMPERING, PRYING OPENING DETECTOR MODULE OR ATTEMPTED REPAIRS OF ANY KIND BY NON-FACTORY PERSONNEL WILL VOID ALL WARRANTIES To return a Detector; it must be packaged in static protective material. If this material is not available, carefully wrap the Detector and harness within aluminum foil. Before shipping the Detector back to the factory, contact Honeywell Analytics Customer Service for a required Return Material Authorization (RMA) for all returns. HONEYWELL 18 OPERATOR MANUAL // SECTION 5: PINOUT DATA SECTION 5: PINOUT DATA PIN Description 1 DCRtn (Not Chassis Ground) 2 Data “A” (RS-485 COMM A) 3 Data “B” (RS-485 COMM B) 4 DC (+) Voltage 5 Fault Relay Contact A (Normally energized CLOSED) 6 Fault Relay Contact B (Normally energized CLOSED) 7 Alarm Relay Contact A (Normally OPEN) 8 Alarm Relay Contact B (Normally OPEN) 9 Alert / Early Warning Relay Contact A (Normally OPEN) 10 Alert / Early Warning Relay Contact B (Normally OPEN) Table 2: Flame Detector Connector Pin-outs for FS10-R type Detectors J1 Connector: FIRE DETECTOR Module HONEYWELL 19 OPERATOR MANUAL // SECTION 5: PINOUT DATA PIN Description 1 DCRtn (Not Chassis Ground) 2 Data “A” (RS-485 COMM A) 3 Data “B” (RS-485 COMM B) 4 DC (+) Voltage 5 Fault Relay Contact A (Normally energized CLOSED) 6 Fault Relay Contact B (Normally energized CLOSED) 7 Alarm Relay Contact A (Normally OPEN) 8 Alarm Relay Contact B (Normally OPEN) 9 Not used 10 Not Used Table 3: Flame Detector Connector Pin-outs for FS10-R45 type Detectors DO NOT CONNECT SHIELD AT THE FLAME DETECTOR. Note: COMM as it is used in this document is an abbreviation for Communications. Detector relays are shown as they are during Normal Operation, that is, there are no Fire Alarm conditions or Faults. HONEYWELL 20 OPERATOR MANUAL // SECTION 5: PINOUT DATA 1 2 3 4 5 6 7 8 9 10 Figure 3: FS10-R, Detector Module, Connector Rear View HONEYWELL 21 OPERATOR MANUAL // SECTION 6: ACCESSORIES SECTION 6: ACCESSORIES 6.1 Detector Heavy Duty Swivel Mount (Part No. SM2) 2.95 2.00 4.26 4.86 0.295 Dia. 4.7” approx. Figure 4: Detector Swivel Mount Figure 5: Model SM4 Stainless Steel Swivel Mount HONEYWELL 22 OPERATOR MANUAL // SECTION 6: ACCESSORIES 6.2 Test Lamp (Part No. FS-846-B) This portable, hand-held test lamp is battery-powered for remote activation of the FS System 10 Flame Detectors. This device allows the entire Fire Protection System to be tested during start-up or routine maintenance. This test lamp simulates the radiant energy emitted by an actual fire in order to test the Detectors without the need for an open flame. Eight “D” sized replaceable flashlight batteries are required to power the Test Lamp. Note: Refer to the SYSTEM TEST WARNING of Section 3.6. 6.3 Disposable Protective Covers for Detectors (Part No. DPC-12) Honeywell Analytics’ Flame Detectors, with their unique wide spectral bands, can “see through” factory supplied Disposable Protective Covers with no reduction in Detector performance (for end-users with a planned maintenance schedule). Should debris collect, these specifically designed protective covers may be easily replaced. The task of cleaning the Detector viewing windows for proper operation is eliminated, thus reducing maintenance requirements. A regularly scheduled maintenance plan can virtually eliminate the need to interrupt a production process in order to clean a Detector’s dirty viewing window. Each package contains twelve (12) Protective Covers. 6.4 Extension Pole for Disposable Covers (Part No. EXPL-1) This extension is used to install or remove the FS System 10 Disposable Protective Covers in hard-to-reach areas. The pole extends in three sections to a length of 11.0 feet. 6.5 Air Shield for Dirty Applications (Part No. DASA1-P) The Detector Air Shield mounts to the Flame Detector housing for installation in areas with high levels of airborne contaminants. The Air line fitting accepts ¼” O.D. nylon tubing for an instrument grade air supply of 5 to 15 psi @ 6 cubic ft. per minute. HONEYWELL 23 OPERATOR MANUAL // SECTION 6: ACCESSORIES 6.6 PC Interface Kit (Part No. FS10-IK) The PC Interface Kit electronically converts the Detector’s RS-485 digital output (FireBus) signal into a standard RS-232 signal for interfacing to an IBM type PC computer. This optional interface Kit allows access to post event analysis (FirePic), as well as monitoring the Detector’s operation (SnapShot). Post event analysis includes the Detector’s time and date stamp of ALERT, ALARM and FAULT histories (Event History). The PC Interface Kit includes; a self-powered (internal rechargeable battery) terminal box with two connecting cables, a 120 VAC wall transformer for recharging the battery, and User PC software. Note: The PC Interface Kit may also be used with a Detector that is powered by an external 24 VDC source (a complete user instruction is included with the Interface Kit). HONEYWELL 24 OPERATOR MANUAL // INDEX Index Controller Fault ....................... 17 Detector Cable ................................... 19 Cleaning .............................. 17 HONEYWELL Input Power Milliamps ................................ 8 Test Lamp ............................... 23 Through the Lens Fault ........... 17 25 OPERATOR MANUAL // LIMITED WARRANTY Limited Warranty Honeywell Analytics warrants its Products against defects in material and workmanship under normal use and service for a period of two (2) years from the date of shipment as described herein. Honeywell Analytics, at its option, will repair or replace, at no charge, such products found to be defective during the warranty period provided that they are returned in accordance with the terms of this warranty. Replaced parts or boards are warranted for the balance of the original applicable warranty period. All Replaced parts of Products shall become the property of Honeywell Analytics. This express limited warranty is extended by Honeywell Analytics to the original purchaser only and is not assignable or transferable to any other party. This is the complete warranty for the Products manufactured by Honeywell Analytics. Honeywell Analytics assumes no obligations or liability for additions or modifications to this warranty unless made in writing and signed by an officer of Honeywell Analytics. Honeywell Analytics does not warrant the installation, maintenance or service of its Products. Honeywell Analytics is not responsible in any way for ancillary equipment not furnished by Honeywell Analytics, which is attached to or used in connection with its Product(s), or for operation of the Product(s) with ancillary equipment and all such equipment if expressly excluded from this warranty. This warranty sets forth the full extent of Honeywell Analytics’ responsibility regarding the Products’ repair or replacement at Honeywell Analytics’ options, is the exclusive remedy. This Warranty is given in lieu of all other Express Warranties, Implied Warranties, including without limitation, Implied Warranties of Merchantability and fitness for a particular purpose, are limited to the duration of this Limited Warranty. In no other event shall Honeywell Analytics be liable for damages in excess of the purchased price of the product(s), for any loss of use, loss of time, inconvenience, commercial loss, lost profits or savings or other incidental, special or consequential damages arising out of or in connection with the use or inability to use such product, to the full extent such may be disclaimed by law. THIS WARRANTY DOES NOT COVER: 1. Defects or damage resulting from use of the Product(s) in other than its normal and customary manner. 2. Defects or damage from misuse, accident, or neglect. 3. Defects or damage from improper testing, operation, maintenance, installation, alteration, modification or adjustment. 4. Product(s) subject to unauthorized Product modifications, disassemblies or repairs (including, without limitation, the audition of the product of non-Honeywell Analytics supplied equipment) which adversely affect performance of the Product(s) to interfere with Honeywell Analytics’ normal warranty inspection and testing of the Product(s) to verify any warranty claim. 5. Product(s) that have had the serial number removed or made illegible. 6. Freight cost to the repair facility. 7. A Product which due to illegal or unauthorized alteration of the software/firmware in the Product, does not function in accordance with Honeywell Analytics’ specifications. 8. Scratches or other cosmetic damage to Product surfaces that do not affect the operation of the Product. 9. Normal and customary wear and tear. Laws in the United States and other countries preserve for Honeywell Analytics certain exclusive rights for copyrighted Honeywell Analytics software/firmware, such as the exclusive rights to reproduce in copies and distribute copies of such Honeywell Analytics software/firmware. Honeywell Analytics software/firmware may be used only in the Product(s) in which the software/firmware was originally embodied and such software/firmware in such Product(s) may not be replaced, copied, distributed, modified in any way, or used to produce any derivative thereof. No other use including, without limitation, alteration, modification, reproduction, distribution, or reverse engineering of such Honeywell Analytics software/firmware or exercise or rights in such Honeywell Analytics software/firmware is permitted. No license is granted by implication, estoppel or otherwise under Honeywell Analytics patent rights or copyrights. HONEYWELL 26 OPERATOR MANUAL // CONTACT HONEYWELL ANALYTICS Contact Honeywell Analytics Americas Honeywell Analytics Inc. 405 Barclay Blvd. Lincolnshire, Illinois USA 60069 Email: [email protected] Europe Life Safety Distribution AG Javastrasse 2 8604 Hegnau Switzerland Email: [email protected] Asia Pacific Honeywell Analytics Asia Pacific Co., Ltd. #701 Kolon Science Valley (1) 43 Digital-Ro 34-Gil, Guro-Gu Seoul, 152-729 Korea Email: [email protected] Internet These Honeywell websites may be of interest to Industry Solution customers. Honeywell Organization URL Corporate www.honeywell.com Honeywell Analytics www.honeywellanalytics.com Telephone Contact us by telephone at these numbers. Organization Americas Honeywell Analytics Inc. 1-800-538-0363 1-800-321-6320 Europe Life Safety Distribution AG {32-2} 728-2711 Asia Pacific Honeywell Analytics Asia Pacific Co., Ltd. HONEYWELL Phone Number +82 2 6909 0321 VOIP: +8 5401 0321 27 1998M0950 Revision A July 2014 © 2014 Honeywell International Inc.


