1
Anaheim Scientific
S665 Users Manual
keys to switch to the manual mode. After switching to Manual mode, the
measurement name will not change automatically.
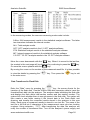
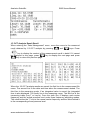
Line 3. Setup Before Start: When the screen indiates “No”, this means the
integrated measurement can be started by pressing start-up key. Press either the
” and “
” keys to change from “No” to “Yes”. First enter parameter setup
“
by pressing the “
” key, and set the measurement name and integrated
” key to start measuring. In this way,
measuring time etc. Then press the “
individual measurements are clearly known by the measurement name and
integrated measuring time of each measurement.
CAUTION
This function does not work in the 24H measurement mode.
Line 4. indicates that the integrated measurement will begin after delay time set
once the the start-up pushbutton is pressed. The delay time is shown. Move the
” and “
” keys to adjust the delay time within the
cursor to “4”, and use the “
range of 0 to 10 seconds. “0” means no delay time with 10 being 10 second delay.
Note: This function does not work in the 24H measurement mode.
Line 5. This line indicates if the contents shown on the LCD display can be printed
with an optional micro printer when pressing the “
” key. Press “On” to print
or press “Off” to turn off this feature. Micro printer currently not available for Model
S665.
Line 6 shows the setting of measurement time. Set the desired measurement time
from 1 s to 24 h.
The analyzer will save the above settings automatically when it is turned off, and
import them automatically when it is turned on next time without the need to reset.
The last line shows the release date of the software.
Measurement Name Listing
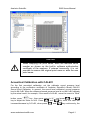
As shown below, in the “Setup” interface, when the cursor is on Line 2, press
” key to enter the display interface of the prestored measurement name
“
listing:
www.anaheimscientific.com
Page 9