1
8-Port IP Power Manager
IPM-8001/8002
Quick Installation Guide
Table of Contents
Package Content............................................................................................... 3
Physical Installation.......................................................................................... 4
Initial IP Power Manager................................................................................... 5
Further Configuration........................................................................................ 8
Thank you for purchasing PLANET IP Power Manager. In this Quick Installation
Guide, it illustrates the basic configuration. For more information, please also refer
to the User’s manual.
Package Content
One IP Power Manager
One Power Cord
One User’s Manual CD
One Quick Installation Guide
One Console Cable
Rack Mount Ear Kit
Four Rubber Feet
Four Feet Screw
Note
If any of the above items are missing or damaged, contact your
local dealer for support.
Physical Installation
Connect IPM-8001/8002 to your hub/switch. And also connect a PC which is CDROM ready to the same hub/switch.
Connect the power cord to the power inlet and plug the other end into a power
outlet as shown:
If you have seen the 7-Segment LED shows “E16”. That is mean the power
phase of your power outlet is reverse. Please try to make the power phase
exactly. Or you can refer to our manual to disable the power phase protection on
IPM8001/8002 temporally.
Initial IP Power Manager
The following procedure describes the basic steps needed to set up the IPM8001/8002:
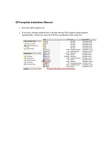
1.Please insert User’s Manual and Utility CD into the CD-ROM drive to initiate the
autorun program. Once completed a menu screen will appear.
2.Click on “Initial Utility” hyper link to initiate the installation. If the autorun program is not process in your PC, you can click the “Start” button and choose
“Run”. (Suppose “E” is your CD-ROM drive). When the dialog box appears, enter
“E:\Utility\Setup.exe” and press enter key. You will see the dialog box as below.
3.Please press “Discover” button to find out your IPM-8001/8002.
1.Please select your IPM-8001/8002 in the Device List and click “Modify” button to
enter the user account and password. In default, user account and password is
“admin”. Please press “OK”.
2.In default, IPM-8001/8002 is DHCP Client enable. If you don’t have DHCP Server
in your network, please click “Set IP” button. Then enter a new IP address that
in the same segment of your configuration PC. Please press “OK”.
3.Please press “Browse” button, then you will see a dialog box asking you to enter the User Name and Password. In default, please enter “admin” as your User
Name and Password for first time configure IPM-8001/8002. Please press “OK”.
4.Then the IPM-8001/8002 configuration web page will appear as below. You can
check and start the management of the IPM-8001/8002.
Further Configuration
If you want to set more detail settings of IPM-8001/8002, please refer to our
manual and configure with your Web Browser. If you have any difficulty on
resolving the problem while installing or using IPM-8001/8002, please feel free to
contact your local dealer or PLANET technical support.