1
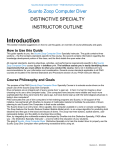
Simply
brilliant
isn’t it?
Easy to see
Simple to use
Brilliant LCD display
1
Table of Contents
Getting Started:
Specifications ......................................................................... 4
Introduction ............................................................................ 5
Warnings ................................................................................ 6
Battery Charging and Replacement ....................................... 8
High Pressure Hose and Quick Disconnect ......................... 10
Initial Setup............................................................................ 11
Main Menu and Navigation .................................................. 12
Personalizing and setting up your Cobalt:
Settings Menu ......................................................................
Time and Date ......................................................................
Personal Info ........................................................................
Preferences ..........................................................................
Dive Settings ........................................................................
Gas and Tank Settings .........................................................
Gas Mixes Editing.................................................................
Gas Switch Alerts .................................................................
Screen Brightness ................................................................
System Information ..............................................................
13
14
15
16
17
18
19
20
21
22
Diving with Cobalt:
Pre-Dive Check .................................................................... 23
Ready To Dive ...................................................................... 24
2
The Dive Screen ...................................................................
Compass ..............................................................................
Safety and Deep Stops ........................................................
Multi-Gas Diving ...................................................................
Decompression Diving .........................................................
Decompression Violations ....................................................
Other Dive Screen Alerts.......................................................
Post Dive Screen ..................................................................
25
26
27
28
29
32
33
34
The Dive Log:
Dive Log Summary................................................................ 35
Dive Log Details ................................................................... 36
Dive Profiles .......................................................................... 37
Dive Planning:
No Stop Times ......................................................................
Dive Simulation Menu ..........................................................
Simulation Set-up .................................................................
Simulating Dives ...................................................................
Viewing Simulated Dives ......................................................
Decompression/ Surfacing Schedules .................................
38
39
40
41
43
45
Care and Maintenance, Warranty
Maintenance, Software Upgrades ........................................ 46
Download Logbook .............................................................. 46
Warranty ............................................................................... 47
Dive Display
Saturation Indicator
No Deco Time
a
Compass with Heading
Current Depth
Temperature
Gas Time Remaining
(minutes)
Menu Navigation
Buttons
Scroll Up / Gas Switch
Back / Compass Off
Select / Wake / Compass On
Dive Time
Maximum
Depth
Gas Mix
Tank
Pressure
Welcome and congratulations for purchasing
the Cobalt; the most intuitive, easy to use
and easy to read dive computer available. To
personalize your computer and learn more
about its many features, please take a few
minutes to read this manual before using.
A partial feature list:
Powerful ARM® microprocessor
Brilliant high resolution color display
Rechargeable battery
Leakproof magnetic buttons
Air and Nitrox to 99% O2
Preprogram up to 6 gas mixes
Gas switch underwater
Recreational RGBM algorithm
Customizeable user options
3D, fully compensated digital compass
600 hour dive memory
Automatic altitude adjustment
Maximum operating depth 330’ (100 meters)
Scroll Down or Screen
Brightness while diving
3
Specifications
Physical
Software
Length ................................................................ 6.5" (16.5 cm)
Width.................................................................... 2.6" (6.6 cm)
Thickness ............................................................ 1.4" (3.5 cm)
Weight with hose ................................................. 1.1 lb (500 g)
Weight without hose ............................................ 0.7 lb (317 g)
Hose connection.............. 1/4 turn quick disconnect with lock
Hose type.................... Slimline 5/16" (8 mm) Kevlar reinforced
Switches.............................. Magnetic Leakproof Pushbuttons
User Interface............................. Menu Driven Graphic Display
User Customization.............. Alerts, Units, Language, Dive Log
Storage Rate, Safety Reserve
Operating Firmware ............................ ©Ocean Concepts, Inc.
Firmware Updates................................... User Upload by USB
Electronics
Display ................................ 2.4" (61 mm) LCD full color
Battery type...................................... Lithium Ion Rechargeable
Battery duration.................... 40-50 hours dive time per charge
Battery life....................minimum 80% after 300 charge cycles
Battery charger...................................... A/C 110/220V or USB
Battery Replacement...................................... Dealer or Factory
Depth sensor ............................................. 0-200 psi (0-14 bar)
Tank pressure sensor...............0-5000 psi (0-350 bar) Ceramic
Compass............................................3D fully tilt compensated
4
Algorithm
Algorithm.................... Recreational RGBM (Dr. Bruce Wienke)
Tissue compartments ............................................................15
Altitude range.......................... Automatic to 10,000' (3,048 m)
Gas Types............................................ Air or Nitrox to 99% O2
Gas Switching................................ Up to 6 user defined mixes
Settings...................................... Age, Workload, Conservatism
Decompression.......................... Deco, Deep and Safety Stops
Operating limits
Maximum depth .................................................... 330' (100M)
Maximum tank pressure................................5000 psi (344 bar)
Operating temperature............................ 0°-125°F (-18°-49°C)
Introduction
The Cobalt Diving computer is the first of a new generation
of computers that are easy to use, intuitive and easy to
read. The menu-driven interface is self-explanatory at
every level and can be mastered in just a few minutes. In
spite of its simplicity it is immensely powerful and offers
many sophisticated functions to the advanced user.
The full color LCD display is easy to read, sharp and
bright, with high contrast, and is very energy efficient for
long battery life.
The lithium ion battery is built into the case. It can be
quickly recharged with the AC charger or slow charged by
plugging into the USB port of any PC. It will provide 40-50
hours of dive time between charges and many months of
standby power. If capacity diminishes after several years
of use, replacement can be done by the factory or an
authorized Atomic Aquatics Dealer.
The on board rapid response 3D digital compass makes
underwater navigation simple. Set a course and go.
Unlike most digital compasses, it will remain active until
you choose to turn it off. Crucial dive information is
always displayed.
The Cobalt includes a high pressure quick disconnect that
allows the Cobalt to be removed and carried separately
from your regulator system.
The Cobalt is a multi gas computer that can be set for any
Air/Nitrox mix to 99% O2. Up to 6 mixes can be preset for
easy switching, including gas switches underwater.
The dive log and planner are powerful tools that allow the
easy interactive planning of almost any dive, including
repetitive and multi-day diving. The logbook will store up
to 600 hours of detailed dive profiles in memory.
The Algorithm used in Cobalt is the Recreational RGBM
(Reduced Gradient Bubble Model) created exclusively
for Atomic Aquatics by Dr. Bruce Wienke. The RGBM is
designed to cover a wide spectrum of diving activities
such as bounce, altitude, decompression, repetitive and
multi day. RGBM is a dual phase model that combines
the dissolved phase (Haldane) and free phases (Bubble).
Physiological factors such as age and exertion level
may be input by the user. Additional settings are also
provided to set the conservatism level. Visit our website
www.atomicaquatics.com for more information.
5
Warnings
WARNING
Before diving, you should have the proper training from
a qualified instructor and obtain a certification from a
qualified training agency. No computer is a substitute for
proper training.
WARNING
This computer is for recreational use only. The computer
is not designed for commercial or professional diving, the
demands of which may exceed your and the computer’s
limitations. Exceeding these limitations may cause serious
decompression sickness or other injuries, including death.
WARNING
Read this manual carefully before diving. It is imperative
that you fully understand the functions and displays of
the dive computer and that you are both proficient in and
familiar with their use prior to diving. The improper use of
this computer may lead to serious injury or death.
WARNING
The gas mixes for enriched air nitrox will not accept
fractional percentage values of oxygen concentration.
You should always round down when editing a gas mix in
the Gas/Tank Settings Menu. For example, a gas mix of
32.6% oxygen should be entered as 32%. Rounding up
will affect decompression calculations which could lead to
decompression sickness.
6
WARNING
There is always a risk of decompression sickness on any
dive regardless of whether you follow dive tables or a dive
computer. In order to lessen the risk of decompression
sickness, you should always dive well within the exposure
limits provided by this computer. If you experience
symptoms of decompression sickness, seek medical
attention immediately!
WARNING
Before diving, make sure the battery is charged to allow
diving time well in excess of your planned dive. Atomic
recommends that you not dive with a battery status of less
than 25%.
Warnings
WARNING
Do not dive without activating the computer. Before
entering the water, you should ensure that the display
is functioning properly, that you have reviewed the
information in the PreDive Check menu, and have selected
the Ready to Dive option. If you feel the computer is not
functioning properly or that the information contained in
the display is incorrect, do not dive.
WARNING
You should never dive with enriched air nitrox unless
you have personally verified the oxygen percentage and
entered the proper value into the Gas/Tank Settings
menu of your dive computer. Failing to verify the oxygen
percentage or entering the wrong value could subject you
to decompression sickness.
WARNING
WARNING
You should never share or trade your dive computer
during a dive. Your computer gathers information
during a dive that is applicable only to you. If you
share or trade your computer with another diver, your
decompression limits will be inaccurate which may
cause decompression sickness.
Always dive with back-up instruments. Even when using
a dive computer, you should always carry a submersible
pressure gauge, a depth gauge, and a watch or other
timing device.
WARNING
You should never fly after diving until you verify that the
No Fly Time reads 0:00. Flying during the No Fly Time can
result in decompression sickness.
7
Compass Recalibration Procedure
Turn on the computer, go to Main Menu, Settings, Calibrate
Compass.
Step 1. Orient the Cobalt along an estimated North-South
direction. Press SELECT to
start calibration. Step 1 will
begin flashing. Rotate the
Cobalt in a North-South plane
until Step 1 stops flashing
and Step 2 begins to flash.
USB/
Charger
Terminal
Socket
and Wet
Contacts
Step 2. Turn 90 degrees and
point the Cobalt East-West.
Rotate on its lengthwise axis
on the east-west plane, until
Step 2 stops flashing and the
compass appears.
Check the compass function
and repeat if needed. If
satisfied, select the Save
button.
Exit the calibration screen
using the BACK button.
Avoid exposing the Cobalt to strong magnetic fields. These can
alter the compass calibration. Note that diving near large metal
masses may alter the accuracy of any compass.
AC Charger
USB
Over
Pressure
Plug
DO NOT
TAMPER
WITH
USB
Cable
AC
USB
Side
AC Charger
Cable
AC Side
USB/Charger Adapter
(Flip Adapter
over for USB)
Slot for
USB Charger
NOTE: Always unplug the adapter from
the Cobalt when not charging or the battery will discharge.
8
Battery
Your Cobalt uses a rechargeable Lithium Ion battery that is sealed inside the case. Check the battery level (the charge level is
displayed in the Main Menu) and fully charge the battery before the first use and occasionally afterwards. Best battery life will
come from keeping the battery charged. A full charge will last for approximately 40-50 hours of dive time (depending mostly
on screen brightness settings). A battery warning indicator will appear on the dive display if the battery charge is below 20%.
This charge level should still be sufficient to complete several average dives.
On the surface, The Cobalt display will automatically go dark after 5 minutes to conserve power. Press the SELECT button
to wake the display. The Cobalt is never really turned completely off, but has various sensing modes depending if the Cobalt
is wet, or in the “Ready to Dive” screen. It will wake automatically if it is submerged in water and will start a dive if it senses
pressure. However, we strongly recommend that you use the Pre-Dive Check function to ensure your settings are correct, and
manually select the “Ready to Dive” screen before entering the water.
If the Cobalt 2 becomes completely discharged and will not wake, it can be recharged using either the A/C or USB charging
source. However, if you utilize a USB source you will need to perform a manual reset by holding both the SELECT and BACK
buttons down for at least 11 seconds. The A/C charger will provide an automatic reset, and will charge more rapidly. You will
need to reset the time and date (page 14). On powering up again, the Cobalt will return to the time as of the end of the last
dive. Your logged dives, decompression status, and other personal information are preserved and will not be affected by loss
of power. The battery will last several years of normal use before gradually diminishing in capacity, and can be replaced by the
factory or an authorized Atomic Aquatics Dealer.
Charger set-up
The Cobalt can be charged with either the AC quick charger (about 2 hours to full charge) or from a USB cable connected to a
computer (about half the speed of AC charging). The AC charger will automatically select 110 or 220v AC. Plug the end of the
charger cable into the charger/USB adapter. Plug the charger into an AC outlet and the adapter into the bottom of the Cobalt.
The adapter has 2 sides, make sure you insert it into the side nearest the charge method you selected (AC charger or USB).
Confirm charging by going to the main menu. The display will say “charging”. If the battery is either too hot or too cold to
charge properly the message “Charge Stopped” will display until the temperature is within an acceptable range.
9
Connecting Cobalt to the High Pressure Quick Disconnect
Figure 1
Figure 2
Figure 3
High pressure
connector
Lock ring
High pressure
hose and
quick disconnect
Unscrew the
lock ring until
ring is flush
with end of
disconnect
Push on and
turn to the
right 1/4 turn
to lock
Screw lock
ring gently
up against
console base
to prevent
accidental
disassembly
Do NOT
overtighten
10
High Pressure Hose and Quick Disconnect
The Cobalt is supplied with a lightweight, small diameter
high pressure hose that is both flexible and highly durable
(maximum 5000 psi (344 Bar) working pressure). The
smooth outer covering is UV resistant and will not abrade
or collect sand or debris. The quick disconnect feature
allows you to easily disconnect the Cobalt from the high
pressure hose and regulator system for separate transport
or storage.
Important Note: Always turn the air pressure off
and depressurize your regulator before attempting to
remove or connect the Cobalt to the high pressure
quick disconnect. It will be very difficult to connect or
disconnect if there is pressure in the hose.
Initial set up
Note: We recommend initial set up and check be done
by an authorized Atomic Aquatics dealer.
1. To assemble the hose to your regulator, first identify
the High Pressure port on your first stage you wish
to use (marked HP). Remove the plug, and install the
threaded end (7/16-20 thread) of the hose. Screw in
the hose fitting hand tight, then snug it securely with
a wrench (9/16"). Do not over tighten or you may
damage the threads (maximum 40 inch/pounds).
2. Connect the Cobalt to the quick disconnect fitting.
Unscrew the large plastic locking ring towards the
hose so the end is flush with the end of the metal
quick disconnect fitting ( Fig. 1). Push the quick
disconnect onto the Cobalt and twist 1/4 turn
clockwise to lock it in place (Fig. 2). Gently screw the
plastic locking ring up against the base of the Cobalt
to keep it in place (Fig. 3).
3. Connect the regulator to your tank and slowly turn the
air on. Check for leaks by listening and submerging
the hose fittings in water.
4. Press the Select button to wake the Cobalt and go to
the dive screen to check the air pressure. Upon initial
pressurization it will take approximately 20 seconds
for the air pressure to display.
5. To remove the Cobalt from the quick disconnect,
depressurize the regulator, unscrew the locking
ring, push in and turn the disconnect 1/4 turn
counterclockwise to release. Replace the rubber
protective cap on the high pressure inlet of the Cobalt
when not in use.
11
Main Menu
Menu Selections
The Main Menu is “home” on the
Cobalt Computer. It contains the
most commonly used items related
to diving or dive planning.
Current time
and date
Surface interval
since last dive
(max 24 hours)
Battery status
Time until
flying (hours:
minutes)
Up
12
Back
Select
Back will always
return you “home”
to the Main Menu
Down
Pressing the “soft touch” rubber
buttons of the Cobalt activate leak
proof magnetic switches. Press to
make a momentary contact and
release to make your selection. It’s
not necessary to hold the buttons
down. Try it a few times to get the
feel of their operation.
From any screen, pressing the BACK
button repeatedly will return you to
this menu.
Manual Reset The Cobalt 2 can be manually reset in the event of
a software problem by holding both the SELECT and BACK buttons
down simultaneously for 11 seconds. After reset the Cobalt will go
to the Set Time and Date screen. Reset the current time and date.
No user data, or saved dives will be lost.
Warning! Never perform a reset during a dive as your
decompression status will no longer be accurate for that dive.
Main Menu
Settings Menu
Highlighted Menu
Item
The Settings Menu is the “Control
Center” of your Cobalt computer.
It's where you will find menu items
related to personal preferences
and settings.
Help Text
Use the UP or
DOWN button
to highlight
your selection
Use the UP and DOWN buttons to
highlight the menu items. You will see
a brief description of the menu item
in the lower help menu.
Press
SELECT to
enter
Press the SELECT button to go to
the highlighted screen.
Important!
Use these settings to personalize
your Cobalt before you dive.
13
Main Menu
Settings Menu
Time and Date
Use the SELECT
button when a box is
highlighted to edit the
values. Once the digit
is highlighted in yellow,
use the UP and DOWN
buttons to increase or
decrease the number.
Press SELECT again to
accept the value and
move to the next digit
or field.
If the box is not active
(all blue, with no single
digit highlighted) the
UP and DOWN buttons
will move from box
to box.
The BACK button
saves and returns to
the previous menu.
14
Important! The time and date must be correctly
set in order to accurately track your dives.
Setting the time and date enables the Cobalt
to keep track of dives chronologically. The
internal clock is also used for decompression
calculations. If you travel to a different time
zone, set to the local time before diving.
Time and Date must be reset any time the
battery becomes completely discharged.
You must use the 24 hour format to initially
enter the time but the display preference can be
set to 24 hour or AM / PM. For instance; 2:00
PM in the 24 hour format would be set 14:00.
WARNING! If you are still in a state of partial
saturation following a dive, resetting to a different
time will alter your decompression calculations.
A warning will appear if you attempt to set the
time to earlier than the last saved time.
Main Menu
Use the UP and
DOWN buttons to
move between the
entry fields.
Press the SELECT
button to save the
highlighted field.
When a character is
highlighted, press UP
and DOWN to change
the value and press
SELECT to enter and
move to the next
entry field.
Help screen
provides extra setup
information.
Settings Menu
Personal Info
Press SELECT to activate the highlighted
window to enter:
Your Name.
Contact Information (phone or other
personal #).
Birthdate (will compute your age).
Press the UP or DOWN buttons to
sequence through the letters and numbers.
Press SELECT to enter the letter and
advance to the next one.
Important!
The age is used by the algorithm, which
increases conservatism slightly with age.
Please set it truthfully.
15
Main Menu
Settings Menu
Preferences
Use the UP and
DOWN and buttons
to move between the
User Preferences.
Use the SELECT
button view to save
the highlighted
selection.
Depth can be set to feet or meters.
Pressure Units can be set to
PSI or BAR.
Volume Units can be set to
cubic feet or to liters.
Temperature Units can be set
to °F or °C.
Languages can be set to currently
supported languages.
Dive Log Data Storage is the frequency
(every 5, 15, 30, or 60 seconds) with which
Cobalt saves a snapshot of your dive data.
This determines how many dives can be
stored in the dive log. At the default frequency
of 30 seconds the dive log will hold about 600
hours of diving. Selecting a shorter frequency
of 15 seconds would reduce this by half.
16
Main Menu
Alerts will remind you
during a dive when a
particular preset event
occurs.
Two independent Low
Gas Alerts can be set.
Max Depth Alarm can
be set to sound if a set
depth is exceeded.
Alerts can be both visual
and audible (ON), visual
only (SILENT), or (OFF).
Visual alerts will flash
the relevant part of the
dive display.
WARNING:
Although the risk is very small,
no decompression algorithm
can eliminate the risk of
decompression sickness.
More conservative settings will
help reduce risk even further.
Settings Menu
Dive Settings
Risk Level is used to add more conservatism
to the STANDARD decompression algorithm.
STANDARD is the basic setting yielding
the longest no-decompression limits.
MODERATE is slightly more conservative
than standard.
CONSERVATIVE is the most conservative
setting and has the shortest no-decompression
limits.
Exertion Level is set to the planned exertion
level for the dive. Setting the exertion level
to high increases the conservatism of the
algorithm (shortens no-deco times).
Safety Reserve sets the tank pressure with
which you wish to return to the surface. This
is used in diving by the Gas Time Remaining
calculation, which shows the time you can
remain at a depth while still returning to the
surface with this reserve pressure, after making
all deep, decompression, and safety stops.
17
Main Menu
Settings Menu
The Defined Gas
Mixes screen lists
up to 6 predefined
gas mixes and tank
sizes. These are
preset to 3 of the
most common: Air,
EAN 32 and EAN 36.
You can quickly
select any mix
displayed in the list
to be your primary
mix (primary is
the gas in the
tank connected
to the Cobalt).
18
Gas/Tank Settings
The Primary gas is the gas to which the
Cobalt’s hose is connected. To switch from
the primary gas to any mix in the additional
mix list, scroll down to the gas you want and
press SELECT. This opens a pop-up menu
with the options to Make Primary, Edit, or
Remove (or Add if the field is empty). Select
Make Primary and the selected gas will
move to the top of the screen as your primary
gas. It will also be displayed in the dive and
the pre-dive check screens.
You can also edit any
mix or the tank size
associated with it.
Choosing the Edit or the Add option will
open the Add / Edit Gas Mix screen where
the gas mixture and tank size can be defined.
Inputting the
correct tank size will
help Cobalt more
accurately calculate
gas consumption.
If you frequently dive with a particular EAN /
Nitrox mix or just with different tank sizes, this
screen allows you to quickly switch to that
mix or tank size without having to enter the
details each time.
Main Menu
Settings Menu
The Gas Mix Edit
screen allows you to
set the parameters for
the gas mixtures you
will be using.
Gas Switch Alerts
must be set if you
want to switch gases
underwater. Selecting
this option will take
you to another screen
where alerts can be
set for any gas mix
that has been defined
in the Gas/Tank
Settings screen.
If an alert is set, you
can switch gases at
any time underwater,
however an alert
will sound at the
predetermined depth.
You must manually
confirm gas switchingit is not automatic.
Gas/Tank Settings
Gas Mix Edit
Set % O2. Enter the oxygen value between
21 (for Air) and 99 in 1% increments.
Set PO2 Alert allows you to set the PO2
limit alarm for each defined mix (values
between 1.0 and 1.6 ATM). The MOD
(maximum operating depth) will automatically
update to reflect the chosen PO2 limit.
Select Specify Tank Size as either cubic
feet @ pressure or tank volume in liters, then
enter Tank Size. Entering the correct Tank
Size for the primary mix will enable the
Cobalt computer to accurately calculate your
gas consumption.
The Cobalt only estimates gas time remaining
for the primary gas. Once a gas switch is
made underwater, the Cobalt will pause
the gas time remaining calculation until it is
switched back to the primary gas.
19
Main Menu
Settings Menu
Gas/Tank Settings
Gas Switch Alerts
Enter this screen from
the Defined Gas Mixes
Screen or any Gas Mix
Edit Screen.
Choose the mix.
Enter the switch depth.
Choose the alert
to come on during
D-descent or A-ascent.
Important: You must
preprogram at least
one gas switch alert
in order to enable
the manual gas
switch function when
underwater (accessed
when diving by pressing
the UP button).
Gas Mix Edit
Gas Switch Alerts
Gas Switch Alerts must be set if you are
diving with multiple gas mixes and wish
to enable gas switching during a dive. A
maximum of six alerts may be set, only for
gas mixes that have been defined in the
Gas/Tank Settings screen.
After adding the gas switch alert, you will see
a table summarizing the alerts. You can add,
remove, or edit any switch alert.
During the dive an alert will sound and a
dialog screen will appear when the set depth
is reached. Gas switching in Cobalt is never
automatic—if you do not acknowledge a
switch alert by pressing a button and then
confirm with a 2nd press the alert will go away
with no change.
When diving, the current gas selection is
always displayed.
20
Main Menu
In this screen,
adjust the display
brightness using
the UP and DOWN
buttons.
When diving, only
the DOWN button
will adjust screen
brightness.
Note: Turning
the brightness
up will use more
battery power.
Increase
Decrease
Settings Menu
Screen Brightness
This screen sets the default brightness preference
for your Cobalt computer. There are two options:
Scroll Up/Down allows you to set the brightness
manually. Use the UP and DOWN buttons in this
screen to adjust the default brightness level. Lower
levels will save battery power. Automatic will allow
the Cobalt to automatically adjust the display
brightness to match external lighting conditions.
Color displays may be difficult to read in direct
sunlight. Turn the display towards the shade or
turn up the brightness level.
In normal diving environments the display will
seem bright even at a low setting, and you will
want to dim it or set it to automatic for night diving.
Underwater, each press of the DOWN button
will reduce the brightness from high to low.
Once it reaches the lowest setting, The next
button press will return to the brightest setting
and repeat the sequence.
21
Main Menu
Settings Menu
User Name
Serial Number
Software Version
Sensor Readings:
Current Atmospheric
Pressure
Tank Pressure
Temperature
Battery Status
USB - Use to connect to
a personal computer*
Demo- Use to view
sample Dive Screens
* visit www.
atomicaquatics.com for
the current status of any
PC or Mac download
programs for Cobalt
22
System Information
The system Info screen contains important
information about your Cobalt. There is also
a button to enable transfer of dive data to
Atomic's dive log software on your personal
computer* and an option to view a set of
demonstration dive displays. Use the UP or
DOWN buttons to toggle between options, and
press the select button when highlighted blue
to access them.
In the demo mode, press the SELECT and
BACK buttons to cycle through a series of
sample dive screens. When in various sample
screens, use the UP and DOWN buttons to
view alerts and alarms and to see the gas
switching dialog. Deep, Safety, and Deco
stops will count down in real time. Experiment!
Repeatedly pressing the BACK button will
return you to the System Info screen.
Main Menu
Pre-Dive Check
The Pre-Dive Check
screen provides
a single place to
review important
information about
the alert settings,
risk level, and
gas settings prior
to diving.
Once all the user settings have been entered in
the Cobalt, you can go to the Pre-Dive Check
to review all your important settings and critical
dive information prior to your dive.
To change the settings for Low Gas, Gas at
Surface, Max Depth, or Risk Level see the Dive
Settings screen.
Gas settings, PO2 alert settings, tank size,
and alternate mixes are set in the Gas/Tank
Settings screen.
Alternate mixes will not display unless a Gas
Switch Alert is programmed in the Gas Switch
Alert screen.
Press SELECT to go to the Ready to Dive
screen. Press BACK to return to the Main Menu
and change your settings.
23
Main Menu
The Cobalt Dive
Screen is organized
into three sections.
The top section
contains calculated
values related
to time and
decompression
information.
The center section
contains current
dive information,
including the
compass display.
The bottom section
contains information
related to gas
mixtures and air
pressure.
Ready to Dive
Always select the Ready to Dive screen
before diving. This puts Cobalt "on alert"
and improves the accuracy of recording the
beginning of a dive.
If Cobalt remains below 4 ft. (1.2m) depth for a
brief time it will begin a dive and display a no
decompression time. Once a dive is started the
Cobalt will only display the Dive Screen. Other
screens will not be accessible until the dive is
ended by remaining above 2 ft. (0.6m) depth for
two minutes.
During the dive, button functions are limited:
SELECT - compass on/set course.
BACK - compass off.
UP - If at least one Gas Switch Alert is set, UP
initiates gas switching by bringing up a list of
available mixes for which the current depth is
less than the MOD.
DOWN - step through display brightness
settings.
24
Main Menu
Ready to Dive
Tissue Saturation Bars
No Deco Time
Current Depth
Temperature/Time of Day
(alternating)
Gas Time Remaining
(minutes) calculated
from tank pressure
and breathing rate
PO2 (only displays if an
EAN mix is being used)
Elapsed Dive
Time
Ascent Rate Bars
Each dot
indicates 3 ft
or 1 meter
per minute
Maximum Depth
Gas Mix
Tank Pressure
The Dive Screen
The saturation indicator at the top of the
screen changes from green to yellow to
red as saturation increases. When the first
red bars appear, you will be nearing the
end of your no-deco limit and entering a
decompression dive.
You may see an indicator requiring
Deep Stops and Safety Stops, even
though there is still no-decompression
time remaining.
All deco calculations are based upon a
30 foot per minute ascent rate. The
Ascent Rate indicator bars on the right
side of the screen will also change from
green to yellow to red as your ascent
speed increases. The Cobalt will sound
and flash SLOW! if this ascent rate is
exceeded for more than 10 seconds.
25
Bearing Marker
(green dot)
Main Menu
Selected compass
course in degrees
N, E, and W indicators
The reciprocal course
marker (red diamond)
is automatically set
at 180 degrees from
the bearing marker
(green dot).
Press the SELECT button
each time you want to
select a new course.
(Multiple courses cannot be
entered simultaneously).
Compass calibration –
The compass should be
re-calibrated to your
particular locale. Go to
Settings/Calibrate and
follow the screen prompts.
See page 8 for more details.
Note: Do not attach any metal rings or hooks to the Cobalt unless
they are non-magnetic as it will affect the compass. We recommend
using the supplied plastic loop secured to the hose.
26
Ready to Dive
Compass
The compass display can be turned on during a
dive by pressing the SELECT button, and turned
off by pressing the BACK button. It will remain
displayed until you turn it off. It is a true 3D
compass and will work at any angle.
Navigation is easy. Aim the Cobalt in the
direction you want to go. When the compass
screen is on, pressing SELECT again will set a
bearing marker (green dot). As long as you keep
the green dot between the 2 markers at the
top of the compass display, you are on course.
A reciprocal course marker (red diamond, not
visible here) is also automatically set at 180°.
Follow it for your return course. Optionally
you can display additional markers at 90° and
120° by scrolling down in the course set menu
and selecting the appropriate option. The 90°
markers are red or green squares (green to the
left of your destination and red to the right of
your destination. The 120° markers are red and
green triangles.
Main Menu
Ready to Dive
The top section of the
dive display changes
when a safety, deep,
or decompression stop
is required.
The next required stop
depth and time (min:sec)
are shown in the box
at the top left of the
screen.
No Deco Time is moved
to the upper right of
the screen.
Safety Stops are always
recommended and
indicated in a green box
that will appear when
nearing the surface or
after any deep or safety
stops have cleared.
Deep stops are
indicated in a blue box
as the stops become
required.
Safety and Deep Stops
Even diving within the No-Deco limits, you
may still accrue a safety stop or deep stops.
These are pauses in your ascent that reduce
the likelihood of micro bubble formation and
decompression sickness. Safety stops are
performed at 15 ft (+-5'). Deep stops are similar
to safety stops, but are made at deeper depths.
Do not overstay deep stops as this will
begin to increase your tissue saturation
and your ascent time to the surface. Always
observe all safety and deep stops.
On ascending to within 5 ft. of any prescribed
stop, an alert will sound and the stop depth
window will indicate “At Stop”. The time will
start counting down to zero. The stop will clear
and the next stop (if any) will be displayed.
Straying outside the stop range will trigger an
alert and warning to “Go Up” or “Go Down”.
27
Main Menu
Ready to Dive
If you plan on switching
to an alternate mix while
diving, you must first
program at least one
Gas Switch Alert in the
Gas Switch Alert screen.
Cobalt will use planned
gas switches when
calculating no-deco
times and surfacing
schedules. Switching
away from your primary
gas mix will disable
the gas time remaining
calculations. This and
the tank pressure
reading will be shown
in a grayed text color
whenever you are not
using the primary mix.
28
Multi-Gas Diving
Gas switching can be initiated manually or by automatic
alerts. Alerts can be set to activate on Descent or
Ascent. Ascent Alerts require you to dive below the alert
depth for at least three minutes to become active.
Using alerts:
When reaching the alert depth, an alert will appear
showing the planned gas switch. Press SELECT to
acknowledge the switch, then again at the second dialog
window to confirm. The dive display will update to show
the new gas mix. If you Press BACK or do nothing, the
planned gas switch will be dismissed. Your no-deco time,
ascent time, and any surfacing schedule will recalculate
based on the current mix. You can also scroll to any other
defined mixes if you are switching to an alternate gas.
Manual Switching:
If any Gas Switch Alert is set, you can initiate gas
switching manually. Press the UP button during a
dive, and a dialog allowing you to scroll through all the
defined mixes will appear. Use the UP button to step
through the available mixes. Confirm the switch just
as with an alert initiated switch.
Main Menu
In decompression
diving, the display
further changes
with the Ascent time
replacing the No-Deco
time in the upper right
corner of the display.
Deco Stops are
indicated in an
orange window.
Ascent time is based
upon a direct ascent
at a rate of 30' per
minute including all
decompression, deep
and safety stops.
Warning!
All deco stops must
be completed, in
addition to any deep
or safety stops
indicated!
Ready to Dive
Decompression Diving
Decompression is indicated when the nodeco time reaches zero and is replaced by the
Ascent Time.
Decompression stops will be indicated as they
accrue. Only the deepest stop (which may be
a blue Deep Stop) will be displayed. When it is
completed the next required stop will appear.
Any programmed gas switches are taken
into account when Cobalt calculates
decompression and ascent time. However, if
you dismiss a gas switch alert dialog without
making the switch, Cobalt will recalculate your
decompression schedule based on the current
gas mix.
For deep and exceptional exposures
(decompression dives below 150'), you will not
see deep or safety stops. The algorithm will
incorporate them into the required deco stops,
which must be observed.
29
Main Menu
Ready to Dive
When you reach a
depth within 5' (1.5m)
of the stop depth,
the label will change
from Deco Stop to At
Stop and the time will
begin counting down
towards zero.
Decompression:
At Stop
To reach your decompression stop, ascend at
a constant 30 foot per minute rate to the depth
indicated in the Deco Stop window. When you
are within 5 ft (1.5m) of the indicated depth,
the Deco Stop label will be replaced by the At
Stop label. The timer will count down to zero
as you complete the stop.
When completed, the next stop (if required) will
be indicated in the Deco Stop window.
If you go below the stop depth after beginning
a stop, the timer will stop counting and a GO
UP! alert will sound and display. Continuing to
descend will result in the calculation of a new
decompression schedule, which may include
deeper or longer stops.
30
Main Menu
Ready to Dive
Ascending more
than 5 feet above
the stop depth
will trigger a GO
DOWN! alert.
Warning!
Descend
immediately
to indicated
stop depth!
Decompression:
Above Stop Alert
If you violate the stop depth (ceiling) the timer
will stop counting down until you descend to
within the stop depth range.
Descend immediately to the indicated
stop depth!
Immediate descent will resume the countdown
timer and the schedule. Delay will create a
decompression violation.
31
If you see these warnings
flash back and forth,
descend immediately to the
indicated stop depth!
If you see this warning
stop diving and seek
medical attention!
This warning will remain
in the dive screen if you
attempt to dive again.
Decompression
Violations
Warning!
If you fail to complete a DECO stop,
the display will flash DECO Violation,
Schedule Not Verified and Go
Down! Descend immediately to
the indicated depth! If you violate
a deco schedule and see these
warnings, the Cobalt can no longer
compute a proper deco schedule
and the displayed schedule may no
longer be valid. You should still
complete any displayed schedule
before surfacing and if possible
make additional safety stops.
If you surface from a dive with this
warning you are advised to stop
diving and to seek medical
attention.
The DECO VIOLATION will display in the Pre-Dive and Dive screens
for 24 hours. If you ignore these warnings and dive again, the
Cobalt will continue to function and display all dive data, however
the decompression information may not be valid!
32
DRAFT COPY
32
Ascent Rate Alert
(Slow your ascent!)
Flashing Depth Alert
(Ascend to shallower
depth!)
Flashing Low Air
or Gas Time Alert
(Ascend to
shallower depth!)
Flashing PO2 or CNS
Alerts. PO2-(Ascend
to shallower depth!)
CNS- Alerts you if
you reach 80% or
more (Ascend and
terminate dive!)
User set Low Gas
and Max Depth Alerts
can be both visual
and audible (ON),
visual only (SILENT),
or (OFF). All others
are both visual and
audible and cannot
be turned off.
Other Dive Screen
Alerts and Warnings
Ascent Rate SLOW!
If your ascent rate exceeds 30 feet per minute for
longer than 10 seconds, the Ascent Warning sounds
and flashes SLOW! Stop and slow your ascent!
Gas Time and Low Air
The Gas Time will flash and sound an alert if the gas
time remaining is two minutes or less. This is the
time you can remain at the current depth, and still
allow for a safe ascent to the surface, making all
stops, and arriving with your preset safety reserve.
The Tank Pressure will flash (and sound, if the audio
alert is turned on) when it becomes less than the
user preset alert pressure.
PO2
The PO2 will flash and an alert will sound if the
value exceeds either the limit set in the Gas mix Edit
Screen or the maximum allowable (1.6).
Depth
The depth will flash if it exceeds the depth in
the alert setup or the maximum operating depth
(330 feet or 100 meters).
33
Main Menu
Dive Log
The Surface Time and
No Fly Time clocks
will begin counting.
Press the UP or
DOWN buttons to
highlight either the
View Profile (for a
detailed graphic view
of the dive profile) or
View NST (switches
to the No Stop Times
screen).
Press SELECT when
the icon is highlighted
blue to view these
other screens.
Dive Log Summary
Post Dive
If you ascend to within 2' (0.6m) of the surface
for at least 2 minutes, the Cobalt will end
the dive and record it in the Dive Log. At
this point, the Dive Screen will change to the
Ready to Dive screen (dashes will replace the
No Deco Time). If you then press the BACK
button, or if another dive does not begin
within three additional minutes, Cobalt will
display the Post Dive screen.
The Post Dive screen summarizes all the
details from the dive including any violations,
CNS status, and OTU (oxygen toxicity units).
You can view the dive profile for this dive or the
No-Deco limits for your next dive by selecting
the View Profile or View NST icons.
If you leave this screen, you can recall the
information by going to the Dive Log and
viewing the last saved dive.
34
Main Menu
The Dive Log
Summary screen
is a list of all dives
logged by the Cobalt
computer, showing
dive number, time,
date, duration, and
maximum depth.
The Cobalt
computer can store
approximately 600
hours of diving at
the default sample
storage rate (every
30 seconds).
You can set a shorter
storage interval for
more detailed profile
information in the
User Preferences
menu but this will
reduce the number
of dives stored.
Dive Log
Dive Log Summary
Scroll up and down through the list using
the UP and DOWN buttons. The dives are
numbered with highest Dive # being the most
recent. This summary shows the time of day,
date, duration and the maximum depth of the
dive.
Pressing SELECT when a particular Dive # is
highlighted will open the Dive Details screen,
with more detailed information about that dive.
Pressing SELECT when the left or right arrow
icons are highlighted will display the next or
previous page.
Note: Dive #1 is the test dive done at the
factory to ensure accurate operation and
cannot be erased.
35
Main Menu
Dive Log
Dive Log Summary
Select the View
Profile icon to see
a graphic profile
where you can
step through the
dive and view each
stored segment.
Select the View
NST icon to go
to the No Stop
Time calculator.
This option is only
available when you
are viewing the
most recent dive in
the log.
36
Dive Details
The Dive Log Detail provides a complete
summary page of the dive, including
the breathing gas used, maximum and
average depth, starting and ending tank
pressure, actual gas consumption and gas
consumption rate, and any violations.
Surface Time (if less than 24 hours) and
No-Fly Time are displayed at the top of
this screen. CNS % and OTU (oxygen
toxicity units) are displayed in the bottom
section, along with any violations
such as Ascent Rate, PO2 limits or
Decompression Violations.
Main Menu
The Dive Log
Profile allows you to
step through the dive
in the same interval
that was used for
data storage.
Press UP to advance,
press DOWN to go
back.
The Cobalt
computer can store
approximately 600
hours of diving at
the default sample
storage rate of every
30 seconds.
The sample storage
rate can be set in the
User Preferences
screen.
Dive Log
Dive Log Summary
Dive Log Profile
Dives data is stored in the Dive Log as a series
of “snapshots” taken at the storage interval
selected in the User Preferences. Navigate
forward and back through the dive using the
UP and DOWN buttons. As you move through
the dive the dive data will update below.
Violations are indicated by a red section in
the vertical dive profile line. Pressing the
SELECT button will jump to any “event” in the
dive, such as a violation, calculating a new
decompression schedule, or a gas mixture
switch. These will be noted by abbreviations in
the STATUS area at the bottom of the screen:
Sw = gas switch
DSch = decompression schedule created
As = ascent rate violation
PO2 = PO2 limit exceeded
XSt = missed decompression stop
√St = stop completed
Ba = low battery alert issued
CNS = CNS violation
37
Main Menu
Planning
Use your current
deco status or
additional surface
time.
Forecast with your
current gas or a
different mix.
No deco times
displayed in 10'
(3m) increments.
Times displayed
for EAN will not
go beyond the
calculated MOD
(maximum operating
depth), based on
the PO2 limit you
have selected.
38
No Stop Times
Checking no stop times is probably the most
common dive planning function. Cobalt
allows you to easily predict no stop time after
additional surface interval, or using different
EAN mixes. The no stop times (No Deco limits)
are based upon your current saturation and
default to the last primary gas setting.
You can enter additional surface time and/ or
change the gas mix in the fields at the top of
the screen. Cobalt will recalculate new no-stop
times based on those changed parameters.
Pressing SELECT when the arrow icon is
highlighted will take you to a second page
of times.
Main Menu
Simulate dive based
upon your current
deco status or the
last saved simulation
(for multi-dive
planning).
Enter additional
surface time after the
last dive.
Set simulation
details.
View any saved
simulated dives in the
SIM Dive Log.
Erase all saved
simulation dives.
Planning
Simulation Menu
The Simulation Menu is the control center for
Cobalt’s Advanced Dive Planning features.
From here you can plan dives, including
multiple dive series and multi- gas diving, save
and view previously saved simulations, predict
gas consumption on dives, and generate
RGBM decompression tables.
Unlike Desktop dive planning software,
Cobalt's simulations can start with your current
decompression status based on actual diving.
Simulating dives is an excellent way to
familiarize yourself with the operation of the
Cobalt computer.
39
Main Menu
Set gas consumption
rate in cubic feet or
liters to predict gas
use during a dive
Set risk level and
exertion level for the
algorithm
Set altitude range
Set SIM Gas mixes
Set SIM Gas switch
alerts
Settings in the
simulation setup,
SIM Gas mixes, and
SIM gas switch alerts
apply only to the
simulator, and do not
change any settings
used for actual diving
Planning
Simulation Menu
Simulation Setup
The same preferences in the dive settings
menu are available in the simulator. In
addition, you can set a specific gas
consumption rate and an altitude range other
than the current altitude. Changing settings
in the simulator only applies to the simulated
dives and will not change your dive settings.
Risk Level and exertion levels adjust the
conservatism of the algorithm.
Change altitude settings only if you want
the simulation to be other than your current
altitude. The Cobalt Computers pressure
sensor will base calculations on current
atmospheric pressure if Current Altitude
is selected.
Selecting the Gas Mixes icon allows set up
of alternate or multiple EAN mixes. Selecting
the Switch Alerts icon allows programming
gas switches for simulated dives.
40
Main Menu
Planning
Simulation Menu
Interactive profile
showing input of depth
and time
The display updates
through the dive,
including showing
predicted gas
consumption in
Surface Cubic Feet
(or liters, if liters are
selected in the volume
preferences). If any
stops are required,
they will appear as they
would on the actual
dive screen.
Start Simulation
Simulating a dive is done by pressing the
DOWN button to descend 5 feet (or one
meter) for each button press. Pressing
SELECT will then increase the dive time by
one minute with each press. Each SELECT
press will extend the dive profile being drawn
on the screen.
You can complete the dive entirely with
button presses, however to easily complete
the simulation at any time, press the BACK
button. A pop-up menu will appear, giving
you the option of saving or not saving the
dive. If you select Save, an ascent profile
will be drawn to the surface, including any
decompression stops, deep stops, or safety
stops. If any gas switch alerts are set, the gas
switches will be automatically made. The dive
will be saved in the Sim Dive Log, and you
will be returned to the Simulation Menu.
41
Main Menu
Simulating multi-gas or
decompression dives is
done in the same basic
manner as simulating
other dives.
When simulating
decompression dives the
Deep Stop, Next Stop,
or Safety Stop boxes will
show on the screen, just
as it would in the actual
dive screen. To ascend
you can either manually
ascend using the UP
button, pressing SELECT
to increment time at
decompression stops; or
you can press the BACK
button and select Save
to generate a path to the
surface, automatically
making all stops and
any programmed
gas switches. The
decompression schedule
is saved with the dive in
the SIM Dive Log.
42
Planning
Simulation Menu
Start Simulation
Advanced Dives
To simulate dives using Nitrox or multiple gas
mixtures, you must first set up the gas mixtures
and gas switch alerts in the Simulation
Setup: Gas Mixes screen. Gas mixtures
entered in the Simulator are distinct from gas
mixtures set up in the normal diving area of the
Cobalt; changing one will not alter the other.
Gas Switch alerts (if set) will trigger an alert
dialog when the switch depth is reached, just
as they would in actual diving. If the automatic
ascent option (the BACK button) is used,
any programmed gas switches will be made
automatically on ascent.
Gas consumption is predicted for each mix
used, and can be seen at the bottom of the
screen when ascending manually, or viewed in
saved SIM dives by stepping through them in
the Profile Screen.
Main Menu
Planning
Simulation Menu
From the SIM dive
log, you can select
and view a variety of
details about the dive
Use the UP and
DOWN arrow to
highlight the dive and
Press the SELECT
button to view the
dive details.
Any repetitive dives
are noted by an
arrow between
the Dive #s
View Saved SIM Dives
Saved simulation dives can be stored in this
special log for planning, demonstration, or
reference. The SIM dive log works just like
the actual dive log, except SIM dives can
be erased using the Clear Saved SIM Dives
function in the Simulation Menu. Clearing
Saved SIM Dives is a global action- individual
SIM dives can't be erased.
Select the highlighted dive you wish to view
and press SELECT to go to the SIM Dive
Detail screen.
43
Main Menu
Planning
Simulation Menu
Use the UP or DOWN
buttons to highlight
and press SELECT
to view additional
information.
View Profile
View NST (this option
shows only for the
last saved SIM dive)
Show Deco (this
option shows only if
a Deco schedule was
generated)
View Saved SIM Dives
SIM Dive Detail
A summary of recorded dive data is
displayed for the SIM dive.
Additional screens are accessible to:
View a detailed profile of the SIM
dive including gas consumption for
secondary mixes.
View a no-stop time calculator based on
the results of the last saved SIM dive.
View a decompression schedule
(if any) showing all Deep, Deco, and
Safety stops. (Note: This option will
only appear when the BACK button with
the Save option is used on starting the
ascent to allow the Cobalt to automatically
calculate the ascent schedule.)
44
Main Menu
Planning
Simulation Menu
Total ascent time
to reach the surface
Depth and type
of Stops
View Saved SIM Dives
SIM Dive Detail
DECO
Surfacing Schedule
To view the surfacing schedule of any
saved simulation dive, Select the Show
Deco button in the Detail Screen for the
particular dive.
The surfacing schedule shows all the
required safety, deco and deep stops to
reach the surface and the total time to
ascend to the surface at a 30 feet per
minute rate.
45
Maintenance
After each dive rinse the Cobalt and quick disconnect with fresh water. Be sure to rinse the underside recess where
the USB pins and water contacts are located. It may be rinsed or soaked with or without the quick disconnect installed.
The high pressure sensor is a ceramic material and is not affected by water. Replace the rubber cap on the high
pressure fitting when not in use to keep out dirt or contaminants. Store in a clean dry place out of direct sunlight. The
high pressure hose and quick disconnect assembly should be serviced every 2 years or 300 dives by an authorized
Atomic Aquatics Dealer or by the factory.
To avoid depleting the battery, do not store the Cobalt with the charging adapter plugged into the unit. Remove the
charger from the Cobalt when fully charged. Avoid placing the Cobalt near strong magnetic fields such as speakers or
large motors, as these could disturb the compass calibration.
Downloading the logbook
The Cobalt will store approximately 600 dives in the onboard logbook at the default sample rate of 30 seconds.
Downloading the Cobalt 2's dive log data to a personal computer is supported by a number of dive log applications for
Windows, Mac OS, and Linux. Check the Atomic Aquatics Website www.atomicaquatics.com for current information
regarding availability of download software.
Software upgrades
From time to time new software versions will be available for the Cobalt. It is always recommended that you use the
latest software version. The software version is listed in the Settings Menu/System Information screen. Check the
Atomic Aquatics Website www.atomicaquatics.com for available downloads and the most current information regarding
the how to obtain these updates.
46
Warranty
Atomic Aquatics warrants this Dive Computer against defects in materials and workmanship for 1 year to the original
owner. Atomic Aquatics will at its option repair or replace any components it finds defective. This warranty covers only
products purchased from authorized Atomic Aquatics Dealers. To activate this warranty you must complete and return
the warranty registration card or register online within 30 days of purchase.
A minimum reasonable maintenance of fresh water rinsing after use in salt water and proper storage is required.
Factory or authorized dealer servicing of the high pressure quick disconnect assembly is required at intervals of
300 dive hours or 2 years, whichever occurs first. This service will include disassembly, cleaning, replacement and
lubrication of all o-rings and seals, and safety check.
To obtain warranty service, you must deliver the product to Atomic Aquatics or one of its authorized repair facilities.
If you send it to the factory, you must pay the shipping charges to the factory. If the computer is returned to the factory
and it is determined that the problem is due to material or manufacturing defect, there will be no charge for parts, labor
or return shipping.
This warranty does not cover damage or defects due to neglect, misuse, alteration, or attempted repairs or disassembly
by someone other than an authorized dealer. Atomic Aquatics shall not be liable for loss of use of this product or
incidental or consequential costs or damages incurred with the use of this product. Some states do not allow this
exclusion so the above may not apply to you.
This warranty gives you specific legal rights and you may have other rights which vary from state to state.
47
Phone (888) 270-8595
www.atomicaquatics.com
MADE IN U.S.A.
12/2013