1
.NET & Internet of Things
The fun and easy way,
the FEZ way...
Connecting the world, one “thing” at a time!
Brought to you by
with the
April 27, 2011
Copyright © 2011 GHI Electronics, LLC
www.ghielectronics.com
GHI Electronics,LLC
.NET & Internet of Things
Table of Contents
1.Introduction..................................................................................3
2.Prerequisite.................................................................................4
3.Complete Kits..............................................................................5
3.1.Internet of things Kit...........................................................5
3.2.FEZ Ultimate Kit.................................................................6
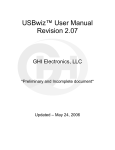
4.FEZ Ultimate Kit Contents...........................................................7
4.1.FEZ Panda II......................................................................7
The Panda Hardware........................................................7
The Panda Software..........................................................8
4.2.FEZ Internet of Things Kit Contents..................................9
FEZ Connect Shield..........................................................9
LED....................................................................................9
Switch..............................................................................10
Temperature sensor .......................................................10
38Khz Infrared Receiver..................................................11
IRLED Transmitter...........................................................11
Light Sensor.....................................................................12
Piezo (speaker)...............................................................12
Variable Resistor (POT) ..................................................13
Serial-to-USB ..................................................................13
Cables..............................................................................13
5.Going on a Test Drive................................................................14
5.1.Testing the Emulator........................................................14
5.2.Check the Firmware Version (very important).................16
5.3.Testing FEZ Panda II.......................................................18
5.4.The on-board LED & Button............................................19
5.5.FEZ Connect Shield.........................................................22
Fading LED......................................................................25
Making Noise!..................................................................27
Open Drain......................................................................29
5.6.Connecting Ethernet........................................................29
Accessing the Internet.....................................................32
Using DHCP....................................................................33
5.7.We are Ready!.................................................................34
6.FEZ TCP/IP Networking Sockets..............................................35
6.1.User Datagram Protocol (UDP).......................................35
Send UDP Message........................................................35
Receive UDP Messages..................................................36
UDP Transceive data with PC.........................................37
6.2.Transmission Control Protocol (TCP)..............................39
TCP client example.........................................................39
TCP server example........................................................41
7.FEZ-HTTP.................................................................................44
8.Network-Controlled Screamer...................................................47
9.Remote Mouse Prank................................................................55
10.Sensor Monitoring...................................................................60
11.FEZ-Telnet...............................................................................65
12.You've got mail, and SMS.......................................................69
The program flow.............................................................69
What we need..................................................................69
What is next?...................................................................75
13.FEZmote- Internet TV-Remote................................................76
Digital Signal Recording..................................................76
Signal Playback...............................................................78
We Need More.................................................................79
14.Using FEZ Touch.....................................................................80
15.What is next?...........................................................................81
Document Information
Information
Description
Abstract
This document provides several fun projects on how to
connect things to the cloud.
Join our community at www.TinyCLR.com
Page 2 of 81
Rev.1.20
GHI Electronics,LLC
.NET & Internet of Things
Introduction
1. Introduction
While the internet is becoming an essential part of our daily life, it is also becoming an
important part of the devices (things) we depend on. If devices can communicate then they
can probably preform better. This concept is called “The internet of things”. See wikipedia
for more details http://en.wikipedia.org/wiki/Internet_of_Things and don't forget to watch
this video as well http://www.youtube.com/watch?v=sfEbMV295Kk
But how do we connect to the internet? We would need hardware with Ethernet or WiFi
interface. We also need the low level software that carries out the low level communication
over the internet. Neither of these is usually simple to accomplish, but thanks to .NET
Micro Framework from Microsoft and the devices and libraries from GHI Electronics,
connecting devices to the internet is a simple task.
Join our community at www.TinyCLR.com
Page 3 of 81
Rev.1.20
GHI Electronics,LLC
.NET & Internet of Things
Prerequisite
2. Prerequisite
This book expects you to have basic knowledge of C# and visual studio. Not to worry, if
you don't, there is another beginner guide to get you through it all.
This page is a compilation of key resources and tutorials http://www.tinyclr.com/support
Not to forget about the very friendly and active community available at
http://www.tinyclr.com/forum/ and the hundreds of code examples found at
http://code.tinyclr.com
Join our community at www.TinyCLR.com
Page 4 of 81
Rev.1.20
GHI Electronics,LLC
.NET & Internet of Things
Complete Kits
3. Complete Kits
This book is aimed towards the FEZ Internet of Things Kit and FEZ Ultimate Kit
3.1. Internet of things Kit
With over ten years of experience working on little embedded devices and with the help of
the www.TinyCLR.com community, GHI is combining the most popular sensors along with
plenty of projects to bring the “internet of things” right to your desk. Complete projects with
detailed explanations are included in this book to complete many internet-connected
device, all for under $100.
On the hardware side, all of the components are plug-and-play. No soldering or any
special skill is required. Also, on the software side, all open-source drivers are included.
Use the provided drivers as-is or modify to fit your needs.
The kit doesn't come with a processor board giving the user further flexibly selecting a
device. FEZ Domino, FEZ Panda or FEZ Panda II are ideal mates for the Internet of
Things Kit. The kit even works with Arduino and its derivatives, keeping in mind that all
open-source code samples are this book are aimed to using C# for FEZ and .NET Micro
Framework.
Join our community at www.TinyCLR.com
Page 5 of 81
Rev.1.20
GHI Electronics,LLC
.NET & Internet of Things
Complete Kits
3.2. FEZ Ultimate Kit
Expanding on the Fez Internet of Things Kit, FEZ Ultimate kit takes the same kit and adds
FEZ Panda II with FEZ Touch at only $149.95.
Join our community at www.TinyCLR.com
Page 6 of 81
Rev.1.20
GHI Electronics,LLC
.NET & Internet of Things
FEZ Ultimate Kit Contents
4. FEZ Ultimate Kit Contents
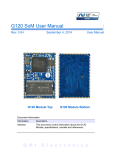
4.1. FEZ Panda II
The second generation of FEZ Panda is a state-of-the-art processor board, capable of
hosting complete commercial applications.
The Panda Hardware
•
72Mhz 32-bit processor with 512KB of FLASH and 96KB of RAM
•
148KB of FLASH and 62KB of RAM are available for your application
•
Micro SD socket capable of hosting any size memory card, drop in a 16GB memory
card and you have near unlimited embedded storage
•
Real Time Clock (RTC). By adding a little 3V watch battery, FEZ Panda can keep
track of time for years even if FEZ Panda is powered off
•
Over 60 digital inputs and outputs
•
6x Analog inputs
•
One analog output which is also capable of audio playback
Join our community at www.TinyCLR.com
Page 7 of 81
Rev.1.20
GHI Electronics,LLC
.NET & Internet of Things
FEZ Ultimate Kit Contents
•
6x PWM channels
•
2x CAN channels
•
4x UART (serial ports)
•
2x SPI
•
I2C
•
USB Client
•
USB Host (requires minor hardware modifications)
The Panda Software
FEZ Panda packs loads of libraries ready for you to use. Some of these libraries are from
the core of NETMF and some are GHI exclusive. Here is some of the main libraries
•
Threading
•
Memory management
•
Visual Studio Debugging
•
SPI
•
UART, serial COM ports
•
I2C
•
CAN
•
OneWire
•
In Field Update
•
Wiznet networking
•
CAN
•
USB Client Customization, USB Card reader simulation, USB mouse/keyboard
simulation, USB virtual serial port.
•
USB Debugging + Virtual Serial port
Join our community at www.TinyCLR.com
Page 8 of 81
Rev.1.20
GHI Electronics,LLC
.NET & Internet of Things
FEZ Ultimate Kit Contents
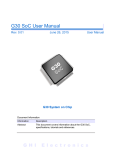
4.2. FEZ Internet of Things Kit Contents
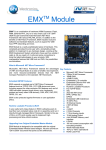
FEZ Connect Shield
This shield plugs right into FEZ Panda and “connects” you to the outside world. It has the
circuitry needed to connect to Ethernet and also has eight JST connectors, where eblocks
can plug right in. There are also 2 headers to connect servo motors.
eblocks are electronics building blocks where each has a specific feature allowing
electronics to connect to our physical world. From measuring temperature to outputting
light. The following eblocks come standard with the “FEZ Internet of Things” kit but note
that there are plenty of other sensors for you to add to your project, these sensors can be
purchased at http://www.ghielectronics.com/catalog/category/3/
LED
There are 3 LEDs included with the kit, Red, Yellow and Green.
Join our community at www.TinyCLR.com
Page 9 of 81
Rev.1.20
GHI Electronics,LLC
.NET & Internet of Things
FEZ Ultimate Kit Contents
Switch
An easy way to read an input from a user.
Temperature sensor
This component provides an analog value representing the temperature at the tip of the
NTC water resistant thermistor (included). Temperature measured can be ranging
between -20 to 54 degree Celsius. This sensor works with any pin with Analog input
feature on FEZ.
Join our community at www.TinyCLR.com
Page 10 of 81
Rev.1.20
GHI Electronics,LLC
.NET & Internet of Things
FEZ Ultimate Kit Contents
38Khz Infrared Receiver
This component is used to detect infrared signals of 38kHz carrier. The sensor output is
logical high when it detects 38kHz frequency, otherwise the output is low. It can be used
to detect the signal sent by the ER-4 Easy Remote (not included) or most TV remotes.
IRLED Transmitter
Pair this simple IR LED Transmitter with the Infrared Receiver.
Join our community at www.TinyCLR.com
Page 11 of 81
Rev.1.20
GHI Electronics,LLC
.NET & Internet of Things
FEZ Ultimate Kit Contents
Light Sensor
Use with any analog pin to measure light's intensity.
Piezo (speaker)
Piezo can be used to generate all kinds of tones. Use it as an alarm clock or to play
simple melodies!
Join our community at www.TinyCLR.com
Page 12 of 81
Rev.1.20
GHI Electronics,LLC
.NET & Internet of Things
FEZ Ultimate Kit Contents
Variable Resistor (POT)
Potentiometers (POT for short) are variable resistors that change their resistance when
the knob is rotated. This is similar to the volume control you see on many devices.
Works with any pin with Analog input feature on a FEZ.
Serial-to-USB
This eblock instantly converts any COM (serial) port into a USB connection. Windows
sees this eblock as a virtual serial port so, for Windows applications, this is simply a
serial port on the system.
Cables
The kit also includes a mini USB Cable for the Serial-to-USB eblock and an Ethernet
Cable.
Join our community at www.TinyCLR.com
Page 13 of 81
Rev.1.20
GHI Electronics,LLC
.NET & Internet of Things
Going on a Test Drive
5. Going On A Test Drive
Note 1: If you are already using GHI's NETMF devices then you can skip this chapter. If
this is the first time you use GHI NETMF devices then start with this tutorial
http://wiki.tinyclr.com/index.php?title=First_Project
5.1. Testing the Emulator
Create a new “Micro Framework” C# console project
Leave the code unchanged and press F10 (once) to step in the code. This is a shortcut for
“Debug → Step Over”. Now, open the output window. Note that you need to enable “expert
settings” if you haven't done so already.
Join our community at www.TinyCLR.com
Page 14 of 81
Rev.1.20
GHI Electronics,LLC
.NET & Internet of Things
Going on a Test Drive
Step more in the code using F10 till you go over the line with “Debug.Print” and you will
see “Hello World” in the output window.
Stop debugging using “shift+F5”. Save your project as we will be adding to it shortly.
Join our community at www.TinyCLR.com
Page 15 of 81
Rev.1.20
GHI Electronics,LLC
.NET & Internet of Things
Going on a Test Drive
5.2. Check the Firmware Version (very important)
Before using your FEZ, it is very important to check that your PC and your FEZ has the
latest firmware. Start by checking the release notes online found at this link
http://www.tinyclr.com/release-notes/
Now, open the release notes file found on your PC under
C:\Program Files (x86)\GHI Electronics\GHI NETMF v4.1 SDK\Release Notes.rtf
If your PC has an older version than what is online, you should uninstall the GHI SDK then
download and install the newer one from GHI.
The next thing to check is that FEZ has the latest firmware loaded on it, which is also the
latest version, as we have done in previous step. We need to start MFDeploy, a software
that ships with Microsoft NETMF SDK. You should find it under
C:\Program Files (x86)\Microsoft .NET Micro Framework\v4.1\Tools
Under “Device”, select USB and you should see USBizi_USBizi in the list. I am assuming
you have FEZ connected of course. Now click “Ping” and your FEZ will respond with
TinyCLR
Join our community at www.TinyCLR.com
Page 16 of 81
Rev.1.20
GHI Electronics,LLC
.NET & Internet of Things
Going on a Test Drive
From the top menu, run “Target → Device Capabilities” which will query a lot of info from
FEZ but we are mainly interested in is the “Solution version”. This number much match the
USBizi version number in release notes, which also matches the latest from the website.
Firmware update tutorial is available here:
http://wiki.tinyclr.com/index.php?title=Firmware_Update_USBizi
Join our community at www.TinyCLR.com
Page 17 of 81
Rev.1.20
GHI Electronics,LLC
.NET & Internet of Things
Going on a Test Drive
5.3. Testing FEZ Panda II
We now know NETMF is working fine on the emulator so let us do the same but this time
on FEZ Panda II. You may have a different FEZ board but this will apply.
Assuming you already have the GHI NETMF SDK installed and it is usually located at this
folder on your PC
“C:\Program Files (x86)\GHI Electronics\GHI NETMF v4.1 SDK”
From the earlier project, enter project properties
Setting the “Deployment Transport” interface is found under the “.NET Micro Framework”
tab.
Join our community at www.TinyCLR.com
Page 18 of 81
Rev.1.20
GHI Electronics,LLC
.NET & Internet of Things
Going on a Test Drive
First plug in FEZ Panda II to your PC using the provided USB cable. Do not connect FEZ
Panda II to anything besides the USB cable, no shields and no eblocks. It is highly
recommend to use a powered USB HUB. If you do not have one, then plug FEZ directly to
your PC, not through a HUB. Once it is connected, Windows will ask for drivers, which are
found at
“C:\Program Files (x86)\GHI Electronics\GHI NETMF v4.1 SDK\USB Drivers\GHI_NETMF_Interface”
Now, change “Transport” to USB and you should see “USBizi_USBizi” under “Device”.
Why USBizi? The base processor of FEZ Panda is GHI's commercial USBizi chipset.
View the source code file and try F10 as before but this time the deploying will happen to
FEZ Panda instead of the emulator. Step in the code and verify that you see “Hello world”
in the output window as before.
5.4. The on-board LED & Button
LEDs are those little lights you see in about every electronics devices out there. They draw
very little power, extremely cheap and they live almost forever!
There is an LED right on FEZ Panda but what pin the LED is connected to? We could
check the circuits schematics but that is not what modern programming is about. There is
a library (an assembly) from the GHI SDK that includes all pin definitions. Let us add it to
our project.
Right click on your project and select “Add Reference...”
Join our community at www.TinyCLR.com
Page 19 of 81
Rev.1.20
GHI Electronics,LLC
.NET & Internet of Things
Going on a Test Drive
Then add FEZPanda_II_GHIElectronics.NETMF.FEZ if you are using FEZ Panda II.
We will be controlling processor ports/pins so we need the Microsoft.SPOT.Hardware.
(SPOT is an old name for NETMF)
Join our community at www.TinyCLR.com
Page 20 of 81
Rev.1.20
GHI Electronics,LLC
.NET & Internet of Things
Going on a Test Drive
We can now change the code to match the following. You can copy/paste the code if you
like.
using
using
using
using
System;
System.Threading;
Microsoft.SPOT;
Microsoft.SPOT.Hardware;
using GHIElectronics.NETMF.FEZ;
public class Program
{
static OutputPort MyLED = new OutputPort((Cpu.Pin)FEZ_Pin.Digital.LED, true);
public static void Main()
{
while (true)
{
MyLED.Write(false);
Thread.Sleep(300);
}
}
MyLED.Write(true);
Thread.Sleep(300);
}
If you don't understand the code above, we suggest reading the beginner's guide.
Basically, the code goes in an endless loop and turns the LED on then off every 300ms.
FEZ Panda II also hosts a button that is used to force the board in boot loader mode but
we can also use this button in our application. Modify the code to the following:
using
using
using
using
System;
System.Threading;
Microsoft.SPOT;
Microsoft.SPOT.Hardware;
using GHIElectronics.NETMF.FEZ;
public class Program
{
static OutputPort MyLED = new OutputPort((Cpu.Pin)FEZ_Pin.Digital.LED, true);
static InputPort MyButton = new InputPort((Cpu.Pin)FEZ_Pin.Digital.LDR, false,
Port.ResistorMode.PullUp);
public static void Main()
{
while (true)
{
MyLED.Write( MyButton.Read() );
Thread.Sleep(10);
}
}
}
Join our community at www.TinyCLR.com
Page 21 of 81
Rev.1.20
GHI Electronics,LLC
.NET & Internet of Things
Going on a Test Drive
In an endless loop, we are reading the button and setting its value to the LED. Since an
unpressed button is high (true) and pressed button is low (false) then the LED will be on
when button is not pressed and off when pressed.
The 10ms delay is added there as a good programming practice. There is no reason on
why we should use 100% of processor time in a dead-endless-loop and if the time we
press the button to the time the LED change was delayed by 10ms then you will probably
not see the difference.
5.5. FEZ Connect Shield
One of the most popular FEZ Panda add-ons is the FEZ Connect shield. This shield has
Ethernet interface, with all its required circuitry, and also has connections for eblocks and
Servo Motors.
The two servo connections are connected to PWM-capable digital pins. Powering a servo
requires 6V which should be connected to the “Srv Pwr” pin. This requires little soldering
skills. This is not explained in the book but the FEZ Connect user manual explains all of
this in details.
Join our community at www.TinyCLR.com
Page 22 of 81
Rev.1.20
GHI Electronics,LLC
.NET & Internet of Things
Going on a Test Drive
eblocks can be digital or analog, and can even require special peripheral interface from the
system, such as PWM or UART. The eblocks' connectors on the FEZ Connect Shield offer
UART (serial), I2C, Analog In, Analog Out and PWM. The provided projects will utilize the
eblocks showing their functions and possible uses.
All of the eblocks connectors have a standard pin-out, composing of 5V, signal and
Ground. Optionally, the 2 analog-related connectors can have 3.3V or 5V through a
jumper. If you're not sure what you need, then leave it at 5V, the default.
Let's try to connect an LED eblock through FEZ Connect and blink it, just like we did with
the on-board LED. First, disconnect FEZ and plug the FEZ Connect shield on top. Now,
plug any of the LED eblocks that came with the kit into any of the eblock connectors. To
demonstrate that analog pins also work as digital, we are going to connect the LED to An2,
just like shown below.
Join our community at www.TinyCLR.com
Page 23 of 81
Rev.1.20
GHI Electronics,LLC
.NET & Internet of Things
Going on a Test Drive
Then we will take the old code and modify it.
using
using
using
using
System;
System.Threading;
Microsoft.SPOT;
Microsoft.SPOT.Hardware;
using GHIElectronics.NETMF.FEZ;
public class Program
{
static OutputPort MyLED = new OutputPort((Cpu.Pin)FEZ_Pin.Digital.An2, true);
public static void Main()
{
while (true)
{
MyLED.Write(false);
Thread.Sleep(300);
}
}
MyLED.Write(true);
Thread.Sleep(300);
}
Join our community at www.TinyCLR.com
Page 24 of 81
Rev.1.20
GHI Electronics,LLC
.NET & Internet of Things
Going on a Test Drive
Run the program and observe the LED eblock blinking. Now, can you connect the button
eblock to your hardware and control the LED from it? All you need to do is copy the code
we did before with the on-board button/LED and change one line of code.
Fading LED
We saw how easy it was to blink an LED but what about fading an LED in and out? This
can be done using PWM. See http://www.tinyclr.com/support for PWM tutorials.
PWM controls the level of energy transferred by switching a pin high and low very quickly
where the ratio of the ON to OFF state determines the level. For example, 50% duty cycle
is 50% energy and so on and so forth. The PWM feature can be found in
GHIElectronics.NETMF.Hardware.dll. If you're not sure how to add an assembly then
consult http://wiki.tinyclr.com/index.php?title=First_Project
Now, what pin is PWM capable? This is generated by the internal hardware which means
the pins will handle the signal with zero processor interaction but this is not available on
every single pin. Thanks to VS2010's IntelliSense, we can easily see what pins have PWM
feature.
Looking at what IntelliSense gave us and at the board, it seems that the easiest socket to
access is Di5 since it's on the edge, so let's use it.
Join our community at www.TinyCLR.com
Page 25 of 81
Rev.1.20
GHI Electronics,LLC
.NET & Internet of Things
Going on a Test Drive
using
using
using
using
System;
System.Threading;
Microsoft.SPOT;
Microsoft.SPOT.Hardware;
using GHIElectronics.NETMF.Hardware;
using GHIElectronics.NETMF.FEZ;
public class Program
{
static PWM MyFader = new PWM((PWM.Pin)FEZ_Pin.PWM.Di5);
}
public static void Main()
{
byte i = 0;
while (true)
{
MyFader.Set(10000, i);
if (i++ >= 100)
{
i = 0;
}
Thread.Sleep(10);
}
}
The LED will now be coming in slowly till it is fully on (100%) then it's back to level zero
(0%). This can be more exiting by making the LED fade in and out.
using
using
using
using
System;
System.Threading;
Microsoft.SPOT;
Microsoft.SPOT.Hardware;
using GHIElectronics.NETMF.Hardware;
using GHIElectronics.NETMF.FEZ;
public class Program
{
static PWM MyFader = new PWM((PWM.Pin)FEZ_Pin.PWM.Di5);
public static void Main()
{
byte i = 0;
int dirr = 1;
while (true)
{
MyFader.Set(10000, i);
i =(byte) (i + dirr);
if (i >= 90)
dirr = -1;
if (i <= 10)
dirr = 1;
Join our community at www.TinyCLR.com
Page 26 of 81
Rev.1.20
GHI Electronics,LLC
.NET & Internet of Things
Going on a Test Drive
}
}
Thread.Sleep(10);
}
Making Noise!
In our coming projects, we may need to generate some sounds as an indication of
something. This is where the Peizo eblock becomes very handy. Connect it to a PWM pin
and give a frequency of your choice, you can even play some melodies. In the last fading
demo we were playing with the duty-cycle but we left the frequency constantly at 10Khz.
When generating tones, we will leave the duty-cycle at 50% but we change the frequency.
Look at the code below, do you recognize this code? It the the same fading LED code,
only with a different eblock.
using
using
using
using
System;
System.Threading;
Microsoft.SPOT;
Microsoft.SPOT.Hardware;
using GHIElectronics.NETMF.Hardware;
using GHIElectronics.NETMF.FEZ;
public class Program
{
static PWM MyPWM = new PWM((PWM.Pin)FEZ_Pin.PWM.Di5);
public static void Main()
{
int i = 5000;
int dirr = 100;
while (true)
{
MyPWM.Set(i, 50);
i = i + dirr;
if (i >= 2000)
dirr *= -1;
if (i <= 10000)
dirr *= -1;
Thread.Sleep(1);
}
}
}
Try this code and see if you recognize what FEZ is playing!
Join our community at www.TinyCLR.com
Page 27 of 81
Rev.1.20
GHI Electronics,LLC
.NET & Internet of Things
Going on a Test Drive
using
using
using
using
System;
System.Threading;
Microsoft.SPOT;
Microsoft.SPOT.Hardware;
using GHIElectronics.NETMF.Hardware;
using GHIElectronics.NETMF.FEZ;
public class Program
{
static PWM MyPWM
const int NOTE_C
const int NOTE_D
const int NOTE_E
const int NOTE_F
const int NOTE_G
const
const
const
const
const
const
int
int
int
int
int
int
=
=
=
=
=
=
new PWM((PWM.Pin)FEZ_Pin.PWM.Di5);
261;
294;
330;
349;
392;
WHOLE_DURATION = 1000;
EIGHTH = WHOLE_DURATION / 8;
QUARTER = WHOLE_DURATION / 4;
QUARTERDOT = WHOLE_DURATION / 3;
HALF = WHOLE_DURATION / 2;
WHOLE = WHOLE_DURATION;
static int[] note = { NOTE_E, NOTE_E, NOTE_F, NOTE_G, NOTE_G, NOTE_F, NOTE_E, NOTE_D,
NOTE_C, NOTE_C, NOTE_D, NOTE_E, NOTE_E, NOTE_D, NOTE_D, NOTE_E, NOTE_E, NOTE_F,
NOTE_G,
NOTE_G, NOTE_F, NOTE_E, NOTE_D, NOTE_C, NOTE_C, NOTE_D, NOTE_E, NOTE_D, NOTE_C,
NOTE_C};
static int[] duration = { QUARTER, QUARTER, QUARTER, QUARTER, QUARTER, QUARTER,
QUARTER,
QUARTER, QUARTER, QUARTER, QUARTER, QUARTER, QUARTERDOT, EIGHTH, HALF, QUARTER,
QUARTER,
QUARTER, QUARTER, QUARTER, QUARTER, QUARTER, QUARTER, QUARTER, QUARTER, QUARTER,
QUARTER,
QUARTERDOT, EIGHTH, WHOLE};
}
public static void Main()
{
while (true)
{
for (int i = 0; i < note.Length; i++)
{
MyPWM.Set(note[i], 50);
Thread.Sleep(duration[i]);
}
Thread.Sleep(100);
}
}
What if we don't have a free PWM pin, then how do we use the Piezo? Not to worry, FEZ
can generate all kinds of waveforms using a feature called “Output Compare” on any IO.
This tutorial covers the details. http://wiki.tinyclr.com/index.php?title=Output_Compare
Join our community at www.TinyCLR.com
Page 28 of 81
Rev.1.20
GHI Electronics,LLC
.NET & Internet of Things
Going on a Test Drive
Open Drain
Two of the eblock connections are I2C-capable pins. These pins are special from other
pins because they are open drain. An open drain pin is a pin than can be low or floating
but never high. FEZ has on-board resistors pulling the two I2C pins high so these pins (I2C
and SDA) can be high and low as usual, but the high state is high through pull up resistors.
If you do not understand this fully then do not worry about this for now.
5.6. Connecting Ethernet
The details of sockets and networking are covered in later projects but here we want to
make sure Ethernet is connected and working properly.
Start by connecting FEZ through the included Ethernet cable to the same switch where
your PC is connected. Note that your PC/laptop can be connected using WiFi but the
same switch should also have wired Ethernet connection to where you plug in your FEZ.
You could connect FEZ directly to the PC's Ethernet port but then you will not be able to
access the internet.
Now, you need to know your local network address. It should be 192.168.x. The reason
“192.168” is used is because these addresses are only allowed on local networks and are
not routed to the internet. Your router/switch handles Ethernet traffic internally and when
you access the internet, your data get translated with your external IP.
Open your PC's command prompt and enter ipconfig. You should see your internet
connection and determine what is your local network address.
From the above image, you can see that I am using WiFi to connect to the router/switch
with IP address 192.168.1.5, this means my network address is 192.168.1 and my PC's
address is 5. I am not going to use DHCP and I need to make sure I am using an IP that is
not used by any other device. It will probably be safe if I assume that address 222 is not
Join our community at www.TinyCLR.com
Page 29 of 81
Rev.1.20
GHI Electronics,LLC
.NET & Internet of Things
Going on a Test Drive
used by any PC or device since I am on a small network in my setup. I only have my PC,
my laptop and FEZ.
We need to write some code now. Go back to the last code we created and add
GHIElectronics.NETMF.W5100.dll assembly. The Ethernet controller used on FEZ Panda
is Wiznet W5100.
To initialize the Ethernet controller you need to choose the SPI module connected to Di13,
Di12 and Di11 (SPI.SPI_module.SPI1) on FEZ boards. Also you need to choose Di10 as Chip
Select and Di7 as W5100 Reset.
WIZnet_W5100.Enable(SPI.SPI_module.SPI1, (Cpu.Pin)FEZ_Pin.Digital.Di10,(Cpu.Pin)FEZ_Pin.Digital.Di7, true);
// WIZnet interface with FEZ Connect
Then you need to provide the network settings according to your needs, static or dynamic
settings using DHCP. We will use static settings in the following example.
In the network settings, MAC address (physical address) is needed. This is a good tool to
generate MAC addresses: http://www.macvendorlookup.com/
Take the LED blinking example and add a new line of code to initialize the Ethernet
controller, and some code to set FEZ's IP and MAC addresses as explained before.
Join our community at www.TinyCLR.com
Page 30 of 81
Rev.1.20
GHI Electronics,LLC
.NET & Internet of Things
Going on a Test Drive
using
using
using
using
System;
System.Threading;
Microsoft.SPOT;
Microsoft.SPOT.Hardware;
using GHIElectronics.NETMF.FEZ;
using GHIElectronics.NETMF.Net;
using GHIElectronics.NETMF.Net.NetworkInformation;
public class Program
{
static OutputPort MyLED = new OutputPort((Cpu.Pin)FEZ_Pin.Digital.An3, true);
public static void Main()
{
byte[] ip = { 192, 168, 1, 222 };
byte[] subnet = { 255, 255, 255, 0 };
byte[] gateway = { 192, 168, 1, 1 };
byte[] mac = { 0x00, 0x88, 0x98, 0x90, 0xD4, 0xE0 };
WIZnet_W5100.Enable(SPI.SPI_module.SPI1, (Cpu.Pin)FEZ_Pin.Digital.Di10,
(Cpu.Pin)FEZ_Pin.Digital.Di7, true);
NetworkInterface.EnableStaticIP(ip, subnet, gateway, mac);
NetworkInterface.EnableStaticDns(new byte[] { 192, 168, 1, 1 });
while (true)
{
MyLED.Write(false);
Thread.Sleep(300);
MyLED.Write(true);
Thread.Sleep(300);
}
}
}
The arguments used in the above example match where the W5100 Ethernet controller on
FEZ Connect Shield is connected to FEZ Panda.
We are now ready to run our program, which will blink an LED and setup the Ethernet
Controller. The blinking LED is an indication that the system is up and running. While FEZ
is running (blinking), try to ping it from your PC and you should see something like this.
Ping 192.168.1.222
Join our community at www.TinyCLR.com
Page 31 of 81
Rev.1.20
GHI Electronics,LLC
.NET & Internet of Things
Going on a Test Drive
Important: If you do not see a response then go back and check your code and setup.
The next chapters rely on having FEZ Panda being connected to your network.
Accessing the Internet
This is optional but if you have an internet connection you can verify the connection by
obtaining GHI's website IP address. Here is the code. You have to make sure that you are
using a correct Gateway IP address and DNS server IP address to get internet access.
using
using
using
using
System;
System.Threading;
Microsoft.SPOT;
Microsoft.SPOT.Hardware;
using GHIElectronics.NETMF.FEZ;
using GHIElectronics.NETMF.Net;
using GHIElectronics.NETMF.Net.NetworkInformation;
public class Program
{
static OutputPort MyLED = new OutputPort((Cpu.Pin)69, true);
public static void Main()
{
byte[] ip = { 192, 168, 1, 222 };
byte[] subnet = { 255, 255, 255, 0 };
byte[] gateway = { 192, 168, 1, 1 };
byte[] mac = { 0x00, 0x88, 0x98, 0x90, 0xD4, 0xE0 };
WIZnet_W5100.Enable(SPI.SPI_module.SPI1, (Cpu.Pin)FEZ_Pin.Digital.Di10,
(Cpu.Pin)FEZ_Pin.Digital.Di7, true);
NetworkInterface.EnableStaticIP(ip, subnet, gateway, mac);
NetworkInterface.EnableStaticDns(new byte[] { 192, 168, 1, 1 });
IPHostEntry GHI_ip =Dns.GetHostEntry("www.GHIElectronics.com");
Debug.Print("GHI's IP = " + GHI_ip.AddressList[0].ToString());
IPHostEntry TinyCLR_ip = Dns.GetHostEntry("www.TinyCLR.com");
Debug.Print("TinyCLR's IP = " + TinyCLR_ip.AddressList[0].ToString());
while (true)
{
MyLED.Write(false);
Thread.Sleep(300);
MyLED.Write(true);
Thread.Sleep(300);
}
}
}
The code prints this in the output window.
Join our community at www.TinyCLR.com
Page 32 of 81
Rev.1.20
GHI Electronics,LLC
.NET & Internet of Things
Going on a Test Drive
Note that in my case, my router did work as my DNS server but this may not be the case
for your network setup. If you are not sure of what DNS address to you use, ppen your
PC's command prompt and enter ipconfig /all and it will show the DNS server your PC
using.
You only need DNS if you want to access a website by its name instead of its IP. But you
can always ping a website from your PC to find its IP then use that in your code. Not a
good practice as the IP of a website may change.
Here is an output of pinging GHI website, compare to the output above:
Using DHCP
In modern networks with many devices connected, it can be very difficult to assign an IP
address to every device. Instead, the device starts by requesting an IP address from a
DHCP server which assigns a unique IP for the device. The challenge is that we need to
know the IP of the device to connect to it. Some code can be added to print the device's
IP on the display or the debug output. The examples used in this book assumes a static
IP is used. Here is an example code to obtain an IP address using DHCP.
public static void Main()
{
// Enable the Ethernet
WIZnet_W5100.Enable(SPI.SPI_module.SPI1, (Cpu.Pin)FEZ_Pin.Digital.Di10,
(Cpu.Pin)FEZ_Pin.Digital.Di7, true);
Dhcp.EnableDhcp(new byte[] { 0x00, 0x88, 0x98, 0x90, 0xD4, 0xE0 }, "AnyName");
Debug.Print("Network settings:");
Debug.Print("IP Address: " + new IPAddress(NetworkInterface.IPAddress).ToString());
Debug.Print("Subnet Mask: " + new IPAddress(NetworkInterface.SubnetMask).ToString());
Debug.Print("Default Getway: " + new IPAddress(NetworkInterface.GatewayAddress).ToString());
Debug.Print("DNS Server: " + new IPAddress(NetworkInterface.DnsServer).ToString());
// .....
// .....
Join our community at www.TinyCLR.com
Page 33 of 81
Rev.1.20
GHI Electronics,LLC
.NET & Internet of Things
Going on a Test Drive
5.7. We are Ready!
So far, you have tested the functionality of individual components in the system and we are
ready to make some fun and exciting projects.
Remember to always consult the contents of this page for future help and explanations:
http://www.tinyclr.com/support
Join our community at www.TinyCLR.com
Page 34 of 81
Rev.1.20
GHI Electronics,LLC
.NET & Internet of Things
FEZ TCP/IP Networking Sockets
6. FEZ TCP/IP Networking Sockets
6.1. User Datagram Protocol (UDP)
UDP is an important member of TCP/IP stack. It is a simple connectionless protocol. For
you it means that its communication mechanism is simply sending data to the other peer
without verifying whether the data packet is received successfully or not. UDP is widely
used with services such as DNS, DHCP, NTP, and TFTP.
Send UDP Message
To send UDP messages, you define the destination IP address and the destination UDP
port. For example, the DNS service UDP port is 53.
This example shows how to send UDP messages with FEZ Connect. FEZ will send
hello messages to the device with the IP 192.168.1.1 at UDP port 2000.
using System;
using System.Threading;
using Microsoft.SPOT;
using Microsoft.SPOT.Hardware;
using GHIElectronics.NETMF.FEZ;
using GHIElectronics.NETMF.Net;
using GHIElectronics.NETMF.Net.Sockets;
using GHIElectronics.NETMF.Net.NetworkInformation;
using System.Text;
using Socket = GHIElectronics.NETMF.Net.Sockets.Socket;
public class Program
{
public static void Main()
{
byte[] ip = { 192, 168, 1, 200 };
byte[] subnet = { 255, 255, 255, 0 };
byte[] gateway = { 192, 168, 1, 1 };
byte[] mac = { 0x00, 0x26, 0x1C, 0x7B, 0x29,0xE8 };
WIZnet_W5100.Enable(SPI.SPI_module.SPI1, (Cpu.Pin)FEZ_Pin.Digital.Di10,
(Cpu.Pin)FEZ_Pin.Digital.Di9, true); // WIZnet interface setting on FEZ Connect
NetworkInterface.EnableStaticIP(ip, subnet, gateway, mac);
NetworkInterface.EnableStaticDns(new byte[] { 192, 168, 1, 1 });
Socket socket = new Socket(AddressFamily.InterNetwork, SocketType.Dgram, ProtocolType.Udp);
IPAddress DestinationIP = new IPAddress(new byte[] { 192, 168, 0, 1 });
IPEndPoint DestinationEndPoint = new IPEndPoint(DestinationIP, 2000);
byte[] buf;
Join our community at www.TinyCLR.com
Page 35 of 81
Rev.1.20
GHI Electronics,LLC
.NET & Internet of Things
FEZ TCP/IP Networking Sockets
for (int y = 0; y < 1000; y++)
{
}
}
Thread.Sleep(2000);
buf = Encoding.UTF8.GetBytes("Hello World from FEZ Panda" + y.ToString());
try
{
socket.SendTo(buf, DestinationEndPoint);
}
catch
{
}
}
Receive UDP Messages
To receive UDP messages you need to bind to a specific port number so the other peer
can find your UDP service through the IP address and that port.
This example shows how to receive UDP messages with FEZ Connect. FEZ will receive
UDP messages sent to port 2000.
using
using
using
using
using
using
using
using
using
using
System;
System.Threading;
Microsoft.SPOT;
Microsoft.SPOT.Hardware;
GHIElectronics.NETMF.FEZ;
GHIElectronics.NETMF.Net;
GHIElectronics.NETMF.Net.Sockets;
GHIElectronics.NETMF.Net.NetworkInformation;
System.Text;
Socket = GHIElectronics.NETMF.Net.Sockets.Socket;
public class Program
{
public static void Main()
{
byte[] ip = { 192, 168, 1, 200 };
byte[] subnet = { 255, 255, 255, 0 };
byte[] gateway = { 192, 168, 1, 1 };
byte[] mac = { 0x00, 0x26, 0x1C, 0x7B, 0x29,0xE8 };
WIZnet_W5100.Enable(SPI.SPI_module.SPI1, (Cpu.Pin)FEZ_Pin.Digital.Di10,
(Cpu.Pin)FEZ_Pin.Digital.Di7, true); // WIZnet interface setting on FEZ Connect
NetworkInterface.EnableStaticIP(ip, subnet, gateway, mac);
NetworkInterface.EnableStaticDns(new byte[] { 192, 168, 1, 1 });
Socket serversocket = new Socket(AddressFamily.InterNetwork, SocketType.Dgram,
ProtocolType.Udp);
EndPoint ServerEndPoint = new IPEndPoint(IPAddress.Any, 2000);
serversocket.Bind(ServerEndPoint);
int i = 1;
Join our community at www.TinyCLR.com
Page 36 of 81
Rev.1.20
GHI Electronics,LLC
.NET & Internet of Things
FEZ TCP/IP Networking Sockets
while (true)
{
if (serversocket.Poll(-1, SelectMode.SelectRead))
{
EndPoint recEndPoint = null;
byte[] inBuf = new byte[serversocket.Available];
int count = serversocket.ReceiveFrom(inBuf, ref recEndPoint);
Debug.Print(new String(Encoding.UTF8.GetChars(inBuf)));
Debug.Print("From" + recEndPoint .Address.ToString());
}
}
}
}
UDP Transceive data with PC
Now we will try to exchange UDP messages between our FEZ device and the PC.
Let's suppose that the PC's IP address is 192.168.0.1 and the FEZ device's IP address
is 192.168.0.200, and we will set a UDP server at the PC that receives messages on
UDP port 2000. On the other side, we will let our FEZ device send this message "Hello
PC" to the PC's IP address and UDP port 2000, then it will wait for the response
message from the PC "Hello FEZ device".
Deploy this code on FEZ device
using
using
using
using
using
using
using
using
using
using
System;
System.Threading;
Microsoft.SPOT;
Microsoft.SPOT.Hardware;
GHIElectronics.NETMF.FEZ;
GHIElectronics.NETMF.Net;
GHIElectronics.NETMF.Net.Sockets;
GHIElectronics.NETMF.Net.NetworkInformation;
System.Text;
Socket = GHIElectronics.NETMF.Net.Sockets.Socket;
public class Program
{
public static void Main()
{
byte[] ip = { 192, 168, 0, 200 };
byte[] subnet = { 255, 255, 255, 0 };
byte[] gateway = { 192, 168, 0, 1 };
byte[] mac = { 0x00, 0x26, 0x1C, 0x7B, 0x29,0xE8 };
WIZnet_W5100.Enable(SPI.SPI_module.SPI1, (Cpu.Pin)FEZ_Pin.Digital.Di10,
(Cpu.Pin)FEZ_Pin.Digital.Di9,true); // WIZnet interface setting on FEZ Connect
NetworkInterface.EnableStaticIP(ip, subnet, gateway, mac);
NetworkInterface.EnableStaticDns(new byte[] { 192, 168, 0, 1 });
Socket mySocket = new Socket(AddressFamily.InterNetwork, SocketType.Dgram, ProtocolType.Udp);
IPAddress DestinationIP = new IPAddress(new byte[] { 192, 168, 0, 1 });
IPEndPoint DestinationEndPoint = new IPEndPoint(DestinationIP, 2000);
String msg = "Hello PC";
Join our community at www.TinyCLR.com
Page 37 of 81
Rev.1.20
GHI Electronics,LLC
.NET & Internet of Things
FEZ TCP/IP Networking Sockets
byte[] bytesToSend = Encoding.UTF8.GetBytes(msg);
while (true)
{
mySocket.SendTo(bytesToSend, bytesToSend.Length, SocketFlags.None, DestinationEndPoint);
while (mySocket.Poll(2000000, SelectMode.SelectRead))
{
if (mySocket.Available > 0)
{
byte[] inBuf = new byte[mySocket.Available];
from the 192.168.0.2
EndPoint recEndPoint = new IPEndPoint(IPAddress.Any, 0);
mySocket.ReceiveFrom(inBuf, ref recEndPoint);
if (!recEndPoint.Equals(DestinationEndPoint))// Check if the received packet is
continue;
Debug.Print(new String(Encoding.UTF8.GetChars(inBuf)));
}
}
}
}
}
Now create a regular C# console application and add System and System.Net libraries,
and add this code
using
using
using
using
using
using
System;
System.Collections.Generic;
System.Linq;
System.Text;
System.Net.Sockets;
System.Net;
class Program
{
static void Main(string[] args)
{
Socket mySocket = new Socket(AddressFamily.InterNetwork, SocketType.Dgram,
ProtocolType.Udp);
IPEndPoint MyServiceEndPoint = new IPEndPoint(IPAddress.Any, 2000);
mySocket.Bind(MyServiceEndPoint);
while (true)
{
while(mySocket.Poll(200000,SelectMode.SelectRead))
{
if(mySocket.Available>0)
{
byte[] inBuf = new byte[mySocket.Available];
EndPoint recEndPoint = new IPEndPoint(IPAddress.Any,0);
mySocket.ReceiveFrom(inBuf, ref recEndPoint);
Console.WriteLine("Message From" + ((IPEndPoint)recEndPoint).Address.ToString());
Console.WriteLine(new string(Encoding.UTF8.GetChars(inBuf)));
String msg = "Hello FEZ Device";
byte[] bytesToSend = Encoding.UTF8.GetBytes(msg);
mySocket.SendTo(bytesToSend, bytesToSend.Length, SocketFlags.None,
(IPEndPoint)recEndPoint);
Join our community at www.TinyCLR.com
Page 38 of 81
Rev.1.20
GHI Electronics,LLC
.NET & Internet of Things
FEZ TCP/IP Networking Sockets
}
}
}
}
}
Run this application. You will notice that the PC and the device are exchanging the
messages as expected.
6.2. Transmission Control Protocol (TCP)
TCP is the other important member of TCP/IP stack. UDP is connectionless, on the other
hand TCP is connection-oriented protocol. This means that you can imagine TCP session
as a virtual connection between the client and the server.
The main thing that TCP connection offers is a handshaking mechanism between the
client and the server to ensure that the sent TCP packet has been received successfully.
You don't need to worry about all these details since they are handled internally. You only
need to open the TCP connection using a networking socket in the code and start
exchanging data. TCP is also widely used with services such as HTTP(web browsing),
Telnet, FTP, SMTP (sending emails), and POP3.
TCP client example
Here is a simple example on how to create a TCP client.
using
using
using
using
using
using
using
using
using
using
System;
System.Threading;
Microsoft.SPOT;
Microsoft.SPOT.Hardware;
GHIElectronics.NETMF.FEZ;
GHIElectronics.NETMF.Net;
GHIElectronics.NETMF.Net.Sockets;
GHIElectronics.NETMF.Net.NetworkInformation;
System.Text;
Socket = GHIElectronics.NETMF.Net.Sockets.Socket;
Join our community at www.TinyCLR.com
Page 39 of 81
Rev.1.20
GHI Electronics,LLC
.NET & Internet of Things
FEZ TCP/IP Networking Sockets
public class Program
{
public static void Main()
{
byte[] mac = { 0x00, 0x26, 0x1C, 0x7B, 0x29, 0xE8 };
WIZnet_W5100.Enable(SPI.SPI_module.SPI1, (Cpu.Pin)FEZ_Pin.Digital.Di10,
(Cpu.Pin)FEZ_Pin.Digital.Di9, true); // WIZnet interface on FEZ Connect
Dhcp.EnableDhcp(mac,"FEZ"); // Get the network settings from Dhcp server. The user can
exchange this with static settings.
Debug.Print("Network settings:");
Debug.Print("IP Address: " + new IPAddress(NetworkInterface.IPAddress).ToString());
Debug.Print("Subnet Mask: " + new IPAddress(NetworkInterface.SubnetMask).ToString());
Debug.Print("Default Getway: " + new IPAddress(NetworkInterface.GatewayAddress).ToString());
Debug.Print("DNS Server: " + new IPAddress(NetworkInterface.DnsServer).ToString());
Socket socket = new Socket(AddressFamily.InterNetwork, SocketType.Stream, ProtocolType.Tcp);
IPAddress ServerIP = new IPAddress(new byte[] { 192, 168, 0, 200 });
IPEndPoint ServerEndPoint = new IPEndPoint(ServerIP, 12000);
byte[] buf = Encoding.UTF8.GetBytes("Hello World from FEZ Panda");
socket.Connect(ServerEndPoint);
socket.Send(buf);
if(socket.Poll(5*1000000,SelectMode.SelectRead)) // wait for data from the server
{
byte[] inbuf = new byte[socket.Available];
socket.Receive(inbuf);
Debug.Print(new string(Encoding.UTF8.GetChars(inbuf)));
}
socket.Close();
}
}
Join our community at www.TinyCLR.com
Page 40 of 81
Rev.1.20
GHI Electronics,LLC
.NET & Internet of Things
FEZ TCP/IP Networking Sockets
TCP server example
This is a simple web server. Given a request, it returns an HTML document. The same
document is returned for all requests and no parsing of the request is done. This
example is based on SimpleServer example code available with NETMF SDK example
code.
This server IP address is 192.168.0.200 and the network ID is 192.168.0.x. This server
is listening on TCP port 12000. You can change these addresses according to your
network settings.
using System;
using System.Threading;
using Microsoft.SPOT;
using Microsoft.SPOT.Hardware;
using GHIElectronics.NETMF.FEZ;
using GHIElectronics.NETMF.Net;
using GHIElectronics.NETMF.Net.Sockets;
using GHIElectronics.NETMF.Net.NetworkInformation;
using System.Text;
using Socket = GHIElectronics.NETMF.Net.Sockets.Socket;
public class Program
{
public static void Main()
{
const Int32 c_port = 12000;
byte[] ip = { 192, 168, 0, 200 };
byte[] subnet = { 255, 255, 255, 0 };
byte[] gateway = { 192, 168, 0, 1 };
byte[] mac = { 0x00, 0x26, 0x1C, 0x7B, 0x29,0xE8 };
WIZnet_W5100.Enable(SPI.SPI_module.SPI1, (Cpu.Pin)FEZ_Pin.Digital.Di10,
(Cpu.Pin)FEZ_Pin.Digital.Di7, true);
NetworkInterface.EnableStaticIP(ip, subnet, gateway, mac);
NetworkInterface.EnableStaticDns(new byte[] { 192, 168, 0, 1 });
Socket server = new Socket(AddressFamily.InterNetwork,
SocketType.Stream, ProtocolType.Tcp);
IPEndPoint localEndPoint = new IPEndPoint(IPAddress.Any, c_port);
server.Bind(localEndPoint);
server.Listen(1);
while (true)
{
// Wait for a client to connect.
Socket clientSocket = server.Accept();
// Process the client request. true means asynchronous.
new ProcessClientRequest(clientSocket, true);
}
}
/// <summary>
/// Processes a client request.
/// </summary>
internal sealed class ProcessClientRequest
{
private Socket m_clientSocket;
/// <summary>
/// The constructor calls another method to handle the request, but can
/// optionally do so in a new thread.
/// </summary>
Join our community at www.TinyCLR.com
Page 41 of 81
Rev.1.20
GHI Electronics,LLC
.NET & Internet of Things
FEZ TCP/IP Networking Sockets
/// <param name="clientSocket"></param>
/// <param name="asynchronously"></param>
public ProcessClientRequest(Socket clientSocket, Boolean asynchronously)
{
m_clientSocket = clientSocket;
}
if (asynchronously)
// Spawn a new thread to handle the request.
new Thread(ProcessRequest).Start();
else ProcessRequest();
/// <summary>
/// Processes the request.
/// </summary>
private void ProcessRequest()
{
const Int32 c_microsecondsPerSecond = 1000000;
// 'using' ensures that the client's socket gets closed.
using (m_clientSocket)
{
// Wait for the client request to start to arrive.
Byte[] buffer = new Byte[1024];
if (m_clientSocket.Poll(5 * c_microsecondsPerSecond,
SelectMode.SelectRead))
{
// If 0 bytes in buffer, then the connection has been closed,
// reset, or terminated.
if (m_clientSocket.Available == 0)
return;
// Read the first chunk of the request (we don't actually do
// anything with it).
Int32 bytesRead = m_clientSocket.Receive(buffer,
m_clientSocket.Available, SocketFlags.None);
// Return a static HTML document to the client.
String s =
"HTTP/1.1 200 OK\r\nContent-Type: text/html; charset=utf8\r\n\r\n<html><head><title>.NET Micro Framework Web Server on USBizi Chipset </title></head>" +
"<body><bold><a href=\"http://www.tinyclr.com/\">Learn more about the
.NET Micro Framework with FEZ by clicking here</a></bold></body></html>";
byte[] buf = Encoding.UTF8.GetBytes(s);
int offset = 0;
int ret = 0;
int len = buf.Length;
while (len > 0)
{
ret = m_clientSocket.Send(buf, offset, len, SocketFlags.None);
len -= ret;
offset += ret;
}
}
m_clientSocket.Close();
}
}
}
}
Join our community at www.TinyCLR.com
Page 42 of 81
Rev.1.20
GHI Electronics,LLC
.NET & Internet of Things
FEZ TCP/IP Networking Sockets
To test the server, open any web browser on any station connected to the same network
and enter this address //192.168.0.200:1200
You probably noticed that this web server code is simple, but it can be even simpler
using the HTTP class provided as you will see in the next examples.
Join our community at www.TinyCLR.com
Page 43 of 81
Rev.1.20
GHI Electronics,LLC
.NET & Internet of Things
FEZ-HTTP
7. FEZ-HTTP
Do you know that you are probably using HTTP daily? HTTP is how web pages are
transferred from servers to your internet browser. Let's go back one step and detail this.
What defines a web-page's look is something called HTML (Hyper Text Markup
Language), a text that defines the look of a page.
Nothing better to explain this than trying a simple example. Open notepad on your PC and
put this text in it.
<html>
<body>
<h1>FEZ Panda</h1>
<p>Embedded Systems were never easier!</p>
</body>
</html>
Save the file and then rename its extension from .txt to .HTML. Now open the file with any
browser. It should look like this.
Join our community at www.TinyCLR.com
Page 44 of 81
Rev.1.20
GHI Electronics,LLC
.NET & Internet of Things
FEZ-HTTP
Those HTML files are stored on the server or even dynamically generated and then
transferred to your browser using HTTP (Hyper Text Transfer Protocol). This protocol runs
on top of TCP. To handle HTTP on FEZ, we can either implement HTTP right on top of
TCP or use the HTTP services built in FEZ. Compare this with the Telnet project in
upcoming sections.
Here is an example that uses HTTP to transfer the HTML code we tested earlier. Note how
we are listening on port number 80 which is the default HTTP port.
This FEZ's IP address is 192.168.0.200. and the network ID is 192.168.0.x. you can
change these addresses according to your network settings.
using
using
using
using
using
using
using
using
using
using
System;
System.Threading;
Microsoft.SPOT;
Microsoft.SPOT.Hardware;
GHIElectronics.NETMF.FEZ;
GHIElectronics.NETMF.Net;
GHIElectronics.NETMF.Net.Sockets;
GHIElectronics.NETMF.Net.NetworkInformation;
System.Text;
Socket = GHIElectronics.NETMF.Net.Sockets.Socket;
public class Program
{
public static void Main()
{
const Int32 c_port = 80;
byte[] ip = { 192, 168, 0, 200 };
byte[] subnet = { 255, 255, 255, 0 };
byte[] gateway = { 192, 168, 0, 1 };
byte[] mac = { 0x00, 0x26, 0x1C, 0x7B, 0x29, 0xE8 };
WIZnet_W5100.Enable(SPI.SPI_module.SPI1, (Cpu.Pin)FEZ_Pin.Digital.Di10,
(Cpu.Pin)FEZ_Pin.Digital.Di7, true);
NetworkInterface.EnableStaticIP(ip, subnet, gateway, mac);
NetworkInterface.EnableStaticDns(new byte[] { 192, 168, 0, 1 });
HttpListener listener = new HttpListener("http", c_port);
listener.Start();
while (true)
{
HttpListenerResponse response = null;
HttpListenerContext context = null;
try
{
context = listener.GetContext();
response = context.Response;
// We are ignoring the request, assuming GET
// HttpListenerRequest request = context.Request;
// Sends response:
response.StatusCode = (int)HttpStatusCode.OK;
byte[] HTML = Encoding.UTF8.GetBytes(
"<html><body>" +
"<h1>FEZ Panda</h1>" +
"<p>Embedded Systems were never easier!</p>" +
"</body></html>");
response.ContentType = "text/html";
Join our community at www.TinyCLR.com
Page 45 of 81
Rev.1.20
GHI Electronics,LLC
.NET & Internet of Things
FEZ-HTTP
response.OutputStream.Write(HTML, 0, HTML.Length);
response.Close();
}
}
catch
{
if (context != null)
{
context.Close();
}
}
}
}
To test the server, open any web browser on any station connected to the same network
and enter this address //192.168.0.200 if you are using a port other than 80 , then you
need to enter //192.168.0.200:port_number
Join our community at www.TinyCLR.com
Page 46 of 81
Rev.1.20
GHI Electronics,LLC
.NET & Internet of Things
Network-Controlled Screamer
8. Network-Controlled Screamer
In this project, we will use use FEZ to activate lights and sounds remotely, through a
network connection and a simple web page. This page can be accessed from a smart
phone with a web browser or from any PC's browser on the same network, a perfect
gadget for Halloween.
The hosted web page will look like this.
We will first start with LEDs and use the Piezo eblock to make some noise. The next step
will be to utilize the audio playback feature to play some scary sounds!
Here is an image of our first setup:
Join our community at www.TinyCLR.com
Page 47 of 81
Rev.1.20
GHI Electronics,LLC
.NET & Internet of Things
Network-Controlled Screamer
The Connections:
•
Red LED eblock on Di1
•
Green LED eblock on Di0
•
Yellow LED eblock on Di8
•
Piezo eblock on Di5
The code is shown below:
using
using
using
using
using
System;
System.Threading;
System.Text;
Microsoft.SPOT;
Microsoft.SPOT.Hardware;
using
using
using
using
GHIElectronics.NETMF.FEZ;
GHIElectronics.NETMF.Hardware;
GHIElectronics.NETMF.Net;
GHIElectronics.NETMF.Net.NetworkInformation;
public class Program
{
public static void Main()
{
OutputPort red = new OutputPort((Cpu.Pin)FEZ_Pin.Digital.Di1, false);
OutputPort green = new OutputPort((Cpu.Pin)FEZ_Pin.Digital.Di0, false);
OutputPort yellow = new OutputPort((Cpu.Pin)FEZ_Pin.Digital.Di8, false);
PWM piezo = new PWM((PWM.Pin)FEZ_Pin.PWM.Di5);
byte[]
byte[]
byte[]
byte[]
ip = { 192, 168, 1, 176 };
subnet = { 255, 255, 255, 0 };
gateway = { 192, 168, 1, 1 };
mac = { 0x00, 0x88, 0x98, 0x90, 0xD4, 0xE0 };
WIZnet_W5100.Enable(SPI.SPI_module.SPI1, (Cpu.Pin)FEZ_Pin.Digital.Di10,
(Cpu.Pin)FEZ_Pin.Digital.Di7, true);
NetworkInterface.EnableStaticIP(ip, subnet, gateway, mac);
NetworkInterface.EnableStaticDns(gateway);
// start server
HttpListener listener = new HttpListener("http", 80);
listener.Start();
while (true)
{
HttpListenerResponse response = null;
HttpListenerContext context = null;
try
{
context = listener.GetContext();
response = context.Response;
// The button is pressed
if (context.Request.HttpMethod == "POST")
{
Join our community at www.TinyCLR.com
Page 48 of 81
Rev.1.20
GHI Electronics,LLC
.NET & Internet of Things
Network-Controlled Screamer
for (int i = 0; i < 10; i++)
{
piezo.Set(1000, 50);
Thread.Sleep(100);
piezo.Set(100, 50);
Thread.Sleep(100);
green.Write(red.Read());
yellow.Write(red.Read());
red.Write(!red.Read());
}
}
// turn off
green.Write(false);
yellow.Write(false);
red.Write(false);
piezo.Set(false);
// Sends response
response.StatusCode = (int)HttpStatusCode.OK;
byte[] HTML = Encoding.UTF8.GetBytes(
"<html><body>" +
"<h1>Hosted on FEZ Panda II</h1>" +
"<p>Let's scare some people!</p>" +
"<form action=\"\" method=\"post\">" +
"<input type=\"submit\" value=\"Activate!\">" +
"</form>" +
"</body></html>");
response.ContentType = "text/html";
response.OutputStream.Write(HTML, 0, HTML.Length);
response.Close();
}
catch
{
if (context != null)
{
context.Close();
}
}
}
}
}
Create a new project and add the above code to it. You will also need to add these
assemblies to “references”:
•
FEZPanda_II_GHIElectronics.NETMF.FEZ.dll
•
GHIElectronics.NETMF.Hardware
•
GHIElectronics.NETMF.W5100
•
GHIElectronics.NETMF.W5100.Http
•
Microsoft.SPOT.Hardware
•
Microsoft.SPOT.Native
•
mscorelib
Join our community at www.TinyCLR.com
Page 49 of 81
Rev.1.20
GHI Electronics,LLC
.NET & Internet of Things
Network-Controlled Screamer
You are now ready to run the project on FEZ. Once running, open a browser on the
network and enter your device's IP address. This should result in
Note: If the page didn't show then your network settings are different. Please go back to
the earlier chapters and make sure you can network-ping the device “ping 192.168.x.x”
Click the button on that page and you should see the LEDs blinking and hear some noise
coming from the Piezo. All is fun but not very scary, yet! We need to add some scary audio
and also use an amplified speakers to make sure the sound is loud enough. PC speakers
are perfect for what we need. We will use some wires to connect the speakers input
connector to An3, which is the analog out pin on FEZ Panda.
The audio connector for a speaker has different regions where it gets the audio from. To
read more about it see Wikipedia: http://en.wikipedia.org/wiki/TRS_connector
Basically, the sleeve is connected to GND on FEZ and the right or left audio channel is
connected to the Audio Out on FEZ. In the image below, the black wire and black clip are
connected to ground and the green wire and green clip are connected to the A3 pin:
Join our community at www.TinyCLR.com
Page 50 of 81
Rev.1.20
GHI Electronics,LLC
.NET & Internet of Things
Network-Controlled Screamer
The audio files supported are in wave format 8000 KHz mono. These can take a lot of
memory, so normally you can put them on an SD card or USB thumb drive. But we can
include a short one in the Visual Studio project's Resources.
Visual Studio has special handling for Audio resources, so you will get errors when you
add an audio file. To solve this, rename the file from scream.wav to scream.bin. The file is
found at http://www.ghielectronics.com/downloads/FEZ/scream.wav
Now you can extract the resource and play it. To play the audio files, you need a WAVE
parser. Copy the following code and add into a new file in the same project. Name the file
WAVE.cs
using System;
using Microsoft.SPOT;
using Microsoft.SPOT.Hardware;
public class WAVE
{
int index;
int dataSize;
int sampleRate;
/// <summary>
/// Loads a WAV file. ONLY PCM 8-bit Mono.
/// </summary>
/// <param name="wav">WAV file bytes.</param>
public WAVE(byte[] wav)
{
// see https://ccrma.stanford.edu/courses/422/projects/WaveFormat/
index = 0;
if (wav[index + 0] != 'R' || wav[index + 1] != 'I' || wav[index + 2] != 'F' ||
wav[index + 3] != 'F')
{
throw new Exception("File is not RIFF");
}
index += 4;
// ChunkSize
uint ChunkSize = Utility.ExtractValueFromArray(wav, index, 4);
index += 4;
//format
if (wav[index + 0] != 'W' || wav[index + 1] != 'A' || wav[index + 2] != 'V' ||
wav[index + 3] != 'E')
{
throw new Exception("File is not WAVE format");
}
index += 4;
// fmt sub chunk //////////////////////
//subchunk ID
if (wav[index + 0] != 'f' || wav[index + 1] != 'm' || wav[index + 2] != 't' ||
wav[index + 3] != ' ')
{
throw new Exception("Unexpected fmt subchunk!");
}
Join our community at www.TinyCLR.com
Page 51 of 81
Rev.1.20
GHI Electronics,LLC
.NET & Internet of Things
Network-Controlled Screamer
index += 4;
bool BitVarSampleRate16;
uint Subchunk1Size = Utility.ExtractValueFromArray(wav, index, 4);
index += 4;
if(Subchunk1Size == 16)
{
BitVarSampleRate16 = true;
}
else if(Subchunk1Size == 18)
{
BitVarSampleRate16 = false;
}
else
{
throw new Exception("Invalid Subchunk1Size.");
}
ushort AudioFormat = (ushort)Utility.ExtractValueFromArray(wav, index, 2);
index += 2;
if (AudioFormat != 1)
{
throw new Exception("AudioFormat invalid.");
}
ushort NumChannels = (ushort)Utility.ExtractValueFromArray(wav, index, 2);
index += 2;
if (NumChannels != 1)
{
throw new Exception("Must be mono.");
}
sampleRate = (int)Utility.ExtractValueFromArray(wav, index, 4);
index += 4;
if (sampleRate != 8000)
{
throw new Exception("Sample rate must be 8000KHz.");
}
ushort ByteRate = (ushort)Utility.ExtractValueFromArray(wav, index, 4);
index += 4;
ushort BlockAlign = (ushort)Utility.ExtractValueFromArray(wav, index, 2);
index += 2;
if (BitVarSampleRate16)
{
ushort BitsPerSample = (ushort)Utility.ExtractValueFromArray(wav, index,
2);
index += 2;
if (BitsPerSample != 8)
{
throw new Exception("Must be 8 bit.");
}
}
else
{
uint BitsPerSample = Utility.ExtractValueFromArray(wav, index, 4);
index += 4;
if (BitsPerSample != 8)
{
throw new Exception("Must be 8 bit.");
Join our community at www.TinyCLR.com
Page 52 of 81
Rev.1.20
GHI Electronics,LLC
.NET & Internet of Things
Network-Controlled Screamer
}
}
//// data sub-chunk ///////////////////////////////////////
if (wav[index + 0] != 'd' || wav[index + 1] != 'a' || wav[index + 2] != 't' ||
wav[index + 3] != 'a')
{
throw new Exception("Unexpected data subchunk!");
}
index += 4;
uint Subchunk2Size = (ushort)Utility.ExtractValueFromArray(wav, index, 4);
index += 4;
dataSize = (int)Subchunk2Size;
////////////////////////////////////////////
}
public int GetDataIndex()
{
return index;
}
public int GetDataSize()
{
return dataSize;
}
public int GetSampleRate()
{
return sampleRate;
}
}
One important note here, since we are adding a resource to our project then things can
be tricky for beginners due to the namespace of the resource handler and the namespace
of the project. Here is what we suggest, start a new console project and name it
FEZscare. Then copy/paste the code below to your project and add the new WAVE.cs file.
Here's the project code modified to play audio back:
using
using
using
using
System;
System.Text;
Microsoft.SPOT;
Microsoft.SPOT.Hardware;
using
using
using
using
GHIElectronics.NETMF.FEZ;
GHIElectronics.NETMF.Hardware;
GHIElectronics.NETMF.Net;
GHIElectronics.NETMF.Net.NetworkInformation;
public class Program
{
public static void Main()
{
byte[] scare = Resources.GetBytes(Resources.BinaryResources.scream);
WAV_playback.WAVE wav = new WAV_playback.WAVE(scare);
AnalogOut audio = new AnalogOut((AnalogOut.Pin)FEZ_Pin.AnalogOut.An3);
audio.SetLinearScale(0, 255);
Join our community at www.TinyCLR.com
Page 53 of 81
Rev.1.20
GHI Electronics,LLC
.NET & Internet of Things
Network-Controlled Screamer
byte[]
byte[]
byte[]
byte[]
ip = { 192, 168, 1, 176 };
subnet = { 255, 255, 255, 0 };
gateway = { 192, 168, 1, 1 };
mac = { 0x00, 0x88, 0x98, 0x90, 0xD4, 0xE0 };
WIZnet_W5100.Enable(SPI.SPI_module.SPI1, (Cpu.Pin)FEZ_Pin.Digital.Di10,
(Cpu.Pin)FEZ_Pin.Digital.Di7, true);
NetworkInterface.EnableStaticIP(ip, subnet, gateway, mac);
NetworkInterface.EnableStaticDns(gateway);
// start server
HttpListener listener = new HttpListener("http", 80);
listener.Start();
while (true)
{
HttpListenerResponse response = null;
HttpListenerContext context = null;
try
{
context = listener.GetContext();
response = context.Response;
// The button is pressed
if (context.Request.HttpMethod == "POST")
{
audio.Set(scare, wav.GetDataIndex(), wav.GetDataSize(),
wav.GetSampleRate());
}
// Sends response
response.StatusCode = (int)HttpStatusCode.OK;
byte[] HTML = Encoding.UTF8.GetBytes(
"<html><body>" +
"<h1>Hosted on FEZ Panda II</h1>" +
"<p>Let's scare some people!</p>" +
"<form action=\"\" method=\"post\">" +
"<input type=\"submit\" value=\"Activate!\">" +
"</form>" +
"</body></html>");
response.ContentType = "text/html";
response.OutputStream.Write(HTML, 0, HTML.Length);
response.Close();
}
}
catch
{
if (context != null)
{
context.Close();
}
}
}
}
Join our community at www.TinyCLR.com
Page 54 of 81
Rev.1.20
GHI Electronics,LLC
.NET & Internet of Things
Remote Mouse Prank
9. Remote Mouse Prank
Building on the previous project, we want to see how we can control the cursor on a PC
using an “emulated mouse”. The USB port on FEZ Panda is normally used for deploying
and debugging applications. The same USB port can be customized in many ways. An
easy example would be to make this port works as if it was a USB mouse. Thanks to the
enhanced GHI libraries, developers don't need to have any knowledge of USB classes. In
order for us to use the USB port, we first need to switch deploying/debugging to serial port.
The kit includes a Serial-to-USB eblock which takes a serial port and converts it into a
Serial<->USB connection on the PC. First, connect 2 cables from the eblock to FEZ
Connect COM1 sockets, C1TX socket is COM1 TX pin for example. Note that TX pin from
the eblock goes to RX pin on FEZ Connect and RX pin on eblock goes to TX pin on FEZ
Connect. This is shown in this image:
Join our community at www.TinyCLR.com
Page 55 of 81
Rev.1.20
GHI Electronics,LLC
.NET & Internet of Things
Remote Mouse Prank
Connect the USB cable from the eblock to the PC. Windows should be able to
automatically download and install the drivers. If not, you can find the drivers at
http://www.ftdichip.com/FTDrivers.htm. We now have a serial connection going to the PC
but we still need to switch debugging from USB to serial (that is virtual USB<->serial in our
case). This is simply accomplished by connecting MODE pin to ground. If you look in the
middle of the 40-pin header on FEZ Panda II, you will see MOD pin right next to GND pin.
All we need is a wire in between. You can use a metal clip or a jumper as well.
We are now ready to try FEZ with a serial connection instead of USB. Remember that
even though you have a USB cable connected to the PC, the eblock creates a USB virtual
Serial Connection. So as far as Windows and its software, this is a serial connection. Open
MFDeploy and select serial instead of USB then check what COM ports are available.
Let's say we have COM1, COM2 and COM5. Now, close MFDeploy, disconnect the USB
cable from Serial-to-USB eblock and re-open MFDeploy and check the ports again. You
will notice that one of them is missing. That one is then the one we need, which is the
eblock virtual serial port. For example, if I now have COM1 and COM2 but no longer have
COM5 then COM5 is the one associated with the eblock. We now can use COM5 (in our
example) to ping FEZ Panda from MFDeploy. You should see TinyCLR back, just like we
did before with USB. If not, go back and check all steps before proceeding. Note that the
USB cable going to the eblock doesn't power FEZ Panda so you need to power it up using
a power supply or the second USB cable included in the kit.
Once we can ping FEZ Panda from MFDeploy to verify a good debugging connection,
copy this code to your project.
using
using
using
using
using
System;
System.Threading;
System.Text;
Microsoft.SPOT;
Microsoft.SPOT.Hardware;
using GHIElectronics.NETMF.FEZ;
using GHIElectronics.NETMF.Net;
using GHIElectronics.NETMF.Net.NetworkInformation;
using GHIElectronics.NETMF.USBClient;
public class Program
{
public static void Main()
{
// start the mouse
USBC_Mouse mouse = USBClientController.StandardDevices.StartMouse();
byte[]
byte[]
byte[]
byte[]
ip = { 192, 168, 1, 176 };
subnet = { 255, 255, 255, 0 };
gateway = { 192, 168, 1, 1 };
mac = { 0x00, 0x88, 0x98, 0x90, 0xD4, 0xE0 };
Join our community at www.TinyCLR.com
Page 56 of 81
Rev.1.20
GHI Electronics,LLC
.NET & Internet of Things
Remote Mouse Prank
WIZnet_W5100.Enable(SPI.SPI_module.SPI1, (Cpu.Pin)FEZ_Pin.Digital.Di10,
(Cpu.Pin)FEZ_Pin.Digital.Di7, true);
NetworkInterface.EnableStaticIP(ip, subnet, gateway, mac);
NetworkInterface.EnableStaticDns(gateway);
// start server
HttpListener listener = new HttpListener("http", 80);
listener.Start();
while (true)
{
HttpListenerResponse response = null;
HttpListenerRequest request = null;
HttpListenerContext context = null;
try
{
context = listener.GetContext();
response = context.Response;
request = context.Request;
// The button is pressed
if (request.HttpMethod == "POST")
{
if (request.ContentLength64 > 0)
{
// read te radio value
byte[] buffer = new byte[(int)request.ContentLength64];
request.InputStream.Read(buffer, 0, buffer.Length);
string move = new string(Encoding.UTF8.GetChars(buffer));
// now we have "Move=Up" for example, let's get the "Up"
int index = move.IndexOf('=');
move = move.Substring(index + 1);
switch (move)
{
case "Up":
mouse.SendData(0, -100, 0, USBC_Mouse.Buttons.BUTTON_NONE);
break;
case "Down":
mouse.SendData(0, 100, 0, USBC_Mouse.Buttons.BUTTON_NONE);
break;
case "Right":
mouse.SendData(100, 0, 0, USBC_Mouse.Buttons.BUTTON_NONE);
break;
case "Left":
mouse.SendData(-100, 0, 0, USBC_Mouse.Buttons.BUTTON_NONE);
break;
case "Random":
mouse.SendData(100, 0, 0, USBC_Mouse.Buttons.BUTTON_NONE);
Thread.Sleep(100);
mouse.SendData(0, 100, 0, USBC_Mouse.Buttons.BUTTON_NONE);
Thread.Sleep(100);
mouse.SendData(-100, 100, 0,
USBC_Mouse.Buttons.BUTTON_NONE);
Thread.Sleep(100);
break;
}
}
Join our community at www.TinyCLR.com
Page 57 of 81
Rev.1.20
GHI Electronics,LLC
.NET & Internet of Things
Remote Mouse Prank
}
// Sends response
response.StatusCode = (int)HttpStatusCode.OK;
byte[] HTML = Encoding.UTF8.GetBytes(
"<html>" +
"<body>" +
"<h1>What is happening to my mouse?</h1>" +
"Select:" +
"<form action='' method='post'>" +
"<input type='radio' name='Move' value='Up' />Mouse Up</input> <br/>" +
"<input type='radio' name='Move' value='Down' />Mouse Down</input>
<br/>" +
"<input type='radio' name='Move' value='Left' />Mouse Left</input>
<br/>" +
"<input type='radio' name='Move' value='Right' />Mouse Right</input>
<br/>" +
"<input type='radio' name='Move' value='Random' />Mouse Random</input>
<br/>" +
"<br/>" +
"<input type='submit' value='Send' />" +
"</form>" +
"</body>" +
"</html>"
);
response.ContentType = "text/html";
response.OutputStream.Write(HTML, 0, HTML.Length);
response.Close();
}
}
}
catch
{
if (context != null)
{
context.Close();
}
}
}
Make sure you have the following assemblies in references:
•
•
•
•
•
•
•
•
FEZPanda_II_GHIElectronics.NETMF.FEZ
GHIElectronics.NETMF.Hardware
GHIElectronics.NETMF.USBClient
GHIElectronics.NETMF.W5100
GHIElectronics.NETMF.W5100.Http
Microsoft.SPOT.Hardware
Microsoft.SPOT.Native
mscorelib
Join our community at www.TinyCLR.com
Page 58 of 81
Rev.1.20
GHI Electronics,LLC
.NET & Internet of Things
Remote Mouse Prank
Run the project and windows will now detect a USB mouse. This USB Mouse is actually
FEZ Panda presenting itself to the PC as a USB Mouse. We can now try the web page
hosted from FEZ. Open the browser like in the last project and enter FEZ's IP address.
You should see something similar to this image:
Select one of the radio buttons and click submit. You will notice the mouse moving on the
screen. You can now hide FEZ Panda behind the PC and then move the mouse remotely
from the phone's browser, a fun way to drive someone crazy!
Join our community at www.TinyCLR.com
Page 59 of 81
Rev.1.20
GHI Electronics,LLC
.NET & Internet of Things
Sensor Monitoring
10. Sensor Monitoring
With the “Internet of Things” catching on so
quickly, we are starting to see websites that
have services dedicated for “things”. A good
example is ThingSpeak which is a free
website that lets you upload sensor
information to the server and then this data
can be retrieved or charted later for analysis.
In this project, we will see how to periodically
read the thermometer and light sensor
eblocks and publish the data to ThingSpeak.
Start by connecting the thermometer eblock to An2 and the light sensor to An3. This is
everything we need for hardware but we still need to do some setup on
www.ThingSpeak.com.
Once you sign up, you'll be redirected to the
Channels page. Now we need to create a channel
that we can publish our data to. This is done by
clicking “Create New Channel” which will bring up
the channel form. For Name let's put "FEZ
Temp/Light" and for the Description add
"Temperature and light intensity." Since this project
publishes two pieces of data, We'll need to use two
fields. Label Field1 "Temperature" and then click
add field next to Field2 and set it as "Light
Intensity." Finally, click Update Channel to save
your changes.
Join our community at www.TinyCLR.com
Page 60 of 81
Rev.1.20
GHI Electronics,LLC
.NET & Internet of Things
Sensor Monitoring
After saving, you should land on the channel you
created. In the data table below is your Write API
Key. Copy the key value and overwrite the key
variable (<YourThingSpeakKey>) in Visual Studio.
Copy the code below into a project and run it. As it
runs you will see the Debug.Print output every 30
seconds of the data being sent to ThinkSpeak.
Make sure you have the following assemblies in
references:
•
•
•
•
•
•
•
•
•
using
using
using
using
using
using
using
using
using
using
FEZPanda_II_GHIElectronics.NETMF.FEZ
GHIElectronics.NETMF.Hardware
GHIElectronics.NETMF.USBClient
GHIElectronics.NETMF.W5100
GHIElectronics.NETMF.W5100.Dhcp
GHIElectronics.NETMF.W5100.Http
Microsoft.SPOT.Hardware
Microsoft.SPOT.Native
mscorelib
System;
System.IO;
System.Threading;
System.Text;
Microsoft.SPOT;
Microsoft.SPOT.Hardware;
GHIElectronics.NETMF.FEZ;
GHIElectronics.NETMF.Hardware;
GHIElectronics.NETMF.Net;
GHIElectronics.NETMF.Net.NetworkInformation;
public class Program
{
static Thread thread;
static bool running;
static string url = "http://api.thingspeak.com/update";
static string key = "<YourThingSpeakChannelKey>";
static AnalogIn thermometer;
static AnalogIn lightSensor;
static int temp;
static int light;
public static void Main()
{
// Enable the Ethernet
WIZnet_W5100.Enable(SPI.SPI_module.SPI1, (Cpu.Pin)FEZ_Pin.Digital.Di10,
(Cpu.Pin)FEZ_Pin.Digital.Di7, true);
Dhcp.EnableDhcp(new byte[] { 0x00, 0x26, 0x1C, 0x7B, 0x29, 0xE8 }, "FEZ
Join our community at www.TinyCLR.com
Page 61 of 81
Rev.1.20
GHI Electronics,LLC
.NET & Internet of Things
Sensor Monitoring
Temp/Light");
// Show we've started by blinking the LED
int count = 0;
bool ledState = false;
OutputPort led = new OutputPort((Cpu.Pin)FEZ_Pin.Digital.LED, ledState);
while (count < 20)
{
ledState = !ledState;
led.Write(ledState);
count++;
Thread.Sleep(100);
}
// Initialize the eblocks
thermometer = new AnalogIn((AnalogIn.Pin)FEZ_Pin.AnalogIn.An2);
thermometer.SetLinearScale(-22, 56);
lightSensor = new AnalogIn((AnalogIn.Pin)FEZ_Pin.AnalogIn.An3);
lightSensor.SetLinearScale(0, 100);
// Begin sampling the temperature
running = true;
thread = new Thread(MainLoop);
thread.Priority = ThreadPriority.Highest;
thread.Start();
}
public static void MainLoop()
{
string result;
while (running)
{
temp = thermometer.Read();
light = lightSensor.Read();
// Convert to Fahrenheit
temp = ((temp * 9) / 5) + 32;
Debug.Print("Temperature: " + temp + " F");
// Swap the intensity making zero complete darkness
light = 100 - light;
Debug.Print("Brightness: " + light + "%");
+ light);
// ThingSpeak will respond with an Entry ID
result = SendToThingSpeak(url + "?key=" + key + "&field1=" + temp + "&field2="
Debug.Print("Entry ID: " + result);
}
Thread.Sleep(30000);
}
public static string SendToThingSpeak(string url)
{
string result = null;
// Create an HTTP Web request.
HttpWebRequest request = HttpWebRequest.Create(url) as HttpWebRequest;
// Set request.KeepAlive to use a persistent connection.
request.KeepAlive = true;
// Get a response from the server.
WebResponse resp = null;
try
Join our community at www.TinyCLR.com
Page 62 of 81
Rev.1.20
GHI Electronics,LLC
.NET & Internet of Things
Sensor Monitoring
{
resp = request.GetResponse();
}
catch (Exception e)
{
Debug.Print("Exception in HttpWebRequest.GetResponse(): " + e.ToString());
}
// Get the network response stream to read the page data.
if (resp != null)
{
Stream respStream = resp.GetResponseStream();
byte[] byteData = new byte[4096];
char[] charData = new char[4096];
int bytesRead = 0;
Decoder UTF8decoder = System.Text.Encoding.UTF8.GetDecoder();
int totalBytes = 0;
// allow 5 seconds for reading the stream
respStream.ReadTimeout = 5000;
// If we know the content length, read exactly that amount of
// data; otherwise, read until there is nothing left to read.
if (resp.ContentLength != -1)
{
for (int dataRem = (int)resp.ContentLength; dataRem > 0; )
{
Thread.Sleep(500);
bytesRead =
respStream.Read(byteData, 0, byteData.Length);
if (bytesRead == 0)
{
Debug.Print("Error: Received " + (resp.ContentLength - dataRem) + "
Out of " + resp.ContentLength);
break;
}
dataRem -= bytesRead;
// Convert from bytes to chars, and add to the page string.
int byteUsed, charUsed;
bool completed = false;
totalBytes += bytesRead;
UTF8decoder.Convert(byteData, 0, bytesRead, charData, 0, bytesRead,
true, out byteUsed, out charUsed, out completed);
result = result + new String(charData, 0, charUsed);
}
}
else
{
result = new String(System.Text.Encoding.UTF8.GetChars(byteData));
// Read until the end of the data is reached.
while (true)
{
// If the Read method times out, it throws an exception,
// which is expected for Keep-Alive streams because the
// connection isn't terminated.
try
{
Thread.Sleep(500);
bytesRead =
respStream.Read(byteData, 0, byteData.Length);
}
catch (Exception)
Join our community at www.TinyCLR.com
Page 63 of 81
Rev.1.20
GHI Electronics,LLC
.NET & Internet of Things
Sensor Monitoring
{
bytesRead = 0;
}
// Zero bytes indicates the connection has been closed by the server.
if (bytesRead == 0)
break;
int byteUsed, charUsed;
bool completed = false;
totalBytes += bytesRead;
UTF8decoder.Convert(byteData, 0, bytesRead, charData, 0, bytesRead,
true, out byteUsed, out charUsed, out completed);
result = result + new String(charData, 0, charUsed);
}
}
// Close the response stream. For Keep-Alive streams, the
// stream will remain open and will be pushed into the unused
// stream list.
resp.Close();
}
return result;
}
}
After allowing the program to run awhile, you'll be ready to view the data. ThingSpeak also
has charting tools which enable you to create a line, bar or column graph to visualize your
data, including many additional options.
You're now ready to expand upon our example or create a whole new project. For
example, ever ask yourself, “Did I close the garage door?” You can now answer that
question. Using a light sensor and distance detector you can reasonably record when your
garage door is open or closed. Simply log into ThingSpeak to check! Just imagine all the
information you can collect and access from the internet.
Join our community at www.TinyCLR.com
Page 64 of 81
Rev.1.20
GHI Electronics,LLC
.NET & Internet of Things
FEZ-Telnet
11. FEZ-Telnet
Telnet is very simple but very powerful. It is basically a TCP connection between 2 nodes
and works very well like a terminal software. There are many applications that support
Telnet for PCs and for mobile phones. We will run the tests on “Moca Telnet Lite”, a free
iPhone app, and on TeraTerm on PC. TeraTerm is a free software that GHI uses for
firmware update and it is also recommended for development. Even though it is mostly
used with serial connections, it can also work over the network, Telnet.
FEZ will be the server, waiting for client requests to handle specific tasks. We need to run
a listening socket and wait for connection. A new thread is spawned for every connection
so you can actually have more than one connection. The “Process” method will look for
strings ending with enter key, that is '\r' for return. Once it detects the enter key, it will send
the command string to the “HandleCommand” method.
Note that whatever you enter on the Telnet client will be sent to the server but not
necessarily shown in the client side (your side). This is resolved by the server echoing the
data back to the client. In our code, this is done by entering “echo” command, which
toggles EchoIsEnabeled flag. The code also has “LED ON” and “LED OFF” commands so
try them out. Note that the LED is connected to Di5.
using
using
using
using
using
System;
System.Threading;
System.Text;
Microsoft.SPOT;
Microsoft.SPOT.Hardware;
using GHIElectronics.NETMF.FEZ;
using GHIElectronics.NETMF.Net;
using GHIElectronics.NETMF.Net.NetworkInformation;
using GHIElectronics.NETMF.Net.Sockets;
public static class MySocketServer
{
// Our LED eblock is connected to Di5
static OutputPort LED = new OutputPort((Cpu.Pin)FEZ_Pin.Digital.Di5, false);
public static void Main()
{
byte[] ip = { 192, 168, 1, 176 };
byte[] subnet = { 255, 255, 255, 0 };
byte[] gateway = { 192, 168, 1, 1 };
byte[] mac = { 0x00, 0x88, 0x98, 0x90, 0xD4, 0xE0 };
WIZnet_W5100.Enable(SPI.SPI_module.SPI1, (Cpu.Pin)FEZ_Pin.Digital.Di10,
(Cpu.Pin)FEZ_Pin.Digital.Di7, true);
Join our community at www.TinyCLR.com
Page 65 of 81
Rev.1.20
GHI Electronics,LLC
.NET & Internet of Things
FEZ-Telnet
NetworkInterface.EnableStaticIP(ip, subnet, gateway, mac);
NetworkInterface.EnableStaticDns(gateway);
// Our Listening socket
Socket server = new Socket(AddressFamily.InterNetwork, SocketType.Stream,
ProtocolType.Tcp);
// Telnet usually uses port 23
IPEndPoint localEndPoint = new IPEndPoint(IPAddress.Any, 23);
server.Bind(localEndPoint);
// start listening
server.Listen(1);
}
while (true)
{
// Wait for a client
Socket Sock = server.Accept();
new TelnetProcess(Sock);
}
internal sealed class TelnetProcess
{
byte[] prompt = Encoding.UTF8.GetBytes("\r\nFEZ >");
private Socket clientSocket;
bool EchoIsEnabeled = false;
public TelnetProcess(Socket Sock)
{
clientSocket = Sock;
// Spawn a new thread
new Thread(Process).Start();
}
private void HandleCommand(string cmd)
{
string str;
cmd = cmd.ToUpper();
switch (cmd)
{
case "ECHO":
EchoIsEnabeled = !EchoIsEnabeled;
clientSocket.Send(prompt);
str = "EchoIsEnabeled = " + EchoIsEnabeled;
clientSocket.Send(Encoding.UTF8.GetBytes(str), 0, str.Length,
SocketFlags.None);
break;
case "LED ON":
LED.Write(true);
clientSocket.Send(prompt);
str = "LED is now on";
clientSocket.Send(Encoding.UTF8.GetBytes(str), 0, str.Length,
SocketFlags.None);
break;
case "LED OFF":
LED.Write(false);
clientSocket.Send(prompt);
str = "LED is now off";
clientSocket.Send(Encoding.UTF8.GetBytes(str), 0, str.Length,
SocketFlags.None);
break;
}
}
private void Process()
Join our community at www.TinyCLR.com
Page 66 of 81
Rev.1.20
GHI Electronics,LLC
.NET & Internet of Things
FEZ-Telnet
{
byte[] command = new byte[100];
int index = 0;
using (clientSocket)
{
clientSocket.Send(prompt);
while (true)
{
if (clientSocket.Receive(command, index, 1, SocketFlags.None) == 0)
{
clientSocket.Close();
break;
}
if (command[index] == '\r')
{
// do we have some data?
string cmd = new string(Encoding.UTF8.GetChars(command), 0, index);
HandleCommand(cmd);
index = 0;
clientSocket.Send(prompt);
}
else if (command[index] >= 32 && command[index] <= 126)
{
// Echo back
if (EchoIsEnabeled)
clientSocket.Send(command, index, 1, SocketFlags.None);
}
}
}
index++;
if (index >= command.Length)
{
Debug.Print("We have too much data!");
index = 0;//dump it all
}
}
}
}
We can now use Telnet with a few lines of code. This image shows TeraTerm
communicating with FEZ:
Join our community at www.TinyCLR.com
Page 67 of 81
Rev.1.20
GHI Electronics,LLC
.NET & Internet of Things
FEZ-Telnet
If we want to read the temperature back from the device, we will add a command called
“temp” to return back the temperature form the included Temperature eblock.
Join our community at www.TinyCLR.com
Page 68 of 81
Rev.1.20
GHI Electronics,LLC
.NET & Internet of Things
You've got mail, and SMS
12. You've Got Mail, And SMS
In this project, we will create a piece of hardware that reports a door (opened/closed)
status through emails. This can be good starting point for a security system or a monitoring
system. Maybe you are monitoring the temperature in a warehouse and need a warning
email if the temperature is too high or too low. What if you don't have access to email, but
you had access to SMS through your phone? This is actually very easy. Each provider, has
a specific email that you can use as a gateway for SMS. For example, AT&T in the USA
uses [email protected] so if the phone number was 0123456789 then the email to
send an SMS is [email protected]. Contact your cellphone provider for details.
The program flow
1. The system is connected to the Ethernet network and it gets the network settings
automatically using DHCP feature.
2. It checks whether the date and time are set and sends an email if they are not.
3. After complete boot up, the system sends an email with the initial door state:
Subject: FEZ Door Monitor has booted up.
Body: The system booted up at 04/22/2011 10:54:28 and the door was opened.
4. The systems monitors the door and sends an email as soon as the status changes,
for example it sends and email with this message:
The Door was closed at: 04/22/2011 10:56:15
What we need
1. The main system is our FEZ Panda II board
2. Real Time Clock which is included with FEZ Panda II and is maintained by the onboard super capacitor included on FEZ Connect shield.
3. FEZ Connect shield.
4. A button eblock that we will use as a touch sensor. So when the door is closed the
button will be pressed. We are connecting it to Digital I/O Di2.
5. A LED eblock (optional) connected to Digital I/O Di8.
There are many methods of sending emails. In this project we will use the simplest and the
Join our community at www.TinyCLR.com
Page 69 of 81
Rev.1.20
GHI Electronics,LLC
.NET & Internet of Things
You've got mail, and SMS
most common method which is Simple Mail Transfer Protocol (SMTP). SMTP is an
application layer protocol of the Internet protocol suite. This protocol uses TCP protocol to
exchange data between the client and the server. Usually the SMTP server TCP port
number is 25.
Here is a simple dialog (from wikipedia) between the SMTP client (the party willing to send
the email) and the SMTP server (the party that handle sending the message):
•
•
•
•
•
•
•
•
•
•
•
•
•
•
•
•
•
•
•
•
•
•
•
•
S: 220 smtp.example.com ESMTP Postfix
C: HELO relay.example.org
S: 250 Hello relay.example.org, I am glad to meet you
C: MAIL FROM:<[email protected]>
S: 250 Ok
C: RCPT TO:<[email protected]>
S: 250 Ok
C: DATA
S: 354 End data with <CR><LF>.<CR><LF>
C: From: "Bob Example" <[email protected]>
C: To: "Alice Example" <[email protected]>
C: Cc: [email protected]
C: Date: Tue, 15 Jan 2008 16:02:43 -0500
C: Subject: Test message
C:
C: Hello Alice.
C: This is a test message.
C: Your friend,
C: Bob
C: .
S: 250 Ok: queued as 12345
C: QUIT
S: 221 Bye
{The server closes the connection}
So all we need to let our device send an email is to talk to the SMTP server the same way.
In other words:
1. Open a TCP Socket with the SMTP server at port 25.
2. Send the required information for the email as in the example.
3. Verify that the server understands what the device is sending.
4. Close the TCP Connection.
The following class does the SMTP Client part, Copy the code into a new file and add to
your project. Name the file SMTP.cs
Join our community at www.TinyCLR.com
Page 70 of 81
Rev.1.20
GHI Electronics,LLC
.NET & Internet of Things
You've got mail, and SMS
using
using
using
using
using
using
System;
Microsoft.SPOT;
System.Text;
GHIElectronics.NETMF.Net;
GHIElectronics.NETMF.Net.Sockets;
GHIElectronics.NETMF.Net.NetworkInformation;
public class SmtpClient
{
private string _SmtpServerName = null;
private int _Port = 0;
private enum SmtpState
{
NotConnected,
DomainAccepting,
MailFromAccepting,
RecipientAccepting,
DataCommandAccepting,
MessageAccepting,
ConnectionClosing
};
SmtpState state;
public SmtpClient(string SmtpServerName, Int32 Port)
{
if (Port < 0)
throw new ArgumentOutOfRangeException();
_SmtpServerName = SmtpServerName;
_Port = Port;
}
public void Send(string from, string recipient, string subject, string body)
{
state = SmtpState.NotConnected;
/* Connect to the Server*/
// Figure out the Server IP Address
IPHostEntry SmtpServerHostEntry = Dns.GetHostEntry(_SmtpServerName);
IPEndPoint SmtpServerEndPoint = new IPEndPoint(SmtpServerHostEntry.AddressList[0],
_Port);
// Establish the connection with SMTP Server
Socket SmtpConnection = new Socket(AddressFamily.InterNetwork, SocketType.Stream,
ProtocolType.Tcp);
SmtpConnection.Connect(SmtpServerEndPoint);
String ResponseStr = null;
while (SmtpConnection.Poll(5000000, SelectMode.SelectRead))
{
byte[] ReceiveBuffer = new byte[SmtpConnection.Available];
SmtpConnection.Receive(ReceiveBuffer, ReceiveBuffer.Length, SocketFlags.None);
// The first 3 bytes hold the message number which is enough for us.
ResponseStr = new String(Encoding.UTF8.GetChars(ReceiveBuffer), 0, 3);
int Response = Int16.Parse(ResponseStr);
switch (state)
{
case SmtpState.NotConnected:
if (Response == 220) // Domain service ready.
{
SmtpConnection.Send(Encoding.UTF8.GetBytes("HELO " +
from.Split(new char[] { '@' })[1] + "\r\n"));
state = SmtpState.DomainAccepting;
Join our community at www.TinyCLR.com
Page 71 of 81
Rev.1.20
GHI Electronics,LLC
.NET & Internet of Things
You've got mail, and SMS
">\r\n"));
+ ">\r\n"));
}
break;
case SmtpState.DomainAccepting:
if (Response == 250) // Requested mail action okay, completed.
{
SmtpConnection.Send(Encoding.UTF8.GetBytes("MAIL FROM:<" + from +
state = SmtpState.MailFromAccepting;
}
break;
case SmtpState.MailFromAccepting:
if (Response == 250) // Requested mail action okay, completed.
{
SmtpConnection.Send(Encoding.UTF8.GetBytes("RCPT TO:<" + recipient
state = SmtpState.RecipientAccepting;
}
break;
case SmtpState.RecipientAccepting:
if (Response == 250) // Requested mail action okay, completed.
{
SmtpConnection.Send(Encoding.UTF8.GetBytes("DATA\r\n"));
state = SmtpState.DataCommandAccepting;
}
break;
case SmtpState.DataCommandAccepting:
if (Response == 354) //Start mail input; end with <CRLF>.<CRLF>.
{
SmtpConnection.Send(Encoding.UTF8.GetBytes("Subject: " + subject +
"\r\n"));
"\r\n"));
"\r\n\r\n"));
SmtpConnection.Send(Encoding.UTF8.GetBytes("From: " + from +
SmtpConnection.Send(Encoding.UTF8.GetBytes("To: " + recipient +
SmtpConnection.Send(Encoding.UTF8.GetBytes(body + "\r\n"));
SmtpConnection.Send(Encoding.UTF8.GetBytes(".\r\n"));
state = SmtpState.MessageAccepting;
}
break;
case SmtpState.MessageAccepting:
if (Response == 250) // Requested mail action okay, completed.
{
SmtpConnection.Send(Encoding.UTF8.GetBytes("QUIT\r\n"));
state = SmtpState.ConnectionClosing;
}
break;
case SmtpState.ConnectionClosing:
if (Response == 221) // Requested mail action okay, completed.
{
SmtpConnection.Close();
return;
}
break;
}
}
SmtpConnection.Close();
throw new Exception("SMTP connection Timeout");
}
}
Now we are ready to complete our email based door monitor. Here is the complete
Join our community at www.TinyCLR.com
Page 72 of 81
Rev.1.20
GHI Electronics,LLC
.NET & Internet of Things
You've got mail, and SMS
project's main program:
using
using
using
using
using
using
using
System;
System.Threading;
Microsoft.SPOT;
Microsoft.SPOT.Hardware;
GHIElectronics.NETMF.Hardware;
GHIElectronics.NETMF.Net;
GHIElectronics.NETMF.Net.NetworkInformation;
using GHIElectronics.NETMF.FEZ;
// This application uses the drivers button.cs and lcd.cs provided by GHI Electronics for
faster developing.
// The user can use different methods to read the button such as InterruptPort class and
OutputPort Class to control the LED.
public class Program
{
static public SmtpClient mySmtp;
static public FEZ_Components.Button DoorSensor = new
FEZ_Components.Button(FEZ_Pin.Interrupt.Di2);
static public FEZ_Pin.Interrupt DoorSensorPin = FEZ_Pin.Interrupt.Di2;
static public FEZ_Components.LED Indicator = new
FEZ_Components.LED(FEZ_Pin.Digital.Di8);
static public bool IsTimeSet = false;
public static void Main()
{
byte[] SetTimeFlag_helper = new byte[4];
/*a simple application to set the time and date
RealTimeClock.SetTime(new DateTime(2011, 04, 22, 10, 14, 00, 0));
// We will save a flag in RTC Battery RAM indicating that we set the time
SetTimeFlag_helper[0] = 1;
BatteryRAM.Write(0, SetTimeFlag, 0, 4);
Thread.Sleep(Timeout.Infinite);
*/
try
{
WIZnet_W5100.Enable(SPI.SPI_module.SPI1, (Cpu.Pin)FEZ_Pin.Digital.Di10,
(Cpu.Pin)FEZ_Pin.Digital.Di7, true);
Dhcp.EnableDhcp(new byte[] { 0x00, 0x26, 0x1C, 0x7B, 0x29, 0xE8 },
"FEZ_SMTP");
Debug.Print("Network settings:");
Debug.Print("IP Address: " + new
IPAddress(NetworkInterface.IPAddress).ToString());
Debug.Print("Subnet Mask: " + new
IPAddress(NetworkInterface.SubnetMask).ToString());
Debug.Print("Default Getway: " + new
IPAddress(NetworkInterface.GatewayAddress).ToString());
Debug.Print("DNS Server: " + new
IPAddress(NetworkInterface.DnsServer).ToString());
mySmtp = new SmtpClient("smtp.comcast.net", 25);
// In our application we saved this SetTimeFlag[0] to 1 when we set the
correct time and date.
BatteryRAM.Read(0, SetTimeFlag_helper, 0, 4);
Join our community at www.TinyCLR.com
Page 73 of 81
Rev.1.20
GHI Electronics,LLC
.NET & Internet of Things
You've got mail, and SMS
if (SetTimeFlag_helper[0] == 1)
IsTimeSet = true;
if (IsTimeSet)// The time and date are still set correctly in the Real Time
Clock and we can use it in our application
{
// Set system's clock
Utility.SetLocalTime(RealTimeClock.GetTime());
Indicator.StartBlinking(1000, 1000); // This means that the led will
blink every one second. This tells the user that the system's time and date are still set
correctly.
}
else // This means that the Real Time Clock has lost power, so the time and
date need to be set again by the user.
{
mySmtp.Send("[email protected]", "[email protected]", "The
date and time are not set", "The date and dime are not set, please set the correct time and
date.\n");
Indicator.StartBlinking(50, 50); // This will let the led blink fast to
tell the user that the time and date are not set.
}
mySmtp.Send("[email protected]",
"[email protected]",
"FEZ door Monitor has booted up",
"The system booted up at " + (IsTimeSet ?
DateTime.Now.ToString() : "time is invalid") + "and the door was " + (DoorSensor.GetState()
== FEZ_Components.Button.ButtonState.Pressed ? "closed\n" : "opened"));
DoorSensor.ButtonPressEvent += new
FEZ_Components.Button.ButtonPressEventHandler(DoorSensor_ButtonPressEvent);
Thread.Sleep(Timeout.Infinite);
}
catch
{
Indicator.StartBlinking(100, 1000); // This means that something wrong has
happened and the system is not currently working.
Thread.Sleep(Timeout.Infinite);
}
}
static void DoorSensor_ButtonPressEvent(FEZ_Pin.Interrupt pin,
FEZ_Components.Button.ButtonState state)
{
if (pin == DoorSensorPin)
{
if (state == FEZ_Components.Button.ButtonState.NotPressed)
{
mySmtp.Send("[email protected]",
"[email protected]",
"FEZ Door Monitor",
"The door was opened at: " + (IsTimeSet ?
DateTime.Now.ToString() : "time is invalid") + "\n");
}
else
{
mySmtp.Send("[email protected]",
"[email protected]",
"FEZ Door Monitor",
Join our community at www.TinyCLR.com
Page 74 of 81
Rev.1.20
GHI Electronics,LLC
.NET & Internet of Things
You've got mail, and SMS
"The door was closed at: " + (IsTimeSet ?
DateTime.Now.ToString() : "time is invalid") + "\n");
}
}
}
}
Important note: The sender's email address should be a real address or the server will
refuse to send the message.
We now can change the email address with the SMS gateway's email and the email will be
transmitted as a SMS message.
What is next?
1. Develop an NTP (Network Time Protocol) client to get the correct time from the
internet and feed it to the real time clock.
2. Add other kinds of sensors to report other information through emails.
3. Add an attachment feature.
Join our community at www.TinyCLR.com
Page 75 of 81
Rev.1.20
GHI Electronics,LLC
.NET & Internet of Things
FEZmote- Internet TV-Remote
13. FEZmote- Internet TV-Remote
How many times have you looked for the TV remove and you couldn't find it? How many
remotes do you have in your living room? Since you probably own a smart phone which is
always in your pocket, wouldn't it be great if you could open up the web browser and
change the station or the volume on your TV? Even better, the same smart phone can
control the satellite receiver? Well, here is how to make one!
This project can be divided into smaller parts:
1. Learn the original remote signal and record it.
2. Replay the recorded signal to simulate the original remote.
3. Use a web page to control the signal.
Part 3 above is very similar to the earlier “screamer” project. I will not cover this here but I
will show you how to record a TV remote signal and how to play it back.
Digital Signal Recording
The TV remotes usually transmit an Infrared signal with a 38KHz carrier frequency. The
Infrared eblock filters out the carrier giving us the actual remote signal, which is exactly
what we need. FEZ is very well capable of decoding the signal. This means FEZ can tell
when the mute button is pressed for example. This won't be necessary for this project.
FEZ will record the signal and play it back later without knowing what is in the signal.
GHI NETMF devices include a class called PinCapture which takes an int array and
records the time between any transitions on a pin. For the remote demo, 100 samples
should be enough but let's get 300 samples. Here is the code to record the signal on pin
Di2 when a button is pressed on Di3. There is also an LED on Di5 which lights up when
FEZ is recording.
using
using
using
using
System;
System.Threading;
Microsoft.SPOT;
Microsoft.SPOT.Hardware;
using GHIElectronics.NETMF.Hardware;
using GHIElectronics.NETMF.FEZ;
public class Program
{
Join our community at www.TinyCLR.com
Page 76 of 81
Rev.1.20
GHI Electronics,LLC
.NET & Internet of Things
FEZmote- Internet TV-Remote
static PinCapture cap = new PinCapture((Cpu.Pin)FEZ_Pin.Digital.Di2,
Port.ResistorMode.Disabled);
static uint[] buffer = new uint[300];
static OutputPort LED = new OutputPort((Cpu.Pin)FEZ_Pin.Digital.Di5, false);
public static void Main()
{
InterruptPort Button = new InterruptPort((Cpu.Pin)FEZ_Pin.Interrupt.Di3, true,
Port.ResistorMode.PullUp, Port.InterruptMode.InterruptEdgeLow);
// Add a button event
Button.OnInterrupt += new NativeEventHandler(Button_OnInterrupt);
Thread.Sleep(Timeout.Infinite);
}
static void Button_OnInterrupt(uint data1, uint data2, DateTime time)
{
Debug.Print("Capturing...");
LED.Write(true);
// button was pressed
int edges = cap.Read(false, buffer, 0, buffer.Length, 3000);
if (edges == 0)
{
Debug.Print("Nothing was captured");
}
else
{
Debug.Print("We have " + edges + " edges");
for (int i = 0; i < edges; i++)
{
Debug.Print("Edge #" + i + "= " + buffer[i]);
}
}
LED.Write(false);
}
}
Join our community at www.TinyCLR.com
Page 77 of 81
Rev.1.20
GHI Electronics,LLC
.NET & Internet of Things
FEZmote- Internet TV-Remote
Signal Playback
Another unique feature of GHI's NETMF devices is OutputCompare, which helps in
generating digital waveforms. We want to take the signals recorded earlier and pass it
on to OutputCompare for playback. The challenge here is in generating the 38KHz
carrier frequency. This can be done with PWM but then we will need a PWM pin for the
carrier plus a free pin for signal. Not to worry, the OutputCompare has a built-in carrier
frequency generator.
In this example code, we will use the button to playback the signal. If the button is held
down for 5 seconds then FEZ goes into recording mode and the LED comes on. We will
take the same setup from before and add an IrLED eblock to Di8.
The steps are simple:
1. Press and hold the button eblock for 5 seconds till the Red LED comes on. Quickly
do the next step as FEZ will timeout in 3 seconds.
2. Bring the TV remote and face it to the 32KHz infrared receiver eblock. Hit one of the
buttons you want to learn.
3. Once FEZ learns the one button on the remote then the Red LED shuts off.
4. Press and release the button eblock and FEZ will transmit the learned signal.
using
using
using
using
System;
System.Threading;
Microsoft.SPOT;
Microsoft.SPOT.Hardware;
using GHIElectronics.NETMF.Hardware;
using GHIElectronics.NETMF.FEZ;
public class Program
{
static PinCapture cap = new PinCapture((Cpu.Pin)FEZ_Pin.Digital.Di2,
Port.ResistorMode.Disabled);
static OutputPort LED = new OutputPort((Cpu.Pin)FEZ_Pin.Digital.Di5, false);
static OutputCompare RemoteGenerator = new OutputCompare((Cpu.Pin)FEZ_Pin.Digital.Di8,
false, 300);
static uint[] buffer = new uint[300];
static int edges;
static Timer ButtonTimer = new Timer(new TimerCallback(ButtonTimerHandler), null, -1,
-1);
public static void Main()
{
InterruptPort Button = new InterruptPort((Cpu.Pin)FEZ_Pin.Interrupt.Di3, true,
Port.ResistorMode.PullUp, Port.InterruptMode.InterruptEdgeBoth);
// Add a button event
Button.OnInterrupt += new NativeEventHandler(Button_OnInterrupt);
Thread.Sleep(Timeout.Infinite);
Join our community at www.TinyCLR.com
Page 78 of 81
Rev.1.20
GHI Electronics,LLC
.NET & Internet of Things
FEZmote- Internet TV-Remote
}
}
static void ButtonTimerHandler(object o)
{
Debug.Print("Programming mode");
Debug.Print("Press and hold a button on the TV remote");
LED.Write(true);
edges = cap.Read(false, buffer, 0, buffer.Length, 3000);
if (edges == 0)
{
Debug.Print("Nothing was captured!");
}
else
{
Debug.Print("We have " + edges + " edges");
}
LED.Write(false);
Debug.Print("Done programing!");
}
static void Button_OnInterrupt(uint port, uint state, DateTime time)
{
if (state == 0)//pressed
{
ButtonTimer.Change(5000, -1);
}
else
{
ButtonTimer.Change(-1, -1);
//send the signal
LED.Write(true);
Debug.Print("Send TV signal");
RemoteGenerator.SetBlocking(true, buffer, 0, edges, 100, true, 38000);
LED.Write(false);
}
}
Note that the IrLED eblock uses a tiny LED. You will need to be close to the TV for it to
work. If desired, an experienced user can modify the eblock with a transistor and a high
power IrLED.
We Need More
The project needs to be expanded to learn multiple buttons. Also, the recorded signals
should be stored on the SD card. You can even use the touch display to create a fancy
full color display universal remote control.
Join our community at www.TinyCLR.com
Page 79 of 81
Rev.1.20
GHI Electronics,LLC
.NET & Internet of Things
Using FEZ Touch
14. Using FEZ Touch
GHI provides drivers for the color display and for the touch interface. A sample "paint"
application demonstrates the driver and the touch interface.
http://code.tinyclr.com/project/277/fez-touch-lcd-component/
Join our community at www.TinyCLR.com
Page 80 of 81
Rev.1.20
GHI Electronics,LLC
.NET & Internet of Things
What is next?
15. What Is Next?
One important place to always visit is this page that has all the
resources needed and many tutorial links:
http://www.tinyclr.com/support
This is a list of other resources that should help in your next invention!
•
•
•
•
•
•
•
•
•
The official FEZ website with all the fun:
http://www.tinyclr.com/
GHI blog is always a good place to visit:
http://ghielectronics.blogspot.com
The GHI community wiki:
http://wiki.tinyclr.com
The GHI community code share:
http://code.tinyclr.com
Facebook:
http://www.facebook.com/pages/GHI-Electronics/201366383211427
Twitter:
http://twitter.com/GHIElectronics
YouTube:
http://www.youtube.com/GHIElectronics
A good and free eBook to continue learning about C# is available at:
http://www.programmersheaven.com/2/CSharpBook
Microosft's .NET Micro Framework community:
http://www.netmf.com/
Join our community at www.TinyCLR.com
Page 81 of 81
Rev.1.20