1
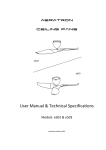
User Manual & Technical Specifications Models: AE2 & AE3 43”/1092mm > 50”/1270mm > 60”/1524mm LED Light Kit & Ceiling Extension Kit is optional for all AE2 & AE3 Aeratron™ models Attention Electricians: YOU MUST TEST THE FAN MOTOR PRIOR TO INSTALLING THE MOTOR HOUSING AND BLADES. FOR ANY PROBLEMS FOUND DURING FAN INSTALLATION PLEASE CONTACT THE NATIONAL DISTRIBUTOR/RETAILER PRIOR TO LEAVING THE SITE. THIS FAN MUST BE INSTALLED BY A LICENCED AND QUALIFIED ELECTRICIAN IN ACCORDANCE WITH LOCAL AUTHORITY REGULATIONS International Edition 2015 >> IMPORTANT INFORMATION - PLEASE READ BEFORE ATTEMPTING INSTALLATION 1. Please read these instructions carefully, be mindful of all warnings and safety information shown throughout this manual. Should you have any questions please call your local agent. 2. Please review the accompanying assembly diagrams before attempting installation. 3. This fan MUST be installed by a licensed & qualified electrician according to local authority regulations and in accordance with current wiring rules of the country/state. 4. A copy of the purchasing receipt and proof of installation by a licensed and qualified electrician according to local authority regulations is required for all warranty claims. 5. Where special access equipment is required to service the fan in accordance with local authority regulations all associated costs are the responsibility of the owner. 6. Should a warranty claim be required, we reserve the right to charge a service fee for all call outs where the fan is found not to be defective and / or where access is not provided. 7. To enable future programming, maintenance, cleaning and troubleshooting an isolation switch per fan is highly recommended. Without an isolation switch per fan, an electrician maybe required to assist with programming, maintenance, cleaning and troubleshooting. All associated costs are the responsibility of the owner. 8. A Maximum of 8 fans on each RCD / circuit is recommended. The fans are a Class 5 Device with leakage to Earth. 9. Your warranty will be void if a solid state dimmer or any other brand of wall controller is used. 10. The means for mains power disconnection must be incorporated in the fixed wiring in accordance with national wiring rules. 11. To avoid possible electric shock during installation, be sure electricity is turned off at the main power box before commencing work. Disconnect power by removing fuse or turning off circuit breaker before installing the fan. Ensure all spliced connections are adequately insulated. 12. Warning! Do not allow the rotating fan blades to come into contact with any object, this can cause serious injury or death. 13. Damage caused by incorrect installation, Force-majeure, lightning, electrical surges & spikes, exposure to water, pests or moisture is not covered under warranty. Australia, New Zealand: In accordance with AS/NZS60355-1 & ASNZS60355-2-80: “This appliance is not intended for use by persons (including children) with reduced physical, sensory or mental capabilities, or lack of experience and knowledge, unless they have been given supervision or instruction concerning use of the appliance by a person responsible for their safety. Children should be supervised to ensure that they do not play with the appliance.” 2 - – - >> Instructions ................................................................................................................................................................ 4 General precautions .............................................................................................................................................. 4 Location and installation requirements for your fan ............................................................................................. 4 Mechanical issues .................................................................................................................................................. 5 Electrical issues ...................................................................................................................................................... 5 Unpacking your fan ................................................................................................................................................... 6 Checking ceiling condition and preparing for fan installation ................................................................................... 7 Installing Remote Control Receiver into hanger bracket ...................................................................................... 8 Preparing Fan Motor Housing ............................................................................................................................... 9 Remote Control Set-up ............................................................................................................................................ 10 Code match the Transmitter (Hand held) with the Receiver............................................................................... 10 Attaching Fan Motor Housing to Motor Assembly .................................................................................................. 11 Closing Screw Cover ................................................................................................................................................ 11 Fan Blades and Middle Piece Assembly ................................................................................................................... 12 AE2....................................................................................................................................................................... 12 AE3....................................................................................................................................................................... 13 Fan Blades to Shaft Assembly .................................................................................................................................. 14 LED Light (optional) ................................................................................................................................................. 15 Ceiling Extension (optional) ..................................................................................................................................... 15 Raked Ceiling Options .............................................................................................................................................. 16 Raked Ceiling with Extension Kit ............................................................................................................................. 16 Technical specifications ........................................................................................................................................... 17 AE2 and AE3......................................................................................................................................................... 17 Dimensions for Model ......................................................................................................................................... 17 Care & Cleaning ....................................................................................................................................................... 18 TROUBLE SHOOTING ............................................................................................................................................... 18 If the fan is noisy .................................................................................................................................................. 18 If the fan rotates but does not create much airflow ........................................................................................... 18 General Information ................................................................................................................................................ 19 Normal Wear and Tear. ....................................................................................................................................... 19 Ceiling Fan Warranty. .......................................................................................................................................... 19 Transfer of Warranty. .......................................................................................................................................... 20 The following is NOT covered by warranty.......................................................................................................... 20 Aeratron ceiling fan warranty details .................................................................................................................. 21 3 - – - >> Instructions Thank you for choosing an Aeratron™ Ceiling Fan. You have chosen the best! LED Light Kit & Ceiling Extension Kit is optional for all AE2 & AE3 Aeratron™ models. We feel confident that your new ceiling fan will provide you many years of enjoyment. General precautions Please read and follow these instructions carefully, and be mindful of all warnings shown throughout this manual. This fan must be installed by a licensed and qualified electrician according to local authority regulations. Be cautious! Read all instructions and safety information, and review the accompanying assembly diagrams before installing your new fan. This appliance is not intended for use by persons (including children) with reduced physical, sensory or mental capabilities, or lack of experience and knowledge, unless they have been given supervision or instruction concerning use of the appliance by a person responsible for their safety. Children should be supervised to ensure that they do not play with the appliance. Location and installation requirements for your fan To provide adequate clearance from the floor the lowest point on the fan blades must be at least 2.1m (83”) from the floor in Australia, and at least 2.3m (91”) from the floor in the European Union and affiliated countries. Note: For a fan mounted directly to the ceiling, the lowest point of the fan blade is approximately 300mm (113/16”) below the ceiling. Make sure that the chosen location of the fan will not allow the rotating fan blades to come into contact with any object. 4 - – - >> Ensure ceiling joists are sound and of adequate size and strength to support a 35Kg (77lbs) load. To reduce the risk of fire, electrical shock or personal injury, ensure that the fan mounting bracket is supported directly from the building structure. DO NOT mount to an outlet box. The mounting bracket must be firmly screwed to a load bearing structure e.g. a concrete ceiling, steel structure or timber frame. If a timber frame is to be added it must be securely nailed or screwed between two beams. Mounting boxes must be embedded in concrete or other load bearing material. Mechanical issues Do not remove the fan from the ceiling after installation. Do not attach the Fan Assembly before the Fan Motor Housing is installed and secured. To protect the finish, the Fan Motor Housing should be kept in the carton until ready to be installed. After the fan is completely installed, check to make sure that all connections are secure to prevent the fan from falling and/or causing damage or injury. To reduce the risk of personal injury, do not bend or damage the motor Drive Shaft or Fan Assembly when handling or installing Aeratron fans are equipped with a self-balancing system and do not require manual balancing! Electrical issues ! Means for disconnection must be incorporated in the fixed wiring in accordance with national wiring rules! We highly recommend installing the fan with an on/off switch so that the current to the fan receiver can be turned off by this switch. The fan can be used with a wall control and in conjunction with most home automation systems. Extra electronics are required; please contact your fan supplier for further information. To avoid possible electric shock during installation, be sure electricity is turned off at the main power box before commencing work. Disconnect power by removing fuse or turning off circuit breaker before installing the fan. Ensure all spliced connections are adequately insulated. Note: Nothing in this manual is intended to instruct or assist untrained or unqualified persons to install this product. Additionally, it is the responsibility of the installer and user to apply common sense and care at all times. 5 - – - >> Unpacking your fan Unpack your fan and check the contents. Do not discard the carton. If warranty replacement or repair is ever necessary, the fan should be returned in the original packaging. Examine all parts. You should have the following: Hanger Bracket Motor Assembly Control Receiver Motor Housing Hanger Bracket Fastener Control Transmitter 2 x AAA Batteries NOTE: Wall control and Home Automation control components are not included; please contact your local fan supplier for more information. OR HUB SCREW x 10 6 - – - >> Checking ceiling condition and preparing for fan installation Before commencing installation, turn off electricity supply at the main power box. Disconnect power by removing fuse or turning off circuit breaker. Installation mounted to Ceiling Joist or Embedded Mounting Box Install mounting bracket to ceiling joist or Mounting Box embedded in concrete using the screws and washer provided. The mounting plate should be able to hold a weight of at least 35kg (77lbs). NOTE: Proper care must be taken when mounting to concrete ceilings. For safe mounting these ceilings may require plastic plugs / anchors and stronger screws. Preparing Fan Motor Assembly Remove one Motor housing fixing Screw, and put it aside for re-assembly with Fan Motor Housing later Adjust remaining two Motor housing screws to provide clearance for installing the Motor Housing 7 - – - >> Installing Remote Control Receiver into hanger bracket Note: Installing more than 1 Fan! Power up each Receiver and code match before installation (see page 10) Slide Remote Control Receiver into Hanger Bracket from the opposite side of the Terminal block in the orientation as shown above After installing receiver, readjust Fan Motor assembly ensure the drive shaft is vertical 8 - – - >> Connect LIVE, GROUND and NEUTRAL from Mains Power (House) to Terminal Block. Connect LIVE, GROUND and NEUTRAL from Remote Control Receiver to Terminal Block. Plug the 8-Pin connector from the DC Motor into the 8-Pin connector from the Receiver. Plug the 2-Pin connector from the DC Motor into the 2-Pin connector from the Receiver. (Connecting the 2-pin connector now, will allow an easy retrofit of the LED light kit at any time) NOTE: ensure that the 8-pin connector is fully engaged! If not connected correctly the motor may rotate “jagged” or not rotate at all. !!TEST MOTOR NOW (refer to page 10) before mounting the motor housing!! Preparing Fan Motor Housing Ensure that Motor Housing Screw Covers are in full open position 9 - – - >> Remote Control Set-up ! Note: Code matching is required even if the remote control may control the fan out of the box ! Code match the transmitter with the receiver Note: receiver itself has NO DIP switch. Set your Dip Switch to control individual fan(s) (one per fan handset) and only power to one fan receiver per time. Chose same code setting for up to 8 fans controlled by one handset within a 7m (23’) radius with power to all fans. Dip Switch Speed Remote Control Code Setting Up 1-2-3-4-5-6 Down 6-5-4-3-2-1 To start the fan press speed button To change speed of fan press or (indicated by a short buzzer sound) LCD indicates maximal speed (max) On/Off Press the button to start or switch off the fan Forward Reverse For cooling effect and in combination with Air Condition System (clockwise rotation) To support heating system to exchange temperature (counter clockwise rotation) Light Press the button to turn on or switch off the LED light (Light is optional) Code match the Transmitter (Hand held) with the Receiver 1. Set the code to be encoded by the Dip Switch of transmitter 2. Switch on the main power to activate the receiver, indicated by (one beep) 3. Within 3 minutes after the power is turned on (one beep), press the transmitter’s “ON/OFF” key and do not release (min. 5 seconds) until receiver issues (four beep) short sounds which indicates successful code match 4. After successful code match, the fan automatically returns to the original speed as indicated on LCD screen 5. Press any transmitter button to check for proper functioning 6. For code changes, repeat steps 1 to 5 The transmitter and receiver will memorise the code for future use (also if switched off). 10 - – - >> Attaching Fan Motor Housing to Motor Assembly Line up fixing hole in Motor Housing with screw hole in chassis and install screw Install motor housing using a clockwise Bayonet action Tighten screws securely Ensure that Fan Motor Housing fixing point with the hole (not bayonet slot) is aligned with chassis arm from which fixing screw was removed (see page 7). Closing Screw Cover Close all three Screw Covers NOTE: Please ensure that the drive shaft is centred with the motor housing opening! 11 - – - >> Fan Blades and Middle Piece Assembly ! CONSTANTLY HANDLE FAN WITH CARE AT ALL TIMES TO AVOID DAMAGING THE FAN/SURFACE ! AE2 OPTION Place AE2 Hub Upper onto a clean working area. Line-up the three mounting holes in the Fan Blade with the two screw boss and hole in the Hub Upper. NOTE: Please use a power tool on medium torque setting to ensure tight and secure blade assembly Fix the Fan Blade tight and firm using 2 Hub screws Fix second Blade tight and firm using 2 Hub screws With care, turn the fan over and fasten the AE2 Hub Lower to the fan assembly using the 2 Hub screws 12 - – - >> Fan Blades and Middle Piece Assembly ! CONSTANTLY HANDLE FAN WITH CARE AT ALL TIMES TO AVOID DAMAGING THE FAN/SURFACE ! AE3 OPTION Place AE3 Hub Upper onto a clean working area. Line-up the three mounting holes in the Fan Blade with the two screw boss and hole in the Hub Upper. NOTE: Please use a power tool on medium torque setting to ensure tight and secure blade assembly. Fix the Fan Blade tight and firm using 2 Hub screws Fix second and third Fan Blades tight and firm using 2 Hub screws for each Blade With care, turn the fan over and fasten the AE3 Hub Lower to the fan assembly using the 3 Hub screws 13 - – - >> Fan Blades to Shaft Assembly NOTE: Re-adjust the fan assembly now to make sure that it is vertical, the fan assembly will be vertical if the clearance “X“ between the ceiling and motor housing is equal all way round. 14 - – - >> LED Light (optional) Line up the 2 pins on the LED light with the 2 Holes in the Ceramic Holder and push the LED Light up till the Safety clip is engaged. Re-check the correct assembly by a “gentle pull on the Light” to make sure the LED is tightly fitted. . Ceiling Extension (optional) Suitable for Raked Ceiling up to 17° 15 - – - >> Raked Ceiling Options Raked Ceiling with Extension Kit 16 - – - >> Technical specifications AE2 and AE3 Dimensions for Model: AE2-43” & AE3-43” AE2-50” & AE3-50” AE2-60” & AE3-60” Fan Weight: AE2-43” = 5.4Kg AE3-43” = 6.0Kg AE2-50” = 5.7Kg AE3-50” = 6.5Kg AE2-60” = 5.8Kg AE3-60” = 6.7Kg (11.9lbs) (13.2lbs) (12.6lbs) (14.3lbs) (12.8lbs) (14.8lbs) Colour options: White/ Silver/ Black Wood-grain dark/light Remote control: Hand Held, RF Options: Wall Switch control Home Automation control 17 - – - >> Care & Cleaning Regular cleaning of the Aeratron Ceiling fan blades and fan motor housing is the only maintenance needed. Due to the self-balancing design, a large build up of dust on blades may create an imbalance in extreme cases only, causing the blades to wobble during use. This is likely to be more apparent on fans with an extension rod. Regular cleaning of the blade is recommended to prevent dust from building up. 1. When cleaning your fan, only use a soft brush or lint free cloth to avoid scratching the finish. DO NOT use water when cleaning your ceiling fan. It could damage the motor or blades and/or create the possibility of electric shock. 2. When dusting the blades, you must support the blades to prevent bending - no pressure should be applied to the blade pivot. After cleaning the blades, check to ensure that the Drive Shaft is vertical, otherwise the fan may wobble. 3. Occasionally, it may be necessary to re-tighten the fan blades and fan motor housing fixing screws to prevent any clicking or humming sounds during operation. This is especially true in climates with broad temperature and humidity ranges. 4. If you experience any flaws in the operation of your fan, please check the points in the Trouble Shooting section below. WARNING: Except for items 1 to 3 below, the following require access to areas of the fan which carry lethal voltage and must be carried out by properly qualified personnel. ONLY points 1 to 3 below can be carried out by the user. TROUBLE SHOOTING If the fan does not operate properly, or turns on or off at random. 1. 2. 3. 4. 5. 6. 7. 8. If applicable, change the batteries in the Remote Control Transmitter (Handset). Reset code match(see page 10) Reset the code, using a different dip switch setting (see page 10) Multiple fans: power to all fans > code match > control all fans with one handset. OR > power up (first) 1 fan > code match > power disconnect, power up second fan > code match > power disconnect . . . . . . .to use one handset per fan (see page 10) Disconnect and reconnect the 8-pin connector to make sure that the connectors are fully engaged (see page 9) Check the main and branch circuit breakers and/or fuses. Check the wire connections to the fan. Other RF devices may obstruct the handset to receiver signal. If the fan is noisy 9. Check to make sure that Suspension Ball is located in the slot correctly, and the one screw securing the suspension ball is tight (see page 8). 10. Check that Hanger Bracket is solidly mounted, no movement allowed (see page 7) 11. Check that the 2 Hub screws per fan blade are tight and firm (see page 12 and 13) 12. Excess wind can lift the fan blades and result in some noise. If the fan rotates but does not create much airflow 13. The room may contain items which obstruct the air-flow. 14. The fan may be too small for the size of the room. 15. The fan might be in reverse function (counter clockwise rotation) Note: In some areas, signals are sent through the power lines by the electricity supplier for the control of off peak hot water, street lights and so on. These signals may cause an intermittent humming in the ceiling fan. Filters may be available in your country at customer costs. It is not a ceiling fan fault. 18 - – - >> General Information 1. All electrical motors, including fan motors generate some noise, and may feel hot to the touch. This is NOT a fault. 2. Ceiling fans tend to move during operation due to the fact that they are not rigidly mounted. (Rigid mountings can generate excessive vibration and stress on the mountings). Movement of a couple of centimetres is quite OK and does not suggest that the fan will fall down. The Aeratron fan is mounted securely on a metal Hanger Bracket with rubber cushioning and a ball joint to allow free movement. Please note that due to manufacturing variations not all Aeratron ceiling fans are exactly the same - some may move more than others. Note: Excessive wobble can be caused by the Drive Shaft not being positioned vertically. This can be easily rectified by adjusting the position of the Fan Motor Assembly in the Hanger Bracket (see page 14). 3. Ceiling fans are an environmentally smart choice to help cool you in your home. They work by creating air flow which causes a cooling sensation on the skin. Ceiling fans do not cool down air, so for energy wise use, they should be switched off when leaving a room. The effectiveness of ceiling fans is also dependent on the humidity in the air - they are more effective in humid environments, and less so in dry ones. 4. During winter, a reverse (counter clockwise) turning fan helps to reduce heating costs. Warm air rises to the ceiling, where it cannot be felt by the occupants of a room, especially in areas with high ceilings. The fan assists to distribute warm air more evenly in the room allowing to set the thermostat several degrees lower. Normal Wear and Tear. Threaded components working slightly loose or parts even slightly damaged or bent during vigorous cleaning or bumping can cause wobble and noise. This is not covered under warranty, but care during maintenance and cleaning should prevent this from occurring. Ceiling Fan Warranty. You must have the original purchase receipt or bill of sale to make a warranty claim. No claim will be accepted unless proof of date of purchase is available at the time of making the warranty claim. Ceiling Fan Warranty Period. The ceiling fan itself, excluding the Remote Control Transmitter and Receiver, is covered by a 3 year inhome warranty unless stated otherwise in your jurisdiction (USA –30 year warranty on the motor). For any warranty claims, please contact your local or regional retailer or distributor. Aeratron Pty Ltd will, at its discretion, only repair or replace defective products which have been directly purchased from Aeratron Pty Ltd, all other product claims must be lodged through your local retailer/distributor. Labour and product delivery costs are borne by Aeratron Pty Ltd or the retailer during this 3 year period. The cost of obtaining or using special access equipment (scissor lifts, scaffolding etc.) is specifically excluded, and it is the responsibility of the owner to provide such equipment and have it safely installed and operated. Remote Control Warranty Period. In general, Aeratron Pty Ltd Remote Control Receivers and Transmitters (Handsets) are covered by a 1 year in-home warranty (unless stated otherwise in your jurisdiction) under the same conditions as described above for fans. 19 - – - >> Balance of Warranty on Repaired or Replaced Products. Any replaced or repaired product is covered only by the balance of the warranty remaining on the original article. Transfer of Warranty. If the dwelling where the fan is installed changes hands, the balance of the warranty passes to the new owner, providing the original bill of sale for the product is retained by the new owner. Warranty does not cover damage to the fan if it is moved from one dwelling to another during the warranty period. The warranty is voided in total if the product is sold as second hand goods. The following is NOT covered by warranty. 1. Any damage incurred after delivery to the owner that is not caused by a fault in the products materials or workmanship; damage from lightning or power surges; incorrect installation; damage due to incorrect installation; noise or other influence of ripple control or information access systems operated over power delivery infrastructure; water damage of any kind; installation or use outdoors; damage arising from connection to or use with alternative power systems (e.g. inverters, solar, etc.). 2. Ceiling fans not installed by a licensed electrician. 3. Repair of a ceiling fan used incorrectly, accidentally damaged, modified in any way or not serviced in accordance with the maintenance instructions. 4. Travelling costs incurred by Aeratron Pty Ltd personnel or service agents and/or the cost of transporting and insuring the ceiling fan between the nearest Aeratron Pty Ltd agents' service depot and its normal location. These costs must be met by the purchaser. 5. Subject to any statutory provisions to the contrary, claims for damage to furniture, carpet, walls, ceilings, foundations or any other consequential loss either directly or indirectly resulting from a faulty ceiling fan. 6. Signals sent through the mains power supply by the electricity supplier for off peak hot water, and other signals including those for street lights and such. These signals may cause an intermittent humming in the ceiling fan. It is not the fault of the ceiling fan. 7. A service call fee will be charged where; there is nothing wrong with the ceiling fan or; the defective operation of the ceiling fan is due to failure of electricity or; the installation is not in accordance with Aeratron Pty Ltd instructions and/or applicable local regulations or; the defects have been caused by incorrect application or abuse of the ceiling fan or; the damage has been caused by unauthorised persons attempting to repair the fan. 8. When humidity is high and temperature drops moisture condenses on metal surfaces including ceiling fans. The layer of moisture can be almost microscopic but it will affect the surface by depositing a tiny layer of dissolved salts or airborne acidic compounds and thus eventually leading to corrosion if the product is not properly and regularly cleaned. 9. Travelling costs incurred by Aeratron personnel or service agents exceeding 50kms between the nearest agents’ service depot and the customer. These costs must be met by the purchaser. Making a Claim You must have the original purchase receipt or bill of sale along with a proof of installation by a Licensed Electrician to make a warranty claim. No claim will be accepted without these documents being provided. Please contact the local agent via the warranty Hotline, web or email. Please note carefully - If the product is found to be free of defects or the product is not functioning properly as a result of faulty installation or lack of maintenance then Aeratron or its service agent reserve the right to charge a service fee to rectify the reported problem. 20 - – - >> WARRANTY PHONE NUMBERS AUSTRALIA 1300 116 305 (9am to 5pm EAST) USA – please call +1 (415) 237-2322 Please Note: When calling for warranty you will require the following information; date of purchase; model and colour of the fan. The installing electrician’s details may also be required. Aeratron ceiling fan warranty details Please File with your Purchase Receipt Customer Details Name; ______________________________________________ Address: ____________________________________________ Post Code: ___________________________________________ Phone Number: _______________________________________ Fan Details Model: ______________________________________________ Colour: ______________________________________________ Date of Purchase: ______________________________________ Electricians Details Name of Electrician: ____________________________________ Licence Number: _______________________________________ Please scan and send per email to your local or national retailer or distributor 21 - – - International Edition 2015