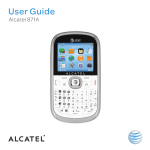
1
Some of the contents in this manual may differ from your phone depending on the software of the phone. Actual color may vary. Your phone is designed to make it easy for you to access a wide variety of content. For your protection, we want you to be aware that some applications that you enable may involve the location of your phone being shared. For applications available through AT&T, we offer privacy controls that let you decide how an application may use the location of your phone and other phones on your account. However, the AT&T privacy tools do not apply to applications available outside of AT&T. Please review the terms and conditions and the associated privacy policy for each location-based service to learn how location information will be used and protected. In addition, your AT&T phone may be used to access the internet and to download, and/or purchase goods, applications, and services from AT&T or elsewhere from third parties. AT&T provides tools for you to control access to the Internet and certain Internet content. These controls may not be available for certain devices which bypass AT&T controls. Service provided by AT&T Mobility. Portions © 2012 AT&T Intellectual Property. All rights reserved. AT&T, the AT&T logo and all other AT&T marks contained herein are trademarks of AT&T Intellectual Property and/or AT&T affiliated companies. All other marks contained herein are the property of their respective owners. ALCATEL is a trademark of Alcatel-Lucent used under license by TCT Mobile Limited. OM510AR1 CJA3244ALAAB Table of contents 1. Basics .................................. 3 Editing/Deleting Contacts ...................... 13 Box Contents ......................................... 3 Making a Call from Your Contact List ... 13 Activating Your Phone ............................ 3 Speed Dial List ...................................... 14 Powering On or Off ................................ 4 Address Book Settings .......................... 14 Charging Your Device ............................. 4 5. Entering Text .........................15 Phone Overview ..................................... 5 Keypad Inputting ................................... 15 Setting Up Voicemail............................... 6 Text Input Mode ................................... 16 2. Getting Started ....................... 7 Changing Text Mode ............................. 16 Status Bar Icons .................................... 7 6. Messaging ...........................17 Menu Navigation ..................................... 8 Types of Messages ............................... 17 Changing Your Shortcuts Menu .............. 8 Creating and Sending New Text Messages ...................................... 18 3. Phone Calls ..........................10 Making a Call ........................................ 10 Answering a Call ................................... 10 Ending a Call ......................................... 11 Adjusting Call Volume ........................... 11 Recent Calls .......................................... 11 In-Call Options ..................................... 12 4. Address Book ........................12 Using the Contact List ........................... 12 Adding New Contacts ............................ 13 Creating and Sending New Multimedia Messages ........................... 18 Reading New Messages ........................ 19 Using Message Options ........................ 19 Deleting Messages ................................ 20 Message Settings.................................. 20 7. AppCenter ............................21 Accessing AppCenter ............................ 21 Ringtones ............................................. 21 Ringback Tones .................................... 21 1 Wallpapers ............................................ 22 11. Safety and Use ......................33 Accessing My Accounts & Credits ........ 22 12. General Information ................39 8. Mobile Web ..........................22 13. Warranty ..............................40 Launching Browser ............................... 22 Accessing a WAP Site ........................... 22 Navigating with the Browser ................. 23 Settings................................................. 23 9. Settings ...............................24 Accessing the Setting Menu.................. 24 Profile ................................................... 24 Phone Settings...................................... 25 Call Settings .......................................... 26 Flight Mode ........................................... 27 Security................................................. 28 Networks............................................... 28 Connectivity .......................................... 28 10. My Stuff ...............................29 Tools ..................................................... 29 Audio .................................................... 31 Pictures................................................. 32 Other ..................................................... 32 Games................................................... 32 Memory Status ..................................... 32 Services ................................................ 32 2 1. Basics Inserting or Removing the SIM Card Box Contents You must insert your SIM card before making and receiving calls. You should find the following items inside the box: • Battery • Charger • User guide • Phone and feature guide • Quick start guide • SIM card Activating Your Phone Removing or Installing the Back Cover 1. Power off your phone and remove the battery before inserting or removing the SIM card. 2. Place the SIM card with the metal contact facing down and slide it into its housing. The cut corner should be on the bottom right. 3. To remove the card, press the bottom and slide it out. 3 Installing or Removing the Battery If you don’t know your PIN code or if you have forgotten it, contact your network operator. Power Off Your Phone Press and hold the screen. key from the Home Charging Your Device 1. Place the battery on the back of the phone so the metal contacts match up on the battery and in the battery cavity. 2. Slide the battery down into the battery cavity until it locks into place. 3. To remove, lift the battery out of the cavity from the upper right corner. Powering On or Off Power On Your Phone 1. Press and hold the powers on. key until the phone 2. Enter your PIN code if necessary and then press and hold the key. 3. The Home screen is displayed. 4. While the phone is searching for a network, Searching/Emergency will be displayed. 4 The light at the top of the phone when the phone is plugged in indicates it's charging. 1. Plug the AC Charger into a standard outlet. 2. To access the charging port on the upper right side of your phone, open the flap and plug the other end of the AC charger into the charging port. • Charging may take about 10 minutes to start if the battery is completely dead. • Be careful not to force the plug into the socket. • Make sure the battery is correctly inserted before connecting the charger. • Use a wall socket that is easily accessible and in close proximity to the phone (avoid electric extension cables). Phone Overview • When using your phone for the first time, charge the battery fully (approximately 3 hours). When the battery is fully charged the will display on the screen. To reduce power consumption, when the battery is fully charged, disconnect your phone from the AC Charger and the charger from the wall outlet. Switch off some applications when not in use; reduce the backlight time, etc. Left soft key: Performs the functions indicated by the screen text on the bottom left of the display Send key: Pick up Make a call Access recent calls 1 key: Access your voicemail (press and hold) 5 * key: Lock/Unlock the keypad (press the key and the key to Lock/ Unlock the keypad while on the Home screen) Change input method (in edit mode) Right soft key: Performs the functions indicated by the screen text on the bottom right of the display Setting Up Voicemail 1. From the Home screen, press and hold the key. 2. When connected, you’re prompted to set up your voicemail. Changing the Voicemail Number 1. From the Home screen, press the access the main menu. key to End key: Power on/off (press and hold) End call Return to the Home screen 2. From the main menu, select Messaging > Voicemail. # key: Change profile (press and hold to change the mode between General profile and Vibration profile while on the Home screen) Enter symbol table (in edit mode) 4. Change voicemail name/number as you want. Navigation key: Up: Create Message Down: Address Book Left: My Stuff Right: Calendar OK: Confirm an option Mobile Web (continuous press twice) Volume key: Side up key: Increase volume (press) Increase volume continuously (press and hold) Side down key: Decrease volume (press) Decrease volume continuously (press and hold) 6 3. To edit voicemail, press Options and select Edit. 5. Press the key to save the change. 2. Getting Started SIM card unavailable Status Bar Icons 3G connecting (1) This list covers the symbols appearing on your phone’s display and indicator area. Battery charge level 3G connection status (Activated) GPRS connection status (Activated) GPRS connecting Meeting mode: Your phone vibrates, but does not ring or beep with the exception of the alarm. EDGE connecting Headset connected Silence mode: Your phone does not ring, beep or vibrate with the exception of the alarm. Call forwarding activated: Your calls are forwarded. Alarm or appointments programmed Level of network reception Voicemail message arrived Missed calls Call in progress EDGE connection status (Activated) Message unread Message list is full: Your phone cannot accept any new messages. You must access the message list and delete at least one message on your SIM card. Emergency alerts Flight mode Mute incoming call Roaming (1) The icons and illustrations in this guide are provided for informational purposes only. 7 Menu Navigation Changing Your Shortcuts Menu Accessing Menus Using Numbered Menu Shortcuts You can access menus and submenus by scrolling the Navigation keys or by using the shortcut keys. Numbered menu items, such as menus, submenus, and options can be quickly accessed by using their shortcut numbers. From the Home screen, you can also press and hold the number keys (2 to 9) to access any function/ URL/contact to which you have previously assigned a shortcut. Accessing a Menu Function by Scrolling 1. From the Home screen, press the access the main menu. key to 2. Access submenus included in the menu by scrolling to and highlighting the option and key or the key. If the pressing the menu contains further options, repeat this step. 3. Press the Up or Down Navigation key to scroll through the menus. Make your key or the selection by pressing the key. 4. Return to the previous menu level by key. pressing the key to directly exit the menu 5. Press the without changing any settings. 8 1. From the Home screen, press the access the main menu. key to 2. From the main menu, select Settings > Phone Settings > Keypad > Numeric Keys. 3. Set the Function/URL/Contact shortcut of your choice by pressing the key and following the prompts. Soft keys 1. From the Home screen, press the access the main menu. key to 2. From the main menu, select Settings > Phone Settings > Keypad > Soft Keys. 3. From here you can also set the Function/ URL/Contact shortcut of your choice. Navigation Keys The Navigation keys come preset, however you are able to change them to suit your needs. 1. From the Home screen, press the access the main menu. key to 2. From the main menu, select Settings > Phone Settings > Keypad > Navigation Keys. 3. Change the Up, Down, Left and Right menu options by highlighting the option and pressing the / key. 4. Use the Up or Down Navigation keys to your new shortcut choice. 5. Press the / • Create Message: You can create and send Text Messages or Multimedia Messages directly. For more information, refer to page 18. • Refill Account: Allows you to add more minutes or data as you need them. • Calculator: Displays the Calculator screen. For more information, refer to Calculator on page 30. • Mobile Web: Allows you to access Mobile web. For more information, refer to Mobile Web on page 22. • Games: Displays the Games menu. key to save the change. Go To Applications can be accessed from the Home screen by pressing the Go To soft key. This displays the following menu items: • Alarm Clock: Allows you to set the alarm clock for your phone. For more information, refer to Alarm on page 29. • Recent Calls: Displays the Recent Calls screen. For more information, refer to Recent Calls on page 11. 9 3. Phone Calls Calling Your Voicemail (1) Making a Call 1. From the Home screen, enter the area code and phone number. 2. If you press an incorrect key, press the key to delete the incorrect digits. 3. Press the key to make the call. Voicemail allows callers to leave voice messages in your voice mailbox. You can review, play, and delete your voice messages any time you are in your carrier's network coverage area. From the Home screen, press and hold the key. Making an Emergency Call Answering a Call • Dial emergency number and press the key. Press the Or • Press and hold the emergency call. key to make an You do not need a SIM card or unlock your phone to make an emergency call. Making an International Call 1. Press and hold the character appears. key until the + 2. Enter the country code, area code and phone number. 3. Press the key to make the call. key to answer an incoming call. Muting the Ringtone To mute ringtone of current incoming call • Press the volume key down. Rejecting a Call • Press the key once to reject the call. Handling Two Calls 1. To add a second party during a call, dial the number directly. 2. After answering a second call, you can press Navigation left key/Navigation soft key to change connection status. (1) 10 / Contact your network operator to check service availability. Conference Calls (1) Recent Calls Your phone allows you to talk to several people at the same time. You can access the function using the following options: 1. If you are on a double call, press the Options soft key and select Conference Call. • Select Go To > Menu from Home screen, then select Recent Calls. 2. If a third call comes in, answer it by pressing the key and speak with your new caller. 3. This caller becomes a member of the conference if you press Options and select Conference Call. 4. To end the conference call, press Options and select End > End Conference. Ending a Call • Press the key from Home screen. • Select Recent Callls from main menu. Once enter this menu, following lists will be displayed: Missed calls Outgoing calls (Redial) Answered calls/Rejected calls Select a number from the call memory and press Options, to Send Message, Edit Before Call, etc. When you want to end your call, briefly press the key. Adjusting Call Volume You can adjust the sound level during a call using the Volume key. (1) Contact your network operator to check service availability. 11 In-Call Options (1) During a call, press the Options soft key to access the following: • Mute/Unmute: Mutes/Unmutes the conversation from your end. • Hold: Hold the current call. • End: End the current call. • New Call: Hold the current call and dial another number. • Contacts: Add a contact or access preloaded contacts. • Messaging: Send an SMS/MMS to the caller. • DTMF Off/On: Allows you to send (Dual Tone Multi-Frequency) tones to the contacts you have selected. • Calendar: Enter Calendar. • Services: Allows you to enter service lists provided by your operator. • Sound Recorder: Record your current call. 4. Address Book Using the Contact List 1. From the main menu, select Address Book. 2. Press the List. / key to access the Contact Available Options When you highlight a specific contact, press the Options soft key to access the following: • Add: Add a contact (name, numbers, address, e-mail, etc.). • View: Review the information you’ve stored for a contact. • Send Message: Send an SMS/MMS to a contact you’ve selected. • Edit: Modify the contents of a file: name, number, ringtone, image, etc. • Edit Before Call: Edit the phone number before placing a call. • Delete: Delete a single contact highlighted. • Delete More: Delete multiple selected contacts. • Call: Call the selected contact. • Copy: Copy the selected contact to the SIM card if there is sufficient memory. Connect your network operator to check service availability 12 (1) • Send vCard: Exchange data via SMS, MMS. Editing/Deleting Contacts • Groups: You can view, send messages or e-mails to the selected group or you can create or delete groups as you want. Edit contacts information or delete the contacts you do not want to keep. • Settings: Address Book settings. For more information, refer to Address Book Settings on page 14. Adding New Contacts 1. From the main menu, select Address Book. 2. When the contact list screen appears, select Add New Contact. 3. Enter information into the fields provided. Press the Up or Down Navigation key to scroll the list. 4. To save the new information, press Options > Save. Creating a Favorite 1. From the main menu, select Address Book. 2. When the contact list screen displays, highlight and select a contact to view details. 3. After selecting the contact, press Options > Set As Favorite. 4. Your favorite contacts ( ) are at the top of the entire contact list in your phone contacts. Editing a Contact 1. From the main menu, select Address Book. 2. When the contact list screen displays, highlight and select a contact to edit their information. 3. Once you have selected the contact, press the / key to edit each field. 4. To save the information entered, press Options > Save. Deleting Contact 1. From the main menu, select Address Book. 2. To delete a contact, press Options > Delete; to delete more contacts, press Options > Delete More. Making a Call from Your Contact List 1. From the main menu, select Address Book. 2. When the contact list screen displays, highlight the contact you want to call and key. press the 13 Searching for a Number in the Address Book Changing a Number Assigned to a Key 1. From the main menu, select Address Book. 1. From the main menu, select Settings > Phone Settings > Keypad > Numeric Keys. 2. When the contact list screen displays, enter the first few letters of the name to display. A list of contacts appears based on the letters you have entered. 3. Scroll to the name you are looking for by pressing the Up or Down Navigation key. 4. Press the key to select the contact. Speed Dial List Once you have stored phone numbers from your Address Book, you can set a maximum of 8-speed dial entries and then dial them easily by pressing and holding the corresponding numeric key. Setting Up Speed Dial Entries 1. From the main menu, select Settings > Phone Settings > Keypad > Numeric Keys. 2. Highlight the key with which you wish to assign the speed-dialing number (from 2 to 9), press Options > Edit > Contacts. 3. Scroll to choose a contact you want to assign from Contacts and press OK. 14 2. Highlight the key with which you wish to re-assign the speed-dial number press Options > Edit > Contact. 3. Scroll to choose the new contact you want to assign from Contacts and press OK. Address Book Settings Address Book Settings allows you to adjust various settings. 1. From the main menu, press Address Book > Options > Settings. 2. Choose from the following options: • Preferred Storage: Choose to save your contacts in one of the following locations: SIM/Phone/Phone And SIM. • My vCard: Allows you to add information as an attachment when sending a message. • Memory Status: Displays the space used and allocated for the Address book in the phone or SIM. • Emergency Call: Allows you to add one or more contacts in the Emergency call list. 5. Entering Text • Copy All: Allows you to copy all contacts from the SIM to the phone or vice versa. This section describes how to choose your preferred text input mode when entering characters. • Delete All: Allows you to delete all contacts from the phone and SIM. Keypad Inputting • Display Format: Allows you to choose the way in which contact names are displayed. key: Press: Insert smart punctuation. Press and hold: Insert 1. Navigation key: : Validate a letter/word. : Previous/next letter/word. : Page up/down. Keypad: Press: Alphabetic input (a, b, c). Press and hold: Numeric input (1, 2, 3). key: Access the Symbol table when input mode is not numeric. 15 key: Input “0” in numeric mode, or “space” in text mode. key: Press: Change input methods. Press and hold: Access the language list. Symbol Table Press the key to display the symbols table. Use the Navigation key to move the cursor over the desired symbol and press the key to select. • ABC Mode: Allows you to enter alphabetic characters by pressing the key labeled with the corresponding letter. • Smart SPANISH Mode: Allows you to enter words with fewer keystrokes. Smart SPANISH Mode automatically compares the series of keystrokes you make with its preset linguistic dictionary and selects the most likely word you are writing, to help save time. • Numeric Mode: Allows you to enter numbers. Changing Text Mode 1. When you are in a text entry field, press Options > Input Mode to change text input mode. 2. Choose from the following options: Smart ABC, Smart abc, Smart Abc, ABC, abc, Abc or Add numbers. Text Input Mode Text mode allows you to choose between Smart ABC, ABC, or Numeric modes. • Smart ABC Mode: Allows you to enter words with fewer keystrokes. Smart ABC Mode automatically compares the series of keystrokes you make with its preset linguistic dictionary and selects the most likely word you are writing, to help save time. 16 6. Messaging You can create, edit and receive SMS and MMS messages. The MMS function can only be used if the service is provided by your operator, if your contract includes an MMS option. Types of Messages Your phone provides the following message types: Broadcast SMS Allows you to receive and store Broadcast SMS. Choose from the following options: • Receive Mode: Set to On/Off as required, depending on whether you want to receive Broadcast SMS or not. • Channel Settings: Select a channel in a list from which you would like to receive Broadcast SMS. • Languages: Select either English or Spanish languages. • Text Message • Read Messages: View a Broadcast SMS. • Multimedia Message Emergency Alerts • Service Message Emergency Alerts allows customers to receive geographically-targeted messages. Alert messages are provided by the US Department of Homeland Security and will alert customers of imminent threats to their safety within their area. There is no charge for receiving an Emergency Alert message. The Short Message Service (SMS) allows you to send and receive text messages to and from other mobile phones. To use this feature, you may need to subscribe to your service provider’s message service. The Multimedia Messaging Service (MMS) allows you to send and receive multimedia messages (such as picture messages) to and from other mobile phones. To use this feature, you may need to subscribe to your service provider’s multimedia message service. There are three types of Emergency Alerts: • Alerts issued by the President • Alerts involving imminent threats to safety of life • AMBER Alerts (missing child alert) 17 Customers may choose not to receive Imminent Threat and AMBER Alerts. Alerts issued by the President can not be disabled. To disable Imminent Threat and AMBER Alerts, follow the instructions below: Enabling/Disabling Imminent Threat Emergency Alerts 1. From the main menu, select Messaging > Emergency Alerts > Options > Settings > Emergency Alert Notification. 2. Choose from All Alerts On, Extreme Alerts Only, or Presidential Alerts Only. Enabling/Disabling AMBER Emergency Alerts 3. From the main menu, select Messaging > Emergency Alerts > Options > Settings > AMBER Alert Notification. 4. Choose On or Off, select OK. Templates Creating and Sending New Text Messages 1. From the main menu, select Messaging > New Message. 2. Write a text message. One or more recipients can be added from the Address Book, or you can enter a recipient by pressing the / key to enter the telephone number. 3. Press the / key to send the message. Creating and Sending New Multimedia Messages An SMS will be converted to MMS automatically when pictures or sounds are included. 1. From the main menu, select Messaging > New Message > Options > Switch To MMS. Gives you the option to send commonly used messages to save time. There are two kinds of template to choose from. 2. Write your multimedia message, adding pictures, sounds. Enter a recipient by / key to enter the pressing the telephone number. • Text Messages: Choose from a list of standard SMS messages. 3. Press the message. • Multimedia Message: Choose from a list of standard MMS messages or choose one of your own. 18 / key to send the multimedia An SMS message of more than a certain number of characters (the number of characters depends on your language) will be charged as several SMS messages. An MMS message containing photos and/or sounds may also be billed as more than one message. Specific letters (accented) will increase the size of the SMS, which may also cause multiple SMS messages to be sent to your recipient. Reading New Messages 1. From the main menu, press Messaging > Inbox. 2. Highlight an unread message and press the / key. 3. Press the Up or Down Navigation key to scroll through the message screen. 4. When you have finished, press the key to to view more messages or the return to the Home screen. Using Message Options When text or multimedia messages are highlighted in the Inbox, the following options are available by pressing the key. • View: Allows you to view the message. • Reply: Allows you to reply to the message. • Call: Allows you to call the sender of the message. • Add To Contacts: Allows you to extract the number of sender to add to contact list. • Forward: Allows you to forward this message to another recipient. • Delete: Allows you to delete the selected message. • Delete All: Allows you to delete all Inbox messages. • Move To Archive: Allows you to move archive the message. • Mark Several: Allows you to mark several messages for further operation. • Copy To SIM/Phone: Allows you to copy message to the SIM card/Phone. • Move to SIM/Phone: Allows you to move message to the SIM card/Phone. • Copy All: Copy all messages from your SIM card to the phone or from the phone to your SIM card. • Move All: Move all messages from your SIM card to the phone or from the phone to your SIM card. • Details: View details of the message. While viewing the contents of a single text or multimedia message, you can access the following options by pressing the key. 19 • Reply: Allows you to reply to the message. Message Settings • Forward: Allows you to forward this message to another recipient. 1. From the main menu, select Messaging > Settings. • Add To Contacts: Extracts the number of the sender and adds it to your contact list. 2. Select one of the three options and choose a setting for it. • Call: Allows you to call the sender of the message. Text Message: • Delete: Allows you to delete the selected message. • Extract: Allows you to extract the number, URL, Email address or USSD from the text of message for dialing, saving to the phone book etc. • Copy To SIM/Phone: Copy the selected message to your SIM card/Phone. • Move To SIM/Phone: Move the selected message to your SIM card/Phone. • Move To Archive: Archives the selected message. • Edit Option: Choose options from Mark Text or Copy All. • Details: View details of the message. Deleting Messages 1. From the main menu, select Messaging > Inbox. 2. Delete messages by pressing Options > Delete or Delete All. 3. Select Yes. 20 • Profile Settings: Allows you to choose a profile for text message writing. It can be retrieved directly from your SIM. Alternatively, you can create your own profile. • Memory Status: Displays the amount of space currently in use on your phone and SIM. • Preferred Storage: Select the default message storage location: SIM or Phone. Multimedia Message: • Data Account: There are several accounts for you to select from when you are editing a multimedia message. • Common Settings: Choose from a range of options including Edit/Send/Retrieve/ Memory Status depending on the current task. Service Message: • Enable Push: You can select from Accept All/Accept Authenticated Or Trusted/ Disabled when deciding which messages are received. • Enable White List: Provides the following action options if a white list has been created: Discard If Unmatched/Notify If Unmatched/Disabled. • Enable Black List: Provides the following action options if a black list has been created: Notify If Unmatched/Disabled. • White List: Allows you to add a phone number or IP address to a white list. • Black List: Allows you to add a phone number or IP address to a black list. 7. AppCenter The AppCenter website provides links to a variety of content such as ringing tones, graphics, multimedia, and applications that may be purchased and downloaded to your device. Accessing AppCenter From the main menu, select AppCenter. Ringtones This menu option connects to AT&T’s ringtone download site. Additional charges may be incurred when downloading ringtones. Contact AT&T for additional information. Ringback Tones This menu option connects to AT&T’s ringback tones download site. Ringback Tones replace the standard ringing sound that callers normally hear while they wait for you to answer your phone. Additional charges may be incurred when downloading ringtones. Contact AT&T for additional information. 21 Wallpapers This menu option connects to AT&T’s wallpapers download site. Additional charges may be incurred when downloading games or graphics. Contact AT&T for additional information. Accessing My Accounts & Credits You can view and manage accounts linked to your AT&T Access ID from the AppCenter. From the myAT&T Mobile login screen, enter your AT&T Access ID and password. For AT&T Access IDs with two or more linked accounts, the subsequent screen will provide the option to select which account you would like to manage. 8. Mobile Web Your phone is equipped with a Mobile Web browser allowing you to access Internet sites specifically for mobile phones. Launching Browser 1. From the main menu, select Mobile Web. 2. Your phone connects to the network and loads the homepage of the Wireless Web service provider. The content of the start-up homepage depends on your Wireless Web service provider. 3. To scroll through the screen, use the Up and Down Navigation keys. 4. To exit the browser at any time, simply key. press the Accessing a WAP Site There are several ways to access a WAP site: • By selecting a link on the browser. • By using a bookmark item in the Favorites menu. Use View in the browser Options. • By entering a URL address manually. Use Go To URL in the browser Options. 22 Navigating with the Browser 1. To scroll through browser items, press the Up or Down Navigation keys. 2. To select a browser item, press Options > Use Link > Go To or the key. 3. To return to the previous page, press Options > Navigate > Backward or the key. 4. To move to next page, press Options > Navigate > Forward. 5. To access the browser menu list, press the key. 6. To return to the start-up homepage, press Options > Homepage. There are other options below based on open web. • Save Image: Save Image downloaded from open web. • Bookmarks: There are three options for choose with My Account, AppCenter and Mobile Web Respectively. • Open File: Open an html file from the Download. • Recent Pages: Display recent pages accessed. • Offline Pages: Display offline pages. • Current Page: You can set the current page as Homepage or send address as SMS or MMS. • Service Inbox: Display Service Inbox. Settings • Homepage: You can use the default homepage or select a custom one. • Browser Options: A range of browser options are provided. • Preferences: Activate Timeout, and whether or not to Show Images/Play Sounds/Load Unknown Media etc. when you are browsing a website. • Security Settings: Displays allows you to choose from the following options: Session Info./Existing Certificates/Trusted Certificates. • Service Message Settings: When you are browsing a website , you can choose Options > Service Message Settings, and enter the following fields Enable Push/ Enable White List/Enable Black List/White List/Black List. • Restore Browser Settings: You can restore the browser to its default settings by key or the key. pressing the • Add To Bookmarks: You can add the website to Bookmarks. 23 9. Settings Accessing the Setting Menu From the main menu, select Settings and select the function of your choice in order to customize your mobile phone. Profile Allows you to personalize ringtones for different events and environments. General To modify the sound settings, select Options > Customize. The following functions are available: • Mode: You can set your phone ringtone to Ring Only, Discreet (ring with beep), Vibration (all sounds are replaced by vibrations except for alarms), Vibration + Melody, Vibration Then Melody, Beep Then Vibration, Silence (no sounds except for alarms, the (silence) icon will then be displayed). • Ringtone: Press the Up or Down Navigation key to scroll through different ringtones. / key to select • Ring Type: Press the Ascending, Beep Once or Repeat. 24 / key to adjust the • Volume: Press the volume using the Up or Down Navigation key or volume key on the side of your phone. • Key Beep: Press the the type of key beep. / key to select • Message Tone: Press the / key to select a melody for incoming messages. Meeting The phone will not ring or beep unless an alarm has been set. A new event will cause it to vibrate. Outdoor This profile is designed for outdoor users who require louder ringtones. Indoor Ringtone/beep volumes will be slightly lower than the General mode volume. Silence This profile will turn off all ringtones, including notification sounds. Phone Settings • Backlight Setting the Time and Date Screen: Reduce brightness for enhanced battery performance and to save power during periods of expected inactivity. Allows you to set the date and time in 12H or 24H format. You can also set the daylight saving adjustment. From the main menu, select Settings > Phone Settings > Time And Date. Display From the main menu, select Settings > Phone Settings > Display. • Wallpaper The wallpaper is displayed when you switch on your phone. By selecting Wallpaper you can customize it by replacing the default image or animation. • Theme Enables you to customize the graphic style and the colors of your mobile phone. • Brightness Adjust the LCDs black levels by using the Left or Right Navigation key. Keypad: Customize your keypad light by selecting On/Off. Languages Adjust the language used for message display. The Auto option selects the language according to the home network (if available). From the main menu, select Settings > Phone Settings > Languages. HAC HAC (Hearing Aid Compliance) Allows users with impaired hearing to use the phone conveniently. You can choose this function by pressing the HAC > On button. Headset Mode Switch audio play (incoming call, message beep, alarm beep...) between Headset Only and Phone & Headset. From the main menu, select Settings > Phone Settings > Headset Mode. 25 Keypad Call Settings Numeric Keys From the main menu, select Settings > Call Settings. From the main menu, select Settings > Phone Settings > Keypad. By customizing your keys, you can access any function directly from the Home screen. Soft Keys Customize the Soft Keys by assigning specific functions, numbers from contacts and URLs to each key. (See more details on page 8) Navigation Key Customize the Navigation key by assigning specific functions, numbers from contacts and URLs to each key. (See more details on page 9) My Numbers • My Number: Type in or modify your mobile phone number or the number to access your voicemail and then confirm. Your telephone number is usually written on your SIM card. • Voicemail Server: Edit your Voicemail name or Voicemail number in order to access. For more information, refer to Setting Up Voicemail on page 6. Call Timer Auto Keypad Lock • Call Timers: View and reset the times of last call, dialed calls and received calls. Customize your auto keypad lock by selecting 5 Seconds/30 Seconds/1 Minute/5 Minutes/ Off these options. • Call Time Reminder: Select your preference from the following three options: Off/Single/Periodic. Input Method Call Waiting Please see the Text input mode chapter on page 15. In addition to the specific characters table for Chinese, other data input modes are also available in your mobile phone. This feature allows you to write short messages and add names with special characters to your contacts. Activate/Deactivate/Query Status the notification beep of a second incoming call. 26 Call Forwarding Auto Redial Activate cancel or verify the status of call forwarding to Voice Calls, Data Calls, and Fax, or you can choose Cancel All. Activate or deactivate the automatic callback of any calls that do not get through the first time. • Voice Calls: Transfer all voice calls if your line is busy, unreachable, or you do not answer. Text Phone • Data Calls: Transfers data calls when activated. • Fax: Transfers Fax messages. • Cancel All: Cancels all forwarding settings. Caller ID • Set By Network: This may be different according to the network in your country. • Hide Number: Hide your Caller ID when you are making a call. • Send Number: Your Caller ID will be sent along with your call. Text phone can be used by people who are hearing or speech impaired. After connecting the cell phone and TTY machine it connects to a relay service, which converts incoming speech to text for the person using the TTY and converts outgoing text from the TTY machine to a spoken voice for the person on the other end of the conversation. Flight Mode Functions such as Voice calls and Messages etc. are barred. It can also be used to increase the length of time the phone can be left in standby mode. From the main menu, select Settings > Flight Mode. 27 Security Networks From the main menu, select Settings > Security. From the main menu, select Settings > Networks. • Activate PIN: The SIM card protection code is requested each time the phone is powered on. Network Selection • Change PIN: Change PIN code. • Change PIN2: A protection code for certain SIM card features (Billing/Cost/FDN, etc.) will be requested if you attempt to access them when this option is activated. You can also update it with a new one (between 4 and 8 digits). • Activate Phone Code: Once activated, this is requested each time the phone is powered. • Change Phone Code: Initial setting is 1234. • Fixed Dialed Number: Allows the phone to be locked so that it can only dial certain numbers, or numbers with certain prefixes. To activate this function, PIN2 code is mandatory. • Master Master Clear: Clears mobile phone settings (e.g. user profiles) and private data (e.g. photos, messages and recent calls etc.) Master Reset: Clears your preferential settings but keeps private data and independent data. 28 • Select Network: The choice of network connection is left up to the user. • Search Mode: Network connection can be switched between Manual and Auto. Data Service Allows you activate or deactivate data international roaming service by selecting On/Off. Data International Roaming Enables data services to be used while roaming overseas. Connectivity Data Account • AT&T Data Accounts: A list of preset data accounts is available for selection. Use the Options listed below as required: Edit: Edit the selected data account. Add GPRS Account: Add a new GPRS account. Add CSD Account: Add a new CSD account. Delete: Delete the selected account. Change To Default: Change selected account to default. Multimedia Message • Data Account: Select from a list of preset data accounts. • Common Settings: Edit the settings for sending multimedia messages and view memory status. Web Produces a list of settings identical to those available for a browser. 10. My Stuff Tools Alarm Your mobile phone has a built-in alarm clock with a snooze feature. You can set up to five separate alarms and choose whether or not the alarm should repeat. Setting an Alarm 1. From the main menu, select My Stuff > Tools > Alarm. 2. To edit the alarm, press Options and select Edit. The following options display: • Time: Set the specified time for this alarm. • Repeat: Select Once (default)/Every day/ Days or customize as preferred. • Snooze: The alarm will repeat at regular intervals. • Mode: Select the mode for your alarm Ringtone: Ring Only, Vibration, Silence or Vibration + Melody. • Melody: Choose a melody as your alarm notification sound. 3. Press Save to save the changes and turn on your new alarm. 29 Viewing Saved Alarms Viewing an Event 1. From the main menu, select My Stuff > Tools > Alarm. 1. From the main menu, select My Stuff > Tools > Calendar. 2. The screen displays 5 saved alarms. The alarm marked by “ √ ” is ON. 2. To check the event, press Options > All Appointments. Editing/Deleting an Alarm 3. To view the details of the event, press Options and select View. 1. From the main menu, select My Stuff > Tools > Alarm. 2. To edit the alarm, press Options and select Edit; To turn on/off the alarm, press Options and select On/Off. Calendar Editing/Deleting an Event 1. From the main menu, select My Stuff > Tools > Calendar. 2. To view the event, press Options and select View/View All. Your phone has a built-in Calendar with a monthly-view calendar for you to keep track of important meetings, appointments, etc. 3. To edit the event, press Options and select Edit; to delete the event, press Options and select Delete/Delete All. Viewing Your Calendar Calculator From the main menu, select My Stuff > Tools > Calendar. Days with events entered will be marked in color. 1. From the main menu, select My Stuff > Tools > Calculator. Adding an Event 1. From the main menu, select My Stuff > Tools > Calendar. 2. Using the Navigation key, highlight the date, and press Options and select Create. 3. Fill in all required information for this new event. 4. When done, press Save. 30 2. Enter a number, select the type of operation to be performed using the Navigation keys, and enter the second number, then select the / key to display the result. 3. Once an operation is complete, you can select Clear to clear numbers and carry out a new operation. World Clock Sending a Voice Memo The World clock shows current local time and the time zone in different cities. You may view up to 3 cities at one time. 1. From the main menu, select My Stuff > Tools > Voice Recorder. From the main menu, select My Stuff > Tools > World Clock. Voice Recorder Recording a New Memo 2. To send the memo via MMS, press Options and select Send. Deleting a Voice Memo 1. From the main menu, select My Stuff > Tools > Voice Recorder. 1. From the main menu, select My Stuff > Tools > Voice Recorder. 2. To delete the memo, press Options and select Delete/Delete All. 2. The first time you record the memo, press Create, or press Options and select New Record. Unit Converter 3. The voice recorder screen displays. Use the weight or length converter by selecting the unit you wish to convert, then pressing the numeric key to input the digits. 4. Press the recording. key to start/pause the 5. When done, press Stop to stop recording and save the file. Naming/Renaming a Voice Memo 1. From the main menu, select My Stuff > Tools > Voice Recorder. 2. To rename the memo, press Options and select Rename. From the main menu, select My Stuff > Tools > Unit Converter. Finally confirm with OK. Audio The Audio menu option allows you to shop tones and answer tones and download and store files using the WAP browser. You can also access music and audio clips you have recorded. 31 Shop Tones Pictures 1. From the main menu, select My Stuff > Audio > Options > Shop Tones. A menu displays giving you the option to Shop Tones, view Downloaded Tones, or view Default Tones. Select a picture or a photo as wallpaper. 2. Highlight the Shop Tones menu option to launch the WAP browser and select a file to download. Answer Tones From the main menu, select My Stuff > Audio > Options > Answer Tones. Gives your callers their favorite songs to listen to with Answer Tones when waiting for your answer. The following options display: • Shop Answer Tones: Launches the WAP browser. Choose and set an answer tone and follow the on-screen options. • Manage Answer Tones: Launches the WAP browser. You can assign Answer Tones to Callers and Groups, turn your greeting on or off, and shop for more Answer Tones. • About Answer Tones: Launches the WAP browser. You can navigate through the frequently asked questions regarding Answer Tones. 32 Others You can save other updated file from MMS or Mobile Web with Pictures or Audio support file exception. Games There are two available games pre-loaded in your phone. From the main menu, select My Stuff > Games. Memory Status 1. From the main menu, select My Stuff > Memory Status. 2. Your phone’s memory is shared between several functions: contacts, calendar, messages, images, melodies, games, etc. Services The SIM Toolkit allows network operators to develop phone applications without modifying or installing software on the phone. The SIM toolkit application provides the user interface for this functionality. 11. Safety and Use We recommend that you read this chapter carefully before using your mobile phone. The manufacturer disclaims any liability for damage, which may result as a consequence of improper use or use contrary to the instructions contained herein. - do not place your mobile phone on top of the dashboard or within an airbag deployment area, - check with your car dealer or the car manufacturer to make sure that the car’s electronic devices are shielded from mobile phone RF energy. • TRAFFIC SAFETY: • CONDITIONS OF USE: Given that studies show that using a mobile phone while driving a vehicle constitutes a real risk, even when the hands-free kit is used (car kit, headset...), drivers are requested to refrain from using their mobile phone when the vehicle is not parked. Check the laws and regulations on the use of wireless mobile phones and their accessories in the areas where you drive. Always obey them. The use of these devices may be prohibited or restricted in certain areas. You are advised to switch off the mobile phone from time to time to optimize its performance. When driving, do not use your mobile phone and headphone to listen to music or to the radio. Using a headphone can be dangerous and forbidden in some areas. When switched on, your mobile phone emits electromagnetic waves that can interfere with the vehicle’s electronic systems such as ABS anti-lock brakes or airbags. To ensure that there is no problem: Remember to abide by local authority rules of mobile phone use on aircrafts. Operational Warnings: Obey all posted signs when using mobile devices in public areas. Follow Instructions to Avoid Interference Problems: Turn off your mobile device in any location where posted notices instruct you to do so. In an aircraft, turn off your mobile device whenever instructed to do so by airline staff. If your mobile device offers an airplane mode or similar feature, consult airline staff about using it in flight. Switch the mobile phone off when you are in health care facilities, except in designated areas. As with many other types of equipment now in regular use, mobile phones can interfere with other electrical or electronic devices, or equipment using radio frequency. 33 Switch the mobile phone off when you are near gas or flammable liquids. Strictly obey all signs and instructions posted in a fuel depot, gas station, or chemical plant, or in any potentially explosive atmosphere. When the mobile phone is switched on, it should be kept at least 15 cm from any medical device such as a pacemaker, a hearing aid or insulin pump. In particular when using the mobile phone you should hold it against the ear on the opposite side to the device, if any. Read and follow the directions from the manufacturer of your implantable medical device. If you have any questions about using your mobile device with your implantable medical device, consult your healthcare provider. To avoid hearing impairment, answer the call before holding your mobile phone to your ear. Also move the handset away from your ear while using the “hands-free” option because the amplified volume might cause hearing damage. It is recommended to have proper supervision while small children use your mobile phone. When replacing the cover please note that your mobile phone may contain substances that could create an allergic reaction. Always handle your mobile phone with care and keep it in a clean and dust-free place. 34 Do not allow your mobile phone to be exposed to adverse weather or environmental conditions (moisture, humidity, rain, infiltration of liquids, dust, sea air, etc.). The manufacturer’s recommended operating temperature range is 14°F (-10°C) to 131°F (+55°C) (the max value depends on device, materials and housing paint/texture). Over 131°F (55°C) the legibility of the mobile phone’s display may be impaired, though this is temporary and not serious. Do not open or attempt to repair your mobile phone yourself. Do not drop, throw or try to bend your mobile phone. Do not paint it. Use only batteries, battery chargers, and accessories which are recommended by TCT Mobile Limited and its affiliates and are compatible with your mobile phone model. TCT Mobile Limited and its affiliates disclaim any liability for damage caused by the use of other chargers or batteries. Your mobile phone should not be disposed of in a municipal waste. Please check local regulations for disposal of electronic products. Remember to make back-up copies or keep a written record of all important information stored in your mobile phone. Prolonged exposure to music at full volume using the music player may damage your hearing. Set your mobile phone’s volume to it’s lowest setting prior to inserting headphones in your ears and adjust the volume to your preference. Only use headphones that are recommended by TCT Mobile Limited and it’s affiliates. • PRIVACY: Please note that you must respect the laws and regulations in force in your jurisdiction or other jurisdiction(s) where you will use your mobile phone regarding taking photographs and recording sounds with your mobile phone. Pursuant to such laws and regulations, it may be strictly forbidden to take photographs and/or to record the voices of other people or any of their personal attributes, and reproduce or distribute them, as this may be considered to be an invasion of privacy. It is the user’s sole responsibility to ensure that prior authorization be obtained, if necessary, in order to record private or confidential conversations or take a photograph of another person; the manufacturer, the seller or vendor of your mobile phone (including the operator) disclaim any liability which may result from the improper use of the mobile phone. • BATTERY AND ACCESSORIES: Before removing the battery from your mobile phone, please make sure that the mobile phone is switched off. Observe the following precautions for battery use: - Do not attempt to open the battery (due to the risk of toxic fumes and burns). - Do not puncture, disassemble or cause a short-circuit in a battery, - Do not burn or dispose of a used battery in the garbage or store it at temperatures above 140°F (60°C). Batteries must be disposed of in accordance with locally applicable environmental regulations. Only use the battery for the purpose for which it was designed. Never use damaged batteries or those not recommended by TCT Mobile Limited and/or its affiliates. This symbol on your mobile phone, the battery and the accessories means that these products must be taken to collection points at the end of their life: - Municipal waste disposal centers with specific bins for these items of equipment - Collection bins at points of sale. 35 They will then be recycled, preventing substances being disposed of in the environment, so that their components can be reused. jurisdiction may not work in another jurisdiction. They should be used for this purpose only. In European Union Countries: Characteristics of power supply (depending on the country): These collection points are accessible free of charge. All products with this sign must be brought to these collection points. Travel charger: Input: 100~240 V, 50/60 Hz, 0.15 A In Non European Union Jurisdictions: Items of equipment with this symbol are not be thrown into ordinary bins if your jurisdiction or your region has suitable recycling and collection facilities; instead they are to be taken to collection points for them to be recycled. In the United States you may learn more about CTIA’s Recycling Program at www.recyclewirelessphones.com CAUTION: RISK OF EXPLOSION IF BATTERY IS REPLACED BY AN INCORRECT TYPE. DISPOSE OF USED BATTERIES ACCORDING TO THE INSTRUCTIONS. CHARGERS Home A.C./Travel chargers will operate within the temperature range of: 32°F (0°C) to 104°F (40°C). The chargers designed for your mobile phone meet with the standard for safety of information technology equipment and office equipment use. Due to different applicable electrical specifications, a charger you purchased in one 36 Output: 5V, 550 mA Battery: Lithium 850 mAh RADIO WAVES: THIS MOBILE PHONE MEETS THE GOVERNMENT’S REQUIREMENTS FOR EXPOSURE TO RADIO WAVES. Your mobile phone is a radio transmitter and receiver. It is designed and manufactured not to exceed the emission limits for exposure to radio-frequency (RF) energy. These limits are part of comprehensive guidelines and establish permitted levels of RF energy for the general population. The guidelines are based on standards that were developed by independent scientific organizations through periodic and thorough evaluation of scientific studies. These guidelines include a substantial safety margin designed to ensure the safety of all persons, regardless of age and health. The exposure standard for mobile phones employs a unit of measurement known as the Specific Absorption Rate, or SAR. The SAR limit set by public authorities such as the Federal Communications Commission of the US Government (FCC), or by Industry Canada, is 1.6 W/Kg averaged over 1 gram of body tissue. Tests for SAR are conducted using standard operating positions with the mobile phone transmitting at its highest certified power level in all tested frequency bands. Although the SAR is determined at the highest certified power level, the actual SAR level of the mobile phone while operating can be well below the maximum value. This is because the mobile phone is designed to operate at multiple power levels so as to use only the power required to reach the network. In general, the closer you are to a wireless base station antenna, the lower the power output of the mobile phone. Before a mobile phone model is available for sale to the public, compliance with national regulations and standards must be shown. The highest SAR value for this model mobile phone when tested is 1.04 W/Kg for use at the ear and 1.15 W/Kg for use close to the body. While there may be differences between the SAR levels of various mobile phones and at various positions, they all meet the government requirement for RF exposure. For body-worn operation, the mobile phone meets FCC RF exposure guidelines provided that it is used with a non-metallic accessory with the handset at least 1.5 cm from the body. Use of other accessories may not ensure compliance with FCC RF exposure guidelines. Additional information on SAR can be found on the Cellular Telecommunications & Internet Association (CTIA) Web site: http://www. phonefacts.net The World Health Organization (WHO) considers that present scientific information does not indicate the need for any special precautions for use of mobile phones. If individuals are concerned, they might choose to limit their own or their children’s RF exposure by limiting the length of calls, or using “hands-free” devices to keep mobile phones away from the head and body. (fact sheet n°193). Additional WHO information about electromagnetic fields and public health are available on the following website: http://www.who.int/peh-emf. Note: This equipment has been tested and found to comply with the limits for a Class B digital device pursuant to part 15 of the FCC Rules. These limits are designed to provide reasonable protection against harmful interference in a residential installation. This equipment generates, uses and can radiate radio frequency energy and, if not installed and used in accordance with the instructions, may cause harmful interference to radio communications. However, there is no guarantee that interference to radio or television reception, which can be determined by turning the equipment off and on, the user is encouraged to try to correct the interference by one or more of 37 the following measures: - Reorient or relocate the receiving antenna. - Increase the separation between the equipment and receiver. - Connect the equipment into an outlet on a circuit different from that to which the receiver is connected. - Consult the dealer or an experienced radio/ TV technician for help. Changes or modifications not expressly approved by the party responsible for compliance could void the user’s authority to operate the equipment. For the receiver devices associated with the operation of a licensed radio service (e.g. FM broadcast), they bear the following statement: This device complies with Part 15 of FCC Rules. Operation is subject to the following two conditions: (1) This device may not cause harmful interference, and (2) This device must accept any interference received. Including interference that may cause undesired operation. Your mobile phone is equipped with a built-in antenna. For optimal operation, you should avoid touching it or degrading it. 38 As mobile devices offer a range of functions, they can be used in positions other than against your ear. In such circumstances the device will be compliant with the guidelines when used with headset or usb data cable. If you are using another accessory ensure that whatever product is used is free of any metal and that it positions the mobile phone at least 1.5 cm away from the body. • LICENCE Obigo® is a registered trademark of Obigo AB. TouchPal™ and CooTek™ are trademarks of Shanghai HanXiang (CooTek)Information Technology Co., Ltd. and/or its Affiliates. Hearing Aid Compatibility 12. General Information This phone has been tested and rated for use with hearing aids for some of the wireless technologies that it uses. However, there may be some newer wireless technologies used in this phone that have not been tested yet for use with hearing aids. It is important to try the different features of this phone thoroughly and in different locations, using your hearing aid or cochlear implant, to determine if you hear any interfering noise. Consult your service provider or the manufacturer of this phone for information on hearing aid compatibility. If you have questions about return or exchange policies, consult your service provider or phone retailer. Your telephone is rated: “For Hearing Aid", to assist hearing device users in finding phones that may be compatible with their hearing devices. • Website: www.alcatelonetouch.com Your telephone is rated: “For Hearing Aid", to assist hearing device users in finding phones that may be compatible with their hearing devices. This device is HAC M3/T3 compatible. For more information please refer to “Hearing Aid Compatibility with Mobile Phones” leaflet or visit our website www.tctmobile.com • Hot Line Number: In the United States, call 8773444-702- for technical support. On our Internet site, you will find our FAQ (Frequently Asked Questions) section. You can also contact us by e-mail to ask any questions you may have. An electronic version of this user guide is available in English and other languages according to availability on our server: www.alcatelonetouch.com Your mobile phone is a transceiver that operates on GSM networks with 850/900/1800/1900 MHz bands or UMTS networks with 850/1900 MHz. Protection Against Theft (1) Your mobile phone is identified by an IMEI (mobile phone serial number) shown on the packaging label and in the product’s memory. We recommend that you note the number the first time you use your mobile phone by entering *#06# and keep it in a safe place. It may be requested by the police or your operator if your mobile phone is stolen. (1) Contact your network operator for service availability. 39 Disclaimer 13. Warranty There may be certain differences between the user manual description and the mobile phone’s operation, depending on the software release of your mobile phone or specific operator services. 12 MONTH LIMITED WARRANTY TCT Mobile shall not be held legally responsible for such differences, if any, nor for their potential consequences, which responsibility shall be borne by the operator exclusively. Personal Communications Devices, LLC (the "Company") warrants to the original retail purchaser of this cellular handset or wireless device (Product), that should this Product or any part thereof during normal consumer usage and conditions, be proven defective in material or workmanship that results in the Product's failure within the first twelve (12) month period from the date of purchase (proof of purchase required), such defect(s) will be repaired or replaced (with new or rebuilt parts) at the Company’s option, without charge for parts or labor directly related to the defect(s). The antenna, keypad, display, rechargeable battery and battery charger, if included with the Product, are similarly warranted for twelve (12) months from the date of purchase. This Warranty extends only to consumers who purchase the product in the United States or Canada and it is not transferable or assignable. 40 This Warranty does not apply to: (a) Product subjected to abnormal use or conditions, accident, mishandling, neglect, unauthorized alteration, misuse, improper installation or repair or improper storage; (b) Product whose mechanical serial number or electronic serial number has been removed, altered or defaced; (c) Damage from exposure to moisture, humidity, excessive temperatures or extreme environmental conditions; (d) Damage resulting from connection to, or use of any accessory or other product not approved or authorized by the Company; (e) Defects in appearance, cosmetic, decorative or structural items such as framing and non-operative parts; (f) Product damaged from external causes such as fire, flooding, dirt, sand, weather conditions, battery leakage, blown fuse, theft or improper usage of any electrical source; g) Product subjected to unauthorized modifications to the software of the Product or to the Product itself; (h) Product subjected to the unauthorized opening or repair of the Product; (i) Product subjected to hacking, passwordmining, jail breaking, the unlocking of the boot loader using the fast boot program or the tampering with or short-circuiting of the battery; (j) Product that has been modified to alter functionality or capability of the Product without the written permission of the Company. The Company disclaims liability for removal or reinstallation of the Product, for geographic coverage, for inadequate signal reception by the antenna or for communications range or operation of the cellular system as a whole. When sending your wireless device to the Company for repair or service, please note that any personal data or software stored on the Product may be inadvertently erased or altered. Therefore, we strongly recommend you make a back up copy of all data and software contained on your Product before submitting it for repair or service. This includes all contact lists, downloads (i.e. third-party software applications, ringtones, games and graphics) and any other data added to your Product. In addition, if your Product utilizes a SIM or Multimedia card, please remove the card before submitting the Product and store for later use when your Product is returned. The Company is not responsible for and does not guarantee restoration of any third-party 41 software, personal information or memory data contained in, stored on, or integrated with any other wireless device, whether under warranty or not, returned to the Company for repair or service. To obtain repairs or replacement within the terms of this Warranty, the Product should be delivered with proof of Warranty coverage (e.g. dated bill of sale), the consumer’s return address, daytime phone number and/ or fax number and complete description of the problem, transportation prepaid, to the Company at the address shown below or to the place of purchase for repair or replacement processing. In addition, for reference to an authorized Warranty station in your area, you may telephone in the United States (800) 229-1235, and in Canada (800) 465-9672 (in Ontario call 416-695-3060). THE EXTENT OF THE COMPANY’S LIABILITY UNDER THIS WARRANTY IS LIMITED TO THE REPAIR OR REPLACEMENT PROVIDED ABOVE AND, IN NO EVENT, SHALL THE COMPANY’S LIABILITY EXCEED THE PURCHASE PRICE PAID BY PURCHASER FOR THE PRODUCT. ANY IMPLIED WARRANTIES, INCLUDING ANY IMPLIED WARRANTY OF MERCHANTABILITY OR FITNESS FOR A PARTICULAR PURPOSE, SHALL BE LIMITED TO THE DURATION OF THIS WRITTEN WARRANTY. 42 ANY ACTION FOR BREACH OF ANY WARRANTY MUST BE BROUGHT WITHIN A PERIOD OF 18 MONTHS FROM DATE OF ORIGINAL PURCHASE. IN NO CASE SHALL THE COMPANY BE LIABLE FOR AN SPECIAL CONSEQUENTIAL OR INCIDENTAL DAMAGES FOR BREACH OF THIS OR ANY OTHER WARRANTY, EXPRESS OR IMPLIED, WHATSOEVER. THE COMPANY SHALL NOT BE LIABLE FOR THE DELAY IN RENDERING SERVICE UNDER THIS WARRANTY OR LOSS OF USE DURING THE TIME THE PRODUCT IS BEING REPAIRED OR REPLACED. No person or representative is authorized to assume for the Company any liability other than expressed herein in connection with the sale of this product. Some states or provinces do not allow limitations on how long an implied warranty lasts or the exclusion or limitation of incidental or consequential damage so the above limitation or exclusions may not apply to you. This Warranty gives you specific legal rights, and you may also have other rights, which vary from state to state or province to province. IN USA: Personal Communications Devices, LLC. 555 Wireless Blvd. Hauppauge, NY 11788 (800) 229-1235 IN CANADA: PCD Communications Canada Ltd. 5535 Eglington Avenue West Suite #210 Toronto, ON M9C 5K5 (800) 465-9672 43