1
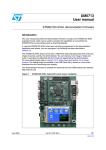
Open4
Using Open4 and EvoPrimers
(fun, easy introduction kits
for microcontrollers)
User Manual
Document version
01 June 2010
Open4 Base
Contents
1. Introduction.......................................................................................................................4
1.1 Purpose of this manual......................................................................................................................4
1.2 Scope of this manual.........................................................................................................................4
1.3 Additional help or information............................................................................................................5
2. Presentation.....................................................................................................................6
2.1 Base features.....................................................................................................................................6
2.2 Development software.......................................................................................................................6
3. Primer hardware...............................................................................................................7
3.1 Package contents..............................................................................................................................7
3.2 Components overview.......................................................................................................................7
3.3 Opening the base...............................................................................................................................8
3.4 Features of thebase unit....................................................................................................................8
3.4.1 LCD.............................................................................................................................................8
3.4.2 3D MEMS accelerometer............................................................................................................8
3.4.3 Audio capabilities........................................................................................................................8
3.4.4 Power supply..............................................................................................................................8
3.4.5 Extension connector...................................................................................................................9
3.4.6 Application-specific daughter boards........................................................................................11
4. Getting started................................................................................................................12
4.1 Insert a target board.........................................................................................................................12
4.2 Connect the battery, charge and power up......................................................................................13
4.3 Removing a target board.................................................................................................................13
4.4 Inserting and removing a MicroSD card..........................................................................................14
4.5 Use your Primer applications...........................................................................................................14
4.6 Resetting your Primer......................................................................................................................14
4.6.1 Hardware reset.........................................................................................................................14
-2-
Open4 Base
4.6.2 Software reset...........................................................................................................................14
4.7 Sharing with the Circle community...................................................................................................14
5. Conformity and recycling................................................................................................15
6. Glossary.........................................................................................................................16
7. Index...............................................................................................................................17
8. History............................................................................................................................18
-3-
1. Introduction
Open4 Base
1. Introduction
Open4 provides a versatile solution for exploring a variety of new microcontrollers, thanks to its rich set
of hardware features and interchangeable target microcontrollers. Because of this versatility, the
Open4 is the foundation of a range of "Primer" products that will help users quickly explore, learn and
start applications for:
Microcontroller line
ST EvoPrimer
Raisonance Primer
STM8L Ultra-Low Power
EvoPrimer for STM8L UltraLow Power Line
Open4 STM8L Ultra-Low
Power
STM32F Performance
EvoPrimer for STM32F
Performance Line
Open4 STM32F
Performance
STM32F Connectivity
EvoPrimer for STM32F
Connectivity Line
Open4 STM32F Connectivity
All these Primers are made up of an Open4-derived "Base" platform and compatible "Target Board"
featuring a target microcontroller:
STMicroelectronics:
MCU Line
ST Target Board
Raisonance Target Board
STM8L Ultra-Low Power
STM8L152C6 EvoPrimer
Target Board
STM8L152C6 Open4 Target
Board
STM32F Performance Line
STM32F103VE EvoPrimer
Target Board
STM32F103VE Open4
Target Board
STM32F Connectivity Line
STM32F107VC EvoPrimer
Target Board
STM32F103VC Open4
Target Board
Regardless of the commercial product that the user has bought (EvoPrimer or Open4) these Target
Boards are compatible with and may be used on any of these Base platforms:
•
Open4 base,
•
EvoPrimer base (debug limited to 64 Kbytes in target RAM or Flash memory)
1.1 Purpose of this manual
This manual gives an installation procedure and overview of the Open4 Base.
Armed with the knowledge in this manual, Open4 Primer users can quickly start using a Primer and
exploring a target MCU.
1.2 Scope of this manual
This manual is applicable to all Open4 Primer versions and derived products. It describes the basic use
and hardware features.
-4-
Open4 Base
1. Introduction
Some technical information about your Primer is available from the Ride7 interface:
- The 3D MEMS inertial sensor data sheet
- specific MCU documentation
- specific MCU reference manual
This document provides descriptions and user instructions that are common to all Open4-derived
Primers. Instructions that are specific to a target microcontroller are found in the specific Target Board
documentation. Documentation for all Open4-derived Primers is provided at www.mcu-circle.com. .
1.3 Additional help or information
Please visit the Raisonance website: http://www.raisonance.com/ and its support forum or contact
Raisonance.
Address:
Telephone:
Fax:
Email:
Raisonance S.A.S.
17, Avenue Jean Kuntzmann,
38330 Montbonnot Saint Martin
France
+33 4 76 61 02 30
+33 4 76 41 81 68
[email protected]
If you find any errors or omissions, or if you have suggestions for improving this manual, please let us
know by email.
-5-
2. Presentation
Open4 Base
2. Presentation
The Open4 is an enhancement of the STM32-Primer (released in 2007) and the STM32-Primer2.
An Open4 Primer or derived Primer products consists of an base and a Target Board. The base
includes user interface and target evaluation features, plus the debugging and programming features
which are driven from the Raisonance software tools. The Target Board includes the target MCU and
may have some additional evaluation features.
2.1 Base features
The base has the following capabilities:
USB debug/programming connection
•
QVGA (320x240) backlit color LCD, with touch screen capability
•
Joystick and 4 push buttons
•
Micro SD card connector
•
Audio circuit with Microphone/Loudspeaker/Jack
•
3D MEMS accelerometer
•
Li-Ion battery with charge management circuitry
•
Add-on connectors (USART, SPI, I2C, ADC,...)
•
2.2 Development software
The development software offered with the any Target
Board provides everything you need to program the
microcontroller and debug applications, including:
•
Rlink USB driver for USB host connection providing incircuit programming and debugging.
•
Ride7 integrated development environment for code
editing, device programming and application debugging.
•
Raisonance toolchain for different microcontrollers.
•
CircleOS Operating System and base services. An
online community available at http://www.mcu-circle.com/ makes it possible to share your Primer
experience with others on the forums, retrieve useful resources, application notes, firmware, demos
(C sources and projects) and applications, all available for free download.
-6-
Open4 Base
3. Primer hardware
3. Primer hardware
3.1 Package contents
Your Primer base unit has been carefully packed. Examine the equipment for damage that may have
occurred during shipment. If you find any damage, or if any of the items are not included, please
contact Raisonance. Your package should contain the following items:
1. The base in its plastic case.
2. A USB cable for host PC connection that can be used to program and debug the target
microcontroller.
3. Plastic cover to protect the Target Board once installed.
Your Primer's Target Board is packaged separately. Refer to Target Board documentation for its
package contents.
3.2 Components overview
Here is a brief overview of the main components of the Open4 Primer:
Microphone
Target Board
(Packaged
separately)
4 toolbar
buttons
Headphones
jack
Battery in charge
(Red Led L0)
Battery fully
charged
(Green Led L1)
USB debug
connector
Touchscreen
Application LED0
(Red Led L2)
Application LED1
(Green Led L3)
Joystick
Loudspeaker
Li-Ion battery
(inside)
IrDA
transceiver
MicroSD slot
Extension
board cover
-7-
3D MEMS
accelerometer
(inside)
3. Primer hardware
Open4 Base
3.3 Opening the base
Normally, it is not necessary, in any case, to open the base. But, opening the plastic casing is easy.
Just unscrew the 4 screws to separate the top and bottom of the casing.
Note that the board is screwed onto the top plastic half of the case. This should not be removed as the
display connector (flex) is very sensitive and may be damaged during this maneuver.
Warning: In order to avoid harming your Open4 Primer, the board should not be unscrewed
from the transparent plastic case.
3.4 Features of thebase unit
3.4.1 LCD
The base is equipped with a QVGA (320 x 240) LCD with touchscreen capability.
3.4.2 3D MEMS accelerometer
The Open4 Primer base is equipped with a MEMS inertial sensor (LIS3LV02DL from
STMicroelectronics). This device can be used as a human interface device to select commands in
coordination with a graphic pointer. When you start a Primer for the first time, you will see a small ball
moving according to the orientation of the Primer. The information about the 3D position is provided by
the MEMS.
3.4.3 Audio capabilities
The base is equipped with a loudspeaker, a microphone and a 3,5 mm headphones jack.
Nevertheless, the audio generation is not embedded, and is provided by the target board (audio codec
embedded or PWM buzzer).
3.4.4 Power supply
The base features a 400mAh Li-Ion rechargeable battery, equipped with a voltage regulator and a
battery charger.
When the USB connector is linked to a PC, the host voltage (supplied by the PC) is used to recharge
the battery. When no USB host is connected, the battery is used to supply the power for the Primer.
When the battery is fully charged, the Primer can be used for about 6 hours. The duration of the
batteries depends on the activity.
-8-
Open4 Base
3. Primer hardware
3.4.5 Extension connector
The base has a 20-pin HE14 female right-angle extension connector that you can access when
removing the bottom part of the case.
The extension connector permits the usage of generic peripherals, depending on the Target Board that
is inserted into the Base.
Peripherals :
•
power supply (regulator and battery),
•
1 x SPI,
•
1 x I2C,
•
1 x UART,
•
2 x ADC inputs,
•
1 x timer,
•
1 x CAN.
Detail of the connector :
Pin
Printed name
Description
1
V2V8
Connected to the output of the U6 regulator (3.1V). This source
can provide approximately 100mA to the extension board.
2
GND
Ground
3
SCL
I2C clock
4
SDA
I2C data
5
MISO
SPI MISO
6
SD
SPI MOSI or I2S Serial Data
7
SCK
SPI Clock or I2S Clock
8
WS
I2S Word Select
9
CANH
CAN transceiver outputs
10
CANL
11
ADC1
Analog input 1
12
ADC2
Analog input 2
13
A_TIM
Timer ouput
14
CTS
UART CTS
15
RTS
UART RTS
16
TX
UART Tx
17
CK
Push button input. Can wakeup the daughterboard.
18
RX
UART Rx
-9-
3. Primer hardware
Open4 Base
Pin
Printed name
Description
19
VEXT
Base battery voltage provided as input for the extension board
20
GND
Ground
Note:
* The signals on the extension connector are directly provided by the Target Board, via the base 70 pins
connector, without any treatment.
* Printed names on the Open4 Primer extension board may not accurately match the pin names that
exist for the Target Board. This is because the Open4 base is a generic design that supports several
processor families (namely STM32, STM8...), and inherits specifications from the Primer1, which do not
share the same feature set.
- 10 -
Open4 Base
3. Primer hardware
3.4.6 Application-specific daughter boards
The Open4 Primer base has been designed to be extended through application-specific daughter
boards.
Such daughter boards connect to the extension connector and are compatible (mechanically and
electronically) with the previous STM32-Primer2, so you should be able to reuse your previous designs
without modification to the daughter board. However, some limitations may apply, for instance if you
use specific processor/peripheral capabilities that are not portable between designs.
You can design your own daughter board if your application requires it. The following picture shows the
mechanical constraints that you should respect so that your daughterboard fits inside the base case.
Daughterboard mechanical specifications
- 11 -
4. Getting started
Open4 Base
4. Getting started
The procedure for getting started is reduced to four simple operations:
1. Insert a Target Board into the Primer base (see below).
2. Switch the Power Switch to provide current to the Target Board (see below).
3. Slide the transparent cover in place.
4. Press the Joystick to power up the Primer.
4.1 Insert a target board
The first thing to do is to insert a microcontroller target board:
1. Remove the transparent cover.
2. Switch off the battery.
3. Insert the Target Board into the base, as shown on the image, ensuring that the PCB is against
the guides.
4. Push until the top of the Target Board fit with the side of the base.
Switching OFF the Primer
Inserting a Target Board
- 12 -
Open4 Base
4. Getting started
4.2 Connect the battery, charge and power up
Your Primer is initially shipped with the battery disconnected, in order to prevent discharging and
potentially harming the battery. You need to connect the battery before operating your Primer:
1. Open the Primer’s case by removing the transparent cover which covers the target board.
2. Switch the button as shown on the image to power on your device.
3. Close the case.
4. Connect the Primer to the USB port on a PC to charge its battery. Only the Red LED (L0) will
be lit if the battery is charging. The Green LED (L1) is lit when fully charged.
5. After charging the battery, press the push button to activate the Primer.
Switching ON the Primer
4.3 Removing a target board
If you want to change the Target Board in order to explore the capabilities of
another microcontroller, follow these steps:
5. Power off the Primer base.
6. Remove the transparent cover that is over the Target Board.
7. Switch off the battery.
8. Turn the base so the display is facing downward.
9. Holding the base with both hands, push upward on the Target Board
with both thumbs pressing evenly on the Target Board’s plastic
drawer.
10. When the Target Board dislodges from the connector, remove it
completely by pulling on the plastic drawer.
- 13 -
4. Getting started
Open4 Base
4.4 Inserting and removing a MicroSD card
The base is equipped with a MicroSD (Micro Secure Digital) card slot, which can be used for storing
data.
The slot is located at the front of the base, between the IrdA transmitter.
Insert your MicroSD card into the slot (card contacts on the bottom), then gently slide it. Be careful not
to harm your MicroSD card nor connector on the base!
Note: To remove the MicroSD card, do not pull it away from the slot, but push it deeper into the slot. A
spring mechanism automatically extracts it.
4.5 Use your Primer applications
Target Boards include preinstalled applications (games like Maze or Breakout, test applications...).
You can start an application by selecting it from your Primer's main menu (just press the button).
You can add more applications to your Primer by downloading them on the web site http://www.mcucircle.com. Refer to the Target Board specific User manual.
4.6 Resetting your Primer
4.6.1 Hardware reset
A hardware reset will restart your Primer (restoring it to a clean state), but will not remove its ROM
contents.
•
Remove any USB cable.
•
•
Remove the plastic case protecting the target board.
Change the switch to its open state (this will disconnect the internal battery) then replace the
switch as it was.
•
•
Put the plastic case back in place.
Restart your Primer by pressing its joystick/push button.
4.6.2 Software reset
A software reset will erase all the flash memory in your Primer and all applications will be suppressed.
The procedure is depending on the microcontroller Target Board, we invite you to refer to the specific
User Manual.
4.7 Sharing with the Circle community
You can share your Open4 experience with the other members through the http://www.mcucircle.com/ community.
Here you will find the resources to help you get started with your Primer, and stimulate new creative
application ideas, including:
• The latest products, such as the new Target Boards,
• Applications & projects from Raisonance and other users,
• Design resources including software, board schematics, documentation...,
• Forums where users can share their experience, ideas, and projects.
- 14 -
Open4 Base
5. Conformity and recycling
5. Conformity and recycling
For more information on conformity and recycling, please visit the Raisonance website
www.raisonance.com
ROHS Compliance (Restriction of Hazardous Substances)
Raisonance products are certified to comply with the European Union RoHS Directive (2002/95/EC)
which restricts the use of six hazardous chemicals in its products for the protection of human health
and the environment.
The restricted substances are as follows: lead, mercury, cadmium, hexavalent chromium,
polybrominated biphenyls (PBB), and polybrominated diphenyl ethers (PBDE).
CE Compliance (Conformité Européenne)
Raisonance products are certified to comply with the European Union CE Directive.
In a domestic environment, the user is responsible for taking protective measures from possible radio
interference the products may cause.
FCC Compliance (Federal Communications Commission)
Raisonance products are certified as Class A products in compliance with the American FCC
requirements. In a domestic environment, the user is responsible for taking protective measures from
possible radio interference the products may cause.
WEEE Compliance (The Waste Electrical & Electronic Equipment Directive)
As part of our continuing efforts to proved the best service to our users an communities, Raisonance is
actively defining take-back and recycling programs for EU customers as part of the implementation of
the European WEEE directive. The WEEE symbol is a reminder not to dispose of your electronic
equipment in standard trash receptacles.
For more information about disposal and recycling of electronic goods, please refer to
http://www.raisonance.com/support/weee.php.
Raisonance disposes of its electrical equipment according to the WEEE Directive (2002/96/EC).
Upon request, Raisonance can recycle customer’s redundant products.
- 15 -
6. Glossary
Open4 Base
6. Glossary
Term
Description
Open4
Open4 Primer, a base for microcontroller evaluation & development platform
EvoPrimer
Commercial products which are derived from the Raisonance Open4 and
distributed by STMicroelectronics for exploring, evaluating, developing and fine
tuning applications for a variety of ST 8 and 32-bit microcontrollers. Certain use
limitations may apply to these commercial products
Open4
Raisonance versatile hardware platform, which is used in a variety of
commercial products that allow users to explore, evaluate, develop and fine
tune applications for a range of microcontrollers that are mounted on Open4
compatible Target Boards. Also refered to as the "Base platform." Also
distributed under the name EvoPrimer base
Base
For all operations and features concerning just the Open4 / EvoPrimer base
Primer
For all operations and features requiring both base and Target Board
Target board
Boards featuring target microcontrollers which, when installed on an Open4derived base allow execution of applications, programming of the target
microcontroller and debugging of the applications running on the target
microcontroller. Hardware features of Target Boards will vary depending on the
target MCU and its features. Some features of the base platform may not be
available depending on the features and capabilities of the target microcontroller
Daughter board
Application-specific daughterboard, connected to the extension connector.
- 16 -
Open4 Base
7. Index
7. Index
Alphabetical Index
CE......................................................................15
Compliance........................................................15
Directive.............................................................15
FCC....................................................................15
Lead...................................................................15
Raisonance .......................................................15
ROHS.................................................................15
Web site...............................................................5
WEEE.................................................................15
- 17 -
8. History
Open4 Base
8. History
Date
Modifications
June 2010
Initial version.
Disclaimer
Information in this document is subject to change without notice and does not represent a commitment
on the part of the manufacturer. The software described in this document is provided under license and
may only be used or copied in accordance with the terms of the agreement. It is illegal to copy the
software onto any medium, except as specifically allowed in the license or non disclosure agreement.
No part of this manual may be reproduced or transmitted in any form or by any means, electronic or
mechanical, including photocopying, recording, or information storage and retrieval systems, for any
purpose other than the purchaser’s personal use, without prior written permission.
Every effort has been made to ensure the accuracy of this manual and to give appropriate credit to
persons, companies and trademarks referenced herein.
This manual exists both in paper and electronic form (pdf).
Please check the printed version against the .pdf installed on the computer in the installation directory,
for the most up-to-date version.
The examples of code used in this document are for illustration purposes only and accuracy is not
guaranteed. Please check the code before use.
Copyright © Raisonance 1987-2010 All rights reserved
- 18 -