1
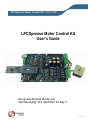
LPCXpresso Motor Control Kit - User’s Guide Copyright 2013 © Embedded Artists AB LPCXpresso Motor Control Kit User’s Guide Get Up-and-Running Quickly and Start Developing Your Application On Day 1! EA2-USG-1101 Rev B LPCXpresso Motor Control Kit - User’s Guide Page 2 Embedded Artists AB Davidshallsgatan 16 211 45 Malmö Sweden [email protected] http://www.EmbeddedArtists.com Copyright 2011-2013 © Embedded Artists AB. All rights reserved. No part of this publication may be reproduced, transmitted, transcribed, stored in a retrieval system, or translated into any language or computer language, in any form or by any means, electronic, mechanical, magnetic, optical, chemical, manual or otherwise, without the prior written permission of Embedded Artists AB. Disclaimer Embedded Artists AB makes no representation or warranties with respect to the contents hereof and specifically disclaim any implied warranties or merchantability or fitness for any particular purpose. Information in this publication is subject to change without notice and does not represent a commitment on the part of Embedded Artists AB. Feedback We appreciate any feedback you may have for improvements on this document. Please send your comments to [email protected]. Trademarks All brand and product names mentioned herein are trademarks, services marks, registered trademarks, or registered service marks of their respective owners and should be treated as such. Copyright 2013 © Embedded Artists AB LPCXpresso Motor Control Kit - User’s Guide Page 3 Table of Contents 1 Document Revision History 5 2 Introduction 6 2.1 Features 6 2.2 ESD Precaution 7 2.3 General Handling Care 7 2.4 Code Read Protection 7 2.5 CE Assessment 8 2.6 Other Products from Embedded Artists 8 2.6.1 Design and Production Services 8 2.6.2 OEM / Education / QuickStart Boards and Kits 8 3 Introduction 9 3.1 Board Structure 9 3.2 Motor Control Overview 9 3.3 Usage of CPU Pins Notes about LPC1114 control 12 3.3.2 Notes about LPC11C24 control 12 3.3.3 Notes about LPC1343 control 13 3.3.4 Notes about LPC176x control 13 4 LPCXpresso Motor Control Board Design 14 4.1 Phase Control 15 4.2 Phase Measurement 15 4.3 Input Stage and Brake Functionality 16 4.4 Power Supply 16 4.5 Sensor Inputs 16 4.6 Controlling MCU, Expansion connector (J8) and JP6 17 4.6.1 LPCXpresso LPC1114 17 4.6.2 LPCXpresso LPC176x 17 4.6.3 Other controlling MCUs 17 4.7 Communication Interfaces 17 4.7.1 USB-to-UART Bridge Interface 18 4.7.2 USB Interface 19 4.7.3 CAN Interface 19 4.7.4 RS422/RS485 Interface 19 4.7.5 Ethernet Interface 19 4.8 HMI 19 4.9 Debug 20 4.10 Known Board Design Issues 20 4.11 Default Jumpers Positions 22 5 Getting Started Copyright 2013 © Embedded Artists AB 10 3.3.1 24 LPCXpresso Motor Control Kit - User’s Guide 5.1 Page 4 Kit Content and Preparation 5.1.1 Step 1: Mount LPCXpresso LPC1114 board 24 5.1.2 Step 2: BLDC Motor Preparation 25 5.1.3 Step 3: Connect Power Supply 26 5.1.4 Step 4: Loading the Demo Application 26 5.2 Installing USB Driver 30 5.3 Demo Application 31 5.4 Compiling the Demo Application 31 5.5 Things to Note/Known Issues 33 5.5.1 Evaluation Platform – Not for End-products 33 5.5.2 Power Supply 33 5.5.3 Board Errata 33 5.5.4 Screw Connectors 34 6 Troubleshooting 35 6.1 Powering 35 6.2 Download Demo Application to LPCXpresso Board 36 6.3 Connect LPCXpresso Board 36 6.4 Power Electronics and BLDC Motor 37 7 Further Information Copyright 2013 © Embedded Artists AB 24 38 LPCXpresso Motor Control Kit - User’s Guide Page 5 1 Document Revision History Revision Date Description PA1 2011-02-01 First (incomplete) version PA2 2011-02-09 Second (more complete) version PA3 2011-02-14 Preliminary version PA4 2011-02-26 Corrected some smaller errors in text (demo application is not preloaded) and text in Fig 20. PA5 2011-04-24 Added information about LPCXpresso LPC176x usage. Added 7) in section 4.10. PA6 2011-11-30 Corrected spelling error A 2012-01-13 Added note about CE marking. B 2017-07-12 Added information about hardware revision B Copyright 2013 © Embedded Artists AB LPCXpresso Motor Control Kit - User’s Guide Page 6 2 Introduction Thank you for buying Embedded Artists’ LPCXpresso Motor Control Kit based on NXP’s motor control solutions. The board has been developed in close cooperation with NXP. The kit contains an LPCXpresso board with LPC1114 target, which has a Cortex-M0 core, as motor controller. Several other NXP MCUs can also be used with the board to demonstrate motor control. This document is a User’s Guide that describes the combination of the LPCXpresso Motor Control Board and the LPCXpresso LPC1114, together forming the LPCXpresso Motor Control Kit. 2.1 Features Embedded Artists’ LPCXpresso Motor Control Kit makes it possible for you to get started with motor control prototyping immediately. It is a universal platform for low voltage motor control based on NXP’s MCUs. With this platform it is possible to control BLDC, BLAC, stepper and dual brushed DC motors. The board has been designed for evaluation and is not designed for final integration into end-products performing motor control. Controller MCU Socket for LPCXpresso LPC1114, LPC11C24 and LPC1343 Socket for LPCXpresso LPC176x Socket for LPC1xxx in PLCC44 Expansion connector for control by LPC1800/LPC4000/LPC2900 families, or other Phase Control 4 phases (based on NXP PMSN2R6-40YS NMOSFET), accessed via screw terminals Phase control support 100% duty cycle Voltage measurement (on three phases and virtual ground) Current measurement (in-phase on three phases and common low-side) Input current measurement, including over-current trip Brake functionality Hall & QEI sensor inputs, connected via screw terminals Temperature sensor 12-30V input voltage, 17A peak current (max 300W output) On-board 15W power supply (+11V, +5V, +3.3V) Communication Interfaces USB interface (must be supported by controlling MCU) Ethernet interface (must be supported by controlling MCU) CAN interface (must be supported by controlling MCU) RS422/485 interface UART-to-USB interface User Interface Copyright 2013 © Embedded Artists AB 5-key joystick switch LPCXpresso Motor Control Kit - User’s Guide 96x64 pixel OLED Other Reset pushbutton I2C-E2PROM SWD/JTAG connector Dimensions 2.2 Page 7 200 x 150 mm Power Supply Input 2.1mm input jack, or via screw terminals 12-30V, 17A max ESD Precaution Please note that the LPCXpresso Motor Control Board and the LPCXpresso LPC1114 Board come without any case/box and all components are exposed for finger touches – and therefore extra attention must be paid to ESD (electrostatic discharge) precaution. Make it a habit always to first touch the metal surface of one of the USB or Ethernet connectors for a few seconds with both hands before touching any other parts of the boards. That way, you will have the same potential as the board and therefore minimize the risk for ESD. Note that Embedded Artists does not replace boards that have been damaged by ESD. 2.3 General Handling Care Handle the LPCXpresso Motor Control Board and the LPCXpresso LPC1114 Board with care. The boards are not mounted in a protective case/box and are not designed for rough physical handling. Connectors can ware out after excessive use. The boards are designed for evaluation and prototyping use, and not for integration into end-products. The LPCXpresso Motor Control Board has an OLED display. Do not exercise pressure on the display glass area or the flex cable connecting the display to the pcb. That will damage the display. Note that Embedded Artists does not replace boards where the OLED has been improperly handled. Some components on the LPCXpresso Motor Control Board can become very hot during normal operation. The BLDC motor is powerful and can cause damage of improperly used. Be careful when working with the board and BLDC motor. Pay extra attention to safety precaution. 2.4 Code Read Protection The LPC1114 has a Code Read Protection function (specifically CRP3, see LPC1114 datasheet/user’s manual for details) that, if enabled, will make the LPC1114 impossible to reprogram (unless the user program has implemented such functionality). Note that Embedded Artists does not replace LPCXpresso LPC1114 boards where the LPC1114 has CRP3 enabled. It’s the user’s responsibility to not invoke this mode by accident. Copyright 2013 © Embedded Artists AB LPCXpresso Motor Control Kit - User’s Guide 2.5 Page 8 CE Assessment The LPCXpresso Motor Control Kit (consisting of the LPCXpresso Motor Control Board, LPCXpresso LPC1114 Board, 24V power supply and BLDC motor) is CE marked. See separate CE Declaration of Conformity document. The LPCXpresso Motor Control Kit is a class A product. In a domestic environment this product may cause radio interference in which case the user may be required to take adequate measures. EMC emission test has been performed on the LPCXpresso Motor Control Kit. The included LPCXpresso LPC1114 board, 24V power supply and BLDC were used along with the default sample application running on the LPC1114. The wires between the LPCXpresso Motor Control Board and the BLDC motor were tightly twisted. Connecting other devices to the product via the general expansion connectors on the LPCXpresso Motor Control Board may alter EMC emission. The same is true for using other power supplies, other BLDC motors and running other control algorithms on the LPC1114. It is the user’s responsibility to make sure EMC emission limits are not exceeded when connecting other devices to the LPCXpresso Motor Control Board and when experimenting with different motor control algorithms. Due to the nature of the LPCXpresso Motor Control Kit – an evaluation platform not for integration into an end-product – fast transient immunity tests and conducted radio-frequency immunity tests have not been executed. Externally connected cables are assumed to be less than 3 meters. The general expansion connectors where internal signals are made available do not have any other ESD protection than from the chip themselves. Observe ESD precaution. 2.6 Other Products from Embedded Artists Embedded Artists have a broad range of LPC1000/2000/3000/4000 based boards that are very low cost and developed for prototyping / development as well as for OEM applications. Modifications for OEM applications can be done easily, even for modest production volumes. Contact Embedded Artists for further information about design and production services. 2.6.1 Design and Production Services Embedded Artists provide design services for custom designs, either completely new or modification to existing boards. Specific peripherals and I/O can be added easily to different designs, for example, communication interfaces, specific analog or digital I/O, and power supplies. Embedded Artists has a broad, and long, experience in designing industrial electronics in general and with NXP’s LPC1000/2000/3000/4000 microcontroller families in specific. Our competence also includes wireless and wired communication for embedded systems. For example IEEE802.11b/g (WLAN), Bluetooth™, ZigBee™, ISM RF, Ethernet, CAN, RS485, and Fieldbuses. 2.6.2 OEM / Education / QuickStart Boards and Kits Visit Embedded Artists’ home page, www.EmbeddedArtists.com, for information about other OEM / Education / QuickStart boards / kits or contact your local distributor. Copyright 2013 © Embedded Artists AB LPCXpresso Motor Control Kit - User’s Guide Page 9 3 Introduction The LPCXpresso Motor Control Kit is a universal platform for low voltage motor control based on NXP’s MCUs. It is possible to control BLDC, BLAC, stepper and dual brushed DC motors. The platform directly supports control via the LPCXpresso LPC1114 (included in kit), LPCXpresso LPC11C24 , LPCXpresso LPC1343 and LPCXpresso LPC176x boards. Note that mbed is not directly supported. Other controlling MCUs can however be used via the expansion connector. There is a 5 minute multimedia overview presentation of the board on the product’s web page. This chapter also gives an overview of the board. 3.1 Board Structure The LPCXpresso Motor Control Board has a structure as outlined in the picture below. The right side contains the power electronics for driving the motor phases. The left side is the controlling side with sockets for different LPCXpresso boards as well as a PLCC44 socket for LPC1xxx processor control. The left side also contains an OLED and a joystick that can serve as a user interface to the system. In between the two sides, an expansion connector is placed and there is also a special connector that can disconnect the left side from controlling the right side (power electronic side). By disconnecting the left side, the expansion connector can be used to let an arbitrary MCU control the board. Power Electronic Side Communication Interfaces Motor and Power Supply Connectors Control Side HMI – User Interface (OLED + Joystick) Figure 1 – LPCXpresso Motor Control Board Overview 3.2 Motor Control Overview The LPCXpresso Motor Control Board has four phases that can be controlled. Voltage and in-phase current can be measured on three of these phases. Common virtual ground and common DC-link Copyright 2013 © Embedded Artists AB LPCXpresso Motor Control Kit - User’s Guide Page 10 current can also be measured. For rotor position measurement there are three hall sensor inputs and optional quadrature sensor inputs. These control and measurement possibilities give great flexibility in controlling different kinds of motors. BLDC – Brushless DC motor BLAC – Brushless AC motor Stepper Dual brushed DC motor For a detailed description about motor control principles, please read the different Application Notes from NXP. 3.3 Usage of CPU Pins The table below lists which MCU pins that are used for controlling the different parts of the LPCXpresso Motor Control board. Signal LPC1114/1343 pins in 3-phase setup LPC1114/1343 pins in 4-phase setup LPC11C24 pins in 3-phase setup LPC11C24 pins in 4-phase setup LPC176x pins in PWM mode LPC176x pins in Motor Control IP block mode Default PWM: PHAHigh PIO0_1 / CLKOUT / CT32B0_MAT2 / USB_FTOGGLE PIO0_1 / CLKOUT / CT32B0_MAT2 / USB_FTOGGLE PIO0_1 / CLKOUT / CT32B0_MAT2 / USB_FTOGGLE PIO0_1 / CLKOUT / CT32B0_MAT2 / USB_FTOGGLE P2.0 / PWM1.1 / TXD1 P1.19 / MCOA0 / USB_PPWR / CAP1.1 PWM: PHA-Low PIO0_11 / AD0 / CT32B0_MAT3 PIO0_11 / AD0 / CT32B0_MAT3 PIO0_11 / AD0 / CT32B0_MAT3 PIO0_11 / AD0 / CT32B0_MAT3 P0.9 / I2STX_SDA / MOSI1 / MAT2.3 P1.22 / MCOB0 / USB_PWRD / MAT1.0 PWM: PHBHigh PIO0_8 / MISO/ CT16B_MAT0 PIO0_8 / MISO/ CT16B_MAT0 PIO0_8 / MISO/ CT16B_MAT0 PIO0_8 / MISO/ CT16B_MAT0 P2.1 / PWM1.2 / RXD1 P1.25 / MCOA1 / MAT1.1 PWM: PHB-Low PIO0_9 / MOSI / CT16B0_MAT1 / SWO PIO0_9 / MOSI / CT16B0_MAT1 / SWO PIO0_9/ MOSI / CT16B0_MAT1 / SWO PIO0_9/ MOSI / CT16B0_MAT1 / SWO P0.8 / I2STX_WS / MISO1 / MAT2.2 P1.26 / MCOB1 / PWM1.6 / CAP0.0 PWM: PHCHigh PIO1_1 / AD2 / CT32B1_MAT0 PIO1_1 / AD2 / CT32B1_MAT0 PIO1_1 / AD2 / CT32B1_MAT0 PIO1_1 / AD2 / CT32B1_MAT0 P2.2 / PWM1.3 / CTS1 P1.28 / MCOA2 / PCAP1.0 / MAT0.0 PWM: PHCLow PIO1_2 / AD3 / CT32B1_MAT1 PIO1_2 / AD3 / CT32B1_MAT1 PIO1_2 / AD3 / CT32B1_MAT1 PIO1_2 / AD3 / CT32B1_MAT1 P0.7 / I2STX_CLK / SCK1 / MAT2.1 P1.29 / MCOB2 / PCAP1.1 / MAT0.1 PWM: PHDHigh Not available PIO1_9 / CT16B1_MAT0 Not available PIO3_3 P2.3 / PWM1.4 / DCD1 P2.3 / PWM1.4 / DCD1 PWM: PHDLow Not available PIO1_10 / AD6 / CT16B1_MAT1 Not available PIO1_10 / AD6 / CT16B1_MAT1 P0.6 / I2SRX_SDA / SSEL1 / MAT2.0 P0.6 / I2SRX_SDA / SSEL1 / MAT2.0 Hall-A PIO2_0 / DTR PIO2_0 / DTR PIO2_0 / DTR PIO2_0 / DTR P1.20 / MCI0 / PWM1.2 / SCK0 P1.20 / MCI0 / PWM1.2 / SCK0 Hall-B PIO2_1 / DSR PIO2_1 / DSR PIO2_1 / DSR PIO2_1 / DSR P1.23 / MCI1 / PWM1.4 / MISO0 P1.23 / MCI1 / PWM1.4 / MISO0 Hall-C PIO2_2 / DCD PIO2_2 / DCD PIO2_2 / DCD PIO2_2 / DCD P1.24 / MCI2 / PWM1.5 / MOSI0 P1.24 / MCI2 / PWM1.5 / MOSI0 QEI-PHA Only available at expansion connector Only available at expansion connector Only available at expansion connector Only available at expansion connector Only available at expansion connector Only available at expansion connector Copyright 2013 © Embedded Artists AB LPCXpresso Motor Control Kit - User’s Guide Page 11 QEI-PHB Only available at expansion connector Only available at expansion connector Only available at expansion connector Only available at expansion connector Only available at expansion connector Only available at expansion connector QEIIndex Only available at expansion connector Only available at expansion connector Only available at expansion connector Only available at expansion connector Only available at expansion connector Only available at expansion connector Analog: BEMFA PIO1_4 / AD5 / CT32B1_MAT3 / WAKEUP PIO1_4 / AD5 / CT32B1_MAT3 / WAKEUP PIO1_4 / AD5 / CT32B1_MAT3 / WAKEUP PIO1_4 / AD5 / CT32B1_MAT3 / WAKEUP P0.23 / AD0.0 / I2SRX_CLK / CAP3.0 P0.23 / AD0.0 / I2SRX_CLK / CAP3.0 Analog: BEMFB PIO1_10 / AD6 / CT16B1_MAT1 Not available PIO1_10 / AD6 / CT16B1_MAT1 Not available P0.25 / AD0.2 / I2SRX_SDA / TXD3 P0.25 / AD0.2 / I2SRX_SDA / TXD3 Analog: BEMFC PIO1_11 / AD7 PIO1_11 / AD7 PIO1_11 / AD7 PIO1_11 / AD7 P1.30 / VBUS / AD0.4 P1.30 / VBUS / AD0.4 Analog: VZERO Not available Not available Not available Not available P0.2 / TXD0 / AD0.7 P0.2 / TXD0 / AD0.7 Analog: PHA-curr Not available Not available Not available Not available P0.24 / AD0.1 / I2SRX_WS / CAP3.1 P0.24 / AD0.1 / I2SRX_WS / CAP3.1 Analog: PHB-curr Not available Not available Not available Not available P0.26 / AD0.3 / AOUT / RXD3 P0.26 / AD0.3 / AOUT / RXD3 Analog: PHC-curr Not available Not available Not available Not available P1.31 / SCK1 / AD0.5 P1.31 / SCK1 / AD0.5 Analog: Current, either DC-curr. or Inputcurr. PIO1_0 / AD1 / CT32B1_CAP0 PIO1_0 / AD1 / CT32B1_CAP0 PIO1_0 / AD1 / CT32B1_CAP0 PIO1_0 / AD1 / CT32B1_CAP0 P0.3 / RXD0 / AD0.6 P0.3 / RXD0 / AD0.6 Analog mux-ctrl PIO1_8 / CT16B1_CAP0 PIO1_8 / CT16B1_CAP0 PIO1_8 / CT16B1_CAP0 PIO1_8 / CT16B1_CAP0 P0.28 / SCL0 / USB_SCL P0.28 / SCL0 / USB_SCL Brake: status0 PIO2_11 / SCK PIO2_11 / SCK PIO2_11 / SCK PIO2_11 / SCK P1.27 / CLKOUT / USB_OVRCR / CAP0.1 P1.27 / CLKOUT / USB_OVRCR / CAP0.1 Brake: status1 PIO0_2 / SSEL / CT16B0_CAP0 PIO0_2 / SSEL / CT16B0_CAP0 PIO0_2 / SSEL / CT16B0_CAP0 PIO0_2 / SSEL / CT16B0_CAP0 P2.5 / PWM1.6 / DTR1 P2.5 / PWM1.6 / DTR1 Brake: ctrl PIO1_9 / CT16B1_MAT0 Not available PIO3_3 Not available P3.25 / MAT0.0 / PWM1.2 P3.25 / MAT0.0 / PWM1.2 Input current trip PIO0_7 / CTS PIO0_7 / CTS PIO0_7 / CTS PIO0_7 / CTS P2.12 / EINT2 / I2STX_WS P2.12 / EINT2 / I2STX_WS P1.21 / MCABORT / PWM1.3 / SSEL0 P1.21 / MCABORT / PWM1.3 / SSEL0 Input current reset PIO3_5 (or PIO2_5 on LPC1343) PIO3_5 (or PIO2_5 on LPC1343) Not available Not available P0.18 / DCD1 / MOSI0 / MOSI P0.18 / DCD1 / MOSI0 / MOSI UARTTXD PIO1_7 / TXD / CT32B0_MAT1 PIO1_7 / TXD / CT32B0_MAT1 PIO1_7 / TXD / CT32B0_MAT1 PIO1_7 / TXD / CT32B0_MAT1 P0.15 / TXD1 / SCK0 / SCK P0.15 / TXD1 / SCK0 / SCK UARTRXD PIO1_6 / RXD / CT32B0_MAT0 PIO1_6 / RXD / CT32B0_MAT0 PIO1_6 / RXD / CT32B0_MAT0 PIO1_6 / RXD / CT32B0_MAT0 P0.16 / RXD1 / SSEL0 / SSEL P0.16 / RXD1 / SSEL0 / SSEL UARTmux ctrl PIO3_4 (or PIO2_4 on LPC1343) PIO3_4 (or PIO2_4 on LPC1343) PIO2_6 PIO2_6 P0.27 / SDA0 / USB_SDA NOTE: need pull-up See section 4.10 P0.27 / SDA0 / USB_SDA NOTE: need pull-up See section 4.10 Copyright 2013 © Embedded Artists AB LPCXpresso Motor Control Kit - User’s Guide Page 12 RS485ctrl PIO1_5 / RTS / CT32B0_CAP0 PIO1_5 / RTS / CT32B0_CAP0 PIO1_5 / RTS / CT32B0_CAP0 PIO1_5 / RTS / CT32B0_CAP0 P0.22 / RTS1 / TD1 P0.22 / RTS1 / TD1 Joystickup PIO2_7 PIO2_7 PIO2_7 PIO2_7 P2.7 / RD2 / RTS1 P2.7 / RD2 / RTS1 Joystickdown PIO2_8 PIO2_8 PIO2_8 PIO2_8 P2.8 / TD2 / TXD2 P2.8 / TD2 / TXD2 Joystickright PIO2_9 PIO2_9 Not available Not available P2.10 / EINT0 / NMI P2.10 / EINT0 / NMI Joystickleft PIO2_10 PIO2_10 PIO2_10 PIO2_10 P2.11 / EINT1 / I2STX_CLK P2.11 / EINT1 / I2STX_CLK Joystickcenter PIO2_6 PIO2_6 Not available Not available RDP2.6 / PCAP1.0 / RI1 RDP2.6 / PCAP1.0 / RI1 OLED Volt-EN PIO2_3 / RI PIO2_3 / RI PIO2_3 / RI PIO2_3 / RI DP0.21 / RI1 / RD1 DP0.21 / RI1 / RD1 I2C-SDA PIO0_5 / SDA PIO0_5 / SDA PIO0_5 / SDA PIO0_5 / SDA P0.10 / TXD2 / SDA2 / MAT3.0 P0.10 / TXD2 / SDA2 / MAT3.0 I2C-SCL PIO0_4 / SCL PIO0_4 / SCL PIO0_4 / SCL PIO0_4 / SCL P0.11 / RXD2 / SCL2 / MAT3.1 P0.11 / RXD2 / SCL2 / MAT3.1 3.3.1 Notes about LPC1114 control The LPC1114 is limited in the number of available pins. All features of the LPCXpresso Motor Control Board cannot be used on the board. The default setup is to control three (of the four) phases. It is illustrated in the grayed column in the table above. All four phases can however the controlled. The trade-off is to lose the back EMF analog signal for phase B and the brake control signal. In-phase current measurement and virtual-ground voltage measurement analog signals are not available for the processor. The USB, CAN and Ethernet communication interfaces are not available simply because the LPC1114 does not support these interfaces on-chip. The QEI interface is not connected to the LPC1114. This interface is only available via the expansion connector. 3.3.2 Notes about LPC11C24 control The limitations for LPC11C24 are the same as for the LPC1114, as described above. The only differences are (pin numbering refers to the 2x27 pos edge connector of the LPCXpresso board): The LPC11C24 has a CAN interface, which the LPC1114 does not have. Pin PIO1_9 is not available (was pin 42). Instead pin PIO3_3 is connected to pin 42. This affects the brake control signal and PhD-H signal. PIO3_3 moved (from pin 53) to pin 42 (see above). PIO2_6 moved (from pin 48) to pin 46. This makes it impossible to read the joystick right key. Pin PIO3_4 is not available (was pin 46). This affects the uart-mux signal, signal PIO2_6 shall be used instead. Pin PIO3_5 is not available (was pin 47). This makes it impossible to reset the input overcurrent trip. Copyright 2013 © Embedded Artists AB LPCXpresso Motor Control Kit - User’s Guide 3.3.3 Page 13 Pin PIO2_9 is not available (was pin 51). This makes it impossible to read the joystick center key. Notes about LPC1343 control The limitations for LPC1343 are the same as for the LPC1114, as described above. The only difference is that the LPC1343 has an USB interface, which the LPC1114 does not have. 3.3.4 Notes about LPC176x control The LPC176x has more pins and can measure the same analog signals as the LPC1114/1343 plus virtual ground (voltage) and in-chase current for phase A, B and C. The LPC176x can control all four phases simultaneous without any trade-off. The PWM signals can be generated in two different ways; either via the PWM peripheral block or via the motor control peripheral block. The signals for these two different blocks are connected together, so the block that is inactive must set the associated pins in input mode (so there is no interference with the block that is generating the phase control signals). The QEI interface is not connected to the LPC176x. This interface is only available via the expansion connector. Note that pin P0.27 needs a pull-up (1K-10Kohm) to +3.3V in order to correctly control the UART multiplexer. This is missing in the design. See section 4.10 for details about this. Copyright 2013 © Embedded Artists AB LPCXpresso Motor Control Kit - User’s Guide Page 14 4 LPCXpresso Motor Control Board Design This chapter contains information about the general design of the LPCXpresso Motor Control Board and how to set the few jumpers on the board. The schematic can be downloaded in PDF from the support page, and is recommended to have printed out while reading this chapter. The datasheets for specific components must be read in order to obtain detailed and specific information for different functions. The following of this chapter is a walkthrough of the design from a functionality perspective. The picture below gives an overview of where the different functions are located on the board. Note that there are two different versions of the hardware, rev A and rev B. The two versions are functionally equivalent. Rev B has slightly less noise in the phase current measurement (compared to rev A) and digital phase voltage measurement (which does not exist at all on rev A boards). SWD/JTAG interface Local power supply (+11V/+5V/+3.3V) JP6 – separation of control and power sides Expansion Connector Break control Ethernet interface QEI interface CAN and RS485 interface Hall sensor interface USB interface Power supply input LPC1xxx LPCC44 socket Motor winding connector LPCXpresso Sockets 4 phases with gate drivers USB connector for USB-toUART Bridge OLED and Joystick Reset-LED and push-button Input current measurements and trip. DCinput current measurement Figure 2 – LPCXpresso Motor Control Board Detailed Overview, rev A Copyright 2013 © Embedded Artists AB Phase voltage and current measurements Temperature sensor Voltage indicator LEDs J13 – access motor signals LPCXpresso Motor Control Kit - User’s Guide Local power supply (+11V/+5V/+3.3V) LPC1xxx LPCC44 socket Page 15 Break control SWD/JTAG interface QEI interface Ethernet interface Hall sensor interface CAN and RS485 interface Power supply input USB interface Input current measurements and trip. DCinput current measurement LPCXpresso Sockets USB connector for USB-toUART Bridge Motor winding connector J14/16 – access motor signals Reset-LED and push-button JP6 – separation of control and power sides OLED and Joystick Expansion Connector 4 phases with gate drivers Phase voltage measurements Temperature sensor Current measurement Figure 3 – LPCXpresso Motor Control Board Detailed Overview, rev B 4.1 Phase Control There are four phases with full control. The gate drivers are based on the chip HIP4081AIBZ from Intersil. This chip supports 100% duty cycle. See the datasheet for details. As phase transistors, the N-channel MOSFET PSMN2R6-40YS from NXP is used. This MOSFET has the following rating: 40V/100A and Rds on 2.8 mOhm. 4.2 Phase Measurement It is possible to measure voltage and current individually on three of the four phases. In situation where the fourth phase is used, there is no need for voltage and current measurement on the fourth phase. Phase voltages are measures with 1/12 division and is low-pass filtered. An extra capacitor can be enabled by inserting jumpers on JP11-JP13, respectively, to further low-pass filter the voltage measurement signals. In-phase currents are measures via 5milli-ohm series resistors and AD8210 (U17-U19). The chip offers x20 amplification of the current measurement signal and is bidirectional. When zero current the output will be VREF/2 = 3.3/2 = 1.65V. Increasing voltage reflect current out from the board. Copyright 2013 © Embedded Artists AB LPCXpresso Motor Control Kit - User’s Guide Page 16 There is also a common virtual ground voltage measurement signal, which is used in some motor control algorithms. All voltage and current sense signals are available on J14 (and J16 on rev B boards) along with +5V supply voltage. It is possible to create custom voltage and current measurement solutions via J14 (and J16 on rev B boards). SJ1-SJ7 can switch from the standard measurement solution to the custom solution. It is possible to measure phase A output signal via an adjustable comparator (U16 and R93). This can be used to measure the gate driver delay (and to calibrate the motor control algorithm). To simplify connection to an oscilloscope, all motor winding signals along with input voltage, VBUS and shunt are available on J13 (just beside the screw connector J12). 4.3 Input Stage and Brake Functionality There are two input connectors for the power supply; either the 2.1mm power jack or via screw connector J12. The power supply included in the kit has a 2.1mm power jack connector with positive center. The voltage input (on both connectors) is reverse polarity protected via D34. The reverse polarity protection diode (D34) also functions as part of the brake functionality. If the motor is spinning in generator mode (and is hence generating current) the motor voltage (schematic signal net VBUS) will increase to a point where it will damage the electronics. D34 is used to measure the voltage increase and if above a threshold, Q12 will connect the three power dissipation resistors (R113, R118 and R120) to VBUS. This will quickly consume power and slow down the spinning motor (i.e., function as a brake). R112 is used to measure the input current via U21 (a high-side current-shunt monitor). This chip has x20 amplification so 10A will generate a 2V measurement signal. It also has a comparator which makes it possible to set a trip point for over-current protection. The comparator output is directly connected to the gate drivers and will disable these in case of an over-current situation. The overcurrent trip point is adjustable between 3A and 18A with trimming potentiometer R127. The input current measurement signal is connected to an analog input on the LPCXpresso target boards, via analog multiplexor U1. Signal AIN-CTRL shall be high to measure the input current. If low, the DC-link current measurement signal is instead connected (the common low-side current of the phase drivers). The board contains five big reservoir capacitors (5000uF, C65-C69). These capacitors will handle the current spikes from the PWM control of the motor. They also make the input power supply requirement less stringent in supplying large currents spikes. There is however a trade-off; there will be a high current spike when the power supply is connected. Some power supplies might go into over-current protection because of this startup current spike. 4.4 Power Supply The power supply input voltage is taken from the motor supply. It is in the range from 12-30V minus one diode drop (D34). Three voltages are generated; +11V, +5V and +3.3V. A switching regulator, U26 - LM5085MYE, is used to generate +11V/1.5A. The converter is designed for 15W. The +11V is needed for the gate drivers and the OLED display. The +11V voltage us also used to generate +5V and +3.3V via simple linear voltage regulators (U24 and U25). +5V is used to power external Hall sensors and the current measurement circuits. The +3.3V is used to power the rest of the board. 4.5 Sensor Inputs There are two main sensor input connectors, J9 and J10. J9, that is normally used, can either interface Hall sensors or a quadrature sensor. There are three jumpers (JP7-JP9) to enable optional pullup or pulldown resistors. Normally these jumpers are set to enable the pullup resistors since the kit contains a BLDC motor with Hall sensors. Copyright 2013 © Embedded Artists AB LPCXpresso Motor Control Kit - User’s Guide Page 17 There is also J10 that is a quadrature sensor input. The signals from this connector are only available on the expansion connector since no LPCXpresso board has enough pins to handle these signals. The board also contains an i2c temperature sensor (LM75A). It is supposed to measure the temperature on the power electronics, but due to position on board and general mounting of the board, the temperature measured is not precise. It is included for completeness in demo applications since real motor control applications must monitor the temperature of the controller. All sensor input signals are available on J11 to simplify connection to an oscilloscope or logic analyzer. 4.6 Controlling MCU, Expansion connector (J8) and JP6 The LPCXpresso Motor Control Board has been designed for direct interface to a number of LPCXpresso boards; LPC1114, LPC11C24, LPC1343 and LPC176x. There is also a PLCC44 socket for LPC11xx processors. Section 3.3 contains a description of which pins to interface the LPCXpresso Motor Control board are used on different LPCXpresso boards. 4.6.1 LPCXpresso LPC1114 This is the default configuration and is what is delivered with the LPCXpresso Motor Control Kit. 4.6.2 LPCXpresso LPC176x Note that in case an LPCXpresso LPC176x board shall be used, pin-lists for the two 27 pos edge connectors must also be soldered. Also the 19 signal positions in between the edge connectors must have pin-lists soldered. 4.6.3 Other controlling MCUs There is also an expansion connector (J8, see schematic page 6) where all relevant signals for the power electronic side are available. Other MCUs can be used to control the LPCXpresso Motor Control Board, like the LPC2900, LPC1800 and LPC4300 families. The control side of the board can be disconnected, if needed, by removing the solder bumps in JP6. 4.7 Communication Interfaces There are multiple communication interfaces on the LPCXpresso Motor Control Board. The picture below gives a detailed overview of the interfaces and the following sub-sections explain each interface in more detail. Note that the picture represent a rev A board and the rev B board is very similar in connector placement. Copyright 2013 © Embedded Artists AB LPCXpresso Motor Control Kit - User’s Guide Page 18 Ethernet interface connector (J4) CAN and RS422/485 interface connector (J7) From top to bottom: 8: CAN-H 7: CAN-L 6: GND 5: RS422 RX+ 4: RS422 RX3: RS422 TX+ 2: RS422 TX1: GND Termination Resistors Control (JP5) Jumper 1-2 inserted by default RS422/485 Select (JP4) Both jumpers inserted by default, USB interface connector (J5) USB connector (J6) for USB-to-UART Bridge LEDs for signaling UART communication activity (LED1-LED2) Figure 4 – LPCXpresso Motor Control Board Communication Interfaces, rev A 4.7.1 USB-to-UART Bridge Interface There is a UART-to-USB bridge on the board. This is to simplify connection to a PC because serial ports are not so common any more, especially not on laptops. It is the controlling MCU’s UART that is connected to the USB channel. This UART can for example be used as the console channel for applications. Printf() output is typically directed to this UART channel. The UART-to-USB bridge is based on the chip FT232RL from FTDI. A driver is typically needed to be installed on the PC side. The driver creates a virtual COM port on the PC that represents the UART channel. Any program on the PC can connect to this COM port for communication with the controlling MCU on the board. There are two LEDs (Transmit – LED2 and Receive – LED1) that signal communication activity. Note that signal UART_RS485 must be high in order to connect the UART signals to the USB-to-UART bridge. The signal UART_RS485 controls a multiplexor (U7/U8) for the UART_TXD/UART_RXD Copyright 2013 © Embedded Artists AB LPCXpresso Motor Control Kit - User’s Guide Page 19 signals. The MCU UART can be connected to either to the USB-to-UART bridge or the RS422/485 interface. 4.7.2 USB Interface The USB interface (J5 on schematic page 4) is currently only supported by the LPCXpresso LPC1343 and LPC176x boards. The controlling MCU must have an on-chip USB interface. The interface is very straight forward and consists of a mini-B USB connector, ESD protection, VBUS sense and DP pull-up resistor control. 4.7.3 CAN Interface There is a CAN interface on the board that is based on the NXP chip TJF1051T/3. The interface is straight forward consisting of a CAN transceiver, ESD protection and connector. The CAN interface (part of connector J7 on schematic page 4) is currently only supported by the LPCXpresso LPC176x board. The controlling MCU must have an on-chip CAN interface. Note that there are no termination resistors in the CAN interface. If needed, such termination resistors must be connected externally. Note that the LPCXpresso LPC11C24 has an on-chip CAN-transceiver. The interface connector to this is located on the LPCXpresso LPC11C24 board. The CAN interface and associated connector on the LPCXpresso Motor Control board is in this case not used. 4.7.4 RS422/RS485 Interface There is a RS422/485 interface on the board based on SN65HVD35. RS422 has individual transmit and receive pairs, while RS485 share the same signal pair (and is hence half-duplex). By inserting both jumpers in JP4, the two signal pairs are connected and a RS485 interface is created. By removing the jumpers in JP4 a RS422 interface is created. Via JP5 it is also possible to add termination resistors, if needed. Note the different orientation for jumpers in JP4 and JP5. The transceiver (U6 on schematic page 4) has built-in ESD protection. Communication direction over the RS485 interface is controlled via signal RS485-RTS and is by default half-duplex (i.e., no simultaneous transmit and receive). A high level enables the transmitter while a low level enables the receiver. It is possible to remove R30 in order to always enable the receiver. The transmitter is still controlled by the signal RS485-RTS. Note that signal UART_RS485 must be low in order to connect the UART signals to the RS422/485 interface. The signal UART_RS485 controls a multiplexor (U7/U8) for the UART_TXD/UART_RXD signals. The MCU UART can be connected to either to the USB-to-UART bridge or the RS422/485 interface. 4.7.5 Ethernet Interface The Ethernet interface (J4 on schematic page 4) is currently only supported by the LPCXpresso LPC176x board. The interface is actually just a RJ45 connector with integrated magnetics. The Ethernet-PHY interface is on the LPCXpresso board. 4.8 HMI The board contains an OLED display and a joystick that can be used as Human-Machine Interface to the motor control application. These components can be found on schematic page 5. The OLED is interfaces via the I2C bus and communication speed is limited to the 400kHz limit of the I2C specification. The OLED requires an external +11V supply. This voltage must be controlled in a timely manner. See the sample driver code from the support page for details and/or read the datasheet for the display. Copyright 2013 © Embedded Artists AB LPCXpresso Motor Control Kit - User’s Guide Page 20 The 5-key joystick is connected to the controlling MCU via direct digital signals. Note that on rev B boards the joystick has been turned 90 degrees anti-clockwise compared to a rev A board. When the board is oriented as in Figure 3 the up-direction for the joystick is left. The down-direction is right, etc. 4.9 Debug There is a SWD/JTAG connector interface (J3 on schematic page 3) that is normally used for the LPC1xxx MCU in the PLCC44 socket. J3 is the new and smaller footprint standard ARM debug connector. It has 2x5 pins in 50 mil pitch. The connector supports both the SWD and JTAG interfaces, but LPC11xx/13xx processors only support SWD. Note that not all, and in particular older, JTAG debug probes do not support the SWD interface standard. When an LPCXpresso boards is used to control the board, the LPC-LINK is typically used to download program code and debugging via the SWD/JTAG interface. In this case there is no need to use J3. Note that in case J3 is used with an LPCXpresso board, the LPC-LINK side of the LPCXpresso board must be disconnected. Else there will be two drivers of the SWD/JTAG interface. 4.10 Known Board Design Issues This section lists a couple of known design issues that is good to know when using the board for motor control evaluation. 1. The powering and reset structure of the USB-to-UART chip (FT232RL, U5 on schematic page 4) is not optimal in some situations. If a USB cable is not connected, the TX and RX LEDs are on since the chip is not powered. It is no problem with this other than an irritating light from the two LEDs. When using the USB channel to send UART communication to a PC, i.e., when a USB cable is actually connected, the chip will be reset when the internal reset signal is active (for example by the reset push-button). This will cause a new USB enumeration in the PC and it will take a few seconds to complete. During this time, no UART communication will be forwarded over the USB channel. A workaround for this USB enumeration delay is to add a 5 second delay in the application code before the UART is actually used. 2. The three LEDs (LED5-LED7 on schematic page 10) that indicate voltage presence (VBUS, +11V and +3.3V) are quite bright and can get somewhat hot. In case the bright light is irritating, the LEDs can be removed from the board or covered. Note that (de-)soldering on the board voids any warranty. 3. The I2C-temperature sensor (U12 on schematic page 12) is mounted on the board in a way that is inappropriate for real applications. It does not measure the true temperature on the phase driver stages. The temperature sensor is only included for completeness of sample/demo motor control applications. It is suitable to set the temperature trip level to a very low value, i.e., just above room temperature. 40-45 degrees Celsius is a suitable trip level. The voltage indicator LEDs actually heats the temperature sensor somewhat (typically 5-10 degrees Celsius). 4. The five input capacitors have a combined capacitance of 5000uF (C65-C69 on schematic page 10). The high capacitance is needed to smooth the current pulses from the PWM control of the motor. It reduces the requirements on the external power supply. A (negative) consequence of the high input capacitance is a high inrush current when an external power supply is connected. The over-current protection on some power supplies might be triggered by this. The power supply must be able to handle the high inrush current. 5. The CAN interface does not have any termination resistor. If needed, such termination resistor must be added externally. 6. The board can sometimes be in an undefined reset state after power-up. This can happen if the USB cable (for the UART-to-USB bridge) is not inserted. The FT232RL chip is not initialized properly and pulls the reset signal low. The Reset-LED has typically a weak light. Copyright 2013 © Embedded Artists AB LPCXpresso Motor Control Kit - User’s Guide Page 21 The solution is to remove R143. This resistor can be found just right of LED1 and LED2 (close to the USB connector). 7. On rev A boards; when using the LPCXpresso LPC176x to control the board, pin P0.27 needs a pull-up resistor to +3.3V (value is non-critical, 1K-10Kohm will work). See picture below for how re-work can be done. Note that this pull-up resistor is only needed when using LPCXpresso LPC176x to control the board. Figure 5 – Pull-up resistor on LPCXpresso LPC176x, pin P0.27 Copyright 2013 © Embedded Artists AB LPCXpresso Motor Control Kit - User’s Guide 4.11 Default Jumpers Positions Figure 6 illustrates the default jumper positions as mounted when the board is delivered from Embedded Artists. Note the different hardware versions (rev A and rev B). Figure 6 – Default jumper positions, rev A hardware Copyright 2013 © Embedded Artists AB Page 22 LPCXpresso Motor Control Kit - User’s Guide Figure 7 – Default jumper positions, rev B hardware Copyright 2013 © Embedded Artists AB Page 23 LPCXpresso Motor Control Kit - User’s Guide Page 24 5 Getting Started This chapter contains information about how to get acquainted with the LPCXpresso Motor Control Kit. Please read this section first before you start using the board - it will be well spent time! 5.1 Kit Content and Preparation The LPCXpresso Motor Control Kit is delivered in two boxes. Box #1 contains: 1) LPCXpresso Motor Control Board 2) LPCXpresso LPC1114 with pin lists soldered. Note: the demo application is not pre-programmed to this board. The demo application has to be downloaded into the board. See description about how to do this further down this chapter. 3) USB cable, mini-B to A. Box #2 contains: 1) BLDC motor 2) Power supply, 24V/60W 3) Power cable to power supply (wall connector, EU style). Adapters for US and UK wall connectors are included as well. Follow the instructions below to get everything up and running quickly. The picture below illustrates three of the four steps. 1) Rev B boards: Mount LPCXpresso LPC1114 board in left position 1) Rev A boards: Mount LPCXpresso 3a) Connect LPC1114 board in power supply here lower position 3b) Voltage indicator LEDs 2) Connect motor cables here (into two screw connectors) Figure 8 – Board Preparation 5.1.1 Step 1: Mount LPCXpresso LPC1114 board Mount the LPCXpresso LPC1114 Board on the LPCXpresso Motor Control Board. Make sure the LPCXpresso board is mounted in the lower position (closest to the OLED). The upper position is for LPCXpresso LPC176x boards. Double-check that the pin lists of the LPCXpresso LPC1114 board are correctly inserted into the LPCXpresso Motor Control Board (in lower position and all pins inserted correctly into the base board socket – no pin should be visible under the LPCXpresso LPC1114 board). Copyright 2013 © Embedded Artists AB LPCXpresso Motor Control Kit - User’s Guide 5.1.2 Page 25 Step 2: BLDC Motor Preparation The BLDC motor shall be mounted in two screw connectors, see picture below. Note that the cables from the motor come in two groups. Cables shall NOT be mixed between the two groups. The group with five cables goes to the 5 pos connector and the group with 3 cables goes to the 8 pos connector. Figure 9 – BLDC motor with screw connectors The five cables of the 5 pos screw connector shall be mounted as indicated below, from top to bottom: red, blue, green, yellow and black cable. Figure 10 – BLDC motor hall sensor cables Copyright 2013 © Embedded Artists AB LPCXpresso Motor Control Kit - User’s Guide Page 26 The three cables of the 8 pos screw connector shall be mounted as indicated below, from top to bottom: no, no, no, no, yellow, green, blue, no cable. Figure 11 – BLDC motor winding cables 5.1.3 Step 3: Connect Power Supply The LPCXpresso Motor Control Board must always be powered from an external power supply. The LPCXpresso LPC1114 board cannot alone power the board (even if the voltage indicator LEDs light somewhat when the board is powered only from the LPCXpresso LPC1114 board). In included power supply has a standard 2.1mm power plug that is used to power the board. Center pin is positive. Note that the board can also be powered via the 8-pos screw connector (the same connector that the motor windings are connected to). Verify that all three voltage indicator LEDs are on (from left to left: orange, blue, and green). Note that the LEDs are quite bright and become relatively hot. 5.1.4 Step 4: Loading the Demo Application The demo application must be downloaded to the LPCXpresso LPC1114 board. This is a description how to download a new/updated demo application to the LPCXpresso LPC1114 board. First make sure that the latest version of the LPCXpresso IDE is installed. The LPCXpresso LPC1114 board can be programmed standalone or inserted into the LPCXpresso Motor Control Board. If it is mounted on the latter, make sure that the external power supply is connected and supply 24V to the board. Secondly, import the demo application project into the Eclipse workspace. The demo application can be downloaded from the Embedded Artists support page after registering the product. Third, click on the "Program Flash" icon from the tool bar, see picture below. The icon can be at different places depending on window size. Copyright 2013 © Embedded Artists AB LPCXpresso Motor Control Kit - User’s Guide Page 27 Program Flash Icon Figure 12 – LPCXpresso IDE Program Flash Icon The next step is to select which processor to download to. Select LPC1114/301 from the list that is presented. Then press OK button. Note that this step is sometimes not needed because the LPCXpresso IDE can itself detect which processor it is connected to. Figure 13 –LPCXpresso IDE Target Selection Copyright 2013 © Embedded Artists AB LPCXpresso Motor Control Kit - User’s Guide Page 28 The next step is to browse to the file to download. Press the “Browse” button. Figure 14 – LPCXpresso IDE Program Flash Window Browse to the projects top directory and then “Debug”. In this subfolder there is either a file ending with *.axf or *.bin. Select one of these files. Press the “Open” button. 1) Find project top directory 2) Find “Debug” subdirectory Figure 15 – Browse to File to Download Copyright 2013 © Embedded Artists AB 3) Select either *.axf or *.bin file LPCXpresso Motor Control Kit - User’s Guide Figure 16 – LPCXpresso IDE Program Flashing in Progress Copyright 2013 © Embedded Artists AB Page 29 LPCXpresso Motor Control Kit - User’s Guide Page 30 There is an alternative way of initiating the program download process. From the workspace, right click on the *.axf or *.bin file (found under the “Debug” subdirectory). Then select “Binary Utility” and “Program Flash”. 1) Right click on *.axf or *.bin file 2) Select “Binary Utility” 3) Select “Program Flash” Figure 17 – LPCXpresso IDE Binary Utility Unplug the USB cable to the LPCXpresso LPC1114 board and press the reset push-button. A startup message should be displayed on the OLED. 5.2 Installing USB Driver The LPCXpresso Motor Control Board contains an USB-to-UART bridge chip (FT232R from FTDI) that connects a UART channel from the controlling MCU to a virtual COM port on the PC/laptop (via USB). This UART channel is typically used as the console channel for applications. Printf() output can for example be directed to this UART channel. The UART channel can also be used for sending motor control commands to the controlling MCU. A USB driver must be installed on the PC/laptop in order for the virtual COM port to be created. See FTDI’s installation guides for details how to install the driver for different operating systems: http://www.ftdichip.com/Support/Documents/InstallGuides.htm Copyright 2013 © Embedded Artists AB LPCXpresso Motor Control Kit - User’s Guide 5.3 Page 31 Demo Application There is a demo application for the included LPCXpresso LPC1114 board. It is not pre-loaded so it has to be downloaded. See section 5.1.4 above for details how to download a new/updated demo application to the LPCXpresso LPC1114 board. The demo application demonstrates BLDC control via Hall sensors. The application begins with displaying a startup message on the OLED. After this the BLDC motor can be started by pressing the center key of the joystick. After a short while, the BLDC motor will start spinning. The speed can be adjusted up/down by pressing the up/down keys of the joystick. Rotation direction can be changed with right/left keys of the joystick. The OLED display the measured rpm value graphically of the motor. Note that this value is varying a bit since motor is unloaded. This is quite normal. Note that the joystick is rotated 90 degrees anti-clockwise on rev B boards. This means that speed is adjusted up/down by moving the joystick left/right, and rotation direction can be changed with up/down on the joystick. 5.4 Compiling the Demo Application This section describes how to compile the demo application for the LPCXpresso LPC1114 board. First make sure that the latest version of the LPCXpresso IDE is installed. Secondly, import the demo application project into the Eclipse workspace. The demo application can be downloaded (as a zip-file) from the Embedded Artists support page after registering the product. The zip-file contains all project files and is simple way to distribute complete Eclipse projects. Select the Import and Export tab in the Quickstart menu and then Import archived projects (zip), see figure below. 1) Select Import and Export 2) Select Import archived projects (zip) Figure 18 – LPCXpresso IDE Import Archived Project Copyright 2013 © Embedded Artists AB LPCXpresso Motor Control Kit - User’s Guide Page 32 Next, browse and select the downloaded zip file containing the archived demo application. Make sure both sub-projects are selected, see figure below. 1) Browse and select archived project file 2) Select both sub-projects 3) Import project Figure 19 – LPCXpresso IDE Import Archived Project Window The project is now imported. Click (to select) the main project. Browse and edit the project files. Build/clean/debug the project from the Quickstart menu (Start here), see picture below. When debugging a project, make sure the LPCXpresso LPC1114 board is connected via USB to the PC because the application will be downloaded to the board via LPC-LINK (SWD/JTAG interface). 1) Click (to select) main project 2) Browse and edit project files 3) Build/clean/debug project Figure 20 – LPCXpresso IDE Build/Debug Project Copyright 2013 © Embedded Artists AB LPCXpresso Motor Control Kit - User’s Guide 5.5 Page 33 Things to Note/Known Issues This section contains a couple of notes that are important to know about when working with the board. 5.5.1 Evaluation Platform – Not for End-products The LPCXpresso Motor Control Kit is an evaluation platform for various motor control based on the NXP LPC-family of microcontrollers. The kit has not been designed for end-use in products. The user of the kit must be aware of the current and voltages present. It is possible to damage the LPCXpresso Motor Control board, the BLDC motor and the power supply if improperly used. 5.5.2 Power Supply The included power supply is intended to for demo applications. If the BLDC motor is heavily loaded and/or used in demanding ways, the power supply might be inadequate to power the setup. In this case, use a power supply that is capable of delivering the current surges needed. Note that the included power supply generates a considerable amount of noise when loaded. It might not be a suitable power supply when doing motor control algorithm development. The power supply is mostly for running the demonstration application. 5.5.3 Board Errata There are two errors on LPCXpresso Motor Control Board rev A. The errors have been fixed on most boards but some early boards have been shipped without fixes. It is easy to identify boards that have been fixed – these boards have a wire on the solder side of the board, as described below. First a short wire shall be soldered between two pads on the solder side of the board. See picture below for an illustration where to solder the wire. Note that the wire is between the two left-most pins in each group of 1x2 pins. The wire is to connect a signal net to ground (else it is floating). This error affects the back-EMF voltage measurement on phase C. Once the wire is soldered the measurement works as intended. Solder short wire between the two left pins Figure 21 – Wire to fix layout error on rev A boards Copyright 2013 © Embedded Artists AB LPCXpresso Motor Control Kit - User’s Guide Page 34 Secondly, R110 is missing. It is a 47Kohm 0603 resistor. It is found on the lower board edge in the middle, see picture below for location. This resistor is important to measure virtual ground correctly. Note that the LPC1114 cannot measure this signal. 47Kohm 0603 resistor missing Figure 22 – R110 (47Kohm) missing 5.5.4 Screw Connectors The green connectors can sometimes follow/lift when the screw connector part is removed (because of the high forces involved). This does not affect functionality or reliability of the board. It is just to push back the connect housing if this occurs. Figure 23 – Screw Connector Housing Copyright 2013 © Embedded Artists AB Connector shroud lifted LPCXpresso Motor Control Kit - User’s Guide Page 35 6 Troubleshooting This chapter contains information about how to troubleshoot boards that does not seem to operate properly. It is strongly advised to read through the list of tests and actions that can be done before contacting Embedded Artists. The different tests can help determine if there is a problem with the board, or not. For return policy, please read Embedded Artists’ General Terms & Conditions document. This document can be found on the Embedded Artists’ web site. 6.1 Powering The first step is to make sure that powering works properly. 1. Remove powering to the LPCXpresso Motor Control Board. 2. Remove the LPCXpresso LPC1114 board and the BLDC motor connections. 3. Measure the output voltage directly from the 24V/60W power supply that is included in the kit. Do not connect the power supply to anything when measuring this. Acceptable voltage range is 23 to 26 V. Note: before starting the measurement with a multimeter, make sure the measurement is set to voltage (as opposed to current) and that the wires to the multimeter are correctly connected. Performing a voltage measurement with a multimeter set to current measurement will short the output from the power supply and can destroy the power supply. 4. Connect the 24V/60W power supply included in the kit. 5. Measure voltages at five different positions on the board: a. Measure 24V (23-26V) from power supply. Measure at J12 between VIN and GND. b. Measure 24V (22-26V) after input protection diode. Measure at J12 between VBUS and GND. c. Measure the +11V supply. Measure at JP6 and use JP15 as ground reference. Acceptable range for the +11.0V voltage is 10.40V to 11.60V. d. Measure the +5V supply. Measure at JP6 and use JP15 as ground reference. Acceptable range for the +5.0V voltage is 4.50V to 5.50V. e. Measure the +3.3V supply. Measure at JP6 and use JP15 as ground reference. Acceptable range for the +3.3V voltage is 3.15V to 3.45V. f. If the reset-LED is dimming instead of being clearly on or off, it is also a sign that the supply voltages are not stable and outside of valid ranges. If problem; since the BLDC motor is disconnected and there is no big current consumption on passive boards, it is likely that some part of the LPCXpresso Motor Control Board consumes a lot of current. It might be possible to locate the faulty section/component by checking component temperatures with the finger tip. Be careful because faulty components can get very hot. The picture below illustrates where to find the different voltage measurement pads/connectors. Copyright 2013 © Embedded Artists AB LPCXpresso Motor Control Kit - User’s Guide From bottom to top (JP6): +11V, +5V, +3.3V, … Voltage indicator LEDs Page 36 Ground reference (JP15) From top to bottom (J12): VIN (24V), GND, shunt, VBUS, PHA, PHB, PHC, PHD Figure 24 – Measurement Pad Locations, rev A board 6. Verify that the three voltage indicator LEDs on the lower right corner of the board are all on. 7. Verify that there are no voltage dips on the supply. A typical indication of this is that the resetLED flash from time to time. It can be an indication of power supply connector ware out (the 2.1mm power jack). 8. Verify that the reset-LED flash when pressing the reset push-button. The LED should also light shortly after releasing the push button. The extra “LED on time” is very short but still noticeable (typically a 1/5 of a second, i.e., 200mS). a. If the reset-LED is constantly on, try removing R143 (see also section 4.10 ). 6.2 Download Demo Application to LPCXpresso Board Download the latest demo application into the LPCXpresso LPC1114 board. See section 5.1.4 above for details how to download a demo application to the LPCXpresso LPC1114 board. 6.3 Connect LPCXpresso Board The second step is to make sure that the LPCXpresso LPC1114 Board is working when connected to the LPCXpresso Motor Control Board. 1. Disconnect the power supply, wait 10 seconds until all voltage indicator LEDs are off. Mount the LPCXpresso LPC1114 Board on the LPCXpresso Motor Control Board. Make sure the LPCXpresso board is mounted in the lower position (closest to the OLED). The upper position is for LPCXpresso LPC176x boards. 2. Connect the 24V/60W power supply again. Measure the +5V and +3.3V voltages again (see step 5 above). If any of the voltages are below acceptable range it is a sign of too high current consumption. It is likely that the LPCXpresso LPC1114 board is the failing part in this case. 3. Verify that the reset-LED flash when pressing the reset push-button. If the reset-LED is always on when the LPCXpresso Board is mounted the voltage test above should likely have Copyright 2013 © Embedded Artists AB LPCXpresso Motor Control Kit - User’s Guide Page 37 failed. The LPCXpresso LPC1114 board is likely the failing part in this case. When doing this test, be sure to not have anything connected in the USB connector on the LPCXpresso board (or anything connected to the SWD/JTAG interface connector). 4. Verify that the startup message is appearing on the OLED. 5. For this test to work, the demo application must be recompiled. In file config/application.h there is a define: #define USE_UART that must be set to 1 for the UART to be active. By default this define is set to 0. Change this, recompile and download the application. Connect a USB cable (mini-B to A, as included in the kit) between a PC and the USB-toUART bridge connector on the LPCXpresso Motor Control Board. Start a terminal program on the PC and verify that a startup message is sent from the board. 6. For this test to work, the demo application must be changed according to step 5) above: Verify that the TX-LED (found close to the USB connector) shortly flash when the startup message is send from the board. 7. For this test to work, the demo application must be changed according to step 5) above: Verify that the RX-LED (found beside the TX-LED) shortly flash whenever a character is sent from the terminal program. 6.4 Power Electronics and BLDC Motor In this test the power electronics and the BLDC motor operation is verified. 1. Disconnect the power supply. 2. Connect the BLDC motor. Make sure cabling is correct (see correct cabling in the Getting Started Chapter in this document). Also make sure that no extra load is connected to the motor. 3. Connect the 24V/60W power supply again. Measure the +5V voltage again. If the voltage is below acceptable range it is a sign of too high current consumption in the hall sensors of the BLDC motor. 4. Verify again that the startup message is appearing on the OLED. 5. The BLDC motor shall start spinning after a few seconds. A couple of tries before spinning correctly is a normal startup procedure. 6. Verify that the rpm is increasing a little bit every time the joystick switch is pressed up, and decreasing every time the joystick is pressed down. Note that the rpm value varies quite a lot. This is because the motor is not loaded and is quite normal behavior for an unloaded motor. Copyright 2013 © Embedded Artists AB LPCXpresso Motor Control Kit - User’s Guide Page 38 7 Further Information The LPC1114 microcontroller is a complex circuit and there exist a number of other documents with a lot more information. The following documents are recommended as a complement to this document. [1] NXP Motor Control Web Site http://ics.nxp.com/support/microcontrollers/motor.control/ [2] NXP LPC1114 Datasheet http://ics.nxp.com/products/lpc1000/datasheet/lpc1111.lpc1112.lpc1113.lpc1114.pdf [3] NXP LPC1114 User’s Manual http://ics.nxp.com/support/documents/microcontrollers/pdf/user.manual.lpc11xx.lpc11cxx.pdf [4] NXP LPC1114 Errata http://ics.nxp.com/support/documents/microcontrollers/pdf/errata.lpc1114.pdf [5] ARM Processor Documentation Documentation from ARM can be found at: http://infocenter.arm.com/. [6] Information on different ARM Architectures http://www.arm.com/products/processors/technologies/instruction-set-architectures.php [7] ARMv6-M Architecture Reference Manual. Document identity: DDI 0419B http://infocenter.arm.com/help/index.jsp?topic=/com.arm.doc.ddi0419b/index.html [8] Cortex-M0 Technical Reference Manual. Revision: r0p0 http://infocenter.arm.com/help/index.jsp?topic=/com.arm.doc.ddi0432c/index.html [9] LPCXpresso IDE: NXP's low-cost development platform for LPC families, which is an Eclipsebased IDE. http://ics.nxp.com/lpcxpresso/ [10] LPC1000 Yahoo Group. A discussion forum dedicated entirely to the NXP LPC1xxx series of microcontrollers. http://tech.groups.yahoo.com/group/lpc1000/ [11] LPC2000 Yahoo Group. A discussion forum dedicated entirely to the NXP LPC2xxx series of microcontrollers. This group might be more active than the LPC1000 group. http://tech.groups.yahoo.com/group/lpc2000/ Note that there can be newer versions of the documents than the ones linked to here. Always check for the latest information/version. Copyright 2013 © Embedded Artists AB