1
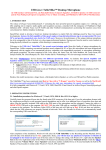
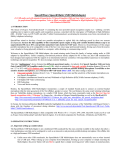
SpeechWare USB 3-in-1 TableMike Desktop Microphone (1) USB interface with Sound Ports, (2) Detachable Boom and (3) Speech Equaliser for Speech recognition, Voice or Music recording and Wideband or High Definition VoIP - Windows®/MacOS® 1. INTRODUCTION The release of Dragon NaturallySpeaking® 11 containing the most powerful speech recognition engine ever --utilising a 22 kHz sampling rate to improve audio quality and recognition accuracy, coincided with the emergence of Wideband or High Definition (HD - 20 kHz) Voice over IP (VoIP) and other 'Unified Communications' accelerating the transition away from conventional low fidelity telephone technology. SpeechWare aimed to develop a brand new desktop microphone to exploit fully the challenge posed by these two nascent developments: harness the full capability of this speech engine at long and variable dictation distance (up to an unprecedent 50 cm or 20”); and provide unmatched voice clarity for VoIP users. Moreover, the performance of this unique desktop microphone has to be comparable to that of the best very close range professional headsets; freeing users from the need to wear a headset or being physically tethered to a computer, while dictating or communicating over IP. Welcome to the USB 3-in-1 TableMike, the basic award-winning model from this family of unique microphones by SpeechWare. Unlike competing conventional products merely adapted for PC or Mac; this microphone has been designed and engineered with the support of an international advisory committee with unparalleled experience in microphone technology and speech recognition. The team comprised of Mr. Larry Allen, Mr. James Carr, Mr. Peter Maddern, Mr. Lunis Orcutt, Mr. Enrique Padilla, Mr. Chuck Runquist, Mr. Thilo Voelter and Dr. Wahrenberger. We also encourage customer feedback. This truly “Multipurpose” device features two different operational modes. An industry first Speech Equaliser and Amplifier mode (Green LED), which is optimised for long and variable distance (30 cm to 50 cm / 12” to 20”) Speech Recognition with LOW ambient noise, and a Normal or HD VoIP mode (Blue LED). This latter setting is ideal for: Close and variable dictation (5 cm to 15 cm / 2” to 6”) Speech Recognition with MODERATE ambient noise; Full duplex (simultaneous Sound in and out) Wideband or High Definition (HD) 20 kHz Internet telephony (VoIP); Full duplex HD Video conferencing; HD Podcasting; Voice and Music recording. Besides, this model incorporates an industry first detachable boom, a couple of Sound ports to connect an external Mic/Earset. The TableMike has been consistently rated “Best in Class” with a raving “5 Dragon” by Nuance, as well as by MacWorld: - http://www.macworld.com/article/163860/2011/12/choose_the_right_mac_microphone_for_speech_recognition.html - http://www.macworld.com/article/1167380/usb_6_in_1_tablemike_great_for_mac_speech_recognition.html It is fully compatible with the forthcoming Windows® 8, 7, Vista®, XP®, 2000, MacOS® X and Linux® as well as Dragon NaturallySpeaking® and other Speech engines. 2. OPERATING INSTRUCTIONS 2.1. Installation procedures for Windows® 7, Vista®, XP®, 2000 & Mac OS® X or higher Carefully insert the gooseneck boom into the female mini-XLR connector of the base unit. Cover the microphone element with the windscreen provided to avoid unwanted speech degradation, and to offer it an additional layer of protection from dust and saliva. Plug the specially insulated USB cable to the USB ports of the microphone and the computer. Connect the cable to a DEDICATED USB port on the computer. DO NOT USE any other USB cable or a multiple USB Splitter or USB Hub device to connect to the computer. The Indicator Light (LED) of the base unit will light up in Red. If the unit does not initialise check that the USB connectors are properly inserted at both ends. Wait a few seconds for Windows® to automatically install the corresponding USB sound drivers: After completion of the installation, Windows® will select the 'USB TableMike' as the Recording and the Playback Device, and will make it the default for ALL applications. Hence, you will not hear any playback if a Speaker or Earset is not plugged in the Sound out port (rear of the base unit). To change this setting, with Windows® 7, right-click the Speaker Icon in the lower right hand corner of the Windows® System Tray (Systray) and choose 'Playback devices'. Click the 'Mixer' link to open the 'Volume Mixer'. Select 'Speakers' and choose another available Device to be used (normally the built-in PC Speaker). The procedure is similar under Windows® Vista®, XP® and 2000. You can also go to 'Control Panel', 'Sound' and select the 'Playback' tab to achieve the same result. Also, in the 'Sound' window click the 'Recording' tab and check that the 'USB TableMike' is the 'Default Device'. Select and click-right on it. Click 'Properties', 'Advanced' and choose '1 channel, 16 bit, 44100 Hz --or 48000 Hz (DVD Quality)': 2.2. Additional instructions for Mac OS® X or higher Go to the Utilities folder in your Applications folder, and launch 'Audio MIDI Setup'. Select 'USB TableMike' from the list of devices. Click on the 'Input' tab, then choose '41000.0 Hz' and '1ch-16bit' from the Format menu. Quit the Setup. USB TableMike USB TableMike When you use Dragon Dictate®, choose Tools > Microphone Setup to calibrate the TableMike. When you do this, click on the red icon to enable the microphone, then wait for about 30 seconds in silence until the gain setting reaches the maximum level of 99. At this point, start reading the text to have Dragon Dictate® adjust the TableMike's volume properly. 3. Working with NaturallySpeaking® under Windows® 7, Vista® or XP® Due to the uniqueness of the built-in Speech Amplifier and Equaliser for best performance and recognition accuracy at long dictation distance (30 cm to 50 cm / 12” to 20”) and in an environment with low noise, we strongly recommend you create a NEW Dragon User Profile USB with the Green LED operational and use it for a few hours, in this way: a) Check the position of the Push Button microphone switch (Mute) under the base of the microphone. It has three different settings: 'Always On', 'Press to Lock' and 'Press to Talk'. The Push Button should be positioned in the middle for most users. On the unit, press the 'Push' button and the Red LED in the base will change and remain Green - Speech Recognition usage at long and variable range with LOW ambient noise. b) In Green LED Mode by default, the microphone will substantially increase both voice pick-up and noise cancelling levels to deliver high recognition accuracy from 30 cm to 50 cm (12” to 20”) range, depending on your voice and ambient noise. Ideally, place and keep yourself at about 30 cm (12”) from the microphone element. Note that the Automatic Gain Control (AGC) will automatically adjust the signal output volume depending upon your distance from the microphone element. As the distance increases, the volume output increases. However, this can cause a problem because the AGC is an amplification process and amplifying the output also amplifies any background noise or sounds, which may provoke some 'Please say that again' or '???' messages from NaturallySpeaking®. These messages do not affect accuracy. c) Note that NaturallySpeaking® may also display the following two Error messages if the aforementioned ranges and conditions are not observed. In the first case, place yourself closer to the microphone during the 'Check Microphone' which is tuned for headsets, whereas in the second positioned the microphone farther away –or switch to Blue LED: Position yourself closer to the microphone Position yourself farther away or switch to Blue LED In case of MODERATE ambient noise (as well as VoIP use) you are also recommended to shorten the dictation distance (about 5 cm to 15 cm / 2” to 6”) and switch to Blue LED mode. The latter is available when pressing again the right hand side button of the microphone Control Panel (the LED turns Blue). In this case, simply calibrate the microphone (open the existing User Profile, click in the 'Audio' menu and then select 'Check Microphone…'). With HIGH ambient noise, connect a headset in the base. Whatever procedure you choose NaturallySpeaking® will present you with the following windows: a) First, NaturallySpeaking® will check your soundcards. If you only have one in your PC, you will not get the first window because you do not need to make a selection. If you have more than one soundcard installed, it will ask you to choose which one you wish to utilise. Select 'USB TableMike' and click 'Next' in the first window. Position yourself within the recommended distance from the TableMike microphone capsule depending on your voice level and ambient noise. Click 'Next' again: b) Click the 'Start Volume Check' button and read the text until it turns grey. Read at your normal pace and voice level, making short pauses (3 to 5 seconds) at each punctuation sign. In this way, both your voice and pauses (silence) will be sampled. DO NOT SHOUT OR YELL if the 'Gain' bar at the right hand side of the first window does not move or moves very little. After the text turns grey again, click 'Next'. Repeat the previously outlined process in the second window by clicking 'Start Quality Check' and then 'Finish': To ensure that you get the most optimal signal-to-noise ratio, run the 'Check Microphone' process in the environment in which you will be dictating. That is, if you are going to be dictating into a low or moderate noise environment, be sure that you run it under those conditions. If your background environment changes during the course of the day, always rerun it again. Also, it is recommended that you rerun the process periodically if you are continuously dictating for long periods of time because both your environment and voice tend to change. This will ensure that your audio setup remains optimal. Occasionally, you may need to place yourself a bit closer to the microphone element during the 'Check Microphone' to pass the Audio Setup Wizard, which is tuned for headset microphones -- then dictate at the recommended distance. With MODERATE ambient noise change to Blue LED. You can even plug a high quality external headset microphone in the back of the unit, like our FlexyMikes (www.speechware.be/en/hardwareFlexyMike.php) for HIGH ambient noise rejection. If you wish to use the USB TableMike under Green LED and LOW ambient noise with your current User Profile, you MUST ALWAYS perform an additional Extended Training. This is because the audio characteristics of the SpeechWare 6-in-1 TableMike are significantly different from any other type of USB microphone, as you can easily hear when playing back your dictation. In principle, it may happen that the overall accuracy degrades slightly from what you were getting with your previous microphone and current Profile. It is also important to understand that it may take a little time for your current Profile to adjust to your previous performance and accuracy. In addition, each user is different and some may not require this Extended Training and period of use, while others may. However, DO NOT OVER TRAIN. Otherwise, your Profile can become excessively large which can effect overall performance (i.e., increase latency) and will not gain you any improvement in accuracy. DO NOT SHOUT OR YELL either when training or dictating... If you wish to use the USB TableMike as a high quality voice recorder; instead of a digital one, to automatically transcribe your recordings, configure it under Normal Mode (Blue LED) for close dictation and download our free and forthcoming TableMike Recorder application or any other from the web. Save your recording in a standard sound format such as: wav, MP3 or wma with at least 16 bits, 11,025 Hz, mono. NaturallySpeaking® 11 or higher will transcribe more effectively recordings made with a 22,000 Hz sampling rate. Save your recording in a standard sound format such as: wav, MP3 or wma with at least 16 bits, 11,025 Hz, mono. You may also want to download and evaluate our demo QuickTypist application to transcribe and edit your recordings, as well as our free Apps for iPhone, Android and BlackBerry. The former application contains enhanced transcription traits to complement NaturallySpeaking®: http://www.quicktypist.com 4. Summary of recommendations for best use and performance of the multipurpose USB 3-in-1 TableMike Usage Recommendation Comments 1. Speech Recognition with a New User Profile and LOW ambient noise Set the LONG-RANGE Mode [Green LED] Calibrate and always run a General and Extended Trainings Keep the dictation distance at about 30 cm [12”] for maximum accuracy. Occasionally, you may need to place yourself closer to the microphone during the 'Check Microphone' to pass the Audio Setup. Train... 2. Speech Recognition with an Existing User Profile and LOW to MODERATE noise Set the NORMAL/VOIP Mode [Blue LED] Calibrate Microphone and Run an additional Extended Training with the current Profile Keep the dictation distance at 5 cm to 15 cm [2” to 6”] for maximum accuracy 3. Speech Recognition with HIGH ambient noise Set the NORMAL/VOIP Mode [Blue LED] and plug a good noise cancelling headset microphone in the back of the base, such as our FlexyMike Connecting a headset automatically disables the microphone boom [no need to dissemble the unit]. The headset impedance must be adequate 4. Telephony and HD Voice over IP, as well as recording Set the NORMAL/VOIP Mode [Blue LED] and keep the unit at the recommended 5 cm to 15 cm [2” to 6”] Using the LONG-RANGE Mode [Green LED] for this purpose may generate undesirable echo! 5. Optional recommended accessories to complement your working experience with the USB 3-in-1 TableMike Fix-to-table or Wall-mount Adapter for safety and greater practicality: http://www.tablemike.com/options.php Telescopic (53 cm to 65 cm or 21” to 25.5”) microphone boom for an amazing flexibility and range FlexyMike Single Ear and Dual Ear, the lightest and most comfy headsets to connect into the back of the TableMike with very noisy environments: https://www.tablemike.com/en/flexymike-single-best-headset-speech-recognition.php and https://www.tablemike.com/en/flexymike-dual-best-headset-speech-recognition.php TableMike Config application to assign the two Volume buttons in the control panel of the TableMike to six different hotkeys of choice or any existing NaturallySpeaking Voice Command: http://www.tablemike.com/download.php Specifications (major innovations highlighted in blue) Main features: USB interface (v.1 and 2.0 compliant) with audio output and input Sound ports Detachable boom with professional hi-fi mini-XLR connectors for easier removal, portability and storage Speech Equaliser for Speech recognition at range and Normal or HD VoIP mode Operating System: Windows® 8, 7 / Vista® / XP® / 2000 / MacOS® 10.0 or higher / some Linux® without additional USB Sound drivers Compatible voice applications: Dragon NaturallySpeaking®, Microsoft Speech for Windows®, ViaVoice®, etc. Capsule type: Back Electret Condenser with Cardioid Polar Pattern Control Panel: Digital buttons to avoid unwanted noise 'clicks' Push Button modes: Always On / Press to Lock / Press to Talk ADC sample resolution and rates: 16 bit mono and up to an exceptional 48 kHz for both Recording and Playback (maximum of 22 kHz in competing devices) Sensitivity & SNR: -37 dB@1kHz, SPL=1Pa and an exceptional 92 dB, 1kHz at 1 Pa Frequency response and Output Impedance: 80 - 20,000 Hz and 1700 ohms Sound ports: Standard 3.5 mm mono mic-in and 3.5 mm stereo out with 2 Watts Power supply: from the USB port of the PC (no need for batteries) Other unique features: Automatic Gain Control (AGC) or voice amplifier, High and Low Pass filters, Digital Signal Process (DSP) For more information and the latest version of this Manual please check: http://www.tablemike.com/download.php