1
USER MANUAL
Model: HDSM V2.5
Horizon Digital Satellite Meter
Issue 2.5 – Sept 2006
Horizon Global Electronics Ltd
www.horizonhge.com
Horizon Global Electronics Ltd
Unit 1
8 Kinetic Crescent
The London Office and Science Park
Enfield
EN3 7XH
United Kingdom
Phone:
Fax:
Email:
Web:
+44 (0)20 8344 8230
+44 (0)20 8344 8235
[email protected]
www.horizonhge.com
Chapter 1
Getting Started
1) General Information & Safety
2) Accessories
3) Features
4) Using the Meter
5) Charging the Battery
6) Downloading from the Website
7) Transferring Files into your Meter.
8) Troubleshooting
9) Notes
1) General Information & Safety
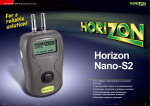
The HDSM is a compact, light weight and easy to use satellite installation meter
featuring an easy to read display that show Signal strength and digital signal quality.
Finding your satellite is easy by using the left or right arrow keys to select your desired
satellite and your HDSM will lock onto the satellite shown in the display.
Everything you need is supplied with your meter, which includes a mains charging lead,
in-car charger and data lead. The rain cover and leather case are already fitted.
The HDSM can also be easily re-programmed from the Horizon Global Electronics
website www.horizonhge.com with your choice of satellites or the default file for your
region.
Spare battery packs are available directly from Horizon Global Electronics and can be
replaced without voiding your warranty.
Replacement data leads, mains charging leads and in-car chargers are also available
directly from Horizon Global Electronics.
The HDSM supports up to four different languages selectable from the setup menu.
The HDSM can also be programmed for special custom applications like VSAT
installation, making it a very affordable solution.
Safety
Clean only with a dry cloth.
Always use the protective case and cover provided.
Read the instructions fully before operating your unit for the first time.
Care should be exercised when using the carry strap as it can present a choking hazard,
only use when slipping or falling is not a possibility.
Do not disassemble your unit or interfere with the internal components; this will void your
warranty and there is a possibility of electric shock.
Only use the provided battery, mains lead, DC car charger and computer programming
lead as using other types may cause damage to your unit which will void your warranty
or cause electric shock. Replacement battery packs are available directly from Horizon
Global Electronics Ltd.
Should repair or service be required contact us directly at Horizon Global Electronics Ltd
by calling us on +44 (0)208 344 8230 or via our website www.horizonhge.com
2) Accessories
Your HDSM is supplied with this Instruction Manual and these items below. Please
check if you have all the following. If any items are missing please contact your supplier.
DC Car Charger Lead
AC Mains Charger Lead
Rain Cover
Computer Programming Lead
Leather Case
` Battery Pack
The mains lead should match your region, if your mains charger lead is not correct for
your region one can be obtained from Horizon or a local supplier/ importer.
Note: The items shown above are subject to change without notice.
Please dispose of the packaging carefully and recycle where
possible.
3) Features
Specifics;
•
•
•
•
•
•
•
•
•
•
•
•
•
•
•
•
•
Signal Strength and BER displayed together
32 Transponders or 16 Satellites, horizontal & vertical
Audible and visual tune-in, with display backlight
DVB, C & KU band, MPEG, VSAT compatible
Input dynamic range – 65dBm~25dBm
Input Connector F-female. Input imp 75ohms
Symbol Frequency rate from 1Msps~~45Msps
Universal Charger 100V~240V AC12 W. Intelligent charger (CE approved) with
delta V delta T detection, Fast Charge then Trickle.
Run time with full charge, average 5 hours from 3.3Ah NiMH battery
Figure of 8 mains input connector. 2.1mm Female PSU plug for external charge
via supplied car charger
LNB short circuit protection 500 mA automatic limiter
RF input range 950-2150MHz
Computer Interface: Serial Port (Com 1, 2, 3 or 4) for updating satellite settings
RF Level can be displayed in dBuV (accurate to +1dB) or linear scale (256
steps). Feature available in setup mode.
C/N (carrier to noise) is displayed in dB
Quality (pre BER or bit error rate) locks on faster making it easier to lock on to
the satellite initially; typical lock in less than 100mS
Instead of “found” to indicate lock of correct satellites actual B.E.R can be
displayed. Feature available in set up mode
4) Using the Meter
The HDSM Keypad
To turn the meter on press and hold the
button for 5 seconds
The first screen will flash indicating the Version Number, Satellite List Name and the
Battery Strength in % terms.
To select different satellites use the Left and Right
cursor.
You can set your preferences by entering the “Setup Mode”. To access the menu
shown below, make sure the meter is off then press and hold the “OFF” button for 5
seconds.
Functions in set up mode are:
1.
2.
3.
4.
5.
6.
7.
8.
9.
Exit
Backlight On/Off
Clicking On/Off
Sleep
Defaults
Language: English, French, Dutch, Spanish
RF Linear or dBuV
Found or Numerical BER value
BER Log or Linear
Please note points: 2, 3, 4, 5, 6, 7, 8, and 9 can all be changed to suit your preference,
by pushing the left or right button on the keypad.
4) Using the Meter
Continued From Previous Page
How to align your dish
•
Once your dish mounting has been securely installed in a suitable direction
connect the LNB to your HDSM meter with a short length of cable (1.5M or 4 feet
being ideal) Tip: Your dish clamp should be just nipping the metal work allowing
you to adjust the dish position, and it should hold when you release.
•
Switch on your HDSM by pressing the button
your desired satellite by using the left or right arrow
key.
•
Point the dish in the approximate direction of the required satellite, and slowly
sweep the dish across the sky adjusting your elevation at the end of each sweep.
Whilst you are sweeping the sky the rate of beeps will change as you pass each
satellite; the scale on the meter will also change.
•
Once you have located your satellite the HDSM will change tone and “Found” will
be displayed on the screen.
•
Peak up on your selected satellite by making fine azimuth and elevation
adjustments to get the S and Q values as high as possible. You may wish to use
the auto ranging function to recalibrate the displayed signal level to enable you to
peak up with more accuracy by pressing the
button twice.
for 5 seconds and select
4) Using the Meter
Continued From Previous Page
•
Now adjust the polarisation of the LNB in fine steps clockwise and anticlockwise
to get the pre BER (Q) bar to as high as value as possible. Flip between the
Vertical and Horizontal polarities (where available) to ensure both values are as
high as you can get them, and tighten the LNB clamp.
•
Tighten up the dish fixings in an even manner to ensure a good fixing whilst
keeping an eye on the display, which will enable you to make fine adjustments as
you tighten.
•
Installation Complete.
How to select DiSEqC Commands.
To switch to DiSEqC commands,
Press and hold the down button for 5 seconds to bring
up the DiSEqC menu.
Press down or up to select the required switch and the
right arrow to send
.
To turn your meter off, press and hold down the
button, till “Shutting Down” appears on the screen.
5) Charging the Battery
The meter will NOT be fully charged when you receive it. We recommend you charge
the meter for an initial 24 hours before use. If your meter is not being used for a long
period of time we recommend disconnecting the battery.
The battery pack is replaceable. To replace the batteries slide the meter out of its
,protective case open the cover on the bottom of the unit and disconnect the batteries. If
the battery has been disconnected the meter will indicate flat battery (0%). You can also
top up your battery from your vehicle with the DC Adapter supplied.
PLEASE NOTE: The meter will not operate whilst the unit is being charged.
Charging with the Mains Lead
Open the flap at the back of the HDSM leather case to access the mains inlet. Plug the
mains lead into this port and the other end to your local supply socket.
Charging from a Vehicle.
The vehicle 12V DC charge port is on the right side of the unit. Plug the car charger lead
into the bottom socket and the other end to the vehicle’s “aux” socket. Please note that
on certain vehicles the aux socket is switched off unless the vehicle is running.
For in vehicle charging only use the lead supplied. The use of another lead may damage
the meter and will void the warranty. The HDSM can remain connected to either power
source in “Trickle Charge” state for an extended period of time without damaging any
internal components or the battery pack.
6) Downloading from the Website
The HDSM meter is supplied with a standard UK Default File upon delivery. To
customize the meter, go to our download page on our website www.horizonhge.com
where you will find a list of available satellites ready for you to download.
To be able to update your satellite list you will require a PC with at least one 9 pin serial
port and running a Windows operating system; you will also require access to the
internet. A USB to Serial Interface adapter may also be used.(not supplied)
To change the satellite list in your HDSM, go to our website www.horizonhge.com and
DOWNLOAD page. Then select “Click for downloads for this product”.
The following screen will appear; click on your required region and follow the instructions
on the next page.
To download one of our preconfigured options, please click on the link
shown by the arrow above, drag and drop your desired hex file into the
satmeter loading program, or alternatively select your region from the map,
for example; Europe and UK
6) Downloading from the Website
Continued from previous page
•
Enter a selection name for the file, which will be on display when you turn on
your meter.
•
Enter your email address; this is where the file you create will be sent to
•
Select your desired transponders by highlighting and clicking the satellite
required to put it into your selected transponders list.
•
Once the selection is complete, click
email.
•
Collect the email in your inbox. The email will have an attachment, this is the
actual loading program preloaded with your selection.
•
Follow the instructions on the next page to upload the file into your meter.
•
For the experienced user, as an option you can also download from the same
page off the website.
and you will be sent an
7) Transferring Data into your Meter
Make sure your Satellite Meter is switched off then connect the data lead to the Serial
Port at the back/side of your PC/Laptop and the other end to your meter, as shown
below;
Wait for the
meter to
display
then click Transfer
After a few seconds a progress bar will appear
If you get this
error message,
check your COM-port
selection, by selecting the
correct COM number
When complete you will see a popup window that says:
Click “OK” and close the program
Disconnect the meter from the computer, power it up and it will be ready for use.
8) Troubleshooting
All HDSM owners should be aware that the unit is location sensitive and will only pick up
satellites within the downlink footprint of its programming.
Please ensure that you have the most up to date settings loaded into your HDSM meter
these can be found in the downloads section of the Horizon Global Electronics Ltd
website.
If the meter shows no signal level or indication of lock check the condition of your F-F
lead for sound connections and that the length of cable is undamaged. If there are kinks
in your cable or if there is any of the outer braid touching the centre core this will impact
on your HDSM’s performance.
I2C Error Indication
The I2C error detection firmware is embedded into all versions of Horizon Global
Electronics Ltd meters; it is there in the event of a fault to protect the circuitry. The I2C
error indicates that the internal electronics are not receiving correct communication with
the internal tuner. This may be caused by very low battery power (typically in extremely
cold weather conditions)
On the HDSM I2C errors can occur if there is a high current demand from the LNB or
there are loose connections between the HDSM and the LNB (check the cable) or
switching to a Horizontal selection with a very weak battery. In low temperature
environments do not leave your unit in your vehicle overnight as this will also impact on
the performance of your meter.
Storage
If you wish to store your unit for extended periods of time greater than 3 weeks
disconnect the battery connectors. When required reconnect and charge overnight prior
to use.
Tip: To keep your battery in good working order we recommend a full overnight charge
at least once every two weeks for light usage. For every day usage we recommend to
put your unit on overnight charge prior to the next working day to ensure maximum
battery power is available.
For any additional help please don’t hesitate to contact Horizon directly.
9) Notes
SPECIFICATION
Battery Pack
Intelligent Charger with delta V/T detection
Universal charger input range
Battery life with full charge
Unit discharge time (idle State)
LNB supply voltage
LNB supply current
LNB short circuit protection
RF input range
Number of satellite Stored in memory
Computer Interface
Ni-MH 3.3Ah
Fast Charge (4 Hours), then trickle
100-240 V AC @0.3A
More than 5 hours
~24 days
13V for V and 18V for H
250 mA
automatically @ 500mA
-65 dBm to 25 dBm
32 Transponders (16 Satellites)
Serial via RS232
LIMITED WARRANTY
Horizon will, at our option, repair or replace any HORIZON Digital Satellite Meter
found defective in manufacture within the warranty period (1 year).
The warranty period is determined by the date of HDSM purchase. Keep your
receipt as proof of purchase. Otherwise the warranty is determined by date of
manufacture.
This warranty does not apply to damage caused by accident, misuse, or
tampering with the unit or seals. This does not affect your statutory rights.
DECLARATION OF CONFORMITY
Manufacture: Horizon Global Electronics Ltd
Address: Unit 1, 8 Kinetic Crescent, London Office & Science Park, Enfield EN3 7XH
Declares that the (Horizon Digital Satellite Meter (“HDSM V2.5) is in conformity with the
following Directives and standards.
Low Voltage: 73/23/EEC
93/68/EEC
EMC: 89/336/EEC
93/68/EEC
Technical Department
Horizon Global Electronics
London 1st October 2001
www.horizonhge.com
92/31/EEC