1
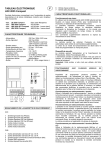
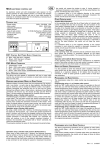
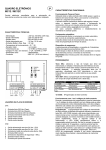
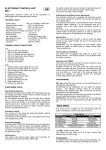
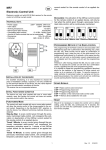
ELECTRONIC PANEL MC12 / MC12C GB Mono-phase electronic control unit for the automation of sliding doors and rolling shutters with incorporated radio receiver. TECHNICAL DATA: - Power supply : 230 Vac 50-60Hz 2.5W max. - Flashing light output : 230 Vac 500 W max. - Motor outputs : 230 Vac 500 W max. - Aux. power supply output : 24 Vac 1.5 W max. - Button and safety device input : 24 Vdc - Working temperature : -10 55 °C - Radio receiver : see model - Op. transmitters : 12-18 Bit, or Rolling Code - Max. TX codes in memory : 7 UP, 7 DOWN or 7 P/P - Dimension of panel : 99x50x28mm. - Container : ABS V-0 ( IP44 internal use ). OPERATING FEATURES: Step-by-step operation: By using both the radiocontrol ( LED CODE on ) and the low voltage push button panel ( PUL ) to activate the fastening, the following functioning is obtained: the fi rst command impulse activates the opening mechanism until time expiry of the timing motor. The second command impulse closes the frame. If an impulse is sent before time has expired, the control unit will stops the motion. A further input implements the re-starting of the motion in the opposite direction. Automatic closing: The control unit closes the frame automatically without sending other commands. Choice of this operating mode is described under the instruction for setting the Pause time. Safety device: The control unit allows for the connection and control of Photocells, Tyre sensors (NC). Command from these devices are ignored during opening whilst the gate is closing they will reverse the direction of movement. Important: If not used the terminals must be jumped. PROGRAMMING: SEL button: selects the type of function to be memorised, the selection is indicated by a fl ashing LED. By repeatedly pressing the button it is possible to choose the desired function. The selection will remain active for 10 seconds indicated by a fl ashing LED. If no other operations are executed during this period, the control board will return to its previous state. SET button: programs the information relative the type of function previously selected with the SEL button. LED Reference 1) CODE 2) LAMP/CORT. 3) T. MOT. 4) T. PAUSE. LED Off No code Flashing Unlimited timing No automatic close LED On Code activated Courtesy Light Programmed delay With automatic close 1) CODE: (Radiocontrol programming) CONNECTIONS OF THE TERMINAL BOARD: CN1 : 1 2 3 4 5 6 7 : 230 Vac input (Phase). :230 Vac input (Neutral) :230 Vac fl ash input (Neutral) : 230 Vac fl ash input (Phase). :Opening motor output :Common motor output. :Closing motor output. CN2: 1 :24 Vac 1.5 W service power supply output. 2 :24 Vac 1.5 W service power supply output. 3 :Open-close push button control input (NA). 4: Common GND input. 5 :Safety device input (NC). 6 :Aerial earth input. 7 :Aerial hot pole input. Operation with 1 or 2 codes of the radiocontrol. During the programming procedure, it is possible to save 1 or 2 radiocontrol codes. One code allows for cyclical operation (Up/Down), two codes allow to obtain two distinct controls, the fi rst for ascent and the second for descent. Programming: The transmission code is programmed in the following manner: press the SEL button, LED CODE starts fl ashing. At the same time send the fi rst code selected with the desired radiocontrol and LED CODE will start fl ashing quickly, send the second code to be saved. LED CODE will remain on and the programming is complete. If the second code is not sent within 10 seconds the control unit will exit the programming phase and select the function with only one code of the radiocontrol. In case all 7 available codes have been memorised, by repeating the programming operation, all 4 LEDs indicators will start to fl ash very fast, indicating that further memorising is not possible. Programming the transmission code remotely. This procedure allows to program the transmission code remotely, without using the SEL button on the unit itself, but remotely following the operation. To program a transmission code remotely, proceed as follows: send the code of a previously saved radiocontrol code continuously for more than 10 seconds, at the same time the control unit enters the programming mode as described above. Enabling the programming of a transmission code remotely. The control unit is supplied by the manufacturer with remote programming of a transmission code not enabled; to enable the function proceed as follows: connect the control unit to a 230Vac power supply by pressing and holding the SEL button. All the indicator LEDs will turn on and the programming is complete. To disable the function enabled previously, repeat the operation or conduct the RESET procedure. Deletion Cancellation of all memorised codes is carried out in the following manner: press the SEL button and LED CODE will start to fl ash. Then press the SET button. The procedure is now complete and LED CODE will stop fl ashing. 2) LAMP/CORT. : (Selection of the fl ashing light or the courtesy light) The control unit has a 230 Vac 500 W output, for connection to a fl ashing light or a courtesy light. The control unit is supplied by the manufacturer with the Flashing function enabled. If you wish to enable the courtesy light, proceed as follows: use the SEL button to navigate to the LAMP/CORT LED when fl ashing and then press the SET button. The LAMP/CORT button will light up permanently. Repeat the procedure to restore the previous confi guration. Flashing function: The 230 Vac output will be activated each time that the automation is moving, for the duration of the motor time. If the Pause time is memorised, the fl ashing light will be active even during the Pause. Functioning of the Courtesy light: The 230 Vac output will be activated for 3 minutes, each time that an ascent command is given. 3) T. MOT. (Programming the motor operating time max. 4 minutes) The control unit is factory supplied with a working time motor predefi ned equal to 30 sec. If a reprogramming of the motor operating time is needed, it must be carried out through the closed frame in the following manner: use the SEL button to navigate to the T. MOT LED when fl ashing, then continuously press the SET button. The rolling shutter will start the opening. When you have reached the required height, release the SET button and at the same time the motor time storage will be completed and the T. MOT. LED will remain lit and fi xed. If you want an infi nite motor time, use the SEL button to navigate to the T.MOT LED when fl ashing and press the SET button for less than 1 second. At the same time the LED will shut off and the operation will be completed. It is advisable to memorise a time that is a few seconds longer after the frame has reached the end. 4) T. PAUSE: (Automatic closing time programming max. 4 minutes) The manufacturer furnishes the control unit with an automatic closure (pause time equal to 15 sec.). If a reprogramming of the automatic closing time is needed, it must be carried out through the closed frame in the following manner: use the SEL button to navigate to the T. PAUSE LED when fl ashing. Then press and hold down the SET button for a period equal to the desired pause interval between closing and opening operations. At expiration of the desired time release the SET button. At the same time the memorisation of automatic closing time will be determined and the T. PAUSE LED will remain lit. If you do not want automatic closing, take position on the fl ashing of the T. PAUSE LED. Then press the SET button for less than a second. At the same time the LED will shut off and the operation will be concluded. RESET: To reset the default confi guration of the control unit, press the SEL and SET buttons simultaneously; all RED indicator LEDs will switch on and then off again immediately. IMPORTANT FOR THE INSTALLER IMPORTANT FOR THE INSTALLER The control unit was designed to be assembled together with other components (motor, shutter or gate, safety devices) to constitute a finished product (machine) in compliance with Machinery Directives. The safety of the final installation and the compliance with all prescribed Standards is the responsibility of the person who assembles the various parts to construct a total closing. It is also advised to comply with the following recommendations: Before automating the frame, check that it is in good conditions, in compliance with the Machinery Directive and with EN 12604. Wiring of the various electrical components outside of the control unit must be carried out in compliance with that prescribed in Standard EN 60204-1 and its amendments at point 5.2.7 of EN 12453. Power supply and connection cables must be fixed using the cable glands supplied as optional accessories. The gearmotor used to move the frame must comply with that prescribed at point 5.2.7 of EN 12453. Fix the control unit on a wall. To mount it, use the special support supplied with the casing and insert fixing screws in the designated spaces. Mounting of a push button panel for manual control must be done positioning the push button panel where the user is not in a dangerous position, in compliance with point 5.2.8 of EN 12453. The control unit does not have any type of isolating device for the 230 Vac line. It will therefore be the responsibility of the installer to arrange an isolating device inside the plant. It is necessary to install a monophase switch with over-voltage category III. It must be positioned where it can be protected from accidental closing, according to that prescribed in point 5.2.9 of EN 12453. In compliance with 5.4.2 of EN 12453, it is recommended to use gearmotors equipped with an electric-mechanical release device, so that the door can be moved manually in case of necessity. In compliance with 5.4.3. of EN 12453, use electricmechanical release systems or similar devices which stop the door safely in the end run position. Cables for power and connection to the motor suitable for insertion in the pg9 cable glands provided must have an outside diameter between 4.5 and 7 mm. The internal conductors wires must have a nominal section of 2.. 0.75mm If a raceway is not used, use H05RR-F cables. Fix a warning sign near the place of installation, conform with ISO 3864, with minimum height of 60 mm Use safety devices capable of monitoring the status of their connection to the electrical control unit. When installation is complete, carry out all the controls prescribed by EN 12453 - EN 12445 to be sure that the closing complies with the provisions. For a correct functioning of the radio receiver, if using one or more control units, the installation at a minimum distance of at least 3 metres one from the other is recommended. - The device must never be used by children or persons with reduced physical-psychological abilities, unless supervised or trained on the functioning and the use modalities. - Do not allow children to play with the device and keep the radiocontrols away from their reach. - Ensure there is no-one immediately near-by until the door is not fully open or closed. - ATTENTION: keep this instruction manual and respect the important safety prescriptions contained herein. The non compliance with the prescriptions may cause damages and serious accidents. - Frequently examine the plant to detect any signs of damaging. Do not use the device if a repair intervention is necessary. Warning All operations that require the opening of the casing (cables connection, programming, etc.) must be carried out by expert personnel during installation. For any further operation which requires the casing to be re-opened (re-programming, repair or installation amendments) contact the after-sales assistance. STATEUROP declares that the products: Electronic control unit: MC12 / MC12C comply with the specifications of the R&TTE 99/5/EC, EMC 2004/108/EC and LVD 2006/95/EC Directives. Rev. 1.0 on 07-11-2011