1
VOOK
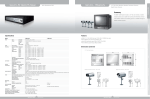
PROFESSIONAL MONITORING
Digital Video Recorder
CONTENT
❶ NOTICE
1.1 NOTICE‐‐‐‐‐‐‐‐‐‐‐‐‐‐‐‐‐‐‐‐‐‐‐‐‐‐‐‐‐‐‐‐‐‐‐‐‐‐‐‐‐‐‐4 ❷ OVERVIEW
2.1 FEATURES‐‐‐‐‐‐‐‐‐‐‐‐‐‐‐‐‐‐‐‐‐‐‐‐‐‐‐‐‐‐‐‐‐‐‐‐‐‐‐7 2.2 PACKING DETAILS‐‐‐‐‐‐‐‐‐‐‐‐‐‐‐‐‐‐‐‐‐‐‐‐‐‐‐10 2.3 NAMING AND FUNCTIONS‐‐‐‐‐‐‐‐‐‐‐‐‐‐‐‐12 2.3.1 FRONT PANEL‐‐‐‐‐‐‐‐‐‐‐‐‐‐‐‐‐‐‐‐‐‐‐‐‐‐‐‐‐12 2.3.2 REAR PANEL‐‐‐‐‐‐‐‐‐‐‐‐‐‐‐‐‐‐‐‐‐‐‐‐‐‐‐‐‐‐‐15 2.3.3 REMOTE CONTROLLER‐‐‐‐‐‐‐‐‐‐‐‐‐‐‐‐‐‐18 2.3.4 Q‐MENU‐‐‐‐‐‐‐‐‐‐‐‐‐‐‐‐‐‐‐‐‐‐‐‐‐‐‐‐‐‐‐‐‐‐‐‐19 2 4 SPECIFICATION
2.4 SPECIFICATION‐‐‐‐‐‐‐‐‐‐‐‐‐‐‐‐‐‐‐‐‐‐‐‐‐‐‐‐‐‐‐20 20
❸ INSTALLATION
3.1 TOTAL CONNECTION DIAGRAM‐‐‐‐‐‐‐‐‐26 3.2 INDIVIDUAL CONNECTION‐‐‐‐‐‐‐‐‐‐‐‐‐‐‐‐27 3.2.1 POWER‐‐‐‐‐‐‐‐‐‐‐‐‐‐‐‐‐‐‐‐‐‐‐‐‐‐‐‐‐‐‐‐‐‐‐‐27 3.2.2 VIDEO & AUDIO‐‐‐‐‐‐‐‐‐‐‐‐‐‐‐‐‐‐‐‐‐‐‐‐‐ 28 3.2.3 HDD CONNECTION‐‐‐‐‐‐‐‐‐‐‐‐‐‐‐‐‐‐‐‐‐ 32 3.2.4 EXTERNAL CONNECTOR‐‐‐‐‐‐‐‐‐‐‐‐‐‐‐ 34 ❹ OPERATION
4.1 PRE‐OPERATION‐‐‐‐‐‐‐‐‐‐‐‐‐‐‐‐‐‐‐‐‐‐‐‐‐‐‐‐‐37 4.2 POWER CONNECTION‐‐‐‐‐‐‐‐‐‐‐‐‐‐‐‐‐‐‐‐‐‐38 4.3 LIVE DISPLAY‐‐‐‐‐‐‐‐‐‐‐‐‐‐‐‐‐‐‐‐‐‐‐‐‐‐‐‐‐‐‐‐‐ 40 4.3.1 SINGLE DISPLAY‐‐‐‐‐‐‐‐‐‐‐‐‐‐‐‐‐‐‐‐‐‐‐‐‐ 40 4.3.2 MULTIPLE DISPLAY‐‐‐‐‐‐‐‐‐‐‐‐‐‐‐‐‐‐‐‐‐‐41 4.4 AUTO SEQUENCE ‐‐‐‐‐‐‐‐‐‐‐‐‐‐‐‐‐‐‐‐‐‐‐‐‐‐‐ 45 4.4 AUTO SEQUENCE 45
4.5 DIGITAL ZOOM‐‐‐‐‐‐‐‐‐‐‐‐‐‐‐‐‐‐‐‐‐‐‐‐‐‐‐‐‐‐ 46
4.6 PIP‐‐‐‐‐‐‐‐‐‐‐‐‐‐‐‐‐‐‐‐‐‐‐‐‐‐‐‐‐‐‐‐‐‐‐‐‐‐‐‐‐‐‐‐‐‐ 47 1
CONTENT
4.7 SPOT‐‐‐‐‐‐‐‐‐‐‐‐‐‐‐‐‐‐‐‐‐‐‐‐‐‐‐‐‐‐‐‐‐‐‐‐‐‐‐‐ 48 4.8 PTZ‐‐‐‐‐‐‐‐‐‐‐‐‐‐‐‐‐‐‐‐‐‐‐‐‐‐‐‐‐‐‐‐‐‐‐‐‐‐‐‐‐‐ 49 4.9 MOUSE‐‐‐‐‐‐‐‐‐‐‐‐‐‐‐‐‐‐‐‐‐‐‐‐‐‐‐‐‐‐‐‐‐‐‐‐‐ 50 4.10 OSD‐‐‐‐‐‐‐‐‐‐‐‐‐‐‐‐‐‐‐‐‐‐‐‐‐‐‐‐‐‐‐‐‐‐‐‐‐‐‐‐52 4.10 OSD
52
4.11 RECORDING‐‐‐‐‐‐‐‐‐‐‐‐‐‐‐‐‐‐‐‐‐‐‐‐‐‐‐‐‐ 53 4.11.1 NORMAL RECORDING‐‐‐‐‐‐‐‐‐‐‐‐ 53 4.11.2 EVENT RECORDING‐‐‐‐‐‐‐‐‐‐‐‐‐‐‐‐ 55 4.11.3 SCHEDULE RECORDING‐‐‐‐‐‐‐‐‐‐‐ 55 4.12 SEARCH‐‐‐‐‐‐‐‐‐‐‐‐‐‐‐‐‐‐‐‐‐‐‐‐‐‐‐‐‐‐‐‐‐‐‐ 56 4.12.1 NORMAL SEARCH‐‐‐‐‐‐‐‐‐‐‐‐‐‐‐‐‐‐ 56 4.12.2 EVENT SEARCH‐‐‐‐‐‐‐‐‐‐‐‐‐‐‐‐‐‐‐‐‐ 59 4.12.3 TIME SEARCH‐‐‐‐‐‐‐‐‐‐‐‐‐‐‐‐‐‐‐‐‐‐‐‐61 4.12.4 JOG SHUTTLE SEARCH‐‐‐‐‐‐‐‐‐‐‐‐‐62 4 13 BACK UP
4.13 BACK UP‐‐‐‐‐‐‐‐‐‐‐‐‐‐‐‐‐‐‐‐‐‐‐‐‐‐‐‐‐‐‐‐‐‐
63
63 4.14 BACK UP VIEWER‐‐‐‐‐‐‐‐‐‐‐‐‐‐‐‐‐‐‐‐‐‐‐65 2
❺ SETUP MENU
5.1 FACTORY DEFAULT‐‐‐‐‐‐‐‐‐‐‐‐‐‐‐‐‐‐‐‐‐‐‐67 5.2 QUICK SETUP‐‐‐‐‐‐‐‐‐‐‐‐‐‐‐‐‐‐‐‐‐‐‐‐‐‐‐‐‐‐69 5.2.1 LANGUAGE ‐‐‐‐‐‐‐‐‐‐‐‐‐‐‐‐‐‐‐‐‐‐‐‐‐‐‐‐ 69 5.2.2 RESOLUTION‐‐‐‐‐‐‐‐‐‐‐‐‐‐‐‐‐‐‐‐‐‐‐‐‐‐‐69 5.2.3 QUALITY‐‐‐‐‐‐‐‐‐‐‐‐‐‐‐‐‐‐‐‐‐‐‐‐‐‐‐‐‐‐‐‐ 70 5.2.4 OVERWRITE‐‐‐‐‐‐‐‐‐‐‐‐‐‐‐‐‐‐‐‐‐‐‐‐‐‐‐ 70 5.2.5 PRE‐RECORD‐‐‐‐‐‐‐‐‐‐‐‐‐‐‐‐‐‐‐‐‐‐‐‐‐‐ 70 5.2.6 REMOTE ID‐‐‐‐‐‐‐‐‐‐‐‐‐‐‐‐‐‐‐‐‐‐‐‐‐‐‐‐ 70
5.3. CAMERA‐‐‐‐‐‐‐‐‐‐‐‐‐‐‐‐‐‐‐‐‐‐‐‐‐‐‐‐‐‐‐‐‐‐ 71 5.3.1 CHANNEL‐‐‐‐‐‐‐‐‐‐‐‐‐‐‐‐‐‐‐‐‐‐‐‐‐‐‐‐‐‐‐71 5.3.2 TITLE‐‐‐‐‐‐‐‐‐‐‐‐‐‐‐‐‐‐‐‐‐‐‐‐‐‐‐‐‐‐‐‐‐‐‐‐‐72 5.3.3 ADJUST‐‐‐‐‐‐‐‐‐‐‐‐‐‐‐‐‐‐‐‐‐‐‐‐‐‐‐‐‐‐‐‐‐‐73 5.3.4 PTZ PROTOCOL‐‐‐‐‐‐‐‐‐‐‐‐‐‐‐‐‐‐‐‐‐‐‐‐73 5.3.5 PTZ BAUDRATE‐‐‐‐‐‐‐‐‐‐‐‐‐‐‐‐‐‐‐‐‐‐‐‐73 5.3.6 PTZ SPEED‐‐‐‐‐‐‐‐‐‐‐‐‐‐‐‐‐‐‐‐‐‐‐‐‐‐‐‐‐‐74 5.3.7 PTZ ID‐‐‐‐‐‐‐‐‐‐‐‐‐‐‐‐‐‐‐‐‐‐‐‐‐‐‐‐‐‐‐‐‐‐‐ 74 5.4 DISPLAY‐‐‐‐‐‐‐‐‐‐‐‐‐‐‐‐‐‐‐‐‐‐‐‐‐‐‐‐‐‐‐‐‐‐‐ 75 5.4.1 SEQUENCE‐‐‐‐‐‐‐‐‐‐‐‐‐‐‐‐‐‐‐‐‐‐‐‐‐‐‐‐ 75
5.4.2 OSD DISPLAY‐‐‐‐‐‐‐‐‐‐‐‐‐‐‐‐‐‐‐‐‐‐‐‐‐ 76 5.4.3 VIDEO LOSS‐‐‐‐‐‐‐‐‐‐‐‐‐‐‐‐‐‐‐‐‐‐‐‐‐‐ 77 5.4.4 SPOT‐‐‐‐‐‐‐‐‐‐‐‐‐‐‐‐‐‐‐‐‐‐‐‐‐‐‐‐‐‐‐‐‐‐‐ 78 5.4.5 VIDEO FORMAT‐‐‐‐‐‐‐‐‐‐‐‐‐‐‐‐‐‐‐‐‐‐ 78 5.5 RECORD‐‐‐‐‐‐‐‐‐‐‐‐‐‐‐‐‐‐‐‐‐‐‐‐‐‐‐‐‐‐‐‐‐‐ 79 5.5.1 RESOLUTION‐‐‐‐‐‐‐‐‐‐‐‐‐‐‐‐‐‐‐‐‐‐‐‐‐ 79 5.5.2 WATERMARK‐‐‐‐‐‐‐‐‐‐‐‐‐‐‐‐‐‐‐‐‐‐‐‐‐ 83 5.5.3 SCHEDULE SETUP‐‐‐‐‐‐‐‐‐‐‐‐‐‐‐‐‐‐‐ 83 5.5.4 AUDIO‐‐‐‐‐‐‐‐‐‐‐‐‐‐‐‐‐‐‐‐‐‐‐‐‐‐‐‐‐‐‐‐‐‐87
5.5.5 OVERWRITE‐‐‐‐‐‐‐‐‐‐‐‐‐‐‐‐‐‐‐‐‐‐‐‐‐‐‐ 88 5.6 EVENT‐‐‐‐‐‐‐‐‐‐‐‐‐‐‐‐‐‐‐‐‐‐‐‐‐‐‐‐‐‐‐‐‐‐‐‐‐‐89 5.6.1 SENSOR‐‐‐‐‐‐‐‐‐‐‐‐‐‐‐‐‐‐‐‐‐‐‐‐‐‐‐‐‐‐‐‐ 89 5.6.1 SENSOR
89
5.6.2 SENSOR IN‐‐‐‐‐‐‐‐‐‐‐‐‐‐‐‐‐‐‐‐‐‐‐‐‐‐‐‐ 89 5.6.3 MOTION‐‐‐‐‐‐‐‐‐‐‐‐‐‐‐‐‐‐‐‐‐‐‐‐‐‐‐‐‐‐‐ 90 5.6.4 MOTION SET‐‐‐‐‐‐‐‐‐‐‐‐‐‐‐‐‐‐‐‐‐‐‐‐‐‐91 5.6.5 ALARM‐‐‐‐‐‐‐‐‐‐‐‐‐‐‐‐‐‐‐‐‐‐‐‐‐‐‐‐‐‐‐‐‐ 94 5.6.6 RECORD TIME‐‐‐‐‐‐‐‐‐‐‐‐‐‐‐‐‐‐‐‐‐‐‐‐‐94 5.6.7 POP UP‐‐‐‐‐‐‐‐‐‐‐‐‐‐‐‐‐‐‐‐‐‐‐‐‐‐‐‐‐‐‐‐‐95 5.6.8 PRE‐RECORD‐‐‐‐‐‐‐‐‐‐‐‐‐‐‐‐‐‐‐‐‐‐‐‐‐‐95 5.7 NETWORK SETUP‐‐‐‐‐‐‐‐‐‐‐‐‐‐‐‐‐‐‐‐‐‐‐ 96 5.7.1 IP SETUP‐‐‐‐‐‐‐‐‐‐‐‐‐‐‐‐‐‐‐‐‐‐‐‐‐‐‐‐‐‐‐ 96 5 7 2 DDNS‐‐‐‐‐‐‐‐‐‐‐‐‐‐‐‐‐‐‐‐‐‐‐‐‐‐‐‐‐‐‐‐‐‐‐ 98 5.7.2 DDNS‐‐‐‐‐‐‐‐‐‐‐‐‐‐‐‐‐‐‐‐‐‐‐‐‐‐‐‐‐‐‐‐‐‐‐
98
5.7.3 E‐MAIL‐‐‐‐‐‐‐‐‐‐‐‐‐‐‐‐‐‐‐‐‐‐‐‐‐‐‐‐‐‐‐‐‐ 99 5.7.4 DVR NAME‐‐‐‐‐‐‐‐‐‐‐‐‐‐‐‐‐‐‐‐‐‐‐‐‐‐‐100 5.7.5 DVR LOCATION‐‐‐‐‐‐‐‐‐‐‐‐‐‐‐‐‐‐‐‐‐‐100 5.8 SYSTEM‐‐‐‐‐‐‐‐‐‐‐‐‐‐‐‐‐‐‐‐‐‐‐‐‐‐‐‐‐‐‐‐‐‐‐101 5.8.1 LANGUAGE‐‐‐‐‐‐‐‐‐‐‐‐‐‐‐‐‐‐‐‐‐‐‐‐‐‐‐101
5.8.2 DATE/TIME‐‐‐‐‐‐‐‐‐‐‐‐‐‐‐‐‐‐‐‐‐‐‐‐‐‐‐102 5.8.3 USER SETUP‐‐‐‐‐‐‐‐‐‐‐‐‐‐‐‐‐‐‐‐‐‐‐‐‐103
5.8.4 HDD FORMAT‐‐‐‐‐‐‐‐‐‐‐‐‐‐‐‐‐‐‐‐‐‐‐ 105 5.8.5 CONTROLLER‐‐‐‐‐‐‐‐‐‐‐‐‐‐‐‐‐‐‐‐‐‐‐‐106 5 8 6 SYSTEM LOG
5.8.6 SYSTEM LOG‐‐‐‐‐‐‐‐‐‐‐‐‐‐‐‐‐‐‐‐‐‐‐‐‐106 106
5.8.7 INFORMATION‐‐‐‐‐‐‐‐‐‐‐‐‐‐‐‐‐‐‐‐‐‐‐‐107 5.8.8 RESET‐‐‐‐‐‐‐‐‐‐‐‐‐‐‐‐‐‐‐‐‐‐‐‐‐‐‐‐‐‐‐‐‐‐‐‐109
5.9 UPDATE‐‐‐‐‐‐‐‐‐‐‐‐‐‐‐‐‐‐‐‐‐‐‐‐‐‐‐‐‐‐‐‐‐‐‐‐ 110
5.9.1 USB UPDATE‐‐‐‐‐‐‐‐‐‐‐‐‐‐‐‐‐‐‐‐‐‐‐‐‐‐ 110
5.9.2 NETWORK UPDATE‐‐‐‐‐‐‐‐‐‐‐‐‐‐‐‐‐‐ 111 5.9.3 UPDATE‐‐‐‐‐‐‐‐‐‐‐‐‐‐‐‐‐‐‐‐‐‐‐‐‐‐‐‐‐‐‐‐ 112
❻ MULTI NETVIEWER PROGRAM
6.1 DEFINITION‐‐‐‐‐‐‐‐‐‐‐‐‐‐‐‐‐‐‐‐‐‐‐‐‐‐‐‐‐‐‐113
6.2 NET VIEWER SET UP‐‐‐‐‐‐‐‐‐‐‐‐‐‐‐‐‐‐‐ 113 6.2.1 INSTALLATION‐‐‐‐‐‐‐‐‐‐‐‐‐‐‐‐‐‐‐‐‐‐‐‐113 117
117 6 2 2 PROGRAM REMOVAL
6.2.2 PROGRAM REMOVAL‐‐‐‐‐‐‐‐‐‐‐‐‐‐‐
6.2.3 NET VIEWER FUNCTION‐‐‐‐‐‐‐‐‐‐‐‐119 6.3 WEB VIEWER‐‐‐‐‐‐‐‐‐‐‐‐‐‐‐‐‐‐‐‐‐‐‐‐‐‐‐‐‐140 6.3.1 MAC ADDRESS ON IE
(INTERNET EXPLORER)‐‐‐‐‐‐‐‐‐‐‐‐‐‐140
6.3.2 PLAY BACK‐‐‐‐‐‐‐‐‐‐‐‐‐‐‐‐‐‐‐‐‐‐‐‐‐‐‐‐‐141
6.3.3 MULTIPLE DISPLAY‐‐‐‐‐‐‐‐‐‐‐‐‐‐‐‐‐‐‐142 ❼ TROUBLE SHOOTING‐‐‐‐‐‐‐‐‐‐‐‐‐‐‐‐‐‐‐143 ❽ WARRANTY‐‐‐‐‐‐‐‐‐‐‐‐‐‐‐‐‐‐‐‐‐‐‐‐‐‐‐‐‐‐‐‐146 3
NOTICE
NOTICE BEFORE INSTALLATION
4
This manual serves basic operation on installation, and operation of DVR (Digital Video Recorder). User who first operates DVR, or is not accustomed to use is strongly recommended to contact
manufacturer, or supplier while installation, and to use in order to receive the technical service. All users have to operate DVR after having read this manual sufficiently even though they are very skilled at this unit. Please keep notice at this manual to protect your safety from danger or
keep notice at this manual to protect your safety from danger, or property. Please keep this manual on such a place where can easily be reached after having read it all. NOTICE FOR SAFETY
Please make sure of usage after bearing the following contents in mind to shorten the safety, and product failure before its operation. DO NOT SHOCK IN MOVE, AND INSTALLATION.
▪
▪
▪
▪
▪
▪
▪
▪
▪
▪
▪
▪
▪
▪
▪
Please check rating voltage (standard:DC12V5A, high‐end:12V8A) before power on. Please check power off before installation. Avoid any place with moisture because of electric shock, and fire. Avoid any place with moisture because of
electric shock and fire
Avoid any place with moisture, dust, or soot. Avoid any place with direct sunlight, or heating appliances. Avoid high, or low temperature. Procure sufficient air ventilation for the connection of system wiring. Don't install near to electronic devices such as radio, or TV. Install in sufficient air ventilation, and no vibration. Please take care of not putting the electric product into the cooling fan. Don't use water, or cleanser in surface cleaning to prevent an electric shock . Pl
Please clean system by dry towel in external cleaning. l
b d
li
l l
i
Do not pull power cord forcefully. Do not place any heavy objects on the main system. Do not open, or disassemble DVR without an assistance of qualified service
personnel. ▪ Please power off in case of moving DVR. ▪ Please equip with the safety facility to diminish the loss for electricity failure,
and lighting. ▪ Do not connect signal cable of camera with DVR system during camera installation. ▪ Please power off immediately, contact manufacturer, or supplier if you catch
strange scent, or smog. 5
This equipment had been tested and found to comply with the limits for CLASS A digital deice, pursuant to Part 15 of FCC Rules. These limits are designed to provide reasonable protection against harmful interface when the equipment is operated in a commercial environment. FCC Compliance Statement
Caution : Any change, or modification in construction of this device which are not expressly approved the party responsible for compliance could avoid the user‘s authority to operate the equipment . NOTE : This equipment has been tested, and found to comply with the limits 6
for a Class A digital device, pursuant to part 15 of the FCC rules. This limits are designed to provide reasonable protection against harmful interference when the equipment is operated in a commercial environment. This equipment generates, uses, can radiate radio frequency energy, and , if not installed, and used in accordance with the instruction manual, may cause harmful interference to radio communications. Operation of this equipment in a residential area is likely to cause harmful interference in which cause the user will be required to convert the
interference at his own expense.
OVERVIEW
2.1 FEATURES 1. SURVEILLANCE
► Real time moving picture (Max. MPEG‐4 480 Frame (Basic 16CH)) . ► Multi screen display (Basic on 16CH): Single / 4 / 6 / 9 / 13 / 16 . ► PIP (Picture In Picture) . ► Auto sequence. ► Multi output monitor (Output monitor 1, Spot 1, S‐Video 1, VGA 1). ► PTZ (Pan / Tilt / Zoom). ► Digital Zoom (X2) ► Mosaic function . ► Video loss sensor detection. ► External alarm, and recording event list for motion detection. ► Supported user friendly GUI interface, remote controller, and mouse. 2. RECORDING
► Recording in high quality of MPEG‐4 real time motion picture ► Recording resolution setup adjustable to backup capacity (16CH Max. 480 frame) ► Multi recording for manual, event, and schedule. ► One time system for display, recording, playback, backup, and network. ► Easy setup for recording resolution, and motion detection part. ► Supported manual, and reserved recording function. ► Supported Individual channel recording. 7
3. PLAYBACK
► Playback by event, time, and channel. ► Mouse controlled search ► Playback for still image, and search for still display detection. ► Playback by event list (sensor, motion). ► Easy search with remote controller, and mouse. ► Digital zoom in playback display screen (Digital Zoom X2) 4. NETWORK
8
► Supported PPPoE, Static and DHCP. Supported PPPoE Static and DHCP
► Supported itself, and general DDNS. ► TCP/IP. ► Unlimited multi access (Recommended 5). ► Supported multi mode (LIVE/PB/NETWORK BACKUP/FILE PLAY) ► Multi DVR Control ► Remote Control ► PTZ Control ► Save AVI
► Save & print still ► Auto update ► Web viewer ► File viewer ► CMS NetViewer 5. AUDIO
► One time recording for real time 4CH audio input. ► U2 Series / S2 Series ‐ Input : 4CH(rear), Output : 1ch(rear)
S1 Series ‐ ‐ Input : 1CH(rear), Output : 1ch(rear)
► Audio channel selectable. 6. BACKUP
► Backup by network viewer. ► Supported multi backup function : CD±R,CD±RW,DVD±R,DVD±RW and USB Drive.
7. OTHERS
► S‐Video, Spot output. ► Alarm In/Out, RS‐485, RS‐232 Connections. ► Connection of loop‐through. ► Supported multi language. ► One remote controller for Max. 5 DVRs. ► Easy operation with USB mouse. Easy operation with USB mouse
► Easy firmware upgrade with USB, network. 9
2.2 PACKING DETAILS
DVR includes main unit, and its following accessories in the package packing. Please check all items if there is all packed inside as below. DVR UNIT
U2‐series
10
S2‐series
S1‐series
Contents
U2
S2
S1
Program CD
Remote controller Quick guide
User manual
User manual
11
Batteries Power cord
Adaptor (12V8A) (12V8A) (12V5A) HDD screw
Rack mount
Sata HDD data cable
X (OPTION) X
4 3 1
2.3 NAMES AND FUNCTION
2.3.1 FRONT PANEL
PREMIUM DVR ‐ U2 Series
SECTION
NO
1
2
3
4
FUNCTION
5
6
7
BACKUP
12
SEARCH 1
8
RECORDING 9
SYSTEM
10
SETUP
LED
REMOTE CONTRO R
CONTROLLER
POWER
SEARCH 2
DIRECTION
NAME
DVD RW USB 2.0 INFO DISPLAY PTZ BACK UP SEARCH
REW PLAY/PAUSE FAST STOP REC FUNCTION
Back up recording &playback video in DVD/CD
External connector (USB & MOUSE)
Show information for DVR system, HDD and firmware
Change divided display in live&playback mode
Control function of PTZ
Go to backup mode
Go to search mode
Rewind (MAX.x32)
Play / Pause
Fast forward
Stop
Recording or not
Q.MENU Go to Q.MENU mode
11
POWER REC ALARM NET Power ON/OFF
Recording
Sensor event
Network connection
12
SENSOR Remote controller receiving sensor
13
POWER Safety power ON/OFF
14 JOG‐SHUTTLE Controller for playback direction speed and step playback
15
ENTER
Operation
STANDARD DVR – S2 Series
SECTION
CHANNEL
BACKUP
FUNCTION
LED SIGNAL
NO
1
2
3
4
5
6
7
8
9
10
POWER SUPPLY 11
SYSTEM SETUP 12
13
14
PLAYBACK, RECORD AND ETC.
15
16
17
NAME
CH 1‐10 USB 2.0 DISPLAY AUTO PIP OSD INFO BACK UP PTZ POWER REC
ALARM NET POWER Q.MENU REC REW PLAY/PAUSE FAST STOP SENSOR SEARCH ◀▶
▲▼
ENTER BACKUP
18
DVD RW
FUNCTION
Channel selection in live, and play back display
External connector of USB, and mouse
Change split display in live, and play back Sequence operation, and stop
Another display in one channel display. Icon, time table, and channel name in monitor display. System status, HDD status, and firmware information. Back up mode. Use, or stop of PTZ function. Electric status. Recording feasibility
Event detection Network connection Stable stop of system operation
Q.MENU mode
Urgent recording Reverse play back speed in play back mode
Play back start, or temporary pause
Forward play back speed in playback mode
Stop play back mode, and return to live display mode
Remote controller sense
Search mode
Left & right direction key, and channel change
Left & right direction key, and channel change
Up & down direction key, and channel change
In case of execution CHOICE, change into single display
from live, and play back display
Backup for recorded, and stored video by DVD/CD
13
COMPACT DVR – S1 Series
CLASSIFICATION
BACKUP
SEARCH
14
LED DISPLAY
Q.MENU
MULTIPLE
RECORDING
POWER
DIRECTION KEY
REMOTE CONTROLLER
LED DISPLAY
NO
1
2
4
5
6
7
8
NAME
USB 2.0 SEARCH REW PLAY/PAUSE FAST STOP Q.MENU DISPLAY REC POWER ▲▼▶◀
9
SENSOR
Remote controller sensor
10
POWER REC
ALARM NET Electric status
Recording Event detection
Network connection
3
FUNCTION
External terminal(USB, Mouse)
Search mode
Reverse play back speed in play back mode
Play back start, or temporary pause
Forward play back speed in play back mode
Stop play back mode and return to live display mode
Q.MENU mode
Multiple display mode
Urgent recording
Stable stop of system operation
Left/right, and up/down direction key. Channel change
2.3.2 REAR PANEL
PREMIUM(U2 Series) & STANDARD(S2 Series) DVR
16CH
NO
1
INPUT / OUTPUT
FUNCTION
CONNECTOR NAME
AUDIO IN
Audio input & RCA input connector.
2
CH1~16
3
LOOP OUT
BNC(loop) output connector of camera
4
DC12V
Connect power code of adaptor socket
5
SEN.IN/AL/485
6
RS‐232
7
VGA
15
BNC input connector of camera
External sensor input relay output, PTZ camera
RS‐232 terminal
LCD monitor output connector
8
USB
External(USB, MOUSE) connector
9
LAN
Network (RJ‐45) connector
10
AUDIO OUT
11
S‐VIDEO
Audio output connector
12
VIDEO OUT
Monitor output connector by BNC
13
SPOT OUT
Spot monitor output connector by BNC
S‐VIDEO monitor connector
connector
PREMIUM(U2 Series) & STANDARD(S2 Series) DVR
8CH
16
4CH
COMPACT DVR (S1 Series )
4CH
17
8CH
No
Input/output terminal 1
CH 1~16
Function
Camera BNC input terminal
2
VIDEO OUT
3
AUDIO IN,OUT
Monitor output & Spot monitor terminal
4
VGA
LCD monitor terminal
5
LAN
Network terminal (RJ45)
6
RS‐232
7
SEN.IN/AL/485
8
DC12V
9
FAN
10
LOOP OUT
Audio input & output terminal
RS232C terminal
External sensor, relay output, PTZ camera terminal
Adaptor power code socket
Cooling fan
Camera Loop out terminal
2.3.3 REMOTE CONTROLLER
18
NO
NAME
1
POWER
FUNCTION
Power ON/OFF
Power ON/OFF
2
REC
3
CHANNNEL
Recording
4
OSD
OSD ON/OFF
5
INFO
Information of DVR
6
P/T
7
ZOOM
8
MUTE
9
LOG
10
MENU
11
▲
Up
12
▼
Down
13
◀
Left
14
▶
Right
15
ENTER
Menu
Channel button
PAN/TILT MODE
Zoom/Focus mode
Audio ON/OFF
Log List
Q.MENU
16
SEARCH
Search recording list 17
BACK UP
Backup
18
◀◀
Reverse play
19
▶II
Play and pause
20
▶▶
21
■
Fast forward
Stop
22
DISP
Display mode 23
PIP
PIP mode
24
AUTO
A t
Auto sequence
25
SPOT
Spot monitor
2.3.4 Q‐MENU
Group Conversion Rec : Recording ON/OFF
System Setup
Search recording Display : Screen division (4,6,9,13,16CH )
Backup (copy)
Auto : Auto sequence display Info : System information
PIP : PIP mode
PTZ : Pan‐tilt camera control Digital zoom
Audio : Audio ON/OFF
19
OSD ON/OFF
2.4 SPECIFICATION
PREMIUM DVR – U2 Series
Model
KDMH‐16U2C4N
KDMH‐08U2H2
KDMH‐04U2D1
16/8/4 Channel Input(BNC)
16/8/4 Channel Input(BNC)
NTSC / PAL, 1V 75 Ohm
Video Signal
Video Output 5 Outputs (Composite BNC, VGA, S‐Video, Loop through, Spot)
Compression
Enhanced MPEG‐4, M‐JPEG
Real Time Watching / Recording / Playback / Networking / Pentaplex Operation
Back‐Up Archiving
Resolution
NTSC – 704X480 / PAL – 704X576
Speed
Real Time Display
Display
16, 13, 9, 6, 4, 1 screen
Mode
PIP, Auto Screen
NTSC – 704X480, 704X240, 352X240,
Resolution
PAL – 704X576, 704X288, 352X288
Recording
CIF 480ips/400ips CIF 240ips/200ips CIF 120ips/100ips
REC &PB Speed HD1 240ips/200ips HD1 240ips/200ips HD1 120ips/100ips
& Playback
D1 120ips/100ips D1 120ips/100ips
D1 120ips/100ips
Mode
Continuous, Schedule, Event(Motion, Sensor)
Search
Search by Calendar Search List, Event List, Time List Internal HDD
3
Internal DVD
1
Backup
External Backup
USB
Network Backup
TCP/IP(Backup Browser)
Serial Pan/Tilt, Zoom, RS‐485, RS‐232
Interface
Preset
Alarm Sensor Input
16port
8port
4port
Control
Relay Out
4 port
Audio Input
4 Channel Input
Audio
Audio Output
1 Channel Out
Interface
TCP/IP
Protocol
STATIC, DHCP, PPPoE
Network
Functional Remote Client Software, Web Viewer(HTTP / IE), ,
(
/ ),
B
Browser
CMS System Control
Front Keypad(6X6) &Jog Shuttle, Remote Controller, Mouse
Language
Multi OSD
Video Input
20
System Upgrade
USB / Network
Signal Loss Detection
BEEP / BEEP+OSD / OSD / OFF
Motion Detect Trace
Motion Sensitivity
Mosaic
Zoom
Dimension
Weight
Power Supply
Approval
YES / NO
1~8
ON/OFF
X2
430(W) X 92(H) X 380(D)mm
8.0kg(without HDD)
DC 12V 8A
FCC, CE
21
STANDARD DVR – S2 Series
Model
Video Signal
Video Signal
KDMH‐16S2C4
Video Input
Video Output
Compression
Pentaplex Operation
Display
Resolution
Speed
Mode
Resolution
22
Recording& Playback
REC &PB
Speed
Mode
Search
Internal HDD
Internal DVD
External Backup
Backup
Network Backup
Serial Pan/Tilt, Interface Zoom, Preset
Sensor Input
Alarm Control
Relay Out
Audio Input
Audio
Audio Output
Interface
Protocol
Network
Browser
KDMH‐16S2C2
KDMH‐08S2C2
KDMH‐04S2H1
16/8/4 Channel Input(BNC)
NTSC / PAL 1V 75 Ohm
NTSC / PAL, 1V 75 Ohm
5 Outputs (Composite BNC, VGA, S‐Video, Loop through, Spot)
Enhanced MPEG‐4, M‐JPEG
Real Time Watching / Recording / Playback / Networking / Back‐Up Archiving
NTSC – 704X480 / PAL – 704X576
Real Time Display
16, 13, 9, 6, 4, 1 screen
PIP, Auto Screen
NTSC – 704X480, 704X240, 352X240
PAL – 704X576, 704X288, 352X288
PAL –
704X576 704X288 352X288
CIF 480ips/400ips CIF 240ips/200ips CIF 240ips/200ips CIF 120ips/100ips
HD1 240ips/200ips HD1 120ips/100ips HD1 120ips/100ips HD1 120ips/100ips
D1 120ips/100ips D1 60ips/50ips
D1 60ips/50ips
D1 60ips/50ips
Continuous, Schedule, Event(Motion, Sensor )
Search by Calendar Search List, Event List, Time List
2
1
USB
TCP/IP(Backup Browser)
RS‐485, RS‐232
16port
16port
8port
4port
4 port
1port
4 Channel Input
1 Channel Out
TCP/IP
STATIC, DHCP, PPPoE
Functional Remote Client Software, Web Viewer(HTTP / IE), CMS
i
l
li
S f
b i
(
/ )
S
System Control
Language
System Upgrade
Signal Loss Detection
Motion Detect Trace
Motion Sensitivity
Mosaic
Zoom
Dimension
Front Keypad(6X6), Remote Controller, Mouse
Multi OSD
USB / Network
BEEP / BEEP+OSD / OSD / OFF
YES / NO
1~8
ON/OFF
X2
430(W) X 75(H) X 360(D)mm
Weight
7.50kg (without HDD)
Power Supply
Approval
DC 12V 8A
FCC, CE
23
COMPACT DVR – S1 Series
Model
Video Signal Video Input
Compression
Pentaplex Operation
Display
Resolution
Speed
Mode
Resolution
Recording
& Playback
24
REC &PB REC
&PB
Speed
Mode
Search
Internal HDD
External Backup
Backup
Network Backup
Serial Pan/Tilt, Interface Zoom, Preset
Sensor Input
Alarm Control
Alarm Out
Audio Input
Audio
Audio Output
Interface
Protocol
Network
Browser
SSystem Control
t
C t l
Language
System Upgrade
KDMH‐8S1C2
KDMH‐4S1H1
8/4 Channel Input(BNC)
NTSC / PAL 1V 75 Ohm
NTSC / PAL, 1V 75 Ohm
Enhanced MPEG‐4, M‐JPEG
Real Time Watching / Recording / Playback / Networking/ Back‐Up Archiving
NTSC – 704X480 / PAL – 704X576
Real Time Display
9, 6, 4, 1 screen PIP, Auto Screen
NTSC – 704X480, 704X240, 352X240
PAL – 704X576, 704X288, 352X288
CIF 240ips/200ips
HD1 120ips/100ips
HD1 120ips/100ips
D1 120ips/100ips
D1 60ips/50ips
Continuous, Schedule, Event(Motion, Sensor)
Search by Calendar Search List, Event List, Time List
1
USB
TCP/IP(Backup Brower)
RS‐485,
RS
485, RS
RS‐232
232
8port
1port
4port
1port
1 Channel Input
1 Channel Out
TCP/IP
STATIC, DHCP, PPPoE
Functional Remote Client Software, Web Viewer(HTTP / IE), CMS
F tK
Front Keypad(6X6), Remote Controller, Mouse
d(6X6) R
t C t ll M
Multi OSD
USB / Network
Signal Loss Detection
Motion Detect Trace
Motion Sensitivity
Mosaic
i
Zoom
Dimension
Weight
Power Supply
Approval
BEEP / BEEP+OSD / OSD / OFF
YES / NO
1~8
O /O
ON/OFF
X2
17.0”x14.1”x3.0”(430x360x75mm)
4.5kg(NET),5.0KG(GROSS)
DC 12V 5A
FCC, CE
25
INSTALLATION
3.1 TOTAL CONNECTION DIAGRAM
26
3.2 INDIVIDUAL CONNECTION 3.2.1 POWER
Please plug in the power adaptor
27
NOTE
1. Please connect the provided power adaptor to DVR system.
2. Please use the power adaptor(DC12V 8A), in case of installing 4 HDD. 3. In order to turn off DVR, press “POWER” button and follow the messages.
After that, unplug the power adaptor.
3.2.2 RACK MOUNT INSTALLATION
The rack mount can be installed to DVR like the picture. It is available for U2 / S2 series.
28
3.2.2 VIDEO & AUDIO
▮ VIDEO INPUT
Please connect DVR, and CCTV camera with CAMERA IN connector on rear panel by coaxial cable. This DVR system can be connected with cameras of maximum NO. of 16/8/4. NOTE
1. Video input type should be either NTSC or PAL, Don't use two types in mix. 2. Automatic setup for 75Ω resistance 75Ω terminal resistance is set up,
automatically split into, and becomes Hi‐Z status when connected with video output connector under input one.
p
p
CAUTION
1.Video vibration may be caused when the user connects BNC of camera to the loop connector. Be sure to link it to camera input connector.
2. Too much vibration may be caused in case of connecting BNC connector to
camera output without the camera cable.
t t ith t th
bl
29
▮ VIDEO OUTPUT
Please connect DVR to monitor with video cables. ▮ AUDIO INPUT
Please connect MIC built‐in camera or the external audio device to AUDIO IN connector, in the back of this DVR.
[AUDIO INPUT CONNECTORS]
30
[AUDIO OUTPUT CONNECTORS]
PREMIUM DVR COMPACT DVR
STANDARD DVR
The channels with audio output are displayed in red
NOTE
Audio Input Setup : Main Menu ÆRecord Æ Audio Setup
▮ AUDIO OUTPUT
Please connect RCA cable of the speaker built‐in monitor to audio out connector in the back of DVR
NOTE
1. Four audio input synchronizes audio output for CH1~CH4 in single display. 2. Audio is available for “LIVE” and “PLAYBACK” mode. 3. Audio is not supported in Fast Forward playback in single display mode.
31
3.2.3 HDD CONNECTION
POWER CABLE
32
DATA CABLE
► Please fix HDD to DVR unit by screws. ► Please connect main board to HDD with the power cable. ► Please assemble DVR and turn it on. The format automatically starts after power on. If not, format HDD manually.
Main Menu Æ System Æ HDD format NOTE
1. DVR must power off before installing HDD.
2. For fixing screw to HDD bracket, please don't shock, which may cause
HDD breakdown. 3 Pl
3. Please check problem after HDD installation. h k
bl
ft HDD i t ll ti
4. If HDD is not recognized, please contact HDD manufacturer or
Supplier, and change it into new one. 5. DVR automatically formats HDD of which the format type is not supported
by DVR. 6. The firmware upgrade is available only when HDD is installed in DVR. 7. When installing HDD (or additional HDD) in DVR, please be sure to
connect the data cable to HDD port on main board. If the data cable is connected to DVD port, the recording data may be damaged. 33
3.2.4 EXTERNAL CONNECTOR
▮ SENSOR IN / RS‐485
The external sensor terminal, RS‐485, receives the data from the external sensor or Equipment. And the data such as the motion detection, motion sensor and video loss
Is transmitted to the external equipments.
RS‐485
34
No
1
2
3
4
5
6
7
8
9
10
11
12
Description
RS 485 +
RS 485 ‐
ALARM OUTPUT 1 ALARM OUTPUT 2 ALARM OUTPUT 3 ALARM OUTPUT 4 GROUND
GROUND
SENSOR INPUT 1
SENSOR INPUT 2 SENSOR INPUT 3 SENSOR INPUT 4 No
13
14
15
16
17
18
19
20
21
22
23
24
NOTE
User can set values in menu
Description
SENSOR INPUT 5
SENSOR INPUT 6 SENSOR INPUT 7 SENSOR INPUT 8
SENSOR INPUT 9 SENSOR INPUT 10 SENSOR INPUT 11 SENSOR INPUT 12 SENSOR INPUT 13 SENSOR INPUT 14 SENSOR INPUT 15 SENSOR INPUT 16
▮ RS‐232
RS‐232 is the connection port to the external controller.
35
No
1
2
3
4
5
Description
N/C
TX 232C
RX 232C
N/C
GND
6~9
N/C
NOTE
User can set values in menu
User can set values in menu
▮ ETHERNET & USB
1) USB No
1
2
3
4
2) ETHERNET No
1
2
3
4
5
6
7
8
36
Description
VCC
USB DATA ‐
USB DATA ‐
USB DATA +
GND
Description
N/C (Not Connected)
N/C (Not Connected)
N/C (Not Connected)
RX‐ (Receive Data‐)
N/C (Not Connected)
N/C (Not Connected
RX+ (Receive Data+)
TX‐ (Transmit Data‐)
TX+ (Transmit Data+)
OPERATION
4.1 PRE‐OPERATION
Please make sure of power voltage before power on.
4.2 POWER CONNECTION
▮ POWER ON
Please make sure of power voltage before power on. 1. Connect DVR to D/C power Jack by using the provided power adaptor in the package.
1
Connect DVR to D/C power Jack by using the provided power adaptor in the package
If the power adaptor is connected to DVR, the power is on. The following display appears. 3. Booting time takes about 30 seconds after power is on. 4. Video signal is automatically detected when power is on. 5. The menu values set by user is not changed in sudden power failure.
37
CAUTION
1. User is strongly recommended to use the adaptor in the package that
manufacturer provides. 2. The DVR may be fatally damaged if the different voltage of adaptor is used.
▮ POWER OFF
Press red POWER button on front panel.
Its function is mainly to prevent system damage due to suddenly unexpected power off.
Pull off adaptor on rear panel when the message appears below. 38
39
Select YES to power off.
System is closing. In this process, user can not return to "power on" mode.
Pull off the power adaptor on rear panel when “SYSTEM IS
SHUTDOWN SAFELY PLEASE TURN OFF THE POWER S/W NOW”
SHUTDOWN SAFELY. PLEASE TURN OFF THE POWER S/W NOW” appears.
39
4.3 LIVE DISPALY 4.3.1 SINGLE DISPLAY
When user selects one channel in multiple channel mode, this channel is switched over to single channel mode as below. User needs to press one more channel button after +10 button when he selects over channel 10. For example, he needs to press channel 1 Button after +10 Button when selecting channel 11. This channel selection method is the same as both live mode and playback mode. 40
[Full multiple channel ]
[Single channel ]
NOTE
If pressing +10 button twice or any channel button is not followed for about 2 seconds after pressing +10 button it goes to channel 10
2 seconds after pressing +10 button, it goes to channel 10.
4.3.2 MULTIPLE DISPLAY
▮ LIVE DISPLAY SCREEN
Current date and time
Current date and time
DVR status icon
Event recording on 41
Audio on Quick menu
Recording on Network online NOTE
For more details, please refer to Q.menu set up.
▮ PLAYBACK DISPLAY MODE
The first information line : “LIVE” time
The second information line : Recording date and time
42
Play back mode
Play back speed control icon
▶ /▮▮ : PLAY / PAUSE ◀◀ : REW ■ : STOP ▶▶ : FF
: DIGITAL ZOOM
NOTE
The user can play the recording data frame by frame by pressing REW or FF button in playback mode. p y
In 16 multiple channel, user can move to channel 1 by pressing digital zoom button.
Digital Zoom is available by the mouse or the remote controller
in “PLAYBACK” mode.
“DISPLAY” button enables you to select the type of the display.
1. Auto sequence or PIP mode can
switchover to 16 channel display
mode
d by
b pressing
i DISPLAY button.
b tt
2. The display type is switched
over to 16 channel display → 13
channel display → 9 channel
display → 6 channel display → 4
channel display mode in order by
pressing DISPLAY button, or
clicking the right button of mouse
repeatedly.
NOTE
The user can move to next channel by clicking the right button of mouse in single mode. To return to divided channel mode, the user needs to press on quick menu
or DISPLAY button on front panel.
13 channel display → 9 channel display → 6 channel display → 4 channel display
The display channel can be changed by pressing UP/DOWN button in divided channel mode as desired. 43
▮ MOSAIC FUNCTION
The user can make a certain area in live mode blurred for private purpose. Mosaic ON
1. Select one channel that user likes to set up. 2. Put the mouse at the starting point you want, and drag it to the desiring area with left‐button pressed. 44
Mosaic OFF
3. This mosaic function is only available iin “LIVE” mode, and does not
“LIVE”
d
dd
t affect any ff t
recording data even if it is on when recording is triggered. 4. To release this function, drag mouse diagonally from the right bottom of set area with it pressed.
Mouse starting point
NOTE
This mosaic function is only available at “LIVE” display mode.
4.4 AUTO SEQUENCE (AUTO)
“AUTO” button automatically switch over the single channel display or 4 channels
display in order.
‐ Display mode setup : Main Menu > Display > Sequence > Mode : single or quad ‐ Interval setup : Main Menu > Display > Sequence > Interval : 1 sec ~ 60 sec. I t
l t
M i M
Di l
S
I t
l 1
60
Press “AUTO” again to display the current channel.
▶ press “DISPLAY” button to stop “AUTO SEQUENCE”
▶ No video input channel is not displayed in the single channel display mode.
[ Single channel ]
[ 4 channel ] CH1
CH1 ,2,3,4
45
CH2
CH5,6,7,8
CH3
CH9,10,11,12
CH4
.
.
.
CH13,14,15,16
.
.
.
4.5 DIGITAL ZOOM
User can magnify the area 2 times digitally. 46
1. Click
on Q.MENU and select the area by pressing the direction key. 2. Press ENTER button, and the image is magnified digitally. This 2
Press ENTER button and the image is magnified digitally This
function is available only in the single channel mode.
3. press “ENTER” button again to release.
4. The double‐click of the mouse also magnify the image.
4.6 PIP
▶ The smaller video is displayed in the single channel mode.
▶ The user can monitor main channel and sub channel together in single channel mode. ▶ Various PIP modes are displayed when pressing PIP button repeatedly.
Various PIP modes are displayed when pressing PIP button repeatedly
▶ The sub channel location is changed when pressing PIP button.
47
▶ The sub channel display is changed by pressing LEFT / RIGHT button of direction
key. ▶ The main channel display is changed by pressing UP / DOWN button of p y
g
yp
g
/
direction key.
▶ To stop this function, press DISPLAY button. 4.7 SPOT
[SPOT monitor]
48
1. SPOT monitor supports only “LIVE” single channel, or “LIVE” 4 channel display. 2. SPOT monitor also supports AUTO SEQUENCE function, and can set up time interval.
4.8 PTZ
PTZ is used for controlling camera with PAN/TILT/ZOOM/FOCUS. 1. Press PTZ button in “LIVE 16 split channel mode, and single channel mode appears. appears
2. Press ENTER button, and move to each menu like CH, P/T, Z/F. 3. PTZ camera is controlled with LEFT / RIGHT buttons on front panel, mouse, or remote controller. 4. To release this function, press PTZ button again. 49
① CH : Channel change ② P/T : PAN & TILT control ③ Z/F : ZOOM & FOCUS control To function above, please setup PROTOCOL, BAUDRATE, SPEED, ID from MAIN To
function above please setup PROTOCOL BAUDRATE SPEED ID from MAIN
MENU>CAMERA.
CAUTON
Make sure that PTZ speed dome camera is properly installed on the relevant channel before PTZ operation.
NOTE
PTZ mode is available at live single display mode only, not controlled by divided channel display mode.
To release this function, press PTZ button again.
50
4.9 MOUSE
By using USB mouse, setting values can easily be adjusted, or changed. ▮ MOUSE OPERATION
RIGHT BUTTON
LEFT BUTTON
MOUSE WHEEL
1. Left button ① To select menu or to confirm setting value ② To move to 16/13/6/4 CH in display screen mode by pressing “DISPLAY” icon.
③ To revert into the previous multiple screen mode from 1 CH single screen mode 2. Right button
① In display screen mode 13 multiple screen mode : To move to next channel by one channel. 9 multiple screen mode : To move to 1‐9 channel and 8‐16channel 6 multiple screen mode : To move to next channel by one channel 4 multiple screen mode : To move to 1‐4, 5‐8, 9‐12, 13‐16 channel ② To move to next channel from single channel in play back mode ③ To change sub‐channel in PIP mode To change sub channel in PIP mode
▮ KEY BUTTON OPERATION ON FRONT PANEL
1. ◀▶ : To move cursor to left, or right
2. ▼▲ : To move cursor to up, or down 3.
: ENTER button. To activate the corresponding function. 4. Q.MENU : To get out of current menu ▮ Remote controller operation
1. ◀▶ : To move to left or right
2. ▼▲ : To move to up or down 3
3.
: ENTER button To activate the corresponding function
: ENTER button. To activate the corresponding function 4. Q.MENU : To get out of current menu 51
4.10 OSD
► OSD can be removed by pressing “OSD” button or on the screen.
[OSD ON]
52
[OSD OFF]
icon on Q.MENU 4.11 RECORDING
4.11.1 NORMAL RECORDING
Press REC button,, and LED is lighting
g
g in red. Recordingg starts and the recordingg
icon
appears at the right upper side. To stop recording, press REC button
again and the recording icon disappears.
53
CAUTON
1. The schedule recording is set as the factory default.
2. The schedule recording should be disable to stop recording.
3. After the schedule recording is disable, it is possible to start or stop
recording by pressing “REC” button. NOTE
1 P
1. Password approval is pre‐requisite to stop recording. d
li
i i
di
2. The schedule recording enables the user to start recording at the desired
date and time
HDD RECORDING CAPACITY TABLE
*16CH , HDD250GB/STD
RESOLUTION SUPER
54
HIGH
LOW
QUALITY 4
QUALITY 3
QUALITY 2
QUALITY 1
75
7.5
1
d
day
6
h
hour
2
d
day
3
h
hour
3
d
day
0
h
hour
4
d
day
0
h
hour
6
2
day
2
hour
3
day
13
hour
5
day
0
hour
6
day
16
hour
5
2
day
10
hour
4
day
2
hour
5
day
18
hour
7
day
17
hour
3
4
day
13
hour
7
day
17
hour
10
day
21
hour
14
day
12
hour
2
5
day
13
hour
9
day
9
hour
13
day
5
hour
17
day
11
hour
1
6
day
10
hour
10
day
19
hour
15
day
4
hour
20
day
0
hour
15
2
day
23
hour
5
day
2
hour
7
day
5
hour
9
day
19
hour
10
3
day
18
hour
6
day
11
hour
9
day
4
hour
12
day
16
hour
75
7.5
4
d
day
14
h
hour
7
d
day
17
h
hour
10
d
day
20
h
hour
14
d
day
8
h
hour
6
4
day
23
hour
8
day
8
hour
11
day
17
hour
15
day
12
hour
5
5
day
13
hour
9
day
10
hour
13
day
7
hour
17
day
21
hour
3
6
day
4
hour
10
day
10
hour
14
day
16
hour
19
day
10
hour
2
8
day
13
hour
14
day
14
hour
20
day
15
hour
27
day
18
hour
1
10 day
15
hour
18
day
4
hour
25
day
17
hour
34
day
17
hour
30
4
day
10
hour
7
day
14
hour
10
day
18
hour
14
day
16
hour
15
7
day
5
hour
12
day
6
hour
17
day
7
hour
23
day
4
hour
10
9
day
3
hour
15
day
15
hour
22
day
3
hour
29
day
21
hour
7.5 11 day
20
hour
20
day
3
hour
28
day
10
hour
37
day
22
hour
6
12 day
13
hour
21
day
9
hour
30
day
5
hour
40
day
13
hour
5
12 day
19
hour
21
day
17
hour
30
day
15
hour
40
day
22
hour
3
14 day
11
hour
24
day
15
hour
34
day
19
hour
46
day
17
hour
2
16 day
18
hour
28
day
10
hour
40
day
2
hour
53
day
8
hour
1
17 day
8
hour
29
day
10
hour
41
day
12
hour
55
day
9
hour
▸ Please calculate, and apply HDD recording time of 8ch(2 times), or 4ch(4 times) DVR l
l l
d
l H
di
i
f 8 h(2 i
)
4 h(4 i
) V
based on this table.
▸ This table based on the test result of our R&D Institute.
▸ This table is depending on user's environment.
4.11.2 EVENT RECORDING If “EVENT RECORDING” is setup, the recording automatically begins in detecting the motion or sensor.
4.11.3 SCHEDULE RECORDING
If “SCHEDULE RECORDING” is setup, the recording automatically begins on the desired
date and time
55
4.12 SEARCH
Press SEARCH button and the following SEARCH menu appears on the screen. The recorded video can be found in each search mode (NORMAL / EVENT / TIME)
DVR can record and search the files at the same time.
56
To cancel recording search, and to get back to live display mode, press SEARCH button again. 4.12.1 NORMAL SEARCH (DATE AND TIME SEARCH)
① After pressing SEARCH button, move to the date with yellow y
color, and press ENTER button. ② When time graph appears, move
g p pp
,
to
the time user wants, and press ENTER button while time is in yellow color. ③ When minute graph appears, move to the area in yellow color, and press ENTER button at the area you want. ④ Recorded video is played back at
selected date ** Return to ”SEARCH” mode, press “STOP “ button. NOTE
1. Press Q’MENU button to move to each search mode (NORMAL / EVENT / TIME)
Q
(
/
/
)
2. Press UP/DOWN direction key to search the recording files monthly. 3. The yellow area means there are the recording files. 57
▮ REW,PLAY/PAUSE,FAST,STOP In the single channel play mode, the digital zoom is available
58
► REW : Pressing REW button in playback display mode to rewind the file
(x2, x3, x4, x5, x6) ► FF (Fast Forward) : Press FF button in playback display mode, playback is faster than normal speed (x2, x3, x4, x5, x6) ► PLAY / PAUSE : Press PAUSE in playback display mode, playback
/
p y
p y
,p y
stops temporarily . p
p
y
Press button again, playback starts again.
► STOP : Press STOP button in playback display mode to move to “SEARCH” mode.
NOTE
Press “FF” or “REW” in “PAUSE” mode to playback the video per frame
4.12.2 EVENT SEARCH
The user can search the recording data by the motion or sensor detection.
❶ Press Q. MENU button and move to “EVENT SEARCH” mode.
❷ Press “ENTER” button on the date in yellow. ❸ Event type : To search event recording data by all, motion, sensor ► Motion : Motion detection record Motion : Motion detection record
► Sensor : Sensor detection record ❹ Channel selection : Search the recording data by all channels or each channel. ❺ Move to the yellow area on time graph and select the time, Then, press “ENTER” button, and the event list appears. 59
PAGE : 0001/0042
It means the current & total page. Each page has 10 recording files. Move to next page with left (◀), right (▶) button and move to the recording files with up (▲), down (▼) button. Select the file and press “ENTER”
to play.
❻ Press “DISPLAY” button to move to the split channel and the below screen appears 60
❼ Select the changer to playback
❽ Press “STOP” button to mover to “SEARCH” mode. ❾ Press “SEARCH” button to close “SEARCH” mode.
4.12.3 TIME SEARCH
The user select the date and time to search the recording files.
❶ Move to TIME SEARCH menu M
t TIME SEARCH
by pressing Q.MENU button. ❷ Select date and time to search. ❸ Press ENTER button, and play back display appears as below. 61
❹ Press “STOP” button to move to “SERACH” mode.
4.12.4 JOG SHUTTLE SEARCH
JOG SHUTTLE is easier to search the recording files.
❶ Jog dial
❷ Shuttling
62
❶ Jog dial : Convenient to search frame by frame, and the detailed motion in
short time in pause mode.
❷ Shuttling : To control, and search playback speed by max. 32 times both in
forwarding, and opposite direction. NOTE
This function is available only for U2 series.
4.13 BACK UP
The user can backup the recording files in DVD±RW,CD±RW, and USB drive. Press “BACKUP” button to “BACKUP” mode and select media to backup.
** MEDIA FOR BACK UP : DVD± RW,DVD± R,CD± RW,CD± R,USB MEMORY STICK
1. Copying setup 2. Copying… 4. Closing… 3. Burning… 5. Completed
63
1. Insert blank CD in DVD ROM of DVR. 2. Select DVD from DEVICE selection, and press ENTER button. 3. With the use of direction key button, select channel, date, time and minute to
copy respectively. 4. The backup file size is automatically calculated. 5 Press "START“ to ba k p
5. Press "START“ to backup.
6. Press “BACKUP” button to exit to menu. NOTE
64
1. The format of DVD ROM begins.
. The format of V ROM begins.
2. Set up START time, and END time is automatically set according to the
media capacity. The backup file size can be calculated by changing “START”
and “END” time.
3. Max. 4.5GB(4500MB) is the free space in 1 DVD media. It takes around 35 minutes
4. In abrupt switch off, or copying not carried out normally, take out DVD
media, and start it from the first stage.
5. USB copying is in the same way as above.
6 Normal backup may not properly be performed if the free space of
6. Normal backup may not properly be performed if the free space of USB drive is less than 512 MB . CAUTION
Don't remove DVD‐ROM, or USB drive forcefully while copying.
It may cause system shutdown.
4.14 FILE VIEWER
After the file backup, the below files are generated.
65
① After double‐click “FILEVIEWER”, the above window appears. The backup file list is displayed in the left. p
p y
The backup file is generated per minute.
② Double‐click the backup file to playback.
Back up file is generated every 1 minute.
y
Audio playback speed control
Open the backup files in PC to playback
66
Display mode
Play, Stop, REW, FF buttons
l
b
Still image Print & archive
SETUP MENU
5.1 FACTORY DEFAULT
MAIN MENU Q.menu
SUB MENU
1.Language
2 R l ti
2.Resolution
3.Quality
4.Overwrite 5.Pre‐record 6.Remote ID
1.Channel 2.Title
3.Adjust
Camera
4.PTZ Protocol
5.PTZ Baudrate 6.PTZ speed 7.PTZ ID 1.Sequence
2.OSD Display
Display 3.Video loss
4.SPOT
5.Video Format 1.Resolution 2.Watermark
3.Schedule Setup
4.Audio Setup
Record
5.Overwrite
DEFAULT
English
Hi h
High 3
Yes Yes ALL
1
CH01
1.Contrast
5
2.Brightness
5
3.Hue
5
4.Saturation
5
5.B/W
No
OFF 9600
3
0
1.Conversion type Single 2.Conversion interval
01 second
1.Icon
Yes 2.Title
Yes 3.Date/Time
Yes OSD
1.Mode setup Single
2.Interval setup
01 second
NTSC or PAL
High
Quality 3
No ON
1.Input 1
1
2.Input 2
2.Input 2
2
3.Input 3
3
4.Input 4
4
5.LIVE output
Input 1
ON
67
MAIN MENU Event
SUB MENU
1.Sensor
1
Sensor
2.Sensor type 3.Notion
4.Motion set
5.Alarm
6.Event time
7.POP‐UP 8. Pre‐record
1 IP setup
1.IP setup
2.DDNS Network
3 E‐MAIL
3.E‐MAIL DEFAULT
OSD
Off Off
1.Trace
2.Sensitivity
3.Area
1.Alarm1
2.Alarm2
3.Alarm3
4.Alarm4
10seconds
Off On
1 Type
1.Type
2.IP address
3.Subnet
4.Gateway
5.Command Port
6.Video Port
7.Web Port
8.PPPoE
1.Dns IP
2.Url
3.Port
4.IP Renewal
1 Send E‐MAIL
1.Send E‐MAIL
2.SMTP server 68
4.DVR NAME 5.DVR location 1.Language
2.Date, time 3 User setup
3.User setup
3.Period
4.Test
DVR
DVR01
English 1. Type YY‐MM‐DD 1 Admin setup
1.Admin setup
2.User setup
System
4.HDD format
5.Controller
6.System log
6.System log
7.information
8.Reset
Update
1.Type
2.Update 3.Update (KERNEL )
1.HDD
2.Format
Type 1. Factory reset 2. Set ‐value copy 3. Set‐value load USB Off
4
Off Off
Off
Motion
Loss
DHCP
XXX.XXX.XXX.XXX
XXX.XXX.XXX.XXX XXX.XXX.XXX.XXX
9201 9202
80
1.ID
12345678 2.Password
00000000
164.124.101.002 Videonetserver.com 20000
10minutes
__@__.COM
@ COM
1. Type
2. Name
3. Port
4. Id
5. Pw
1.ID
1
ID
2.Password
1.User
2.Id
3.Password
4.Authority
Setup Search Backup Rec Off HDD1 No RS‐485
Off
On
On
On
default
Kornet.net
25
********
********
off
67
5.2 QUICK SETUP
69
5.2.1 LANGUGE ‐ English, Korean, Chinese, Russian Etc.
This DVR supports 14 countries of language. Select a language g
y
y
g
with the use of left & right direction key. Factory default is English.
5.2.2 RESOLUTION
The recording resolution can be selected super, high and low. Super (set up till D1 7.5FPS)
High (set up till HD1 15FPS) Low (set up till CIF 30FPS ) 5.2.3 QUALITY / 1, 2, 3, 4
The recording quality can be set from 1 to 4.
The recording files size depends on the quality.
5.2.4 OVERWRITE / ON, OFF
Once HDD capacity reaches the full size, it again returns to the first stage.
It carries out the Overwrite (yes), and records continually. In setting "No",
"HDD FULL" appears at the bottom of display, and record stops.
5.2.5 PRE‐RECORD / ON, OFF
/
70
The event recording starts 2~3 seconds before the events happens.
5.2.6 REMOTE ID / 1, 2, 3, 4, ALL
Install the various DVRs at the same place, and one remote controller can control various DVRs respectively by granting ID to them. Only remote controller can be
various DVRs respectively by granting ID to them. Only remote controller can be used to control. Setting values are ranged into 1~4, and ALL. 69
5.3 CAMERA 71
5.3.1 CHANNEL / 1~16
Select channel no to set up 5.3.2 TITLE / CH 1‐CH 16
The user can decide the installed camera's name by each channel. Move to “TITLE” and press “ENETR” button and the window appears as below. 72
Typewrite the name of the camera and press ENTER to change.
NOTE
1. The name should be less 8 letters.
1.
The name should be less 8 letters.
2. Default : channel 1.
71
5.3.3. ADJUST
1. Contrast : 1‐9 stage 2. Brightness : 1‐9 stage
3. Hue : 1‐9 stage 4. Saturation: 1‐9 stage 5. B/W : Yes / No 5.3.4 PTZ PROTOCOL / OFF, PELCO‐P, PELCO‐D
Select the matching protocol for PANTILT camera installed to the external. NOTE
Miss‐matching protocol causes no working. Contact manufacturer, or supplier if specified protocol is required.
5.3.5 PTZ BAUDRATE / 2400, 4800, 9600, 19200, 115200
PTZ protocol means telecommunication speed. Select PTZ protocol suitable to installed camera. The low level decreases camera speed of 6 Band ratio. 73
5.3.6 PTZ SPEED / 0,1,2,3,4
To control the speed of PTZ camera. 5.3.7 PTZ ID / 0~255
To set up PTZ camera ID. 74
73
5.4 DISPLAY 75
5.4.1 SEQUENCE
Sequentially display switchover is set from 1‐16 channels in “LIVE” display mode. 1.1 MODE / SINGLE, QUAD To set up 1 channel, or 4 channel 1.2 INTERVAL
( 1‐60 Second )
5.4.2 OSD DISPLAY
The user can display or remove OSD such as icon, title, date and time in “LIVE” display mode.
76
75
2.1 ICON / ON, OFF
Display icon or not
2.2 TITLE / ON, OFF
Display the name of the camera or not
2.3 DATE, TIME / ON, OFF
Display date and time or not.
NOTE
It is impossible to remove OSD in “PLAYBACK” mode.
5.4.3 VIDEO LOSS When the real‐time camera video loss occurs, it advises BLANK loss status to the relevant channel, or show "L" letters. 77
► OFF : Not Supported ► OSD : Display video loss status in letter on display ► OSD + BEEP : Display video loss status in letter, and buzzer sound. ► BEEP : Display video loss in buzzer sound BEEP : Display video loss in buzzer sound
5.4.4 SPOT / SINGLE , QUAD
Select single and QUAD mode. Set up switchover interval of SPOT monitor. 78
77
When the switchover interval is disable, set one channel of 1~16 ones. Th f ti
The function of auto display f t di l
conversion can be added. 5.4.5 VIDEO FORMAT / NTSC, PAL
User can set the receiving type of respective camera installed in each area. 5.5. RECORD 5.5.1 RESOLUTION
The user can select the resolution
① SUPER
(QUALITY) 1 / 2 / 3 / 4 7.5 ips per channel
79
80
② HIGH
(QUALITY) 1 / 2 / 3 / 4 15IPS per each channel
③ USER SUPER
HIGH
LOW
(QUALITY)
(QUALITY)
(QUALITY)
1 / 2 / 3 / 4
1 / 2 / 3 / 4 1 / 2 / 3 / 4
The user is able to set resolution, quality. If the user doesn’t want recording, please select “OFF” in IPS. In “PLAYBACK” mode the blue screen is displayed in the channel of which IPS is off. [ Recording setup display‐USER ]
[ Recording playback display ] ④ LOW (QUALITY) 1 / 2 / 3 / 4 each channel 30IPS 81
NOTE
1. The recording resolution setup is related to HDD capacity. 2. The recording level (Quality) can be set to 1, 2, 3, 4.
2. The recording level (Quality) can be set to 1, 2, 3, 4. 3. Overwrite ON : When HDD does not have enough space to backup, return to the first, and recording starts by overwriting the old data.
*RECORDING RESOLUTION
Resolution
1
82
704x480
D1
Record ips
Super
1
Quality
4
3
2
1
2
704x480
D1
Super
2
4
3
2
1
3
704x480
D1
Super
3
4
3
2
1
4
704x480
D1
Super
4
4
3
2
1
5
704x480
D1
Super
5
4
3
2
1
6
704x480
D1
Super
6
4
3
2
1
7
704x480
D1
Super
7.5
4
3
2
1
8
704x240
HD1
High
1
4
3
2
1
9
704x240
HD1
High
2
4
3
2
1
10
704x240
HD1
High
3
4
3
2
1
11
704x240
HD1
High
4
4
3
2
1
12
704x240
HD1
High
5
4
3
2
1
13
704x240
HD1
High
6
4
3
2
1
14
704x240
HD1
High
7.5
4
3
2
1
15
704x240
HD1
High
10
4
3
2
1
16
704x240
HD1
High
15
4
3
2
1
7
17
352x240
35
x 40
CIF
Low
ow
1
4
3
2
1
18
352x240
CIF
Low
2
4
3
2
1
19
352x240
CIF
Low
3
4
3
2
1
20
352x240
CIF
Low
4
4
3
2
1
21
352x240
CIF
Low
5
4
3
2
1
22
352x240
CIF
Low
6
4
3
2
1
23
352x240
CIF
Low
7.5
4
3
2
1
24
352x240
CIF
Low
10
4
3
2
1
25
352x240
CIF
Low
15
4
3
2
1
26
352x240
CIF
Low
30
4
3
2
1
* Factory Default : "High", and Level "3". 79
5.5.2 WATERMARK / ON, OFF
Select whether or not the watermark is on.
5 5 3 SCHEDULE SETUP
5.5.3 SCHEDULE SETUP Select “DATE” & “TIME” and press “ENTER” button. The color turns yellow.
83
❶
❷
❸
❶ NORMAL (Yellow) : The recording begins on the selected date & time.
❷ MOTION (Blue) : The recording begins when the motion is detected on the selected date & time
❸ SENSOR (Red) : The recording begins when the sensor is defected on the selected date & time.
The schedule recording enables the user to record on the selected date and time.
Schedule record release
Schedule record setup
84
81
Select “ALL” and press “ENTER” to record the whole date & time.
❶ NORMAL (Yellow green)
1. The recording begins on the 1
The recording begins on the
selected date & time.
2. Move to “DATE” & “TIME” with the direction key.
3. Press "ENTER" to select and
press “ENTER” again to release.
❷ MOTION (Sky blue)
1. The recording begins when the motion is detected on the selected date & time.
85
NOTE
The following is needed when motion recording is set up. 1) NORMAL recording setup ON : As above picture, 'M' appears on display when not having motion recording from 9~11 AM to 16~18PM, but event recording list is not appeared. At normal recording, recording works normally
works normally.
2) NORMAL recording setup OFF : As above setup, undesignated area is not recorded.
→ In all recording, “NORMAL” recording setup has its priority.
3) Event list is recorded for 10 seconds from the first motion detection. ( if 10 seconds are set up ). If motion is continually detected for 10 seconds,
recording time is prolonged, and shows one event list.
4) Normal recording is more secure than motion recording when the place Normal recording is more secure than motion recording when the place
(bank, train station, etc) motion is going on for long times.
86
83
❸ SENSOR (Orange)
Automatically recording sensor video that is detected at the time of area painted in
at the time of area painted in orange. NOTE
If schedule recording is set, it has recording prior to motion and sensor one in turn.
5.5.4 AUDIO INPUT1,INPUT2,INPUT3,INPUT4,LIVE OUTPUT
Maximum 4 audio input, and one audio output. In activating audio function, audio icon
appears at the top of p y
display screen. ▪ Input : Select 4 channel of 1~16 ones, and input. ▪ Output : Select one of 4 input channels. The channel color turns red. 87
5.5.5 OVER WRITE / ON, OFF When HDD reaches full size of capacity, it returns to the first stage, and
continually records by overwritting. In "NO", "HDD FULL" message appears at the bottom of display screen, and record stops. 88
85
5.6 EVENT User can set up with 'ENTER" button, or MOUSE the detailed article necessary to event record
89
5.6.1 SENSOR / OFF, OSD, OSD + BEEP, BEEP
/
,
,
,
In sensor detection, select display mode on screen. 5.6.2 SENSOR IN
► CH 1 ~ 16 N.O / N.C / OFF ► User can set up the sensor mode for the relevant channel. N.O : General open mode (NORMAL OPEN ) N.C : General Closed mode (NORMAL CLOSE) OFF : Not set up. 5.6.3. MOTION ‐ OFF, OSD, OSD + BEEP, BEEP
90
87
Select how to alarm when the motion is detected.
If “OSD” is selected,
"M" appears.
5.6.4 MOTION SET
Setup the motion detection in detail
91
(1) TRACE ( ON, OFF ) In motion sensor detection, cursor appears in activation according to the moving objects.
(2) SENSITIVITY ( 1 ‐ 8 ) User can set up moving sensitivity by each channel. The sensitivity can be selected
from 1 to 8
from 1 to 8.
92
89
(3) AREA ( FULL, SET, OFF ) ▪ FULL : Full part ▪ SET : User's area set up ▪ OFF : Not set up
Th
The user can select l
the motion detection area
when “SET” is selected
► In "SET" position, the selected area appears on the display in green by pressing "ENTER" button with direction key moving. ► In using "MOUSE", drag left mouse, and set up its area in the below direction.
[ Part setup as much as drag ]
[ Mouse release ]
► In "SET" position, it is changed into display of yellow green when pressing "ENTER" button with direction key moving.
By dragging the set area by
mouse in diagonal direction,
it is released.
Mouse position
93
5.6.5 ALARM
Each alarm function can be set for
4 alarms port.
94
► Alarm 1
► Alarm 2
► Alarm 3
Alarm 3
► Alarm 4
Sensor, Motion, LOSS, OFF , NETWORK
Sensor, Motion, LOSS, OFF , NETWORK
Sensor Motion LOSS OFF NETWORK
Sensor, Motion, LOSS, OFF , NETWORK
Sensor, Motion, LOSS, OFF ,NETWORK 5.6.6 RECORD TIME ( 10 SECOND ~ 10 MINUTE )
► In the event occurrence, continual recording time is set.
► When the event happens before the continual recording time is released, recording time is extended from the point of its occurrence.
91
5.6.7 POP ‐ UP / ON , OFF ► In the event occurrence, the relevant display is enlarged, and popped up to
the full display.
5.6.8 PRE ‐ RECORD / ON , OFF ► When “PRE‐RECORD” is on, the recording begins 2~3 seconds before the event is
detected.
ex) If event is triggered at 3:10, it records videos from 3:09: 57. 95
5.7 NETWORK SETUP
5.7.1 IP SETUP
Allocate IP address to DVR
96
93
1) IP Type ( STATIC / DHCP / PPPoE ) Select the type to match user's network environment .
1‐1) STATIC : Fixed IP The user directly sets up IP information ISP allocated. 1‐2) DHCP :
)
Floating IP l
DVR automatically receives IP address by DHCP server. 1‐3) PPPoE : DVR is connected to WAN without sharing internet (router). User should insert ID, and password ISP provides. 2) IP address ( 000.000.000.000 ) Input IP address that ISP (internet service provider) provides. 3) Subnet mask ( 000.000.000.000 ) Input the address of subnet mask ISP (internet service provider) provides. 4) Gateway ( 000.000.000.000 ) Input the gateway address ISP (internet service provider) provides. 5) COMMAND PORT ( 9201 ) COMMAND PORT is subject to the relevant network status (like fire‐wall, etc.). The factory default is set in 9201.
6) VIDEO PORT ( 9202 ) It is required for video transmission by network. 7) WEB PORT ( 80 ) It is needed for monitoring by internet explorer without client software program. (Net viewer). 8) PPPoE ( PASSWORD / ID )
Input password and ID ISP (internet service provider) provides 97
5.7.2 DDNS
98
95
1) As DNS server(videonetserver.com) is already established, the user’s DNS server is not required.
2) IP RENEWAL ( 10 MINUTES / 20MINUTES / 30MINUTES )
DVR send its IP address to DNS server regularly for renewal.
5.7.3 E‐MAIL
99
1) SEND E‐MAIL
_______@__________com In EVENT happening, insert e‐mail address to send the message
when the event happens.
2) SMTP SERVER Insert SMTP & DNS server. 2‐1) TYPE DEFAULT / USER 2‐2) NAME KORNET.NET 2‐3) PORT 25 2‐4) ID
)
******** 2‐5) PW
******** 3) PERIOD ( ONCE / EVENT / OFF ) Once : send an e‐mail once a day.
Event : send an e‐mail whenever the event happens.
Off : Do not send an e‐mail.
4) TEST )
Send a test e‐mail.
5.7.4 DVR NAME ( DVR )
Input each ID of DVR to verify each DVR in CMS 100
5.7.5 DVR LOCATION ( DVR01 )
Input the location DVR is placed.
97
5.8 SYSTEM
5.8.1 LANGUAGE
Press “ENTER” to select “LANGUAGE”
101
5.8.2 DATE / TIME
On the receipt of this DVR, set the current time correctly, and start recording. 102
99
5.8.3 USER SETUP
Setup the authority for users.
103
1) ADMIN SETUP
► ID
► PASSWORD
xxxxxxxx xxxxxxxx
xxxxxxxx Admin mode has the authority to set up and release all functions of DVR
set up, and release all functions of DVR.
104
2) USER SETUP ► USER
USER 1 ~ USER 3 ► ID
xxxx ► PASSWORD xxxx ► AUTHORITY ► SETUP
ON / OFF
ON / OFF ► SEARCH
ON / OFF ► BACKUP
ON / OFF ► REC OFF
ON / OFF User mode is entitled to set up, and release some functions of DVR. According to administrator's purpose, it can limit the authority of users. 101
5.8.4 HDD FORMAT
If HDD is formatted, all data is deleted. Please backup the files before formatting HDD.
105
Select “YES” to format
NOTE
HDD format is to delete all data in HDD.
Please backup the files before formatting.
5.8.5 CONTROLLER
To set up the interface for the external controller. 1) RS‐232 RS 232
► BAUDRATE 115200
► DATA BIT 8 BIT
► PARITY
NONE
► STOP BIT 1 BIT
2) RS‐485 ► BRAUDRATE EACH ► DATA BIT 8 BIT
► PARITY
NONE
► STOP BIT 1 BIT
106
103
5.8.6 SYSTEM LOG
As a menu to check all data for DVR use, user can check information such as menu access, manual record, switch on/off, network access, back up, and search.
5.8.7. INFORMATION
Display the information about HDD, USB Drive, DVD‐RW, Network, Firmware
107
► Total capacity of HDD ( The used space of HDD) ► [Free space of HDD]
☑ Press up & down button to move to next page. ► Network IP and Mac address ► Current software version ► USB Model No. / Total Capacity USB M d l N / T t l C
it
► DVD RW Model No. 108
105
5.8.8. RESET
Reset the factory defaults of DVR
1) FACTORY RESET ( YES / NO ) 109
Select “YES” to reset.
2) SET ‐ VALUE COPY ( YES / NO ) Select “YES” to copy the settings.
3) SET ‐ VALUE LOAD ( YES / NO ) Select “YES” to load the settings. DVR will reboot after loading the settings.
NOTE
“SET‐VALUE COPY” & “SET‐VALUE LOAD” are useful to apply the same settings
to a number of DVRs
5.9 UPDATE
User can update DVR system with new firmware easily by USB Drive and network. DVR system update should be available only when HDD is installed. 5.9.1 USB UPDATE
5.9.2 NETWORK UPDATE
5.9.2 NETWORK UPDATE
110
107
① For network update, DVR should be connected into internet line. NOTE
It may fail due to user's Internet environment. In this case, USB update is recommend. ② Update DVR by network.
(Main menu > System update > Device ‐ network > Update ‐ Yes) It normally takes 4 ~ 6 minutes.
5.9.3 UPDATE In system update menu, it shows current firmware version and new one.
► OLD S/W : it means current firmware version.
► NEW S/W : it means new firmware version to update. 111
MULTI NET VIEWER PROGRAM
6.1 DEFINITION
N Vi
Net Viewer is a client software that enables users to operate DVR (monitor, i
li
f
h
bl
DVR (
i
playback, and backup) remotely through network. Please kindly read out this manual thoroughly for set up, and proper operation. 6.2 NET VIEWER SETUP
6.2.1 INSTALLATION
112
Insert program CD in the package into CD(DVD)‐ROM in your PC and click the icon ( NetViewerM4H.EXE ) below. double ❶ Press 'Next' button.
111
113
❷ Press 'Next' button.
❸ Press 'Next' button.
❹ Press 'Finish' button. 114
❺ After the installation, “CMS_NetViewer” icon is generated in the desktop.
❻ Along with the icon in the desktop, DVR_NetViewer folder is generated in "All Programs". 113
6.2.2 PROGRAM REMOVAL
(1) Program removal by Setup.exe ❶ Double click the icon of Setup.exe. D bl li k th i
f S t
❷ Select "Remove" and press "Next" button. 115
114
❸ Select "Y" button. ❹ Click "Finish" button and Net viewer is uninstalled. 116
(2) Program removal by Window's Program additional and removal 115
6.2.3 NETVIEWER FUNCTION
Double click the icon
and the program is displayed on screen as follows.
117
CONNECT IPS LIST
SETUP
LIVE/PLAYBACK
NETWORK SPEED
PTZ CONTROLL
DISPLAY DIV
DISPLAY DIV
118
ZOOM
FOCUS
OFF
PLAY
▉ SETUP
CHANNEL
CONNECT
CONNECT LED
AUDIO ON/OFF
MICRO PHONE CONNECT
Click "Setup" button and system setup menu is displayed as follows.
117
1
2
3
13
4
5
6
12
11
7
8
9
10
① DVR Name : Input DVR name. ② IP address : Input DVR IP address or Host Name (MAC address). MAC address is defined as the last 6 digits of Host Name. i.e.) 000001.videonetserver.com ③ ID : Input the ID registered in DVR. cf) Default ID : 00000000 / PASSWORD : 00000000 ④ Password :
Password : Input DVR password Input DVR password
⑤ Command port : Open "9201" from router. ⑥ Video port : Open " 9202" from router. ⑦ Avi save directory : Select directory location that Avi file is saved in. ⑧ ADD & MOD : Add or modify setting values. ⑨ Delete : Delete IP address.
⑩ Cancel : Get out of setup menu. ⑪ Upgrade : Upgrade program version. ⑫ Group setup ⑬ Transmission speed limit: Limit max. display speed according to graphic card specifications. 119
2) Login : Make sure of setup values saved in setup menu and press "OK" button.
[CONNECT] [DISCONNECT]
Click 120
119
How to set up IP router (Model : ZIO / INB5241SRe)
NOTE
Each IP router had its own setup method. Please refer to manual for details.
p
1. Boot your computer. 2. Follow the steps as below. ‐ Start ‐> Run (R) ‐> put in 'cmd' in the blank bar. ‐ Punch in 'ipconfig' at "C: \Documents and Settings \Your PC name". ‐ Identify the default gateway numbers. 113
3. Key in Default Gateway number in the Internet address bar. (e.g.) 192.168.1.1) 4. You can see the window of ZIO / INB5241SRe. 122
121
5. Select "NAT" button. 123
6. Click "Virtual server setup and input the IP address registered in DVR in "port forwarding" menu. * Name : Input DVR name * IP address : Input the IP address registered in DVR
* Protocol : TCP * External port : 9201 (Default) (It should be same as the port number set in DVR.) * Internal port : 9201 7. Click "Add" button and the list is displayed as below.
8. Press "Save" button and the values are saved. 124
123
9. Conduct port forwarding of the port number 9202 by following steps as above NOTE
When monitoring DVR via web viewer, web port should be open. The setup method is same as above. Default is 80.
3) Direct Logon : When double clicking one of DVRs registered in tree view, the DVR is connected and displayed automatically. In case that many DVRs are registered, tree view is dropped down when clicking “▼”. 125
Max. 5 DVRs can be connected
When double clicking one of DVR lists registered on AUTO DEF_DVR, the DVR is moved to CONNECT_DVR. cf) AUTODEF_DVR : The DVR lists registered by SETUP menu. CONNECT_DVR : The DVR lists connected currently from registered DVR lists.
* When connected properly, Live mode is appeared autom atically. NOTE
Max. 5 DVR can be connected at same time. The transmission speed depends on the network condition and the user's computer specification.
126
▮ LAN : LAN DVR search
125
‐It shows all connected DVRs. through LAN by pressing Search DVR button. ‐"End Search.." appears when DVR search process is finished. ‐ It is useful for dynamic LAN environment. It is useful for dynamic LAN environment
CUATION
This function may be limited on LAN or PC protected by firewall.
② WAN : WAN DVR search DVR communicates with DNS server (default : videonetserver) every 10 minutes.
‐ 2008‐1‐16 13:43:18 : Last time to communicate with DNS server
‐ 0c0024.videonetserver.com : host name (MAC address) ‐ 121.192.157.247 : WAN IP of current connected DVR ③ GET : it shows all users connected currently through WAN by pressing Find User GET it h
ll
t d
tl th
h WAN b
i Fi d U
button.
127
▉ LIVE mode
[ Full screen display ] [ 4ch display ] [ 8ch display ] 128
127
[ 9ch display ] [ 16ch display ] [49ch dasplay]
g
p y
y
① Single display : Click channel button or double click channel directly. ② 4ch display : Click 4ch display icon.
③ 8ch display : Click 8ch display icon.
④ 9ch display : Click 9ch display icon.
⑤ 16ch display : Click 16ch display icon.
⑥ 49ch display : Click 49ch display icon. NOTE
Screen display mode is available in playback mode.
▉ PLAYBACK mode
Click ① Press red circle and select "PLAYBACK". Click 129
② Click "Time" button in PLAYBACK mode. ③ Search menu is displayed as below. A. Select the month as you want. B. Select the date.
C. Select the time. The time bar is appeared in the bottom of search menu, showing recording data in yellow. (Blue part means no recording data.) D. Select minute and second in details as you want by clicking up/down buttons. E. Click "OK' button and the data is played. ▉ PLAY speed control
PLAY
STOP/PAUSE 130
129
Reverse play
Reverse play by frame (in pause mode only) Play by frame (in pause mode only) Fast forward
▉ BACKUP
4
Recording date can be archived in PC for data backup. 1
❶ Press backup button and the lists are appears. ❷ Select the list for backup as you want. ❸ Click "backup" button. 2
131
The backup files are saved in C:\DVR_FILE
3
* How to play backup file
❶ Select File Play mode. ❶
❷ Press OPEN button. ❷
❸ Select BACKUP file. ❸
❹ Backup file is played. B k fil i l d
132
131
❹
▉ How to convert to AVI file
When live video or record file is converted to AVI file format, it is played on window media player without Net viewer program. A. AVI file save directory setup
Set save directory as you want like C:\DVR_FILE\NetView_AVI
B. Activation
Select a channel to convert to AVI file and click AVI icon as below. Then, the color of the icon turns yellow
To release, press it again.
C. File play
Double clicking the converted file and it is played on Window Media Player directly. 133
▉ UPGRADE
User can update software version easily just by clicking one button. Click
134
131
▉ LOG LIST
It shows all of DVR log lists generated by system reboot, shutdown, menu setup, network login, network logout and so on. ❶
❶ Network user connect ❷ Menu setup ❷
❸ System Reboot ❸
▉ Still image save
135
[16 div Mode still image] 136
① Select display div mode(1,4,6,9,16Div).
② click
button.
③ Press “SAVE” button to save and press “PRINT & SAVE” to print
▉ Remote Control
It can offer user to adjust menu values remotely. ① REROAD : It reads out menu values from DVR set. ② SET CONFIG : The changed settings is applied to DVR
The changed settings is applied to DVR.
135
137
“REMOTE CONTROL” is available for “Q.Setup” only
▉ PTZ control
User can remotely control PTZ camera on NetViewer. 1) PAN / TILT : Control PTZ camera to up/down/left/right direction. 2) Zoom / Focus 6.3 WEB VIEWER
WebViewer enables the user to access to DVR for the remote monitoring by network.
6.3.1 MAC ADDRESS ON IE (INTERNET EXPLORER)
‐ Type in MAC address of DVR on IE (Internet Explorer). ‐ You can check MAC address in INFO menu by pressing INFO button in live mode.
‐ Mac address consists of "6 digits (the last 6 digits from MAC address)" . videonetserver . com"
i.e) http://0c0024.videonetserver.com ) p //
138
137
① IP ADDRESS: Type in MAC address ( ie) 0c0024.videonetserver.com) ② ID : Input DVR ID (default : 00000000) ③ PASSWORD : Input DVR password (default : 00000000) ④ PORT : Type in 9201 as CMD port (default) and 9202 as Video port (default). ⑤ Press "OK and live mode appears on Net Viewer. 6.3.2 PLAY BACK
139
1. Press "PLAYBACK" button and playback menu appears. 2. Type in date and time as want. 3. Press "OK" button and recording data is played. 6.3.3 MULTIPLE DISPLAY
① Single channel mode
Click channel number or double click the channel directly and then it moves to single channel mode. 140
139
② Various screen mode
User can move to various screen modes like 4,6,8,16 channel mode. Click the icon and it moves to the screen mode accordingly. ③ Playback speed controll
TROUBLE SHOOTING
1. The system power is turn off.
▶ Check if power cable is correctly connected .
▶ Check if input voltage is correct. ▶ If the system power does not turn on while power cable is correctly connected,
please contact the supplier, or manufacturer. 2. The system power is turned on, but no video is displayed on the monitor.
▶ Check if the monitor power cable is properly connected.
▶ Check if the monitor is turned on.
Check if the monitor is turned on
▶ Check if the video output cable of the DVR is properly connected to the monitor. ▶ Unplug the power cable, and plug in again.
3. The camera numbers are displayed on the screen, but the camera images
not displayed.
▶ Check if the camera video output is correctly connected to the DVR system.
▶C
Check if the power cable is correctly connected
ec t e po e cab e s co ect y co ected o
on the camera.
t e ca e a
▶ Check if the video cable is working well , or not, which is connected to system from camera.
▶ When video is connected with various systems, weak video signal causes this kind of problem from video distributor. In this case, the direct connection with video of relevant camera will find the solution by solving this matter. ▶ Turn off DVR system, and turn it on again.
4. The camera video is shown on the screen, but the system doesn't record video.
id
▶ Check if it is set to "NONE" in the record mode of the record setting mode.
▶ Turn off the DVR, and turn it on again.
141
5. Impossible to search for the recorded video.
▶ Check if there is a recorded video data when you are trying to search for on the table.
▶ If there is no recorded video data, check if it is set to "NONE" in the record mode of the recording setting.
d f th
di
tti
6. The audio data is not played in recorded video data.
142
▶ Check if audio record option is correctly set to the camera you wish to record audio.
▶ Check if audio mute is enabled.
▶ Check if microphone ,and speaker port are correctly connected on the rear of y
DVR system. ▶ Check if the connected microphone is properly working.
▶ Check if the connected speaker is properly operating.
7. The color of videos are strange, or video is shown abnormally.
▶ Check if the camera connected to the system has a problem. ▶ Check if the camera is not damaged by inserting abnormal camera No. and normal video camera video No. in replacement.
▶ Check camera No.
Check camera No
▶ Check if the video system setting is the same as your camera system. Depending on your area, the camera system can support either PAL, or NTSC. Relying on the camera video transmission system, video process differs greatly. At this state, video is seen, but hard to recognize it normally.
8. There are much (screen) noise on the image.
▶ Check if the video signal output has the problem from camera. Check if the camera is not damaged by inserting another camera into the working video output in replacement. 141
▶ Check if it is cut, or cross‐wired, or shortened for the video cable to connect the camera ,and the DVR.
▶ Check if there is a high voltage wire around the video cable connecting the camera to the DVR system. It can cause the noise problem to decrease video quality.
▶ Check if it is correct for the video cable to connect camera to the DVR system. Che k if it is orre t for the ideo able to onne t amera to the DVR s stem
When a normal power‐supplying cable is used instead of the video cable, screen noise can be generated.
9. Sometimes system itself restarts.
▶ System itself can restart due to watchdog function when any problem occurs to the DVR.
10. The connected sensor is not working.
▶ Check if the type of sensor in event setup menu is the same as the connected sensor.
▶ Check if system is set to use the sensor in record schedule window from the recording setting menu. ▶ Check if power cable of the sensor is properly connected.
▶ Check if signal cable of the sensor is properly connected.
143
WARRANTY
The quality of this product is guaranteed by strict quality control processes, and testing. If the product becomes non‐operational, the warranty may be in operation. The warranty period is valid for 1 year from the date of purchase. WARRANTY GUIDE
144
* Check the Product Warranty Sheet to make sure it is still in effect. • Check the problem again, and contact the supplier, or manufacturer you purchased DVR unit from. u t o
• About product repair, exchange, or refund, we follow the "compensation regulation for customer's loss" announced by "the Economic Planning Board". (Korea only) WARRANTY
If the product becomes non‐operational, the warranty may be in operation. The warranty period is valid for 1 year (s) from the date of purchase. Service fee, and replacement parts will be charged in below cases: 1. Damaged the user's carelessness. 2. Damaged due to a natural disaster. 3. Damaged due to the user not following the instructions, and cautions written in the user's guide. 4. Damaged due to incorrect power voltage, and/or frequency being used. 5. If the Product Warranty sheet is expired. y
p
6. Damaged due to an engineer not employed by supplier, or manufacturer modifying the system. 143
If your system is damaged after the expiry of the warranty period, free repair service will not be available. If you wish the system to be repaired, service fee, and replacement parts will be charged. PRODUCT WARRANTY
Product / Model
Serial Number
Dealer
Purchasing Date
Warranty Period
Warranty Period
Name
Customer
Address
year (s) from the purchasing date
year (s) from the purchasing date.
▶ The Product Warranty Sheet will not be issued again. ▶ The Product Warranty Sheet must be filled on the same day as the product's purchase. ▶ This document must be shown in order to receive the free repair service. Thi d
b h
i
d
i
h f
i
i
145
čž
č
VOOK
PROFESSIONAL MONITORING