1
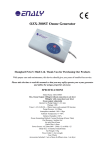
HP-500 Ozone Generator With proper care and maintenance, this device should give you years of trouble-free service. Please take the time to read this manual so that you may safely operate your ozone generator and utilize the unique properties of ozone. SPECIFICATIONS Model Name: HP-500 Max. Ozone Output: 200mg/h without connection to air dryer 500mg/hr with connection to air dryer Ozone output: adjustable Internal Air Pump Output: 1-2 L/min Wattage: 10W Timer: 1,3,5,10,20,30,..., 90min timers and constant ON function Pump Pressure: 2-3 PSI (14-19Kpa) Atmosphere standard: 14.50 ± 0.5 PSI (100±4 Kpa) Ambient Temperature: 0~104F. (40℃) Relative Humidity:≤ 80% Ozone Generating Method: Corona Discharge (Ozone Tube) Gas Resource: Ambient Air Air inlet Dim: 3/16 inch (6mm) Outlet Dim: 3/16 inch (6mm) Power Source: AC120/60Hz. or a 240V/50Hz. model is available Body Size: 4.52 x 8.46 x 2.16 inches (115mm x 215mm x 55mm) Net Weight: 1.63 lbs. (750g) Power Cable: 48 inches (1.2m) in length Case: Plastic Accessories Included: 2 sets of hose & diffuser stone, 1 air dryer SAFETY WARNINGS HEALTH HAZARD WARNING: 1. Permissible Exposure Limits: The following limits accepted in USA, UK and other parts of Europe: 8 hour per day/5 days per week (occupational exposure limit) - 0.1 ppm 15 minute (short term exposure limit) - 0.3 ppm The HP-500 ozone generator is capable of delivering up to 200 gram of ozone per hour. In an enclosed space, the ozone concentration generated by the HP-500 quickly exceeds the 15minute exposure limit of 0.3 parts per million. 2. Toxicology of ozone: Above the exposure limit there is risk of inflammation to the respiratory system. Ozone has been shown to induce asthma attacks. People with history of asthma episodes should not enter a newly ozonized area until all the residual ozone has fully dispersed and the area well ventilated with fresh air. Ozone has a distinctive sharp odor and is detectable by smell even at concentrations well below the 15-minute exposure limit. Most people can detect the smell of ozone at concentrations around 1/10th of the 15-minute exposure limit. A strong smell of ozone normally indicates an ozone concentration that exceeds the 15-minute exposure limit. WARNING: People with smell disorder should not operate this equipment. Leave some room for the unit when using. Don’t attempt to confirm ozone production by directly smelling the ozone coming out of the unit. Short-term inhalation of high concentrations of ozone and long-term inhalation of low concentrations of ozone can cause serious harmful physiological effects. Do not directly inhale ozone gas produced by this device. GENERAL SAFETY WARNINGS: 1. The unit is not waterproof, for indoor uses only. DO NOT allow water to enter. Water damage is not covered by warranty. 2. DO NOT open, temper or try to repair the unit. The unit utilizes very high voltages that can result in injury. Do not touch an opened or tempered unit, while it is working. 3. DO NOT operate the unit in humid conditions (Relative Humidity > 80%). 4. The suggested minimum room space is 1059 cubic feet (30m3) to avoid very strong smell of ozone when purifying air. 5. Keep the unit at a place where the unit is not reachable by children 6. Unplug when you no longer need it. 7. DO NOT use unit within an environment with flammable gases or explosive materials. 8. DO NOT touch the machine with wet or damp hands. 9. Avoid using the unit repeatedly in the warehouse of metals and lactoprene, (any of several synthetic rubber) materials. 10. Use only ozone compatible hoses between the ozone generator and the injection point. Failure to use the correct materials could result in an undesirable leakage of ozone into the surrounding airspace. 11. DO NOT lubricate fittings or hoses with mineral oil or grease. 12. DO NOT place the unit on the carpet when using. 2 IMPORTANT WARNING Ozone Solutions accepts no liability for any damage or injury caused by this product or damages that may arise through its use by the purchaser or by others. The purchaser is responsible for ensuring that the unit is correctly installed, operated and properly maintained. UNIT DESCRIPTION What Is in The Box: 1-HP-500 1- Air Dryer (200ml) and 1 connecting hose 4 inch (10 cm) 2 –hoses; ea. 48 inch (1.2m) 2 -diffuser stones 1- HP-500 user’s manual 1- Air Dryer user’s manual Control Panel Ozone Outlet Air Inlet Power Switch Air Dryer The power switch to turn on the power of the unit is at the right side of the generator. The air inlet is at the front side of the generator. The ozone outlet is at the left side corner. The control panel is on the top side of the unit. 3 LED Display Ozone Output Adjust Controls LED Display ON/OFF UP DOWN Ozone Output Adjust ON/OFF UP DOWN Function Indicates Ozone output: 9 modes Indicates timer time:00,01,03,05,10,20,30,…90 min Indicates Constant-ON Mode: ON Press it to start working Press it to stop working Press and hold it for 3 sec to switch to Constant-On mode Each press increases the timer time by 10 min up to 90 min Each press decreases the timer time by 10 min down to 90 min Each press increase the output from 40mg/hr to 200mg/hr by 20mg/hr up BEFORE USE PREPARATION 1. Ensure that all hoses are free from dust or other contaminants before connecting. 2. Connect one end of 4 inch (10cm) hose to an air inlet (either one) of Air Dryer. 3. Connect the other end of the 4 inch (10cm) hose to the air inlet of the unit. WARNING: Avoid using a hose longer than 4 inches (10cm) to make the connection to the Air Dryer, as an overly long hose can overload the internal air pump and cause a premature failure. 4.1 For water/liquid treatments, connect the 4 ft. (1.2m) hose to the ozone outlet and a diffuser stone to the other end of hose. 4.2 For air treatment, it is recommended to run without the hose connecting to the ozone outlet. 5. Plug in the power plug into a power outlet. WARNING: Use only the rated voltage indicated on the product information label. The product information label is affixed on the case. 4 OPERATING THE UNIT 1. Press the power switch to turn the power on. The LED Display will indicate a timer time last set. 2. Turning the ozone output adjuster to adjust ozone output. The LED Display will indicate Ozone output. There are 9 types: The minimum ozone level is less than 40% of the max. output. 3.1 Using the Timer: 3.1a Press the key or the key once to either increase or decrease the timer time (01 03 05 10 20 30 40 50 60 70 80 90). Press repeatedly until you reach the desired timer time. The maximum timer time is 90 min. The minimum timer time is 0 min (displaying “00”). 3.1b Press the key to start working. The timer time starts blinking and counting down in a 1-minute interval. When the timer time reaches “00” the unit will stop. After 3 sec the LED will again indicate the timer time last set. 3.1c To pause timing, press the key (This will pause working too). The LED display will indicate the timer time last shown before the pause. To resume timing, press key again. OR To stop working immediately, switch the power switch to turn the power off. To restart, repeat from the step1. Note: ♦ When the timer time is set at “00”, key is not functioning. ♦ To adjust the timer time during count-down either press on or key. 5 ♦ To switch to the Constant-On mode when it is working under timer mode, press and hold the key for 3 sec. ♦ If the timer was last used before turning the power off, after turning the power on, the LED will indicate a timer time last set. 3.2 Using the Constant-ON Mode: 3.2a Press and hold the Key for 3 sec. The LED display will show “ON” to indicate the unit is in the Constant-On mode. The unit will start immediately after “ON” is shown. 3.2b To stop working under Constant-on mode, press the display will indicate a timer time last set. key. The LED key again and repeat the step 3.2a) To resume Constant-On, press OR To stop working immediately, switch the power switch to turn the power off. To restart, switch the power switch to turn on the power. Note: ♦ To switch to the timer mode when it is working under Constant-on mode, press the key and follow the instruction 3.1. ♦ During Constant-On Mode, the and keys are not functioning. ♦ If the Constant-ON mode was last used before turning the power off, after turning the power on, the LED will indicate “ON”. The unit will start working after 3 sec. WARNING: To avoid overheating when running it for an extended period of time, keep the area around the generator free from obstructions to maximize air movement and use an external fan if possible. GUIDANCE FOR APPLYING OZONE TREATMENT For any liquid treatment, place the unit at least 4 inches (10cm) above the liquid’s surface to prevent it from entering the generator. For air treatment it is recommended to run without the hose connecting to the ozone outlet. WARNING: Place the unit at least 4 Inches (10cm) above the liquid’s surface to prevent backflow. 6 RESERVE The packing product should be reserved under such conditions: 1. Ambient Temperature: 0~104F (40℃) 2. Relative Humidity: ≤ 80%. 3. Atmosphere standard: 14.50 ± 0.5 PSI (100±4 Kpa.) 4. Indoor without corrosive gases and well ventilated. MAINTENANCE If you only use your ozone generator intermittently, you should store the device in a dry place when not in use and protect it from dust with a plastic bag. If you choose to use an automated ozone delivery system, carry out regular inspections to ensure that your system is working effectively. • Examine all hoses and connections for leaks or damage. • Check air-pump flow rates. • Examine check-valves for effectiveness. • Replace or clean dirty particulate filters. • Replace or recharge the Air Dryer (for more info please see its user’s manual) • Check the diffuser for an efficient bubble-pattern or if using a Venturi inlet, check for the presence of a vacuum. WARRANTY Ozone Solutions warrants the new instruments to be free of defects for a period of one year from the date of shipment. Ozone Solutions will repair or replace defective instruments provided it has been properly installed, operated and maintained in accordance with this manual. The option to repair or replace will be the exclusive decision of Ozone Solutions Damage Caused by Improper or Unintended Use of this Product Will Automatically Void this Warranty MAKING A CLAIM If you believe that this product is not operating satisfactorily you must: 1. Contact us by email at [email protected] 2. Provide us with your name, model and serial number, and the date of purchase. 3. Explain your problem clearly You will be advised by Ozone Solutions if you need to return the unit for servicing. Please note that the purchaser is responsible for all return shipping costs. Ozone Solutions is not responsible for incoming freight costs. Ozone Solutions, Inc. Address: Email: Website: 451 Black Forest Road, Hull Iowa, 51239 USA [email protected] www.ozonesolutions.com 7 8