1
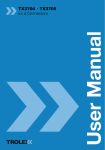
TX3700 • TX3701 • TX3710 • TX3711 User Manual
TX3700 • TX3701 • TX3710 • TX3711 Ex d Connectors
Contents
1.
Product Overview
4
1.1
Operating Features
5
1.2Application
6
1.3Dimensions
7
1.3.1 TX3700 and TX3710 Dimensions7
1.3.2 TX3701 and TX3711 Dimensions8
1.4
Socket Installation Dimensions 9
1.4.1 TX3700 and TX3710 Socket
Installation Dimensions
9
1.4.2 TX3701 and TX3711 Socket
Installation Dimensions
9
1.5
Technical Information
10
1.5.1 TX3700 and TX3710 Technical
Information
10
1.5.2 TX3701 and TX3711 Technical
Information
11
2.Certification
12
2.1 Europe - ATEX
12
2.1.1 ATEX - Equipment Approval
12
2.1.2 ATEX - Component Approval 14
2.1.3 ATEX - Specific Conditions
of use
16
2.2 International - IECEx
17
2.2.1 IECEx - Equipment Approval 17
2.2.2 IECEx - Component Approval 19
2.2.3 IECEx - Specific Conditions
of use
21
2.3 Russia - GOST-R
22
2.3.1 GOST-R - Approval
22
2.3.2 GOST-R - Specific Conditions
of use
22
3.
Fitting and Installation
23
3.1Precautions
23
www.trolex.com
3.2 Tools and Equipment
24
3.3 General Assembly and
Definitions
24
3.4 Fitting and Wiring a Socket
Unit to an Existing Ex Housing 25
3.4.1 Soldered Connections25
3.4.2 Crimped Connections
26
3.5 Mounting a Socket Unit on
an Existing Ex d Housing
28
3.5.1 Internal Earth Bonding
28
3.5.2 Integrity of the Socket Unit
28
3.5.3 Ingress Protection
28
3.5.4 Mounting a Socket Unit on
an Ex e Housing
29
3.6 Fitting a Socket Unit as a
Line Connector
29
3.6.1 Adding a Cover Shell to a
Socket Unit
29
3.6.2 Ingress Protection
29
3.6.3Mating
31
3.6.4 External Earth Bonding
31
3.7 Coding Positions
32
3.8 Ex d Blanking Covers
32
3.9 Mounting Bracket
32
4.Maintenance
33
4.1Introduction
33
4.2Support
34
4.3Disposal
34
4.4 Maintenance Records
35
Disclaimers36
Trademarks36
Contact Details
36
Document History
36
TX3700/1/10/11-UM-EN-02
3
1. Product Overview
Multi pin connector in two shell sizes:
•
•
•
•
•
•
•
•
4
TX3700
TX3710
Accommodates 4, 10 and 14 contact ways
TX3701
TX3711
Accommodates 26 and 37 contact ways
OR
Accommodates 3 and 8 high voltage contact ways
The socket section may be mounted on to an Ex d enclosure or fitted on to a
suitable cable
The plug section may be fitted on to a suitable cable
The contacts are suitable for solder or crimp connections
Standard Ex d cable glands are utilised - not included unless specified
Versions available:
Brass or Stainless Steel - Group I & II
Aluminium - Group II only
Supplied with flexible ingress protecting cover caps
Ex d blanking covers may be supplied where specified
Some versions supplied with short pin for pilot circuit tripping
TX3700/1/10/11-UM-EN-02
www.trolex.com
TX3700 • TX3701 • TX3710 • TX3711 User Manual
1.1 Operating Features
1
Machined metal plug unit with engagement plug forming the flame path
2
Machined metal socket unit with engagement receptacle forming the flame
path
3
High grade co-polymer contact insert carrying slide-in contact pins and
tubes
4
Silver plated contact pins suitable for solder or crimp connections
5
Silver plated contact tubes with longitudinal multi-contact springs for high
reliability and low insertion force, providing exceptionally low contact
resistance
6
Machined metal cover shell for terminating the incoming cable utilising
standard Ex d cable glands of choice
7
Choice of cable gland entry thread to specification
8
Ex d or Ex e enclosure with basic socket unit fitted or cable line-connector
9
Two large, hand operated, mating screws to quickly unite the connector
with complete security
10
Extremely tough moulded urethane weather caps permanently attached and
ready to hand, incorporating shock fenders and IP67 captive ingress seals
www.trolex.com
TX3700/1/10/11-UM-EN-02
5
1.2Application
High integrity, multi path, robust, explosion proof connector, designed for extra
heavy duty and critical applications in Group I and Group II hazardous areas.
Checkpoint
Versions supplied in Aluminium are suitable for Group II environments ONLY.
Rapid and convenient connect/disconnect of control circuits and power circuits for
electrical equipment installation.
Mining, tunnelling, offshore oil and gas platforms, petrochemical plants, process
plants, storage areas and pump stations.
Component acceptance certification for ATEX and IECEx.
6
TX3700/1/10/11-UM-EN-02
www.trolex.com
TX3700 • TX3701 • TX3710 • TX3711 User Manual
1.3Dimensions
1.3.1 TX3700 and TX3710 Dimensions
TX3700 and TX3710 Socket
TX3700 and TX3710 Socket with Cover Shell
TX3700 and TX3710 Plug with Cover Shell
www.trolex.com
TX3700/1/10/11-UM-EN-02
7
1.3.2 TX3701 and TX3711 Dimensions
TX3701 and TX3711 Socket
TX3701 and TX3711 Socket with Cover Shell
TX3701 and TX3711 Plug with Cover Shell
8
TX3700/1/10/11-UM-EN-02
www.trolex.com
TX3700 • TX3701 • TX3710 • TX3711 User Manual
1.4 Socket Installation Dimensions
1.4.1 TX3700 and TX3710 Socket Installation Dimensions
1.4.2 TX3701 and TX3711 Socket Installation Dimensions
www.trolex.com
TX3700/1/10/11-UM-EN-02
9
1.5 Technical Information
1.5.1 TX3700 and TX3710 Technical Information
4 contacts
10 contacts
14 contacts
Maximum current per
25 A
25 A
20 A
pin:
Maximum total
100 A
100 A
100 A
current:
Contact resistance:
400 µ ohms
400 µ ohms
400 µ ohms
Contact diameter:
2.3 mm
2.3 mm
2.0 mm
Maximum conductor
2.5 mm2
2.5 mm2
2.0 mm2
size:
Maximum insulation
3.5 mm
3.5 mm
3.0 mm
diameter:
Maximum voltage:
240 V ac/300 V dc
Test voltage:
2000 V
Termination:
The contacts are suitable for both solder or 8 point crimp
termination
Contact material:
Silver plated brass
Contact insulator:
Acetal co-polymer
Ingress protection:
Dust and water proof to IP67
Ambient temperature
-20°C to +55°C
range:
10
TX3700/1/10/11-UM-EN-02
www.trolex.com
TX3700 • TX3701 • TX3710 • TX3711 User Manual
1.5.2 TX3701 and TX3711 Technical Information
26 contacts
37 contacts
High Voltage Contacts
8 contacts
3 contacts
Maximum current per
20 A
20 A
20 A
20 A
pin:
Maximum total
100 A
100 A
100 A
100 A
current:
Contact resistance:
400 µ ohms 400 µ ohms 400 µ ohms 400 µ ohms
Contact diameter:
2.0 mm
2.0 mm
2.0 mm
2.0 mm
2
2
2
Maximum conductor
2.0 mm
2.0 mm
2.0 mm
2.0 mm2
size:
Maximum insulation
3.0 mm
3.0 mm
3.0 mm
3.0 mm
diameter:
Maximum voltage:
240 V ac/300 V dc
1500 V ac/2200 V dc
Test voltage:
2000 V
4000 V ac/5400 V dc
Termination:
The contacts are suitable for The contacts are suitable for
both solder or 8 point crimp
solder connection only
termination
Contact material:
Silver plated brass
Contact insulator:
Acetal co-polymer
Ingress protection:
Dust and water proof to IP67
Ambient temperature
-20°C to +55°C
-20°C to +70°C
range:
www.trolex.com
TX3700/1/10/11-UM-EN-02
11
2.Certification
2.1 Europe:
ATEX Certification - for use in Group I and Group II hazardous areas
ATEX directive 94/9/EC
Complies with ATEX directive 94/9/EC
2.1.1 ATEX - Equipment Approval
Product Code:
Ex Certificate
Number:
Ex Certification Code:
TX3700
Connector
(SS+PS, S+PS)
Baseefa
06ATEX0307X
I M2 Ex db I Mb (-20°C ≤ Tamb ≤ +55°C)
II 2G Ex db IIB T6 Gb (-20°C ≤ Tamb ≤ +55°C)
TX3700
Connector
with socket
encapsulation
(ES+PS)
Baseefa
06ATEX0307X
I M2 Ex db e I Mb (-20°C ≤ Tamb ≤ +55°C)
II 2G Ex db e IIB T6 Gb (-20°C ≤ Tamb ≤
+55°C)
TX3701
Connector
(SS+PS, S+PS)
Baseefa
06ATEX0308X
I M2 Ex db I Mb (-20°C ≤ Tamb ≤ +55°C)
II 2G Ex db IIB T6 Gb (-20°C ≤ Tamb ≤ +55°C)
TX3701
Connector
(ES+PS)
TX3701
Connector – 3 or
8 contacts – high
voltage (SS+PS,
S+PS)
TX3710
Connector
(SS+PS, S+PS)
12
Baseefa
I M2 Ex db e I Mb (-20°C ≤ Tamb ≤ +55°C)
06ATEX0308X II 2G Ex db e IIB T6 Gb (-20°C ≤ Tamb ≤ +55°C)
Baseefa
06ATEX0308X
I M2 Ex db I Mb (-20°C ≤ Tamb ≤ +70°C)
II 2G Ex db IIB T6 Gb (-20°C ≤ Tamb ≤ +70°C)
Baseefa
II 2G Ex db IIB T6 Gb (-20°C ≤ Tamb ≤ +55°C)
06ATEX 0307X
TX3700/1/10/11-UM-EN-02
www.trolex.com
TX3700 • TX3701 • TX3710 • TX3711 User Manual
2.1.1 ATEX - Equipment Approval - continued
Product Code:
Ex Certificate
Number:
Ex Certification Code:
TX3710
Connector
with socket
encapsulation
(ES+PS)
Baseefa
II 2G Ex db e IIB T6 Gb (-20°C ≤ Tamb ≤ +55°C)
06ATEX 0307X
TX3711
Connector
(SS+PS, S+PS)
Baseefa
II 2G Ex db IIB T6 Gb (-20°C ≤ Tamb ≤ +55°C)
06ATEX 0308X
TX3711
Connector
with socket
encapsulation
(ES+PS)
Baseefa
II 2G Ex db e IIB T6 Gb (-20°C ≤ Tamb ≤ +55°C)
06ATEX 0308X
TX3711
Baseefa
II 2G Ex db IIB T6 Gb (-20°C ≤ Tamb ≤ +70°C)
Connector – 3 or 06ATEX 0308X
8 contacts – high
voltage (SS+PS,
S+PS)
www.trolex.com
TX3700/1/10/11-UM-EN-02
13
2.1.2 ATEX - Component Approval
Complies with the ATEX directive (94/9/EC). These have “component certificates”
which simplify the certification procedure of equipment to which a connector will
be fitted. This means that the connector is accepted as being suitable for use on
other Group I and Group IIB Flameproof equipment. It will not be necessary to
submit documentation or connector samples for repeat examination and testing
when it is incorporated into new flameproof designs.
Product Code:
Ex Certificate
Number:
Ex Certification Code:
TX3700.SS
Cable Mounted
Socket
Baseefa
06ATEX0305U
I M2 Ex db I Mb
II 2G Ex db IIB Gb
TX3700.PS
Baseefa
Cable Mounted Plug 06ATEX0305U
I M2 Ex db I Mb
II 2G Ex db IIB Gb
TX3700.BS
Socket Blank
Baseefa
06ATEX0305U
I M2 Ex db I Mb
II 2G Ex db IIB Gb
TX3700.BP
Plug Blank
Baseefa
06ATEX0305U
I M2 Ex db I Mb
II 2G Ex db IIB Gb
TX3700.S
Basic Socket
Baseefa
06ATEX0305U
I M2 Ex db I Mb
II 2G Ex db IIB Gb
TX3700.ES
Basic socket for
Ex e enclosures
Baseefa
06ATEX0305U
I M2 Ex db e I Mb
II 2G Ex db e IIB Gb
TX3701.SS
Cable Mounted
Socket
Baseefa
06ATEX0306U
I M2 Ex db I Mb
II 2G Ex db IIB Gb
TX3701.PS
Baseefa
Cable Mounted Plug 06ATEX0306U
I M2 Ex db I Mb
II 2G Ex db IIB Gb
TX3701.BS
Socket Blank
Baseefa
06ATEX0306U
I M2 Ex db I Mb
II 2G Ex db IIB Gb
TX3701.BP
Plug Blank
Baseefa
06ATEX0306U
I M2 Ex db I Mb
II 2G Ex db IIB Gb
TX3701.S
Basic Socket
Baseefa
06ATEX0306U
I M2 Ex db I Mb
II 2G Ex db IIB Gb
TX3701.ES
Basic socket for
Ex e enclosures
Baseefa
06ATEX0306U
I M2 Ex db e I Mb
II 2G Ex db e IIB Gb
14
TX3700/1/10/11-UM-EN-02
www.trolex.com
TX3700 • TX3701 • TX3710 • TX3711 User Manual
2.1.2 ATEX - Component Approval - continued
Product Code:
Ex Certificate
Number:
Ex Certification Code:
TX3710.SS
Cable Mounted
Socket
Baseefa
06ATEX0305U
II 2G Ex db IIB Gb
TX3710.PS
Baseefa
Cable Mounted Plug 06ATEX0305U
II 2G Ex db IIB Gb
TX3710.BS
Socket Blank
Baseefa
06ATEX0305U
II 2G Ex db IIB Gb
TX3710.BP
Plug Blank
Baseefa
06ATEX0305U
II 2G Ex db IIB Gb
TX3710.S
Basic Socket
Baseefa
06ATEX0305U
II 2G Ex db IIB Gb
TX3710.ES
Basic socket for
Ex e enclosures
Baseefa
06ATEX0305U
II 2G Ex db e IIB Gb
TX3711.SS
Cable Mounted
Socket
Baseefa
06ATEX0306U
II 2G Ex db IIB Gb
TX3711.PS
Baseefa
Cable Mounted Plug 06ATEX0306U
II 2G Ex db IIB Gb
TX3711.BS
Socket Blank
Baseefa
06ATEX0306U
II 2G Ex db IIB Gb
TX3711.BP
Plug Blank
Baseefa
06ATEX0306U
II 2G Ex db IIB Gb
TX3711.S
Basic Socket
Baseefa
06ATEX0306U
II 2G Ex db IIB Gb
TX3711.ES
Basic socket for
Ex e enclosures
Baseefa
06ATEX0306U
II 2G Ex db e IIB Gb
TX3711.SS.08P
& 03P
Baseefa
06ATEX0306U
II 2G Ex db IIB Gb
TX3711.PS.08T
& 03T
Baseefa
06ATEX0306U
II 2G Ex db IIB Gb
www.trolex.com
TX3700/1/10/11-UM-EN-02
15
2.1.3 ATEX - Specific Conditions of use
1.
The sockets TX3700.S, TX3701.S, TX3710.S and TX3711.S are to be mounted
in the wall of an appropriate flameproof enclosure with an interface as
shown on the drawings listed on certificate numbers:
Baseefa 06ATEX0305U for the TX3700 and TX3710
Baseefa 06ATEX0306U for the TX3701 and TX3711
2.i
The TX3700 and TX3710 sockets are to be used in conjunction with a plug
as Certificate Baseefa 06ATEX0305U or a blanking plug as covered by
Certificate Baseefa 06ATEX0305U.
2.ii
The TX3701 and TX3711 sockets are to be used in conjunction with a plug
as Certificate Baseefa 06ATEX0306U or a blanking plug as covered by
Certificate Baseefa 06ATEX0306U.
3.
When a socket is not fitted with a plug or blanking cover, all the electrical
circuits in the associated flameproof enclosure must be de-energised.
4.
The maximum flameproof gaps shall not exceed 0.2 mm, as on the
drawings listed on certificate numbers:
Baseefa 06ATEX0305U for the TX3700 and TX3710
Baseefa 06ATEX0306U for the TX3701 and TX3711
5.
When the TX3700.ES, TX3701.ES, TX3710.ES or TX3711.ES socket connector
is used, it shall be mounted to an enclosure in accordance with the
certification drawings.
6.
When the TX3700.ES, TX3701.ES, TX3710.ES or TX3711.ES socket connector
is used, the Ingress Protection of the enclosure shall be maintained.
7.
For TX3710 and TX3711, Ex enclosure mountable socket versions of the
connectors, the maximum reference pressure shall be no greater than 20
bar.
16
TX3700/1/10/11-UM-EN-02
www.trolex.com
TX3700 • TX3701 • TX3710 • TX3711 User Manual
2.2 International:
IECEx Certification
2.2.1 IECEx - Equipment Approval
Product Code:
Ex Certificate
Number:
Ex Certification Code:
TX3700
Connector
(SS+PS, BS+PS)
IECEx BAS
12.0035X
Ex db I Mb (-20°C ≤ Tamb ≤ +55°C)
Ex db IIB T6 Gb (-20°C ≤ Tamb ≤ +55°C)
TX3700
Connector
with socket
encapsulation
(ES+PS)
IECEx BAS
12.0035X
Ex db e I Mb (-20°C ≤ Tamb ≤ +55°C)
Ex db e IIB T6 Gb (-20°C ≤ Tamb ≤ +55°C)
TX3701
Connector
(SS+PS, BS+PS)
IECEx BAS
12.0037X
Ex db I Mb (-20°C ≤ Tamb ≤ +55°C)
Ex db IIB T6 Gb (-20°C ≤ Tamb ≤ +55°C)
TX3701
Connector
with socket
encapsulation
(ES+PS)
IECEx BAS
12.0037X
Ex db e I Mb (-20°C ≤ Tamb ≤ +55°C)
Ex db e IIB T6 Gb (-20°C ≤ Tamb ≤ +55°C)
TX3701
Connector – 3 or
8 contacts – high
voltage (SS+PS)
IECEx BAS
12.0037X
Ex db I Mb (-20°C ≤ Tamb ≤ +70°C)
Ex db IIB T6 Gb (-20°C ≤ Tamb ≤ +70°C)
TX3710
Connector
(SS+PS, BS+PS)
IECEx BAS
12.0035X
Ex db IIB T6 Gb (-20°C ≤ Tamb ≤ +55°C)
TX3710
Connector
with socket
encapsulation
(ES+PS)
IECEx BAS
12.0035X
Ex db IIB T6 Gb (-20°C ≤ Tamb ≤ +55°C)
www.trolex.com
TX3700/1/10/11-UM-EN-02
17
2.2.1 IECEx - Equipment Approval - continued
Product Code:
Ex Certificate
Number:
Ex Certification Code:
TX3711
Connector
(SS+PS, BS+PS)
IECEx BAS
12.0037X
Ex db e IIB T6 Gb (-20°C ≤ Tamb ≤ +55°C)
TX3711
Connector
with socket
encapsulation
(ES+PS)
IECEx BAS
12.0037X
Ex db e IIB T6 Gb (-20°C ≤ Tamb ≤ +55°C)
TX3711
Connector – 3 or
8 contacts – high
voltage (SS+PS)
IECEx BAS
12.0037X
Ex db e IIB T6 Gb (-20°C ≤ Tamb ≤ +70°C)
18
TX3700/1/10/11-UM-EN-02
www.trolex.com
TX3700 • TX3701 • TX3710 • TX3711 User Manual
2.2.2 IECEx - Component Approval
Complies with the ATEX directive (94/9/EC). These have “component certificates”
which simplify the certification procedure of equipment to which a connector will
be fitted. This means that the connector is accepted as being suitable for use on
other Group I and Group IIB Flameproof equipment. It will not be necessary to
submit documentation or connector samples for repeat examination and testing
when it is incorporated into new flameproof designs.
Product Code:
Ex Certificate
Number:
Ex Certification Code:
TX3700.SS
Cable Mounted
Socket
IECEx BAS
12.0034U
Ex db I Mb
Ex db IIB Gb
TX3700.PS
Cable Mounted Plug
IECEx BAS
12.0034U
Ex db I Mb
Ex db IIB Gb
TX3700.BS
Socket Blank
IECEx BAS
12.0034U
Ex db I Mb
Ex db IIB Gb
TX3700.BP
Plug Blank
IECEx BAS
12.0034U
Ex db I Mb
Ex db IIB Gb
TX3700.S
Basic Socket
IECEx BAS
12.0034U
Ex db I Mb
Ex db IIB Gb
TX3700.ES
Basic socket for
Ex e enclosures
IECEx BAS
12.0034U
Ex db e I Mb
Ex db e IIB Gb
TX3701.SS
Cable Mounted
Socket
IECEx BAS
12.0036U
Ex db I Mb
Ex db IIB Gb
TX3701.PS
Cable Mounted Plug
IECEx BAS
12.0036U
Ex db I Mb
Ex db IIB Gb
TX3701.BS
Socket Blank
IECEx BAS
12.0036U
Ex db I Mb
Ex db IIB Gb
TX3701.BP
Plug Blank
IECEx BAS
12.0036U
Ex db I Mb
Ex db IIB Gb
TX3701.S
Basic Socket
IECEx BAS
12.0036U
Ex db I Mb
Ex db IIB Gb
TX3701.ES
Basic socket for
Ex e enclosures
IECEx BAS
12.0036U
Ex db e I Mb
Ex db e IIB Gb
www.trolex.com
TX3700/1/10/11-UM-EN-02
19
2.2.2 IECEx - Component Approval - continued
Product Code:
Ex Certificate
Number:
Ex Certification Code:
TX3710.SS
Cable Mounted
Socket
IECEx BAS
12.0034U
Ex db IIB Gb
TX3710.PS
Cable Mounted Plug
IECEx BAS
12.0034U
Ex db IIB Gb
TX3710.BS
Socket Blank
IECEx BAS
12.0034U
Ex db IIB Gb
TX3710.BP
Plug Blank
IECEx BAS
12.0034U
Ex db IIB Gb
TX3710.S
Basic Socket
IECEx BAS
12.0034U
Ex db IIB Gb
TX3710.ES
Basic socket for
Ex e enclosures
IECEx BAS
12.0034U
Ex db e IIB Gb
TX3711.SS
Cable Mounted
Socket
IECEx BAS
12.0036U
Ex db IIB Gb
TX3711.PS
Cable Mounted Plug
IECEx BAS
12.0036U
Ex db IIB Gb
TX3711.BS
Socket Blank
IECEx BAS
12.0036U
Ex db IIB Gb
TX3711.BP
Plug Blank
IECEx BAS
12.0036U
Ex db IIB Gb
TX3711.S
Basic Socket
IECEx BAS
12.0036U
Ex db IIB Gb
TX3711.ES
Basic socket for
Ex e enclosures
IECEx BAS
12.0036U
Ex db e IIB Gb
20
TX3700/1/10/11-UM-EN-02
www.trolex.com
TX3700 • TX3701 • TX3710 • TX3711 User Manual
2.2.3 IECEx - Specific Conditions of use
1.
The sockets TX3700.S, TX3701.S, TX3710.S and TX3711.S are intended
to be mounted in the wall of an appropriate flameproof enclosure with
an interface as shown on the certified drawings listed in the following
documents: Test Report GB/BAS/ExTR12.0042/00
2.
The sockets TX3700.ES, TX3701.ES, TX3710.ES and TX3711.ES are intended
to be mounted in the wall of an appropriate increased safety enclosure
with an interface as shown on the certified drawings listed in the following
documents: Test Report GB/BAS/ExTR12.0042/00
3.i
The TX3700 and TX3710 sockets, covered by Certificate
IECEx BAS 12.0034U, are to be used in conjunction with a plug or blanking
plug covered by the same certificate.
3.ii
The TX3701 and TX3711 sockets, covered by Certificate
IECEx BAS 12.0036U, are to be used in conjunction with a plug or blanking
plug covered by the same certificate.
4.
When a socket is not fitted with a plug or blanking cover, all the electrical
circuits in the associated flameproof enclosure must be de-energised.
5.
The maximum flamepath gaps shall not exceed 0.2mm, as on the certified
drawings listed in the following documents:
Test Report GB/BAS/ExTR12.0042/00
6.
When the TX3700.ES, TX3701.ES, TX3710.ES and TX3711.ES socket
connector is used, it shall be mounted to an enclosure in accordance with
the certification drawings.
7.
When the TX3700.ES, TX3701.ES, TX3710.ES and TX3711.ES socket
connector is used, the Ingress Protection of the enclosure shall be
maintained.
8.
For TX3710 and TX3711 the Ex enclosure mountable socket versions of the
connectors, the maximum reference pressure shall be no greater than 20
bar.
www.trolex.com
TX3700/1/10/11-UM-EN-02
21
2.3 Russia:
GOST-R Certification
2.3.1 GOST-R - Approval
Product Code:
Ex Certificate
Number:
Ex Marking:
TX3700
only
POCC GB
ГЂ05.B03980
Ex d IIB T6
Ex d e IIB T6
2.3.2 GOST-R - Specific Conditions of use
1.
22
Prior to installation, it is essential that user refers to the above certificate
for any specific conditions of use. Copies of certificates are available from
Trolex.
TX3700/1/10/11-UM-EN-02
www.trolex.com
TX3700 • TX3701 • TX3710 • TX3711 User Manual
3. Fitting and Installation
3.1Precautions
Ensure that the current and voltage
parameters of the electrical circuits are
within the limitations specified.
Ensure that all weather seals are present.
The cable gland used with the connector
must be an approved Ex d type which is
suitably certified for the equipment, the
cable and designed for use with single wire
armoured cable.
The multi-core cable must be a type
approved for the conditions of use.
The sealing faces and flame paths will have
been treated with a protective film of grease
during manufacture. Renew if necessary
before assembly.
Ensure that all body screws and mating
screws are in place and are fully engaged
before switching on the supply.
Always electrically isolate all electrical circuits
to the connector before disconnecting.
Fit weatherproof cover caps to disengaged
connectors to protect the flame paths and to
prevent the ingress of debris and moisture
into the contact insert.
Do not disengage the connector by pulling
the cable as this may damage the fitting of
the cable in the cable gland.
www.trolex.com
TX3700/1/10/11-UM-EN-02
23
A connector with a damaged flame path is an
explosion risk and should be removed from
service immediately. Damaged flame paths
cannot be repaired.
An Ex d blanking cover must be fitted to the
open face of a disengaged connector if it is
necessary to re-energise any of the circuits
passing through that connector.
3.2 Tools and Equipment
•
•
•
M5 hex key
Soldering iron OR eight point crimping
tool: DMC FT8
Suitable approved Ex cable glands
3.3 General Assembly and
Definitions
Easily removable contact inserts for solder or
crimp connection.
Checkpoint
The pins and tubes fitted to the TX3701/11, 3
contact and 8 contact high voltage versions
are permanently fixed into the insert and
cannot be removed for crimping purposes.
Contact inserts are matched pairs, carrying
pins and tubes respectively. The contact
numbers are printed in red and blue on
corresponding pairs to avoid confusion when
making-off the connectors. Blue in the socket
unit and Red in the plug unit.
It is recommended that pins are fitted
into socket units. This will provide physical
protection to the pins when the connector is
disengaged.
24
TX3700/1/10/11-UM-EN-02
www.trolex.com
TX3700 • TX3701 • TX3710 • TX3711 User Manual
3.4 Fitting and Wiring a Socket
Unit to an Existing Ex Housing
3.4.1 Soldered Connections
1. Prepare a cut out in the housing for
mounting the socket unit.
2. If required, lightly lubricate the
flamepaths, sealing faces and body
screws using a suitable non-hardening
grease.
3. Insert the socket unit into the prepared
aperture.
4. Make sure that the moulded weather
seal is fitted in place which also
incorporates the weather cap.
5. Secure the assembly into the housing
using the two M5 socket head screws
provided.
6. On the rear of the socket unit unscrew
the knurled clamping ring that holds the
contact insert in place and remove the
complete contact insert.
7. Prepare the connecting wires by
stripping the end insulation by
approximately 6 mm.
8. Feed the connecting wires through the
clamping ring.
Checkpoint
Make sure that the clamping ring is the
correct way round.
9. Solder the wires into the recess at the
end of each contact.
10. Refit the contact insert into the socket
body and secure it using the knurled
clamping ring.
www.trolex.com
TX3700/1/10/11-UM-EN-02
25
Checkpoint
If preferred, the contacts can be removed
from the insert to make soldering easier.
Follow the instructions in the procedure for
making Crimped Connections.
Checkpoint
Do not allow any solder to collect on the
outer diameter of the contact as this will
effectively increase its diameter and make
it difficult to push back into the insert.
3.4.2 Crimped Connections
1. Prepare a cut out in the housing for
mounting the socket unit.
2. If required, lightly lubricate the
flamepaths, sealing faces and body
screws using a suitable non-hardening
grease.
3. Insert the socket unit into the prepared
aperture.
4. Make sure that the moulded weather
seal is fitted in place which also
incorporates the weather cap.
5. Secure the assembly into the housing
using the two M5 socket head screws
provided.
6. On the rear of the socket unit unscrew
the knurled clamping ring that holds the
contact insert in place and remove the
complete contact insert.
7. Prepare the connecting wires by
stripping the end insulation by
approximately 6 mm.
8. Feed the connecting wires through the
clamping ring.
26
TX3700/1/10/11-UM-EN-02
www.trolex.com
TX3700 • TX3701 • TX3710 • TX3711 User Manual
Checkpoint
Make sure that the clamping ring is the
correct way round.
9. The contact insert divides into two parts.
Separate the two parts and feed the
wires individually through the holes in
the top part of the insert, taking care to
relate the wire numbers to the contact
numbers if applicable. Make sure that
the large diameter is facing the end of
the cores.
Checkpoint
Ensure that all wires are running parallel
with no cross-overs.
10. Remove each contact from the bottom
half of the contact insert, crimp the
appropriate wire into the recess at the
end of the contact.
Checkpoint
Carry out a pull test to check the integrity
of the crimp connection.
11. Refit each contact into the corresponding
hole in the bottom half of the contact
insert.
12. Close the two halves of the contact
insert together.
13. Refit the contact insert into the socket
body and secure it using the knurled
clamping ring.
www.trolex.com
TX3700/1/10/11-UM-EN-02
27
3.5 Mounting a Socket Unit on an
Existing Ex d Housing
3.5.1 Internal Earth Bonding
If the installation requires the connector to
be separately earthed, then an earth bonding
conductor can be crimped into the locking
ring using the crimp connector provided.
3.5.2 Integrity of the Socket Unit
The socket unit maintains the Ex d integrity
of the enclosure to which it is fitted even
when disengaged, as long as a socket blank
is fitted to the socket and there is no voltage
present on the exposed contacts.
3.5.3 Ingress Protection
When fitting a TX3700, TX3710, TX3701 or
TX3711 socket unit to an existing enclosure
it is important to ensure that the method
chosen will maintain a minimum standard of
ingress protection.
•
•
•
28
Fit the face seal provided
Threaded fixing holes must be blind
where possible. If through holes are
used, apply a thread sealant or place a
resilient sealing washer under the heads
of the fixing screws
The IP54 rating of the two fastening
holes shall be maintained in accordance
with IEC/EN 60079-14
TX3700/1/10/11-UM-EN-02
www.trolex.com
TX3700 • TX3701 • TX3710 • TX3711 User Manual
3.5.4 Mounting a Socket Unit on
an Ex e Housing
Some versions of the socket unit are
approved for use in Ex e housings and
may be supplied with flexible wires already
connected to the contact insert.
In this case, the rear of the contact insert will
be encapsulated in resin.
Equipment certification for Ex d e versions:
•
•
Ex I M2 Ex d e I
Ex II 2G Ex d e IIB T6
3.6 Fitting a Socket Unit as a Line
Connector
3.6.1 Adding a Cover Shell to a
Socket Unit
A line connector is created by adding a cover
shell and a suitable cable gland to the back
of a basic socket unit. This can be used as an
in-line coupler or as a cable-line connection
to a corresponding socket unit.
1. Prepare the cable in accordance with the
diagram.
www.trolex.com
TX3700/1/10/11-UM-EN-02
29
2. Make off the cable into the cable gland
in the normal way, making sure that
the cable armour is firmly clamped and
that the outer seal is in place and fully
compressed.
Checkpoint
Check the cable and cable gland approval
and suitability.
3. Remove the cover shell from the
connector and fit the cable gland into the
tapped entry, feeding the cable cores
through the cover shell.
Checkpoint
Make sure that the cable gland sealing ring
is in place.
4. Make the cable core connections to
the contact insert in the same way as
described for the socket unit (soldered or
crimped).
5. Replace the cover shell rotating it half a
turn as it closes, to help the cable cores
to coil inside the cover shell. Fit and
tighten the cover shell securing screws.
Checkpoint
Is the weather seal fitted?
30
TX3700/1/10/11-UM-EN-02
www.trolex.com
TX3700 • TX3701 • TX3710 • TX3711 User Manual
3.6.2 Ingress Protection
The connector body itself has been tested to
IP67.
Ingress protection capability is also affected
by the choice of cable gland and the
effectiveness of its installation to the cover
shell of the connector.
3.6.3 Mating
1. Align the alignment pin with the
corresponding hole.
2. Mate the plug unit and socket unit
together.
3. Tighten the two securing screws by
hand.
4. Tighten fully using the hex key provided.
Checkpoint
Is the weather seal fitted?
3.6.4 External Earth Bonding
For external earth bonding use the external
earthing facilities and crimp connectors
provided.
www.trolex.com
TX3700/1/10/11-UM-EN-02
31
3.7 Coding Positions
Up to five coding position options are
available to prevent incorrect mating of
adjacent connectors.
The contact inserts have five coding slots
angularly distributed around the top half of
the insert retaining flange to engage with a
corresponding coding pin.
The contact insert can be rotated in the
housing to any of five positions to prevent
prohibited mating.
Checkpoint
Use the contact reference numbers as a
guide to indicate which coding slot is being
used when viewed from each side of a
connector pair.
3.8 Ex d Blanking Covers
Machined Ex d weatherproof cover caps
must be fitted to disengaged plugs or
sockets to maintain Ex d integrity when it is
necessary to re-apply electrical power to the
system.
3.9 Mounting Bracket
Use a mounting bracket to anchor lineconnected pairs of plugs and sockets to
support trailing cable systems.
32
TX3700/1/10/11-UM-EN-02
www.trolex.com
TX3700 • TX3701 • TX3710 • TX3711 User Manual
4.Maintenance
4.1Introduction
To keep your TX3700, TX3701, TX3710 or
TX3711 connectors in the best possible
condition and minimise downtime, Trolex
strongly recommends that you check
the condition of the connectors every six
months. Keep records of the maintenance
carried out. The planned preventative
maintenance for the TX3700, TX3701,
TX3710 and TX3711 connectors is listed
below:
1. Check the flame paths for damage.
Damaged flame paths cannot be
repaired. Return the connector to Trolex
or your local Trolex agent for repair.
2. Check that the body screws and mating
screws are fully engaged.
Checkpoint
If body or mating screws are damaged
and need to be replaced you must replace
them with stainless steel screws of the
same grade. The screws are grade A2-70.
3. Check for bent or worn pins and tubes in
the contact insert.
4. Check for the presence of moisture
and remove any debris that may have
accumulated inside.
5. Replenish the lubrication of the flame
paths and sealing faces using a suitable
non-hardening grease.
6. Check the integrity of the cable
connection into the cable gland and
ensure that the gland is tight in its
thread.
www.trolex.com
TX3700/1/10/11-UM-EN-02
33
7. Check that all weather seals are present
and in good condition.
8. Check for any damage or corrosion on
any part of the connector housing.
9. Repair or rectify the connector as
necessary.
10. After the completion of all maintenance,
update the maintenance records.
4.2Support
If you need technical support to operate this
product, or would like detail of our after sales
technical support packages, please contact
our local Trolex service agent or
[email protected].
4.3Disposal
Part of the ethos of Trolex is sustainable
design. Ex d Connectors contain materials
that can be recovered, recycled and reused.
At the end of its useful life ensure that the
Ex d Connector is recycled in accordance
with local laws and bylaws for the geographic
area where it is located. The end of its
useful life is to be determined by the owner/
operator of the equipment and not Trolex.
Ensure that the Ex d Connector is recycled
by licenced waste contractors with the
appropriate licences for handling metallic
waste in the geographic area where the
Ex d Connector is located.
Checkpoint
Consult your local Trolex service agent or
the Trolex Product Support Department if
you require assistance with disposal:
[email protected]
34
TX3700/1/10/11-UM-EN-02
www.trolex.com
TX3700 • TX3701 • TX3710 • TX3711 User Manual
4.4 Maintenance Records
Implement a planned preventative
maintenance process and keep good
maintenance records.
Consult your local Trolex service agent or
the Trolex Product Support Department:
[email protected] for help in
implementing a planned preventative
maintenance process.
www.trolex.com
TX3700/1/10/11-UM-EN-02
35
Disclaimers
The information provided in this document contains general descriptions and
technical characteristics of the performance of the product. It is not intended as
a substitute for and is not to be used for determining suitability or reliability of
this product for specific user applications. It is the duty of any user or installer to
perform the appropriate and complete risk analysis, evaluation and testing of the
products with respect to the relevant specific application or use. Trolex shall not be
responsible or liable for misuse of the information contained herein. If you have any
suggestions for improvements or amendments, or find errors in this publication,
please notify us at [email protected].
No part of this document may be reproduced in any form or by any means,
electronic or mechanical, including photocopying, without express written
permission of Trolex.
All pertinent state, regional, and local safety regulations must be observed
when installing and using this product. For reasons of safety and to help ensure
compliance with documented system data, only Trolex or its affiliates should
perform repairs to components.
When devices are used for applications with technical safety requirements, the
relevant instructions must be followed.
Trademarks
© 2015 Trolex® Limited.
Trolex is a registered trademark of Trolex Limited. The use of all trademarks in this
document is acknowledged.
Document History
Issue 01 20 January 2013
Issue 02 5 May 2015
Original publication of this document
Second publication of this document
Contact Details
Trolex Ltd, Newby Road, Hazel Grove, Stockport, Cheshire, SK7 5DY, UK
+44 (0) 161 483 1435 [email protected]
36
TX3700/1/10/11-UM-EN-02
www.trolex.com