1
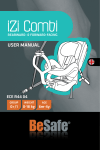
Instruction Manual
Infant car Seat and ISOFIX system
This car seat conforms to ECE R
No.44/04.
It is for children up to
13kg(group 0+)
Warning
Failure to use this car seat properly will increase the risk of
serious injury or death in a sudden stop or crash.
Introduction
目錄
Table of contents
Thank you very much for using this car seat. We sincerely
hope it can bring your child safety convenience and
happiness when you travel.
1.Introduction.......................................................... (1)
2.Table of contents................................................... (2)
The main structure of this product consists of car seat and
base. The latch system of the base can fit different kinds of
cars including both the new car system (ISOFIX car seat
fixing system)and the old car system(safety belt system).
(The additional leading cover can be inserted easily into
the anchor of the infant car seat)
4.Know Your Car Seat.................................... (6)、(14)
5.Carry Handle Operation.......................................... (7)
The device is intended for group 0+ and fixture ISO/R1
8.Selecting A Vehicle Seating location...................... ( 11)
3.Warning............................................................ (3-5)
6.Shoulder Belt Operation.................................. (8)-(9)
7.Using Safety Buckle............................................. (10)
9.Latch system on car&ISOFIX System............ (12-13)
Car seat fixing pole and the stand tube
of the base can increase the safety level of your car seat.
Death or serious injury can be decreased by 22%.
10.Installing Base................................................... (15)
11.Using Base.................................................. (16-18)
12.Attachment and Removal of car seat to Base......... (19)
13.Removal of Base................................................ (19)
14.Care and Cleaning.............................................. (20)
1
2
Warning
Direct sunlight can make this car seat surface hot enough
to burn child. Use caution and check them on hot, sunny
days.
Do not use this car seat if it is damaged, missing
instructions or missing parts.
Do not use car seat if it has been in a crash, it must be
replaced. A crash can cause unseen damage and using it
again could result in serious injury or death.
Never leave child unattended.
Do not use car seat again or throw it away if the label time
at the back of the car seat becomes overdue. Do not sell it
to the consigner or to the flea market, abandon it into a
dark rubbish bin.
Never place the car seat directly to the back of a person.
Make sure that the car seat is on one side behind of your
back.
Do not attach car seat to a shopping trolley.
Do not use car seat in rear seat of a compact pickup truck.
Severe head injury or death can occur.
Never use car seat in any vehicle seating position equip
ped with an active air bag.
Read your vehicle manual if you need to use car seat in the
front when there is no rear seat in your vehicle.
3
Warning
This is ISOFIX CHILD RESTRAINT SYSTEM. It is
approved to regulation No.44/04.
It will fit vehicles with positions approved as ISOFIX
positions (as detailed in the vehicle handbook),
depending on the category of the child seat and of the
fixture.
The mass group and the ISOFIX size class for which this
device is intended is: Group 0+, E – ISO/R1
When the device is used in combination with an adult
safety-belt to be used by means of the following wording:
Only suitable for use in the listed vehicles fitted 3 point,
approved to ECE Regulation No.16 or other equivalent
standards.
It is recommended that any straps holding the restraint to
the vehicle should be tight, that any straps restraining the
child should be adjusted to the child's body, and that
straps should not be twisted
It is recommended that any luggage or other objects liable
to cause injuries in the event of a collision shall be
properly secured.
4
Warning
It is dangerous that making any alterations or additions to
the device without the approval of the competent
authority, and not following closely the installation
instructions provided by the child restraint manufacturer.
There shall be provisions made so that the instructions
can be retained on the child restraint for its life period.
It is recommended that:
a) The child restraint must not be used without the cover.
b) The seat cover should not be replaced with any other
than the one recommendedby the manufacturer, because
the cover constitutes an integral part of the restraint
performance.
Notice
This Child Restraint is classified for"Semi-universal "
Use and is suitable for fixing into the seat positions
with ISOFIX anchorage points like followig cars:
CAR
BMW(Mini)
SAAB
VOLVO(xc70)
FRONT
REAR
Outer centre
Yes
No
Yes
No
Yes
No
No
No
No
Seat positions in other cars may also be suitable to
accept this child restraint. If in doubt, consult either
the child restraint maufacturer or the retailer.
The rigid items and plastic parts of the ISOFIX child
restraint system must be so located and installed that they
are not liable, during everyday use of the vehicle, to
become trapped by a movable seat or in a door of the
vehicle.
The ISOFIX base can only be used with the
special designed shell.
5
6
Tup
Carry
handle operation
Car seat parts
Carry handle
Buckle release
button
Handle release
button
Strap release
button
Fixing lock
Adjusting strap
Rocking base
Canopy
Handle lock
indicator
A
1
C
B
To move the handle from one position to another, press
both release buttons at the same time to the
direction of the arrow (see A B C)
Functions of different positions:
A. For carrying your child or fitting in the car
B. When fitted on the pushchair or for rocking
your baby
C, When used as a seat, e.g. for feeding
Warning
Secure infant in car seat with harness at all time to avoid
fall hazard.
Recline indicator
(both sides)
Pushchair fixings
7
8
Shoulder belt adjustment
Shoulder belt release adjustment:
Put car seat on the ground, move the
handle to the fixed position(see
three positions of the handle on
page 5).Use one hand to pull the
shoulder belt out of the pad
(see position2),and at the same use
1
3
the other hand to press the adjustment
Button in order to release the safety belt.
2
Warning:
When you need to adjust the shoulder belt, make sure
your child is at the right position and try to adjust the
strap before you install car seat to your vehicle.
9
Shoulder belt adjustment
Height selection:
1.the right height selection:
1
-As your child grows you will need to move
the straps to the next slots.The correct slots
are those at, or just below your child ' s
shoulders(fig.l)Diagram1 shows a correct
shoulder strap position, all the others are
incorrect.
2
Warning:
Before tightening the harness, ensure
that the shoulder straps sit conformably
on the child's shoulders, and that the
straps are not twisted.
2.The adjustment of the safety belt:
-Step1.Remove the ends of the shoulder straps from the
metal plate at the rear of the seat.
-Step2.pull the straps through to the front.
-Step3.Re-insert the straps through the appropriate slots
in the seat shell, polystyrene pad, seat cover and head
hugger.
-Step4.Re-attach the loops on the shoulder straps
to the slots on the metal plate, Check that the loops
are within the metal plate slots and are securely attached.
10
Using safety buckle
1
3
2
2
1
3
Step1:pull the strap out of the backrest and put infant into
the car seat.
Selecting A Vehicle Seating Location
NO
Seats which
face the side
of the vehicle
NO
NO
Seats which
face the rear
of the vehicle
Do not use the
car seat in any
vehicle seat
where an airbag
in fitted
Step2:fasten the two locating parts together(fig.1).
YES
Step3.push the locating parts into the socket(fig.2).
A positive click should be heard.
Step 4.cheek by pulling the straps above and below the
buckle(fig.3)
Warning:
After selecting a right vehicle
seating location, you need to
check the installation of your
car seat carefully.
Step5.the buckle is released by pressing the red button.
11
12
Latch system on car&ISO-FIX system
Latch system on car&ISO-FIX System
The latch system can be used when securing this infant
car seat with the stay-in-car base and should be used
whenever possible.
1
Latch system on car
The design and the use method are
different for different latch systems.
Refer to your vehicle manual when you
need to use the latch system.
ISOFIX system
ISOFIX system consists of two
anchors of two anchors at the bottom
of the base and one connector for the
backrest and base. This kind of system
can bring much convenience for the
use of the infant car seat.
13
1-4
2
NO
Unlocked
Read this manual before you use
ISOFIX system
The two leading covers are unnecessary
if you do not have the ISOFIX system
(the usage of the leading cover is on
page 13).
Attention: Death or serious injury
can occur
1.After directing the ISOFIX system
into the leading cover, green will be
shown by the indicator(fig.3).
2.Use ISOFIX system or Latch system
to ensure security.
3
YES
Locked
3.The latch system should be used
whenever possible.
4.Use the stand tube to adjust the
height until it can reach the most
appropriate position.
Death or injury can occur at a lower position.
Suffocation can occur at a higher position.
14
Base parts
Installing Base
1
Car seat fixing
pole
Put the backrest tube into the socket
according to the direction of the
arrow(fig.1),and fix it with screws.
Backrest
Base
Warning: Do not remove again at
random after adjustment correctly.
Car seat base
release button
2
2.turn to open according to the
direction of the arrow when
ISOFIX fixing lock is needed.
Turn back according to the opposite
direction when the fixing lock is
unnecessary.(fig.2&fig.3)
ISOFIX
fixing lock
Stand
Stand release button
3
Warning: keep base folded when
your vehicle is an old style.
Leading cover
15
16
Using base
Using Base
Both latch system on car and ISOFIX system can be used
to tie a car seat base. Refer to your vehicle manual when you
need to use ISOFIXsystem.
Using latch system on car with an old car style:
1
2
1.pull the safety belt directly
through the base with an old
car style(fig.1);then fasten
the safety buckle, attach the
base to the vehicle seat
(fig.2)
2.press the stand release button to adjust the height the
height of the stand tube, ensure that it can touch the floor
of the vehicle.
3
3.check that the base is firmly attached
to the vehicle seat.
Using base with ISOFIXsystem
in a new car style:
1
1.Direct two leading cover into
the anchor of the latch system
on car(fig.1).
1-4
1 -1
3
2
Unlocked
Locked
1-4
Warning:
1-6
You should check that the angle of the car
Seat base is within the safety standard
when you attach car seat to it. Death or serious injury
may occur at a lower position. Suffocation may occur at a
higher position. You should select an appropriate
height position.
17
2.Inseat the fixing lock of the ISOFIX system into
the leading cover until you hear a click(fig2&3&4).
Repeat it on the other side.
Warning:
The indicator will show green when insert rightly.
18
Using base
Attachment and removal of car seat to base
B
5
3.press the stand release button to
adjust the height of the stand tube,
ensure that it can touch the floor of
the vehicle(fig.5).
4.Check that the base is firmly
installed in the vehicle seat.
6
A
1.Lower car seat into base and push down for lock.
You should hear a click as it securely locked.Then
push down handle to the use position B as showed in
left fig.
Warning :Carefully check that the car seat is locked
into base. Lift it up to verify that it is securely locked.
2.Press the release button to release the car seat base,
see the picture on the left.
Warning: keep child with safety belt at all time to
avoid fall hazard.
Removal of base
5.Finished as it shows in fig6.
1
2
1-6
3
4
Attention: It may be better to
use both kinds of safety systems.
1
1-6
Attention:
You should check that the angle of the car seat
base is within the safety standard when you attach
car seat to it. Death or serious injury may occur at
a lower position. Suffocation may occur at a higher
position. You should select an appropriate height
position.
19
2
Remove ISOFIX fixing lock with your fingers according to
the direction of the arrow(fig.1).Press the stand release
button to unfold the stand tube(fig.2).Turn ISO-FIX fixing
lock back according to the direction of the arrow(fig.3).
press the release button while pushing the stand plastic from
slot1 to slot2 according to the arrow direction (fig.4). Then
pull backward to check that the stand tube is securely
locked.(Do it in reverse order for installation ).
20
Care and Cleaning
Cleaning Seat, Strap Covers, And Infant Insert
To Remove Seat Pad: Strap Covers and infant insert:
1.Remove shoulder strap, strap covers and infant insert.
2.Slide seat pad from car seat by urgently pulling it off the
top of car seat back.
To Launder Pad:
Hand wash with mild detergent and air dry. Do not machine
wash or machine dry. Do not use bleach cleaners.
To Reassemble Seat Pad:
Reserve above steps for replacing seat pad and harness
system.
Cleaning Straps:
-Surface wash only with mild soap and damp cloth.
-If harness straps are frayed or heavily soiled, they
MUST be replaced.
Cleaning Shell:
-Wipe with mild solution of soap and water, Avoid wetting
labels.
-Never use " household detergents " : they can weaken plstic.
Cleaning Buckle:
-Rinse buckle with warm water. DO NOT use household
detergents,
-Never lubricate buckle.
21
Note