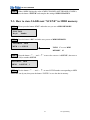
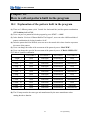
1
ISO 9001 CERTIFIED
CX-5
DMX Intelligent Lighting Controller
【User Manual】
Lite-Puter Enterprise Co., Ltd.
Website: http://www.liteputer.com.tw
E-mail: [email protected]
ISO 9001 CERTIFIED
Index:
Chapter 1. The main function of CX-5
1-1
1-2
1-3
1-4
The features of CX-5................................................................................... 3
Power ....................................................................................................... 4
Signal input/output ....................................................................................... 4
Introduction of the functions ......................................................................... 5
Chapter 2. How to select different scanners
2-1 How to set different scanners....................................................................... 7
2-2 How to define the format of lighting fixtures by user .................................... 8
Chapter 3. SCENE
3-1
3-2
3-3
3-4
3-5
3-6
3-7
3-8
How to set a SCENE.................................................................................. 9
How to store a SCENE ............................................................................. 9
How to load a PATTERN by program ..................................................... 10
How to store a PATTERN into SCENE 301-306 .................................... 10
How to load a SCENE ............................................................................ 10
How to delete a SCENE ......................................................................... 10
How to load a SCENE by "P1… P12"(HOT KEY).................................... 11
How to correspond SCENE 1… 306 to "P1… P12" (HOT KEY) .............. 11
Chapter 4. CHASE
4-1
4-2
4-3
4-4
4-5
4-6
How to edit a CHASE .............................................................................. 13
How to load a CHASE ............................................................................. 14
How to load a CHASE by “P1… P12”(HOT KEY) ................................ 14
How to corresponding CHASE 1… 50 to “P1… P12”(HOT KEY)............ 14
How to delete a STEP from a CHASE...................................................... 15
How to insert a STEP into a CHASE......................................................... 17
Chapter 5. MACRO
5-1
5-2
5-3
5-4
5-5
5-6
How to edit and store a MACRO.............................................................. 19
How to load a MACRO............................................................................ 20
How to load a MACRO by ”P1… P12”(HOT KEY) .............................. 20
How to corresponding MACRO1… 50 to “P1… P12”(HOT KEY)........... 20
How to delete a STEP from a MACRO .................................................... 21
How to insert a STEP into a MACRO....................................................... 23
Chapter 6. LEARN
1
CX-5 [EUM-B]
ISO 9001 CERTIFIED
6-1
6-2
6-3
6-4
6-5
How to edit and store a LEARN ............................................................... 25
How to load a LEARN ............................................................................. 26
How to correspond LEARN 1… 50 to "P1… P12”(HOT KEY) ................ 26
How to load a LEARN by "P1… P12" (HOT KEY) ................................ 27
How to set Xfader speed in a LEARN....................................................... 28
Chapter 7. BLACK、FINE
BLACK ............................................................................................................. 29
FINE.................................................................................................................. 29
Chapter 8. How to select the start address
............................................................................................................................30
Chapter 9. MIDI
9-1 Introduction of MIDI................................................................................. 31
9-2 Set up MIDI channel of CX-5 ................................................................... 32
9-3 How to store 24 different "SCENE" in MIDI memory................................ 33
Chapter 10. How to call out pattern built in the program
10-1 Explanation of the pattern built in the program............................................ 34
10-2 Preview the pattern built in the program, and save it to any
one of SCENE 301 ~ 306.................................................................... 35
10-3 Call out the pattern built in the program by the use of number
buttons under the function SCENE ......................................................... 36
10-4 Call out the pattern built in the program by the use of hot key
"P1… P12" under the function "SCENE" ................................................ 36
Chapter 11. Main lamp setting
11-1 How to setting main lamp......................................................................... 38
Chapter 12. Foresee of FNC Key
............................................................................................................................39
Chapter 13. Appendix
Appendix-1 How to make a "SCENE"............................................................. 41
Appendix-2 Call out the saved scene to amend any of the channels. .................. 42
Appendix-3 When you use P1… P12 to choose the light
you want to control..................................................................... 42
2
CX-5 [EUM-B]
ISO 9001 CERTIFIED
Chapter 1. The main function of CX-5
1-1
The features of CX-5
l
Easy operation:
There is a “LED” indicator beside every function key for reminding users to know to
current condition and for following operation.
l
Compatibility:
CX-5 can control any kind of lighting fixtures and has a data bank of more than
100 famous fixtures inside.
NOTE: Please make sure the protocol of your scanner is DMX signal,
8 bit and not over 14 channel first.
l
1M byte memory, for storing the following data:
<1>. SCENE : 306 sets of “SCENE” memory .
Each set of “SCENE” has independent Xfader SPEED (Time for one
scene to next one) and Chase SPEED (Time for one scene to next one
plus delay time) time for setting .
Each “SCENE” is namable by 10 characters.
6 built in “SCENE” from 301 to 306.
<2>. CHASE : 50 sets “CHASE” memory .
Each set of “CHASE” has 60 STEP , each CHASE STEP means a
“SCENE” memory.
Each CHASE STEP allow to defined both the Xfader SPEED and
Chase SPEED .
Each “CHASE” is namable by 10 characters.
<3>. MACRO : 50 sets of “MACRO” memory .
Each set of “MACRO” has 60 STEP , each
MACRO STEP can be a set of “SCENE”
memory of a set of “CHASE” memory.
Each “MACRO” is namable by 10 characters.
<4>. LEARN : 50 sets of “LEARN” memory .
Each set of “LEARN” memory is corresponding to any set of
3
CX-5 [EUM-B]
ISO 9001 CERTIFIED
“CHASE” memory. A”LEARN” memory can perform different
effects after the memory is stored accompany with music temple.
The Xfader SPEED of each “LEARN” can be defined as 0.2 Sec., or
Chase SPEED .
Each “LEARN” is nameable by 10 characters.
l Date management:
Every memory has a name which is easier to management than number.
l Green Earth :
No battery inside. The date is stored by FLASH MEMORY.
l Easy for user to create effects:
There are 12 sets of “HOT KEY” for SCENE” 、”CHASE” 、”MACRO”
and “LEARN” functions which provide users an immediate control.
1-2 Power
l There is a DC POWER JACK (inside diameter 2Φ ) on real panel, for 15V/1A DC
input.
l Turn on the power switch.
l The definition of DC POWER JECK: inside『-』、outside『+』
DC : 9V / 1A
1-3 Signal input /output
l Audio:Internal and external audio input (100mV)
l MIDI : MIDI IN / MIDI OUT
l DMX output:Standard DMX-512 output, control channel 1 to channel 168.
LAMP NO.
USE CH.
LAMP NO.
USE CH.
1
2
3
4
5
6
1-14
15-28
29-42
43-56
57-70
71-84
7
8
9
10
11
12
85-98
99-112
113-126
127-140
141-154
155-168
4
CX-5 [EUM-B]
ISO 9001 CERTIFIED
1-4 Introduction of functions
l SCENE:
306 sets and all are namable.
l
CHASE:
(1) 50sets of namable memories.
(2) Each CHASE has 60 STEP(a STEP can be a SCENE)
Each
l
MACRO:
(1) 50 sets of namable memories.
(2) Each MACRO has 60 STEP(a STEP can be a SCENE or a CHASE)
l
LEARN:
(1) 50sets of namable memories.
(2) Each LEARN has 60 STEP(a STEP can be a SCENE)
(2) The time between STEP and STEP is adjustable by a previous setting of user.
l
“FINE” KEY:For a limited range adjustment in a SCENE.
l
“BLACK” KEY:One key to turn off all the LAMP.
l “A.” KEY :
For switch between “RUN MODE” and “EDIT MODE”
It means “RUN MODE” when the LED is bright. (P1..P12 is Hot key)
It means “EDIT MODE” when the LED is dark. (P1..P12 is the on / off switch of the
lighting fixtures.)
l
“P1 … P12” (HOT KEY) : IMPORTANT !
(1) In “EDIT MODE” , “P1… P12” means the “ON” or “OFF” switch of
LAMP1… 12
(2) In “RUN MODE” , “P1… P12” means:
5
CX-5 [EUM-B]
ISO 9001 CERTIFIED
<a>. at SCENE function :
“P1… P12” can load any set of data from SCENE 1… 306
(A preset of manufacturer : P1 = SCENE 1 … P12 = SCENE 12)
<b>. at CHASE function :
“P1… P12” can load any set of data from CHASE 1… 50
(A preset of manufacturer: P1 = CHASE 1 … P12 = CHASE 12)
<c>. at MACRO function:
“P1… P12” can load any set of data from MACRO 1… 50
(A preset of manufacturer: P1= MACRO 1… P12= MACRO 12)
<d>. at LEARN function:
“P1… P12” can load any set of data from LEARN 1… 50
(A preset of manufacturer: P1 = LEARN 1 ... P12 = LEARN 12)
6
CX-5 [EUM-B]
ISO 9001 CERTIFIED
Chapter 2. How to select different scanners
2-1 How to select different scanners
STEP-1 :Press ”FNC” then press ”981”
STEP-2 :Use ” w -“ or “ + 4” to find the brand of you scanner, then press ”ENTER”
1:LITE PUTER
Press ‘w ‘ o r ‘4 ‘ key
STEP-3 :Use ” w -“ or “ + 4” to find your scanner and press ”ENTER”
LITE PUTER SCAN
Press ‘w ‘ o r ‘4 ‘ key
7
CX-5 [EUM-B]
ISO 9001 CERTIFIED
2-2 To define the format of lighting fixtures by user
STEP-1 : User can define the format by himself if the fixtures are not in the data bank.
EX. We take the Leo scanner as an example,
CH1=PAN, CH2=TILT, CH3=COLOR / GOBO, CH4=SHUTTER, CH5-CH14=OFF.
STEP-2 : Press “FNC”, then press “988”,
USER DEFINE LAMP
PAN =CHANNEL ?
( Please key in the channel number for Pan.)
STEP-3 : Press “+ 4” key to define Tile.
USER DEFINE LAMP
TILT =CHANNEL 4
STEP-4 : Press “ENTER” to confirm.
USER DEFINE LAMP
TILT =CHANNEL 4
This function simply defines the pan and tile to the joystick.
STEP-5 : Press “FNC 981” and select “1: ANY COMPANY” after the fixture was set.
8
CX-5 [EUM-B]
ISO 9001 CERTIFIED
Chapter 3. SCENE
3-1
How to set a SCENE
STEP-1 :Make sure ”A.” is at ”EDIT MODE”
( The LED of “A.” is dark at ”EDIT MODE”)
STEP-2 :Select the right format for your LAMP (See chapter 7.)
(“P1… P12” means the On/Off switch of LAMP1… LAMP12 at “EDIT MODE”.
Make sure the LED below the “P1” is bright when setting the LAMP 1.)
STEP-3 :Use the ”VR” in CH1-CH12 to create a SCENE. (Move the VR up to top and
down to button before adjusting.)
STEP-4 :Use joystick to adjust. (Move the joystick alongside the edge then adjusting)
STEP-5 :Use ”FINE” key to adjust in a limited range if necessary.
3-2 How to store a SCENE
STEP-1 :Press ”PROG” when the desired scene is created
SC---。---
Key Number .
LCD display
STEP-2 :Key in ”SCENE” number (No. 1… 300),and press ”ENTER”
SC--1。---
EMPTY SCENE LP01
(LCD LINE2:will reveal the name of the SCENE,EMPTY SCENE or “LP xx” which
means the last scene you programmed )
STEP-3 :Use ”1… 9” to key in the name of the SCENE
SC--1。---
Press ‘1 ---’9 KEY
(Use ”0” (Sel.) KEY to confirm when a character was selected, than key in the following characters
9
CX-5 [EUM-B]
ISO 9001 CERTIFIED
by the same way.)
STEP-4 :Press ”ENTER” when a SCENE is named, than adjust the VR of ”Xfader
SPEED” and ”Chase SPEED” to set the output time( from 0.1 … 25.4 Second).
SC-1。XFD-0.5Sec
Adj SPEED VR .
STEP-5
3-3
Press ”ENTER” for storing the SCENE
How to load a pattern by program
Please reference 10-2, Step1 ~Step5. All the patterns must be stored into Scene
301-306.
3-4
How to store a pattern into SCENE 301~306
Please reference 10-2, Step6 ~Step7
3-5 How to load a SCENE
STEP-1 :Press ”SCENE” and key in the SCENE number (from 1… 306)
SCENE
Keyin Number .
STEP-2 :Press ”GO”
3-6 How to delete a SCENE
STEP-1 : Press ”SCENE”
STEP-2 : Press ”DEL.” and key in SCENE number (from 1… 306)
SCENE _ DEL. NO.YES
Keyin Number .
10
CX-5 [EUM-B]
ISO 9001 CERTIFIED
STEP-3 : Press ” YES” , the SCENE is deleted
3-7
How to load a SCENE by ”P1… P12”(HOT KEY)
STEP-1 :Press “SCENE” and make sure the LED of SCENE is bright.
STEP-2 :Press ”A.”,make sure you are at ”RUN MODE“
( the LED of “A..” is bright)
STEP-3 :Press ”P1… P12” for a speedy load of a SCENE .
(A previous setting of manufacturer: P1= SCENE 1 … .. P12= SCENE 12,
Use “FNC” + “2” (FAVORITE SCENE) to change the setting f“P1… P12”)
3-8 How to correspond
SCENE 1… 306 to “P1… P12” (HOT KEY )
STEP-1 : Press “SCENE” and make sure the LED of SCENE is bright.
STEP-2 : Press ”FNC.”
FUNCTION:
Keyin Number
(‘FNC’ + ‘981 … 9 ‘ See Chapter 12 for the table of FNC KEY. )
STEP-3 : Press number key ”982”
FAVORITE SCENE
P 1 = SCENE 1
( LCD vernier flashing at “P 1”)
STEP-4 : Use “ + 4 ” to mover the vernier to “SCENE 1” , and key in the SCENE number
You are going to correspond to “P 1” (from 1… 306)
FAVORITE
SCENE
P 1 = SCENE 23
11
CX-5 [EUM-B]
ISO 9001 CERTIFIED
(for example, we key in “2” , “3” , means “P1 = SCENE 23”)
STEP-5 : Use “w -
“ and “ +4 ” to move vernier , and do the same step for changing
the setting.
STEP-6 : Then move the vernier to “SCENE” and press “ENTER”, the setting of the
correspondence between SCENE and HOT KEY has been changed.
12
CX-5 [EUM-B]
ISO 9001 CERTIFIED
Chapter 4. CHASE
4-1 How to edit a CHASE
STEP-1 :Press ”CHASE” ,than ”PROG”
CH---。-----
Keyin Number .
STEP-2 :Use ‘0… 9’ to select a ”CHASE” number (from 1… 50),then press ”ENTER”
CH-- 1。 ----
EMPTY CHASE
(LCD LINE 2 will reveal the name of the“CHASE”,or “EMPTY CHASE,if the CHASE is
occupied, press ”YES” to overwrite or ”NO” to give up.)
STEP-3 :Use number key ”1… 9” to name the ”CHASE”
CH-- 1。 AB_
Keyin ENGLISH
(Use ”0” (Sel.) KEY to confirm when a character was selected, than key in the following characters
by the same way.)
STEP-4 :Press ”ENTER” when a ”CHASE” is named
CH-- 1。 CHS- 0.5Sec
STEP--- 1,SCENE--
(The vernier is flashing at “STEP 1” )
STEP-5 : Use “ + 4 ” to move the vernier to “SCENE ?” , and key in the “SCENE” number
(from 1… 306) that “STEP 1” is corresponding , adjust the “Xfader SPEED” and
“Chase SPEED” (from 0.1 … 25.4 Second)
CH-- 1。 CHS- 0.5Sec
STEP-- 1,SCENE- 12
(for example, key in “1” , “2” , means “CHASE 1”的“STEP 1 = SCENE 12” )
STEP-6 : Use “w - “ and “ + 4 ” to move vernier , and key in the “SCENE” number you
are going to correspond to.
13
CX-5 [EUM-B]
ISO 9001 CERTIFIED
STEP-7 : Move the vernier to “SCENE” , and press “ENTER” key to store the “CHASE” and
stop editing.
4-2 How to load a CHASE
STEP-1 :Press ”CHASE” , and key in ”CHASE” number (from 1… 50)
CH-- 1。 GO
A
(LCD LINE2 will reveal the name of the ”CHASE” )
STEP-2 :Press ”GO” to load the ”CHASE 1”
4-3 How to load a CHASE by “P1… P12”(HOT KEY)
STEP-1 :Press “CHASE” and make sure the LED of CHASE is bright .
STEP-2 :Press ”A.”,and make sure you are at ”RUN MODE“
(The LED of “A..” is bright)
STEP-3 :Press ”P1… P12” for speed load of a CHASE .
(A previous setting by manufacturer: P1= CHASE 1 … .. P12= CHASE 12)
User can change the setting by press “FNC” + “2” (FAVORITE CHASE)
4-4 How to correspond
the CHASE 1… 50 to “P1… P12”(HOT KEY)
STEP-1 : Press ”CHASE” and make sure the LED of ”CHASE“ is bright
STEP-2 : Press ”FNC.”
FUNCTION
Keyin Number
(‘FNC’ + ‘981 … 9 ‘ Please see Chapter 12.)
STEP-3 : Press number key ”982”
14
CX-5 [EUM-B]
ISO 9001 CERTIFIED
FAVORITE CHASE
P 1 = CHASE 1
(the LCD vernier is flashing at “P 1” )
STEP-4 : Use “ + 4 ” to move the vernier to “CHASE ?” , and key in the “CHASE” number
(from 1… 50) .that is going to be corresponded to “P 1”
FAVORITE
CHASE
P 1 = CHASE 23
(for example, key in “2” , “3” means 即 “P1 = CHASE 23”)
STEP-5 : Use “w -
“ and “ + 4 ” to move the vernier, and key in the “CHASE” number
(from 1… 50) you are going to be corresponded to.
STEP-6 : Move the vernier to “CHASE” and press “ENTER” to confirm the change of
correspondence to HOT KEY.
4-5 How to delete a STEP from a CHASE
STEP-1 :Press ”CHASE” and ”PROG”
CH---。----
Keyin Number .
STEP-2 :Use ‘0… 9’ to select ”CHASE” number (from 1… 50),then press ”ENTER”
(for example, CHASE 1 has the
STEP 1
STEP 2
STEP 3
STEP 4
STEP 5
STEP 6
following steps:
→ SCENE 1
→ SCENE 2
→ SCENE 3
→ SCENE 4
→ SCENE 5
→ SCENE 6
CH-- 1。 -----
ABC
(LCD LINE 2 will reveal the name of “CHASE”,if it is not an empty CHASE, press ”YES” to
overwrite)
15
CX-5 [EUM-B]
ISO 9001 CERTIFIED
STEP-3 :Use number key ”1… 9” to key in the name of the ”CHASE”
CH-- 1。 AB_
Keyin ENGLISH
(Use ”0” (Sel.) KEY to confirm when a character was selected, than key in the following characters
by the same way.)
STEP-4 :Press ”ENTER” when the ”CHASE” is named
CH-- 1。 CHS- 0.5Sec
STEP--- 1,SCENE---
(The vernier is flashing at “STEP 1” )
STEP-5 : Use “w - “ and “ + 4 ” to move the vernier to the “SCENE” number you are
going to delete, and press “DEL.” , not the LED of “YES” and “NO” is flashing,
press “YES” to confirm..
CH-- 1。 NO,YES
STEP-- 2, SCENE-- 2
STEP-6 : The SCENE 2 in CHASE STEP 2 has been deleted after “YES” key is pressed.
STEP-7 : Use “w -
“ or “ + 4 ” to move the vernier to the last STEP (SCENE number) of
the CHASE STEP .
CH-- 1。 CHS- 0.5Sec
STEP-- 5,SCENE-- 6
STEP-8 : Make sure the vernier has been moved to the “SCENE” number and press "ENTER” to
store the date.
CHASE
STEP 1
STEP 2
STEP 3
STEP 4
STEP 5
1
→
→
→
→
→
: (There are 5 STEP)
SCENE 1
SCENE 3 ( SCENE 2 is deleted and replaced by SCENE 3 )
SCENE 4
SCENE 5
SCENE 6
16
CX-5 [EUM-B]
ISO 9001 CERTIFIED
4-6 How to insert a STEP into a CHASE
STEP-1 :Press ”CHASE” then ”PROG”
CH---。----------
Keyin Number .
STEP-2 :Use number key ‘0… 9’ to select the ”CHASE” number (from 1… 50),then
STEP 1
STEP 2
STEP 3
STEP 4
press ”ENTER”
(for example, CHASE 2 has the following date :
→ SCENE 4
→ SCENE 3
→ SCENE 2
→ SCENE 1
CH-- 2。 ----
DEF
(LCD LINE 2 will reveal the name of the “CHASE” , Press ”YES” to overwrite the CHASE if it is
not an empty chase.
STEP-3 :Use the number key ”1… 9” to key in the name of the ”CHASE”
CH-- 2。 DE_
Keyin ENGLISH
(Use ”0” (Sel.) KEY to confirm when a character was selected, than key in the following characters
by the same way.)
STEP-4 :Press ”ENTER” when the ”CHASE” is named
CH-- 2。 CHS- 0.5Sec
STEP--- 1,SCENE--
(now the vernier is flashing at “STEP 1” )
STEP-5 : Move the vernier to the “SCENE” member by “w -
“ or “ + 4 ” key and key in
the number (from 1… 306), Finally press “INS.”, you will see the LED of “YES” , “NO” key is
flashing , press “YES”
CH-- 2。 NO,YES
STEP-- 3,SCENE- 10
(for example, key in “1” , “0” means to insert SCENE 10 into the STEP 3 of CHASE 2)
17
CX-5 [EUM-B]
ISO 9001 CERTIFIED
STEP-6 : You can insert a STEP in CHASE STEP 2 after “YES” key is pressed.
(for example, move the vernier to the “SCENE” number and press “INS.” , you had
inserted SCENE 10 into CHASE STEP 3.)
STEP-7: :Move the vernier to the last CHASE STEP by “w - “ or “ + 4 ” key to revice
CHASE STEP.
CH-- 1。 CHS- 0.5Sec
STEP--- 5,SCENE-- 1
(For example, to increase up to CHASE STEP 5) by “w - “ or “ + 4 ” key.
STEP-8 : Make sure the vernier has been moved to the “SCENE” number , then press “ENTER”
to store the data.:
CHASE 2
STEP
STEP
STEP
STEP
STEP
:
1
2
3
4
5
(There are 5 STEP)
→ SCENE 4
→ SCENE 3
→ SCENE 10 (The SCENE 10 is inserted)
→ SCENE 2
→ SCENE 1
18
CX-5 [EUM-B]
ISO 9001 CERTIFIED
Chapter 5. MACRO
5-1 How to edit and store a MACRO
STEP-1 :Press ”MACRO” and then ”PROG”
MA---。----
Keyin Number .
STEP-2 :Use number key ‘0… 9’ to select the ”MACRO” number (from 1… 50),then
press ”ENTER”
MA-- 1。 -----
EMPTY MACRO
(LCD LINE 2 will reveal the name of “MACRO”, or EMPTY MACRO,
Press ”YES” to overwrite the date if it is not an empty CHASE)
STEP-3 :Key in the name of the”MACRO” by number key ”1… 9”
MA-- 1。 AB_
Keyin ENGLISH
(Use ”0” (Sel.) KEY to confirm when a character was selected, than key in the following characters
by the same way.)
STEP-4 :Press”ENTER” when the ”MACRO” is named
MA-- 1
SC
.
。 STEP
1
(the vernier is flashing at “STEP 1”)
STEP-5: Move the vernier to “SC ” by “ + 4 ” key. ( “SC _” , means MACRO STEP 1,
you can define any date of SCENE 1… 306). You may press “CHASE” key
which means to define CHASE 1… 50 as MACRO STEP 1.
MA--- 1 。 STEP 1
LCD display:
CH 2.
“SC “ means “SCENE”
“CH “ means “CHASE”.
(for example, press “CHASE”,
then key in “2” , means “MACRO 1” “STEP 1 = CHASE 2” )
19
CX-5 [EUM-B]
ISO 9001 CERTIFIED
STEP-6 : Use “w -
“ “ + 4 ” key to move the vernier , and key in the corresponding
“SCENE” or "CHASE” number step by step. .
STEP-7 : Finally, move the vernier to the second line of the LCD “SC _”(or “CH _”) ,
then press “ENTER” to finished and stored the edit of “MACRO”.
5-2 How to load a MACRO
STEP-1 :Press ”MACRO” , and key in the number of ”MACRO” (from 1… 50)
MACRO 1 ‘GO’
AA
(LCD LINE2 will reveal the name of the ”MCARO” )
STEP-2 :Press ”GO” to load the ”MACRO 1”
5-3 How to load a MACRO by ”P1… P12”(HOT KEY)
STEP-1 :Press “MACRO” and make sure you are in “MACRO”
STEP-2 :Press ”A.”,make sure you are at ”RUN MODE“
(The LED of “A..” is bright)
STEP-3 :Press ”P1… P12” to load the MACRO .
(A previous setting by manufacturer: P1= MACRO 1 … .. P12= MACRO 12)
User may use “FNC” + “2” (FAVORITE MACRO) to reset .
5-4 How to correspond the date
of MACRO 1… 50 to “P1…P12”(HOT KEY)
STEP-1 : Press ”MACRO”,and make sure you are in”MACRO“
STEP-2 : Press ”FNC.”
FUNCTION
20
CX-5 [EUM-B]
ISO 9001 CERTIFIED
Keyin Number
(‘FNC’ + ‘981 … 9‘ Please see Chapter 12.)
STEP-3 : Key in ”982”
FAVORITE MACRO
P 1 = MACRO 1
(now the LCD is flashing at “P 1” )
STEP-4 : Use “+ 4 ” to move the vernier to “MACRO ?” ,and key in the MACRO number
that “P 1” is going to corresponded (from 1… 50).
FAVORITE MACRO
P 1 = MACRO 12
(for example, key in “1” , “2” , means “P1 = MACRO 12”)
STEP-5 : Use “w -
“ or “ +4 ” to move the vernier , and key in the corresponding
“MACRO” number (from 1… 50).
STEP-6 : Finally move the vernier to “MACRO” , and press “ENTER”.
5-5 How to delete a STEP in a MACRO
STEP-1 :Press ”MACRO” , then ”PROG”
MA---。----
Keyin Number .
STEP-2 :Use number key ‘0… 9’ to select the ”MACRO” number (from 1… 50), then
press ”ENTER”
(for example, MACRO 1 has the following date:
STEP 1 → SCENE 1
STEP 2 → CHASE 1
STEP 3 → SCENE 2
STEP 4 → CHASE 2
STEP 5 → SCENE 3
STEP 6 → CHASE 3
21
CX-5 [EUM-B]
ISO 9001 CERTIFIED
MA-- 1。 -----
ABC
(LCD LINE 2 will reveal the name of “MACRO”. Press ”YES” to overwrite)
STEP-3 :Use number key ”1… 9” to key in the name of the ”MACRO”
MA-- 1。 AB_
Keyin ENGLISH
(Use ”0” (Sel.) KEY to confirm when a character was selected, than key in the following characters
by the same way.)
STEP-4 :Press ”ENTER” when the ”MACRO” is named
MA--- 1。
STEP 1
SC 1 .
(now the vernier is flashing at “STEP 1” )
STEP-5 : Use “w - “ or “ + 4 ” key to move the vernier to the number of “SC 1"
and press “DEL.” , the LED of “YES” , “NO” LED is flashing. Press “YES” to delete.
MA-- 1。 NO,YES
SC
1.
STEP-6 : The date SCENE 1 in CHASE STEP 1 is deleted after “YES” key is pressed.
(for example, move the vernier to the number of “SC _” at CHASE STEP 1 then press “YES”
key to delete SCENE 1 from CHASE STEP 1 .)
STEP-7 : use “w -
“ or “ + 4 ” key to move the vernier to revise MACRO STEP .
MA--- 1。 STEP 5
CH 3 .
(for example, use “w - “ or “ + 4 ” to increase up to MACRO STEP 5)
STEP-8 : Make sure the vernier has been moved to very end of LCD Line 2 , press “ENTER”
to store the date :
MACRO
STEP 1
STEP 2
STEP 3
STEP 4
STEP 5
1
→
→
→
→
→
: (There are 5 STEP)
CHASE 1 ( SCENE 1 is deleted and replaced by CHASE 1)
SCENE 2
CHASE 2
SCENE 3
CHASE 3
22
CX-5 [EUM-B]
ISO 9001 CERTIFIED
5-6 How to insert a STEP to a MACRO
STEP-1 :Press ”MACRO” then ”PROG”
MA---。----
Keyin Number .
STEP-2 :Use number key ‘0… 9’ to select the ”CHASE” number (from 1… 50),then
press ”ENTER” (for example, the CHASE 2 has the following data:
STEP 1 → SCENE 3
STEP 2 → SCENE 2
STEP 3 → CHASE 2
STEP 4 → SCENE 1
MA-- 2。 -----
DEF
(LCD LINE 2 will reveal the name of the “MACRO”,press ”YES” to overwite)
STEP-3 :Use number key ”1… 9” to key in the name of the ”MACRO”
MA-- 2。 DE_
Keyin ENGLISH
(Use ”0” (Sel.) KEY to confirm when a character was selected, than key in the following characters
by the same way.)
STEP-4 :Press ”ENTER” when the ”MACRO” is named
MA--- 2。 STEP 1
SC 3.
(now the vernier is flashing at “STEP 1” )
STEP-5 : Use “w - “ or “ + 4 ” to move the vernier to the number of “SC 2”,
MA--- 2。 STEP 2
SC 2 .
STEP-6 : Press “CHASE” ,and key in“3” , then key in the CHASE number (from 1… 50) ; and
press “INS.” ., the LED of “YES” , “NO” is flashing, press “YES”
MA-- 2。 NO,YES
CH 3 .
23
CX-5 [EUM-B]
ISO 9001 CERTIFIED
STEP-7 : Use “w - “ or “ + 4 ” to move the vernier to increase the MACRO STEP .
MA-- 2。 STEP 5
SC 1 .
(for example, use “w - “ or “ + 4 ” to increase up to MACRO STEP 5)
STEP-8 : Make sure the vernier has been moved to “SC 1”, press “ENTER” to store the data :
MACRO 2 : (There are 5 STEP)
STEP 1 → SCENE 3
STEP 2 → CHASE 3 (The SCENE 10 is inserted to STEP 3)
STEP 3 → SCENE 2
STEP 4 → CHASE 2
STEP 5 → SCENE 1
24
CX-5 [EUM-B]
ISO 9001 CERTIFIED
Chapter 6 LEARN
6-1 How to edit and store a LEARN
STEP-1 :Press ”LEARN” then ”PROG”
LN---。-----
Keyin Number .
STEP-2 :Use number key ‘0… 9’to select ”LEARN” number (from 1… 50),then
press ”ENTER”
LN-- 1。 -----
EMPTY CHASE
(LCD LINE 2 will reveal the name of the“LEARN” or EMPTY CHASE,
Press ”YES” to overwrite the CHASE)
STEP-3 :Key in the name of the ”LEARN” by number key ”1… 9”
LN-- 1。 AB_
Keyin ENGLISH
(Use ”0” (Sel.) KEY to confirm when a character was selected, than key in the following characters
by the same way.)
STEP-4 :Press ”ENTER” when the ”MACRO” is named
LN-- 1。 AB
MAPING CHASE 0
(now the vernier is flashing at the “MAPING CHASE 0” of the LCD)
STEP-5 :: Key in the “MAPING CHASE” number by number key “0… 9” and press “ENTER”
LN-- 1 . AB
MAPING CHASE 2
(for example, press “MAPING CHASE 2” means “LEARN 1” is corresponded to “CHASE
2”)
If the CHASE 2 has the followig date :
STEP 1 → SCENE 4 ; CHASE SPEED 0.5 SCE ; Xfader SPEED 1.0 SEC
25
CX-5 [EUM-B]
ISO 9001 CERTIFIED
STEP 2
STEP 3
STEP 4
STEP 5
→
→
→
→
SCENE 3 ; CHASE SPEED
SCENE 10 ; CHASE SPEED
SCENE 2 ; CHASE SPEED
SCENE 1 ; CHASE SPEED
1.0 SCE
2.0 SCE
3.0 SCE
5.0 SCE
; Xfader SPEED 0.5 SEC
; Xfader SPEED 1.5 SEC
; Xfader SPEED 2.5 SEC
; Xfader SPEED 3.0 SEC
STEP-6 : The “GO” LED is flashing and please press “GO”
STEP-7 : The LCD will reveal in Line 1 about how many SCENE STEP is included in “LEARN
1”and how many STEP and the aggregate time in Line 2 (from 0.1… 25.4 second)
LN 1 ------à 05 STEP
STEP 1 = 2.0 Sec
STEP-8 : Press “GO” , Chase SPEED = 2.0 SECOND is stored into STEP 1 (SCENE 4)
STEP-9 : Press “GO” to create the CHASE SPEED of the other sets.
6-2
How to load a LEARN
STEP-1 :Press ”LEARN” , and key in the ”LEARN” number (from 1… 50)
LEARN
1
‘GO’
AA
(LCD LINE2 will reveal the name of the ”LEARN”)
STEP-2 :Press ”GO” to load ”LEARN 1”
6-3 How to correspond
LEARN 1…50 to "P1…P12" (HOT KEY)
STEP-1 : Press ”LEARN”,and make sure you are in ”LEARN“
STEP-2 : Press ”FNC”
FNCTION
Keyin Number
26
CX-5 [EUM-B]
ISO 9001 CERTIFIED
( 'FNC' + '981… 9' Please read Chapter 12)
STEP-3 : Press number ”2”
" FAVORITE LEARN "
P1
=LEARN 1
(now the vernier is flashing at “P 1” )
STEP-4 : Use “ + 4 ” to move the vernier to “LEARN ? ” ,and key in the “LEARN” (from
1… 50) which is going to corresponded to “P 1”
(now the vernier is flashing at “P 1” )
6-4
.How
to load a LEARN by ”P1… P12”(HOT KEY)
" FAVORITE LEARN "
P1
=LEARN 1
STEP-1 : Press ”LEARN”,and make sure you are in ”LEARN“
STEP-2 : Press ”FNC.”
FUNCTION
KEYIN NUMBER
(‘FNC’ + ‘ 981..9‘ Please read Chapter 12.)
STEP-3 : Press number ”2”
" FAVORITE LEARN "
P 1
=LEARN 1
(now the vernier is flashing at “P 1” )
STEP-4 : Use “ + 4 ” to move the vernier to “LEARN 1” ,and key in the “LEARN” (from
1… 50) which is going to corresponded to “P 1”
" FAVORITE LEARN "
P1
=LEARN 12
27
CX-5 [EUM-B]
ISO 9001 CERTIFIED
(for example, key in “1” , “2” means “P1 = LEARN 12”)
STEP-5 : Use “w - “ or “ + 4 ” to move the vernier to corresponding “LEARN” step by
step.
STEP-6 : Finally move the vernier to “LEARN” , and press “ENTER” to finish.
6-5 How to set Xfader SPEED in a LEARN
STEP-1 : Press ”FNC.”
FUNCTION
KEYIN Number
(‘FNC’ + ‘ 981 … 9 ‘ Please read Chapter 12)
STEP-2 : Press number ”3”
LEARN Xfader <
>
XFD SPD = 0.2 SEC ‘
STEP-3 : Press ” w - “ o r “ + 4” , L C D w i l l r e v e a l “XFD SPD = 0.2 SEC” or
“XFD SPD = CHS SPD”
STEP-4 : Press ”ENTER” to finish the setting of LEARN Xfader.
(XFD SPD = 0.2 SEC means Xfadre SPEED = 0.2 SECOND
XFD SPD = CHS PSD means Xfadre SPEED =Chase SPEED)
28
CX-5 [EUM-B]
ISO 9001 CERTIFIED
Chapter 7. BLACK、FINE
BLACK :
to stop the ouput of ”LAMP1… LAMP12” temporarily until the ”BLACK” key is off
FINE :
To adjust in a limited range while setting a Scene or operating a main lamp.
29
CX-5 [EUM-B]
ISO 9001 CERTIFIED
Chapter 8. How to select the start address
(START ADDRESS = 1)
Lite-Puter
LITE PUTER SCAN
(START ADDRESS = 43)
GENI
NIMBUS-2
(START ADDRESS = 71)
SHOE PRO
CYBERSCAN
(START ADDRESS = 15)
HIGH END
TRACKSPOT
DMX SIGNAL
MARTIN
ROBOSCAN 1020
DMX SIGNAL
Lite Puter
CX-5
(START ADDRESS = 85)
CLAY PAKY
SUPERSCAN
(START ADDRESS = 29)
(START ADDRESS = 57)
B+K
VARYTEC
(START ADDRESS = 9)
JB
VARYSCAN1
ACME
INFLECTION
CX-5 can control different scanner at the same time, please set the
correct start address for every scanner.
30
CX-5 [EUM-B]
ISO 9001 CERTIFIED
Chapter 9.
9-1
MIDI
Introduction of MIDI
“MIDI” is an abbreviation for “Music Instrument Digital Interface”. MIDI interface will carry out a
string of digital code while users play the keyboard.
Basic MIDI format include :
【CHANNEL】 (For different kind of musical instrument)
【NOTE】
(From 0 to 127)
【VELOCITY】 (From 0 to 127)
The function “MIDI IN” of CX-5 can call out the 24 data saved in “SCENE” according to the
first two data-【CHANNEL】and【NOTE】.
MIDI interface can send out 16 different kinds of musical effect by installing different value on
CHANNEL (1-16). As a result of that, the MIDI-CHANNEL in CX-5 has to be corresponding
to the CHANNEL of MIDI interface, then CX-5 can receive the data which MIDI interface
sends out correctly.
【NOTE】can send 128 different kinds of digital code to CX-5. CX-5 would divide the 128 note
into 24 team of MIDI MEMORY, and each one of that represents a “SCENE”.
31
CX-5 [EUM-B]
ISO 9001 CERTIFIED
CORRESPONDING TABLE of MIDI NOTE NUMBER & MIDI MEMORY IN CX-5
Midi Note Number
CX-5 MIDI MEMORY
SCENE NO.
0, 24, 48, 72, 96, 122
=
1
1-306 any one
1, 25, 49, 73, 97, 123
=
2
1-306 any one
2, 26, 50, 74, 98, 124
=
3
1-306 any one
3, 27, 51, 75, 99, 125
=
4
1-306 any one
4, 28, 52, 76, 100, 126
=
5
1-306 any one
5, 29, 53, 77, 101, 127
=
6
1-306 any one
6, 30, 54, 78, 102,
=
7
1-306 any one
:
:
:
:
:
:
:
:
:
21, 45, 69, 93, 119
=
22
1-306 any one
22, 46, 70, 94, 120
=
23
1-306 any one
23, 47, 71, 95, 121
=
24
1-306 any one
9-2 Set up MIDI channel of CX-5
STEP-1 Check the value of CHANNEL of MIDI interface.
STEP-2 Press the button “FNC”
FUNCTION
Keyin Number
STEP-3 Press the button “986” and make sure you are at MIDI CHANNEL SETTING of
CX-5
MIDI CH. SETTING
MIDI CHANNEL=1
STEP-4 Press the buttons “w–“ and “+ 4” that are flashing at this time to change the value of
“MIDI CHANNEL”
MIDI CH. SETTING
“
+>”once.
MIDI CHANNEL = 2
In this case, the user has pressed the button
32
CX-5 [EUM-B]
ISO 9001 CERTIFIED
STEP-5 When “LCD” displays the value of MIDI CHANNEL & KEYBOARD OF MIDI is
the same, press the button “ENTER” and complete the setting of MIDI CHANNEL.
9-3. How to store 24 different “SCENE” in MIDI memory.
STEP-1 Please press the button “FNC” and make sure you are at MIDI MEMORY.
FUNCTION
Keyin
Number
STEP-2 Press the button “985” and make sure you are at MIDI MEMORY.
FAVORITE MIDI
MEM 1 = SCENE
STEP-3
”MEM 1” means MIDI
MEMORY #1
Press the button “w–“ and “+4” to move the cursor to “=SCENE”, then enter a
number (1~306) to number SCENE.
FAVORITE MIDI
MEM 1=SCENE 1
STEP-4 Use the button “w–“ and “+ 4” to enter SCENE number corresponding to MIDI
MEMORY one by one, then press the button “ENTER” to save the data in memory.
33
CX-5 [EUM-B]
ISO 9001 CERTIFIED
Chapter 10.
How to call out pattern built in the program
10-1 Explanation of the pattern built in the program
(1) There are 3 different pattern (circle. Vertical. line. horizontal line) and four pattern combinations
(V2.X edition) built in CX-5.
(2) Users can preview pattern built in the program by press “FNC” + “984”.
(3) In the function “Preview Of Pattern Built In The Program”, users can select 4 different kinds of
pattern combinations by keying in number “1~4”.
(4) After the pattern has been decided, users can move the control stick whose location represents
the center of the pattern.
(5) Users can change the radius of the movement of the pattern by move “MASTER”.
(6) Users can change the speed of the movement of the pattern by move “CHASS SPEED VR”.
(7) Table of 4 pattern combination
PATTERN 1
PATTERN 2
PATTERN 3
PATTERN 4
Circle
vertical line
horizontal line
circle
LAMP 2
Circle
vertical line
horizontal line
vertical line
LAMP 3
Circle
vertical line
horizontal line
horizontal line
LAMP 4
Circle
vertical line
horizontal line
circle
LAMP 5
Circle
vertical line
horizontal line
vertical line
LAMP 6
Circle
vertical line
horizontal line
horizontal line
LAMP 7
Circle
vertical line
horizontal line
circle
LAMP 8
Circle
vertical line
horizontal line
vertical line
LAMP 9
Circle
vertical line
horizontal line
horizontal line
LAMP 10
Circle
vertical line
horizontal line
circle
LAMP 11
Circle
vertical line
horizontal line
vertical line
LAMP 12
Circle
vertical line
horizontal line
horizontal line
LAMP 1
(8) The 12 lamps must be the same type and manufactured by the same manufacturer when
running the above function.
34
CX-5 [EUM-B]
ISO 9001 CERTIFIED
10-2 Preview the pattern built in the program, and save it
to any one of SCENE 301~306
The six data buffer, SCENE 301~306, are designed specially for the pattern built in the program.
Users can set up the “pattern”、”radius” and “speed” wanted under the function “Preview The
Pattern Built In The Program”, then press the button ”PROG” to save the data into any one of
“SCENE 301~306”.
STEP-1 Press the button “FNC” and key in “984”.
GRAPHIC FUNCTION
GRAPHIC DISABLE
STEP-2 Press the buttons “w -“ & “ +4 ” and make the second line on LCD show
“GRAPHIC ENABLE”
GRAPHIC FUNCTION
GRAPHIC ENABLE
STEP-3 Then press “ENTER” and enter the function “Preview the pattern built in the program”
GRAPHIC FUNCTION
GRAPHIC MODE ←
=1 “GR
GRAPHIC MODE =1”
means that you have selected a pattern
combination (LAMP1~12 are circles)
STEP-4 Use “C H1 ~CH12” VR change the pattern of intelligent light.
STEP-5 Move “MASTER” VR & “CHASE SPEED” VR to the proper state by moving the
joystick.
STEP-6 Press the button “PROG”, then the LCD will show as below.
GRAPHIC FUNCTION
PROGRAM SC 301
“SC 301” means “SCENE 301”.
STEP-7 Users can select 6 different SCENE memories “SCENE 301~SCENE 306” by pressing
“w -” & “+ 4“.
35
CX-5 [EUM-B]
ISO 9001 CERTIFIED
GRAPHIC FUNCTION
PROGRAM SC 303
STEP-8
Users have pressed “ + 4”, so the SCENE
memories change to SCENE 303.
Pressing “ENTER” when all the “pattern”、the “center” and the “speed” are decided,
then the data of the pattern will be saved in SCENE 303.
(SCENE 301~SCENE 306 cannot control different types of scanners at one time.)
10-3 Call out the pattern built in the program by the
use of number buttons under the function SCENE”
STEP-1
After saving the pattern built in the program in SCENE 301~ 306, users can press the
button “SCENE” and enter the function “SCENE”.
STEP-2 Press “3”、“0”、“1” and “GO” to call out the pattern saved in SCENE 301.
STEP-3 Press “3”、“0”、“6” and “GO” to call out the pattern saved in SCENE 3 0 6 .
10-4 Call out the pattern built in the program by the use
of hot key “P1~P12” under the function “SCENE”
STEP-1 Press “SCENE” to enter the function “SCENE” .
STEP-2 Press “FNC” + “982” to enter the edit model “FAVORITE SCENE”.
FAVORITE SCENE
P1 = SCENE
STEP-3 Set up P1~P12 according to the description in Chapter 2-6 and save them in the
memory.
P1=SCENE 306
P2=SCENE 305
P3=SCENE 304
P4=SCENE 1
P5=SCENE 302
:
36
CX-5 [EUM-B]
ISO 9001 CERTIFIED
STEP-4 Press the key “A” and enter “SCENE RUN MODE” ,then users can call out the data
show in STEP-3 by using P1~P12.
37
CX-5 [EUM-B]
ISO 9001 CERTIFIED
Chapter 11. Main Lamp Setting
When users enter the function “CHASE”、“MACRO”、“LEARN”, all the lamps will be
controlled by the program. But if users press “FNC” + “987” and enter the function “MAIN
LAMP SETTING”, they can choose a main lamp “LAMP 1… .12” by using
“w -” & “+ 4“.
After the main lamp have selected, the main lamp won’t change the output as the program changes
with running of “CHASE”、“MACRO”、“LEARN”, but users can change its output and position
by controlling of the joystick controller VR.
11-1 How to setting main lamp
STEP-1 Press “FNC” + “987” .
SELECT MAIN LAMP
MAIN LAMP = OFF
Means that LAMP1 ~ LAMP12 all are
controlled by program
STEP-2 Use “w -” & “+ 4“. Assign main lamp.
SELECT MAIN LAMP
MAIN LAMP = 1
MAIN LAMP =1
Means press “ + 4 “
STEP-3 After make sure the MAIN LAMP, press “ENTER“. LAMP 1 will be assigned
"MAIN LAMP"
38
CX-5 [EUM-B]
ISO 9001 CERTIFIED
Chapter 12 Foresee of FNC Key
“FNC” + “981”
→ The function to set up the manufacturers and types of scanner.
“FNC” + “982”
→ The setting up of P1… ..P12 (HOT KEY) is as below:
Under “SCENE”: “P1...P12” can correspond to any data in
“SCENE1… 306”
Under “CHASE”: “P1… P12” can correspond to any data in
“CHASE1… 50”
Under “MACRO”: “P1....P12” can correspond to any data in
"MACRO1… 50”
Under “LEARN”: “P1… .P12” can correspond to any data in
“LEARN1… 50”
“FNC” + “983” → Set upXfader SPEED of the function “LEARN” as 0.2 SECOND or
CHASE SPEED.
“FNC” + “984” → Use “w - ” & “ + 4“ to select 4 different kinds of pattern.
“FNC” + “985” → Set up 24 sets of MIDI MEMORY ( please refer to Chapter 9-3 )
(1) Each of the 128 different MIDI NOTE NUMBER is correspond to
24 different sets of MIDI MEMORY
(please refer to Chapter 9-1 –Corresponding Table of MIDI
NOTE NUMBER & MIDI MEMORY In CX-5).
(2) Each set of MIDI MEMORY can correspond to any one of
SCENE 1… 306”.
(3) After MIDI MEMORY are set as SCENE 1~306, users can call out
24 different SCENE by MIDI KEY.
“FNC” + “986” → Set up MIDI CHANNEL of CX-5.(please refer to Chapter9-2)
(1) Outside MIDI interface can set up 16 different CHANNEL (1~16).
(2) The value of CHANNEL inside CX-5 has to correspond to thoseof the
MIDI interface , so that CX-5 can receive the MIDI signal from
MIDI interface.
39
CX-5 [EUM-B]
ISO 9001 CERTIFIED
“FNC” + “987” → Set up MAIN LAMP of CX-5 (please refer to Chapter 11).
Users can select one of “MAIN LAMP 1… 12” as MAIN LAMP or
“MAIN LAMP OFF” by pressing “w - ” & ” + 4“.
“FNC” + ”988” → For user define the channel of Pan and Tile.
“FNC” + ”989” → For selecting “chase control by program” or Manual override.
STEP-1 : Press “FNC”+”989”
CHASE CONTROLER
CTL. BY PROGRAM
STEP-2 : Press ”ENTER”, it means chase controlled by program.
STEP-3 : If you want manual override, use “w-“ or “ +4” to
select
CHASE CONTROLER
CTL. BY USER
“FNC “ + “971 “
→ For Chase Steps Preview. Select the chase you want to preview and
“FNC “ + “972 “
press ”GO” to go to next step.
→ For selecting the moving speed under CHASE mode. It can be
controlled by program or user.
STEP-1 : Press"FNC" + "972"
CHASE SPD. CTL.
CTL. BY SPEED VR
STEP-2 : Press “ENTER”, user can control chase time by adjusting VR.
STEP-3 : If you want it be controlled by program, use “w-“ or “+4” to
select
CHASE SPD. CTL.
CTL. BY PROGRAM
STEP-4 : Press “ENTER” to confirm.
40
CX-5 [EUM-B]
ISO 9001 CERTIFIED
Chapter 13 Appendix
Appendix-1:
How to make a " SCENE "
STEP-1: Press the "SECNE" key to be in the "SCENE MODE" situation.
STEP-2: To make sure the led which is beside "A" function key is "OFF" situation
(Led "OFF" means into "EDIT", the user can control 1… 12 intelligent lights through
P1… P12.)
STEP-3: Press any key from P1… P12, and choose the intelligent lights you want to control.)
STEP-4: Push the CH1 VR to the top first, then pull it down to the bottom, and move it to the
right position to change the channel corresponding with the CH1 VR. The data in the
other channels will be unchanged.)
STEP-5: Push the crank handle to right first, then push it to left, and move it to the right position to
change the data of PAN. The data in the other channel will be unchanged.
STEP-6: Push the crank handle to the top first, then pull it down to the bottom, and move it to the
right position to change the data of TILT. The data in the other channels will be
unchanged.)
STEP-7: You can change the data of the channels corresponding with CH1 VR by step1… step6,
the data of the other channels which have not been operated by the steps of pushing VR
will not change with the changed position of VR.
STEP-8: The data of selected intelligent lights can be changed by pushing VR just like the
step4… step6, then you can use "PROG" key to save the output data in "SCENE"
memories.
41
CX-5 [EUM-B]
ISO 9001 CERTIFIED
Appendix-2:
Call out the saved scene to amend any of the channels.
STEP-1: Press the "SCENE" key to be in the " SCENE MODE ".
Set the channels of 1… 12 intelligent lights as follows:
CH1 VR = COLOR
CH2 VR = GOBO
STEP-2: Press the SCENE NO.(range 1… 300) via digital "0… 9", then press
"ENTER" to call out the scene you want.
Example: the data of the called scene is:
Intelligent light 1
the red round.
Intelligent light 2
the red round.
Intelligent light 3
the red round.
STEP-3: Press P1, P2, P3 to light their leds.
STEP-4: Push CH1 VR to choose the color you want. If you want to change round
to other shapes, please push CH2 VR.
STEP-5: Use "PROG" key to save the output data in "SCENE" memories.
Appendix-3:
Something important you have to know
when you use P1…P12 to choose the light you want to control.
After pressing P1… P12 to choose the intelligent lights you want to control, you must repush the VR
up and down to change its data.
42
CX-5 [EUM-B]