1
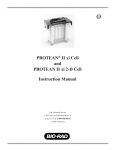
MOD
E
FRA L 2128
CTIO
N CO
L
LEC
TOR
Thre
sh
Next old
tu
Drain be 2
in
ADV g
COL
L
STO
P
7
4
1
HELP
CE
8
5
2
0
9
6
3
.
MODEL 2128
FRACTION COLLECTOR
INSTRUCTION MANUAL
Catalog Numbers
731-8123
731-8124
Table of Contents
TABLE OF CONTENTS
Safety
...................................................................................................................................................
3
Section 1.0
1.1
1.2
1.3
1.4
1.5
Introduction ....................................................................................................................
Overview ..........................................................................................................................
Features ...........................................................................................................................
Unpacking ........................................................................................................................
Physical Description .........................................................................................................
Dispenser Arm Positions ..................................................................................................
Section 2.0
Front and Rear Panel Controls and Connectors ......................................................... 10
Section 3.0 System Configurations and Plumbing .........................................................................
3.1 System Configurations .....................................................................................................
3.1.1 Connection to a Bio-Rad Econo System and Automated Econo System ...........
3.1.2 Connection to Bio-Rad’s Econo Components .....................................................
3.1.3 Connection to Non-Bio-Rad Components ...........................................................
3.2 Plumbing ..........................................................................................................................
4
4
5
5
7
8
14
14
15
16
17
19
Section 4.0
Stand-Alone Operation .................................................................................................. 22
Section 5.0
Operation with the Econo System and Automated Econo System ........................... 34
Section 6.0 Maintenance and Troubleshooting ............................................................................... 38
6.1 Maintenance ..................................................................................................................... 38
6.2 Troubleshooting ................................................................................................................ 39
Appendix A
Appendix B
B.1
B.2
Appendix C
Appendix D
Appendix E
Appendix F
Appendix G
Tube Rack Options .........................................................................................................
Delay Function ................................................................................................................
Determining Delay ............................................................................................................
Examples of Delay Function .............................................................................................
Bubble Filter Time ..........................................................................................................
Connection to Bio-Rad's HPLC System .......................................................................
Rear Panel Connector Information ...............................................................................
Specifications .................................................................................................................
Warranty and Ordering Information .............................................................................
40
42
42
43
46
47
48
50
52
1
Table of Contents
LIST OF FIGURES
1.
Model 2128 Fraction Collector, shown with Rack #1 .................................................................
2.
The Fittings Kit ...........................................................................................................................
3.
Physical Features of the Fraction Collector ...............................................................................
4.
Dispenser Arm Positions ............................................................................................................
5.
Connecting the Fraction Collector to an Econo System .............................................................
6.
Connecting the Fraction Collector to Econo Components .........................................................
7.
Connecting the Fraction Collector to Components other than Bio-Rad’s ...................................
8.
Stand-alone Mode Menu Tree ...................................................................................................
9.
Econo Mode Menu Tree .............................................................................................................
10.
Cleaning the Drop Head Window ...............................................................................................
B-1.
Example showing Collect All Method with a Delay of 0.2 Minutes .............................................
LIST OF TABLES
1.
Front Panel Controls ..................................................................................................................
2.
Rear Panel Connectors ..............................................................................................................
3.
Plumbing a Fraction Collector ....................................................................................................
4.
Plumbing a Fraction Collector with the Optional Diverter Valve .................................................
5.
Stand-alone Operation using the Collect All Method .................................................................
6.
Stand-alone Operation using the Time Windows Collection Method .........................................
7.
Stand-alone Operation using the Peak Collection by Threshold Detection Method ..................
8.
Stand-alone Operation using the Peak Collection by Threshold Detection
with Time Windows Method .......................................................................................................
9.
Operation of the Fraction Collector from the Econo System ......................................................
4
6
7
9
15
16
17
33
37
38
43
10
12
19
20
23
25
27
30
35
2
Safety
SAFETY
!
Caution/Warning
Disconnect power to the Fraction Collector before servicing. No user-serviceable parts
are inside. Refer servicing to Bio-Rad service personnel.
This instrument is intended for laboratory use only.
This product conforms to the "Class A" standards for electromagnetic emissions intended for laboratory
equipment applications. It is possible that emissions from this product may interfere with some sensitive
appliances when placed nearby or in the same circuit as those appliances. The user should be aware of this
potential and take appropriate measures to avoid interference.
This Bio-Rad Model 2128 Fraction Collector is designed and certified to meet I.E.C. 1010* safety standards,
and it meets the compliance requirements of CISPR 11A** for conducted and radiated electromagnetic
emission. Certified products are safe to use when operated in accordance with the instruction manual. This
safety certification does not extend to other chromatography equipment or accessories not I.E.C. 1010
certified, even when connected to this Fraction Collector.
This instrument should not be modified or altered in any way. Alteration of this instrument will void the
manufacturer’s warranty, void the I.E.C. 1010 certification, and create a potential safety hazard for the user.
Bio-Rad is not responsible for any injury or damage caused by the use of this instrument for purposes other
than for which it is intended or by modifications of the instrument not performed by Bio-Rad or an authorized
agent.
Avoid contact with dispenser arm slot or diverter valve while unit is in operation. Diverter valve shall be
handled only while installing, removing or plumbing valve according to procedures outlined in the instruction
manual. Otherwise, inaccurate dispenser arm positioning or interruption of programmed collector method may
result.
*I.E.C. 1010 is an internationally accepted electrical safety standard for laboratory instruments.
**CISPR 11A is an internationally accepted standard for conducted and radiated electromagnetic emission.
3
Introduction
1.0 INTRODUCTION
1.1 OVERVIEW
The Model 2128 Fraction Collector is used for automatic fraction collection in a variety of laboratory applications. It may be used as a stand-alone unit or as part of Bio-Rad’s Econo System and HPLC chromatography
instruments.
The Model 2128 Fraction Collector is microprocessor controlled, with easy-to-use front panel controls and a
menu-driven software interface for method setup. Instrument operation may be initiated from the front panel
or by command from an external source. When not in use, the tube rack may be removed and the dispenser
arm rotated to its storage position to minimize space requirements.
MOD
E
FRA L 2128
CTIO
N CO
L
LEC
TOR
Thre
sh
Next old
tu
Drain be 2
in
ADV g
COL
L
STO
P
7
4
1
HELP
CE
8
5
2
0
9
6
3
.
Figure 1. Model 2128 Fraction Collector, shown with Rack #1
4
Introduction
1.2 FEATURES
The Model 2128 Fraction Collector provides a number of features, including the following:
•
Collection into microplates, microtubes, test tubes (12 mm to 18 mm in diameter and any height up to
180 mm), and bottles of any size
•
Collection by drop count or time; collection by volume when under Econo System control
•
Collection over the entire run, using Time Windows, Peak Detection, or combinations of Time Windows and Peak Detection
•
Optional diverter valve for flow diversion and to minimize spillage during tube changes
•
Menu-driven software for ease of programming
•
Ability to start/stop an external pump and chart recorder
•
Accepts a range of UV signal inputs for peak collection
•
Rotating arm and removable racks minimize space requirements
•
Removable drain trough for easy cleaning
•
On-screen help function
1.3 UNPACKING
When you receive the Fraction Collector, carefully inspect the containers for any damage which may have
occurred in shipping. Severe damage to a container may indicate damage to its contents. If you suspect
damage to the contents may have occurred, immediately file a claim with the carrier in accordance with their
instructions before contacting Bio-Rad Laboratories.
The Fraction Collector and the standard tube rack (Rack #1) are shipped in separate cartons. Open the
shipping cartons.
!
Caution
Do not lift the Fraction Collector by its dispenser arm!
5
Introduction
Lift the Fraction Collector out of its packing. Do not lift the unit by its dispenser arm. Remove the remaining
contents of each of the boxes and check all of the parts against the supplied packing list. The Model 2128
Fraction Collector is shipped with the following:
•
Fraction Collector unit
•
AC power cord
•
Fittings kit (shown in Figure 2 below)
•
User Manual
•
Tube rack #1 (1)
•
Drain tubing
If any part is missing or damaged, contact Bio-Rad Laboratories immediately.
5
4
2
1
3
Item
Number
1
2
3
4
5
Quantity
1
4
4
1
1
Contents of Fittings Kit
1.5 meters Tefzel® Tubing, 1/16" OD, .020" ID
Fittings, 1/4-28, 1/16" OD
Ferrules, 1/16" OD
Union, Luer to 1/4-28
Combicon connector (separate)
Figure 2. The Fittings Kit
6
Introduction
1.4 PHYSICAL DESCRIPTION
Refer to Figure 3 for the following discussion.
INLET
TUBING
TUBING
GUIDES
MOD
E
FRA L 2128
CTIO
N CO
L
DRAIN
TROUGH
DISPENSER
ARM
LEC
TOR
SOCKET FOR
OPTIONAL
DIVERTER
VALVE
Thre
sh
Next old
tu
Drain be 2
in
ADV g
COL
L
STO
P
7
4
1
HELP
POWER
SWITCH
CE
8
5
2
0
DROP
HEAD
DRAIN
TUBING
9
6
3
.
RACK
POSITIONING
GUIDES
Figure 3. Physical Features of the Fraction Collector
Component
Function
Rack Positioning
Guides
Accurate dispensing requires that the rack be positioned in the rack positioning
guides. The rack is designed so that only the feet on one side can be positioned in
the guides. This ensures that the front of the rack faces forward, and that the rack is
accurately positioned to receive fractions.
Dispenser Arm
Moves the drop head in a serpentine X-Y motion over each of the collection tubes.
The dispenser arm may be rotated 90° using the green tab at its axis.
Drop Former
The drop former is located in the drop head. The drop former accepts 1/4-28 fittings.
7
Introduction
Component
Function
Drop Head
Consists of the drop former, a photo diode cell for drop counting, and a clear glass
tube to protect the photo diode cell from splashes. The inlet tubing is connected to
the drop former, which provides uniform drop size.
Drain Trough
Fluid designated as waste is emptied into the drain trough which drains toward the
back of the unit. Approximately 0.5 meters of 1/4" ID, 3/8" OD, 1/16" wall, Tygon
tubing is provided to direct the flow out of the drain trough.
Inlet Tubing
The tubing which runs from the detector or the diverter valve to the drop former.
1/16" OD, 0.020" ID Tefzel® tubing is supplied with the unit.
Socket for (Optional)
Diverter Valve
A diverter valve may be mounted on the drop head to control the flow of fluid and
to minimize spillage during tube changes. This diverter valve is available as an
option. (Refer to Appendix G for ordering information.)
1.5 DISPENSER ARM POSITIONS
The dispenser arm can be rotated to conserve bench space when the Fraction Collector is not being used.
There are three positions for the dispenser arm, as shown in Figure 4 and discussed below. Rotating the
dispenser arm requires first lifting the green tab at the axis end of the arm. Note: Be sure the Fraction
Collector is turned off before manually moving the arm.
REAR OF UNIT
STORAGE
REAR OF UNIT
STOW
REAR OF UNIT
PARK
Figure 4. Dispenser Arm Positions
8
Introduction
•
Storage position: The Fraction Collector is shipped with the dispenser arm in its Storage position. To
•
Stow position: The arm must be in Stow position (at the front of the unit) before it can be rotated for
conserve bench space when the Fraction Collector is not being used, the dispenser arm may be
returned to the Storage position from the Stow position. The Storage position must be used when
shipping the unit.
storage. If power is off, the arm may be moved manually to this position. Alternatively, Stow may be
selected from the Mode menu.
Before rotating the arm between the Storage and Stow positions, the Fraction Collector must be
turned off. To rotate the arm, lift and hold the green tab at the arm’s axis end and then rotate the
other end of the arm.
•
Park position: Always ensure that the arm is in the Park position (at the rear of the unit) before
turning power on. The arm must be moved manually with the power off. The arm will initialize itself
over its X-Y motion when power is turned on. Some noise will occur during this operation. After each
run, the dispenser arm automatically returns to its Park position.
If the arm is ever moved accidentally, turn the unit off and manually move the arm to the Park position before
turning the power back on. Turning the unit on with the arm out of the Park position will cause some noise to
occur as the arm attempts to initialize. This is not detrimental to the Fraction Collector.
When a collection method is programmed and the READY soft key is pressed, the arm will move to a position
over the drain trough nearest to the start tube. (If the optional diverter valve is installed, the drop head moves
over the start tube.) Pressing RUN then starts the collection method.
9
Front and Rear Panel Controls and Connectors
2.0 FRONT AND REAR PANEL CONTROLS AND CONNECTORS
Table 1.
Front Panel Controls
DRAIN TROUGH
MODEL 2128
FRACTION COLLECTOR
STATUS AND CONTROL
PARAMETERS (3 LINES)
Threshold
Next tube 2
Draining
ADV
COLL
MENU SELECTIONS
STOP
SOFT KEYS
(FOR MENU SELECTION)
CURSOR CONTROL
KEYS
HELP
7
8
9
4
5
6
1
2
3
CE
0
.
NUMERIC
KEYPAD
DECIMAL KEY
CLEAR ENTRY KEY
HELP KEY
POWER ON/OFF SWITCH
Key
Description
Cursor Control keys: Allow you to move the cursor on the LCD up, down, left or right.
Soft keys: These four keys are located directly below the LCD display. The function
each key executes depends on the menu selection displayed above it. Menu selections
change depending on where you are in the menu hierarchy.
10
Front and Rear Panel Controls
Table 1. (continued)
Front Panel Controls
Key
HELP
Description
Help key: Pressing this key at any time will display information on how to use the
unit. Use the NEXT and LAST soft keys to scroll through the Help screens.
CE
Clear Entry key: To clear a cursor field.
.
Decimal key: To enter a decimal value.
11
Front and Rear Panel Controls and Connectors
Table 2.
Rear Panel Connectors
REC
I/O
10mV
100mV
1V
10mV
100mV
1V
REC
I/O
ANALOG IN
ANALOG GND
ANALOG IN
ANALOG GND
Connector
10mV
100mV
1V
Description
Analog Input Range Select switch: When the Fraction Collector is connected to an
external UV monitor, this switch setting must correspond to the UV monitor’s output.
I/O
I/O connector: This 15-pin D connector is used for connecting the following:
• A Model ES-1 Econo System Controller or a Model EP-1 Econo Pump. The Econo
System Controller or Econo Pump controls the Fraction Collector.
• External pump. The Fraction Collector starts and stops the pump. (The pump
must have compatible control circuitry logic. Refer to Appendix E.)
12
Front and Rear Panel Controls and Connectors
Table 2. (continued)
Rear Panel Connectors
Connector
Description
REC
REC connector: This 8-pin mini-DIN connector is for connecting the following:
• A Model ES-1 Econo System Controller. The Econo System controls the Fraction
Collector’s diverter valve (optional).
• A stand-alone chart recorder. The Fraction Collector controls the chart recorder.
(The chart recorder must have compatible control circuitry logic. Refer to Appendix E.)
ANALOG IN
ANALOG GND
Combicon connector: For connecting a UV monitor. This allows the Fraction
Collector to accept signals for Peak Detection by Threshold. (Refer to in Chapter 4.)
13
System Configurations and Plumbing
3.0 SYSTEM CONFIGURATIONS AND PLUMBING
3.1 SYSTEM CONFIGURATIONS
The Model 2128 Fraction Collector can be operated in either of the following configurations:
•
With a Bio-Rad Econo System, in which the Econo System controls the operation of the Fraction
Collector. Fraction size (in ml) is set on the Econo Pump. This configuration is discussed in
section 3.1.1.
•
With Bio-Rad Econo components, such as the Model EP-1 Econo Pump, a Model EM-1 Econo UV
Monitor and/or a Model 1325, 1326, or 1327 Econo Recorder. When connected to the Model EP-1
Econo Pump, the pump controls the Fraction collector. If the Econo Pump is not used, the Fraction
Collector provides complete control of fraction collection. This configuration is discussed in
section 3.1.2.
•
With non-Bio-Rad components, such as a pump, a UV monitor, and/or a chart recorder. The Fraction Collector may be used to start/stop a pump, and it provides complete control of fraction collection. This configuration is discussed in section 3.1.3.
Note: Before proceeding, make sure power is turned off to each component to be connected. Also, be
sure to use a grounded, surge protected outlet when plugging in the power cables.
14
System Configurations and Plumbing
3.1.1 Connection to a Bio-Rad Econo System and Automated Econo System
To connect a Model ES-1 Econo System Controller or to a Model EP-1 Econo Pump to the Model 2128
Fraction Collector, use Econo System Cable #15 (15-pin to mini-DIN). If the Fraction Collector’s diverter
valve is to be used, you will also need Econo System Cable #3 (mini-DIN to mini-DIN) for valve control from
the Econo System Controller or Econo Pump. The diverter valve and the cable are purchased separately. In
this configuration, the SV-3 valve must be removed from the Econo System.
ECONO PUMP
CONNECT TO EXTERNAL
ECONO PUMP OR TO
ECONO SYSTEM
CONTROLLER
ECONO SYSTEM CABLE #15
ECONO SYSTEM CABLE #3
USED ONLY WHEN THE
OPTIONAL DIVERTER VALVE
IS MOUNTED ON THE
FRACTION COLLECTOR'S DROP HEAD
Figure 5. Connecting the Fraction Collector to an Econo System
1. Connect the Fraction Collector to the Model ES-1 Econo System Controller using Econo System
Cable #15 (15-pin D to mini-DIN cable).
a. Connect the cable’s 15-pin D connector to the port labeled I/O on the Fraction Collector.
b. Connect the mini-DIN connector to the port labeled
on the Econo System Controller.
2. If the Fraction Collector's diverter valve will be used, connect the Econo System Controller to the
Fraction Collector using Econo System Cable #3 (mini-DIN to mini-DIN cable). (The Econo System’s
Model SV-3 valve must be removed.)
a. Connect the cable’s mini-DIN connector to the REC port on the Fraction Collector.
b. Connect the other mini-DIN connector to the
port on the Econo System Controller.
3. Connect all power cords to available grounded, surge protected outlets.
4. To plumb the Fraction Collector, follow the procedure in section 3.2. Then follow the procedure in
Chapter 5, Operation with the Econo System.
15
System Configurations and Plumbing
3.1.2 Connection to Bio-Rad’s Econo Components
The following configuration shows the Fraction Collector set up with a Model EP-1 Econo Pump, a Model EM1 Econo UV Monitor, and/or a Model 1325, 1326, or 1327 Econo Recorder. This simple isocratic system
allows full use of the Fraction Collector’s advanced programming features. This configuration requires Econo
System Cable #16, Econo System Cable #7, and two bare wires. Note that the Model EP-1 Econo Pump is
not connected to the Fraction Collector. Use the Vt function on the Econo Pump to stop solvent delivery after
the required volume.
ECONO RECORDER
FRACTION
COLLECTOR
CHANNEL 1
ECONO
UV MONITOR
ECONO PUMP
NO CONNECTION
TO FRACTION
COLLECTOR
BARE WIRES
ECONO SYSTEM
CABLE #7
ECONO SYSTEM CABLE #16
Figure 6. Connecting the Fraction Collector to Econo Components
1. Connect the Fraction Collector to the Econo Recorder using Econo System Cable #16 (mini-DIN-toDIN cable).
a. Connect the 8-pin mini-DIN connector to the port labeled REC on the Fraction Collector.
b. Connect the DIN connector to the Channel 1 DIN port on the Econo Recorder.
2. Connect the Econo EM-1 UV Monitor to the Econo Recorder using Econo System Cable #7 (mini-DIN
to breakout cable).
a. Connect the 8-pin mini-DIN connector to the Econo UV Monitor’s recorder port.
b. Connect the positive (+) wire to the Econo Recorder’s channel 1 (+) banana plug socket. Connect
the ground (–) wire to the channel 1 (–) banana plug socket. This provides 0 V to 1 V AUFS.
(Refer to the documentation for the Econo Recorder and the Econo UV Monitor for instructions on
making connections to these units.)
16
System Configurations and Plumbing
3. Connect the Fraction Collector to the Econo EM-1 UV Monitor, via the Econo Recorder.
a. The Fraction Collector’s UV input is connected in parallel to the Econo Recorder. To do this,
connect the bare wires between the Econo Recorder’s channel 1 banana plug’s (+) and (–)
connectors and the Fraction Collector’s male Combicon Analog IN and Analog OUT connector
using the female Combicon connector supplied with the fittings kit, shown in Figure 2.
b. Set the Analog Input Range Select switch to 1 V.
4. Connect the power cord to an available grounded, surge protected outlet.
5. To plumb the Fraction Collector, follow the procedure in section 3.2. Then follow the procedure in
Chapter 4, Stand-Alone Operation.
3.1.3 Connection to non-Bio-Rad Components
To connect the Fraction Collector to a non-Bio-Rad pump, UV monitor, and/or chart recorder, you will need
the Model 2128 Accessory Cable (15-pin to bare wires), Econo System Cable #7 (mini-DIN to bare wires),
and two bare wires. In addition, the pump and chart recorder circuit logic must be Start/closed circuit=ON;
Stop/open circuit=OFF. The UV monitor’s analog output must be 10 mV, 100 mV or 1 V. (Refer to Appendixes E and G for details.)
CHART RECORDER
FRACTION
COLLECTOR
UV MONITOR
PUMP
BARE WIRES
FRACTION COLLECTOR
ACCESSORY CABLE
ECONO SYSTEM CABLE #7
Figure 7. Connecting the Fraction Collector to Components other than Bio-Rad’s
1. Connect the Fraction Collector to the chart recorder using Econo System Cable #7 (mini-DIN-tobreakout cable).
a. Connect the 8-pin mini-DIN connector to the port labeled REC on the Fraction Collector.
b. Connect the appropriate wires at the cable’s breakout end to the chart recorder.
17
System Configurations and Plumbing
2. Connect the Fraction Collector to the pump using the Model 2128 Accessory Cable (15-pin D to
breakout cable).
a. Connect the 15-pin D connector to the port labeled I/O on the Fraction Collector.
b. Connect the appropriate wires at the cable’s breakout end to the pump.
3. Connect the Fraction Collector to the UV monitor using the female Combicon connector provided in
the fittings kit, shown earlier in Figure 2.
a. The UV monitor’s (+) output connects to the Combicon’s Analog IN (pin 1), and the UV monitor’s
(–) connects to the Combicon’s Analog GND (pin 2). Ensure that the wires are securely held in
the Combicon connector by tightening the screws with a small screwdriver.
b. Connect the cable to the Analog In/Analog Gnd connector on the Fraction Collector.
4. If your UV monitor has a selectable range of output settings, we recommend using either the 100 mV
or 1 V settings. The Analog Input Range Select switch on the Fraction Collector must be set to
correspond to the UV monitor output. (The 10 mV setting on the Fraction Collector may be used, but
features such as Peak Detection by Threshold and the Bubble Filter Time function may be more
susceptible to interference from electrical noise.)
5. Refer to the documentation for your particular chart recorder, pump, and UV monitor for completing
the setup of those units.
6. Connect all power cords to an available grounded, surge protected outlet.
7. To plumb the Fraction Collector, follow the procedure in section 3.2. Then follow the procedure in
Chapter 4, Stand-Alone Operation.
18
System Configurations and Plumbing
3.2 PLUMBING
Table 3.
Plumbing a Fraction Collector
43 cm
TUBING
1/4-28
FLAT
BOTTOM
FITTING
MOD
E
FRA L 2128
CTIO
N CO
L
1/4-28
FLAT
BOTTOM
FITTING
LEC
TOR
LUER TO 1/4-28
UNION
Step
1.
Description
To connect the inlet tubing, you will need the following:
• 43 cm length of 1/16" OD, 0.020" ID tubing. (Tefzel® or PTFE tubing is recommended.)
Use tubing that is cleanly cut and not flattened or deformed.
• Two 1/4-28 Flat bottom fittings.
Notes: Keep all tubing lengths as short as possible to reduce the Delay Volume. Refer to
Appendix B for discussion of Delay Volume and Delay Time.
Tubing choice is dependent on the flow rate and pressure characteristics of the pumping system.
For flow rates below 40 ml/min, use the supplied 1/4-28 fittings for 1/16" OD, 0.02 or 0.03 ID
tubing. For higher flow rates, use 1/8" OD, 0.062" ID tubing connected by a 1/4-28 nut and
ferrule (available from most tubing/fitting suppliers).
2.
Thread the tubing through the tubing guides on the dispenser arm.
3.
Attach the 1/4-28 flat bottom fittings to the tubing. One end screws into the top of the dispenser
head, and the other goes to the Luer union which connects to tubing from the column. Refer to
the figures at the top of this table.
4.
Ensure that the dispenser arm is in its Park position before power up.
19
System Configurations and Plumbing
Table 4.
Plumbing a Fraction Collector with the Optional Diverter Valve
LUER TO 1/4-28
UNION
1/4-28
FLAT
BOTTOM
FITTING
1/4-28
FLAT
BOTTOM
FITTING
1/4-28
FLAT
BOTTOM
FITTING
43 cm
WASTE LINE
TUBING
MOD
E
FRA L 2128
CTIO
N CO
L
43 cm
INLET LINE
TUBING
LEC
TOR
LUER TO 1/4-28
UNION
12 cm
TUBING
Step
10-32 NUT
AND
FERRULE
FITTING
Description
1.
Attach the diverter valve to the drop head as follows:
a. Select Stow from the Setup menu to move the dispenser arm to its Stow position. (See
Figure 4.)
b. Turn off power to the unit.
c. Carefully slide the drop head to the end of the dispenser arm.
d. Press down the catch on the side of the drop head and slide off the valve connector’s
protective cover.
e. Gently slide the valve onto the connecting pins until a firm fit is achieved.
2.
To connect the tubing for a Fraction Collector with the diverter valve, you will need the following
lengths of 1/16" OD, 0.020" ID tubing:
• Two sections, each of 43 cm length,
• One section of 12 cm length.
You will also need the following connectors:
• Three 1/4-28 flat bottom fittings,
• Three 10-32 nut and ferrule fittings.
Note: The diverter valve is rated to a maximum pressure of 30 psi. For flow rates greater than
10 ml/min, the following tubing is recommended: 1/16" OD, 0.030" ID Tefzel® tubing.
20
System Configurations and Plumbing
Table 4. (continued)
Plumbing a Fraction Collector with the Optional Diverter Valve
CUTTING DIVERTER VALVE TUBING
1. Slide 10-32 nut onto tubing and cut tubing at a sharp angle
with a razor blade.
Step
3.
Cut the
tubing
2. Slide the ferrule onto the tubing and cut the tubing
perpendicular to the ferrule.
Description
Thread the 43 cm inlet and waste tubing lines through the tubing guides on the dispenser arm.
a. Attach the two 1/4-28 flat bottom fittings to the tubing ends which hang below the axis end of
the dispenser arm.
b. Attach 10-32 nut and ferrule fittings to the other ends. It is recommended that the tubing be cut
at an angle to facilitate sliding through the ferrule. After the ferrule is on, the angle must be cut
to the perpendicular before the fitting can be screwed into the valve.
c. Screw the fittings for the waste line and the inlet line into the diverter valve, as shown in the
previous figure.
4.
To the 12 cm tubing line that connects the drop head to the diverter valve:
a. Attach the remaining 1/4-28 flat bottom fitting to the end that will go into the drop head and
screw it in to the top of the drop head.
b. To the other end, attach the 10-32 fitting, and screw it into that side of the diverter valve which
faces you. Refer to the figures at the beginning of this table.
5.
Before turning on the power, return the drop head to a position over the drain trough and push the
arm to the rear of the machine (Park position). The arm will re-initialize when power is turned on.
21
Stand-alone Operation
4.0 STAND-ALONE OPERATION
Standard operation of the Fraction Collector is in stand-alone mode (STD mode), in which fractions may be
collected based on Time (minutes) or Drops (up to a flow of 5.0 ml/min). In this mode the Model 2128 Fraction Collector is not connected to Bio-Rad’s Econo System or HPLC system. However, it may be connected
to separate components such as a UV monitor, a chart recorder, and, if desired, a pump. There are basically
four different means of collecting fractions:
•
Collect All: Allows you to collect the entire run, without allowing any fluid to run to waste. This is
•
Time Windows Collection: Allows you to specify periods of time (Time Windows) during which frac-
•
Peak Detection by Threshold: Allows you to collect peaks by defining a Threshold value (percent of
full scale) above which fractions will be collected. This method can be used only when the Fraction
Collector is connected to a UV monitor. When the UV signal is below the set Threshold value, fluid
may be diverted to the drain trough or it may be collected in tubes. A slope function is built into the
Threshold function so that double peaks above the set Threshold level are detected and collected
separately. This method is discussed in Table 7.
discussed in Table 5.
tions are to be collected. A simple example of Time Windows is to specify that collection is to begin
after a specified wait period, so that an initial void volume is not collected. The volume prior to that
period will go to the drain trough; the volume after that period will go to fraction collection. A more
advanced example is to specify when collection is to begin and when it is to end. The Model 2128
Fraction Collector lets you define up to 20 different windows. This is discussed in Table 6.
Note: False peaks above a Threshold (such as electrical noise or air bubbles) may be filtered using
the Bubble Filter Time function. See Appendix C for further discussion.
•
Peak Detection by Threshold within Time Windows: Allows you to combine the Peak Detection by
Threshold and the Time Windows methods discussed above. This method can be used only when
the Fraction Collector is connected to a UV monitor. You can program up to 20 different Time
Windows, each with its own Threshold level. This is a useful feature for compensation of baseline
drift. This is discussed in Table 8.
A Delay function is available for all methods of fraction collection in STD mode, except when using
microplates or the Prep-Adapter. For a complete discussion of the Delay function, refer to Appendix B.
Regardless of the type of collection method programmed, the method will end once the End Tube number is
reached. Always ensure that the Start and End Tube numbers are set to allow completion of your collection
method.
Note: Before turning on the power, make sure the arm is in the Park position.
22
Stand-alone Operation
Table 5.
Stand-alone Operation using the Collect All Method
LEGEND
% FULL SCALE
FRACTION SIZE
EQUALS 1 MINUTE
40
EVENT MARKS
35
30
25
20
15
10
5
0
TIME (MIN)
Step
1.
1
Description
Enter the following information into the startup screen:
a) Rack number
b) Start tube number
c) End tube number
d) Fraction size
2
3
4
5
6
7
8
Procedure
The Startup screen is shown below:
Rack # 1
Start # 1
Frac Size
READY EDIT
Collect All
End # 128
1.00 Min
DROP MODE
a. Enter the rack number and press
There are five types of racks, as discussed in Appendix A.
Note that the start number and the end number changes
depending on the rack number selected.
b. Enter the starting tube number and press
The starting and ending tube numbers can be identified by
looking at the numbers on top of the rack. Fractions are
dispensed in a serpentine motion.
c. Enter the ending tube number and press
d. Enter the fraction size in either time or drops:
• Time: Enter the time in minutes. Use the decimal key
to specify times of less than 1 minute.
• Drops: Press the DROP soft key and enter the number
of drops per fraction.
23
Stand-alone Operation
Table 5.
Stand-alone Operation using the Collect All Method
Step
Description
Procedure
2.
Select READY.
Press the READY soft key.
3.
(Optional)
Enter DELAY in time or drops.
For fraction collection to be precisely synchronized with the UV
signal on the chart recorder, enter a Delay Time or Delay Drops.
For discussion of the Delay function, refer to Appendix B.
Note: The Delay must be smaller than the fraction size. The
default Delay value is zero.
4.
Select RUN to start collection.
At any point you may use the following keys:
ADV: To advance to the next tube.
COLL/WASTE: This selection toggles between collect, which
allows you to collect the fluid being dispensed, and waste, which
diverts the fluid to the drain trough.
STOP: To stop the run.
24
Stand-alone Operation
Table 6.
Stand-alone Operation using the Time Windows Collection Method
% FULL SCALE
LEGEND
40
WINDOW #1
35
FRACTION SIZE
IS 1 MINUTE
WINDOW #2
30
EVENT MARKS
25
20
WASTE
15
10
5
0
TIME (MIN)
Step
1.
1
2
Description
Enter the following information
into the startup screen:
a) Rack number
b) Start tube number
c) End tube number
d) Fraction size
3
4
5
6
7
8
Procedure
The Startup screen is shown below:
Rack # 1
Start # 1
Frac Size
READY EDIT
Collect All
End # 128
1.00 Min
DROP MODE
a. Enter the rack number and press
There are five types of racks, as discussed in Appendix A.
Note that the start and end numbers change depending on the
rack number.
b. Enter the starting tube number and press
The starting and ending tube numbers can be identified by
looking at the numbers on top of the rack. Fractions are
dispensed in a serpentine motion.
c. Enter the ending tube number and press
d. Enter the fraction size in either Time or Drops:
• Time: Enter the time in minutes. Use the decimal key to
specify times of less than 1 minute.
• Drops: Press the DROP soft key and enter the number of
drops per fraction.
25
Stand-alone Operation
Table 6. (continued)
Stand-alone Operation using the Time Windows Collection Method
Step
2.
Description
Change the collection method
to Time Windows.
Procedure
The startup screen shows Collect All as the collection method.
To change the collection method,
a. Press the EDIT soft key.
b. Observe the message to select collection method: ALL,
WINDOW, and THRSH.
c. Press the WINDOW soft key.
3.
Enter the start time and the
end time for each Window.
a. Enter the start time and press
b. Enter the end time and press
c. Press the ADD soft key to define the start and end times for
Window 2, if desired. Continue the procedure to define
additional windows (up to 20 max.).
d. Press the OK soft key to return to the startup screen.
4.
Select READY.
Observe that the startup screen shows Windows as the collection method.
Press the READY soft key.
5.
(Optional)
Enter DELAY in time or drops.
For fraction collection to be precisely synchronized with the UV
signal on the chart recorder, enter a Delay Time or Delay Drops.
For discussion of the Delay function, refer to Appendix B.
Note: The Delay must be smaller than the fraction size. The
default Delay value is zero.
6.
Press RUN to start collection.
At any point you may use the following keys:
ADV: To advance to the next tube.
COLL/WASTE: This selection toggles between collect, which
allows you to collect the fluid being dispensed, and waste, which
diverts the fluid to the drain trough.
STOP: To stop the run.
26
Stand-alone Operation
Table 7.
Stand-alone Operation using the Peak Collection by Threshold Detection Method
LEGEND
% FULL SCALE
40
35
PEAK
COLLECTION
EVENT MARKS
NON-PEAK
COLLECTION
WASTE
30
25
20
15
10
5
0
TIME (MIN)
1
2
3
4
5
6
7
8
OR
Example shows a Global Threshold of 10% AUFS, with a fraction size of one minute and non-peak fraction size of two minutes.
Note: Non-peak fluid may be directed to waste or to tubes.
Step
1.
Description
Enter the following information
into the startup screen:
a) Rack number
b) Start tube number
c) End tube number
d) Fraction size
Procedure
The Startup screen is shown below:
Rack # 1
Start # 1
Frac Size
READY EDIT
Collect All
End # 128
1.00 Min
DROP MODE
a. Enter the rack number and press
There are five types of racks, as discussed in Appendix A.
Note that the start and end numbers change depending on the
rack number.
b. Enter the starting tube number and press
The starting and ending tube numbers can be identified by
looking at the numbers on top of the rack. Fractions are
dispensed in a serpentine motion.
c. Enter the ending tube number and press
d. Enter the fraction size in either Time or Drops:
• Time: Enter the time in minutes. Use the decimal key to
specify times of less than 1 minute.
• Drops: Press the DROP soft key and enter the number of
drops per fraction.
27
Stand-alone Operation
Table 7. (continued)
Stand-alone Operation using the Peak Collection by Threshold Detection Method
Step
2.
Description
Change the collection method
to Threshold.
Procedure
To change the current collection method, which is displayed in
the top right of the screen:
a. Press the EDIT soft key.
b. Observe the message to select collection method: ALL,
WINDOW, and THRSH.
c. Press the THRSH soft key.
3.
Define the Global Threshold.
Enter the Global Threshold (%) and then press the OK soft key.
Note: If the “Set Global Threshold” screen does not appear, then
Time Windows were previously set. Select WASTE for the nonpeak destination and proceed to delete all Time Windows from
the following screen using the DELETE soft key.
4.
Indicate whether non-peak
fluid should be directed to
tubes or to waste.
If you wish to collect the non-peak fluid into tubes, then enter the
non-peak fraction size.
5.
Select NO when asked if Time
Windows are to be added.
No Time Windows will be added since, by definition, a Global
Threshold is a single Threshold set over the entire method.
6.
Enter the Bubble Filter Time.
Enter a time in seconds and then press the OK soft key. This
function detects and filters false peaks (such as electrical noise
or air bubbles). Typically, a Bubble Filter Time of 0 or 1 second
will suffice. (For discussion of Bubble Filter Time, refer to Appendix C.)
7.
Select READY.
Observe that the startup screen shows WINDOWS as the collection method. Press the READY soft key.
28
Stand-alone Operation
Table 7. (continued)
Stand-alone Operation using the Peak Collection by Threshold Detection Method
Step
Description
Procedure
8.
(Optional)
Enter DELAY in time or
drops.
For fraction collection to be precisely synchronized with the UV
signal on the chart recorder, enter a Delay Time or Delay Drops.
For discussion of the Delay function, refer to Appendix B.
Note: The Delay must be smaller than the fraction size. The
default Delay value is zero.
9.
Press RUN to start collection.
At any point you may use the following keys:
ADV: To advance to the next tube.
COLL/WASTE: This selection toggles between collect, which
allows you to collect the fluid being dispensed, and waste,
which diverts the fluid to the drain trough.
STOP: To stop the run.
29
Stand-alone Operation
Table 8.
Stand-alone Operation using the Peak Collection by Threshold Detection with Time Windows Method
% FULL SCALE
WINDOW #1
THRESHOLD = 10%
40
35
WINDOW #2
THRESHOLD = 20%
LEGEND
PEAK
COLLECTION
WASTE
30
25
20
EVENT MARKS
15
10
5
0
TIME (MIN)
1
2
3
4
5
6
7
8
Example shows two Time Windows, each with different Threshold settings. Note: Outside a Time Window, fluid goes to waste unless
the COLL soft key is pressed. Within a Time Window, non-peak fluid (below Threshold) may be collected in tubes or sent to waste.
Step
1.
Description
Enter the following information
into the startup screen:
a) Rack number
b) Start tube number
c) End tube number
d) Fraction size
Procedure
The Startup screen is shown below:
Rack # 1
Start # 1
Frac Size
READY EDIT
Collect All
End # 128
1.00 Min
DROP MODE
a. Enter the rack number and press
There are five types of racks, as discussed in Appendix A.
Note that the start and end numbers change depending on the
rack number.
b. Enter the starting tube number and press
The starting and ending tube numbers can be identified by
looking at the numbers on top of the rack. Fractions are
dispensed in a serpentine motion.
c. Enter the ending tube number and press
d. Enter the fraction size in either Time or Drops:
• Time: Enter the time in minutes. Use the decimal key to
specify times of less than 1 minute.
• Drops: Press the DROP soft key and enter the number of
drops per fraction.
30
Stand-alone Operation
Table 8. (continued)
Stand-alone Operation using the Peak Collection by Threshold Detection with Time Windows Method
Step
2.
Description
Change the collection method
to Threshold.
Procedure
To change the current collection method, which is displayed in
the top right of the screen:
a. Press the EDIT soft key.
b. Observe the message to select collection method: ALL,
WINDOW, and THRSH.
c. Press the THRSH soft key.
3.
Define a Global Threshold
(assuming no Time Windows
were previously set).
Enter the Threshold (%) and then press the OK soft key.
Note: If Time Windows were previously set, you will be asked
to select the non-peak destination. Proceed to step 4.
4.
Indicate whether non-peak
fluid is to go to tubes or to
waste.
If you wish to collect the non-peak fluid into tubes within a Time
Window, then enter the non-peak fraction size.
5.
Select YES to add Time
Windows, if Time Windows
were not previously set.
This allows different Threshold settings to be set within multiple
Time Windows.
Note: If Time Windows were
previously set, you may may
now enter different Threshold
settings for each Window.
a. Enter the start time for Window 1 and press
b. Enter the end time for Window 1 and press
c. Enter a Threshold for Window 1.
d. To add another Window, press the ADD soft key. Repeat
“a” through “c” above to enter the start/end times and the
Threshold setting for Window 2.
Continue the procedure to define additional windows (up to
20 max.).
e. Press the OK soft key to continue.
6.
Enter the Bubble Filter Time.
Enter a time in seconds and then press the OK soft key. This
function detects and filters false peaks above a Threshold
(such as electrical noise or air bubbles). Typically a Bubble
Filter Time of 0 or 1 second will suffice. (For discussion of
Bubble Filter Time, refer to Appendix C.)
31
Stand-alone Operation
Table 8. (continued)
Stand-alone Operation using the Peak Collection by Threshold Detection with Time Windows Method
Step
Description
Procedure
7.
Select READY.
Observe that the startup screen shows Thsh+Windows as the
collection method. Press the READY soft key.
8.
(Optional)
Enter DELAY in time or drops.
For fraction collection to be precisely synchronized with the UV
signal on the chart recorder, enter a Delay Time or Delay Drops.
For discussion of the Delay function, refer to Appendix B.
Note: The Delay must be smaller than the fraction size. The
default Delay value is zero.
9.
Press RUN to start collection.
At any point you may use the following keys:
ADV: To advance to the next tube.
COLL/WASTE: This selection toggles between collect, which
allows you to collect the fluid being dispensed, and waste, which
diverts the fluid to the drain trough.
STOP: To stop the run.
32
Stand-alone Operation
COLLECT
ALL
Rack#
Collect All
Start #
End #
Frac Size:
1.0 Min
READY EDIT DROP MODE
Stand-alone Mode
Select Collection
Method:
COLLECT
ALL
ALL WINDOW THRSH
THRESHOLD &
THRESHOLD + WINDOWS
Set Global Threshold
0% Full Scale
TIME WINDOWS
Collect All
Enter Delay:
0.00 Min
RUN
Starts
the
Run
CANCEL
Wdw Start
1
0.0
*End of Table*
ADD DELETE
End
9999.9
Wdw Start
1
0.5
1
2
ADD DELETE
End
1.5
3
CANCEL OK
Select Non-Peak
Destination
OK
TUBES
Enter Non-Peak
Frac Size: 0.50 Min
OK
CANCEL OK
Rack#
Windows
Start #
End #
Frac Size:
1.0 Min
READY EDIT DROP MODE
Windows
Enter Delay:
0.00 Min
RUN
WASTE
Add Time Windows?
NO YES
Th
Wdw Start
End
1
0.0
9999.9 10
*End of Table*
ADD DELETE
OK
CANCEL
Starts
the
Run
Wdw
1
1
ADD
Start
End
0.5
1.5
2
3
DELETE
Th
10
20
OK
Enter Bubble Filter
Time: 0.0 Seconds
OK
Rack#
Threshold
Start #
End #
Frac Size:
1.0 Min
READY EDIT DROP MODE
Rack#
Thsh+Windows
Start #
End #
Frac Size:
1.0 Min
READY EDIT DROP MODE
Threshold
Enter Delay:
0.00 Min
RUN
Thrsh+Windows
Enter Delay:
0.00 Min
RUN
CANCEL
Starts
the
Run
CANCEL
Starts
the
Run
Figure 8. Stand-alone Mode Menu Tree
33
Operation with the Econo System and Automated Econo System
5.0 OPERATION WITH THE ECONO SYSTEM AND
AUTOMATED ECONO SYSTEM
When the Model 2128 Fraction Collector is connected either to a Model ES-1 Econo System Controller or a
Model EP-1 Econo Pump, and Econo is chosen from the Mode menu, the Econo System Controller or Econo
Pump will control the Fraction Collector by sending “tube advance” signals. This means that the Time Windows, Threshold, and Delay functions are no longer programmable from the Fraction Collector.
If the optional diverter valve is mounted on the Fraction Collector's dispenser arm and the Fraction Collector is
connected to the diverter valve port on the Econo System Controller or Econo Pump, the Econo System
Controller or Econo Pump will control the Fraction Collector's diverter valve for flow diversion to waste or
collection.
Threshold, Void (Vo), and up to three Time windows may be programmed from the Econo System Controller
and the Econo Pump. Note that a Bubble Filter feature is already resident in the Econo System’s Threshold
program.
Rack number and tube start/end tube numbers are still programmed from the Fraction Collector. Ensure that
the tube end number equals or exceeds the number of fractions displayed by the Econo Pump.
In Econo mode, the Model 2128 Fraction Collector allows fractions from identical chromatographic separations to be overlaid into the same tubes. This function is called Overlay. Thus the Fraction Collector can fully
utilize the repetitive run feature of the Econo Pump using the Econo System’s Enhanced mode. When using
this feature on the Fraction Collector, it is important to remember that the tube start and end numbers which
you set on the Fraction Collector must correspond with the number of fractions (f) derived from programming
fraction size and Vt on the Econo Pump. For example, assuming the number of fractions (f) is 30:
a)
If Start tube # is 1, then End tube # is 30
b)
If Start tube # is 16, then End tube # is 45
34
Operation with the Econo System and Automated Econo System
Table 9.
Operation of the Fraction Collector from the Econo System
Step
1.
Description
Select the Econo mode.
Procedure
The Startup screen is shown below:
Rack # 1
Start # 1
Frac Size
READY EDIT
Collect All
End # 128
1.00 Min
DROP MODE
Note that the upper right corner shows Collect All, which is a
collection method available only in Stand-alone mode. Do not
enter data into this screen. To change to the Econo mode’s
collection method,
a. Press the MODE soft key.
b. Observe the message to select collection method: STD,
ECONO, LCD, and STOW.
c. Press the ECONO soft key.
2.
Indicate whether or not the
Fraction Collector is
equipped with the optional
diverter valve mounted on
its dispenser head.
a. The following message is displayed: “Is 2128 Valve Cable
connected to Econo System?”
b. The Fraction Collector may be equipped with the optional
diverter valve mounted on the dispenser head
• Answer NO if the Fraction Collector is not equipped with the
optional diverter valve.
Then verify that the Econo System’s SV-3 diverter valve is
connected to the Econo System.
• Answer YES if the diverter valve is mounted on the Fraction
Collector’s dispenser head.
Verify that the REC connector on the rear panel of the
Fraction Collector is connected to the diverter valve port on
the rear panel of the Econo System Controller. There should
now be two cables connecting the Fraction Collector to the
Econo System Controller.
35
Operation with the Econo System and Automated Econo System
Table 9. (continued)
Operation of the Fraction Collector from the Econo System
Step
3.
Description
Indicate whether or not to
overlay fractions.
Procedure
If you select NO, enter the Rack #, the Start tube #, and the
End tube #.
a. Press the ENGAGE soft key. The dispenser arm then moves
over the start tube number.
b. Collection begins when the Econo Pump is started. Collection
is done according to the collection programming entered at the
Econo Pump.
c. To manually advance a tube at any time, press the ADV soft
key; to stop collection, press the STOP soft key.
If you select YES, enter the Rack # and the from tube # and
to tube #. To change the Overlay decision, press the EDIT soft
key.
a. Press the ENGAGE soft key. The dispenser arm then moves
over the start tube number.
b. Collection begins when the Econo Pump is started. The
Overlay cycle number is displayed.
c. To stop collection at any time, press the STOP soft key.
Note: The ADV soft key is not available during overlay.
36
Operation with the Econo System and Automated Econo System
Rack#
Collect All
Start #
End #
Frac Size:
1.0 Min
READY EDIT DROP MODE
Econo Mode:
Select operating
mode:
STD
ECONO
LCD STOW
Is 2128 Valve Cable
connected to Econo
System?
CANCEL NO
YES
Make sure a SV3
VALVE is connected
to Econo System.
OK
Overlay fractions
for cycling method?
NO
YES
Rack#
[ECONO]
Overlay Fractions:
From#
To#
ENGAGE EDIT
SETUP
Moves drop head to
first tube and waits for
Econo System control
Rack#
Start#
ENGAGE
[ECONO]
End#
SETUP
Moves drop head to
first tube and waits for
Econo System control
Figure 9. Econo Mode Menu Tree
37
Maintenance and Troubleshooting
6.0 MAINTENANCE AND TROUBLESHOOTING
6.1 MAINTENANCE
The Model 2128 Fraction Collector requires very little maintenance to assure reliable operation. To clean the
case, first unplug the Fraction Collector. Use a damp cloth to wipe down the outer case. Avoid wetting the
power switch located below the front panel and the connectors on the rear of the unit.
The drain trough may require cleaning if buffers are allowed to dry in it. To clean the drain trough, first
remove it by gently pressing the two spring clips away from the rack and pulling the drain trough up and away.
Flush the drain trough with water.
Over time the clear glass ring inside the drop head may require cleaning. This ring protects the drop detector
from splashes or dust buildup. To clean the clear glass ring, simply unscrew the inlet fitting and lift out the
clear inside ring that protects the detector. Wipe the ring clean using a damp cloth.
MOD
E
FRA L 2128
CTIO
N CO
L
LEC
TOR
Thre
sh
Next old
t
Drain ube 2
in
ADV g
COL
L
STO
P
Figure 10. Cleaning the Glass Ring inside the Drop Head
38
Maintenance and Troubleshooting
6.2 TROUBLESHOOTING
Help menus are available at any time by pressing the HELP key.
Problem
Possible Cause
Solution
Dispenser arm grinds
upon power-up of the
Arm was not in Park position.
Note: While the noise may be
Always ensure the arm is in its Park position.
Fraction Collector.
disturbing, it does not indicate
damage to the unit.
No LCD display
No power to unit.
LCD display is
difficult to read
LCD setting needs adjustment. Increase/decrease the brightness as follows:
a. Press the MODE soft key from the startup
display.
b. Press the LCD soft key.
c. Use the DARK and LIGHT soft keys to
increase/decrease brightness.
Drops miss tube
Rack # incorrect.
Tube rack is mis-aligned.
Drop former missing.
Unit not level.
Drop head mis-aligned.
Enter correct rack number.
Reposition tube rack.
Insert drop former.
Place the unit on level surface.
Turn off the unit and move the arm to the Park
position. Then turn on the unit and allow the unit
to re-position the arm.
Drops not counted
Flow rate is too high.
Drop head is dirty.
When collecting by drops, do not exceed
5 ml/min.
Clean the drop head.
Flow continues after
pump stops
Excessive backpressure.
Change to a tubing with larger inner
diameter (ID).
During Peak Detection Bubble Filter setting is not
bubbles are not being appropriate.
filtered
before turning power on.
Check the power switch to be sure it is on.
Check the power cord connections.
Check the power at the outlet.
If problem persists, contact Bio-Rad.
Note: the unit contains no fuses to replace or
circuit breakers to reset.
Check the Bubble Filter setting.
Reset the Bubble Filter time according to the
guidelines in Appendix C.
Bubbles are too slow to trigger No Corrective action.
the Bubble Filter.
UV Analog Input Range is set
at 10 mV.
The Analog Input Range must be set at 100 mV
or 1 V to effectively use the Bubble Filter function.
39
Appendix A
APPENDIX A. TUBE RACK OPTIONS
The following racks are available for use with the Model 2128 Fraction Collector:
Rack
Name
Software ID
Number
Tube Description
Capacity
Rack #1
1
12 and 13 mm diameter; 180 mm height (max.) 128 (16 x 8) tubes
Rack #2
2
16 to 18 mm diameter; 180 mm height (max.)
78 (13 x 6) tubes
Micro-Adapter
3
Microplate (96 wells in 8 x 12 format)
3 plates (288 wells)
Micro-Adapter
4
Microtubes (capless tubes required)
128 microtubes
Prep-Adapter
5
Bottles of any size
10 bottles
To prepare the Model 2128 Fraction Collector for fraction collection, set up the unit as follows:
•
Racks #1 and #2: Load the collection tubes. Use the support tray as necessary for tubes of less than
•
Micro-Adapter with microplates (Rack #3): Place the Micro-Adapter on top of Rack #1. Mount the
•
Micro-Adapter with microtubes (Rack #4): Place the Micro-Adapter on top of Rack #1. Use capless
•
Prep-Adapter (Rack #5): Attach tubing of sufficient length to each of the funnels to be used. (20 feet
of 3/8" OD, 1/4" ID Tygon tubing is provided for this purpose.) Make sure there are no kinks to
constrict flow in the tubing. Gravity flow from the Prep-Adapter requires that the container used for
collection be mounted below the Prep-Adapter drain holes.
Press the MODE soft key, followed by the STOW soft key to move the dispenser arm to its Stow
position. Turn off the Fraction Collector, and then rotate the arm to its Storage position. Remove the
drain trough by gently pressing back the two spring clips and pulling the drain trough up and away.
Replace the drain trough with the Prep Adapter Rack. Rotate the dispenser arm and return it to the
Park position before turning the unit on.
Note: The Prep-Adapter rack is rated for use with a flow rate of up to 100 ml/min. (For discussion of
the plumbing for high flow rates, refer to section 3.2, Fraction Collector Plumbing.) The Delay function is not available when the Prep Adapter is used.
maximum height.
plates so that position A12 is left-front. We strongly suggest that fraction size be specified in drops
rather than time. Also, use of the optional diverter valve is strongly recommended, as it minimizes
spillage between tube advances. The Delay function is not available with this rack.
microtubes.
The unit is now ready for operation.
40
Appendix A
16 x 8, SHOWN WITH SUPPORT TRAY
(RACK #1)
MICRO-ADAPTER, SHOWN WITH MICROPLATE
(RACK #3)
13 x 6, SHOWN WITHOUT SUPPORT TRAY
(RACK #2)
MICRO-ADAPTER, SHOWN WITH MICROTUBES
(RACK #4)
PREP ADAPTER
(RACK #5)
41
Appendix B
APPENDIX B. DELAY FUNCTION
The purpose of the Delay function is to synchronize the fraction collection event marks and the signal from the
UV monitor (output on the chart recorder) with the actual delivery of liquid into the collection tubes. This
feature allows easy post-run analysis of a chromatogram.
Note 1: The Delay function is not available with large fraction collection using the Prep Adapter (Rack #5),
Micro-Adapter with microplates (Rack #3), and Econo mode operation.
Note 2: The Model 2128 Fraction Collector offers a wide variety of collection options. Different collection
options accommodate the Delay function in slightly different ways. As a consequence, the event marks
on the chart recorder will vary depending on the individual application.
Note 3: The Delay value must always be smaller than the fraction size. The default Delay value is zero.
B.1 DETERMINING DELAY
Delay (time or drops) are determined from the Delay Volume. The Delay Volume, Delay Time, and Delay
Drop are defined below.
Delay Volume: The volume in the tubing which runs between the UV monitor and the drop head. Determine
the Delay Volume using either of the following methods:
a. Using a syringe, fill the tubing (from the UV monitor outlet to the Fraction Collector drop head) with
water. Then expel the water into a separate container and weigh it.
b. Using the inner diameter (ID) and the length of the tubing, determine the volume (V=π r2 l). For
example, a 43 cm length of 0.020" ID (0.025 cm inner radius) tubing has the following volume:
V = π (0.025 cm2) (43 cm) = 0.087 cm3 = 0.087 ml = 87 µl
Delay Time: The length of time that it takes the Delay Volume to flow from the UV monitor to the drop head.
This rate is a function of the flow rate. By dividing the Delay Volume by the flow rate, you can determine the
Delay Time. The following are examples of the Delay Times for different flow rates through a 43 cm section
of tubing.
Volume
87 µl
87 µl
87 µl
87 µl
÷
÷
÷
÷
Flow Rate
0.25 ml/min
0.50 ml/min
1.00 ml/min
2.00 ml/min
=
=
=
=
Delay Time
0.35 min
0.17 min
0.087 min
0.044 min
Delay Drops: The number of drops in the Delay Volume. To determine Delay Drops, assume 1 drop = 50 µl.
The following example is for a 43 cm section of tubing.
Volume
87 µl
÷
50 µl/drop
50 µl/drop
=
Delay Drops
1.74 drops (2 drops approx.)
42
Appendix B
B.2 EXAMPLES OF DELAY FUNCTION
Example 1, Collect All Method
Figure B-1 below shows an example in which the Delay Time is 0.2 minutes and the fraction size is 1 minute.
The chart recorder makes the first tick mark (following the start/run mark) at 0.8 min, and each subsequent
tick mark at 1 minute intervals. Each fraction size is still 1 minute.
LEGEND
% FULL SCALE
FRACTION SIZE
EQUALS 1 MINUTE
40
EVENT MARKS
35
30
25
20
15
10
5
0.8 MIN
1 MIN
0
TIME (MIN)
1
2
3
4
5
6
7
8
Figure B-1. Example showing Collect All Method with a Delay of 0.2 Minutes
43
Appendix B
Example 2, Peak Collection by Threshold
Assume the following:
Flow rate:
Peak fraction size:
Delay Time:
Threshold value:
Non-peak destination:
1 ml/min
1 minute
0.25 minutes
10% AUFS
Waste
At the start of the run an event mark is recorded. Initially the liquid is diverted to waste because the monitor
signal is below Threshold . When the UV signal rises above the specified Threshold of 10%, an event mark is
recorded and the volume corresponding to the Delay Time (the Delay Volume) is collected in tube 1. At the
end of this time, there is a tube advance and the peak is collected in 1 minute fractions. As the falling edge of
the peak passes through the Threshold, an event mark is recorded, but there is no tube advance until the
Delay Time is collected. All subsequent peaks follow this same pattern with the result that each peak is
separated by a tube containing the Delay Volume. Note: If the Delay Time is set to zero, the peaks will be
separated by an empty tube.
% FULL SCALE
40
35
30
25
20
15
10
5
0
DELAY
TIME=0.25
DELAY
TIME=0
TUBE #
1
2
3
4
5
When the non-peak (below Threshold) liquid is diverted to tubes, the Delay Volume (at the rising edge) of the
peak is collected as part of the non-peak fraction. To clearly distinguish between the two types of fractions in
this situation, we suggest programming a much larger non-peak fraction size.
44
Appendix B
Example 3, Collection Using Time Windows
Case 1, where Start Time = 5 and Delay Time = 0.25
Case 2, where Start Time = 5 and Delay Time = 0
Assume the following:
Flow rate:
Peak fraction size:
Time Window #1:
Time Window #2:
1 ml/min
1 minute
Start 5, End 8
Start 10, End 12
Note that each Time Window is separated by a fraction containing the Delay Volume. If Delay Time is
zero, then Tube #1 is empty and subesequent Time Windows are separated by empty tubes.
% FULL SCALE
TIME
WINDOW #1
40
35
TIME
WINDOW #2
30
25
20
15
10
5
0
DELAY
TIME=0.25
DELAY
TIME=0
TUBE #
1
2
3
4
5
6
7
45
Appendix C
APPENDIX C. BUBBLE FILTER TIME
The Bubble Filter Time function is used in conjunction with the Peak Collection by Threshold Detection
function. The purpose of the Bubble Filter Time function is to distinguish true chromatographic peaks from
unwanted signals such as electrical spikes or the passage of an air bubble. Such “false signals” are characterized by extremely fast rise and fall times.
The Bubble Filter Time function is entered at the end of the Threshold programming sequence. The default
value is OFF (t = 0 seconds).
A signal that exceeds the set Threshold value with a rise time of >5.5% Full Scale (FS) in 0.1 seconds is
perceived by the Fraction Collector as possibly signifying a false peak. In such cases, the Fraction Collector
looks for a Bubble Filter Time set by the user. If the signal falls to 2% of the pre-rise FS level within the set
Bubble Filter Time, the signal is rejected and the false peak is not collected. Signals that exceed the Threshold value and are of a longer duration than the Bubble Filter Time are collected as true peaks.
Very sharp, true chromatographic peaks (such as those from an HPLC application) may rise at a sufficient
rate to trigger this function. As a consequence, if an unsuitable Bubble Filter Time has been set, then the
early part of such peaks may not be collected.
The Bubble Filter Time may be set from 0 to 99.9 seconds. For most chromatographic applications, a filter
time of 0 or 1 second will suffice. The actual setting depends upon both the flow rate and peak duration and
should be optimized for each type of separation. Generally speaking, a very short Bubble Filter Time should
be used with sharp peaks of short duration.
% FULL SCALE
45
40
FALSE PEAK CAUSED BY AN AIR BUBBLE,
AS DETERMINED USING A SET BUBBLE
FILTER TIME OF 1 SECOND. MATERIAL IS
NOT COLLECTED.
35
30
25
20
15
10
5
0
ELAPSED TIME < 1 SECOND
46
Appendix D
APPENDIX D. CONNECTION TO BIO-RAD’S HPLC SYSTEM
To connect the Model 2128 Fraction Collector to a Bio-Rad HPLC system, you will need to purchase the
Model 2128-HPLC cable (catalog #731-8291). This is a 15-pin D to 25-pin D cable. The 25-pin end connects
to the Digital I/O port on the rear panel of the HPLC system interface.
Once connected, the Model 2128 is controlled by the HPLC system (just as it would be if it were connected to
a Model ES-1 Econo System Controller). Before using the Fraction Collector with an HPLC system, note the
following:
•
The Fraction Collector must be operated using Econo mode.
•
Use of the diverter valve cable is not supported. Select NO when this selection is presented in Econo
mode.
•
Overlay of fractions is not supported. Select NO when this selection is presented in Econo mode.
47
Appendix E
APPENDIX E. REAR PANEL CONNECTOR INFORMATION
15
14
13
12
11
10
9
8
7
6
5
4
3
8
7
6
5
4
3
2
1
2
1
2
1
8-PIN MINI-DIN
CONNECTOR
15-PIN D
CONNECTOR
2-PIN COMBICON
CONNECTOR
15-PIN D CONNECTOR
Pin#
Input Signals
Type
Active
Description
1.
ADVANCE
Pulse
Low
External signal to advance to next tube. (Minimum pulse
width of 100 ms triggers on positive transition.)
5.
CONNECTED
Level
Low
Indicates remote device is operable.
6.
RUN/END
Level
Low
Low=Start and run is controlled from remote source.
Fraction Collector controls are inactive.
High=Stop run. Fraction Collector is released from remote
control. Fraction Collector controls are active.
Pin#
Output Signals
Type
Active
Description
4.
READY
Level
Low
Signals that the Fraction Collector is functioning properly
and is ready for an input, such as from a controller.
9.
SW Terminal 1
Relay
Closed
Starts/stops another machine, such as a pump.
10.
SW Terminal 2
Relay
Closed
Starts/stops another machine, such as a pump.
15.
GROUND
Signal ground
* All input and output pins, except the relay terminals, are TTL compatible. All input pins are with 10 kΩ pullup. The relay pins are used to control low voltage DC contact-closure type devices, such as 12 V, 10 mA.
48
Appendix E
8-PIN MINI-DIN CONNECTOR
Pin#
Input Signals
2.
Type
Active
Description
WASTE/COLLECT Level
Low
Diverter valve control from the Econo System Controller.
Pin#
Output Signals
Type
Active
Description
3.
EVENT MARK
Pulse
Low
Event marks for Method Start and Fraction Advance.
(Negative pulse width 200 ms.)
4.
FEED/STOP
Level
Low
Chart recorder control. Paper feed/stop.
5.
UP/DOWN
Level
Low
Chart recorder control. Pen up/down.
6.
ADS TERMINAL 1 Relay
Closed
Event marks for Method Start and Fraction Advance via
relay. Pins 6 and 7 momentarily closed for 200 ms.
7.
ADS TERMINAL 2 Relay
Closed
Event marks for Method Start and Fraction Advance via
relay. Pins 6 and 7 momentarily closed for 200 ms.
8.
GROUND
Signal ground.
* All input and output pins, except the relay terminals, are TTL compatible. All input pins are with 10 kΩ pullup. The relay pins are used to control low voltage DC contact-closure type devices, such as 12 V, 10 mA.
!
Caution
Do not apply 110 V AC or 220 V AC directly to the relay terminal pins.
2-PIN COMBICON CONNECTOR
Pin#
Signal Name
Type
Active
Description
1.
ANALOG IN
Input
0 to ±1 V
UV monitor input: ±10 mV, ±100 mV, ±1 V
2.
ANALOG GND
Common
Low
UV monitor input: Analog ground
49
Appendix F
APPENDIX F. SPECIFICATIONS
Fractionation:
Time:
Drop:
Volume:
0.03 to 99.9 minutes
0 to 999 drops; flow rate 5.0 ml/min (max.)
Only when connected to the Model EP-1 Econo Pump or
Econo System
Collection methods:
Time, Drop, Time Windows (up to 20 windows), Peak Detection,
Time Windows plus Peak Detection
Peak Detection:
Threshold, including slope detection algorithm for collection of
double peaks above a set Threshold
Drop counting capability:
Up to 5 ml/min flow rates
Tube capacity:
Rack #1:
Rack #2:
Micro Adapter:
Prep Adapter:
12 and 13 mm diameter tubes (128 tubes max.), adjustable for tube
heights (54, 75, 100, 125, 150, and 180 mm)
16 - 18 mm diameter tubes (78 tubes max.), adjustable for tube heights
(54, 75, 100, 125, 150, and 180 mm)
96-well microtiter plates (3 plates max.) or 1.5 ml
micro test tubes (128 tubes max.); mounts on top of Rack #1
Preparative fraction “separator”; up to 10 fractions can be funneled to
bottles of any size. Max. flow is 100 ml/min
Maximum collection volume:
Virtually unlimited when used with the Prep Adapter
Tube change time:
330 ms, with Rack #1
450 ms, with Rack #2
Drain trough:
PPS; removable for cleaning
Detector Input:
±0 to 10 mV; ±0 to 100 mV; and ±0 to 1 V
Event marker:
TTL diverter/peak mark; contact closure fraction mark
Input power:
100-240 VAC, ±10%, 50/60 Hz, single phase
Input current:
1.2 Amp (max.); fuse rating inside the power supply is 2 Amp
Power consumption:
45 W
Fusing:
No external fusing
50
Appendix F
3-way diverter valve:
Optional 3-way diverter valve mounts next to the drop head to divert
flow to the drain trough or to a collection vessel; will minimize spillage
during fraction changes
External operation:
Can be controlled by the Econo System, Bio-Rad’s HPLC systems,
or others via external commands
Wetted parts:
All non-metal, including PTFE, Tefzel®, PPS, PEEK, KEL-F
Safety certification:
I.E.C. 1010
EMI certification:
CISPR 11A
Environmental
Operating Temp.:
Storage Temp.:
Humidity:
4 to 40°C
4 to 40°C
5 - 95%, non-condensing
Dimensions, with Rack #1:
30.5 cm (W) x 42 cm (D) x 24 cm (H)
Weight, without Rack #1:
5.7 kg
Tefzel is a registered trademark of E.I. du Pont de Nemours & Co.
51
Appendix G
APPENDIX G. WARRANTY AND ORDERING INFORMATION
The Model 2128 Fraction Collector is warranted for 1 year against defects in materials and workmanship. If
any defects should occur during this warranty period, Bio-Rad Laboratories will replace the defective parts
without charge. However, the following defects are specifically excluded:
1.
2.
3.
4.
5.
6.
7.
Defects caused by improper operation.
Repair or modification done by anyone other than Bio-Rad Laboratories or their authorized agent.
Use with fittings or other spare parts not specified by Bio-Rad Laboratories.
Damage caused by deliberate or accidental misuse.
Damage caused by disaster.
Damage due to use of improper solvent or sample.
Tubing and fittings.
For inquiry or request for repair service, contact your local Bio-Rad office.
Bio-Rad Laboratories
2000 Alfred Nobel Drive
Hercules, California 94547
Phone: (510) 741-1000
1-(800) 4-BIORAD
1-(800) 424-6723
Fax:
(510) 741-1060 or
1-(800) 879-2289
Telex: 335-358
Belgium
Bio-Rad Laboratories S.A.-N.V.
Begoniastraat 5
B-9810 Nazareth Eke
Phone: 091-85-55-11
Fax:
091-85-65-54
Italy
Bio-Rad Laboratories S.r.l
Via Cellini, 18A
20090 Segrate - Milano
Phone: 02/21609.1
Fax:
02/21609.399
Spain
Bio-Rad Laboratories, S.A.
Avda, Valdelaparra, 3
Poligono Industrial de Alcobendas
E-28100 Alcobendas (Madrid)
Phone: (91) 661 70 85
(900) 100 204
Fax:
(91) 661-96-98
Eastern Regional Office
85A Marcus Drive
Melville, New York 11747
Phone: (516) 756-2575
1-(800) 4-BIORAD
1-(800) 424-6723
Fax:
(516) 756-2594 or
1-(800) 756-4246
Peoples Republic of China
Bio-Rad Pacific (Beijing Office)
Yanshan Hotel Office Tower #1307
138A Haidian Road
Beijing 100086
Phone: 2563146
Fax:
2564308
Japan
Nippon Bio-Rad Laboratories KK
Sumitomo Seimei Kachidoki Bldg.
5-3-6 Kachidoki
Chuo-Ku Tokyo 104
Phone: 03-3534-7515
Fax:
03-3534-8027
Switzerland
Bio-Rad Laboratories, A.G.
Kanalstrasse 17
8152 Glattbrugg
Phone: 01-810-16 77
Fax:
01-810-19 33
Canada
Bio-Rad Laboratories Ltd.
5149 Bradco Boulevard
Mississauga, Ontario L4W 2A6
Phone: (416) 624-0713
1-(800) 268-0213
Fax:
(416) 624-3019
France
Bio-Rad S.A.
94/96 rue Victor Hugo
B.P. 220
94203 Ivry Sur Seine Cedex
Paris
Phone: 01-4960-6834
Fax:
01-4671-2467
Netherlands
Bio-Rad Laboratories B.V.
Fokkerstraat 10
3905 KV Veenendaal
Phone: 08385-40666
Fax:
08385-42216
United Kingdom
Bio-Rad Laboratories, Ltd.
Bio-Rad House
Maylands Avenue
Hemel Hempstead
Hertfordshire HP2 7TD
Phone: 0442-232552
0800-181134
Fax:
0442-259118
Australia
Bio-Rad Laboratories Pty., Ltd.
Unit 11
112-118 Talavera Rd.
P.O. Box 371
North Ryde
New South Wales 2113
Phone: 02-805-5000
008-224-354
Fax:
02-805-1920
Telex: 79070166
Germany
Bio-Rad Laboratories GmbH
Heidemannstrasse 164
Postfach 45 01 33
D-8000 Munchen 45
Phone: 089 318 84-0
Fax:
089 318 84-100
New Zealand
Bio-Rad Laboratories Pty., Ltd.
Unit 15 Poland Court
21 Poland Road
P.O. Box 100-051
North Shore Mail Centre
Glenfield, Auckland 10
Phone: 09-443 3099
0800-805 500
Fax:
09-443 3097
Austria
Bio-Rad Laboratories Ges.m.b.H.
Auhofstrasse 78D
A-1130 Wien
Phone: 0222-877 89 01
Fax:
0222-876-56-29
Telex: 13-6565
Hong Kong
Bio-Rad Pacific Ltd.
Unit 1111, 11/F., New Kowloon Plaza
38 Tai Kok Tsui Road
Tai Kok Tsui , Kowloon
Phone: 7893300
Fax:
7891257
Telex: 42814
Scandinavia
Bio-Rad Laboratories
Kanalvagen 10C
19461 Upplands Vasby
Phone: 46 (0)8 590-734 89
Fax:
46 (0)8 590-717 81
52
Appendix G
WARRANTY INFORMATION
Model: _____________________________________________________________________
Serial Number: ______________________________________________________________
Date of Delivery: _____________________________________________________________
Warranty Period: _____________________________________________________________
ORDERING INFORMATION
Catalog
Number
Product Description
731-8123
Model 2128 Fraction Collector, 110 V, includes 110 V power cord, Rack #1, Econo
System cable #15, and fittings kit.
731-8124
Model 2128 Fraction Collector, 220 V, includes Rack #1, Econo System cable #15,
and fittings kit.
731-8125
Rack #1, accepts 12 and 13 mm diameter tubes (128 tubes max.).
731-8126
Rack #2, accepts 16 to 18 mm diameter tubes (78 tubes max.).
731-8127
Model 2128 Micro-Adapter, accepts three 96-well microtiter plates or 128 microtubes.
Includes capless microtubes.
731-8128
Model 2128 Prep-Adapter, for preparative collection with up to 10 collection vessels
Includes drain tubing and 20 feet of Tygon tubing
731-8238
Model 2128 Diverter Valve, includes fittings and tubing.
731-8286
Econo System Cable #15, 15-pin D to mini-DIN, for connecting the Fraction Collector
to the Model ES-1 Econo System Controller or the Model EP-1 Econo Pump.
731-8263
Econo System Cable #3, mini-DIN to mini-DIN cable, for connecting the Fraction
Collector to a Model ES-1 Econo System Controller or a Model EP-1 Econo Pump (for
control of the optional diverter valve).
731-8290
Model 2128 Accessory Cable, 15-pin D to bare wires, for connecting the Fraction
Collector to other equipment.
53
Appendix G
Catalog
Number
Product Description
731-8287
Econo System Cable #16, mini-DIN to DIN cable, for connecting the
Fraction Collector to a Model 1325, 1326, or 1327 Econo Recorder
731-8267
Econo System Cable #7, 8-pin mini-DIN to bare wires cable, for connecting the Model EM-1 Econo UV Monitor to the Model 1325, 1326, or
1327 Econo Recorder.
731-8291
Model 2128 HPLC Cable, 15-pin D to 25-pin D cable, for connecting the
Fraction Collector to a Bio-Rad HPLC system
731-8234
Model 2128 Fittings Kit, includes replacement fittings for the drop head.
731-8239
Model 2128 Valve Fittings Kit, replacement fittings for the optional
diverter valve.
Collection Tubes*
223-9500
223-9750
223-9751
1.5 ml Capless micro test tubes, polypropylene, natural, 500/box
13 x 100 mm clear polystyrene test tubes, 1000/box
13 x 100 mm natural polypropylene test tubes, 1000/box
* Additional tubes sizes are available from Bio-Rad. Contact your local Bio-Rad
representative for a liquid handling catalog.
54
Bio-Rad
Laboratories
Life Science
Group
Web site
Also in: Australia
Brazil
Denmark
Israel
Korea
The Netherlands
Austria
Belgium Ph. 09-385 55 11, Fx. 09-385 65 54
Finland
Italy
France Ph. 01 47 95 69 65, Fx. 01 47 41 9133
Japan
Ph. 47-23-38-41-30, Fx. 47-23-38-41-39
Sweden Ph. 46 (0)8-55 51 27 00, Fx. 46 (0)8-55 51 27 80 Switzerland Ph. 061-717-9555, Fx. 061-717-9550 United Kingdom Ph. 0800-181134, Fx. 01442-259118
Bulletin 0000
US/EG
Rev A
00-000
0000
Sig 1200
M7318124 Rev F