1
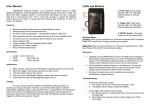
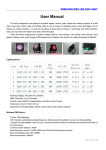
Lightning Trigger: PatchMaster 3in1 Lightning Trigger Laser Trigger* Timelapse Trigger* The PatchMaster Lightning Trigger is an extremely sensitive device to detect lightning events designed to help photographers to take lightning photos during day or night. The device has been designed based on microcontroller technology and has a response (lag) time in milliseconds level. This is more than enough to capture the lightning events. Features: Extremely sensitive optical sensor to detect lightning events Response (lag) time in milliseconds level 10 level sensitivity adjustment and display (unique PatchMaster feature) Optical isolated output to fully protect DSLR from any potential harms Hot shoe mount for mounting the device directly to your camera Microcontroller-based design Instructions: 1. Make sure the camera and PatchMaster Lightning Trigger are turned off. 2. Mount the trigger to the camera using the hot shoe mount. 3. Plug the release cable to the camera. 4. First turn on PatchMaster Lightning Trigger and then the camera. 5. Adjust the sensitivity to the highest level while it doesn’t trigger continuously. 6. Enjoy while the device is taking lightning photos for you. Display: Least sensitive Most sensitive User Manual ( * functional on PatchMaster 3in1 only) Testing: For sure, the best way for testing the PatchMaster Lightning Trigger is examining it during a real storm. However, you still have other options to test the PatchMaster Lightning Trigger until a real storm hits. A camera flash is the best device which can simulate a real lightning for testing purposes. Mount your device per the instructions given above, then fire the flash and verify PatchMaster Lightning Trigger triggers the camera as expected. Please note that your DSLR will not be able to catch the flash light as a flash light has 12ms duration where your DSLR has 50-60 ms lag time. However, a real lightning usually has 100-200 ms duration. Enjoy it! Laser Trigger: (functional on PatchMaster 3in1 only) Timelapse Trigger: (functional on PatchMaster 3in1 only) The PatchMaster Laser Trigger is an extremely sensitive device to detect events that breaks the laser beam. Device can be used to take water droplet photos or anything which passes in front of it. The device has been designed based on microcontroller technology and has “delay function” that can be set between 0 and 1000ms. The PatchMaster Timelapse Trigger is an extremely sensitive device for timelapse photography. The device has been designed based on microcontroller technology and time interval can be set to 8 predefined levels. Features: Features: Extremely sensitive optical sensor to detect lightning events “Delay function” that can be set between 0 and 1000ms Display for adjusting the sensitivity to the desired level Optical isolated output to fully protect the camera from any potential harms Hot shoe mount for mounting the device directly to your camera Powered by 9V alkaline battery Microcontroller-based design 8 predefined time interval Display for setting the desired interval Optical isolated output to fully protect the camera from any potential harms Hot shoe mount for mounting the device directly to your camera Powered by 9V alkaline battery Microcontroller-based design Instructions & Testing: Instructions & Testing: 1. 2. 3. 4. Make sure the camera and PatchMaster Laser Trigger are turned off. Fix the device by mounting to the camera using the hot shoe mount. Plug the release cable to the camera. First turn on PatchMaster Laser Trigger and adjust the delay to the desired level. 5. Set the delay to the desired level. Fix your laser pointer and direct it to the optical sensor of your device. 1. Make sure the camera and PatchMaster Timelapse Trigger are turned off. 2. Mount the trigger to the camera using the hot shoe mount. 3. Plug the release cable to the camera. 4. First turn on PatchMaster Timelapse Trigger and adjust the interval to the desired level. 5. Enjoy while the device is taking photos for you. Predefined Intervals: Laser Beam Doesn’t Match Delay(ms) Laser Beam Matches Delay(ms) 3sec 0-200 0-200 5sec 200-400 200-400 10sec 400-600 400-600 20sec 600-800 600-800 30sec 800-1000 800-1000 1min 6. Enjoy while the device is taking photos for you once the laser beam is interrupted. 5min 10min Camera Settings for Lightning Trigger LEDs and Buttons 1. Adjustment Switch: Adjustment switch for setting lightning sensitivity, laser delay or timelapse interval. 1. Set your camera on the tripod and make sure it is steady. 2. Put the camera to the Manual Focus mode. 3. If available, turn off the Image Stabilizer. 2. Function Button: Function button to set the device one of the following modes: Lightning Trigger, Laser Trigger and Timelapse Trigger. (functional on PatchMaster 3in1 only) 4. Set the camera focus to Infinity manually. 3. Display: 10 level display for indicating lightning sensitivity level, laser trigger delay or timelapse interval. 5. Turn the mode selection wheel to M (Full Manuel). Dimensions: Length Width Height : 3.93 in (100 mm) : 2.36 in (60 mm) : 1.38 in (35 mm) Disclaimer: Lightning can be DANGEROUS. We are not liable for any damage or personal injury associated with the use of the PatchMaster Lightning Trigger. The PatchMaster is intended for use as a camera shutter release device only and not any other purpose. The PatchMaster is not waterproof. It should be treated and handled with the care of a camera and should not be dropped and/or exposed to extreme heat or moisture. 6. Set the aperture between 4.0 and 8.0. 7. Set exposure time value to maximum 1/10 (This duration can be adjusted per the ambient light by the user.)