1
BGA & CSP
Rework System
BGA-3590 Series
CSP-3500 Series
USER GUIDE
Precision Systems for the Electronics Bench
www.metcal.com
P/N 7000-1251, Ver. A , 9/01
ii
BGA-3500 Series Manual 5/01
TABLE OF CONTENTS
PREFACE
Specifications
2
System Part Numbers
3
Environmental Conditions
3
Vision Systems
3
Shipping Data
4
SECTION
I
Introduction and General Overview
4
SECTION
II
System Features and Accessories
5
SECTION
III
System Functions
6
SECTION
IV
Set-Up Procedures
10
SECTION
V
Quick Guide to Calibration (Operation)
11
SECTION
VI
Additional System Features
18
SECTION
VII
Troubleshooting
18
SECTION
VIII
Spare Parts and Optional Accessories
21
SECTION
IX
Nozzle Selection Chart
23
SECTION
X
Warranty and Service
24
Addendum A
BGA Windows Program manual A1-A12
Addendum A page 1
Addendum B
Calibration Procedure B1-B11
Addendum B page 1
©2001 Delawre Capital Formation, Inc. All Rights Reserved. DOVER and the DOVER logo are registered trademarks of
Delaware Capital formation, Inc., a wholly-owned subsidiary of Dover Corporation
BGA-3500 Series Manual 5/01
1
Specifications for the BGA/CSP-3500 Series Rework Systems
Rework System Model
BGA-3591/
CSP-3501
BGA-3592/
CSP-3502
BGA-3591J/
CSP-3501J
Base Unit Input Voltage
115VAC, 50/60Hz
230VAC, 50/60Hz
100VAC, 50/60Hz
Base Unit Power Consumption
Control Unit Input Voltage
Control Unit Power Consumption
1400W (BGA 3591)
940W (CSP 3501) 1010W (BGA/CSP 3500J)
115VAC, 50/60Hz
230VAC, 50/60Hz
100VAC, 50/60Hz
420W max
Base Unit Max Source Temperature
Bottom-side heater:
392°F (200°C)
Control Unit Max Source Temperature
from BGA-3582 Micro Oven
752°F (400°C)
Temperature Control/Range
Closed-loop K-type thermocouple feedback
Maximum PCB Dimensions
20.25” (489mm) x open frame
PCB Thickness
Component Maximum Weight
Component Types
Airflow
Top Heater Element
Vacuum Pump
Base Unit Dimensions
Base Unit Weight
0.031” - 0.125” (0.8mm - 3.2mm)
.92 oz. (0.055 kg)
BGA, QFP, PLCC, TSOP, SOIC, CSP
3-20 l/min
28VAC, 280W max.
12 VDC, 15” Hg (381mm Hg)
22” x 24” x 19” (560 x 610 x 485 mm)
76.5 lbs (34.7 kg)
BGA-3582 Micro Oven™
Head Assy Dimensions
10.5” x 5.0” x 3.25” (267 x 127 x 82.5mm)
BGA-3582 Micro Oven™
Head Assy Weight
2 lb. 10 oz (1.19 kg)
Control Unit Dimensions
13” x 6” x 9.5” (330 x 153 x 241mm)
Control Unit Weight
Warranty
2
20 lb. 7 oz. (9.27 kg)
One year
BGA-3500 Series Manual 5/01
System Part Numbers
Part Number
Item Description
BGA-3591
BGA rework system with high power under-board heater, split field vision system &
monitor 115V NTSC
BGA-3592
BGA rework system with high power under-board heater, split field vision system &
monitor 230V PAL
CSP-3501
CSP Rework System, 115V. NTSC with monitor
BGA-3591-G
BGA Rework System, 115V. NTSC w/o monitor
CSP-3501
CSP rework system with under-board heater, high magnification vision system &
monitor 115V NTSC
CSP-3502
CSP rework system with under-board heater, high magnification vision system &
monitor 230V PAL (Contact Metcal for NTSC format)
CSP-3501-G
CSP Rework System, 115V. NTSC w/o monitor
BGA-3592-G
BGA Rework System, 230V. PAL w/o monitor
CSP-3502-G
CSP Rework System, 230V. PAL w/o monitor
BGA-3591J
BGA rework system with high power under-board heater, split field vision system &
monitor 100V - Japan only NTSC
BGA-3591J-SN
BGA rework system with high power under-board heater100v - Japan only
CSP-3501J-G
CSP Rework System, 100V. NTSC w/o monitor
BGA-3592-N-G
BGA Rework System, 230V. NTSC w/o monitor
CSP-3502-N-G
CSP Rework System, 230V. NTSC w/o monitor
Please note: Monitor will be supplied locally and specification will vary.
Environmental Conditions (all models)
•
•
•
•
•
•
•
Suitable for indoor use only at altitudes not exceeding 6500 ft (2km)
All systems must be grounded
Maximum relative humidity of 80% at 88°F (31°C) decreasing linearly to 50% at 104°F (40°C)
Temperature range of 41°F (5°C) to 104°F (40°C)
Mains supply voltage fluctuations not to exceed ±10% of the nominal voltage
Pollution degree 2 per IEC 644
Insulation category II
Vision Systems
The BGA-3500 systems provide a maximum four-sided view of 46mm x 46mm (1.77” x 1.77”) with a diagonal overlay on the component corners for improved alignment. The zoom lens magnification has a range of
10X to 50X.
BGA-3500 Series Manual 5/01
3
The CSP-3500 systems employ a removable 1.5X lens element to provide a maximum four-sided view of
18mm x 18mm (0.71” x 0.71”) with no corner overlay required. The zoom lens magnification has a
range of 15X to 75X. The 1.5X element may be removed if a larger component is being placed. In addition, a 2X lens element is available to enable placement of extremely small CSP components.
Shipping Data
BGA/CSP Rework System
Size
(L) 41 inches x (W) 30 inches x (H) 25 inches
Weight
185 lbs
Cube Weight 185 International
157 Domestic
Monitor
Supplied locally and specifications may vary
Size
(L) 22 inches x (W) 22 inches X (H) 22 inches
Weight
45 lb
CAUTION!
When operating this equipment, please exercise extreme caution and common sense. If this unit is used
in a manner that it is not intended for, serious personal injury may occur. Please read this operators
manual thoroughly prior to use.
I. INTRODUCTION AND GENERAL OVERVIEW
Thank you for your purchase of a Metcal BGA/CSP-3500 Series Rework System. Each unit has been
inspected thoroughly by Metcal prior to shipment and, with proper maintenance, will give you years of
reliable performance.
Your USER GUIDE is a valuable resource. It explains the system’s options, features, specifications and
outlines the correct operation of your BGA/CSP-3500 Rework System. If any problems should occur during setup or operation of your system, contact your local Metcal Representative or Metcal’s Applications
Engineering Department at (650) 325-3291, or e-mail to [email protected].
This Metcal BGA/CSP-3500 Series Rework System provides both accurate component placement and
specifically tailored reflow profiles (through Metcal’s patented single component Micro Oven™) in a user
friendly, single platform rework system.
The challenges of BGA and Fine-Pitch QFP component placement, including the inability to easily
inspect placement accuracy (with BGAs in particular), call for a solution that allows for simultaneous
viewing of PC board pads and component leads or balls for accurate placement. The BGA/CSP-3500
fills this need with quick, accurate, placement using an optical system with split-field, dual image overlay technology.
The image of the BGA solder balls is overlaid with the image of the PC board pattern. After coarse alignment, the corners of the image are brought together. The image is then viewed on the high-resolution
monitor and fine X, Y and theta adjustment, at up to 50X magnification, can be performed using the
micrometers. Finally, the part is placed and the vacuum is released automatically.
4
BGA-3500 Series Manual 5/01
After accurate component placement, the board holder is unlocked and transferred to underneath the Micro
Oven™. Here, the BGA or Surface Mount Device is subjected to a 4 zone, full convection reflow profile,
specifically tailored to the requirements of that particular PCB, device and solder paste. Accurate duplication of original oven reflow parameters is achieved.
During the course of the reflow profile, source temperatures and time intervals can be modified, eliminating
the need to wait for the current profile to terminate before modifications can be made. Precise solder joint
temperatures are measured and displayed on a real time graphical display, providing the necessary data to
accurately and easily establish the optimum reflow profile for each particular applica
tion within minutes.
II. SYSTEM FEATURES AND ACCESSORIES
BGA/CSP-3500 REWORK SYSTEM INCLUDES:
• BGA/CSP-3500 Series Base Unit
• BGA/CSP-3500 Control Unit with BGA-1 Microprocessor digital module
• High Resolution Camera, 1/2” CCD with “C” mount.
• Open-ended adjustable size board holder with under board support.
• 20” High Resolution Color Monitor (Optional)
• BGA-3528 Micro Oven Head Assembly
ACCESSORIES INCLUDED WITH SYSTEM
• MX-500S-11 or MX-500S-21
• SMTC-061 Blade tip cartridge with BGA version, SMTC-0167 with CSP version
• High temperature vacuum pads (19219)
• Spatula Handle (20534)
• Folding Hex Key Set (12236)
• Type “K” thermocouple (30 AWG (21104), 24 AWG (19984))
• One (1) roll of Kapton tape (20207)
• Stencil Adapter (21149)
• Manual for BGA/CSP-3500 Series.
• BGA-S1 Windows™ based software (19759)
• RS-232 PC interface cable (19756)
• SVHS video cable (20092)
• Adjustable BGA (19993) or CSP (20987)Tooling Plate.
• Vacuum Heads
• Height Reference Block 19993
• Gun-sight alignment assembly (20066)
• Hex Wrenches ( 3/32”, 1/16” & .050”)
• FS-24 Footswitch
• Adjustable Board Holder Fingers (AC-CLAMPSET)
BGA-3500 Series Manual 5/01
5
Main Unit Components - Figure 1
11. Open Frame adjustable printed circuit board holder.
12. Main Power Switch.
13. Subzone heater, heat/cool selector switch.
14. BGA-3528 Micro Oven Head Assembly
15. Z-Axis Adjustment Lever – Rotating Clockwise will raise the head assembly, while rotating
counter clockwise will lower the head assembly.
16. Component Pick-up Solenoid – When engaged, the vacuum is set to automatically raise the
component after reflow.
III. SYSTEM FUNCTIONS
BGA/CSP-3500 SYSTEM - Figure 1 (page 7)
17. Vacuum Cup Height Lock – After the lift solenoid has been armed, this knob locks the vacuum cup
into position on the component to be removed.
18. Quick-change Nozzle Release / Lock Mechanism
19. Nozzle Rotation Knob – Adjusts the angle at which the nozzle sits in reference to the component
10. Board Holder Position Locking Knob – When placing a component, pull this knob towards you
and slide the board holder until it locks securely underneath the Placement arm or reflow head.
11. Underboard Support Assembly– Provides support to the printed circuit board and reduces any
potential of PCB warpage or bowing. Adjust the 4 thumbscrews on the underboard support until
they contact the bottom of the PCB and provide support.
This underboard support is constructed of a special material that reduces the absorption of heat,
however, in some instances it may interfere with the transfer of heat energy from the underboard
heater. Please position it away from the component under rework.
12. X-Axis Lock / Unlock Bar – Set into the “horizontal” position to unlock the X-Axis to make coarse
adjustments, and then set into the “vertical” position to lock the X-Axis to make fine adjustments
using the micrometer.
13. Y-Axis Lock / Unlock Bar – Set into the “horizontal” position to unlock the Y-Axis to make coarse
adjustments, then set into the “vertical” position to lock the Y-Axis to make fine adjustments using
the micrometer.
14. X-Axis Micrometer - Used to make fine adjustments to the X-Axis.
15. Y-Axis Micrometer - Used to make fine adjustments to the Y-Axis.
16. Vacuum Contact LED – Illuminates when the removal vacuum is activated AND the vacuum pad is
in contact with the component.
17. Component Illumination Knob –Varies the amount of light directed to the bottom side terminals of
the component. This adjustment affects the illumination of the component viewed on the monitor.
18. PCB Illumination Knob - Varies the amount of light directed to the top of the PCB. This adjustment
affects the illumination of the PCB pads viewed on the monitor.
6
BGA-3500 Series Manual 5/01
Figure 1
6
7
16
5
9
4
8
11
1
14
2
13
15
3
12
17
10
BGA-3500 Series Manual 5/01
18
7
PLACEMENT SIDE - Figure 2
11. Vacuum LED - Illuminates to indicate vacuum is active.
12. Theta Adjustment Knob – Rotates the component to allow rotational alignment.
13. Fine Z-Axis Adjustment Knob –Raises and lowers the position of the component while suspended by
the vacuum cup. The importance of height adjustment, in reference to focus, will be discussed later
in this manual. Note: Component will be placed incorrectly if height is wrong.
14. Z-Axis Control Knob - Rotating this knob clockwise raises the vacuum head, while rotating counterclockwise lowers the vacuum head.
15. Light Adjustment Ring (Iris) –Controls the amount of light entering the camera.
16. Focus Adjustment Ring – Adjusts the focus of the image projected onto the monitor.
17. Zoom Adjustment Ring – Varies the zoom ratio of the lens.
18. Beam Splitter Knob - Splits the observed image so that only the corners of the component and PCB
can be viewed and magnified in order to make fine adjustments and perform accurate placement
inspection. This function is not present on CSP-3500 Series Systems.
19. Center Adjustment Control Knobs - These two knobs are used for adjusting the projected image so
that it is centered in reference to the monitor.
10. Tooling Plate Holder/ Component Slide - The adjustable MPVB tooling plate is mounted here. This
is used to introduce the component into the optical path of the prism and ensure that component
pick-up is centralized in reference to the vacuum pipette.
11. Vacuum Selector Switch - When this switch is in the “microswitch” position vacuum is controlled
by the microswitch located in the vacuum head. When in the “footswitch” position, vacuum is
controlled by the FS-24 Footswitch.
12. Prism Slide Knob - Pulling this knob towards you accesses the prism to view the component and
board simultaneously. Pushing this knob
forward retracts the prism to allow the
component to be placed.
11
14
Note: An image cannot be viewed on the
Figure 2
On
Back
On Back
monitor when the prism is retracted.
3
5
13. Z-Axis Stop - The position of this screw
determines how far the vacuum head will
travel upward or downward in the Z-Axis.
2
7
10
14. Foot Switch Receptacle - The FS-24
Footswitch connects to this receptacle.
1
4
6
Control Unit
BGA/CSP-3500 Control Unit Front Panel - Figure 3
(page 9)
11. Airflow Gauge: Measures the airflow out
put to the Reflow Head (liters/minute).
12. Main Power Switch
13. Air Flow Control Knob: Adjusts airflow to
the reflow head.
8
12
13
9
8
BGA-3500 Series Manual 5/01
14. Cool Air Fitting: This fitting connects to the large diameter hose with the blue ring
extending from the Reflow Head assembly.
15. Vacuum Connection Fitting: Connects to the small diameter vacuum hose extending
from the Reflow Head assembly.
16. Hot Air Fitting: This fitting connects to the unmarked large diameter hose extending
from the Reflow Head assembly.
17. Reflow Head Electrical Connector: This receptacle accepts the electrical connector
from the Reflow Head Assembly.
18. Start Cycle Button: This button to starts the rework cycle. Pressing this button while
running a profile will advance the profile into the next zone.
19. Bottom Display Up/Down Keys: Use these keys to increase or decrease any displayed
value in the lower display during setting up of the profile.
10. Mode/Zone keys: Selects between Place and Lift modes of machine operation.
11. Top Display Up / Down Keys: Use these keys to increase or decrease any displayed value in the
upper display during setting up of the profile (i.e. temperature). The keys also change system
parameters (i.e. °C to °F).
12. Type-K Thermocouple Input: When the switch (18) is in the “Thermocouple” position the bottom
display will read the temperature measured by the K-Type thermocouple connected to this input.
13. Vacuum On / Off switch: Toggles the
vacuum in the Micro Oven head
assembly on and off.
14. Preheater Mode Selector: Allows
manual activation of preheater.
Switch must be in the automatic
position for correct operation with the
software.
15. Time / Thermocouple Switch: Sets
the bottom display of the BGA
14
module to read either the tempera2
ture of an external thermocouple or
11
time when running or programming
profiles.
10
16. Lock button: Provides lockout feature
13
(when you are not using the security
features of the software) to prevent
9
12
tampering with module profiles.
1
8
16
15
3
7
Figure 3
BGA-3500 Series Manual 5/01
4
6
5
9
Camera Features (not shown)
• YC Out (SVHS Video) Output Connector- When using a high resolution monitor, connect one end of the
SVHS cable into this receptacle and the other end to the “SVHS In” receptacle located in the
rear of the monitor.
• Power Supply Connector - Insert the 12V connector extending from the rear of the BGA/CSP-3500
Main Unit into this receptacle.
• Video Out Connector - If using a monitor without SVHS capability, connect one end of the video cable
to this female BNC receptacle and the other to the monitor’s “Video In” connector
IV. SET-UP PROCEDURES
Prior to performing initial set-up, unpack all accessories from shipping containers. Check that your
BGA/CSP-3500 has arrived complete by verifying all of the accessories listed in Section II have been
included. After all components are located, begin setup.
Placement Section
IMPORTANT: There is a transportation screw located on the bottom of the placement arm and on the tooling plate/component slide to stop these parts from moving during transportation. Completely loosen or
remove these screws prior to operation to allow these parts to move freely without any restrictions.
When setting up this equipment, be sure to arrange it in a position that allows the user to operate this
machine in a comfortable, well-spaced environment.
1. Remove the BGA/CSP-3500 Main Unit, Control Unit, Camera, 20” High-Resolution Monitor (optional)
and all accessories from there shipping containers.
2. Mount the camera to the lens by rotating the camera clockwise so that it fully screws onto the top of
the lens assembly.
3. Connect the black cable extending from the rear of the BGA/CSP-3500 base unit to the connector
marked “12VDC IN” located on the rear of the camera.
4. Connect one end of the appropriate video cable (SVHS or BNC) to the appropriate video output
connector (“Y/C Out” for SVHS or “Video Out” for standard video) on the rear of the camera. Connect
the other end to the correct input on the rear of the monitor.
5. Connect the 5 pin female connector extending from the FS-24 footswitch to the corresponding 5 pin
male connector located on the rear of the BGA/CSP-3500 Main Unit.
6. Select the medium vacuum pipette and attach it to the vacuum shaft of the Placement Head.
IMPORTANT: Every BGA/CSP-3500 Rework System has been factory calibrated.
Recalibration may be required after initial setup due to shipping or rough handling. Verifying calibration is
strongly recommended prior to initial use. This procedure is thoroughly discussed later in the manual in the
section titled “Calibration Proceedure.”
Reflow Section
IMPORTANT: Prior to initial setup of your BGA/CSP-3500, please remove the transportation screw located on
the bottom of the BGA-3500 Series Control Unit. Tilt the unit on its side and remove the screw with a
Phillips-head screwdriver.
10
BGA-3500 Series Manual 5/01
1. Locate the RS232 interface cable and connect one end into the 9-pin connector at the rear of the
BGA-3500 Series Control Unit. Connect the other end of this cable to the Communications Port on
your PC or laptop computer.
2. On the rear of the Control Unit is a gray cable with a black connector marked “Preheater”. Connect
it to the matching connector located on the rear of the BGA/CSP-3500 Main Unit.
3. Place the Head Assembly on top of the theta ring. Tighten the three screws with a small screwdriver
to secure the Head Assembly. Theta can now be adjusted by rotating the Head Assembly to the
desired location.
4. The Head Assembly contains (4) four silicon hoses: (1) one electrical, (2) two air connections and
(1) one vacuum connection. Connect the (1) one electrical 9 pin male connector to the female
matching end on the lower front panel of the Control Unit. Twist and lock into place. The large
diameter hose with the blue ring connects to the fitting marked “COOL” on the Control Unit. The
unmarked large diameter hose connects to the fitting marked “HEAT”. The small diameter silicon
hose connects to the fitting marked “VAC “.
5. Plug in the power cords on the BGA/CSP-3500 Main Unit and Control Unit. Set the BGA/CSP-3500
Main power switch, Control Unit power switch and the Monitor power switch to the “on” position.
Your BGA/CSP-3500 Series Rework System is now ready for operation.
V. QUICK GUIDE TO CALIBRATION OF BGA/CSP-3500
IS YOUR PICTURE CORRECT?
Note: This should be done with a PCB in the board holder
What to check:
• Is the camera mounted so the video image is straight?
If not, rotate the camera.
•
Is the color right in the picture?
If not, check lighting, aperture of lens.
Mirror Adjustment:
• Can you cross the split field to produce a single image at full magnification?
If not, using the 4 mirror adjustment screws and Allen key, align until you get a single image.
•
When fully zoomed out, is there a shadow across the bottom of the screen?
If yes, check for fluorescent lighting above (in room), turn off if possible.
ARE YOU IN CALIBRATION?
Note: This should be done with the Calibration Plates in the Board holder. The medium vacuum cup should
be installed fully on, with the fine Z-Height adjusted down then turned back through 180° (Half a turn).
What to Set-up:
• Is the image of the vacuum cup central on the screen?
If not, use the 2 knurled screws to center it on the screen. Align with the image of the lower
calibration plate and magnify the circle to fill the screen. Place the second calibration plate
on top and lift using the vacuum pick up. Adjust the lights so that both top and bottom image
can be clearly seen.
BGA-3500 Series Manual 5/01
11
Prism Adjustment:
• If the 2 circles do not align, and adjust the outer screws until the Prism is aligned.
Camera Angle adjustment:
• When the image is crossed using the split field, do the lines align correctly? If not, loosen the
lens locking screw and adjust the thumb screw up/down until correct.
Height Adjustment:
• Cross the image over until you see 2 sets of lines. Use the Z-height grub screw to adjust height
until the 4 lines align. Set the height setting block to this height.
You should now be perfectly calibrated.
Note: This is designed as a prompt sheet for the main settings - for full details refer to the factory calibration section of the user manual.
A. PLACEMENT
When your BGA/CSP-3500 Series Rework System has been completely set up and you are familiar with the
functions of the unit, you are ready to place your first component.
1. Ensure that all power switches are in the “ON” position. Push the “Power” button on your monitor so
that it is turned on. Make sure that your monitor is set for the correct input that corresponds with your
video input connector (i.e. “SVHS=Video 3”).
2. Adjust the Component V-block to the dimensions of your component and mount it onto the component
slide. Do not over tighten the V-Block, as you want to obtain a loose fit in reference to the component.
Over tightening will prevent the component from being lifted.
3. Install the appropriate vacuum pipette onto the vacuum head of the placer.
4. Pull the Board Holder Selection Knob towards you and slide the board holder so that it locks into position underneath the Placer.
Note: The following steps are to be followed after deposition of solder paste or flux has been completed.
5. Adjust the board holder to accommodate the PCB by loosening the two black knobs and sliding the
frame so that the PCB fits snugly. The board holder can also be extended by removing the four knurled
screws that hold the rails in place, sliding the rails back and inserting two of these two screws in the
tapped holes that best match your board dimensions.
6. Ensure that the prism assembly is fully retracted. If not, the prism lock will automatically disable the
vacuum head from picking up a component.
7. Insert the component to be placed into the tooling plate. Be sure to reference pin #1 with that of the
PCB.
8. Slide the tooling plate forward so the component can be picked up by the vacuum pipette. Rotate the
Z-Axis knob counterclockwise so that the vacuum head lowers and touches the center of the component. Vacuum can now be activated either via foot switch or automatically when the vacuum head
touches the component. Ensure that the vacuum selector switch is set correctly, according to the chosen method of vacuum activation.
9. Once the vacuum has been activated and the component is in contact with the vacuum pipette, rotate
the Z-Axis knob fully clockwise. Once this step is accomplished, the component will be picked up and
brought to the highest position in reference to the Z-Axis.
12
BGA-3500 Series Manual 5/01
10. Remove the V Block and replace it with the height reference block so that the block sits on the bare
component slide. With the Z-Axis knob rotated fully clockwise and the component lifted to it’s top position, rotate the component height adjustment knob (Fine Z-Axis knob located on top of the vacuum
head assembly) so that the component’s legs or balls are barely in contact with the height adjustment
block. This step brings the component into focus. Every component varies in thickness and this difference must be compensated for. Since component thickness and ball or lead height varies with different
components, this step is required when changing between component types. Please note: This step is
not required every time a component is being placed, but only when changing to a different type or
height component.
11. Pull out the prism by sliding the silver bar on the right of the placement arm back towards you. After
completing this step, you will notice an image of the pad pattern on the PCB and the component balls
or leads appear simultaneously on the monitor.
Please note: With the prism retracted you will see an image on the monitor, it is an internal part of the
machine from the component’s path.
12. The next step is to view a dual image of the pads on the board and the balls or leads of the component
simultaneously. This is accomplished by the following procedure:
a) Adjust the zoom, focus, and lighting so that the pads on the board and the component’s balls are in
focus, can be viewed clearly, and that the lighting is adjusted so the two images can be easily
segregated.
b) Unlock the X and Y-axis by moving the X and Y locking bars on the board holder from the vertical to the
horizontal position. Make coarse adjustments at this point by sliding the board holder to allow the component legs or balls, and the corresponding land pattern to be roughly overlaid. After this image is
obtained, lock the X and Y–axis by switching the locking bars from the horizontal to the vertical position. After both the X and Y-axis are locked, fine adjustments can now be made by rotating the X and Yaxis micrometers until the two images are precisely overlaid. At this point, you can also make adjustments to the angle at which the component is viewed (in reference to the land pattern) by rotating the
theta control knob (located on the right of the vacuum head assembly).
c) Center the total image, in reference to the monitor, by adjusting the two centering screws (located above
the vision splitter knob).
d) Adjust the lighting of the component and the printed circuit board so that they are equally visible and
of equal illumination.
Note: Step “e” is necessary for placing QFP and large BGA components. This operation is not possible on
the CSP-3500 Series Systems.
e) Rotate the vision splitter knob so that only the corners of the component can be viewed. Increase the
zoom and adjust the focus to obtain a clear image of only the corners of the component. Inspect the
alignment of the component corners under high magnification and make any fine adjustments. This step
is recommended because once the corners of the QFP or large BGA are aligned, the center legs or balls
of the lead array are aligned automatically. If the image obtained is not a “true” split, and the symmetry
appears to be imperfect, the image is not centered. Center the image by adjusting the two knobs located above the vision splitter.
After you have inspected the alignment of the component with the pads of the PCB and no final adjustments are required, retract the prism by pushing the prism slide bar horizontally away from you. Lower the
component into place by rotating the Z-Axis knob counterclockwise.
BGA-3500 Series Manual 5/01
13
14. With the component placed onto PCB, the vacuum will automatically deactivate when the vacuum head
senses pressure produced by the component contacting the PCB. If you are controlling the vacuum by
the foot switch, you can deactivate the vacuum by depressing the foot switch.
15. Rotate the Z-Axis knob clockwise until the vacuum head is in the top position.
16. Now that the placement process is complete, check the component for proper position and orientation
prior to reflow.
17. After the component has been accurately placed into the correct position, pull the board holder knob
towards you and slide the board holder until it locks into place underneath the reflow head. Ensure
that the component sits directly underneath the BGA Micro Oven. If necessary, fine adjustments can be
made by rotating the micrometers on the board holder.
MICRO OVEN REFLOW SYSTEM:
IMPORTANT: This section will explain the steps required to program a Component Placement
11. Select the correct placement profile that corresponds with your application.
12. Select the appropriate Micro Oven or SMT nozzle that corresponds with the component that you wish
to remove and install onto the BGA-3528 head assembly.
Prior to installation, the nozzle lock ring should be rotated counterclockwise, before inserting (or removing) the nozzle. The nozzles are indexed and the small notch or oval hole should be facing the operator.
After inserting the nozzle in an upward position, rotate the nozzle lock ring clockwise to secure. If
using a SMT nozzle, be sure to use the optional BGA-NA nozzle adapter, which is secured into the
BGA-3528 Micro Oven head assembly in a similar fashion. SMT nozzles are threaded and simply screw
into the nozzle adapter.
13. Position the Micro Oven Nozzle over the center of the component using the X and Y micrometers for
fine adjustments.
14. Press the start button or click on the start icon to begin the reflow cycle. The system will cycle through
the complete profile and automatically stop at the end.
15. Raise the nozzle assembly off of the PCB by rotating the “Z” axis lever on the reflow arm clockwise.
The BGA component that you have just soldered is now ready for post reflow inspection.
Component Removal:
11. Select the correct removal profile that corresponds with your application.
12. Select the appropriate Micro Oven or SMT nozzle that corresponds with the component that you wish
to remove and install onto the BGA-3528 head assembly.
Prior to installation, the nozzle lock ring should be rotated counterclockwise before inserting (or removing) the nozzle. The nozzles are indexed and the small notch or oval hole should be facing the operator.
After inserting the nozzle in an upward position, rotate the nozzle lock ring clockwise to secure. If
using a SMT nozzle, be sure you are using the optional BGA-NA nozzle adapter, which is secured into
the BGA-2028 Micro Oven head assembly in a similar fashion. SMT nozzles are threaded and simply
screw into the nozzle adapter.
13. Install a vacuum cup onto the vacuum tube in the BGA head assembly.
14. Depress the vacuum solenoid on the top of the BGA head assembly until it “locks” in the down position. Do not use excessive force. Unlock the “Z” axis locking knob on the front of the BGA head assembly so that the vacuum tube moves freely in the “Z” axis.
15. Rotate the “Z” axis lever on the reflow arm (right hand side of the unit) so that the nozzle makes a
complete seal on the board or reaches the stop position.
14
BGA-3500 Series Manual 5/01
16. Turn the vacuum switch (16) to the “on” position.
17. While unlocked, push the spring-loaded head on the Micro Oven down so that the vacuum cup makes a
complete seal on the BGA component which you are removing and then lock the head into place by
tightening the “Z” axis locking knob. You will see the vacuum indicator LED illuminate indicating correct position and seal to the top of the component.
NOTE: When locking the vacuum tube assembly, excessive downward pressure may damage the vacuum
tube and not allow the component to lift. Please use light pressure!
18. With the vacuum switch still in the “on” position, press the start button or click on the start icon to
begin the removal cycle. The system will cycle through the complete profile and automatically lift the
component off the board.
Application Note: When running a removal profile, it is recommended you insert the supplied K-Type
thermocouple between the target component and the PCB so that the thermocouple is in contact with,
and will accurately measure the temperature of the solder joint you are attempting to reflow. The thermocouple can be secured to the PCB with the enclosed Kapton Tape. When developing a profile, this
will allow you to read an accurate solder joint temperature and make any “On-the-fly” changes.
19. Raise the nozzle assembly off of the PCB by rotating the “Z” axis lever on the reflow arm clockwise.
The BGA component that you have just removed will be suspended inside the nozzle by the vacuum
tube.
10. Using a heat resistant material, position it under the nozzle and turn the vacuum off. This will release
the component from the BGA head assembly.
Please do not use your hand to catch the component, even after the cooling cycle, the component can be
extremely hot.
SITE PREPARATION:
Solder Removal
Prepare the site to receive a new component by removing all of the residual solder. This can be done using
the supplied Metcal MX-500 Series Rework System with blade cartridge assembly. Employing Metcal Smart
Heat™ Technology into your rework process will eliminate the potential of accidentally removing any pads
when removing residual solder. This is because Metcal’s patented Smart Heat™ technology ensures that tip
temperature is constantly maintained, regardless of the thermal demand of the assembly that is being
reworked. For more information on Metcal Smart Heat™Technology, please contact your local Metcal representative or Metcal directly.
The following blade style tips are available for the Metcal MX-500 Series Rework System:
SMTC-x60 (.410” length)
SMTC-x62 (.870” length)
SMTC-x61 (.620” length)
SMTC-x110 (1.55” length)
Please note that “x” denotes tip temperature. All cartridges are available in 500, 600 and 700 series
styles. (5 = 500°F, 0=600°F and 1=700°F)
As an option you can use a vacuum desoldering system such as the Metcal SP440 Self-Contained or MX500DS Shop-Air Desolder/Solder Rework System to vacuum residual solder from the PCB.
NOTE ON CLEANING
Although cotton swaps soaked with isopropyl alcohol work satisfactory for removing flux residue, it is strong-
BGA-3500 Series Manual 5/01
15
ly recommended you contact your solder paste manufacturer for recommendations for cleaning the residue
left by their products.
SOLDER PASTE DEPOSITION:
The application of new solder paste can be accomplished with the optional Metcal micro stencils and supplied stencil adapter or with the optional solder paste plates. Please consult your local Metcal representative for the latest catalog of standard stencils and solder paste plates.
The BGA/CSP-3500 Series Rework System uses individual stencils matched to the component pad pattern
for the precise application of the solder paste.
• Select the micro stencil that matches your component layout.
• Mount the stencil to the supplied stencil adapter using the supplied 3/32” hex driver.
• Remove the vacuum pipette from the placement head and replace it with the stencil assembly.
• Loosen the coplanarity locking screw on the micro stencil adapter and lower the stencil until it
contacts the board. This action should help you position the stencil flat to the board. You may have to
raise and lower the stencil to achieve flatness to the board. Once the stencil is flat, lock into position
with the locking screw.
• Raise the stencil to the top alignment position and pull out the prism to align the stencil over the
board. Using your light controls, adjust the image so you have a clear image of both the board and the
bottom of the stencil. Now using the X, Y and Theta adjustments align the board to the stencil.
• Push in the prism to clear the placement path, rotate the Z-axis knob to place the stencil into contact
with the board.
• Deposit the solder paste using the squeegee supplied with the stencil.
• Raise the stencil to the top alignment position, pull out the prism and inspect the pasted board under
the high magnification supplied by the BGA/CSP-3500 placement unit.
Solder Paste Application using the BGA Stenciling Templates:
• Select the correct solder paste plate for your component and application.
• Position the component onto the component side of the plate (the side with the smaller cut out or
etched component corners).
• Secure the component with the supplied clamp assembly. Please be careful not to over-tighten the
clamp as this can cause the plate to bend which affects print quality.
• Apply solder paste to the solder balls using the supplied squeegee. When printing, make sure the
stencil face remains clean after you print, this ensures correct solder paste volume.
• Carefully remove the component clamp assembly and position the solder paste plate onto the bare
component slide aligning it with the two tooling pins.
• Using the vacuum pipette lift the component from the solder paste plate and continue with the
alignment process.
Flux Application Using the Flux Transfer Plates:
Metcal has pioneered the application of high viscosity paste flux using specialized fixtures to ensure consistent repeatable results. Please consult your Metcal representative for more information.
Please note: For this operation it is required that you select footswitch operation and use the footswitch.
The footswitch selector is located on the back of the BGA/CSP-3500 Base unit, on the left side, next to
the placement head.
16
BGA-3500 Series Manual 5/01
• Select the flux transfer plate that meets the component’s requirements for size and depth.
• Using the squeegee, fill the cavity with paste flux. Use the squeegee to smooth the gel flux level with the
sides of the transfer plate. This ensures a repeatable deposit.
• Place the component into the adjustable component fixture and pick it up with the vacuum pipette,
by depressing the footswitch to turn on the vacuum. Adjust the component height using the height
adjustment block.
• Using the micrometers, align the component in the X, Y and Theta axes.
• Remove the adjustable component fixture and replace it with the flux transfer plate.
• Slide the prism into the placement arm, unlocking the Z-axis arm and allowing you to rotate the knob
to dip the component into the flux. Slide the flux transfer plate towards the placement arm to the
component pick-up position.
• Rotate the Z-axis knob counter clockwise until the solder balls contact the bottom plate of the flux
transfer plate. Rotate the Z-axis knob clockwise to raise the component out of the flux to the alignment position.
• Slide the flux transfer plate back towards the operator and remove it from the machine. Inspect the
impression left in the flux to ensure all the solder balls have been coated. Failure to remove the flux
transfer plate between operations will result in the flux overheating; affecting the viscosity of the flux.
• Pull out the prism and check component alignment, adjust as required.
• Push in the prism, rotate the Z-axis knob counter clockwise to place the component onto the PCB.
• Depress the footswitch to release the vacuum.
Application Note On Using The Optional BGA-NA For SMT Rework
The optional BGA-NA Nozzle Adapter allows the BGA/CSP-3500 to use Metcal’s range of FCR/MTR Nozzles
for SMT applications, as well as custom designed SMT nozzles to accommodate virtually any component.
When using the nozzle adapter, the exhaust of the SMT nozzle is extended about 1” from the RTD measuring device as compared to BGA Micro Oven Nozzles. Because of this 1” extension, exhaust temperature will
decrease about 100°C from the source to the lead array.
To compensate for this loss in temperature, it is necessary to increase the profile topside temperature by
100°C. When running a profile, it is strongly recommend that the external thermocouple is secured with the
Kapton tape, and positioned so the thermocouple is in contact with the solder joint. This is necessary to
monitor the relative temperature of the solder joint and modify your profile parameters “on the fly” if necessary, enabling the end user to yield the optimum reflow profile.
For SMT component removal with the BGA-NA nozzle adapter, there are two procedures you can select:
Automatic Vacuum Lift-off:
If automatic vacuum lift off is desired, it is necessary to raise the reflow head so the nozzle is raised off of
the lead array by approximately 1/2”. This space is necessary to compensate for the height difference of
the vacuum tube when the lift solenoid is in the downward position, and will ensure that the component
leads do not bump the rework nozzle when automatically lifted.
After the head is backed off 1/2”, depress the vacuum solenoid on the top of the BGA head assembly until
it “locks” in the down position. Activate the vacuum pump, unlock the spring-loaded Z-axis adjuster on the
BGA head assembly and lower the vacuum cup so it is in contact with the component to be removed. The
vacuum LED will illuminate on the reflow arm to confirm vacuum seal to the component. Start the lift profile and observe the component automatically lift after the reflow cycle has terminated.
BGA-3500 Series Manual 5/01
17
Manual Lift-off
If your PCB is densely populated and adjacent component heating is a considerable issue, it is possible for
the nozzle to be closer to the components lead array than with the above procedure. This can be accomplished by lowering the head so that the nozzle is encapsulating the component, and then adjusting the
spring loaded Z-Axis adjuster on the BGA Head Assembly so that the vacuum pad is in contact with the
component (with the vacuum pump activated the vacuum LED will illuminate to confirm vacuum seal).
Component lift off is accomplished via the Z-Axis control lever on the reflow arm at the end of the reflow
cycle. The operator is now responsible for lifting the component at the end of the heating cycle prior to the
cooling zone.
Please note that a placement profile should be used for this process (even though a component is being
removed) to ensure that the vacuum tube does not automatically lift.
VI. ADDITIONAL SYSTEM FEATURES
A. TYPE-K THERMOCOUPLE INPUT
The BGA/CSP-3500 Series are equipped with a Type-K thermocouple input to measure an external temperature at any time.
To use this feature:
1. Plug the male connector from the external thermocouple into female connector on the BGA-1
module (15).
2. Slide the “time/thermocouple” switch on the BGA-1 module to the “thermocouple” position.
3. At this point the bottom display will read the temperature of the external thermocouple in the scale
(°F or °C) that you have previously selected.
NOTE: The BGA-1 module will display the temperature of the external thermocouple whenever the
“time/thermocouple” switch is in the “thermocouple” position. If this switch is in the “thermocouple” position and no thermocouple is connected, the bottom display will read, “Err”.
B. BGA-NA SMT NOZZLE ADAPTER
With the optional BGA-NA nozzle adapter, your BGA/CSP-3500 Series Rework System can be used to
rework SMT components. This nozzle adapter will enable you to use the broad range of FCR/MTR Series
nozzles available from Metcal. Custom nozzles are also available upon request.
VII. TROUBLESHOOTING
This section provides basic suggestions to assist with problems that might be encountered with your
BGA/CSP-3500. If you are in need of any additional assistance, contact your local Metcal Representative,
or email us at [email protected].
Placement Assembly
1. Problem: No image appears on the monitor.
Check:
• Is the prism assembly fully retracted?
• Is the monitor set to the correct input source?
• Is the cable connected to the correct input
receptacle on the monitor?
18
Possible Solution:
• Slide prism bar fully out.
• Select the input that corresponds with the input
source that you have selected.
• Ensure that the video cable is conncected to the
correct input receptacle on the monitor.
BGA-3500 Series Manual 5/01
2. Problem: Image of pad pattern and PCB appears to be on at angle.
Check:
• Is the camera on an angle?
Possible Solution
• With a .050” hex key or jewelers screwdriver, loosen the camera setscrews located on the camera body
near the lens connector. Gently rotate the camera so the image appears straight, and then retighten the
setscrews. The camera should be in a position that when the board holder is moved, the image moves in
the same direction.
Please note: This step should be performed only if the land patterns and the PCB appear to be on an angle,
not the component image. If the component appears to be in need angular adjustments, the theta axis
should be rotated.
3. Problem: Vacuum not responding when actuated.
Probable Cause:
• Position of the vacuum selector switch is incorrect.
Possible Solution:
• Switch the vacuum selector switch to ensure that it corresponds with the method of actuation that you
have selected to use. If using the FS-24 footswitch, make sure this switch is in the correct position. If
using the micro switch located in the vacuum pickup head, make sure that this switch is in the indicated
position.
4. Problem: Both images are overlaid perfectly on the monitor, but when the component is placed it is
misaligned.
Probable Cause:
• Machine is out of calibration
Possible Solution:
• Calibrate the machine. The calibration procedure is thoroughly discussed later in the manual.
• Z-Axis height is not correctly set
Possible Solution:
• The component height knob needs to be adjusted so that the component leads or balls are barely in
contact with the height adjustment block that is testing on the bare component slide (without component
tooling plate installed). This step should be performed when the Z-Axis knob is rotated fully clockwise so
that the vacuum head is in the fully upward position.
5. Problem: When placing a QFP, the image is split and magnification is increased, and regardless of X, Y,
and theta adjustments made, the will not image perfectly overlay.
Probable Solution:
• The fine Z-Axis knob needs to be adjusted so the component leads barely come in contact with the height
adjustment block resting on the bare component slide (without adjustable component tooling fixture
installed). This adjustment should be made while the Z-Axis knob on the placement arm is rotated fully
clockwise so the placement head is in the fully upward position.
• Calibrate the machine. The calibration procedure is thoroughly discussed later in the manual.
BGA-3500 Series Manual 5/01
19
6. Problem: The component slide and / or prism assembly seem to be “locked up”
or restricted.
Probable Cause:
• The transportation screws are not fully loosened, resulting in the inability of the component slide and / or
prism assembly to move freely.
Solution:
• Loosen transportation screws, which are located on the placement arm underneath the prism assembly
and on the top of the component slide.
Probable Cause:
• The locking arm has moved during transportation to the wrong side of the lock pin.
Probable Solution:
• Remove the side cover from the placement arm and lift arm into the correct position.
7. Problem: The illumination of the component greatly outweighs the illumination of the
PCB so that an image of the component leads is not obtainable (or vise versa).
Probable Cause:
• The lighting is not adjusted correctly.
Possible Solution:
• Adjust the component illumination and PCB illumination knobs so that both images are clearly visible.
8. Problem: You are unable to slide the prism in and out of the placement arm assembly.
Probable Solution:
• The locking arm for the Z-axis control knob is on the wrong side of the prism slider pin. Remove the side
cover and move the locking lever into the correct position.
MICRO OVEN:
1. Problem: When running the BGA-S1 Software, there is an error stating that communication cannot be
established between the PC and BGA System.
Check:
• Has the BGA/CSP-3500 Control Unit been turned on?
• Is the RS232 Cable securely connected between the BGA/CSP-3500 Series Control Unit and the PC?
• Has the correct communication port been selected?
Probable Solution:
• Turn the BGA/CSP-3500 Control Unit on.
• Ensure that a firm connection has been established between the BGA/CSP-3500 Control Unit and the
PC.
• When running the BGA Software, select “Auto Detect” for communication port.
2. Problem: The Micro Oven nozzle is not mounting easily into the BGA-3528 Micro Oven Head Assembly.
Probable Cause:
• The nozzle lock / release lever has not been rotated fully counter-clockwise.
• The notch or oval hole on the Nozzle or BGA-NA Nozzle Adapter has not been indexed correctly.
20
BGA-3500 Series Manual 5/01
Probable Solution:
• Rotate the nozzle lock / release lever fully counterclockwise prior to inserting the nozzle.
• Ensure that the notch or oval hole on the nozzle is indexed so that the notch or oval hole is facing
towards the operator (the front of the machine).
3. Problem: The component will not lift automatically after reflow.
Check:
• Has a “lift” profile been selected?
• Has the lift solenoid been depressed prior to starting the reflow cycle?
• Has the vacuum cup been locked into position so that it is in contact with the component you wish to
remove?
• Has a vacuum cup been inserted onto the vacuum rod?
Probable Solution:
• Ensure that a “lift” profile has been selected, not a “place” profile.
• Depress the lift solenoid prior to starting the reflow cycle.
• Lock the spring loaded Z-Axis on the reflow head so the vacuum cup is in contact with the component to
be removed. The red LED on the reflow arm will illuminate to indicate a vacuum seal. Do not exert excessive pressure or the component may not lift.
• Select the appropriate size vacuum cup for your application and insert onto the vacuum rod.
4. Problem: Operator cannot remember security code and is locked out of the BGA System.
Solution:
• Contact your local Metcal representative or Metcal Applications Engineering for instructions on overriding
and entering a new security code.
5. Problem: When operating with a CSP nozzle in the Placement mode an error “BGA Head Hot” is displayed on the computer.
Solution:
• The vacuum pad may be blocking the air path through the nozzle forcing the head to overheat. Remove
the vacuum pad, allow the head to cool and restart the reflow cycle.
VIII. SPARE PARTS AND OPTIONAL ACCESSORIES:
Listed below are spare parts available for your BGA/CSP-3500 Rework System.
BGA-3500 CONTROL BOX
PART #
DESCRIPTION
17145
In-Line Vacuum Filter
17448
Air Blower Pump (100V, 115V)
17449
Air Blower Pump (230V)
18297
Solenoid (3 Way 24VDC)
20731
PCB Assembly (115V/100V)
20734
PCB Assembly (230V)
19732
BGA-1 Microprocessor Controlled Module
19359
Solenoid Valve (28VAC)
19769
Power Cord (115V)
19768
Power Cord (230V)
20719
Vacuum Pump
BGA-3500 Series Manual 5/01
21
19030
20177
19749
20837
20837
19367
45878
45878
Transformer, 115V
Transformer, 230V
VTM-3 Temperature Control Module
Power Switch, 115V
Power Switch, 230V
Start Cycle Button
Selector Switch (DPST)
Selector Switch (SPST)
BGA-3528 MICRO OVEN HEAD ASSEMBLY
PART #
DESCRIPTION
19870
Heater Element
19501
Vacuum Tube Assembly (not available in Europe)
19722
Solenoid (24VDC)
ADDITIONAL ACCESSORIES:
PART #
DESCRIPTION
19219
Vacuum Pads (40 Pieces, 4 Sizes)
19984
Thermocouple Assembly
21104
Fine Gage Thermocouple Assembly
20207
Kapton Tape (Roll)
BGA/CSP-3500 BASE UNIT (convection preheater)
PART #
DESCRIPTION
AC-525-PH-SET
Heater pair, 500 W, 115V BGA-3000 & CSP-3500 Systems
AC-525-PH-SET
Heater pair, 500W, 230V BGA-3000 & CSP-3500 Systems
70399330
Heater pair, 200 W, 100V BGA-3000 & CSP-3500 Systems
AC-725-PH-SET
Heater pair, 750W, 115V BGA-3500 Systems
AC-725-PH-SET
Heater Pair, 750W, 230V BGA-3500 Systems
70399330
Heater Pair, 700W, 100V BGA-3500 Systems
20835
Fan Detector and Fan Motor Driver PCB
20731
Temperature Controller PCB 100V / 115V Systems
20734
Temperature Controller PCB 230V Systems
20002
Centrifugal Fan, 12VDC
19341
Transformer, 130VA, 100V Units
19029
Transformer, 130VA, 115V Units
20174
Transformer, 130VA, 230V Units
20837
Main Power Switch
PLACEMENT SECTION
PART #
19510
20585
21207
AC-BELT-V
20102
41312
20066
AC-CAMNTSC
22
DESCRIPTION
Halogen Lamp
Mirror Assembly, BGA-3500 Systems
Mirror Assembly, CSP-3500 Systems
Z-Axis Controller Belt
Micrometer
Micro switch (Vacuum Head)
Gun Sight Calibration Assembly
NTSC Camera
BGA-3500 Series Manual 5/01
AC-CAMPAL
PAL Camera
FS-24
Footswitch
20781
Lamp Control PCB
20719
Vacuum Pump
20907
Prism Assembly
Large Vacuum Nozzle
21137
Medium Vacuum Nozzle
21095
Small Vacuum Nozzle
21077
CSP Vacuum Nozzle
OPTIONAL ACCESSORIES:
BGA / CSP Reflow Nozzles
BGA/CSPNozzle Kit: Part
BGA REFLOW NOZZLES
PART NUMBER
BGA-194-194
BGA-220-220
BGA-228-228
BGA-252-291
BGA-276-276
BGA-315-315
BGA-380-380
BGA-403-403
BGA-450-450
BGA-490-490
BGA-NA
CSP NOZZLES
PART NUMBER
CSP-060-060
CSP-077-095
CSP-080-080
CSP-080-095
CSP-085-099
CSP-085-102
CSP-091-132
CSP-093-090
CSP-096-118
CSP-097-144
CSP-097-184
CSP-100-100
CSP-100-122
CSP-110-110
CSP-120-120
CSP-130-130
CSP-150-150
CSP-180-180
BGA-3500 Series Manual 5/01
Number BGA/CSP-NK
INTERNAL DIMENSIONS
19.4mm x 19.4mm
22mm x 22mm
22.8mm x 22.8mm
25.2mm x 29.1mm
27.6mm x 27.6mm
31.5mm x 31.5mm
38mm x 38mm
40.3mm x 40.3mm
45mm x 45mm
49mm x 49mm
Nozzle Adapter for FCR Nozzles
INTERNAL DIMENSIONS
6mm x 6mm
7.7mm x 9.5mm
8mm x 8mm
8mm x 9.5mm
8.5mm x 9.9mm
8.5mm x 10.2mm
9.1mm x 13.2mm
9.3mm x 9mm
9.6mm x 11.8mm
9.7mm x 14.4mm
9.7mm x 18.4mm
10mm x 10mm
10mm x 12.2mm
11mm x 11mm
12mm x 12mm
13mm x 13mm
15mm x 15mm
18mm x 18mm
23
Micro Stencils
The application of new solder paste or flux to the PCB can be accomplished with Metcal’s micro stencils.
The micro stencil is a single component stencil matched to the component land pattern for the precise
application of the solder paste or flux. Please contact your local Metcal representative for information and
availability. Custom sizes and styles are available.
Flux Transfer Plates
The application of high viscosity paste flux can be accomplished with Metcal’s flux transfer plates. The flux
transfer plates allow for a simple, controlled application of paste flux to the solder balls of a BGA or CSP
component. They are available in many sizes and depths. Please contact your local Metcal representative
for information and availability. Custom sizes and configurations are available.
BGA Stenciling Templates
The application of new solder paste or flux directly to the component’s solder balls can be accomplished
with Metcal’s BGA Stenciling Templates. Theses templates allow the precise application of solder paste
without worrying about contact with surrounding parts on the PCB. Since the component is pasted instead
of the board, operators find this to be a much faster and simpler solution. Please contact your local Metcal
representative for information and availability. Custom sizes and styles are available.
CSP or BGA System Conversion
Your Metcal Rework System has been designed to allow for your changing rework needs. Should your system need conversion from BGA to CSP, or CSP to BGA, please consult the your local Metcal representative
for details on the conversion process.
X. WARRANTY AND SERVICE
WARRANTY POLICY:
The BGA/CSP-3500 Series Rework System is under warranty for a period of 12 months, from the purchase
date for all parts and labor. Heater elements are under warranty for a period of 90 days. Please contact
your nearest Metcal office (listed on the back page) for any repair procedure. Metcal is not responsible for
repairs to your system’s monitor. Please consult the manufacturer of your monitor for details regarding your
warranty period and service.
24
BGA-3500 Series Manual 5/01
BGA WINDOWS PROGRAM
Hardware Requirement:
•
•
•
•
•
•
Personal computer with a 486 or higher processor running the Microsoft Windows 95 or Windows 3.1 or later operating system.
8 MB of memory or more
Hard-disk space required: 20MB.
A VGA or Higher resolution monitor (Super VGA recommended).
Microsoft Mouse or compatible point device.
A free RS232 port (com port). Note: Some Laptop PC’s have their com port disabled for power management.
(Ensure com port is enabled.)
Software Requirement:
OK BGA Windows program.
Installation:
•
•
•
•
Start Windows operating system.
Close all applications running except for Program Manager. (Hint: press Ctrl+ESC keys to end task of other applications)
For Windows 3.1 or later: From Program Manager, select File from menu and choose Run. On command line, type a:\setup.exe
then click OK.
For Windows 95: Click Start, select Settings, select Control Panel and choose Add/Remove Program. Then click Install.
Basic Operating Instructions:
•
•
•
•
•
•
•
•
Connect RS232 cable between computer and BGA unit then turn on power.
Start the program: Double click on BGA icon.
If BGA Unit Not Found error message appears on the screen, ensure that BGA-2000 unit is turned on, and RS-232 cable is firmly
connected from PC to back of BGA-3000 unit; click OK then select Options. Select Set Com Port and choose a com port
connected to BGA unit. Select File, choose Exit to quit and restart the program.
Enter password: Enter the same security number set in BGA unit only if this security number was set and click OK.
Select a profile: Click on Place or Lift icon on the top left corner of control panel shown on screen to choose a place or lift
profile. Click on ‘+’ or ‘-’ to increment or decrement the profile number.
Edit a profile: Ensure the ‘Lock’ icon is set to unlock. Click on Lock icon and it will toggle between lock and unlock. Click on the
desired editing field to edit (temperature or time)of control panel. Click on ‘Update’ icon to instantly save changes. (Note: The
first 5 lift and first 2 place profiles are the factory preset profiles and cannot be edited.)
Start the cycle: Click on the start cycle icon (see below).
Print the temperature curves: Click on a graphics display window, select File menu and choose Print.
The basic function of the control panel
Indicate that the content of this
profile has been changed.
Click here to choose the
place or lift profile.
Click here to increment or
decrement the profile number.
Click here to display graphics
window.
Enter the desired settings in
the editing fields.
Click here to change the
temperature scale.
Click here to Start the cycle.
Indicate that the last change
has been saved.
Click Update to down-load
the new settings to the BGA
module.
Click Restore to up-load the
original settings from the
BGA module.
ADDENDUM A
page
1
THE PROFILE
The concept of the profile:
A profile is the relationship between the temperature and time for a given placement or removal process. The profile is broken into
four components known as the Preheat zone, soak zone, peak zone, and cool zone. Each zone has user definable temperature and time
settings allowing the user to create a profile for almost any removal or placement process.
•
•
•
•
Preheat zone is used to pre-heat the circuit board and component in order to drive off moisture that may have been absorbed by
multilayer boards and prevent from the possibility of “popcorning” (local delamination of the part or circuit board). The set
temperature for top and bottom side is identical.
Soak zone has two temperate settings. One setting is for the preheater that is used to maintain the heat beneath the circuit board.
The second setting is the temperature of the top air that heats all of the solder joints under the micro oven to the sub melting
temperature and ensures joints will melt at Peak zone.
Peak zone also has two temperature settings that are similar to Soak zone. The appropriate temperature of the top air should be set
in order to ensure solder joints reach their melting point. Note: For the removal mode, the pick-up solenoid will be triggered at the
end of this cycle allowing the component to be automatically removed from the PCB.
Cool zone is used to cool down the chamber of the micro oven and the solder connections in the place mode, allowing the solder
to solidify at a steady ramp rate and increase solder connection reliability. In the removal mode, the cooling cycle is necessary if
the component is reused and to cool the PCB correctly.
There are two kinds of profiles: One is known as module profile that is stored in the memory device inside the BGA module. The
other known as Library Profile carries more information and is stored on the user-selected drive of their computer. Any profile can
be stored in the preferred location. Periodically, the user should back up profiles by saving onto floppy disk.
The Module Profile
Select temperature scale
Editing Fields of Preheat Zone
Editing Fields of Soak Zone
Editing Fields of Peak Zone
Editing Fields of Cool Zone
Select the graphics display
Restore Settings from BGA Module.
Update settings of BGA Module
The Library Profile
Select the placement
or removal process.
Hardware and process
description area.
ADDENDUM A
page
2
Open a profile stored in BGA module:
Select File from menu, select Open and choose Module Profile. Select a profile from the list on the pop up dialog window and click OK.
The dialog window of the module profile selection
First, click here to select either
Place Mode or Remove Mode.
Click here to pop up the list of profiles and then
select a profile from the list.
Click here to accept the selection.
Click here to abort the selection.
Click here to enable the computer
to search for an empty profile for
you.
Open a profile stored in computer library:
Select File from menu, select Open and choose Library Profile. Enter the file name of the profile on the file dialog window and click OK.
The typical file dialog window
Enter the file name here
or
Select a file name from
the file list.
Click here to accept the
selection.
Click here to abort the
selection.
Click here to pop up a list of drives.
Select a drive containing the profile.
Create a new profile that will be stored on the disk.
Select File from menu and choose New Profile and enter new data. Select File from menu and choose Save File and assign a file
name for the new profile on the file dialog window.
ADDENDUM A
page
3
CONTROL PANEL
All essential functions for the BGA unit can be run from two control panels. One control panel processes the Module Profile
(profiles stored in the BGA-3000 module) and the other the Library Profile (profiles stored on the selected floppy or hard drive of
computer). To select either control panel, choose View from the menu and click on Control Panel. Select either Access Module
Profile or Access Library Profile, or drag an opened profile to the area of the control panel if Mouse Drag & Copy Function in
Options menu is enabled.
Control Panel for the module profile
Click here to increment or
decrement the profile number.
Click here to choose the place
or lift profile.
Enter the desired settings on
the text cell.
Click here to Start the cycle.
Note: Icon change can be
match or space shuttle. (See
Options Menu).
Click Update to down-load
the new settings to the BGA
module.
Click Restore to up-load the
original settings from the BGA
module.
Click here to stop the
process.
Note: Vacuum Control Warning. Vacuum when activated by software and RS 232 is disconnected will not revert to manual control
unless the program is closed down by quitting application or the power is turned on and off again on the BGA-3000 unit.
Control Panel for the Library profile
Name of source file.
Information of the current profile.
Click here to save changes onto disk.
Click here to select temperature scale.
Indicates the status of vacuum pump.
Click here to select vacuum to be controlled
by either BGA unit or software.
Click here to enable/disable vacuum if it is
controlled by software.
ADDENDUM A
page
4
THE GRAPHICS DISPLAY WINDOW
The graphics display window illustrates the temperature, time settings and actual values for the profile. The vertical bars represent
temperature and the horizontal bars represent the process time. The bars can be moved vertically or horizontally to change the
temperature or time settings of the profile by simply clicking on the vertical or horizontal bars and dragging them.
The horizontal dotted lines (Red & Blue) in the graphics display window are reference temperature markers and may be moved
anywhere in the profile.
The BGA unit has three temperature probes. One is located inside the micro oven and one is located inside the preheater. The third
one is known as thermocouple (T.C.) and is connected to the front panel of the BGA module. Each curve illustrates the temperature
of a given probe at a specific time. The T.C. probe is typically placed in between the chip and the PCB by the first balls when trying to
establish a removal process for BGA for the first time. It can be placed in any other desired location. The vertical, dotted lines are
designed to help read the temperature curves easily. The temperature and time measurement window is displayed at the bottom left
hand corner of the graphics display window. Curves and time measurement bars can be added, (maximum of 6), or removed and the ir
attributes changed. Please refer to MENU section.
The topic graphics of the profile
Temperature scales
Process Information. (Shown on
the graphics file only)
Bars represent settings.
(e.g. Temperature & Time
markers of the soak zone)
Two temperature markers.
Curve of T.C.
Time measurement bars
Curve of Top Air
Elapsed time of each zone
Curve of Preheater
The display window which
shows in digital form the
temperatures of the air, T.C.
and preheater at the time
measurement point
Time scales
ADDENDUM A
page
5
CURVES
Copy curves:
To copy a temperature curve from one graphics file to another requires opening a source graphics display window and a destination
graphics display window prior to copying curve (s). Highlight the graphic window and choose Edit from the menu Select Copy
Curve and choose the name of the curve to be copied. Highlight a destination graphics window, select Edit from menu and select
Paste Curve. Enter a name for the new curve on the pop up window. Modify its attributes (e.g. color, line width) as needed and
click OK.
You may select a curve by moving the mouse pointer to the top of the curve, click the left button of the mouse and choose Copy
Curve on the pop up menu. Move mouse within the area of the destination window, click on the right button of the mouse and choose
Paste Curve on the pop up menu. Note: The right button of the mouse may be used by other applications and a different menu
would appear.
To copy curves
Step 1:
Move the mouse pointer to the top
of a curve, click on the left button
of the mouse and select Copy Curve.
Step 2:
Move the mouse pointer to
free space, click on the right
button of the mouse and select
Paste Curve.
The pop up window for the ‘Paste Curve’ command
Indicates the source file of the curve.
Click here to choose the color.
Type a new name for the curve here.
The shape of the current curve.
Choose a line style from the list.
Select line width from the list.
Click here to make this curve visible.
Click here to hide the curve.
Click here to finish pasting.
Click here to abort.
To delete curves:
Highlight a graphics window and select Edit from the menu . Select Cut Curve and highlight the name of the curve to be deleted.
This curve can be pasted on any graphics windows by selecting Paste Curve from the menu.
For a short cut, select a curve to be deleted by moving the mouse pointer to the top of this curve. Click on the left button of the mouse
and choose Cut Curve on the pop up menu.
To change attributes of the curve:
Highlight a graphics window and select View on the menu bar. Select Curve Options and highlight the name of the curve to be
changed. Modify its attributes on the pop up window and click OK to update changes.
For a short cut, select a curve to be changed by moving the mouse pointer to the top of the curve. Click on the left button of the mouse
and choose Curve Options on the pop up menu.
ADDENDUM A
page
6
TIME MEASUREMENT BARS
To move time measurement bars:
Move the mouse pointer to the top of the time measurement bar, press and hold the left button of the mouse (A black mark representing
the timer will appear on the bottom of the bar). Drag the bar by moving the mouse horizontally and release the left button when the
bar reaches the desired time setting.
How to move Time Measurement Bar
Place the mouse pointer on the Time Measurement Bar,
and press and hold the left button of the mouse until the
timer’s black mark appears under the blue line.
Change the time setting by moving the mouse pointer
horizontally.
The Time setting
(In blue)
To add time measurement bars:
Highlight a graphics window and select View on the menu bar. Select Time Measurement Bars. Select Add Time Bar. Choose a
color for the new bar from the color dialog window and click OK. Drag the new bar which appears at the beginning of the graph to the
desired time setting and release the left button. Note: A time measurement bar cannot be added to a graphics window which does not
have actual temperature curves.
Delete time measurement bars:
Highlight a graphics window, select View on the menu bar and select Time Measurement Bars. Choose Delete Time Bar and
choose the time setting (mm:ss) of the bar to be deleted.
How to add/delete Time Measurement Bar
To add a bar, select View,
select Time Measurement Bars,
and choose Add Time Bar.
(Maximum 6)
To delete a bar, select View,
select Time Measurement Bars,
select Delete Time Bar,
and select time of that bar to be
deleted.
ADDENDUM A
page
7
THE SETTINGS OF THE PROFILE
How to change settings of the profile:
On a profile window, click on a text cell and enter settings on that cell. Click on Update after all cells have the correct settings. On a
graphics window, move the mouse pointer to the top of the horizontal bar that represents the settings of the profile. Press and hold the
left button of the mouse and two black marks will appear on the time axis and the temperature axis. To change the temperature setting,
drag the bar up and down by moving the mouse vertically. To change the time setting, extend or shorten the bar by moving the mouse
horizontally. Note: You can only adjust one setting at a time. Release the left button after the appropriate value is reached and click
on Update only if Module Update on the Options menu is not enabled.
The text cells matrix
The graphics window
Show settings of the profile.
Enter settings of the profile here.
Click here to
recover old values.
Click here to
Update new values.
Press and hold the left button
of the mouse here and wait for
two black marks to appear.
Then move mouse vertically to
adjust the temperature or move
mouse horizontally to adjust
the time. (only one operation
can be adjusted at a time)
Copy settings of the profile:
Highlight a window as the source, select Edit from menu and select Copy Profile. Highlight the target window, select Edit again and
choose Paste Profile.
If Drag & Copy Function on the Options menu is enabled, simply move the mouse pointer to the free space on the source window,
press and hold the left button of the mouse. Move the mouse to the target window and release the left button. The copy is complete.
Another way to copy profile settings is to move the mouse pointer to the free space on the window. Click on the right button of the
mouse to open the edit menu. (Note: The right button of the mouse may be used by other applications and a different menu would
appear.)
How to get the editing menu without using the menu bar
Move mouse pointer to free space and
click on the right button of the mouse.
Back up the settings stored in the BGA module:
To save all of the settings in the BGA module to a file, select File from menu, choose Back-Up Module Profiles, enter password on
the pop up window and click OK. Enter the file name on the pop up window and click OK.
Restore the settings of the BGA module:
To copy a back-up file to the BGA module, select File from menu, choose Restore Module Profiles, enter password on the pop up
window and click OK. Then select a file name on the second pop up window and click OK.
ADDENDUM A
page
8
SECURITY
Enter new password/Change password:
Select Security from menu and choose Change Password. If a password has been set, enter the old password on the pop up window
and click OK. You will be asked to enter new password twice if no password has been set.
The password window
Type your password here.
Click here to accept.
Click here to abort.
Lock “editing” function:
Highlight a window, select Security from menu, choose Lock Editing, enter password on the pop up window and click OK to turn on
or off the lock function that prevents unauthorized changes to settings. The lock function also can be operated by toggling the LOCK
switch on the Tool Bar.
Lock “skip cycle” function:
Select Security on the menu bar and choose Lock Cycle Advancing to turn on or off this lock function which prevents users from
skipping the current cycle by pressing the start cycle button during the process.
Lock BGA system:
Select Security on from menu and choose Lock BGA System. Enter password on the pop up window (You will be asked to enter the
new password twice if no password has been set) and click OK. The BGA system is unlocked if the BGA system was in the lock mode
previously. Otherwise, a dialog window appears and will ask you to select a security level. Click OK to select security level 2 which
prohibits the edit function, the skip cycle function and the profile selection function . Only the current lift profile, the current place
profile or the current profile from the profile library can be operated. Click on NO to select security level 1 that allows the user to
operate any profile freely. In security level 1, the status of the skip cycle function is dependent on whether Lock Cycle Advancing in
the Options menu is enabled or not.
The security level dialog window
Click here for security level 1
Click here for security level 2.
Click here to abort.
ADDENDUM A
page
9
The Menu
Open a new profile that is stored in the disk.
Open a profile in BGA module.
Open a profile on the disk.
Open a graphics file on the disk.
Save the selected profile
Save the selected graphics window to the disk.
Update or restore the settings of BGA module.
Save all of profiles in BGA module to the disk.
Restore profiles stored in the disk to BGA module.
Print the current graphics window.
Preview the graphics window.
Change the printer configuration.
Print the current window image.
Quit this program.
Place current settings of the profile on the copy buffer.
Paste the content of the copy buffer to the current profile window.
Place the selected curve to the curve buffer.
Delete the selected curve and place copy to the curve buffer.
Paste the curve on the curve buffer to the current graphics window.
Paste the Bit Map Image of the current window to the Clipboard.
Start control panel setting process.
Stop the current process
Enable vacuum to be controlled by the pseudo vacuum button on
the screen.
Select here to turn vacuum on or off if it is controlled by software.
This is used to test the function of the pickup solenoid.
ADDENDUM A
page 10
Locks the edit functions of the current profile.
Locks BGA systems to prevent unauthorized changes.
Prevents user form skipping a cycle during the process.
Edit password.
Select a profile from BGA module or the disk for Control Panel to process.
View Tool Box.
Set the temperature unit of the current window to Celsius or Fahrenheit.
Select a display mode for the timer
at the right corner of the Tool Box.
Add/Delete the time measurement bars
Change the attributes of the selected curve
Open the graphics window of the current profile window.
The mark indicates the particular item is enabled.
Select and highlight a window from
the list of windows opened
Operator Password to enable machine use without knowing lock
password. If enabled, user may type a number in parenthesis as an
alternate password to run the program after system has been locked.
Otherwise a password is not required.
The selected default temperature scale is used when a
new profile window is opened.
The temperature scale of BGA module and the
control panel are synchronous.
Start cycle icon. (Two choices exist)
Select here to enable the instant update
after the settings bar on the graphics
window is moved.
Select a com port (RS232) which is connected to
the BGA unit. (In auto detection mode, some
foreign devices connected to other com ports will
be falsely triggered.)
Indicate which com port is in use.
Enable a short cut to copy the settings
of the profile by drag a window onto
another window.
The mark indicates the particular item is enabled.
ADDENDUM A
page 11
Get information about BGA windows program.
The BGA information window
Show the version of this program
and the BGA module here.
Select here to create the BGA manual file in *Microsoft Word
format from the optional manual disk.
Select the installation drive.
*Note: Microsoft Word is trademark of Microsoft Corporation.
THE WINDOW IMAGE
Export a window image to Clipboard:
Highlight a window to be exported, select Edit from menu and choose Paste Window Image to Clipboard.
Print a window image:
Highlight a window to be printed, select File from menu and choose Print Window Image.
The Tool Box
.
Start
Cycle
Stop
Cycle
Lock
Editing
Recall
Settings
Update
Settings
Actual
Temperature
Process
Timer
ADDENDUM A
page 12
Revised 8//97
Calibration Procedure for Fine-Pitch
Placer portion of BGA-3000
INTRODUCTION:
The Fine-Pitch Placer portion of the BGA-3000 Rework System is a precision optical instrument that will
provide its user with the ability to accomplish precise, repeatable alignment of component leads or balls
with the mating land pattern on the PCB board. Accurate alignment and placement of any component are
dependent on the system’s optics being adjusted properly. The unit is calibrated at the factory, however;
calibration may be required due to shipping or rough handling. It is advised that the unit’s calibration be
checked prior to use to avoid any placement errors.
CALIBRATION VERIFICATION:
NOTE: Please read user’s manual prior to performing any calibration to insure familiarity with unit.
MATERIAL REQUIRED:
1.
Gun Sight Alignment assembly PN: 20066 (provided with system)
2.
Vacuum Cup size 0.4 PN: 19790 (provided with system)
CAMERA SETUP
1.
The camera has been pre-set at the factory to the following:
a.
“C” mount adapter has been locked with “C” mount fixing screws to 1 1/2
turns from fully home.
b.
Shutter speed has been set: NTSC/PAL
c.
White balance set to auto.
Note: Please do not change these settings
1 1/2 turns from fully
home.
SYSTEM SETUP:
1.
Assemble the unit as described in the user’s manual.
2.
Turn power on to the unit (refer to users manual if necessary).
3.
With the vacuum head assembly at the top position install the vacuum cup
size 0.4 PN: 19790 (Refer to DWG # 5 in Factory Calibration Procedure).
4.
Place the Gun Sight Alignment assembly PN: 20066 onto the board holder and position the center
of the gun sight pattern under the vacuum pickup head. (Lower the head until the vacuum cup
almost touches the gun sight alignment plate.) See FIG A and text below FIG A. If the removable
gun sight plate is still on the assembly remove it now. Set it aside and proceed to position pattern,
still on alignment assembly, in center of cup. After gun sight is aligned with vacuum cup move
head back to top position.
5.
Turn the “Z” adjustment knob fully counterclockwise and then 1/2 turn back clockwise.
ADDENDUM B
page
1
A Board Holder
RBH-D
B Gun Sight
Alignment Ass’y
PN 20066
C Rail Tension
Knobs
D Locking Lever
X Movement
E
Locking Lever
Y movement
Top view of board holder.
Arm not shown for clarity.
FIG A
To place Gun Sight Assembly into board holder as shown above in FIG. A, procede
as follows:
Loosen black knobs marked C to allow movement of the front PCB holding rail.
Move the front rail so that the Gun Sight Assembly can be held in place by the front and rear
PCB holding rail. Tighten the black knobs marked C to secure the Gun Sight Assembly in
place.
To position the Gun Sight Pattern in the center of the vacuum cup do the following:
Move the two levers marked D and E so that when you grab the two black knobs marked C
the board holder moves freely. Position the Gun Sight Pattern in the center of the vacuum cup.
Move the two levers marked D and E back into their original position to lock the board holder
in place.
6.
7.
8.
9.
Adjust the illumination and the macro zoom lens to obtain a clear picture of the gun sight
pattern.
a.
The illumination is adjusted by rotating the lower red knob on the left side of the
placement arm. This adjusts the illumination for the object in the board holder.
b.
The focus on the zoom lens is adjusted by rotating the large ring located at the bottom of
the lens.
c.
The Zoom is adjusted by rotating the middle ring.
The upper ring on the lens is used to adjust the aperture (i.e., how much light the camera
sees)
Place the second gun sight plate over the gun sight pattern on the assembly. Note: This gun sight
pattern should be face down.
Set the vacuum selector switch to trigger from the vacuum pickup head. Bring the vacuum
pickup head down and pick up the top gun sight plate off the gun sight alignment assembly.
Move the pickup head to the uppermost position. Place the height adjustment block on the nest
holder and slide the block under the plate. If the block does not go under the plate rotate the
“Z” adjustment knob clockwise until the block just clears the plate. If there is a gap between the
plate and the height adjustment block rotate the “Z” adjustment knob counterclockwise until the
block just clears the plate. Slide nest holder and height adjustment block back (away from the
unit) and remove block. Remove height adjustment block.
Move the beam splitter out from the arm assembly to its forward most position. Adjust the
illumination until you see both the top gun sight plate marking and the bottom gun sight plate
ADDENDUM B
page
2
10.
marking. If the images are broken (not continuous) use the split vision adjustment knob to correct
and make the image continuous.
The circles should appear as one circle and all markings should be even from one side to the other.
If the gun sights are offset the unit will require calibration. The figure below on the left shows a
unit calibrated correctly and the figure on the right shows a unit out of calibration. If your
screen looks like the one on the right you must perform the factory calibration. Refer to Section
B, step 13 to perform beam splitter adjustment.
NOTE: Do not go to Step 11 if your unit is out of calibration. Perform adjustment before
proceeding to step 11.
h
11.
Using split vision knob; rotate knob clockwise. Split the image bringing the outer lines in toward
the center of the screen. Zoom in on the image and center on the screen if necessary.
If the image on the monitor looks like the image above and on the left the magnification is in need
of adjustment. Refer to section D of the Factory Calibration. If the image on the monitor looks
like the image on the right follow sections C & D in the Factory Calibration.
ADDENDUM B
page
3
FACTORY CALIBRATION
The calibration procedure below describes how to adjust the five major components of the fine pitch placer.
THE FIVE ADJUSTMENTS ARE:
A.
Vision Splitter (mirror) adjustment
B.
Beam Splitter (mirrored cube) adjustment
C.
Vision Assembly adjustment
D.
Magnification adjustment
E.
Lamp Position adjustment
MATERIAL REQUIRED:
1.
PCB Blank, such as OK Ind. PN: 19703 and component such as OK Ind. PN:19385 (BGA-225)
2.
Hex wrench set (must include 0.050”, 1/16”, 3/32", 7/64”)
(.050” and 3/32” wrench provided with system)
3.
Gun Sight Calibration Assembly PN: 20066 (provided with system)
4.
Vacuum Cup Size 0.4 PN: 19790 (provided with system)
5.
Height Adjustment Block PN: 19993 (provided with system)
SETUP:
1.
Assemble the unit as described in the users manual.
2.
Turn power on to the unit (refer to users manual if necessary).
3.
Loosen the beam splitter security screw (located under the arm), and using the steel knurled lever
on the right of the arm, move the beam splitter out from the arm by moving the lever forward.
4.
Place a PCB Blank such OK PN:19703 into the board holder and position the largest component
under the beam splitter.
5.
Adjust the illumination and the macro zoom lens to obtain a clear picture of the components full
pattern.
a.
The illumination is adjusted by rotating the lower red knob on the left side of the
placement arm.
b.
The focus on the zoom lens is adjusted by rotating the large ring located at the bottom of
the lens.
The Zoom is adjusted by rotating the middle ring.
The upper ring on the lens is used to adjust the aperture (i.e., how much light the camera
sees).
PROCEDURE:
A.
VISION SPLITTER (MIRROR) ADJUSTMENT
DWG #1
1.
2.
Turn the split vision adjustment knob counterclockwise until the image on the screen is not
affected by this action. Refer to DWG # 1.
Turn the split vision adjustment knob clockwise until you notice the effect of this action on the
image of the component pattern on the screen. (The two corners A & B will start to move toward
each other.) Refer to DWG # 2. Turn the knob clockwise approximately an additional 30°.
ADDENDUM B
page
4
DWG # 2
A
B
3.
Using a 0.05 hex wrench perform tasks A through F.
DWG # 3
A.
B.
C.
D.
E.
F.
Turn both screws C & D counterclockwise until there is no
effect of this action on the screen. (The image does not move.)
Turn screw D clockwise until the image on the screen starts to move
and turn an additional 65° ± 10° from this point.
Repeat this step for screw C.
Turn both screws E & F counterclockwise until there is no effect of
this motion on the image on the screen. (The image does not shift.)
Turn screw F clockwise until the vertical lines of the component on
the PCB blank are lined up and continuous, not broken.
Turn screw E clockwise until the horizontal lines of the component
on the PCB blank are lined up and continuous, not broken. If you cannot line up the
horizontal lines turn the split adjustment knob and additional 10° - 15°.
Turn split vision knob clockwise 45° and back counterclockwise
until the outline lines up again in both vertical and horizontal
directions. The image should look as in DWG # 4 on the right. If the image looks like
the one on the left, repeat steps A-F.
DWG # 4
SCREEN SPLITTING
LINE
Turn the split vision knob clockwise and counterclockwise to ensure that both
corners move toward each other and back and proper alignment is kept.
ADDENDUM B
page
5
B.
BEAM SPLITTER (MIRRORED CUBE) ADJUSTMENT
1.
Move the Vacuum Head Assembly to the top position and install
size 0.4 Vacuum Cup (P/N 19790) onto the vacuum tube.
(See DWG # 5 below.)
DWG # 5
VACUUM PICKUP HEAD
ASSEMBLY
2.
3.
4.
5.
6.
7.
8.
9.
10.
11.
12.
13.
Turn the Z adjustment knob counterclockwise completely. (Vacuum Tube should be at its
maximum length.)
Turn Z adjustment knob clockwise, making approximately 1/2 turn.
Remove the PCB blank and install the Gun Sight Alignment Assembly in its place (with one
plate) onto RBH-C Board Holder. Refer to Figure A in the calibration verification procedure for
more details. (If necessary)
Retreat the beam splitter and move the Vacuum Pickup Head Assembly into the low position
(vacuum head should be just above the pattern plate).
Position the circle on the fixed pattern plate of the Gun Sight Assembly over the center of the
vacuum cup. Refer to Figure A in the Calibration Verification Procedure for more details.
Move the vacuum head to the top position. Be sure to lock X, Y movement using locking lever
(Refer to Fig. A on page 2.)
Draw beam splitter out from arm assembly, use lever on right side of arm assembly.
Using the zoom lens magnify the circle on the fixed pattern plate until the circle fills the video
screen. Using the two positioning knobs on the vision assembly, move the circle plate to the
center of the screen. (See DWG # 7).
Retreat the beam splitter and install the removable pattern plate (face down) onto the dowel pin.
Move the vacuum head to the low position until the vacuum head touches the pattern plate.
Activate the vacuum and pick up the pattern plate. Move the vacuum pickup head to the top
position.
Draw beam splitter out from arm assembly using lever on right side of arm assembly.
Adjust illumination (top and bottom) by rotating the light adjustment knob (located on the left side
of the unit) to obtain a clear picture of both images.
While viewing the screen, superimpose the images of the two plates. This is done by performing
tasks a, b, c, below. Do not move the board holder and be careful not to touch the top pattern
plate. If you do touch the top pattern plate, please go back to step 4 above.
a.
b.
c.
Using a 1/16” hex wrench loosen both mounting screws, making 2
turns counterclockwise. (See DWG # 6A)
Using a 0.05” hex wrench turn both calibration set screws until
proper alignment is achieved. (See DWG # 6b)
Tighten the mounting screws. This should not affect calibration.
ADDENDUM B
page
6
DWG # 6A
DWG # 6b (image on monitor)
C.
VISION ASSEMBLY ADJUSTMENT
DWG # 7
1.
Turn the split vision knob (marks on the diagonal line will move toward each other) until the four
marks on the diagonal line are visible on the screen (two on each side of the division line). (See
DWG # 9)
Magnify the image, (ring in the middle of the lens should be in the extreme counter clockwise
position) adjust sharpness (largest ring on lens) and illumination to obtain a clear picture. If you
do not see the 4 marks move the positioning knobs until the 4 marks appear on the screen.
2.
ADDENDUM B
page
7
3.
Observe position of the screen splitting line on the screen. If the line does not run through the
center of the marks or while zooming in and out the screen splitting line moves, perform steps
a-f.
DWG # 8
a.
b.
c.
d.
e.
f.
4.
Loosen mounting block screws.
Loosen pivot screw making 2 turns counterclockwise.
Gently push the lens toward the unit until lens is in the extreme right hand position.
Zoom out until image such as DWG # 9 is seen.
Adjust positioning knobs (See DWG # 7) to move the screen splitting line symetrically
in the center of the 4 marks.
Zoom in and out and observe if the screen splitting line moves between 4 marks. If the
screen splitting line does move, turn the pivot screw approximately 1/4 turn. Zoom in and
out to check if line moves. Continue turning screw 1/4 turn until the screen splitting line
remains stationary.
Turn both positioning knobs (See DWG # 7) until the image of the pattern is positioned
approximately in the center of the screen and the line runs through the center of the pattern. (See
DWG # 9)
DWG # 9
SCREEN SPLITTING
LINE
DIAGONAL LINE
MARK ON THE DIAGONAL
LINE
5.
Observe the diagonal line. If it appears to be broken (See DWG # 10), follow the steps a-c.
ADDENDUM B
page
8
DWG # 10
BROKEN DIAGONAL LINE
a.
b.
c.
Loosen the top mounting screw. Use 3/32” hex wrench. (See DWG # 11)
Turn the supporting screw in or out until the diagonal line aligns
itself.
Tighten the top mounting screw.
DWG # 11
D.
MAGNIFICATION ADJUSTMENT
Images of the two patterns, from the top and bottom plates, should be magnified to the same size,
distances, L1 and L2.
If the image on the screen appears as shown in DWG # 12B, adjustment of the magnification is required.
DWG 12A
DWG 12B
SCREEN SPLITTING LINE
ADDENDUM B
page
9
1.
2.
3.
Turn the zoom ring fully counterclockwise.
Move the split vision adjustment knob to see the 4 marks.
While turning the head assembly knob clockwise to exert a slight upward pressure, turn the top
Z-adjuster set screw (Use 0.05” hex wrench) in or out until the distances L1 and L2 are equal. (See
DWG # 12A).The vacuum head assembly should be in the top position. The setting of the top
Z-adjuster set screw is now final and should not be altered. If the distances L1 and L2 are equal,
but shifted (See DWG # 12C) the beam splitter must be recalibrated. To recalibrate, follow step
13 in Beam Splitter adjustment.
DWG 12C
4.
Once magnification is set, adjust the height of the Height Adjustment Block, P/N-19993,
(the distance from the nest holder to the gun sight pattern plate.) Refer to DWG # 13. This will
provide a reference when trying to adjust the magnification for placing components in the future.
E.
1.
LAMP POSITION ADJUSTMENT
Remove Gun Sight Calibration Assembly and replace with PCB blank such as OK Ind.
PN: 19703.
Install adjustable V Block (MPVB) and place component such as OK Ind. PN: 19385 (BGA-225)
in the block. Bring down vacuum pick up head until vacuum activates and pick up component
from the adjustable V block. Remove component nest from nest holder.
Using your height adjustment block as a reference place the height adjustment on the nest holder
and carefully attempt to slide under component. Use the Z adjustment knob to adjust the height of
the component so that the component leads just clear the adjusting screw on the block.
Remove the height adjustment block.
Roughly align the matching image on the PCB blank (BGA-225) with the component. Use
the red light adjustment knobs on the side of the arm to adjust light intensity so that both images
can be seen on the video screen.
Turn the split vision adjustment knob counterclockwise to bring the upper left and lower right
corner in towards each other. Split the image approximately 50%. Adjust zoom so that image
fills the screen.
Remove front cover to expose front lamps. Refer to DWG # 14.
Loosen the screw securing the side lamp and front right lamp. Starting with the side lamp,
position the bracket to give the most light on the top left hand corner of the PCB. Position the
right lamp so that it provides equal intensity on the lower right corner of PCB. Tighten screw and
secure in place.
Loosen the screw securing the front left lamp and position so that it provides equal illumination on
component. Tighten screw and secure into place.
Reinstall front cover and ensure that screws are tight.
2.
3.
4.
5.
6.
7.
8.
9.
10.
DWG # 13
ADDENDUM B
page 10
Do not touch this screw until after you
adjust the block height in step D4.
DWG # 14
ADDENDUM B
page 11
CONTACT INFORMATION AND TECHNICAL SUPPORT
Metcal offers quick response technical service. Please
contact your nearest Metcal office for technical support:
Metcal Headquarters
1530 O‘Brien Drive,
Menlo Park,
CA 94025, USA
Tel: +1 (650) 325 3291
Fax: +1 (650) 325 5932
France
Rue Ampere,
Z.I. Lyon Nord,
69730 Genay
Tel: +33 04 72 08 75 75
Fax: +33 04 72 08 75 70
United Kingdom & European Headquarters
Eagle Close, Chandlers Ford
Eastleigh, Hants.
S053 4NF, England
Tel: +44 (0) 2380 489100
Fax: +44 (0) 2380 489109
Italy
Strada Statale 11 - N. 28,
20010 Vittuone (Milano)
Tel: +39 02 902 5161
Fax: +39 02 901 11147
Japan
2F ASK Bldg.
1-24-4, Ebisu,
Sibuya-ku,
Tokyo, 150-0013
Tel: +81 3 3449-7451
Fax: +81 3 3440-2010
Asia Headquarters
Taiwan
5F No. 79, Sec 1
Hsin-Tai-Wu Road, Hsi-Chih
Taipei Hsien, Taiwan, R.O.C.
Tel: +886 (2) 2698-4013
Fax: +886 (2) 2698-4021
OK Industries Deutschland GmbH
Frankfurter Strasse 74
D-64521 Gross-Gerau
Germany
Tel: +49 (0) 61 52 - 71 12 -0
Fax: +49 (0) 61 52 - 71 12 - 22
China
No. 22 Chao Yang Men Wai Avenue
Beijing Prime Tower, Room 1901
Chao Yang District
Beijing, P. R. China 100020
Tel: +86 10-6588-3360
Fax: +86 10-6588-3359
Precision Systems for the Electronics Bench
Mouser Electronics
Authorized Distributor
Click to View Pricing, Inventory, Delivery & Lifecycle Information:
OK International:
19219 17145 AC-CAMPAL AC-CAMNTSC AC-BELT-V AC-525-PH-SET 20719 20102 20002 19993 19984
19749 19732 19501 19510 17448 45878 41312 21207 21137 20734 20781 20835 20837 20907 21077
BGA-450-450 CSP-180-180 BGA-490-490 BGA-403-403 BGA-380-380 BGA-315-315 BGA-276-276 CSP-130-130
CSP-120-120 CSP-110-110 CSP-100-100 CSP-097-144 CSP-077-095 CSP-060-060 BGA-252-291 BGA-194-194
AC-CLAMPSET 21149 CSP-150-150


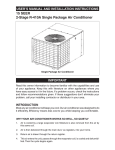

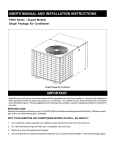


![VTW Software Operation manual[PDF:17.4MB] - FOR](http://vs1.manualzilla.com/store/data/005725901_1-df2c6d7f9199f46fcf33ffa12e63545b-150x150.png)