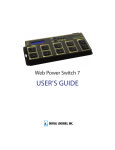
Download EPC II User Manual
Transcript
Ethernet Power Controller II
USER’S GUIDE
2695 Walsh Avenue, Santa Clara, CA 95051
Tel: (408) 330-5599, Fax: (408) 541-8459
www.digital-loggers.com
more equipment can be attached to a single circuit without
overloading.
3URGXFW)HDWXUHV
Congratulations on your purchase. The Ethernet Power Controller II is
a rack mount power switch used for remote control, automatic reboot,
voltage, current, and power monitoring. Current features include:
Redundant Power Supply
Dual, redundant power supplies are included. The loss of either main
power circuit will not affect the power controller. Separate A/B power
loops are provided for redundant equipment.
Web Interface
The internal web server is accessible from any standard web
browser. Simply enter an IP address, and the controller may be
configured and controlled via the web.
MOV Surge Suppression
Dual 3600J metal oxide varistors clamp power surges and spikes,
protecting all attached devices.
Auto-Ping
This powerful feature automatically monitors a remote IP address. If
a server, router, or other TCP peripheral goes down, the controller will
automatically reboot it, without user intervention.
16 Switched Outlets + 2 Un-switched Outlets
Eight switched circuits are provided, each with a pair of 110/220VAC
outlets. Each pair of outlets can be controlled independently. The
outlets are spaced properly for large adapters and plugs. Two unswitched circuits are provided for connection to “always on” devices.
Manual Override Controls
Front panel controls are provided to manually override software
settings. Each outlet can be switched on or off manually, or to “REM”
for remote software control. Two LEDs display status for each relay.
Password Security
Password security is provided to limit access to the power controller.
Sequenced “On Timer”
A programmable delay timer allows outlets to be switched on in
sequence, rather than simultaneously. Most electrical devices draw
more power when they are initially switched on. Using this timer,
2
Ethernet Power Controller II
www.digital-loggers.com
Field Upgradeable Firmware
Firmware is field upgradeable via Ethernet. Memory expansion is
field upgradeable. New features such as serial port support, email
notification, and scheduling are under development. Visit the FAQ
page for information on upgrades available free or at a minimal
charge.
At DLI, we listen to customers. Send your suggestions to engineering
(at) digital-loggers.com. Since we’re constantly adding and changing
features, specifications are subject to change without notice.
6WDQGDUG3DFNDJH&RQWHQWV
1. Ethernet Power Controller II
2. Ethernet Cable – Straight Through
3. Dual Power Cords – Permanently attached per UL
requirements
4. Quick Start Card & Manual
Please contact the shipping carrier immediately if your package
appears opened or damaged in transit. Call DLI at (408) 330-5599 for
technical support, service, or mail-in firmware upgrades.
Ethernet Power Controller II
3
,PSRUWDQW)DFWRU\'HIDXOWV
DEFAULT IP ADDRESS
The factory default IP address is 192.168.0.100
5.
DEFAULT ADMINISTRATOR LOGIN
User name; admin (lower case)
Password: 1234
6.
Note, these defaults have changed since the new release of this
product. Users of the legacy PC-8000 product should visit
www.digital-loggers.com/epc.html
7.
8.
To reset the IP address and admin login to factory defaults, press the
reset button near the Ethernet jack gently.
Note: This procedure resets the admin login and IP address, but it
doesn’t affect outlet names and links.
4XLFN6HWXS
Use these shortcuts if you are an experienced installer. If you are
unfamiliar with the installation of power controllers, please contact
DLI for technical support and installation services.
1. Remove the power controller from its shipping carton. Save
the carton and packing, in case of future upgrade.
2. Check the voltage switch on the bottom of the unit.
3. Attach the power cords to two fused 110/220VAC power
sources with a capacity of at least 15 amperes each.
4. Attach the cable from the controller to a port on your LAN. If
the default IP address of http://192.168.0.100 isn’t
compatible with your network, a crossover cable may help
4
Ethernet Power Controller II
www.digital-loggers.com
9.
during initial configuration. Switch power on. After 10
seconds, a link light should appear. If you are connected to a
switch, you may need to cycle power to establish the port
speed on the switch.
Ping the default address http://192.168.0.100 to confirm that
a good network connection has been established. If you
don’t receive a response, use a crossover cable and see the
“Windows IP setup.” Section below.
Log in to the power controller using the default user name
“admin” and the password “1234” .
“admin” must be entered in lower case.
Click on the “Settings” link to reach the main configuration
page.
Complete the configuration information as described below.
After each section is completed, click the “Submit” button and
wait for the page to refresh before continuing to the next
section.
Set the front panel switches to ON for always on, OFF for
always off, or REM for remote control via Ethernet or serial
connection.
Tip: A lamp or other small appliance is handy for testing the
controller. This ensures that the controller has been configured
properly before attaching your equipment.
:LQGRZV,36HWXS;3
If your default Windows settings won’t access the controller, use a
crossover cable and follow these steps to reach the controller’s IP.
Before adding an IP, close network programs and browsers. Go to
the Network Settings – Local Area Network. Use the keyboard
shortcut <Windows-R> - type “ncpa.cpl” and click OK. Right click on
your LAN connection and choose “Properties”. Highlight “Internet
Protocol” and click the “Properties” button. Click the “Advanced”
button. Under the IP Address settings, click the “Add” button. Enter
Ethernet Power Controller II
5
a new IP, such as 192.168.0.10, and a subnet mask of
255.255.255.0. Press the “Add” button. This new IP is added the
list. Close all windows for the configuration to take effect.
Start your Browser and type 192.168.0.100 in the URL field. The
EPC is displayed. The default user name and password are
“admin” (lower case).
%DVLF2SHUDWLRQ
After power-up, the controller performs a sequence of self-tests to
ensure reliability. After self-test, the controller requests an IP
address if DHCP has been selected. If DHCP is not used or no
server is located, the fixed IP address on the network settings page
is selected.
The controller may then be operated via a web browser. To access
the controller, simply enter the IP address in the URL field of your
web browser. Future versions of the firmware will also support
remote operation via the serial port.
+RPH2XWOHW&RQWURO3DJH
To access the home page, first enter the IP address in web browser
URL field, then log in. The admin has access to all features. User
access is limited to outlets assigned by the administrator. When
configuring the power controller for the first time, use the default
“admin” username and “admin” password.
The home page contains nine links to other pages. The first five are
fixed internal links:
6
Ethernet Power Controller II
www.digital-loggers.com
Outlet Control
Clicking “Outlet Control” links to the home page used for manually
switching outlets on and off. Access to specific outlets is determined
by your login.
Setup
The setup page lets you select outlet names, program web lings,
startup delays, and the power loss recovery mode. You can also
change login credentials on this page.
RTC
The controller features an internal battery-backed up real-time clock.
Use the RTC link to view clock settings or synchronize to your local
PC time.
AutoPing
The AutoPing link lets you set parameters for automatically reboot
attached equipment. First specify an IP address to ping. Next adjust
the timing settings and use the checkboxes to link the IP to specific
circuits. For example, if a router is unreachable, you may choose to
automatically reboot both a router and a switch attached to two
different circuits.
Logout
The controller will automatically log-out when your browser session is
closed. Click this link to log-out in advance.
Help
The Help link displays the latest online manual. Since features are
subject to change without notice, this manual may not be an exact
match for your controller.
Logout
Logout ends the web session. A login is required to reconnect.
Ethernet Power Controller II
7
Programmable Web Links
Four additional user-defined web links are provided on the outlet
control page. Factory defaults are “Link 1”, “Link 2”, etc. You may
change the name and destination URL for these links on the
“Settings” page. These links are convenient for connecting to other
power controllers or to remote sites.
Switching Outlets on and Off
The outlet control page lets you control any pair of outlets (except the
always-on pair). A master setting also allows users with security
access to switch all outlets on or off. The sequence in which outlets
will be switched on is determined by settings on the Admin page.
To switch an outlet on or off, simply click to the right of the outlet
name or number. Switching is immediate.
You may also “Cycle” a device which is connected to the controller.
This feature is useful for rebooting Ethernet devices which may
interrupt the web link to the controller. Clicking “Cycle” switches power
off, waits a few seconds, and then switches power back on. This
resets the attached device. You may also “cycle” all outlets using the
“Cycle all outlets” button on the bottom of the page.
Depending on your web browser settings, you may need to click the
“refresh” button to update the on-screen status display after changing
settings. A screen refresh setting is provided on the Setup page.
6HWXS3DJH
The setup page allows the administrator to configure the power
controller. These settings are supported:
Controller and Outlet Names
Use the controller name fields to assign a Controller Name to the
power controller itself. Examples are “Server Rack Power Strip” or
“Plutonium Refinery Control”. The Controller Name field appears on
the top of the home page. Assign a separate name to each outlet,
such as “Missile Launcher” or “Email Server” to make identification of
each circuit simple.
Power-On Sequence Delay
When a time value is entered in the “All ON sequence delay” field, the
power controller will pause for a period of time before switching each
outlet on in sequence. This delay helps prevent the power surges and
blown circuit breakers which can occur when multiple devices are
switched on simultaneously. A delay of 60 seconds is suggested for
server applications.
You may also enter a screen refresh delay in this section. If “Enable
screen refresh” is checked, and a delay value is entered, your
browser should periodically update the status screen.
Power Loss Recovery Modes
The power loss recovery mode setting has three settings which
take effect after a power failure:
1. You can turn all outlets off (all systems will be switched off
until manually turned on later) by checking the first box.
8
Ethernet Power Controller II
www.digital-loggers.com
Ethernet Power Controller II
9
2. You can automatically turn all outlets on using the “All ON
sequence delay” described above. Check the second option
to do this.
3. You can return to the same outlet settings that were used
prior to the power loss. The “All ON sequence delay” will
also be used in this instance. Check the third option for ALL
ON.
User Defined Links
You may link to other power controllers, your own web pages, or
remote web sites by entering up to four URLs and descriptions in the
Setup page. For example, enter “Site Two Power Controller” in the
description field with a URL of “192.168.0.250” These links appear on
the home page.
$XWR3LQJ3DJH
AutoPing Operation and Settings
AutoPing is an automatic system for rebooting IP equipment without
human intervention. To use AutoPing, first add an IP address. Next,
link that IP address to one or more outlets. Timing settings must also
be considered.
Network Settings
A fixed IP address, network mask, gateway, and subnet mask must
be entered in this field.
Add IP Address to Auto-Ping
Use this option to specify the address of an IP device you wish to
monitor. After entering the IP address, the settings page will refresh
and you can select the outlets associated with this address. Use the
checkboxes in the AutoPing section to correlate the IP address to one
or more outlets. If communications to the IP address is lost, these
outlets will be rebooted. Four parameters are used for AutoPing
operation:
When changing IP addresses, you may need to restart the unit and
your network switch to validate the new IP on an “auto-configuring”
switch port. Be sure to record the new IP address.
Time between pings
This is the time between each “ping” check of the IP address. 60
seconds should be useful for most applications.
Press the “protect” button to lock the network settings. Once locked,
the network settings cannot be changed except by pressing the
physical reset button on the front of the unit.
Ping failures before reboot
This sets the number of failed communications attempts that
must be sequentially detected before a system is rebooted. For
example, when set to 5, the target system must fail to respond 5
times in a row before it is rebooted. Since occasional network
overloads and missed packets can occur during normal network
operation, a number between 5 and 10 pings is recommended.
57&3DJH
The RTC page allows the administrator to set the internal real time
clock. The clock may be set manually or synchronized to your local
PC time.
10
Ethernet Power Controller II
www.digital-loggers.com
Ethernet Power Controller II
11
Times to Attempt Reboot
If you have an unreliable target device, limit the number of times it
will be rebooted by entering that value here. For example,
entering 5 will reboot your server up to 5 times before giving up.
Device Reboot Delay
After rebooting a device with a cold-boot power-off, a waiting
period should occur before the IP address is re-checked by
AutoPing. This delay allows the device to reboot. Windows and
Linux servers can force automatic file system checks which may
take several minutes to complete. Enter a safe value To allow for
this, enter a time delay in the Device Reboot Delay period. For
example, a reasonable value for a typical Windows server might
be 10 minutes (600 seconds). Entering 600 would cause the
power controller to start checking the server for normal operation
10 minutes after reboot.
7HFKQLFDO6XSSRUW
To save time and effort, please read this manual completely before
calling for tech support. You may FAX questions to (408) 541-8459
or email: [email protected] For phone support, dial (408)
330-5599 and please have the following ready so we can better serve
you:
•
•
•
A copy of your invoice.
The firmware version level installed in the power switch. This
information can be found on the lower left corner of the outlet
control page.
A description of the Ethernet devices connected to your unit, for
example, a 10/100 PC and crossover cable.
)XWXUH6HULDO3RUW6XSSRUW
Two serial ports are provided for remote access. This feature will be
added in a free future firmware ugprade.
9ROWDJH&XUUHQW0RQLWRULQJ
The Outlet control page displays voltage and current on the A and B
busses separately. Each of the four web meters acts independently.
The design accuracy of the meters is +/- 2%.
12
Ethernet Power Controller II
www.digital-loggers.com
Ethernet Power Controller II
13
6SHFLILFDWLRQV
Operating input voltage
100-130VAC or 200-277VAC switch
selectable
Input Frequency
Surge Suppression
Ethernet Interface
47-63Hz
Dual MOV, 3500J rating
10/100 autosensing, Static IP, TCP
port selectable, 8 pin RJ-45 with
internal FCC filtering
RS-232, 2 ports, SW support pending
18 x outlets NEMA 5-15R, 2 15A
plugs, others available custom order
Encrypted, base 64
2x15A thermal, slow blow, pushbutton
T-90, 277V, 15-25A contact rating
14AWG low loss stranded, UL SJT
FX3C VW-1 150ºC rating
900ms minimum (all on)
2% or .3A accuracy, 0-20A
100-300VAC, 2% accuracy
On,off,remote switch for each outlet
On/off switch for each power bus
Processor reset-to-default button
19” RETMA rack. 2-U 3.5” height
Power on (8x LEDs), Outlet Status
(8x LEDs), Link, Act
Audio alert 81dBA at case
Bare unit 11.2 lbs, Ship wt. 12.1lbs
-30º to 17ºF, -34º to 77ºC
Cold rolled steel, non flammable
powder coated, no plastics
Serial I/O Hardware
Outlets & plugs
Password transmission
Circuit Breakers
Control Relays
Power cords
Power fail hold-over time
Current Metering
Voltage Metering
Switches & Controls
Size
Indicators
Weight
Operating temperature
Enclosure material
14
/LPLWHG)LYH<HDU:DUUDQW\
Ethernet Power Controller II
www.digital-loggers.com
The terms of this warranty may be legally binding. If you do not agree to the
terms listed below, return the product immediately in original unopened
condition for a full refund. The purchaser assumes the entire risk as to the
results and performance of the unit. DLI warrants this power controller to be
free from major defects. No agency, country, or local certifications are
included with this unit. It is the responsibility of the user to obtain such
certifications if they are necessary. DLI’s entire liability and exclusive remedy
as to defective hardware shall be, at DLI’s option, either (a) return of the
purchase price or (b) replacement or repair of the hardware that does not
meet DLI’s quality control standards and has been returned through proper
RMA procedures. DLI’s liability for repair or replacement is to DLI’s customer
ONLY. WARRANTY SERVICE DOES NOT INCLUDE SOFTWARE OR
HARDWARE UPGRADES. No warranty service will be provided without an
original invoice from DLI and an RMA number provided by technical support.
RMA material must be shipped prepaid to DLI. RMA numbers are valid for
15 days from date of issue. This warranty does not cover products modified,
subjected to rough handling, or used in applications for which they were not
originally intended. No oral advice or verbal warranties made by DLI’s
employees, dealers, or distributors shall in any way increase the scope of
this warranty. DLI makes no warranty as to merchantability or fitness for any
particular purpose. DLI assumes no liability for incidental or consequential
damages arising from the use or inability to use this product. This warranty
gives you specific legal rights. You may also have other rights that vary from
state to state. Since some states do not allow the exclusion of liability for
consequential damages, some of the above limitations may not apply to you.
DIGITAL LOGGERS, INC.
2695 Walsh Avenue
Santa Clara, CA 95051
FAX (408) 541-8459
www.digital-loggers.com
[email protected]
© 2007 DLI This product is protected by pending US patents and foreign patents
Release 1.21
1.2.1 Updated
31, 2007.
Release
UpdatedWednesday,
Friday, MayOctober
23, 2008.
Ethernet Power Controller II
15


