1
How to Prevent Run-off eBook
http://WaterWiseNow.com/RunOff
Run-off Public Enemy #1
Low Head Drainage
Note: If you have difficulty unscrewing the
sprinkler, use the pliers to grasp the sprinkler
body to help you turn it.
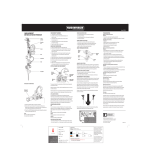
6. Remove the sprinkler nozzle
and filter from the old spray
body, by unscrewing them from
the sprinkler cap. You’ll need
them for the new one.
7. Install the new sprinkler. Screw it in to the
same place the old one was attached.
3. With your hand trowel (or shovel if you
prefer), remove the dirt around the sprinkler.
Place the loose dirt on top of the tarp or plastic
trash bag. This prevents the soil from vanishing
into the lawn. You will use this soil to refill the
hole after you are finished.
Expose the entire sprinkler until you see the
connection at the bottom. Sprinklers are always
screwed into a water supply pipe of some kind
(like PVC or black flexible pipe).
5. Unscrew the sprinkler. Do not be alarmed
if water starts coming out of the pipe! This is
just left over water in the pipes from when you
turned them on and will stop eventually.
8. Notice the height of the new sprinkler, and
make sure it will not be buried at a deeper depth
than the bottom of your grass blades. You want it
to be positioned at the top of the soil level.
9. Take the soil you placed on the tarp, and
begin filling up the hole. Compress the soil
around the new sprinkler so it stays in place,
and so the grass stays at the proper level.
10. Replace the grass clumps on top of the soil
around the new sprinkler. If the pieces are too big
and you have trouble making them fit properly, it
is ok to break them up into smaller pieces.
11. Before you install your new nozzle, flush
the system. To do this, go to the controller and
manually turn on the station you’re working on.
Stuck or confused? Ask us! Call toll-free at 1(844) LESS-H2O or email [email protected]
Copyright 2014 © Water Wise Now, LLC. All Rights Reserved.
PAGE 6