1
2600, 2400, 2300 FOGGERS
USER’S MANUAL
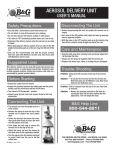
Safety Precautions
• Connect unit to the designated electrical supply:
Do not connect 110V units to 220V power,
Do not connect 220V units to 110V
power.
• Do not move or position the fogger
by pulling it by the electric cord.
• Always use a grounded (3 terminal)
extension cord.
Before Starting
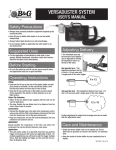
• Calibrate the adjustment knob:
• Turn the knob until closed
• Push down on base of knob and align
the point with groove on the nozzle
• Release base to set the point
• Push down and turn the base, align
with groove
Operating Instructions
Filling
• Do not add more than 1.5 gallons (5.5 liters) liquid to the
tank.
• Do not mix chemical in the tank; pre-mix and then add to
the tank.
• Mix all chemicals according to label directions.
Placement During Operation
• Never place fogger directly on floor, always elevate to keep
dust and moisture out of fogger
• Do not operate fogger in enclosed or small areas for more
than 30 minutes.
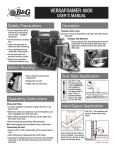
2400, 2600 Operation
• Adjustment knob open one-quarter to one-half turn - This
delivers a ULV fog.
• The spray can not be seen because
the droplets are very small.
• Adjustment knob open one full turn This delivers a power mist which is
visible from nozzle.
Very Important
• When fogging is finished and the unit will be turned
off, follow this sequence:
First, turn off adjustment knob
Second, turn off electric power
Third, open the tank cap
Turn off the
adjustment knob
before turning
power off
Note: Failure to
follow this sequence
can result in liquid
insecticide dripping into the hose and
eventually reaching and destroying the motor.
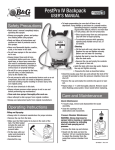
Care and Maintenance
• Always empty and flush the tank after each use; never
leave chemicals in tank for extended periods
• Inspect spray hose and electric
cord for wear or damage.
• Protect nozzle when not in use.
• Cean the filters on the bottom
plate of the fogger; be certain to Clean filter
replace (this protects the motor). regularly
Trouble Shooting
Problem: Fog and power mist is weak
Solution: • Tighten the cap
Problem: Liquid forms around the base of the motor
housing, around mounting screws
Solution: • Unit may have been operating too long and fog
droplets in the ar are forming on the metal
screws
Problem: Fogger is operating erratially; frequently turning
on and off
Solution: • Inspect the electric cord and the plug for damage
• Motor may be damaged from moisture, replace
motor
Problem: Fogger becomes very warm (hot) during normal
operation
Solution: • Remove the lower plate (motor guard) and clean
the filters with a nylon brush
95138800 Rev 2/10
Part
8189-36
8184-48
Part
2385-36
2385-48
FLEX-A-LITE 2600
Description
Supply tube
Supply tube
#
1
2
3
4
5
6
7
8
9
10
11
12
13
14
15
16
17
18
19
19
20
Description
36” Hose assembly
48” Hose assembly
Part #
2332
2334
2346
2331
2330
2333
2329
2352
2357
2359
2353
1433
2354
2385-18
8123
2308
8182
8188-18
2314
2341
2311
Description
Clip
Spring
Venturi
Knob asmbly
O-Ring
Sleeve
Screw
Screw
Hex nut
Spacer
Nozzle
Spring clamp
Screw
Hose asmbly
Spacer
Screw
Pressure tube
Supply tube
110v cord
220v cord
Switch
#
20
21
22
23
24
25
26
27
28
29
30
31
32
33
33
34
35
36
37
38
39
Part #
2340
990
2315
1103
2384
2358
Ref.
2312
2316
8156
Open
Ref.
Open
2323
2324
2305
2306
2605
2608
1145
2355
Description
220v switch
Switch boot
Strain relief
Cap and O-ring
Nozzle asmbly
Tube retainer
Item #17
Strainer
Wire connector
Grommet
Open
Item #18
Open
Motor 110V
Motor 220V
Motor guard
Screw
Tank
Housing
Screw
Mount plate
135 REGION SOUTH DRIVE • JACKSON, GA 30233
Toll Free 800-544-8811 • Phone 678-688-5601
www.bgequip.com • Fax 678-688-5633
MY-TI-LITE 2300, ULTRA-LITE 2400
#
1
2
2
3
4
4
5
6
7
7
8
9
10
11
11
12
12
Part
1103
2306
2406
990
2311
2340
1433
2329
2346
8186
8123
2308
2315
2314
2341
2330
2337
Description
Cap and O-Ring
Housing (Model 2300)
Housing (Model 2400)
Switch boot
Switch 110V
Switch 220V
Spring Clamp
Screw
Venturi (Model 2400)
Venturi (Model 2300)
Spacer
Screw
Strain relief
Electric cord 110V
Electric cord 220V
O-ring (Model 2400)
Plug (Model 2300)
#
13
14
15
16
17
18
19
20
21
21
22
23
24
25
26
27
28
Part #
2331
2332
2334
2333
2316
Open
8156
Open
2323
2324
2305
2306
8194
2312
Open
Ref.
2404
Description
Valve rod, knob (2400)
Clip (Model 2400)
Spring (Model 2400)
Sleeve (Model 2400)
Wire connector
Open
Grommet
Open
Motor 110V
Motor 220V
Motor guard
Screw
Supply tube
Strainer
Open
Item #24
Tank
B&G Help Line
800-544-8811