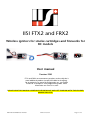
1
IISI FTX2 and FRX2 Wireless ignitors for smoke cartridges and fireworks for RC models User manual Version 2.00 FTX2 and FRX2 are autonomous products and usually don’t need additional product (except USB cable for charging). For an optimal use, personal configuration etc. you need a PCARD or a Cockpit V2 with programming cable. More information on www.iisi-rc.com PLEASE READ THIS MANUAL CAREFULLY BEFORE USAGE AND GET FAMILIAR WITH THE SECURED ARMING PROCESS. IISI FTX2 and FRX2 user manual www.iisi-rc.com Page 1 of 8 1 The basics 1.1 Additional information The FTX2 and FRX2 are immediately usable when leaving the factory. For any changes of the configuration you need a PCARD or the IISI Cockpit V2 with programming cable. Please refer to the respective manuals for more information under www.iisi-rc.com. 1.2 Purpose and Installation The FTX2 and FRX2 are used to ignite smoke cartridges or other fireworks remotely, without using cables. The FTX2 is connected to a free channel of your receiver and transmits the signal to the FRX2 (igniter), which evaluates these signals and triggers the igniter when requested. The advantage of the IISI remote igniter system is the fact, that many RTF models (ready to fly) cannot be equipped easily with cables, especially when the wings are based on foam. The pilot just has to fix the smoke cartridges on the plane. No connectors, no wiring, no hassle. Compared to many other igniter systems, the IISI FRX2 is short circuit proof (and detects this) and it is secured against involuntary ignition when powered on. 1.2.1 Mounting There are no specific mounting rules, nor for the FTX2, nor for the FRX2. Please keep the FRX2 away from dirt, smoke deposit, humidity, heat, etc. 1.2.2 Pairing of FTX2 and FRX2 When the FRX2 leave the factory, they are in the automatic pairing mode. This means that the pairing is automatically done when the system is powered up the first time. Should you want to add more FRX2 or FTX2, you need the PCARD or the IISI Cockpit with a programming cable, in order to modify settings, add pairings, or clear pairings. A FRX2 can be paired with up to 8 different FTX2. So you can choose if you want to put permanently a FTX2 in your model, and share the FRX2 (usual case), or if you want to move all modules from plane to plane. You can pair an infinite number of FRX2 to a single FTX2. The factory default ignition number of the FRX2 is number 1 (first activation of switch after arming). Other users of the IISI igniter system, as well as the full range of the IISI telemetry products, can be used in parallel without interference. 1.2.3 Charging The FRX2 contains a LiPo battery, which can be charged on any USB connector. The charging process is indicated with the red and green LEDs (longer GREEN means higher charging state). When the battery is full (in about 2 hours), the green light blinks slowly, without the red one. Should you don’t use your FRX2 for a longer period of time, it can be left alone at least for one year without discharging the battery. Should you do this, please charge the battery about to half full, in order to preserve the battery. 1.2.4 Switching on and off the FRX2 The FRX2 is switching on and off automatically. It switches on under the following conditions: IISI FTX2 and FRX2 user manual www.iisi-rc.com Page 2 of 8 - Connection of a cartridge, an igniter or the PCARD Connection of a USB charger The FRX2 is switching off after: - a successful ignition, that means when the igniter has burned correctly and “has disappeared”. - removing the cartridge - removing of the charging cable The FRX2 cannot switch off when: - the PCARD is connected - a smoke cartridge or igniter is connected - short circuit on the output 1.2.5 The red and green LEDs of the FRX2 The FRX2 has 2 LEDs with the following function: When switching on: The red and green LED alternate fast for a short time, then they indicate the battery voltage in volts and 1/10th volts: e.g. 4.2V (full battery) * * * * pause * * A nearly empty battery will show * * * Pause * * * * * * (3.6V). If the red LED is used for voltage indication, you should charge it before usage. During one minute, the green LED is constantly on, until a valid signal of a FTX2 is received. After one minute without receiving a signal, the FRX2 shows error condition for safety reasons. When automated pairing is activated, both LEDs are on. Charging: - The red and green LED alternate to show the charging state: The longer the green LED is on, the more energy is in the battery. A full battery shows only a blinking green LED. When a PCARD is connected on its PROG connection: - The red and green LED blink to indicate the parameter (red) and the value / action (green) behind this parameter. o Parameter 1: Ignition number (1-4) o Parameter 2: § Action 1: add FTX2 (add pairing) § Action 2: Delete all pairings - When the desired parameter / action is shown (repeated 3 times each), you can select it by pushing the button of the PCARD. This is indicated by a fast alternating LED pattern. ** *** **** ***** Ignition number 1 Ignition number 2 Ignition number 3 Ignition number 4 *** *** * add FTX2 pairing delete all pairings When a PCARD is connected on its TEST connection: - Do this to test or for practicing the FRX2 without burning a smoke cartridge. The FRX2 behaves like it would when a cartridge is connected. IISI FTX2 and FRX2 user manual www.iisi-rc.com Page 3 of 8 - When the FRX2 is igniting, the LED of the PCARD is activated for a visual feedback. Afterwards, the FRX2 is going to error mode, as long as the PCARD is still there (a real igniter would disappear after burning up). During usage, FTX2 is sending: - When the FTX2 is not armed, the green LED of the FRX2 blinks for every message received. This indicates correct pairing. - When the FTX2 is armed, the red LED of the FRX2 is blinking on every message received. - When the FRX2 will trigger the igniter on the next activation of the radio switch, the red AND the green LED blink together on every message received. - After a successful ignition, the FRX2 switches off. Error Mode: - The red and green LED alternate in a very fast way. Reasons for this could be: o Ignition was not possible (short circuit) o The igniter was burned, but it created a short circuit after burning. o You connected a cartridge, but there was no valid signal during one minute (check if FTX2 is paired with FRX2) o You’ve done an ignition test with the PCARD. This is normal. - You can terminate the error mode only by switching off the FRX2 (remove PCARD / cartridge). The FRX2 cannot switch off in this mode and will discharge the battery completely. Never leave the FRX2 in this mode for a longer time! 1.2.6 Range The IISI smoke igniter system is designed as a short range system, it covers a couple of 10m. This should be fine for all applications. Please note that carbon fiber is blocking radio waves! 1.2.7 Usable igniters and cartridges You can only connect smoke cartridges with built in electrical igniter. Pure pyrotechnical ones, or fireworks, needs to be equipped first with an electrical igniter. The seller of smoke cartridges can help you further. Ideal cartridges are provided by smokefly.ch. They are fully equipped, deliver up to 2 minutes of dense smoke and have a metal can. Other igniters can also be used, as long as they work with voltages below 3V. The FRX2 is short circuit proof; so don’t worry about “wrong” igniters, involuntary short circuits, etc. Only connect passive igniters, and never connect a battery or other voltage on the igniter connection of the FRX2. IISI FTX2 and FRX2 user manual www.iisi-rc.com Page 4 of 8 1.3 FTX2 Connect the FTX2 on a free channel on your receiver. It is powered and controlled through it, and works also with HV systems (up to 16V). 1.3.1 LED of the FTX2 The FTX2 has a red LED, which indicates the status: No signal from the receiver: LED remains off. Signal from receiver available, not yet armed: - Switch is inactive: LED blinks about all 2 seconds - Switch is active: LED blinks fast, about 4x per second Signal from receiver available, system is armed: - LED blinks fast for about 1 second - Afterwards, LED blinks about 1x per second Signal from receiver available, switch on radio active: - LED blinks fast for the time where the switch remains active, but max. during 10 seconds 1.3.2 Programming of the radio The FTX2 needs a free radio channel on your receiver. Program a switch function on this channel (with 1500us center pulse) The position „off“ is -100% (Futaba), which corresponds to the idle position of your gas channel (Signal <1200us) The position „active“ is +100% (Futaba), which corresponds to the full power position of your gas channel (Signal >1600us) The LED of the FTX2 can be used to program your radio (see LED of the FTX2). You can also use a channel with a 3-position switch or a proportional channel. The intermediate position is not used then. 1.3.3 Arming the system D The IISI ignition system has been designed for the best possible security against unwanted ignition. Therefore, it must be armed before usage: The radio switch must be on “off” position during at least 2 seconds. Then (with FRX2 running), activate your switch shortly for about 0.2 to 0.5 seconds, then put it back to “inactive”. A shorter activation time will be interpreted as a glitch; a longer period will be interpreted as an unwanted activation. In both cases, it is ignored by the FTX2. Should you need to repeat the arming procedure, please wait for at least 2 seconds before retry. Please be aware that a second “arming” on an armed system will trigger the ignition! After successful arming, the switch must be on “inactive” for at least 2 seconds. If your switch is on “active” position when the system is powered on, nothing happens! You need first to put your switch back to “off” for at least 2 seconds, before you can arm the system. You’ll need perhaps some practice, in order to arm it at the first try. But it’s worth the effort, as it avoids efficiently any unwanted triggering of the cartridge on the ground. Think of the danger: Risk of fire, trouble other pilots, … IISI FTX2 and FRX2 user manual www.iisi-rc.com Page 5 of 8 For security reasons, the FRX2 MUST be switched on during the arming process of the FTX2, otherwise, it will ignore all future messages from the FTX2 (e.g. when you connect a cartridge to an already running and paired FTX2, and your switch is in “active” position). 1.3.4 Security! in spite of all security features we’ve built it, please be extremely careful with any type of fireworks. Never connect cartridges or fireworks to the FRX2 inside buildings or on other places, where unwanted triggering could damage things! Users under 18 years must not use the system, or only when under adult supervision. Any application of the IISI ignition system, which has the goal to damage property, persons or other valuables, is strictly forbidden! IISI FTX2 and FRX2 user manual www.iisi-rc.com Page 6 of 8 2 Application case On this example we explain how the IISI ignition system is used in a plane with smoke cartridges. We use here one FTX2 with 3 FRX2: 2 on each side of the wing (ignition #2), and one in a central position on the fuselage (ignition #1). 1. First switch your plane on: Receiver, FTX2 and servos are running, the radio switch is on the “off” position. You may do your preflight checks here. 2. Afterwards, connect the 3 smoke cartridges to the FRX2s. They start automatically. 3. Check if the green LEDs of the FRX2 are blinking regularly. 4. Shortly before take off, arm your system (see above). Be careful now, any “active” position of your switch will trigger ignition now! 5. Check if the red AND the green LED on the central FRX2 are blinking, and if the red LED of both FRX2 on the wings are blinking. Take off! 6. During the flight, activate your radio switch to ignite the central cartridge, bring your switch back to the “off” position. 7. To ignite the wing cartridges, re-activate your radio switch. 8. After your flight, check all FRX2 if thy are switched off and remove the cable of the igniters. 3 FRX2 / FTX2 with Cockpit V2 The FTX2 doesn’t need any configuration. The FRX2 can be programmed by using a programming cable (USB to Futaba 3pole, optional item). It gives you comfortable access to all parameters: - Pairing with one or more FTX2 (one at a time) - Set the ignition number - Delete pairings - Activate auto-pairing (is done automatically, when no pairing is present) - Software version of the FRX2 Connect the programming cable on the USB port of the FRX2 and on the IISI Link port of the Cockpit V2. The Cockpit V2 must be switched on. 3.1 Status display in the Cockpit V2 The FTX2 can be paired additionally with the Cockpit V2 (in the same way as a TXE). To do this, connect the FTX2 to the IISI-Link port of the Cockpit by using the programming cable (male to male 3 pole). The pairing is done automatically. IISI FTX2 and FRX2 user manual www.iisi-rc.com Page 7 of 8 Configure your model screen with the FRX2 field, which shows then the radio switch position, arming state and ignition number. You can use the FTX2 in parallel with another TXE in your model, there’s no interference. 4 Limited Warranty We warrant this part against defects in materials and workmanship, under normal consumer use, for a period of two (2) years from the date of retail purchase by the original end-user purchaser, or the period of time required by the laws of the country where the Product is purchased, whichever is longer. Defective parts will be repaired or replaced by new parts at our discretion. There’s no warranty for dirty items or other damages caused by mechanical stress, or batteries. The usage of the IISI products is at customer’s own risk; IISI-RC.COM / ESC GmbH does not cover any consecutive damages in any case. 5 Conformity The IISI System has been tested by a certified lab (ETSI EN 300 220). Declaration of conformity on www.iisirc.com. 6 Disposal Should you dispose of an IISI product, you must observe the regulation of electronic devices in your country. Switzerland: You are not allowed to dispose electronic devices with regular domestic waste. Inform you about specific recycling locations who accept electronic waste. 7 Support Please see http://www.iisi-rc.com IISI FTX2 and FRX2 user manual www.iisi-rc.com Page 8 of 8