1
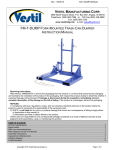
WILKINSON HI-RISE
A WHR HOLDINGS, LLC COMPANY
Operation and Maintenance Instructions
for
TRASH & RECYCLING CHUTE SYSTEMS
WHR Holdings, LLC
3001 Greene Street
Hollywood, FL 33020
Phone: 954-342-4400
Updated October 2010
Table of Contents
Description
Chapter 1: SAFETY
Page
3
Chapter 2: INSTALLATION
4
Chapter 3: OPERATION
5
Chapter 4: PERIODIC & PREVENTATIVE
MAINTENANCE
6
Chapter 5: TROUBLESHOOTING
6
Attachments
8
2
Chapter 1: SAFETY – RULE #1
MOUNT THE COPY OF THIS PAGE THE TRASH ROOM
1. WHENEVER ANY MAINTENANCE OR SERVICE IS TO BE PERFORMED ON THE
TRASH CHUTE SYSTEM, THE ENTIRE SYSTEM SHOULD BE TAKEN OUT OF
SERVICE BY LOCKING ALL OF THE INTAKE DOORS ON THE CHUTE.
2. NEVER PLACE ANY PORTION OF THE BODY INSIDE THE AREA OF THE
DISCHARGE OF THE TRASH CHUTE. DEBRIS OR GARBAGE EXITING THE
TRASH CHUTE MAY CAUSE SERIOUS BODILY INJURY OR DEATH.
3. ALWAYS WEAR SAFETY GLASSES, GLOVES, STEEL-TIPPED SHOES AND A
HARD HAT WHEN MAINTAINING THE TRASH CHUTE SYSTEM.
4. NEVER CLIMB OR REACH INTO THE TRASH CHUTE TO RETRIEVE OBJECTS OR
ARTICLES.
5. COMPLY WITH ALL APPLICABLE REQUIREMENTS OF THE FOLLOWING
DOCUMENTS:
A. ANSI Z245.1-1984 - SAFETY REQUIREMENTS FOR REFUSE COLLECTION
AND COMPACTION EQUIPMENT.
B. ANSI A12.1-1973 - SAFETY REQUIREMENTS FOR FLOOR AND WALL
OPENINGS, RAILINGS AND TOE BOARDS.
C. OCCUPATIONAL HEALTH AND SAFETY ACT- (OSHA)
6. ELECTRICALLY INTERLOCK (EI) DOORS CONTAIN HIGH VOLTAGE. MISUSE OF
THESE DOORS COULD RESULT IN SERIOUS INJURY OR DEATH. ONLY
QUALIFIED PERSONNEL SHOULD PERFORM MAINTENANCE ON THIS
EQUIPMENT.
3
Chapter 2: Installation
WARNING:
Only experienced personnel should attempt to install, service, or operate this equipment. Installing this
equipment requires the installer to work within confined spaces and in areas where fall protection may
be required. Working in both of these areas can cause serious injury or death if the proper procedures
and equipment are not utilized.
2.1 Introduction
This instruction manual includes information detailing the installation, operation and maintenance of
Wilkinson Hi-Rise trash chute system.
Sufficient information is included in this manual to aid qualified personnel in correctly installing,
operating and maintaining this equipment. Added technical help is available through your local
manufacturer's representative or directly from the manufacturer. Refer to the appropriate sources as
required. It is assumed that a specific location for the trash chute system has already been established
with the assistance of the manufacturer’s representative and qualified personnel will be utilized to install
this equipment.
2.2 Trash Chute Installation Instructions
It is preferred that the walls surrounding the chute assembly are not in place at time of installation. The
walls surrounding the trash chute are to be erected by the contractor only after the chute has been
completely installed. When job sight conditions warrant a more expedient method of assembly, at a
minimum, the face wall (the wall the intake door mounts into), should be left open until the chute is
completed in all respects of the installation including but not limited to fire sprinkler connections,
electrical connections, and any other options as specified in the contract documents.
1.
2.
3.
4.
5.
6.
7.
8.
9.
10.
11.
12.
First, locate and identify all intake sections. Place sections on appropriate floors. Each section
will be marked numerically to correspond to shop drawings
When starting installation, start at the floor above discharge area.
Openings in the floor should already be present. Place the floor frame over the opening (DO
NOT FASTEN FLOOR FRAME AT THIS TIME.)
Place intake section over the floor frame (“S” clips or angled clips should slip over the floor
frame.) Go to the discharge area and connect discharge and any other appropriate sections to
the intake above the discharge area. (Whether “A” discharge or type “H” discharge section
should be clipped together, however type “H” discharge will require a pipe pedestal for
support.)
Return to floor above discharge area and place the “B” section onto the intake.
Go to next floor and repeat steps 3, 4, and 6 until you’ve reached the vent area.
Place vent piece (section of chute that passes through roof.)
Go to roof and place flashing collar over the vent piece then connect the vent body with wind
band.
After all floors have been installed fasten floor frames to floor.
Connect intermediate 1 ½ inch IPS-165 degree fusible link automatic sprinkler-to-sprinkler
line.
Connect Disinfecting and Sanitizing unit (D&S Unit) with separate hot water line if present. If
hot water line is not present, utilize cold water line.
Return to discharge area and connect fusible link on the discharge so that the door is in an
open position.
4
Chapter 3: Operation
3.1 Description of Operation
1. The Wilkinson trash chute is designed to handle a normal size (13 gallon) trash bag – one per
transaction.
2. The trash chute is NOT designed to handle commercial type trash such as concrete, wood, and
other types of building material. Material such as this could cause CLOGGING1 or damage to
the trash chute system.
3. The trash chute is NOT designed for residential garbage such as rugs, pizza boxes, large
cardboard boxes that would not fit into a normal size trash bag, pillows, furniture, ironing boards
or other types of residential waste that would not fit in a normal sized trash bag. Material such
as this described could cause CLOGGING* of the trash chute system.
1
Please note: If clogging does occur, contact your local Wilkinson representative to assist in
correcting the clogging problem. If not done correctly, the chute may be damaged.
Also, clogging of the chute due to improper use of trash chute IS NOT covered under the
manufacturer’s warranty for this system. You will be charged an applicable service fee if a
Wilkinson representative is called to the site and the clogging is due to the improper use of the
trash chute system.
3.2 Operation of Trash Chute Doors
The operation of the trash chute doors is as follows:
The trash chute is equipped with Electrical Interlock (EI) doors, the system is designed to allow
only one (1) user access to the trash chute at a time. Once a trash chute door is opened, the
remaining trash doors “lock-out” and will not “unlock” until the trash door that is open is
returned to the closed position.
1. Grab on to handle and activate release latch with thumb (2 See below if trash chute door is
equipped with T-Handles)
2. Push the RED button on the top of the door to activate the locking solenoid
3. Pull door toward you until fully opened
4. Deposit trash in open area of trash chute door
5. Release handle and door will automatically shut
2
If the trash chute doors are equipped with T-handles, to open, grab the T-handle and turn clockwise.
Follow steps 2-4 listed above.
3.3 Locking of Trash Chute Doors
Most of Wilkinson’s trash chutes are furnished with a lock on each intake door. To lock the intake door
to prevent the use of the trash chute, insert key that was furnished with trash chute into the key slot on
the front of the door and turn until door remains locked.
If locks were not furnished with the trash chute door, it is imperative to provide users with the proper
signage informing them that the chute is shut down if required maintenance is being performed. Failure
to shut down the trash chute while maintenance is occurring may result in serious injury or even death.
5
3.4 EI Door MASTER SWITCH
The trash chute system is equipped with an EI door system and equipped with a MASTER SWITCH
which will be installed in the trash room. The MASTER SWITCH switch allows the operator to manually
lock down the trash chute intake doors by energizing or deactivating the locking solenoid installed in
each door. The MASTER SWITCH also allows the chute to be cleaned using the disinfecting and
sanitizer unit installed on the top of the chute. Instructions for using this switch are included below.
The MASTER SWITCH switch has a RED and GREEN light installed on the front of the panel. When
the system is in NORMAL operation and the system there is power to the system, the GREEN LIGHT is
illuminated.
The RED light will illuminate when one of the intake doors are opened. The RED light will go ON and
OFF as user are accessing the trash chute.
SERVICE SWITCH – allows the MASTER SWITCH to LOCK all of the chute intake doors by
deactivating the push buttons on each door thus not allowing the intake door to be opened. Locking of
the doors allow periodic maintenance to be completed such a bin change out.
FIRE SWITCH – ONLY WORKS IN SERVICE MODE and allows the MASTER SWITCH to deactivate
the MAG hold open on the the discharge door allowing it to close. This should be used when
performing maintenance on the system BUT CLOSING THE DISCHARGE DOOR SHOULD NOT BE
USE AS A SHUT OFF DOOR. Using the discharge door as a shut off door to hold back trash may
cause damage to the door and void the warranty.
When the system is LOCKED DOWN, the RED light will be illuminated. The system is LOCKED
DOWN by activating the switch installed in the panel. The LOCK OUT switch is factory calibrated to
LOCK OUT the intake doors for a period of approximately 45 minutes.
After this time frame, the LOCK OUT switch will TIME OUT and the locking solenoids will be deenergized and the chute will be accessible again. The GREEN light will then illuminate on the LOCK
OUT switch that indicates the system needs to be RESET. Activating the switch DOWN until NO lights
are illuminated on the LOCK OUT switch RESETS the system.
Please note: The lock-out switch is factory calibrated to LOCK OUT the trash chute doors for
approximately 20 minutes. It is NOT recommended that the locking solenoids stay activated for
longer than 20 minutes in that this may damage the solenoids.
Once the system is locked down for 20 minutes, it should NOT be LOCKED OUT again for at
least 40 minutes to allow the heat that has built up in the locking solenoids to dissipate.
LOCKING OUT the system before 40 minutes may damage the locking solenoids and will not
allow system to operate as designed.
Damaged locking solenoids due to the system being locked out incorrectly will VOID THE
WARRANTY on the system and the components.
Chapter 4: Periodic & Preventive Maintenance
4.1 Introduction
As with any mechanical devices, this system must be regularly maintained to ensure the system will
operate long-term and trouble-free.
6
The periodic maintenance is regular cleaning and inspection of the entire systems and its attachments.
Like most mechanical devices, you need to keep free of build-up of dust, lint or other foreign objects. It
is recommended the following procedures be followed at a minimum:
4.2 WEEKLY Maintenance
1. DEODORIZE AND SANITIZE the entire chute system utilizing the D&S unit installed at
the top of the chute. The D&S unit should be operated for 5 MINUTES per 20 FLOORS
of chute. For trash chutes with fewer than 20 floors, the D&S unit should be operated for
a minimum of 5 minutes per week.
a. Utilize standard industrial cleaner in the reservoir of the D&S unit. However, it is
recommended that an “Organic” type cleaner be used because the majority of
the wash down fluid will be directed to the floor drain installed in the trash room.
SIMPLE GREEN or equivalent.
2. Clean TRASH chute doors to remove any build up inside the door that may prevent them
from closing properly
3. Clean the areas adjacent to trash doors
4. Clean the areas adjacent to the discharge of the of the trash chute to prevent build up of
trash that may attract rodents or insects
4.3 Periodic Maintenance
1. Follow LUBRICATION schedule for trash chutes doors detailed in ATTACHMENT 1 of
this document. Lubricate utilizing WD-40 or other type industrial lubrication agents
2. Follow CLEANING schedule for trash chutes doors detailed in ATTACHMENT 1 of this
document
Chapter 5: Troubleshooting and Maintenance
5.0 Introduction - Following are some common troubleshooting tips for the Wilkinson Hi-Rise Trash
Chute Systems
Trash Chute door will not open
1. Check the door is not locked; if so, unlock
2. Check that thumb latch or T-handle is releasing catch on top of door. If not, call local
Wilkinson representative for replacement
3. Check to see if a door is open in the system that is engaging EI door lock-down system.
If found, close door and system should go back into normal operation.
4. The LOCK-OUT switch is activated. De-Activate LOCK OUT switch when applicable.
5. The trash chute doors are very simple to operate so if you are not successful in opening
the door with either 1 or 2, 3 or 4 - call your local Wilkinson representative for service
No trash is exiting the trash chute
1. Check trash chute for clogging
2. Be sure system is in operation
7
ATTACHMENT 1: Trash Chute Door Drawings with Maintenance Instructions
8