1
Contents
Important instructions
Complete set
Introduction
SS-30 Features
SS-30 Channels Description
Before you start
Specifications
Power adapter low-voltage connector contacts arrangement
Powering the device from battery and power adapter
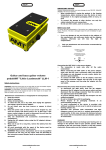
Controls
Front panel
Left panel
Right panel
Battery Compartment
Batteries installation
Audio connections and switching
Block diagram
1
1
2
2
2
2
2
2
2
3
3
3
3
3
3
4
4
IMPORTANT INSTRUCTIONS!
NON-OBSERVANCE OF THE FOLOWING INSTRUCTIONS MIGHT RESULT
IN YOUR DEVICE DAMAGE. GUARANTEE IS VOID IF THE DAMAGES ARE
CAUSED BY NON-OBSERVANCE OF THESE INSTRUCTIONS.
¾
After transportation or storage of the device under negative
temperatures make sure to leave the device under room
temperature in its original packaging for AT LEAST 2
HOURS!
Guitar Preamp
¾
To connect the guitar preamp to other devices use
exclusively cables intended for such connections.
www.amtelectronics.com
¾
Under no circumstances use other types of cables such as
for speakers etc.
CONNECTION of the guitar preamp to power adapter:
¾
Connect the adapter only AFTER all audio connections have
been accomplished!
Safety precautions
¾
CAUTION! There are no user serviceable parts inside. Repair of the device can be
carried out only by qualified experts. If the device is not used it must be
disconnected from mains.
WARNING! In order to avoid fire or electric shock the device must not be exposed to
rain or moisture. Do not let water or other liquid get inside the device. Do not place
vessels such as vases filled with liquid on top of the device.
that the casing, cables, low-voltage connector and power
plug are free from damages: no cuts, cracks, dents and so
on and are in operable condition.
¾
To connect the preamp to the power adapter first insert the
low-voltage connector of power adapter into corresponding
This symbol indicates important information related to the
device maintenance and servicing contained in the
accompanying documentation.
Please read the instruction manual very carefully.
1.
Keep the user's guide at hand.
2.
Pay attention to warnings.
3.
Follow all instructions related to device operation.
4.
To clean the device, use only a dry cloth having disconnected
the device from mains prior to that.
5.
Do not place the device near heat sources, keep it from direct
sunlight.
6.
Lay the mains cable so that it is not stepped on and avoid its
contact with sharp corners, etc. If you use the plug or outlet for
switching the device off they should be easily accessible.
7.
Use only additional devices and accessories recommended by
the manufacturer.
8.
Disconnect the device from mains in case of thunder-storm or
when the device is not in use for prolonged time.
9.
Remove the battery, if you don’t use the device for a prolonged
period of time.
10. All works related to the device repair must be done only by
qualified service personnel.
11. WARNING! All service instructions are intended only for
qualified personnel in order to avoid electric shock; do not
carry out any repair works which are not described in the
instruction manual. Repair works must be carried out only by
Before connecting the preamp to power adapter make sure
socket on the rear panel of the preamp and then plug the
adapter into the wall outlet.
DISCONNECTION of the guitar preamp from power adapter:
¾
To disconnect the preamp from the power adapter first
disconnect the adapter from mains and then disconnect its
low-voltage connector from the socket on the rear panel of
the preamp.
COMPLETE SET
1.
AMT SS-30
1
2.
Instruction manual
1
3.
Packaging box
1
4.
Warranty card
1
qualified experts.
www.amtelectronics.com
1
www.amtelectronics.com
1
CAUTION!
INTRODUCTION
The SS-30 guitar preamp is intended for use in studio and live performances.
AMT SS-30 is a 3-channel JFET-based tube overdrive modeling device with full
parameters visualization. The device allows for simultaneous and separate use of
two outputs to a mixer's line input and an amp's RETURN. The serial FX loop can be
used for external effect pedals connection. With external MIDI converter (e.g. AMT
FS-2MIDI) linked to the special connector the device can be combined with external
MIDI devices.
AMT SS-30 features low energy consumption from 18V DC power adapter or two
9V batteries.
SS-30 Features
- powered by two 9V 6F22 batteries or 18V DC power adapter ;
- fast and hassle-free batteries replacement without using a screwdriver;
- less than 10 mA current consumption (without external MIDI converter);
- 3 channels: Clean, Crunch, Lead
- serial FX Loop
- separate cabinet emulator output
- 3.5 mm jack to control external MIDI devices by means of AMT FS-2MIDI
or damage the dynamic heads of your acoustic system. Before
turning the device on rotate Volume controls to extreme left
position (counter-clockwise). At all times try to adhere to
moderate volume level.
ТЕХНИЧЕСКИЕ ХАРАКТЕРИСТИКИ
SS-30 Channels Description
AMT SS-30 preamp features 3-channel design.
CLEAN Channel has classic clean sound similar to old-time amps and provides
both velvety transparent sound and a slight overdrive depending on CLEAN GAIN
position. CLEAN Channel has separate 3-band tone, drive and level controls as well
as CLEAN BOOST switch providing more energy and presence.
CRUNCH Channel has much higher overall sensitivity. Its wide control range along
with ample output tone control possibilities allows to obtain sounds from light airy
crunch to hard&heavy approaching LEAD Channel's density and brightness.
LEAD Channel is distinguished by high sensitivity and provides aggressive modern
guitar sound for both standard and lower tunings. The well-saturated channel sound
is oriented to obtaining modern resilient chord punch as well as speedy licks
readability. In this way the channel can be used not only for aggressive rhythm parts
but also bright expressive solos.
To enhance tone control possibilities of the common tone control unit of DRIVE
channels (Crunch/Lead) we incorporated DR.TONE SHIFT switch providing better
tone coordination between the preamp and your power amp and cabinet.
CAUTION! AMT preamps like any other high-class devices
are very sensitive to power adaptor quality.
Please be aware that high volume can harm your hearing and /
We insist on
your using either two 9V 6F22 batteries or an adapter meeting the
quality specifications to power your device.
INPUT
Input resistance
Response
OUTPUT
Output resistance
Output signal level
Recommended load, min
CAB.SIM. output
Output resistance
Output signal level
Recommended load, min
RETURN
Input resistance
Response
SEND
Output resistance
Output signal level
Recommended load, min
Power
Voltage
Consumed current
Power adapter (optional)
Voltage
Load current
Dimensions / Weight
NET dimensions (WxHxD). (Without
power adapter)
NET weight (without batteries and power
adaptor)
GROSS dimensions (WxHxD).
GROSS weight
1,0 MOhm
-10dB (250mV)
600 Ohm
0dB (775mV)
10 kOhm
600 Ohm
-10dB (250mV)
10 kOhm
1,0 MOhm
-10dB (250mV)
600 Ohm
-10dB (250mV)
10 kOhm
Two 6F22 batteries
DC 18V
10 mA max (13.5 mA max with
external MIDI converter )
DC 18V
0,15 A min
125х62х106 mm
0,54 kg
About 206х83х140 mm
About 0,7 kg
Before you start
For safe transportation the device was carefully packaged by the manufacturer.
However, if the cardboard packaging is damaged you should immediately inspect
Use
only
auxiliary
devices
recommended by the manufacturer.
and
accessories
the device for the absence of external damages.
¾
In case of damages do NOT SEND the device to manufacturer,
but inform the seller or transport agency, since otherwise you
will lose the right to damage compensation.
¾
In order to avoid damages during storage and transportation
always use original packing.
¾
Do not allow children to play with the device and packaging
materials.
¾
Please, recycle all packing materials in the way harmless to the
environment.
¾
¾
In order to avoid the device overheating provide a sufficient
Powering the device from battery and power adapter
AMT BC-1 is powered either by two 9V 6F22 internal batteries or external
DC 18V power adaptor (the required adaptor quality specifications are shown
airflow around it; do not cover it and do not place near other
in Specifications section)
heat emitting devices.
When using batteries the device enters ON mode only after insertion of
Device operation near powerful radio transmitters and sources
mono jack into the device's INPUT.
of high-frequency signals can result in appreciable deterioration
When using DC 18V adaptor, the device is switched on after insertion of the
of sound. In this case increase the distance between the device
and
the
transmitter
and
use
screened
cables
for
adaptor's connector into the device - insertion of mono jack is not necessary.
all
interconnections.
www.amtelectronics.com
2
www.amtelectronics.com
2
Right panel
CONTROLS
Front panel
24. OUTPUT CONTROL – control signal output for MIDI converter (such as
AMT FS-2MIDI);
25. INPUT – for electric guitar connection;
26. FX LOOP SEND – connects to external effects unit input (-10dB).
Battery compartment
1. CLEAN / DRIVE footswitch selects between CLEAN and DRIVE (Crunch/Lead);
2. DRIVE (Crunch/Lead) channel operation indicator;
3. LD.LEVEL – adjusts the LEAD channel output signal level;
4. LOW – adjusts DRIVE (Crunch/Lead) low frequency response;
5. CR.LEVEL – adjusts CRUNCH channel output signal level;
6. DR.TONE SHIFT switch adjusts high frequency response of DRIVE
(Crunch/Lead);
7. LEVEL – adjusts CLEAN channel output signal level;
8. LOW – adjusts CLEAN channel low frequency response;
9. CLEAN BOOST – adds mid frequencies to CLEAN channel;
10. MID – adjusts CLEAN channel mid frequency response;
11. DC-18V (on the rear panel of the device) for connection of power adapter;
12. HIGH – adjusts CLEAN channel high frequency response;
13. GAIN – CLEAN channel gain adjustment;
14. CRUNCH BRIGHT switch – adds more high-mid frequencies in CRUNCH
channel;
15. CR.GAIN – adjusts CRUNCH channel gain amount;
16. HIGH – adjusts DRIVE (Crunch/Lead) high frequency response);
17. LD.GAIN – adjusts LEAD channel gain amount;
18. MID – adjusts DRIVE (Crunch/Lead) mid frequency response;
19. DRIVE channel operation indicator in LEAD mode;
20. CRUNCH / LEAD footswitch selects between CRUNCH and LEAD in DRIVE
channel;
27. Battery compartment cover;
28. Battery compartment cover screw.
WARNING! All cable connections must be made ONLY
WITH PREAMP SWITCHED OFF!
BATTERY REPLACEMENT
Left panel
WARNING! AMT BC-1 requires two 9V 6F22 batteries.
Never use old and new batteries simultaneously. Replace
both batteries if necessary. Do NOT mix batteries of
different manufacturers and types.
21. OUTPUT TO MIX – direct output to mixer’s line input;
22. OUTPUT TO AMP – direct output to power amp bypassing the built-n
preamp;
23. FX LOOP RETURN – connects to external effects unit output(-10dB);
www.amtelectronics.com
3
To use (replace) the batteries:
1. Loosen the screw (28), lift the battery compartment cover (27) to
access the batteries;
2. Carefully picking one battery with your finger lift it from thу
compartment and pull it toward yourself;
3. Repeat 2 for the second battery;
4. Insert new batteries using the reverse sequence with correct polarity
(battery «+» upwards);
5. Tightly close the battery compartment cover (27). Tighten the screw
(28) slightly pressing the cover..
Note in order not to lose the screw (28) do not remove it from the cover (27), just use it to
loosen the cover.
www.amtelectronics.com
3
AUDIO CONNECTIONS AND SWITCHING
WARNING! All cable connections must be made ONLY WITH
PREAMP SWITCHED OFF!
Possible audio connections of the preamp with external devices:
_______________________________________________________
AMT Electronics оставляет за собой право вносить изменения в
конструкцию и внешний вид изделия, не ухудшающие его
потребительские свойства, без предварительного уведомления. Поэтому
технические данные и внешний вид изделия могут отличаться от
приведенных в данном документе.
www.amtelectronics.com
4
www.amtelectronics.com
4