1
© Doctor Web, 2003-2013. All rights reserved.
This document is the property of Doctor Web. No part of this document
may be reproduced, published or transmitted in any form or by any
means for any purpose other than the purchaser's personal use without
proper attribution.
TRADEMARKS
Dr.Web, the Dr.WEB logo, SpIDer Mail, SpIDer Guard, CureIt!, CureNet!,
AV-desk are trademarks and registered trademarks of Doctor Web in
Russia and/or other countries. Other trademarks, registered trademarks
and company names used in this document are property of their
respective owners.
DISCLAIMER
In no event shall Doctor Web and its resellers or distributors be liable for
errors or omissions, or any loss of profit or any other damage caused or
alleged to be caused directly or indirectly by this document, the use of or
inability to use information contained in this document.
Dr.Web Security Space
Version 8.0
User Manual
04.07.2013
Doctor Web Head Office
2-12A, 3rd str. Yamskogo polya
Moscow, Russia
125124
Web site: www.drweb.com
Phone: +7 (495) 789-45-87
Refer to the official web site for regional and international office
information.
Doctor Web
Doctor Web develops and distributes Dr.Web® information
security solutions which provide efficient protection from
malicious software and spam.
Doctor Web customers can be found among home users from all
over the world and in government enterprises, small companies
and nationwide corporations.
Dr.Web antivirus solutions are well known since 1992 for
continuing excellence in malware detection and compliance
with international information security standards. State certificates
and awards received by the Dr.Web solutions, as well as the
globally widespread use of our products are the best evidence of
exceptional trust to the company products.
We thank all our customers for their support and
devotion to the Dr.Web products!
4
Table of Contents
1. Introduction
8
1.1. About This Manual
10
1.2. Document Conventions
11
1.3. System Requirements
12
1.4. Licensing
14
1.4.1. Key File
14
1.4.2. Obtaining Key File
15
1.4.3. Renewing Registration
18
1.5. Detection Methods
19
1.6. How to Test Anti-virus
21
2. Installing Dr.Web Security Space
22
2.1. Installation Procedure
23
2.2. Removing or changing Dr.Web Security Space
32
2.3. Obtaining Key Files
33
3. Getting Started
35
3.1. SpIDer Agent
38
3.2. Main Settings
41
3.2.1. Notifications Page
43
3.2.2. Update Page
48
3.2.3. Anti-virus Network
52
3.2.4. Preventive Protection Page
53
3.2.5. Dr.Web Cloud Page
56
3.2.6. Report Page
58
User Manual
5
3.2.7. Quarantine Page
61
3.2.8. Proxy Server Page
63
3.2.9. Language Page
65
3.2.10. Self-protection Page
66
3.2.11. Restore Page
67
3.3. License Manager
68
3.4. Quarantine Manager
70
3.5. Anti-virus Network
72
4. Dr.Web Scanner
75
4.1. Scanning Your System
76
4.2. Neutralizing Detected Threats
79
4.3. Scanner Settings
81
4.4. Scanning in Command Line Mode
86
4.5. Console Scanner
87
4.6 Automatic Launch of Scanning
88
5. SpIDer Guard
89
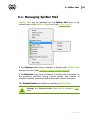
5.1. Managing SpIDer Guard
90
5.2. SpIDer Guard Settings
91
6. SpIDer Mail
93
6.1. Managing SpIDer Mail
96
6.2. SpIDer Mail Settings
97
7. Dr.Web for Outlook
106
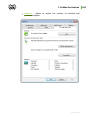
7.1. Configuring Dr.Web for Outlook
106
7.2. Threat Detection
108
7.2.1. Types of Threats
108
7.2.2. Configuring Actions
108
User Manual
6
7.3. Spam Check
111
7.3.1. Configuring Spam Filter
111
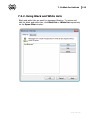
7.3.2. Using Black and White Lists
113
7.4. Logging
116
7.4.1. Event Log
116
7.4.2. Debug Text Log
117
7.5. Statistics
8. SpIDer Gate
119
120
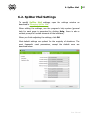
8.1. Managing SpIDer Gate
120
8.2. SpIDer Gate Settings
121
9. Parental Control
123
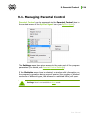
9.1. Managing Parental Control
124
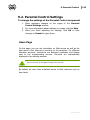
9.2. Parental Control Settings
125
10. Dr.Web Firewall
133
10.1. Training Dr.Web Firewall
133
10.2. Managing Dr.Web Firewall
138
10.3. Firewall Settings
141
10.3.1. Applications Page
142
10.3.2. Parent processes Page
148
10.3.3. Interfaces Page
150
10.3.4. Advanced Page
159
10.4. Event Logging
162
10.4.1. Active Applications
162
10.4.2. Application Filter Log
164
10.4.3. Packet Filter Log
167
11. Automatic Updating
169
User Manual
7
11.1. Running Updates
Appendices
Appendix A. Command Line Parameters
169
172
172
The Scanner and Console Scanner Parameters
172
Dr.Web Updater Command Line Parameters
178
Appendix B. Computer Threats and Neutralization
Methods
183
Appendix C. Naming of Viruses
191
Appendix D. Technical Support
196
User Manual
1. Introduction
1. Introduction
Dr.Web Security Space provides multi-level protection of RAM, hard
disks, and removable devices against viruses, rootkits, Trojans,
spyware, adware, hacktools, and other malicious programs. The
module architecture of Dr.Web Security Space is its significant
feature. The anti-virus engine and virus databases are common for all
components and different operating environments. At present, in
addition to Dr.Web products for Windows, there are versions of antivirus software for IBM® OS/2®, Novell® NetWare®, Macintosh®,
Microsoft Windows Mobile®, Android®, Symbian®, and several
Unix®-based systems (Linux®, FreeBSD®, and Solaris®).
Dr.Web Security Space uses a convenient and efficient procedure
for updating virus databases and program components via the
Internet.
Dr.Web Security Space can detect and remove undesirable
programs (adware, dialers, jokes, riskware, and hacktools) from your
computer. To detect undesirable programs and perform actions with
the files contained in the programs, standard anti-virus components
are used.
Dr.Web Security Space includes the following components:
Dr.Web Scanner for Windows (Scanner) is an anti-virus
scanner with graphical interface. The program runs on user
demand or as scheduled and checks the computer for viruses.
There is also a command line version (Dr.Web Console
Scanner for Windows).
SpIDer Guard® for Windows is an anti-virus guard. The
program resides in the main memory, checks files and memory
on the fly, and detects virus-like activity.
SpIDer Mail® for Windows (Mail Guard) is an anti-virus
guard for e-mail. The program intercepts calls sent from mail
clients to mail servers through POP3/SMTP/IMAP4/NNTP
protocols (IMAP4 stands for IMAPv4rev1), and detects and
neutralizes mail viruses before a mail message is received by the
mail client or before a mail message is sent to the mail server.
User Manual
8
1. Introduction
SpIDer Mail uses Anti-spam to scan mail for spam messages.
Dr.Web for Outlook is a plug-in that checks Microsoft Outlook
mail boxes for viruses and spam.
SpIDer GateTM is an HTTP monitor. By default, SpIDer Gate
automatically checks incoming HTTP traffic and blocks all
malware objects.
The Parental Control component is used to restrict access to
devices, various local and network resources, and allows to set
custom time limits on using your computer and the Internet for
different Windows accounts.
Dr. Web Firewall protects your computer from unauthorized
access and prevents vital data from leaking through networks.
Dr.Web Updater allows registered users to receive updates of
the virus database and other program files as well as
automatically install them.
SpIDer Agent is a utility that lets you set up and manage Dr.
Web Security Space components.
User Manual
9
1. Introduction
1.1. About This Manual
This User Manual describes installation and effective utilization of
Dr.Web Security Space.
You can find detailed descriptions of all graphical user interface (GUI)
elements in the Help system of Dr.Web Security Space which can
be accessed from any component.
This User Manual describes how to install Dr.Web Security Space
and contains some words of advice on how to use the program and
solve typical problems caused by virus threats. Mostly, it describes the
standard operating modes of the program’s components (with default
settings).
The Appendices contain detailed information for experienced users on
how to set up Dr.Web Security Space.
Due to constant development, program interface of your installation
can mismatch the images given in this document. You can always
find the actual documentation at http://download.drweb.com/doc.
User Manual
10
1. Introduction
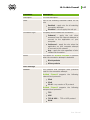
1.2. Document Conventions
The following symbols and text conventions are used in this guide:
Convention
Description
Bold
Names of buttons and other elements of the
graphical user interface (GUI), and required user
input that must be entered exactly as given in the
guide.
Green and bold
Names of Dr.Web products and components.
Green and underlined
Hyperlinks to topics and web pages.
Monospace
Code examples, input to the command line and
application output.
Italic
Placeholders which represent information that must
be supplied by the user. For command-line input, it
indicates parameter values.
In addition, it may indicate a term in position of a
definition.
CAPITAL LETTERS
Names of keys and key sequences.
Plus sign ('+')
Indicates a combination of keys. For example,
ALT+F1 means to hold down the ALT key while
pressing the F1 key.
Exclamation mark
A warning about potential errors or any other
important comment.
The following abbreviations are used in this User Manual:
GUI – Graphical User Interface (GUI version of a program, a
version that utilizes the GUI)
OS – operating system
PC – personal computer
RAM – Random Access Memory
User Manual
11
1. Introduction
1.3. System Requirements
Before installing Dr.Web Security Space:
Install all critical updates recommended by the operating
system developer.
Uninstall all other anti-virus packages from the computer to
avoid possible incompatibility with their resident
components.
If you install Dr.Web Firewall, uninstall all other firewalls.
Specification
Requirement
OS
For 32-bit platforms:
Windows® XP with Service Pack 2 or 3
Windows Vista®
Microsoft® Windows® 7
Microsoft® Windows® 8
For 64-bit platforms:
Windows Vista®
Microsoft® Windows® 7
Microsoft® Windows® 8
You may need to download and install certain system
components from the official Microsoft website. If
necessary, the program will notify you about the
components required and provide download links.
Hard disk space
450 MB for Dr.Web Security Space components.
Files created during installation will require additional
space.
CPU
i686 compatible.
Resolution
Recommended minimum screen resolution is 800x600.
Free RAM
Minimum 512 MB of RAM.
User Manual
12
1. Introduction
Specification
Requirement
Other
Internet connection for updating virus databases and
Dr.Web Security Space components.
User Manual
13
1. Introduction
1.4. Licensing
The use rights for the Dr.Web Security Space are specified in the
key file.
To use Dr.Web Security Space, obtain and install a key file.
For more information on licensing and types of key files, visit the
official Doctor Web website.
1.4.1. Key File
The key file contains the following information:
list of components a user is allowed to use
duration of the license
other restrictions (i.e., the number of computers on which a
program is allowed to be used)
There are three types of key files:
License key file is purchased with the Dr.Web software and
allows a user to use the software and receive technical support.
Parameters of the license key file are set in accordance with the
software's license agreement. It also contains information about
the user and seller.
Demo key file is used to evaluate Dr.Web products. It is
completely free, provides full functionality of the software, but
has a limited duration – 30 days (if it is a promotion license key
file – 3 months).
Demo key files for the same computer cannot be obtained more
often than once in four months. For a promotion license key file –
only once a year.
User Manual
14
1. Introduction
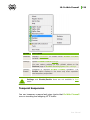
Temporary key file is used if you do not install a license or demo
key file during installation. This key file provides full functionality
of Dr.Web Security Space components, however, updating is
not available until you have installed license or demo key file.
Furthermore, the My Dr.Web and Update items of SpIDer
Agent menu will be inaccessible.
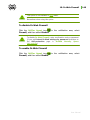
A valid license key file satisfies the following criteria:
License is not expired
All anti-virus components required by Dr.Web Security Space
are licensed
Integrity of the license key file has not been violated
If any of the conditions are violated, the license key file becomes
invalid and Dr.Web Security Space stops detecting and neutralizing
malicious programs.
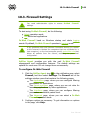
1.4.2. Obtaining Key File
You can receive key files in one of the following ways:
During installation
Via manual product registration on the official Doctor Web
website
Within the product distribution kit
On a separate data carrier provided by the seller
Key files received during installation or within the installation kit are
installed automatically. You need to install key files received in any
other way.
User Manual
15
1. Introduction
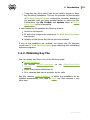
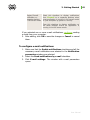
To acquire key files via manual registration:
To register and download key files, a valid Internet connection is
required.
To receive a license key file, a product serial number is required.
Without a serial number, you can only receive a demo key file
during installation.
1. Launch an Internet browser and go to the site specified on the
product registration card supplied with your copy of the
product.
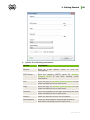
2. Fill in the registration form.
3. Enter the serial number found on the registration card.
4. The license key file is archived and sent to the e-mail address
you specified in the registration form. After registration, you
can also download the license key file from the registration
page. Windows operating systems extract files from ZIParchives automatically. You do not need to purchase or install
additional software.
5. Install the key file.
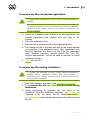
To acquire key files during installation:
To register and download key files, a valid Internet connection is
required. Before installation, ensure that your computer is
connected to the Internet. You can receive a demo key file during
the registration procedure.
1. Start the installation procedure (See Installation Procedure).
2. In the License Key file step, select Receive Key file during
installation.
3. Follow instructions to complete the rest steps of the
installation. Once the installation completes, the procedure of
obtaining a key file starts. On its completion, Dr.Web
Security Space automatically downloads and installs a license
key file.
User Manual
16
1. Introduction
The key file can be delivered as a .key file or an archive containing
such a file. A user can receive a key file via the Dr.Web Updater
during installation or the first update. The utility registers the program
(after the serial number is provided) on the official website and
receives the key file. This procedure is available only for Dr.Web
programs that protect individual workstations. Without a serial
number, a user can only receive a demo key file. (See Receiving key
file).
It is recommended to keep the key file until it expires. If you re-install
a product or install it on several computers, you do not have to
register the serial number again; you can use the key file received
during the first registration.
Demo key file can be used only on the computer on which it was
registered.
User Manual
17
1. Introduction
Subsequent Registration
If a key file is lost, you must register again by inputting the personal
data you provided during the previous registration. You may use a
different e-mail address. In this case, the key file will be sent to the
address specified.
When recovering a demo key file, you will receive the same key file
as you received during the previous registration.
The number of times you can request a key file is limited. One serial
number can be registered no more than 25 times. If requests in excess
of that number are sent, no key file will be delivered. To receive a lost
key file, contact Technical Support, describe your problem in detail and
state personal data you entered when you registered the serial
number.
If no valid key file is found (either for a license or a demo), the
functionality of the program is blocked.
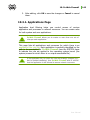
1.4.3. Renewing Registration
When your license expires or the security of your system is reinforced,
you may need to update the license. The new license should be
registered with the product. Dr.Web Security Space supports hot
license updates without stopping or reinstalling the product.
To renew license key files:
1. Open License Manager. To purchase a new license or renew an
existing one, you can also use your personal web page on the
Doctor Web website. To visit your page, use the My Dr.Web
option in the License Manager or SpIDer Agent menu.
2. If your current key file is invalid, Dr.Web Security Space
automatically switches to the new license.
User Manual
18
1. Introduction
1.5. Detection Methods
Dr.Web anti-virus solutions use several malicious software
detection methods simultaneously, and that allows them to perform
thorough checks on suspicious files and control software behaviour:
1. The scans begin with signature analysis, which is performed
by comparing file code segments to the known virus
signatures. A signature is a finite continuous sequence of bytes
that is necessary and sufficient to identify a specific virus. To
reduce the size of the signature dictionary, Dr.Web anti-virus
solutions use signature checksums instead of complete
signature sequences. Checksums uniquely identify signatures
which preserves the correctness of virus detection and
neutralization. The Dr.Web virus databases are composed in
such a way that some entries can be used to detect not just
specific viruses but whole classes of threats.
2. On completion of signature analysis, Dr.Web anti-virus
solutions use the unique Origins Tracing™ method to
detect new and modified viruses that use known infection
mechanisms. Thus, Dr.Web users are protected against
viruses such as notorious blackmailer Trojan.Encoder.18 (also
known as gpcode). In addition to detecting new and modified
viruses, the Origins Tracing mechanism considerably reduces
the number of incidents of false triggering of the Dr.Web
heuristics analyzer.
3. The detection method used by the heuristics analyzer is based
on certain knowledge about the attributes that characterize
malicious code. Each attribute or characteristic has a weight
coefficient that determines the level of its severity and
reliability. Depending on the sum weight of a file, the heuristics
analyzer calculates the probability of unknown virus infection.
As with any system of hypothesis testing under uncertainty, the
heuristics analyzer may commit type I or type II errors (i.e., it
may omit viruses or raise false alarms).
While performing any of the aforementioned checks, Dr.Web antivirus solutions use the most recent information about known
malicious software. As soon as Doctor Web Virus Laboratory
User Manual
19
1. Introduction
experts discover new threats, they issue an update on virus signatures,
behaviour characteristics, and attributes. In some cases updates can
be issued several times per hour. Therefore even if a brand new virus
passes through the Dr.Web resident guards and penetrates the
system, then after update the virus is detected in the list of processes
and neutralized.
User Manual
20
1. Introduction
1.6. How to Test Anti-virus
The European Institute for Computer Anti-Virus Research (EICAR)
Test File helps test the performance of anti-virus programs that detect
viruses using signatures.
For this purpose, most anti-virus software vendors generally use a
standard test.com program. This program was specially designed to let
user test the reaction of newly installed anti-virus tools that detect
viruses without compromising the security of their computers.
Although the test.com program is not actually a virus, it is treated by
the majority of anti-viruses as if it were one. Upon detecting this
"virus", Dr.Web Security Space reports the following: EICAR
Test File (Not a Virus!). Other anti-virus tools alert users
in a similar way.
The test.com program is a 68-byte COM-file that prints the following
line on the console when executed: EICAR-STANDARD-ANTIVIRUSTEST-FILE!
The test.com file contains the following character string only:
X5O!P%@AP[4\PZX54(P^)7CC)7}$EICAR-STANDARD-ANTIVIRUS-TEST-FILE!$H+H*
To create your own test file with the "virus", you can create a new file
with this line and save it as test.com.
When you attempt to execute an EICAR file while SpIDer Guard is
running in the optimal mode, the operation is not terminated and
the file is not processed as malicious since it does not pose any
actual threat to your system. However, if you copy or create such a
file in your system, then it is detected by SpIDer Guard and
moved to Quarantine by default.
User Manual
21
2. Installing Dr.Web Security Space
2. Installing Dr.Web Security Space
Before installing the program, we strongly recommend to:
install all critical updates released by Microsoft for the OS
version used on your computer (they are available on the
company’s updating web site at http://windowsupdate.
microsoft.com);
check the file system with the system utilities and remove the
detected defects;
close all active applications.
Dr.Web Security Space is not compatible with other anti-virus
software. Installing two anti-virus programs on one computer may
lead to a system crash and the loss of important data.
To begin installing Dr.Web Security Space on your computer,
do one of the following:
Execute the file, if supplied as a single executable file.
Insert the company disk into the CD/DVD drive. If autorun is
enabled, the installation procedure will start automatically. If
autorun is disabled, run the executable file of the distribution kit
manually.
Follow the dialog windows of the installation wizard. At any stage of
the installation (before the files are copied onto the computer), you
can return to the previous stage by clicking Back. To continue
installation, click Next. To abort installation, click Cancel.
User Manual
22
2. Installing Dr.Web Security Space
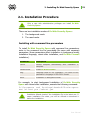
2.1. Installation Procedure
Only a user with administrative privileges can install Dr.Web
Security Space.
There are two installation modes of Dr.Web Security Space:
1. The background mode.
2. The usual mode.
Installing with command line parameters
To install Dr.Web Security Space with command line parameters,
enter in the command line the executable file name with necessary
parameters (these parameters affect installation in background mode,
installation language, reboot after installation, and Dr.Web Firewall
installation).
Parameter
Description
reboot
Restart computer automatically after installation is
complete.
installFirewall
Install Dr.Web Firewall.
lang
Language used for the installation. The value of this
parameter is language in ISO 639-1 format.
silent
Installation in background mode.
For example, to start background installation of Dr.Web Security
Space with reboot after installation, execute the following command:
C:\Documents and Settings\drweb-800-win-space.
exe /silent yes /reboot yes
Installation Wizard checks if the installation file is the latest one. If
newer installation file exists, you will be offered to download it
before the installation.
User Manual
23
2. Installing Dr.Web Security Space
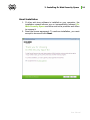
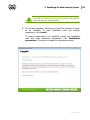
Usual Installation
1. If other anti-virus software is installed on your computer, the
installation wizard informs you on incompatibility between Dr.
Web Security Space and other anti-virus products and offers
to remove it.
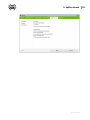
2. Read the license agreement. To continue installation, you must
accept its terms and click Next.
User Manual
24
2. Installing Dr.Web Security Space
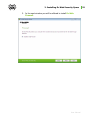
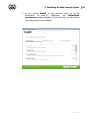
3. In the next window you will be offered to install Dr.Web
Firewall.
User Manual
25
2. Installing Dr.Web Security Space
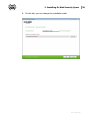
4. On this step, you are prompted to connect to Dr.Web cloud
services that allow to check Web sites using the newest
information.
User Manual
26
2. Installing Dr.Web Security Space
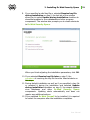
5. On this step, the installation wizard informs you that a key file
is required for Dr.Web Security Space operation. There are
two types of key files: license and demo key file. Do one of the
following actions:
if a key file is present on the hard drive or removable
media, click Browse and select the key file in the
appeared dialog window;
if you want to receive a key file during the installation,
select Receive key file during installation;
if you want to continue the installation and use a
temporary key file, select Receive key file later.
Updating is not available until you have installed license or
demo key file.
Click Next.
User Manual
27
2. Installing Dr.Web Security Space
Use only a Dr.Web Security Space key file. Key files of
this type have the .key extension.
6. The window displays, informing you that the program is ready
to be installed. To start installation with the default
parameters, click Install.
To select components to be installed, specify the installation
path and other additional parameters, click Installation
parameters. The option is meant for experienced users.
User Manual
28
2. Installing Dr.Web Security Space
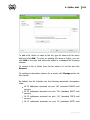
7. If you clicked Install on the previous step, go to the
description of step 10. Otherwise, the Installation
parameters window displays. On the first tab, you can specify
the components to be installed.
User Manual
29
2. Installing Dr.Web Security Space
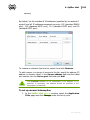
8. On this tab, you can change the installation path.
User Manual
30
2. Installing Dr.Web Security Space
9. If you specified a valid key file or selected Receive key file
during installation on step 5, the last tab of the window
allows you to select Update during installation checkbox to
download updates to virus databases and other program
components. The window also prompts you to create shortcuts
to Dr.Web Security Space.
When you finish adjusting the installation parameters, click ОК.
10. If you selected Receive key file later on step 5, the
procedure of receiving the key file from the Internet starts on
this step.
11. During default installation as well as if you specified a key file
or received it during the installation and selected Update
during installation checkbox on step 9, the wizard updates
virus databases and other Dr.Web Security Space
components. Updating starts automatically and does not
require any additional actions.
12. If you selected Dr.Web Firewall to be installed, it is required
to restart the computer after the installation completes.
User Manual
31
2. Installing Dr.Web Security Space
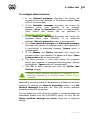
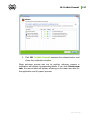
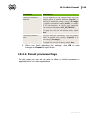
2.2. Removing or changing Dr.Web
Security Space
1. Start the installation wizard with the special tool Add or
Remove programs of the Windows operating system.
2. In the opened window, select the installation mode
to select the components to install, select Change
components;
to restore anti-virus protection on your computer, select
Restore program;
to remove all installed components, select Remove
program.
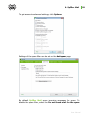
3. To remove Dr.Web Security Space or select components to
be installed, it is required to enter the confirmation code from
the picture in the opened window.
4. If the program prompts you, restart the computer to complete
the procedure.
User Manual
32
2. Installing Dr.Web Security Space
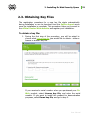
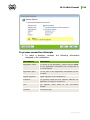
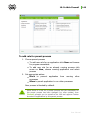
2.3. Obtaining Key Files
The registration procedure for a new key file starts automatically
during installation or can be launched from the SpIDer Agent menu
once the installation is complete. This procedure helps you connect to
the official Doctor Web website and register your installation.
To obtain a key file:
1. During the first step of the procedure, you will be asked to
choose what type of key file you would like to obtain - either a
license or a demo key file.
If you received a serial number when you purchased your Dr.
Web product, select License key file, and enter the serial
number. If you want to install the product for demonstration
purposes, select Demo key file, and go to step 2.
User Manual
33
2. Installing Dr.Web Security Space
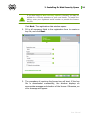
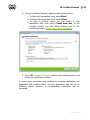
If you have used Dr.Web Security Space in the past, you may be
eligible for a 150-day extension to your new license. To enable the
bonus, enter your registered serial number or provide the license
key file.
Click Next. The registration data window opens.
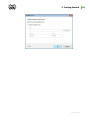
2. Fill in all necessary fields in the registration form to receive a
key file, and click Next.
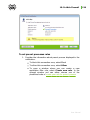
3. The procedure of receiving the license key will start. If the key
file is downloaded successfully, the window displays an
appropriate message and duration of the license. Otherwise, an
error message will appear.
User Manual
34
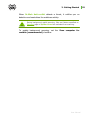
3. Getting Started
3. Getting Started
The installation program allows you to install the following Dr.Web
Security Space components on your computer:
Scanner (GUI and console versions)
SpIDer Guard
SpIDer Mail
Dr.Web for Outlook
SpIDer Gate
Parental control
Firewall
Automatic Updating Utility
SpIDer Agent
Anti-spam
The components of Dr.Web Security Space use common virus
databases and anti-virus engine. In addition, uniform algorithms that
detect and neutralize viruses in scanned objects are implemented.
However, the methods of selecting objects for scanning differ greatly,
which allows these components to be used for absolutely different and
mutually supplementary PC protection policies.
For example, Scanner for Windows scans (on user demand or
according to schedule) certain files (e.g., all files, selected logical disks,
directories). By default, the main memory and startup files are scanned
too. Since it is the user who decides when to launch a task, there is no
need to worry about the sufficiency of computational resources needed
for other important processes.
SpIDer Guard constantly resides in the main memory of the PC and
intercepts calls made to the objects of the file system. The program
checks for viruses in files that are being launched, created, or changed
on the hard drives and those that are opened on removable media and
network drives. Due to a balanced approach to the level of the file
system scanning details the program hardly disturbs other processes
on the PC. However, this results in insignificant decrease of virus
detection reliability.
User Manual
35
3. Getting Started
An advantage of the program is that it provides you with uninterrupted
control of the virus situation during the entire time a PC is running. In
addition, some viruses can only be detected by the guard through their
specific activity.
SpIDer Mail also constantly resides in the memory. The program
intercepts all calls from your mail clients to mail servers via POP3/
SMTP/IMAP4/NNTP protocols and scans incoming and outgoing e-mail
messages before they are received (or sent) by the mail client.
SpIDer Mail is designed to check all current mail traffic going
through a computer. As a result, it becomes more efficient and less
resource-consuming to scan mailboxes. For example, you can control
attempts at mass distribution of a mail worm's functional copies to the
addresses specified in the user address book which is performed via
the worm's own mail clients. You can also disable scanning of e-mail
files for SpIDer Guard, which considerably reduces consumption of
computer resources.
An anti-virus HTTP monitor, SpIDer Gate by default automatically
checks incoming HTTP traffic and blocks all malware objects. HTTP is
used by web browsers, download managers and, other applications
that exchange data with web servers, i.e. those that work with the
Internet. SpIDer Gate resides in the computer’s main memory and
automatically launches upon Windows startup. You can change the
automatic launch mode by clearing the corresponding check box.
The Parental Control component is used to restrict access to both
local and web resources.
Dr. Web Firewall protects your computer from unauthorized access
and prevents vital data from leaking through networks. Firewall
monitors connection attempts and data transfer and helps you block
unwanted or suspicious connections on both network and application
levels.
User Manual
36
3. Getting Started
Ensuring Protection Against Virus Threats
To ensure comprehensive anti-virus protection, we advise you to use
the Dr.Web Security Space components as follows:
Scan your computer file system with the default (maximum)
scanning detail settings.
Keep default settings of SpIDer Guard.
Perform complete e-mail scanning with SpIDer Mail.
Perform scanning of incoming HTTP-traffic with SpIDer Gate.
Block all unknown connections with Dr.Web Firewall.
Perform a periodic complete scan of your PC that coincides with
when virus database updates are issued (at least once a week).
Immediately perform a complete scan whenever SpIDer Guard
has been temporarily disabled and the PC was connected to the
Internet or files were downloaded from removable media.
Anti-virus protection can only be effective if you update the virus
databases and other program files regularly (preferably every
hour). For more information, read Automatic Updating.
User Manual
37
3. Getting Started
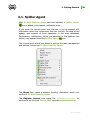
3.1. SpIDer Agent
After Dr.Web Security Space has been installed, a SpIDer Agent icon is added to the taskbar notification area.
If you hover the mouse cursor over the icon, a pop-up appears with
information about the components that are running, the date of last
update, and amount of virus signatures in the virus databases.
Furthermore, notifications, which are adjusted in the settings (see
below), may appear above the SpIDer Agent icon.
The context menu of the icon allows to perform the main management
and settings functions of Dr.Web Security Space.
The About item opens a window showing information about your
version of Dr.Web Security Space.
The Register license item starts the registration procedure for
receiving a key file from Doctor Web servers.
User Manual
38
3. Getting Started
The My Dr.Web item opens your personal web page on the Doctor
Web official website. This page gives information about your license
(e.g., period of usage, serial number), and allows you to renew your
license, contact Technical Support, etc.
The Help item opens the Dr.Web Security Space help system.
The SpIDer Guard, SpIDer Mail, SpIDer Gate, Parental Control
, Firewall and Update items allow you to access the management
and settings features as well as statistics of the corresponding
components.
The Scanner item runs Dr.Web Scanner.
The Disable/Enable Self-protection item allows you to disable/
enable protection of Dr.Web Security Space files, registry keys, and
processes from damage and deletion.
You cannot disable self-protection when in User mode. It is not
recommended to disable self-protection.
If any problems occur during operation of defragmentation
programs, disable self-protection temporarily.
To disable self-protection:
select Disable self-protection in the SpIDer Agent menu;
enter the text displayed in the picture or Dr.Web Security
Space access password.
The Enable self-protection item will appear.
To rollback to a system restore point, disable self-protection.
The Tools item opens a submenu that provides access to:
License Manager
Main settings of Dr.Web Security Space and particular
components
Quarantine Manager
User Manual
39
3. Getting Started
Anti-virus Network
Components statistics
Report generation wizard.
Before contacting Doctor Web Technical Support, generate a
report than indicates how your operating system and Dr.Web
Security Space are functioning.To adjust parameters, in the
opened window, click Report settings. The report will be stored
as an archive in the Doctor Web subfolder of the %USERPROFILE
% directory.
The Administrative/User mode item allows you to switch between
full-function Administrative mode and restricted User mode. In
User mode, access to settings of components is forbidden, as well as
disabling of all components and self-protection. You need
administrative rights to switch to Administrative mode.
This item displays when you do not have administrative privileges.
For instance, this item displays when you log into Microsoft
Windows XP operating systems as a non-privileged user, or when
User Account Control of Windows Vista or Microsoft Windows 7
operating system is enabled. Otherwise, the item is hidden and
SpIDer Agent menu provides access to all features.
User Manual
40
3. Getting Started
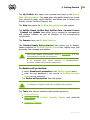
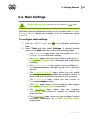
3.2. Main Settings
Dr.Web Security Space settings are not available in User mode.
Centralized settings adjustment allows you to configure main Dr.Web
Security Space settings and settings of all its components except
Scanner.
To configure main settings
1. Click the SpIDer Agent icon in the Windows notification
area.
2. Select Tools and then select Settings. A settings window
opens on the Main tab that contains the following pages:
The Notifications page, where you can configure Dr.Web
Security Space notification settings.
The Update page, where you can configure settings of Dr.
Web Security Space virus databases and components
updating.
The Anti-virus Network page, where you can configure Dr.
Web Security Space operation as part of an anti-virus
network.
The Preventive Protection page, where you can enable
background scanning for rootkits and configure control of
actions that may compromise security of your computer.
The Dr.Web Cloud page, where you can connect to
Doctor Web cloud services.
The Report page, where you can configure event logging
for Dr.Web Security Space components.
The Quarantine page, where you can configure
Quarantine that serves for isolation of infected and
suspicious files.
The Proxy Server page, where you can configure Internet
connection parameters for Dr.Web Security Space
components.
User Manual
41
3. Getting Started
The Language page, where you can select the language to
use in the interface.
The Self-protection page, where you can configure
additional security settings.
The Restore page, where you can configure import and
export of Dr.Web Security Space settings and restore
their default values.
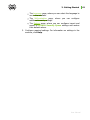
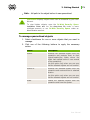
3. Configure required settings. For information on settings in the
sections, click Help.
User Manual
42
3. Getting Started
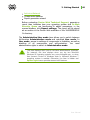
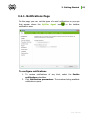
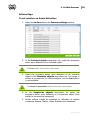
3.2.1. Notifications Page
On this page, you can set the types of e-mail notifications or pop-ups
that appear above the SpIDer Agent icon notification area.
in the taskbar
To configure notifications
1. To receive notifications of any kind, select the Enable
notifications checkbox.
2. Click Notification parameters. The windows listing available
notifications opens.
User Manual
43
3. Getting Started
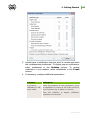
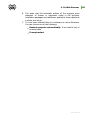
3. Locate types of notification that you want to receive and select
the corresponding checkboxes. To display pop-up notifications,
select checkboxes in the Desktop column. To receive
notification in you mailbox, select checkboxes in the E-mail
column.
4. If necessary, configure additional parameters:
Checkbox
Description
Do not show
notifications in fullscreen mode
Select this checkbox to hide notifications when
an application is running in full screen mode on
your computer (e.g. a game or a movie).
Clear this checkbox to display notification
regardless on the mode.
User Manual
44
3. Getting Started
Display Firewall
notification on
separate desktop
in full-screen mode
Select this checkbox to display notifications
from Firewall on a separate desktop when
some application is running in full screen mode
on your computer (a game or a movie).
Clear this checkbox to display notification on
the same desktop where an application is
running in the full screen mode.
If you selected one or more e-mail notifications, configure sending
e-mails from your computer.
5. After editing, click OK to save the changes or Cancel to cancel
them.
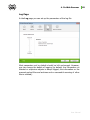
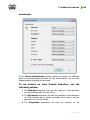
To configure e-mail notifications
1. Make sure that the Enable notifications checkbox and all the
necessary e-mail notifications are selected in the Notification
parameters window are selected.
2. Select the Send notifications by e-mail checkbox.
3. Click E-mail settings. The window with e-mail parameters
opens.
User Manual
45
3. Getting Started
4. Specify the following parameters:
Option
Description
Address
Enter an e-mail address where to send the
notifications.
SMTP Server
Enter the outgoing (SMTP) server for Dr.Web
Security Space to use when sending e-mail
notifications.
Port
Enter the port for Dr.Web Security Space to use
when connecting to the e-mail server.
Login
Enter the login for Dr.Web Security Space to use
when connecting to the e-mail server.
Password
Enter the password to the login that should be used
when connecting to the e-mail server.
Security
Select the security level for the connection.
Authentication
Select the authentication method that should be
used when connecting to the e-mail server.
User Manual
46
3. Getting Started
5. Click Test to send a test message using the provided
parameters. If you do not receive the message within several
minutes, check the provided connection details.
6. After editing, click OK to save the changes or Cancel to cancel
them.
To suspend notifications temporary
To disable sending e-mail notifications, clear the Send notifications
by e-mail checkbox.
To disable all types of notifications, clear the Enable notifications
checkbox.
User Manual
47
3. Getting Started
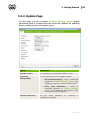
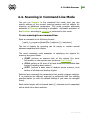
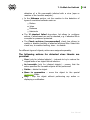
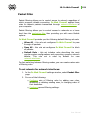
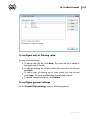
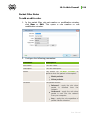
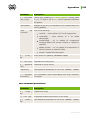
3.2.2. Update Page
On this page, you can configure Dr.Web Security Space update
parameters such as components that should be updated, an updating
source, update period, and update mirror.
Option
Description
Update source
You can specify a convenient update source.
Updating
components
You can choose one of the update modes:
All (recommended) – select to download
updates to Dr.Web Security Space virus
databases, engine, and other components.
Only virus databases – select to
download updates to Dr.Web Security
Space virus databases and engine; other
components are not updated.
Update frequency
You can select frequency
availability of updates.
for
checking
of
User Manual
48
3. Getting Started
Option
Description
Update mirror
You can create an update mirror that will be used
by local network computers with installed Dr.Web
product.
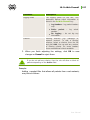
Update Source
To select an update source, click Change. In the opened window
select one of the following update sources:
Internet (recommended) – updates are to be downloaded
from Doctor Web servers. This source is used by default;
Local or network folder – updates are to be downloaded
from a local or network folder, where updates were copied. To
specify the path to the folder, click Browse and select the
required folder, or enter the address manually. Enter the user
name and password if necessary;
Anti-virus Network – updates are to be downloaded from a
local network computer if Dr.Web Security Space product is
installed and update mirror is created on it.
User Manual
49
3. Getting Started
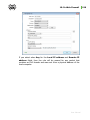
Update Mirror
To allow other local network computers with installed Dr.Web
products to use your computer as an update source, under the
Update mirror click Change and select Create update mirror in
the opened window. Specify the path to the folder, where updates
should be copied. If your computer is connected to several networks,
you can specify IP-address available to computers of only one
network. You can also specify the port for HTTP connections.
User Manual
50
3. Getting Started
User Manual
51
3. Getting Started
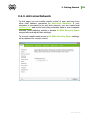
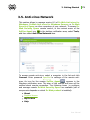
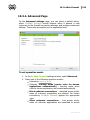
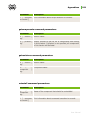
3.2.3. Anti-virus Network
On this page, you can enable remote control of your anti-virus from
other local network computers by Anti-virus Network. If your
computer is connected to an anti-virus network, you can create local
update mirrors and control anti-virus protection state or your computer
remotely (view statistics, enable or disable Dr.Web Security Space
components and adjust their settings).
To prevent unauthorized access to Dr.Web Security Space settings,
set a password for remote control.
User Manual
52
3. Getting Started
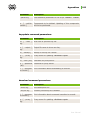
3.2.4. Preventive Protection Page
On this page, you can configure Dr.Web Security Space reaction to
such actions of other programs that can compromise security of your
computer. You can also enable background scanning of your operating
system for rootkits, i.e. malicious programs that are used for hiding
changes to operating system such as running of particular processes,
registry changes, modifications to files and folders.
Preventive Protection Level
In the default Minimum mode, Dr.Web Security Space disables
automatic changes to system objects, modification of which explicitly
signifies a malicious attempt to damage the operating system. It also
blocks low-level access to disk and protects the HOSTS file from
modification.
If there is a high risk of you computer getting infected, you can
increase protection by selecting the Medium mode. In this mode, Dr.
Web Security Space blocks access to the critical objects that can be
User Manual
53
3. Getting Started
potentially used by malicious software.
Using this mode may lead to compatibility problems with legitimate
software that uses the protected registry branches.
When it is required to have total control of access to critical Windows
objects, you can select the Paranoid mode. In this mode, Dr.Web
Security Space also provides you with interactive control over
loading of drivers and automatic running of programs.
Custom Mode
This mode allows flexible configuration of Dr.Web Security Space
reaction to particular events that can compromise security of your
computer.
If any problems occur during installation of important Microsoft
updates or installation and operation of programs (including
defragmentation programs), disable the corresponding options in
this group.
Background Rootkit Scanning
Anti-rootkit component included in Dr.Web Security Space provide
options for background scanning of the operating system for complex
threats and curing of detected active infections when necessary.
If this option is enabled, Dr.Web Anti-rootkit constantly resides in
memory. In contrast to on-the-fly scanning of files by SpIDer Guard,
scanning for rootkits includes checking of autorun objects, running
processes and modules, Random Access Memory (RAM), MBR/VBR
disks, computer BIOS system and other system objects.
One of the key features of the Dr.Web Anti-rootkit is delicate
attitude towards consumption of system resources (processor time,
free RAM and others) as well as consideration of hardware capacity.
User Manual
54
3. Getting Started
When Dr.Web Anti-rootkit detects a threat, it notifies you on
detection and neutralizes the malicious activity.
During background rootkit scanning, files and folders specified on
Exclusion page of SpIDer Guard are excluded from scanning.
To enable background scanning, set the Scan computer for
rootkits (recommended) checkbox.
User Manual
55
3. Getting Started
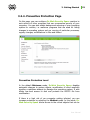
3.2.5. Dr.Web Cloud Page
On this page, you can connect to Doctor Web cloud services and take
part in Dr.Web quality improvement program.
Cloud Services
The URL Filter Dr.Web Cloud Checker allows checking addresses of
web pages on Doctor Web servers in real-time mode.
Depending on update settings, information about malicious websites
and URL lists used by SpIDer Gate and Parental Control may
become out of date. Cloud services can reliably restrict users from
viewing websites of the following categories:
Known infection sources
Websites that are not recommended for visiting by Doctor Web
specialists
Websites with adult content
Websites on violence
User Manual
56
3. Getting Started
Websites on weapon
Gambling websites
Websites on drugs
Websites on terrorism
Web pages with obscene language
Chats
E-mail provides
Social-networking sites
Software Quality Improvement Program
If you participate in the software quality improvement program,
impersonal data about Dr.Web Security Space operation on your
computer will be periodically sent to the company servers, for
example, information on created rule sets for Dr.Web Firewall.
Received information is not used to identify or contact you.
Click the Privacy statement by Doctor Web link to look through a
privacy statement on Doctor Web website.
User Manual
57
3. Getting Started
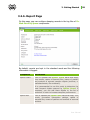
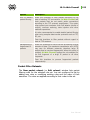
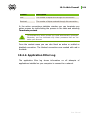
3.2.6. Report Page
On this page, you can configure keeping records in the log files of Dr.
Web Security Space components.
By default, reports are kept in the standard mode and the following
information is logged:
Component
Information
SpIDer Guard
Time of updates and SpIDer Guard starts and stops,
virus events, names of scanned files, names of packers
and contents of scanned complex objects (archives, email attachments, file containers).
It is recommended to use this mode to determine the
most frequent objects scanned by SpIDer Guard. If
necessary, you can add these objects to the list of
exclusions in order to increase computer performance.
SpIDer Mail
Time of updates and SpIDer Mail starts and stops, virus
events, connection interception settings, names of
scanned files, names of packers and contents of scanned
archives.
User Manual
58
3. Getting Started
Component
Information
It is recommended to use this mode when testing mail
interception settings.
SpIder Gate
Time of updates, starts and stops of SpIDer Gate, virus
events, connection interception settings, names of
scanned files, names of packers and contents of scanned
archives.
It is recommended to use this mode for reception of
more detailed information on the checked up objects and
work of the HTTP-watchman.
Firewall
Dr.Web Firewall does not log its operation in standard
mode. When you enable detailed logging, Firewall
collects data on network packets (pcap logs).
Updater
List of updated Dr.Web Security Space files and their
downloading states, details on execution of auxiliary
scripts, date and time of updates, details on Dr.Web
Security Space components restarting after update.
Dr.Web Services
Information on Dr.Web components, changing of Dr.
Web components settings, components starts and stops,
preventive protection events, connections to anti-virus
network.
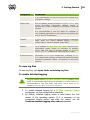
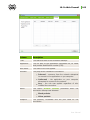
To view log files
To view log files, click Open folder containing log files.
To enable detailed logging
Logging detailed data on Dr.Web Security Space operation may
result in considerable log growth and increase in process load. It is
recommended to use this mode only when errors occur or by
request of Doctor Web Technical Support.
1. To enable detailed logging for a Dr.Web Security Space
component, set the corresponding checkbox
2. By default, detailed logging mode is used before the first
restart of the operating system. If it is necessary to log
component activity before and after the restart, set the
Continue detailed logging after reboot checkbox.
User Manual
59
3. Getting Started
3. Save the changes.
By default, size of log files is restricted to 10 MB.
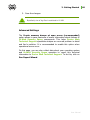
Advanced Settings
The Create memory dumps at scan errors (recommended)
option allows to save maximum of useful information about failures of
Dr.Web Security Space components. This helps Doctor Web
Technical Support specialists analyze an occurred problem in detail
and find a solution. It is recommended to enable this option when
operational errors occur.
On this page, you can also collect data about your operating system
and Dr.Web Security Space operation to report this technical
information to Doctor Web Technical Support. To do this, click on
Run Report Wizard.
User Manual
60
3. Getting Started
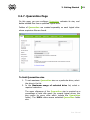
3.2.7. Quarantine Page
On this page, you can configure Quarantine, estimate its size, and
delete isolated files from a specified logical drive.
Folders of Quarantine are created separately on each logical drive
where suspicious files are found.
To limit Quarantine size
1. To set maximum Quarantine size on a particular drive, select
the drive in the list.
2. In the Maximum usage of selected drive list, select a
required restriction.
The upper allowance of the Quarantine size is counted as a
percentage of total disk space (for several logical drives, this
size counts for every drive which include the Quarantine
folder). The 100% value means unlimited Quarantine folder
size.
User Manual
61
3. Getting Started
To empty Quarantine
1. To remove all quarantined files on a particular drive, select the
drive in the list.
2. Click Remove and confirm the deletion when prompted.
Use Advanced settings to select the mode of isolating infected objects
detected at portable data carriers. By default, detected threats are
moved to the Quarantine folder on this data carrier without being
encrypted. The Quarantine folder is created on portable data carriers
only when they are accessible for writing. The use of separate folders
and omission of encryption on portable data carriers prevents possible
data loss.
User Manual
62
3. Getting Started
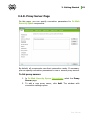
3.2.8. Proxy Server Page
On this page, you can specify connection parameters for Dr.Web
Security Space components.
By default, all components use direct connection mode. If necessary,
you can specify connection parameters to one or several proxy servers.
To list proxy servers
1. In Dr.Web Security Space Main settings, select the Proxy
Server page.
2. To add a new proxy server, click Add. The window with
connection settings opens.
User Manual
63
3. Getting Started
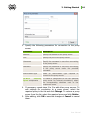
3. Specify the following parameters for connection to the proxy
server:
Parameter
Description
Address
Specify the address of the proxy server.
Port
Specify the port of the proxy server.
Username
Specify the username to use when connecting
to the proxy server.
Password
Specify the password to use when connecting
to the proxy server under the provided
username.
Authorization type
Select an authorization type required to
connect to the proxy server.
Dr.Web
Security
Space components
To enable a component to use the specified
proxy server for Internet connections, select
the corresponding checkbox next to the
component name.
4. If necessary, repeat steps 2 to 3 to add other proxy servers. To
edit settings for connection to a proxy server, select the
required proxy in the list and click Change. To remove a proxy
server from the list, select the required proxy and click Delete.
5. After editing, click OK to save the changes or Cancel to cancel
them.
User Manual
64
3. Getting Started
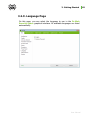
3.2.9. Language Page
On this page, you can select the language to use in the Dr.Web
Security Space graphical interface. All available languages are listed
automatically.
User Manual
65
3. Getting Started
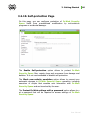
3.2.10. Self-protection Page
On this page, you can configure protection of Dr.Web Security
Space itselft from unauthorized modification by anti-antivirus
programs or accidental damage.
The Enable Self-protection option allows to protect Dr.Web
Security Space files, registry keys and processes from damage and
deletion. It is not recommended to disable self-protection.
The Block user-activity emulation option allows to prevent any
automatic changes in Dr.Web Security Space operation, including
execution of scripts that emulate user interaction with Dr.Web
Security Space and are launched by the user.
The Protect Dr.Web settings with a password option allows to s
et a password that will be required to access settings of Dr.Web
Security Space.
User Manual
66
3. Getting Started
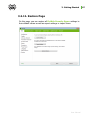
3.2.11. Restore Page
On this page, you can restore all Dr.Web Security Space settings to
their default values as well as export settings or import them.
User Manual
67
3. Getting Started
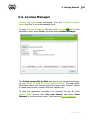
3.3. License Manager
License Manager shows information from the Dr.Web Security
Space key files in an understandable form.
To open License Manager, click the SpIDer Agent icon in the
notification area, select Tools, and then select License Manager.
The Online service My Dr.Web item opens your personal web page
on the official Dr.Web Security Space website. This page gives
information about your license (period of usage, serial number), allows
to renew your license, contact Technical Support, etc.
To start the registration procedure for receiving the key file from
Doctor Web servers, click Get new licence and select from
Internet in the drop-down menu. That launches key file obtaining.
User Manual
68
3. Getting Started
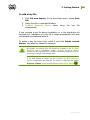
To add a key file
1. Click Get new licence. In the drop-down menu, select from
file.
2. Select the file in a standard window.
3. Dr.Web Security Space starts using the key file
automatically.
If you received a key file during installation or in the distribution kit
complete set, installation of a key file is made automatically and does
not demand any additional actions.
To delete a key file from a list, select it and click Delete current
licence. Last used key cannot be removed.
By default, the license key file should be located in the Dr.Web
Security Space installation folder. Dr.Web Security Space
verifies the file regularly. Do not edit or otherwise modify the file to
prevent the license from compromise.
If no valid license or demo key file is found, Dr.Web Security
Space components are blocked. To receive a valid key file, select
Register License in the context menu of the SpIDer Agent .
User Manual
69
3. Getting Started
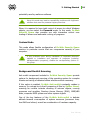
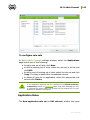
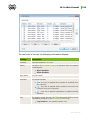
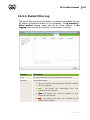
3.4. Quarantine Manager
The Quarantine section of Dr.Web Security Space serves for
isolation of files that are suspicious as malware. Quarantine folders
are created separately on each logic disk where suspicious files are
found. When infected objects are detected at the portable data carrier
accessible for writing, the Quarantine folder will be created on the data
carrier and infected objects will be moved to this folder.
To open Quarantine Manager, click the SpIDer Agent icon in
the notification area, select Tools, and then select Quarantine
Manager.
The central table lists the following information on quarantined objects
that are available to you:
Object – name of the quarantined object
Threat – malware class of the object, which is assigned by Dr.
Web Security Space when the object is quarantined
Date added – the date and time when the object was moved to
Quarantine
User Manual
70
3. Getting Started
Path – full path to the object before it was quarantined
Quarantine displays objects which can be accessed by your user
account.
To view hidden objects, open the Dr.Web Security Space
installation folder and run the dwqrui.exe file under a more
privileged account, or run Dr.Web Security Space under an
administrative account.
To manage quarantined objects
1. Select checkboxes for one or more objects that you want to
manage.
2. Click one of the following buttons to apply the necessary
action:
Button
Description
Restore
Removes the selected objects from the
quarantine and restores them to their
original location(the folder where the
object had resided before it was moved
to the quarantine).
Use this option only when you are sure
that the selected objects are not harmful.
Restore to
Removes the selected objects from the
quarantine and restores them to selected
location.
Use this option only when you are sure
that the selected objects are not harmful.
Delete
Deletes the selected objects from the
quarantine and from the system.
User Manual
71
3. Getting Started
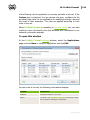
3.5. Anti-virus Network
This section allows to manage version 8.0 of Dr.Web Anti-virus for
Windows, Dr.Web Anti-virus for Windows Servers, or Dr.Web
Securitry Space on other computers of your network. To access Dr.
Web Security Space remote control, in the context menu of the
SpIDer Agent icon in the taskbar notification area, select Tools,
and then select Anti-virus Network item.
To access remote anti-virus, select a computer in the list and click
Connect. Enter password specified in settings of the remote antivirus. An icon for the remote SpIDer Agent appears in the
Windows notification area. The user of the remote anti-virus will be
notified about remote connection. The following items to configure
and manage remote Dr.Web Security Space are available (set of
components depends on which Dr.Web product is installed):
About
Register license
My Dr.Web
Help
User Manual
72
3. Getting Started
SpIDer Guard
SpIDer Mail
SpIDer Gate
Parental Control
Firewall
Tools
Update
Enable/Disable Self-protection
The Tools item opens a submenu that provides access to:
License Manager
Dr.Web Security Space settings
Report generation wizard.
You can manage settings, enable or disable components, and look
through statistics.
Anti-virus Network, Quarantine Manager and Scanner are not
available. Firewall settings and statistics are not available as well, but
you can enable or disable Firewall (if you accessed Dr.Web Antivirus or Dr.Web Security Space). Also you can select the
Disconnect item to terminate remote connection.
If required computer is not on the list, you can try to add it manually.
For this, click Add button and enter IP-address.
You can establish only one connection with remote Dr.Web
product. If one connection is already established, the Connect
button is disabled.
Computers are listed in Anti-virus Network if Dr.Web products
installed on these computers allow remote connection. You can allow
connection to your Dr.Web Security Space on the Anti-virus
Network page in Main settings.
User Manual
73
3. Getting Started
This option is not available in User mode.
User Manual
74
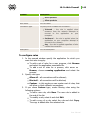
4. Dr.Web Scanner
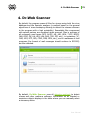
4. Dr.Web Scanner
By default, the program scans all files for viruses using both the virus
database and the heuristic analyzer (a method based on the general
algorithms of virus developing allowing to detect the viruses unknown
to the program with a high probability). Executable files compressed
with special packers are unpacked when scanned. Files in archives of
all commonly used types (ACE, ALZIP, AR, ARJ, BGA, 7-ZIP, BZIP2,
CAB, GZIP, DZ, HA, HKI, LHA, RAR, TAR, ZIP, etc.), in containers (1C,
CHM, MSI, RTF, ISO, CPIO, DEB, RPM, etc.), and in mailboxes of mail
programs (the format of mail messages should conform to RFC822)
are also checked.
By default, Dr.Web Scanner uses all detection methods to detect
viruses and other malicious software. Information on all infected or
suspicious objects displays in the table where you can manually select
a necessary action.
User Manual
75
4. Dr.Web Scanner
The default settings are optimal for most cases. However, if necessary,
you can modify actions suggested upon threat detection by using Dr.
Web Scanner settings window. Please note that you can set custom
action for each detected threat after scan is completed, but common
reaction for a particular threat type should be configured beforehand.
4.1. Scanning Your System
Dr.Web Scanner is installed as a usual Windows application and can
be launched by the user or automatically (see Automatic Launch of
Scanning).
It is recommended for the scanner to be run by a user with
administrator rights because files to which unprivileged users have
no access (including system folders) are not scanned.
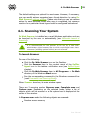
To launch Scanner:
Do one of the following:
Click the Dr. Web Scanner icon on the Desktop.
Click the Scanner item in the context menu of the SpIDer
Agent icon in the taskbar notification area (see SpIDer Agent
chapter).
Click the Dr.Web Scanner item in All Programs -> Dr.Web
directory of the Windows Start menu.
Run the corresponding command in the Windows command line
(read Command Line Scanning Mode).
When Scanner launches, its main window opens.
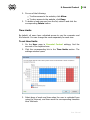
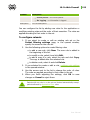
There are 3 scanning modes: Express scan, Complete scan and
Custom scan. Depending on the selected mode, either a list of
objects which will be scanned or a file system tree is displayed at the
center of the window.
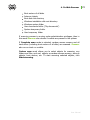
In Express scan mode the following objects are scanned:
Random access memory
User Manual
76
4. Dr.Web Scanner
Boot sectors of all disks
Autorun objects
Boot disk root directory
Windows installation disk root directory
Windows system folder
User documents folder ("My documents")
System temporary folder
User temporary folder
If scanning process is running under administrative privileges, then in
this mode Scanner also checks if rootkits are present in the system.
If Complete scan mode is selected, random access memory and all
hard drives (including boot sectors of all disks) are scanned. Scanner
also runs a check on rootkits.
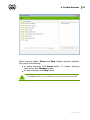
Custom scan mode allows you to select objects for scanning: any
folders and files, and such objects as random access memory, autorun
objects, boot sectors, etc. To start scanning selected objects, click
Start scanning.
User Manual
77
4. Dr.Web Scanner
When scanning starts, Pause and Stop buttons become available.
You can do the following:
to pause scanning, click Pause button. To resume scanning
after pause, click Resume button;
to stop scanning, click Stop button.
The Pause button is not available at scanning processes and RAM.
User Manual
78
4. Dr.Web Scanner
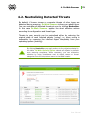
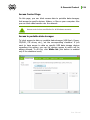
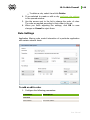
4.2. Neutralizing Detected Threats
By default, if known viruses or computer threats of other types are
detected during scanning, Dr.Web Scanner informs you about them.
You can neutralize all detected threats at once by clicking Neutralize.
In this case Dr.Web Scanner applies the most effective actions
according its configuration and threat type.
Threats to your security can be neutralized either by restoring the
original state of each infected objects (curing), or, when curing is
impossible, by removing the infected object completely from your
operating system (deleting).
By clicking Neutralize you apply actions to the objects selected in
the table. Dr.Web Security Space selects all objects by default
once scanning completes. When necessary, you can customize
selection by using checkboxes next to object names or threat
categories from the drop-down menu in the table header.
User Manual
79
4. Dr.Web Scanner
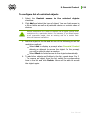
To select an action:
1. Where necessary, select a custom action from the drop-down
list in the Action field. By default, Scanner selects a
recommended action for the type of detected threat.
2. Click Neutralize. Scanner applies all selected actions to the
selected threats.
Suspicious objects are moved to Quarantine and should be sent
for analysis to the anti-virus laboratory of Doctor Web. To send
the files, right-click anywhere in the Quarantine windows and
select Submit file to Doctor Web Laboratory.
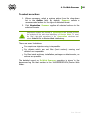
There are some limitations:
For suspicious objects curing is impossible.
For objects which are not files (boot sectors) moving and
deletion are impossible.
For files inside archives, installation packages or attachments, no
actions are possible.
The detailed report on Dr.Web Scanner operation is stored in the
dwscanner.log file that resides in the %USERPROFILE%\Doctor Web
folder.
User Manual
80
4. Dr.Web Scanner
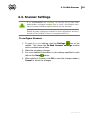
4.3. Scanner Settings
It is recommended for Scanner to be run by a user with
administrator privileges because files to which unprivileged users
have no access (including system folders) are not scanned.
Default program settings are optimal for most applications and they
should not be modified, if there is no special need for it.
To configure Scanner:
1. To open Scanner settings, click the Settings
icon on the
toolbar. This opens the Dr.Web Scanner settings window
which contains several tabs.
2. Make the necessary changes.
3. For more detailed information on the settings specified in each
tab use the Help
button.
4. When editing is finished, click OK to save the changes made or
Cancel to cancel the changes.
User Manual
81
4. Dr.Web Scanner
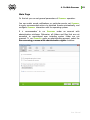
Main Page
On this tab you can set general parameters of Scanner operation.
You can enable sound notifications on particular events, set Scanner
to apply recommended actions to detected threats automatically, and
configure Scanner interaction with the operating system.
It is recommended to run Scanner under an account with
administrative privileges. Otherwise, all folders and files that are not
accessible to unprivileged user including system folder are not
scanned. To run Scanner under an administrative account, select the
Run scanning process with administrative rights checkbox.
User Manual
82
4. Dr.Web Scanner
Actions Page
To set reaction on threat detection:
1. Select the Actions tab in the Scanner settings window.
2. In the Infected objects drop-down list, select the program’s
action upon detection of an infected object.
The Cure action is the best in most cases.
3. Select the program’s action upon detection of an incurable
object in the Incurable objects drop-down list. The range of
actions is the same as for infected objects, but the Cure action
is not available.
The Move to quarantine action is the best in most cases.
4. In the Suspicious objects drop-down list select the
program’s action upon detection of a suspicious object (fully
similar to the previous paragraph).
5. Similar actions should be specified for detection of objects
containing Adware, Dialers, Jokes, Riskware and Hacktools.
User Manual
83
4. Dr.Web Scanner
6. The same way the automatic actions of the program upon
detection of viruses or suspicious codes in file archives,
installation packages and mailboxes, applied to these objects as
a whole, are set up.
7. To cure some infected files it is necessary to reboot Windows.
You can choose one of the following:
Restart computer automatically. It can lead to loss of
unsaved data.
Prompt restart
User Manual
84
4. Dr.Web Scanner
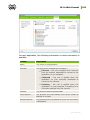
Log Page
In the Log page you can set up the parameters of the log file.
Most parameters set by default should be left unchanged. However,
you can change the details of logging (by default, the information on
infected or suspicious objects is always logged; the information on the
scanned packed files and archives and on successful scanning of other
files is omitted).
User Manual
85
4. Dr.Web Scanner
4.4. Scanning in Command Line Mode
You can run Scanner in the command line mode, then you can
specify settings of the current scanning session and list objects for
scanning as additional parameters. This mode provides automatic
activation of Scanner according to schedule. Automatic activation of
the Scanner according to schedule is performed in this mode.
To run scanning from command line:
Enter a command in the following format:
[<path_to_program>]drweb32w [<obj ects>] [<switches>]
The list of objects for scanning can be empty or contain several
elements separated with blanks.
The most commonly used examples of specifying the objects for
scanning are given below:
/FAST perform an express scan of the system (for more
information on the express scan mode see Scan Modes).
/FULL perform a full scan of all hard drives and removable data
carriers (including boot sectors).
/LITE perform a basic scan of random access memory, boot
sectors of all disks and startup objects.
Switches are command line parameters that specify program settings.
If no switches are defined, scanning is performed with the settings
specified earlier (or with the default settings if you have not changed
them).
Each switch begins with a forward slash (/) character and is separated
with a blank from other switches.
User Manual
86
4. Dr.Web Scanner
4.5. Console Scanner
Dr.Web Security Space also includes Console Scanner that
provides advanced settings.
Console Scanner moves suspicious files to Quarantine.
To run Console Scanner:
Enter the following command:
[<path_to_program>]dwscancl [<switches>] [<obj ects>]
The list of objects for scanning can be empty or contain several
elements separated with blanks.
Switches are command line parameters that specify program settings.
Several parameters are divided by spaces. For the full list of available
switches, refer to Appendix А.
Return codes:
0 – Scanning was completed successfully, infected objects were
not found
1 – Scanning was completed successfully, infected objects were
detected
10 – Invalid keys are specified
11 – Key file is not found or does not license Console Scanner
12 – Scanning Engine did not start
255 – Scanning was aborted by user
User Manual
87
4. Dr.Web Scanner
4.6 Automatic Launch of Scanning
During Dr.Web Security Space installation an anti-virus scanning
task is automatically created in the Task Scheduler (the task is
disabled by default).
To view the parameters of the task, open Control Panel
Administrative Tools Task Scheduler.
In the task list select the Dr.Web Daily scan task. You can enable
the task, adjust trigger time and set required parameters.
On the General tab you can review general information and security
options on a certain task. On the Triggers and Conditions tabs
various conditions for task launching are specified. To review event
log, select the History tab.
You can also create your own anti-virus scanning tasks. Please refer to
the Help system and Windows documentation for more details on the
system scheduler operation.
If installed components include Dr.Web Firewall, Task
Scheduler will be blocked by Firewall after Dr.Web Security
Space installation and the first system reboot. Scheduled tasks will
operate only after second restart when new rule is already created.
User Manual
88
5. SpIDer Guard
5. SpIDer Guard
SpIDer Guard is an anti-virus monitor that resides in main memory,
checks files and memory on the fly, and detects virus-like activity.
By default, SpIDer Guard is loaded automatically at every Windows
startup and cannot be unloaded during the current Windows session.
Only the user with administrator rights can temporarily disable
SpIDer Guard.
By default, SpIDer Guard performs on-access scanning of files that
are being created or changed on the HDD and all files that are opened
on removable media. It scans these files in the same way as the
Scanner but with "milder" options. Besides, SpIDer Guard
constantly monitors running processes for virus-like activity and, if
they are detected, blocks these processes.
By default, upon detection of infected objects SpIDer Guard supplied
with Dr.Web Security Space acts according to actions set on the
Actions tab.
You can set the program’s reaction to virus events by adjusting the
corresponding settings. A user can control it with the help of the
Statistics window and the log file.
User Manual
89
5. SpIDer Guard
5.1. Managing SpIDer Guard
Мain tools for setting and managing in SpIDer Guard reside in its
menu.
The Statistics menu item allows to open the Statistics window,
where the information on the operation of SpIDer Guard during the
current session is displayed (the number of scanned, infected or
suspicious objects, virus-like activities and actions taken).
The Settings menu item opens SpIDer Guard settings window (for
details, see SpIDer Guard Settings).
The Disable item allows to temporary disable program functions (for
users with administrator rights only).
Settings and Disable/Enable items are not available in User
mode.
To disable SpIDer Guard, enter confirmation code or password (if
you set Protect Dr.Web settings by password checkbox on the
Self-protection page in Dr.Web Security Space Main settings).
User Manual
90
5. SpIDer Guard
5.2. SpIDer Guard Settings
The main adjustable parameters of SpIDer Guard are in the
Settings panel. To receive help on parameters specified on a page,
select that page and click Help.
When you finish editing the parameters click OK to save changes or
Cancel to cancel the changes made.
Some of the most frequently changed settings of the program are
described below.
Scanning Page
By default, SpIDer Guard is set in Optimal mode to scan files that
are being executed, created or changed on the hard drives and all files
that are opened on removable media.
In Paranoid mode SpIDer Guard scans files that are being opened,
created or changed on the hard drives, on removable media and
network drives.
Selecting the Use heuristic analysis checkbox enables the heuristic
analyser mode (a method of virus detection based on the analysis of
actions specific for viruses).
User Manual
91
5. SpIDer Guard
User Manual
92
6. SpIDer Mail
6. SpIDer Mail
By default, SpIDer Mail for Windows is included into the set of
installed components, constantly resides in the memory and
automatically reloads at Windows startup. You can disable the
automatic launch mode in SpIDer Agent settings.
By default, the program automatically intercepts all calls of any mail
programs on your computer to POP3 servers on port 110, to SMTP
servers on port 25, to IMAP4 servers on port 143 and to NNTP servers
on port 119.
Any incoming messages are intercepted by SpIDer Mail before they
are received by the mail client. They are scanned for viruses with the
maximum possible level of detail. If no viruses or suspicious objects
are found they are passed on to the mail program in a "transparent"
mode, as if it was received immediately from the server. Similar
procedure is applied for outgoing messages before they are sent to
servers.
By default, the program’s reaction upon detection of infected incoming
messages, as well as messages that were not scanned (e.g. due to
their complicated structure) is as follows:
Messages infected with a virus are not delivered; the mail
program receives an instruction to delete this message; the
server receives a notification that the message had been
received (this action is called deletion of the message).
Messages with suspicious objects are moved to the quarantine
folder as separate files; the mail program receives a notification
about this (this action is called moving the message).
Messages that were not scanned and safe messages are passed
on.
All deleted or moved messages remain on the POP3 or IMAP4
server.
Infected or suspicious outgoing messages are not sent to the server; a
user is notified that a message will not be sent (usually the mail
program will save it).
User Manual
93
6. SpIDer Mail
If an unknown virus distributing through e-mail is resided on the
computer, the program can detect signs of a typical "behavior" for
such viruses (mass distribution). By default, this option is enabled.
SpIDer Mail uses Dr.Web Anti-spam which allows to scan mail for
spam messages. By default, this option is enabled. (For information on
settings of the spam filter, refer to Adjusting Certain Program Settings
).
The default program settings are optimal for a beginner, provide
maximum protection level and require minimum user interference. But
some options of mail programs are blocked (for example, sending a
message to many addresses might be considered as mass distribution
and mail will not be scanned for spam), useful information (from their
safe text part) becomes unavailable if messages are automatically
destroyed. Advanced users can modify mail scanning parameters and
the program’s reactions to virus events.
In certain cases automatic interception of POP3, SMTP, IMAP4 and
NNTP connections is impossible; in such situation the program allows
to set up manual interception of connections.
Dr.Web Scanner can also detect viruses in mailboxes of several
formats, but SpIDer Mail has several advantages:
Not all formats of popular mailboxes are supported by Dr.Web
Scanner. In this case, when using SpIDer Mail, the infected
messages are not even delivered to mailboxes.
The Scanner does not check the mailboxes at the moment of
the mail receipt, but either on user demand or according to
schedule. Furthermore, this action is rather resource-consuming
and takes a lot of time.
Thus, with all the components in their default settings, SpIDer Mail
detects viruses and suspicious objects distributed via e-mail first and
does not let them infiltrate into your computer. Its operation is rather
resource-sparing; scanning of e-mail files can be performed without
other components.
User Manual
94
6. SpIDer Mail
Anti-spam
Dr.Web Anti-spam technologies consist of several thousand rules
that can be divided into several groups:
Heuristic analysis – a highly intelligent technology that
empirically analyzes all parts of a message: header, message
body, and attachments, if any.
Detection of evasion techniques – this advanced anti-spam
technology allows detecting evasion techniques adopted by
spammers to bypass anti-spam filters.
HTML-signature analysis – messages containing HTML code
are compared with a list of known patterns from the anti-spam
library. Such comparison, in combination with the data on sizes
of images typically used by spammers, helps protect users
against spam messages with HTML-code linked to online
content.
Semantic analysis – the words and phrases of a message –
both visible to the human eye and hidden – are compared with
words and phrases typical of spam using a special dictionary.
Anti-scamming – scam (as well as pharming messages) is the
most dangerous type of spam including so-called “Nigerian”
scams, loan scams, lottery and casino scams and false messages
from banks and credit organizations. A special module of Dr.
Web Anti-spam is used to filter scams.
Technical spam – bounces are delivery-failure messages sent
by a mail server. Such messages are also sent by a mail worm.
Therefore bounces are as unwanted as spam.
User Manual
95
6. SpIDer Mail
6.1. Managing SpIDer Mail
SpIDer Mail can be managed via the SpIDer Mail item in the
context menu of the SpIDer Agent icon (see SpIDer Agent).
If the Settings menu item is selected, a window with SpIDer Mail
settings will open (read Adjusting Certain Program Settings).
If the Statistics menu item is selected, a window with information on
the program’s operation during current session (the number of
scanned, infected, suspicious objects and taken actions) will open.
The Disable/Enable item allows to start/stop SpIDer Mail.
Settings and Disable/Enable items are not available in User
mode.
User Manual
96
6. SpIDer Mail
6.2. SpIDer Mail Settings
To modify SpIDer Mail settings, open the settings window as
described in Managing SpIDer Mail.
When editing the settings, use the program’s help system (general
help for each page is generated by clicking Help; there is also a
context prompt for certain elements of the interface).
When you finish adjusting the settings, click OK.
Most default settings are optimal for the majority of situations. The
most frequently used parameters, except the default ones are
described below.
User Manual
97
6. SpIDer Mail
To configure default actions:
1. In the Infected messages drop-down list choose the
program’s action upon detection of an infected message (Cure
action is recommended).
2. In the Incurable messages drop-down list choose the
program’s action upon detection of an incurable
message (Move to quarantine action is recommended).
Other actions with moved files are described in
Neutralizing Detected Threats.
3. In the Suspicious messages drop-down list choose the
program’s action upon detection of
a
suspicious
message. (Move to quarantine action is recommended).
4. In the Non checked messages and Malformed messages
drop-down lists choose the program’s action upon detection of
a non-checked or malformed message. (Ignore action is
recommended).
5. In the Adware and Dialers drop-down lists choose the
program’s action upon detection of adware and dilers. (Move
to quarantine action is recommended).
6. The same procedure is used when setting the program’s
actions upon detection of messages containing jokes, riskware
and hacktools. (Ignore action is recommended).
7. Click OK to apply changes and close the SpIDer Mail
Settings window.
Protection against suspicious messages can be disabled if a PC is
additionally protected by a constantly loaded SpIDer Guard
component.
Additionally, you can increase the default level of reliability of anti-virus
protection by selecting the Move to quarantine option in the Not
checked messages drop-down list. Files with moved messages
should be checked by the scanner.
You can enable the mode when the deleted or moved messages are
immediately deleted from the POP3/IMAP4 server. For this, set the
Delete modified messages on server check box in advanced
settings.
User Manual
98
6. SpIDer Mail
To get access to advanced settings, click Options.
Settings of the spam filter can be set on the Antispam page.
By default SpIDer Mail scans incoming messages for spam. To
disable the spam filter, select the Do not check mail for the spam
User Manual
99
6. SpIDer Mail
mode.
The following headers will be added to all scanned messages:
Yes/No. Yes shows that the
message is spam. No means that SpIDer Mail does not regard
the message as spam.
X-DrWeb-SpamVersion: version. version is the
version of Anti-spam library.
X-DrWeb-SpamReason: spam rate. Spam rate includes
list of evaluations on various spam criteria.
X-DrWeb-SpamState:
During installation with standard parameters, a rule for Outlook
Express (versions 5 and 6) named DRWEB-VR-ANTISPAM RULE
is created. This rule moves all messages that contain prefix
[SPAM] in their subjects to the Deleted folder.
If you use IMAP or NNTP, configure your е-mail client to download
complete messages from the e-mail server at once - without
previewing their headers. This is important for correct operation of
the spam filter.
Selecting the Add a prefix to the subjects of spam messages
check box instructs SpIDer Mail to add a special prefix to subjects of
spam messages. This prefix can be specified in the field below. Use of
the prefix will allow you to create filter rules for spam in e-mail clients
which do not support filtering by headers (e.g. MS Outlook Express).
Selecting the Allow Cyrillic text check box instructs the spam filter
to analyze messages with Cyrillic encoding. If the check box is not
selected, it is highly possible that messages with Cyrillic encoding will
be regarded as spam.
Functioning of the Allow Asian text check box is the same as the
one described above but for East Asian encodings.
In the White list and Black list fields, white and black lists of
senders’ addresses are specified.
If a sender’s address is on the white list, the message is not
scanned for spam.
User Manual
100
6. SpIDer Mail
If a sender’s address is on the black list, the message will be
automatically regarded as spam.
Addresses must be divided by a semicolon (;). The asterisk (*) symbol
can stand for a part of address (for example, *@domain.org denotes
all addresses with the domain.org domain name).
If the spam filter regards certain messages as spam by mistake,
you are advised to forward such messages to special e-mail
addresses for analysis. Messages which are wrongly regarded as
spam should be forwarded to [email protected], and
unblocked spam messages should be forwarded to vrspam@drweb.
com. Forward messages as attachments; do not include them to
the message body.
Application Filter Page
By default, SpIDer Mail intercepts e-mail traffic of all applications
running on your computer automatically. On this page, you can
configure interception of connections between mail clients and mail
servers, as well as list applications whose mail traffic you want to
exclude from monitoring with SpIDer Mail.
User Manual
101
6. SpIDer Mail
To add a file, folder or mask to the list, type its name into the entry
field and click Add. To enter an existing file name or folder, you can
click Add to the right and select the object in a standard file browsing
window.
To remove a file or folder from the list select it in the list and click
Remove.
To configure interception options for a mode, click Change under the
list of ports.
By default, the list includes only the following automatic interception
rules:
All IP addresses accessed via port 143 (standard IMAP4
servers)
All IP addresses accessed via port 119 (standard NNTP
servers)
All IP addresses accessed via port 110 (standard POP3
servers)
All IP addresses accessed via port 25 (standard SMTP
mail
mail
mail
mail
User Manual
102
6. SpIDer Mail
servers)
By default, the list includes all IP addresses (specified by the asterisk *
symbol) and all IP addresses accessed via ports: 143 (standard IMAP4
port), 119 (standard NNTP port), 110 (standard POP3 port) and 25
(standard SMTP port).
To remove an element from the list, select it and click Remove.
To add a server or a group of servers to the list, specify its address (IP
address or domain name) in the Server address field and the called
port number into the Server port field and click Add.
The localhost address is not intercepted if the asterisk (*) is
specified. If necessary, this address should be specified in the
interception list explicitly.
To set up manual interception
1. In the SpIDer Mail settings window, select the Application
Filter page and click Change under the list of ports.
User Manual
103
6. SpIDer Mail
2. Make up a list of resources (POP3/SMTP/IMAP4/NNTP servers)
connections to which should be intercepted. Number them one
after another starting from 7000. Hereinafter these numbers
will be called SpIDer Mail ports.
3. For every resource input the SpIDer Mail port that you
assigned for the mail server into the SpIDer Mail port entry
field, a domain name or IP address of the server into the
Server address entry field and the port number to which a
connection is made into the Server port entry field and click
Add.
4. Repeat these actions for each resource.
5. Click OK.
In the settings of the mail client, instead of the address and port of
POP3/SMTP/IMAP4/NNTP server, specify the address localhost:
port_SpIDer_Mail, where port_SpIDer_Mail is the address assigned
to an appropriate POP3/SMTP/IMAP4/NNTP server.
Secure Connections
You can enable scanning of data transmitted via secure protocols such
as POP3S, SMTPS, or IMAPS. To check such data, select the Check
encrypted traffic (POP3S/SMTPS/IMAPS) checkbox under
Secure Connections. If your client application (a mail client) that
uses secure connections does not refer to the default Windows system
certificate storage, then you need to export Doctor Web SSL
certificate.
Doctor Web Certificate
You may need to scan data transmitted in accordance with SSL
protocol. For instance, you can set SpIDer Mail to receive and send
messages via POP3S, SMTPS, or IMAPS. These protocols use
encrypted SSL connections. In order for Dr.Web Security Space to
scan such encrypted traffic and maintain transparent integration with
some browsers and mail clients that do not refer to the Windows
system certificate storage, it may be necessary to import Doctor Web
SSL certificate into the application certificate storages. To save the
certificate from the system storage for future use in third party
User Manual
104
6. SpIDer Mail
applications, click Export and select a convenient folder.
User Manual
105
7. Dr.Web for Outlook
7. Dr.Web for Outlook
Dr.Web for Outlook plug-in performs the following functions:
Anti-virus check of e-mail attachments transferred via SMTP,
POP3 and HTTP protocols.
Check of e-mail attachments transferred via SSL encrypted
connections.
Spam check.
Detection and neutralizing of malicious objects.
Malware detection.
Heuristic analysis for additional protection against unknown
viruses.
7.1. Configuring Dr.Web for Outlook
You can configure Dr.Web for Outlook plug-in operation and review
statistics at the Microsoft Outlook mail application, in the Tools
Options
Dr.Web Anti-virus tab (in the Files
Options select
Dr.Web for Outlook and click Add-in Options button for Microsoft
Outlook 2010).
The Dr.Web Anti-virus tab of Microsoft Outlook parameters are
active only if user has permissions to change these settings.
On Dr.Web Anti-Virus tab, the current protection status is displayed
(enabled/disabled). The tab provides access to the following program
functions:
Log – allows to configure the program logging.
Check attachments – allows to configure the e-mails check and
to specify the program actions for the detected malicious
objects.
Spam filter – allows to specify the program actions for spam and
to create black and white lists of e-mail addresses.
User Manual
106
7. Dr.Web for Outlook
Statistics – allows to review the number of checked and
processed objects.
User Manual
107
7. Dr.Web for Outlook
7.2. Threat Detection
Dr.Web for Outlook uses different detection methods. The
infected objects are processed according to the actions defined by
user: the program can cure the infected objects, remove them or
move these objects to Quarantine to isolate them from the rest of the
system.
7.2.1. Types of Threats
Dr.Web for Outlook detects the following computer security threats
in the mail:
Infected objects
Bomb viruses in files or archives
Adware
Hacktools
Dialer programs
Joke programs
Riskware
Spyware
Trojan horses (Trojans)
Computer worms and viruses
7.2.2. Configuring Actions
Dr.Web for Outlook allows to specify reaction to detection of
infected or suspicious files and malicious objects during e-mail
attachments check.
To configure the virus check of e-mail attachments and to specify the
program actions for the detected malicious objects, in the Microsoft
Outlook mail application, in the Tools
Options
Dr.Web Antivirus tab (in the Files
Options select Dr.Web for Outlook and
click Add-in Options button for Microsoft Outlook 2010), click Check
User Manual
108
7. Dr.Web for Outlook
attachments.
In the Check attachments window, specify the actions for different
types of checked objects and also for the check failure. You can also
enable/disable checking the archives.
To set actions on virus threats detection, use the
following options:
The Infected drop-down list sets the reaction to the detection
of a file infected with a known virus.
The Not cured drop-down list sets the reaction to the detection
of a file infected with a known incurable virus (and in case an
attempt to cure a file failed).
The Suspicious drop-down list sets the reaction to the
User Manual
109
7. Dr.Web for Outlook
detection of a file presumably infected with a virus (upon a
reaction of the heuristic analyzer).
In the Malware section, set the reaction to the detection of
types of unsolicited software such as:
Dialers
Jokes
Riskware
Hakctools
The If checked failed drop-down list allows to configure
actions, if attachment can not be checked, e.g. if attached file is
corrupted or password protected.
The Check archives (recommended) check box allows to
enable or disable checking of attached archived files. Select this
check box, to enable checking, clear – to disable.
For different types of objects, actions are assigned separately.
The following actions for detected virus threats are
provided:
Cure (only for infected objects) – instructs to try to restore the
original state of an object before infection.
As incurable (only for infected objects) – means, that the
action specified for incurable objects will be performed.
Delete – delete the object.
Move to quarantine – move the object to the special
Quarantine folder.
Skip – skip the object without performing any action or
displaying a notification.
User Manual
110
7. Dr.Web for Outlook
7.3. Spam Check
The Spam Filter section is available for Dr.Web Security Space
only.
If your license does not support the Spam filter, its settings are
not available and the e-mails check for spam is not performed.
Dr.Web for Outlook checks e-mails for spam by means of Dr.Web
Anti-spam and filters the messages according to the user defined
settings.
To configure the check for spam, in the Microsoft Outlook mail
application, in the Tools
Options
Dr.Web Anti-virus tab (in
the Files
Options select Dr.Web for Outlook and click Add-in
Options button for Microsoft Outlook 2010), click Spam filter. The
window with spam filter settings will be opened.
The Spam-filter window will be available only for users with
administrative rights.
For Windows Vista and later operating systems, after clicking
Spam-filter:
if UAC is enabled: administrator is requested to confirm
program actions, user without administrative rights is
requested to enter accounting data of system administrator
if UAC is disabled: administrator can change program
settings, user does not have the access to change program
settings
7.3.1. Configuring Spam Filter
To configure spam filter:
1. To run spam checks, select the Check for spam checkbox.
2. You can add special text to the spam message header by
setting the Add prefix to message header check box. The
added prefix text is specified to the right of the check box. The
User Manual
111
7. Dr.Web for Outlook
default prefix is ***SPAM***.
3. The checked messages can be marked as read in the message
options. To mark messages as read on spam check, select the
Mark message as read check box. This option is enabled by
default.
4. You can also configure black and white lists.
If spam filter defines certain messages incorrectly, you are advised
to forward such messages to special e-mail addresses for analysis.
Messages which are wrongly regarded as spam should be
forwarded to [email protected]
Unblocked spam messages
[email protected]
should
be
forwarded
to
Forward messages as attachments; do not include them to the
message body.
User Manual
112
7. Dr.Web for Outlook
7.3.2. Using Black and White Lists
Black and white lists are used for messages filtration. To review and
edit the black and white lists, click Black list or White list respectively
on the Spam filter window.
User Manual
113
7. Dr.Web for Outlook
To add addresses:
1. Click Add.
2. In the Edit list window, enter the address (see white and
black lists filling methods).
3. Click OK.
To change addresses:
1. Select the address you want to change and click Edit.
2. Change the address.
3. Click ОК.
To delete addresses:
1. Select the address in the list.
2. Сlick Delete.
In the Black and White lists window, click OK to save changes.
White List
If the sender's address is on the white list, the message is not scanned
for spam. But, if domain name of receiver and sender addresses are
matched, and this domain name is specified in the white list using the
* sign, this letter will be checked for spam.
To add a definite sender, enter the full email address (for
example, [email protected]). This ensures delivery of all
messages from this sender.
Addresses must be divided by the ";" symbol.
To add a group of sender addresses, enter the mask that
determines their names. The mask defines template for an
object definition. It may contain regular characters from the email addresses and special * character, replaces any (including
the empty one) sequence of any symbols.
For example, the following addresses are available:
[email protected]
*[email protected]
User Manual
114
7. Dr.Web for Outlook
mailbox@dom*
*box@dom*
The * symbol can be set at the start or at the end of an address
only.
The @ symbol is obligatory.
To ensure delivery of messages sent from any email address
within a domain, use the * character instead of the username in
the address. For example, if you enter *@example.net,
SpIDer Mail will deliver without scanning the messages from all
senders within the example.net domain.
To ensure delivery of messages sent from email address with a
certain user name from any domain, use the * character instead
of the domain name in the address. For example, if you enter
ivanov@*, SpIDer Mail will deliver without scanning the
messages from all senders with the ivanov mailbox name.
Black List
If the sender’s address is on the black list, the message will be
automatically regarded as spam.
To add a definite sender, enter the full email address (for
example, [email protected]). All messages, received from
these addresses, will be automatically regarded as spam.
Addresses must be divided by the ";" symbol.
To add a group of sender addresses, enter the mask that
determines their names. The mask defines template for an
object definition. It may contain regular characters from the email addresses and special * character, replaces any (including
the empty one) sequence of any symbols.
For Example, the following addresses are available:
[email protected]
*[email protected]
mailbox@dom*
*box@dom*
User Manual
115
7. Dr.Web for Outlook
The * symbol can be set at the start or at the end of an address
only.
The @ symbol is obligatory.
To regard as spam messages sent from any email address within
a domain, use the * character instead of the username in the
address. For example, if you enter *@spam.com, SpIDer Mail
will regard as spam messages from all senders within the
spam.com domain.
To regard as spam messages sent from email address with a
certain user name from any domain, use the * character instead
of the domain name in the address. For example, if you enter
ivanov@*, SpIDer Mail will regard as spam messages from
all senders with the ivanov mailbox name.
Addresses from the recipient domain are not processed. For
example, if the recipient mailbox (your mailbox) is in the mail.
com domain, then messages from mail.com domain will not
be processed with the anti-spam filter.
7.4. Logging
Dr.Web for Outlook registers errors and application events in the
following logs:
Windows Event Log
Text Dr.Web debug log
7.4.1. Event Log
Dr.Web for Outlook registers the following information in the
Windows Event Log:
Plug-in starts and stops.
License key file parameters: license validation, license expiration
date (information is written during program launch, during
program operating and when key file is changed).
User Manual
116
7. Dr.Web for Outlook
License errors: the key file is absent, permission for usage of
program modules is absent in the key file, licence is blocked, the
key file is corrupted (information is written during program
launch and during program operating).
Parameters of program modules: Scanner, engine, virus bases
(information is written during program launch and modules
update).
Information on threats detection.
License expiration notifications (a message is registered in 30,
15, 7, 3, 2 and 1 days before expiration).
To view Event Log:
1. On the Control Panel, select Administrative Tools
Event Viewer.
2. In the tree view, select Application. The list of events,
registered in the log by user applications, will be opened. The
source of Dr.Web for Outlook messages is the Dr.Web for
Outlook application.
7.4.2. Debug Text Log
The following information can be registered in the Dr.Web for
Outlook text log:
License validity status
Malware detection reports per each detected malicious object
Read-write errors or errors while scanning for archives or
password-protected files
parameters of program modules: Scanner, engine, Dr.Web
virus databases
Core failures
License expiration notifications (a message is registered in 30,
15, 7, 3, 2 and 1 days before expiration)
User Manual
117
7. Dr.Web for Outlook
Enabling the program logging in the Log file decreases server
performance, therefore it is recommended to enable logging only in
case of errors occurrence in operation of Dr.Web for Outlook.
To configure logging:
1. On Dr.Web Anti-virus tab, click Log. The window of log
settings will open.
2. Specify the detailing level (0 - 5) for logging:
level 0 corresponds to disable logging
level 5 means the maximum level of details for the
program logging
By default, logging is disabled.
3. Specify the maximum log file size (in kilobytes).
4. Click OK to save changes.
The Log window will be available only for users with administrative
rights.
For Windows Vista and later operating systems, after clicking Log:
if UAC is enabled: administrator is requested to confirm
program actions, user without administrative rights is
requested to enter accounting data of system administrator
if UAC is disabled: administrator can change program
settings, user does not have the access to change program
settings.
To view program log:
To open the text log, click Show in folder.
User Manual
118
7. Dr.Web for Outlook
7.5. Statistics
In the Microsoft Outlook mail application, in the Tools
Options
Dr.Web Anti-virus tab (in the Files
Options select Dr.Web for
Outlook and click Add-in Options button for Microsoft Outlook 2010
), statistic information about total number of objects which have been
checked and treated by the program is listed.
These scanned objects are classified as follows:
Checked – total number of checked messages.
Infected – number of messages with viruses.
Suspicious – number of messages presumably infected with a
virus (upon a reaction of the heuristic analyzer).
Cured – number of objects successfully cured by the program.
Not checked – number of objects, which can not be checked
or error has occurred during scan.
Clear – number of messages, which are not infected.
Then the number of the following categories of treated objects is
specified:
Moved to quarantine – number of objects, which have been
moved to Quarantine.
Deleted – number of objects, deleted from the system.
Skipped – number of objects, skipped without changes.
Spam messages – number of objects, detected as spam.
By default, statistics file is drwebforoutlook.stat file that is
located
in
the
%USERPROFILE%\DoctorWeb
folder
(for
Windows 7, C:\Users\<username>\DoctorWeb). To clear statistics,
delete this file.
drwebforoutlook.stat statistics file is individual for each
system user.
User Manual
119
8. SpIDer Gate
8. SpIDer Gate
SpIDer Gate is an anti-virus HTTP-monitor. By default, SpIDer Gate
automatically checks incoming HTTP-traffic and blocks all malware
objects. HTTP is used by web browsers, download managers and other
applications which exchange data with web servers, i.e. which work
with the Internet.
You can configure SpIDer Gate to completely disable monitoring of
incoming or outgoing traffic, compose a list of applications whose
HTTP-traffic should always be checked or exclude certain applications
from being monitored.
By default, SpIDer Gate blocks all incoming malware objects. URL
filtering of malicious and unreliable Web sites is also enabled by
default.
You can also connect to Doctor Web cloud services and check
websites for virus threats in real time.
SpIDer Gate resides in the main memory of the computer and
automatically launches upon Windows startup.
8.1. Managing SpIDer Gate
SpIDer Gate can be managed via the SpIDer Gate item in the
context menu of the SpIDer Agent icon (see SpIDer Agent).
The Settings item provides access to the major part of adjustable
parameters of the program.
The Statistics item opens a window containing information about the
SpIDer Gate performance within the current session.
The Disable/Enable item allows to start/stop SpIDer Gate.
User Manual
120
8. SpIDer Gate
Settings and Disable/Enable items are not available in User
mode.
8.2. SpIDer Gate Settings
The default settings are optimal for most cases. They should not be
changed without necessity.
To change the SpIDer Gate Settings:
1. Make necessary changes on the pages of the SpIDer Gate
Settings window.
2. For more information about settings on a page, click the Help.
3. When you finish adjusting the settings, click OK to save
changes or Cancel to reject them.
User Manual
121
8. SpIDer Gate
Actions Page
User Manual
122
9. Parental Control
9. Parental Control
The Parental Control component allows you to restrict access to
devices on your computer and both local and web resources. You can
also set time limits on using the Internet and computer for certain
Windows accounts.
By restricting access to the local file system you can maintain the
integrity of important files, protect them from viruses and secure the
confidentiality of stored data. It is possible to restrict access to
separate files or folders on local drives and external data carriers. You
can also completely restrict copying data to any kinds of external data
carriers.
By controlling access to web resources you can restrict a user to view
undesirable web sites (e.g. pages on violence, gambling, adult content,
etc.) or allow access only to certain web sites, specified in the
Parental Control settings.
You can also connect to Doctor Web cloud services and check
contents of websites in real time.
User Manual
123
9. Parental Control
9.1. Managing Parental Control
Parental Control can be managed via the Parental Control item in
the context menu of the SpIDer Agent icon (see SpIDer Agent).
The Settings menu item gives access to the main part of the program
parameters (for details, see Parental Control Settings).
If the Statistics menu item is selected, a window with information on
the program’s operation during current session (the number of blocked
resources of different types, last allowed or restricted URLs) will open.
Settings item is not available in User mode.
User Manual
124
9. Parental Control
9.2. Parental Control Settings
To change the settings of the Parental Control component
1. Make necessary changes on the pages of the Parental
Control Settings window.
2. For more information about settings on a page, click the Help.
3. When you finish adjusting the settings, click OK to save
changes or Cancel to reject them.
Users Page
On this page, you can set restrictions on Web access as well as the
time spent in the Internet on working on the computer. For different
Windows accounts, restrictions are assigned separately and display
next to the corresponding account. Accounts are automatically
displayed in the settings window.
Use the arrows to navigate through the user list.
By default, all users have unlimited access to Web resources and no
time limits.
User Manual
125
9. Parental Control
Web Filter
By default, the No restrictions mode is set for all users. You can
configure access to Web resources and populate White and Black lists
separately for each user.
To restrict access to websites
1. On the Users page in Parental Control settings, find the
required account.
2. Click the corresponding link in the Web filtering section. The
settings window opens.
User Manual
126
9. Parental Control
3. Select a mode of access to websites.
Mode
Description
No restrictions
In this mode you grant unlimited access to Internet
resources to all users of your computer.
Custom
In this mode you can select websites to block either by
category, or according to manually populated black
and while lists.
To configure the lists, click Black and White lists.
White list only
In this mode you grant access to the websites in the
white list only. Access to any other website is blocked.
To list trusted websites, click Black and White lists.
Lists of categorized websites are updated with the Dr.Web virus
databases on regular basis.
4. After editing, click OK to save the changes or Cancel to cancel
them.
User Manual
127
9. Parental Control
To create a list of domain names:
1. Enter a domain name (or part of it) into the field.
If you wish to add a specific web site, enter its full address
(e.g. www.example.com). Access to all resources on
that web site will be allowed/restricted.
If you wish to allow/restrict access to web sites,
which contain certain text in their address name,
enter that text into the field (e.g. example means that
access to example.com, example.test.com, test.com/
example, test.example222.ru, etc. will be allowed/
restricted).
If the string contains the "." symbol, it will be considered
a domain name. In this case all resources on the domain
will be filtered. If the string also contains the "/" symbol
(e.g. example.com/test), then the part to the left
of it will be considered the domain name and the part to
the right will be allowed/restricted on the domain (e.g.
example.com/test11, template.example.com/test22,
etc. will be filtered).
User Manual
128
9. Parental Control
2. Do one of the following:
To allow access to the website, click Allow.
To deny access to the website, click Deny.
3. To delete a web resource from the list, select it and click the
corresponding Delete button.
Time Limits
By default, all users have unlimited access to use the computer and
the Internet. You can change the mode separately for each user.
To set time limits
1. On the User page in Parental Control settings, find the
account of the required user.
2. Click the corresponding link in the Time limits section. The
settings window opens.
3. Select days of week and time when the user is restricted from
using the Internet, and then mark the corresponding timeslots
blue. Methods:
User Manual
129
9. Parental Control
To mark one timeslot, click on it once;
To mark several adjacent timeslots, click once on the first
one and select the rest of required squares while holding
the mouse button.
4. Select days of week and time when the user is restricted from
using the computer, and then mark the corresponding
timeslots red.
5. After editing, click OK to save the changes or Cancel to cancel
them.
User Manual
130
9. Parental Control
Access Control Page
On this page, you can block access data to portable data storages,
limit access to specific devices, folders, or files on your computer. Also
you can block data transfer over the network.
Access control rules are effective for all Windows accounts.
Access to portable data storages
To block access to data on portable data storages (USB flash, floppy,
CD/DVD, ZIP drives, etc.), set the corresponding checkbox. If you
want to have access to data on specific USB data storage devices
regardless this setting, you can list devices access to which will be
always allowed. To do this, click White list (this button is enabled
only if the checkbox is set).
User Manual
131
9. Parental Control
To configure list of restricted objects
1. Select the Restrict access to the selected objects
checkbox.
2. Click Add and select the type of object. You can limit access to
a file or folder as well as a particular device or a whole class of
devices.
Access restrictions for a class of devices has a higher priority than
restrictions for a particular device. For instance, if you block access
to all removable media, then an existing rule for a certain flash
drive will become ineffective.
3. Add the object to the list and do one of the following to set the
restriction method:
Select Ask to display a prompt when Parental Control
detects an attempt to access the object. In the prompt,
you will be able to select a reaction.
Select Block to forbid access to the object automatically.
4. To add other objects and folders to the list, repeat steps 2 to 3
. To remove an object from the list, select the corresponding
item in the list and click Delete. Users will be able to access
the object again.
User Manual
132
10. Dr.Web Firewall
10. Dr.Web Firewall
Dr.Web® Firewall protects your computer from unauthorized access
and prevents leak of vital data through networks. Dr.Web Firewall
monitors connection attempts and data transfer and helps you block
unwanted or suspicious connections both on network and application
levels.
Main Features
Dr.Web Firewall provides you with the following features:
Control and filtration of all incoming and outgoing traffic
Access control on application level
Network level packet filtering
Fast selection of rule sets
Event logging
10.1. Training Dr.Web Firewall
By default, once installation completes, Dr.Web Firewall starts
learning usual behaviour of your operating system by intercepting all
new (unknown to the firewall) connection attempts and prompting you
to select the necessary action.
You can either select a temporary solution, or create a rule which will
be applied each time Dr.Web Firewall detects this type of
connection.
When running under limited user account (Guest) Firewall does
not prompt requests for network access attempts. Notifications are
then forwarded to the session with administrator privileges, if such
session is simultaneously active.
User Manual
133
10. Dr.Web Firewall
To process connection attempts
1. To make a decision, consider the following information
displayed in the notification:
Information
Description
Application name
The name of the application. Ensure that the Path
to the application executable file corresponds to
its usual location.
Application path
The full path to the application executable file and
its name.
Digital signature
Digital signature of the application.
Endpoint
The protocol used and the network address the
application is trying to connect to.
Port
The network ports used for the connection
attempt.
Direction
Connection type.
User Manual
134
10. Dr.Web Firewall
2. Once you make a decision, select an appropriate action:
To block this connection once, select Block
To allow this connection once, select Allow
To open a window where you can create a new
application filter rule, select Create new rule. In the
opened window you can either choose one of the
predefined rules or create your rule for application.
3. Click OK. Dr.Web Firewall executes the selected action and
closes the notification window.
In cases when connection was initiated by a trusted application (an
application with existing rules), but this application was run by an
unknown parent process, a corresponding notification will be
prompted:
User Manual
135
10. Dr.Web Firewall
To set parent processes rules
1. Consider the information about parent process displayed in the
notification.
To block this connection once, select Block
To allow this connection once, select Allow
To open a window where you can create a new
application filter rule, select Create new rule. In the
opened window you can either choose one of the
predefined rules or create your rule for parent process.
User Manual
136
10. Dr.Web Firewall
2. Click OK. Dr.Web Firewall executes the selected action and
closes the notification window.
When unknown process was run by another unknown process, a
notification will display corresponding details. If you click Create new
rule, the new window will appear, allowing you to create new rules for
this application and it's parent process:
User Manual
137
10. Dr.Web Firewall
You need administrative rights to create rules.
10.2. Managing Dr.Web Firewall
Dr.Web Firewall installs as a network component and loads on
Windows startup. If necessary, you can suspend Dr.Web Firewall
operation, review its statistics, or change settings.
After a session under limited user account (Guest) is open Firewall
displays an access error message. Firewall status is then displayed
as inactive in SpIDer Agent. However, Firewall is enabled and
operates with default settings or settings set earlier in
administrative mode.
SpIDer Agent provides you with the main Dr.Web Firewall
management and configuration features. Click the SpIDer Agent
icon and select the Firewall group to access them:
User Manual
138
10. Dr.Web Firewall
Option
Description
Statistics
Displays information on events which Dr.Web Firewall
handled.
Settings
Opens Dr.Web Firewall settings.
You can restore settings to their default values on the
Restore page of Dr.Web Security Space Main settings.
Disable/
Enable
Suspends or resumes Dr.Web Firewall operation. The
Enable option displays in the menu only when operation
was temporary suspended.
Settings and Disable/Enable items are not available in User
mode.
Temporal Suspension
You can temporary suspend anti-virus checks that Dr.Web Firewall
runs on incoming and outgoing HTTP traffic.
User Manual
139
10. Dr.Web Firewall
This option is not available in User mode.
Be cautious when using this option.
To disable Dr.Web Firewall
Click the SpIDer Agent icon Firewall, and then select Disable.
in the notification area, select
To disable Dr.Web Firewall, enter confirmation code or password
(if you set Protect Dr.Web settings by password checkbox on
the Self-protection page in Dr.Web Security Space
Main settings).
To enable Dr.Web Firewall
Click the SpIDer Agent icon Firewall, and then select Enable.
in the notification area, select
User Manual
140
10. Dr.Web Firewall
10.3. Firewall Settings
You need administrative rights to access Dr.Web Firewall
settings.
To start using Dr.Web Firewall, do the following:
Select operation mode
List authorized applications
Dr.Web Firewall loads on Windows startup and starts logging
events. By default, Dr.Web Firewall operates in training mode.
If any problems occur with Internet Connection Sharing (i.e. access
to the Internet is blocked for computers that are connected to a
host computer), on the host computer specify packet filter rule that
allows all packets from the subnet, according to your local
configuration.
SpIDer Agent provides you with the mail Dr.Web Firewall
management and configuration features. The default settings are
optimal for most uses. Do not change them unnecessarily.
To configure Dr.Web Firewall
1. Click the SpIDer Agent icon in the notification area, select
Firewall, and then select Settings. The Firewall tab of the
settings window opens that contains the following pages:
The Applications page, where you can configure filtering
parameters for applications.
The Parent processes page, where you can set rules for
launching applications by other applications.
The Interfaces page, where you can configure filtering
parameters on network packet level.
The Advanced page, where you can select a Dr.Web
Firewall operation mode.
2. Configure options as necessary. To get information on options
in the page, click Help.
User Manual
141
10. Dr.Web Firewall
3. After editing, click OK to save the changes or Cancel to cancel
them.
10.3.1. Applications Page
Application level filtering helps you control access of various
application and processes to network resources. You can create rules
for both system and user applications.
Dr.Web Firewall allows you to create no more than one set of
rules per each application.
This page lists all applications and processes for which there is an
application filter rule set. Each application is explicitly identified by the
path to its executable file. Dr.Web Firewall uses the SYSTEM name
to indicate the rule set applied to the operating system kernel (the
system process for which there is no unique executable file).
If the application file, for which the rule was created, changes (e.g.,
due to update installation) then Dr.Web Firewall asks to confirm
that the application is still allowed to access network resources.
User Manual
142
10. Dr.Web Firewall
To configure rule sets
In the Dr.Web Firewall settings window, select the Applications
page and do one of the following:
to add a new set of rules, click New.
to edit an existing set of rules, select the rule set in the list and
click Edit.
to add a copy of existing set of rules, select the rule set and click
Copy. The copy is added after the selected rule set.
to delete all rules for an application, select the appropriate rule
set and click Delete.
If you created a blocking rule for a process or set Block unknown
connections mode on Advanced page, and then disabled the rule
or changed the work mode, the process will be blocked till it's next
attempt to establish connection.
Application Rules
The New application rule set (or Edit rule set) window lists types
User Manual
143
10. Dr.Web Firewall
of the filtering rule for application or process, and also a rule set, if the
Custom type is selected. You can change rule type, configure the list
by adding new rules for the application or modifying existing rules and
the order of their execution. The rules are applied according to their
order in the set.
When Dr.Web Firewall is operating in learning mode, you can start
creating a new rule directly from the windows with notification on an
unknown connection attempt.
To open this window
In the Dr.Web Firewall settings window, select the Applications
page and click New or select an application and click Edit.
For each rule in the set, the following information displays:
Column
Description
Enabled
Execution states for the rule.
Action
The action for Dr.Web Firewall to perform when
the connection attempt is detected:
User Manual
144
10. Dr.Web Firewall
Column
Description
Block packets
Allow packets
Rule name
The rule name.
Connection type
The party which initiates the connection:
Inbound – the rule is applied when
someone from the network attempts to
connect to the application on your
computer.
Outbound – the rule is applied when the
application on your computer attempt to
connect to the network.
Any – the rule is applied regardless of who
initiate the connection.
Description
The rule description.
To configure rules
1. In the opened window specify the application for which you
want the rules to apply:
To add a set of rules for a user program, click Browse
and select the application executable file.
To add a set of rules for a process, click arrow on
Browse, choose running application and select the
process.
2. Specify rule type:
Allow all – all connections will be allowed;
Block all – all connections will be blocked;
Custom – in this mode you can create a set of rules, that
will allow or block different connections.
3. If you chose Custom type, create filtering rules using the
following options:
To add a new rule, click New. The new rule is added to
the end of the list.
To modify a rule, select it and click Edit.
To add a copy of a rule, select the rule and click Copy.
The copy is added after the selected rule.
User Manual
145
10. Dr.Web Firewall
To delete a rule, select it and click Delete.
4. If you selected to create or edit a rule, configure rule settings
in the opened window.
5. Use the arrows next to the list to change the order of rules.
The rules are applied according to their order in the set.
6. When you finish adjusting the settings, click OK to save
changes or Cancel to reject them.
Rule Settings
Application filtering rules control interaction of a particular application
with certain network hosts.
To add or edit a rule:
1. Configure the following parameters:
Parameter
Description
General
Rule name
The rule name.
User Manual
146
10. Dr.Web Firewall
Parameter
Description
Description
The rule description.
State
One of the following execution states for the
rule:
Enabled – apply rule for all matching
connection attempts.
Disabled – do not apply the rule yet.
Connection type
The party which initiates the connection:
Inbound – apply the rule when
someone from the network attempts to
connect to the application on your
computer.
Outbound – apply the rule when the
application on your computer attempt
to connect to the network.
Any – apply the rule regardless of who
initiate the connection.
Action
The action for Dr.Web Firewall to perform
when the connection attempt is detected:
Block packets
Allow packets
Rule Settings
Protocol
The network and transport level protocols
used for the connection attempt.
Dr.Web Firewall supports the following
network level protocols:
IPv4
IPv6
IP all – any version of IP protocol
Dr.Web Firewall supports the following
transport level protocols:
TCP
UDP
TCP & UDP – TCP or UDP protocol
RAW
User Manual
147
10. Dr.Web Firewall
Parameter
Description
Inbound/Outbound
address
The IP address of the remote host. You can
specify either a specific address (Equals) or
several IP addresses using a range (In range
), specific subnetwork mask (Mask), or masks
of all subnetworks, in which your computer
has network addresses (MY_NETWORK).
To apply the rule for all remote hosts, select
Any.
Inbound/Outbound
port
The port used for connection. You can specify
either a specific port number (Equals) or a
port range (In range).
To apply the rule for all ports, select Any.
2. When you finish adjusting the settings, click OK to save
changes or Cancel to reject them.
10.3.2. Parent processes Page
On this page you can set up rules to allow or forbid processes or
applications to run other applications
User Manual
148
10. Dr.Web Firewall
To add rule for parent process
1. Choose parent process:
To add new rule for an application click New and browse
for program executable
To add new rule for an already running process click
arrow on New, choose running application and select
process
2. Set appropriate action:
Block to prevent application from running
processes
Allow to permit application to run other processes
other
New process is blocked by default.
When there is a rule for a parent process and the executable for
this parent process has been changed (e.g. after update), then
Firewall prompts you to reconfirm the rule and approve further
launched of applications by this parent process.
User Manual
149
10. Dr.Web Firewall
10.3.3. Interfaces Page
On the Interfaces page you can select a rule set to use for filtering
packets transmitted through different network interfaces installed on
your computer.
To defile rule sets for network interfaces:
1. In the Dr.Web Firewall settings window, select Interfaces.
2. For an interface of interest, select the appropriate ruleset. If
the ruleset does not exist, you can create a new set of packet
filtering rules.
3. Click OK to save changes, or click Cancel to close the window
without saving changes.
To list all available interfaces, click All. This opens a windows where
you can selected interfaces that should be listed in the table
permanently. Active interfaces are listed in the table automatically.
To configure rules for interfaces, click Configure.
User Manual
150
10. Dr.Web Firewall
Packet Filter
Packet filtering allows you to control access to network regardless of
which program initiates connection. Dr.Web Firewall applies these
rules to network packets transmitted through network interfaces of
your computer.
Packet filtering allows you to control access to networks on a lower
level than the application filter thus providing you with more flexible
options.
Dr.Web Firewall provides you the following default filtering rule sets:
Allow All – this rule set configures Dr.Web Firewall to pass
through all packets.
Deny All – this rule set configures Dr.Web Firewall to block
all packets.
Default Rule – this set includes rules describing the most
popular system configurations and preventing common network
attacks. This rule set is used by default for new
network interfaces.
For fast switching between filtering modes, you can create custom sets
of filtering rules.
To set rulesets for network interfaces:
1. In the Dr.Web Firewall settings window, select Packet filter
page.
2. Do one of the following:
Configure sets of filtering rules by adding new rules,
modifying or deleting existing ones, or changing order of
their execution.
Configure general filtering settings.
User Manual
151
10. Dr.Web Firewall
To configure sets of filtering rules:
Do one of the following:
To add a new rule set, click New. The new rule set is added to
the beginning of the list.
To edit an existing set of rules, select the rule set in the list and
click Edit.
To add a copy of existing set of rules, select the rule set and
click Copy. The copy is added after the selected rule set.
To delete a selected rule set, click Delete.
To configure general settings
On the Packet Filter settings, use the following options:
User Manual
152
10. Dr.Web Firewall
Option
Description
Use TCP stateful
packet filtering
Select this checkbox to filter packets according to the
state of existing TCP connections. Dr.Web Firewall will
block packets that do not match active connections
according to the TCP protocol specification. This option
helps protect your computer from DoS attacks (denial of
service), resource scanning, data injection and other
malicious operations.
It is also recommended to enable stateful packet filtering
when using complex data transfer protocols such as FTP,
SIP, etc.
Clear this checkbox to filter packets without regard to
state of TCP sessions.
Management of
fragmented IP
packets
Select this checkbox to ensure correct processing of large
amounts of data. The maximum transmission unit (MTU)
may vary for different networks, therefore large IP
packets may be received fragmented. When this option is
enabled, Dr.Web Firewall applies the rule selected for
the first fragment of a large IP packet to all other
fragments.
Clear this checkbox to process fragmented packets
independently.
Packet Filter Rulesets
The New packet ruleset (or Edit ruleset) window lists packet
filtering rules for the selected rule set. You can configure the list by
adding new rules or modifying existing rules and the order of their
execution. The rules are applied according to their order in the set.
User Manual
153
10. Dr.Web Firewall
For each rule in the set, the following information displays:
Column
Description
Enabled
Execution states for the rule.
Action
The action for Dr.Web Firewall to perform when the packet
is intercepted:
Block packets
Allow packets
Rule name
The rule name.
Direction
The packet sender:
– the rule is applied when packet is received from
the network.
– the rule is applied when packet is sent into the
network from your computer.
– the rule is applied regardless of packet transfer
direction.
Log
The logging mode for the rule. This parameter defines which
information is stored in the Dr.Web Firewall log:
Log headers – the packet header only.
User Manual
154
10. Dr.Web Firewall
Column
Description
Entire packet – the whole packet.
No logging - no information is logged.
Description
The rule description.
You can configure the list by adding new rules for the application or
modifying existing rules and the order of their execution. The rules are
applied according to their order in the set.
To configure rulesets
1. If you select to create or edit an existing rule set on the
Packet filtering settings page, in the opened window,
specify the name for the rule set.
2. Use the following options to create filtering rules:
to add a new rule, click New. The new rule is added to
the beginning of the list.
to modify a rule, select it and click Edit.
to add a copy of a rule, select the rule and click Copy.
The copy is added after the selected rule.
to delete a rule, select it and click Delete.
3. If you selected to create or edit a rule, configure rule settings
in the opened window.
4. Use the arrows next to the list to change the order of rules.
The rules are applied according to their order in the set.
5. When you finish adjusting the settings, click OK to save
changes or Cancel to reject them.
Packets with no rules in a rule set are blocked automatically except
packets allowed by Application Filter rules.
User Manual
155
10. Dr.Web Firewall
Packet Filter Rules
To add or edit a rule:
1. In the packet filter rule set creation or modification window,
click New or Edit. This opens a rule creation or rule
modification window.
2. Configure the following parameters:
Parameter
Description
Rule name
The rule name.
Description
The rule description.
Action
The action for Dr.Web Firewall to
perform when the packet is intercepted:
Block packets
Allow packets
Direction
The packet sender:
Inbound – apply the rule when
packet is received from the
network.
Outbound – apply the rule when
packet is sent into the network
from your computer.
Any – apply the rule regardless of
packet transfer direction.
User Manual
156
10. Dr.Web Firewall
Parameter
Description
Logging mode
The logging mode for the rule. This
parameter defines which information is
stored in the Dr.Web Firewall log:
Log headers – log packet headers
only.
Entire packet
packets.
–
log
whole
No logging – do not log any
information.
Criterion
Filtering criterion. E.g. transport or
network protocol. To add a filtering
criterion, select a criterion from the list
and click Add. You can add any number
of filtering criteria. For some headers
there are additional criteria available.
3. When you finish adjusting the settings, click OK to save
changes or Cancel to reject them.
If you do not add any criterion, then the rule will allow or block all
packets depending on the Action field.
Example:
Adding a packet filter that allows all packets from a sub-network,
may look as follows:
User Manual
157
10. Dr.Web Firewall
If you select value Any for the Local IP address and Remote IP
address fields, then the rule will be passed for any packet that
contains an IPv4 header and was sent from a physical address of the
local computer.
User Manual
158
10. Dr.Web Firewall
10.3.4. Advanced Page
On the Advanced settings page, you can select a default action,
which Dr.Web Firewall should execute when it detects a new
(unknown to the firewall) connection attempt, and configure advanced
settings. These rules are applied on the application level.
To set operation mode:
1. In the Dr.Web Firewall settings window, select Advanced.
2. Select one of the following operation modes:
Interactive learning mode
(Default) Training mode (create rules for known
applications automatically) – learning mode, when
rules for known applications are created automatically
Block unknown connections – restricted access mode,
when all unknown connections are blocked. For known
connections, Dr.Web Firewall applies the appropriate
rules
Allow unknown connections – free access mode,
when all unknown applications are permitted to access
User Manual
159
10. Dr.Web Firewall
networks
3. Click OK to save changes, or click Cancel to close the window
without saving changes.
Learning Mode
In this mode, you have total control over Dr.Web Firewall reaction
on unknown connection detection, thus training the program while you
working on the computer.
When a user application or operating system attempts to connect to a
network, Dr.Web Firewall checks if there is a filtering rule set for the
application. If there are no filtering rules, Dr.Web Firewall prompts
you to select a temporary solution, or create a rule which will be
applied each time Dr.Web Firewall detects this type of connection.
Training Mode
In this mode, rules for known applications are created automatically.
For other apllications you have control over Dr.Web Firewall
reaction.
When a user application or operating system attempts to connect to a
network, Dr.Web Firewall checks if there is a filtering rule set for the
application. If there are no filtering rules, Dr.Web Firewall prompts
you to select a temporary solution, or create a rule which will be
applied each time Dr.Web Firewall detects this type of connection.
This mode is used by default.
Restricted Access Mode
In this mode, Dr.Web Firewall blocks all unknown connections to
network resources including the Internet automatically.
When a user application or operating system attempts to connect to a
User Manual
160
10. Dr.Web Firewall
network, Dr.Web Firewall checks if there is a filtering ruleset for the
application. If there are no filtering rules, Dr.Web Firewall blocks
network access for the application without displaying any notification
to the user. If there are filtering rules for the application, Dr.Web
Firewall processes the connection according to the specified actions.
Free Access Mode
In this mode, Dr.Web Firewall allows all unknown applications to
access network recourses including the Internet. No notification on
access attempt is displayed.
Advanced Settings
Select the Allow loopback interface checkbox to allow all
applications on you computer to interconnect (i.e. allow unlimited
connections between application installed on your computer). For this
type of connection, no rules will be applied. Clear this checkbox to
apply rules for connections carried out both through the network and
within your computer.
User Manual
161
10. Dr.Web Firewall
10.4. Event Logging
Dr.Web Firewall registers connection attempts and network packets.
The statistics windows provides access to the following logs:
Application Filter Log (Application journal), which contains
information on network connection attempts from various
applications and rules applied to process each attempt.
Packet Filter Log (Packet Filter journal), which contains
information on network packets processed by Firewall, rules
applied to process the packets, and network interfaces used to
transmit the packets. Details level depends on settings of each
packet application rule.
The Active applications page displays applications currently
connected to a network.
To open this window
Click the SpIDer Agent icon in the notification area, select
Firewall, and then select Statistics.
10.4.1. Active Applications
The list of active applications displays information on programs
accessing network resources at the moment.
User Manual
162
10. Dr.Web Firewall
For each application, the following information on active connection is
available:
Column
Description
Name
The name of the application.
Direction
The party which initiated the connection:
Inbound – the rule is applied when someone
from the network attempted to connect to the
application on you computer.
Outbound – the rule is applied when the
application on your computer attempted to
connect to the network.
Listening – the rule is applied when the
application on your computer is awaiting for a
connection attempt from the network.
Protocol
The protocol used to transmit data.
Local address
The protocol and host address from which comes an
attempt to connect.
Remote address
The protocol and host address to which the connection
is attempted.
User Manual
163
10. Dr.Web Firewall
Column
Description
Sent
The number of bytes sent through this connection.
Received
The number of bytes received through this connection.
In the active connections statistics window you can terminate any
active process by right-clicking the process in the table and selecting
Terminate process.
To terminate any active process you need administrative privileges.
Otherwise, you can terminate only those processes that are run
under your account.
From the context menu you can also block an active or unblock a
disabled connection. The blocked connections are marked with red in
the table.
10.4.2. Application Filter Log
The application filter log stores information on all attempts of
applications installed on your computer to connect to a network.
User Manual
164
10. Dr.Web Firewall
Column
Description
Time
The date and time of the connection attempt.
Application
The full path to the application executable file, its name
and process identification number (PID).
Rule name
The name of the rule applied.
Direction
The party which initiated the connection:
Inbound – someone from the network attempted
to connect to the application on you computer.
Outbound – the application on your computer
attempted to connect to the network.
Any – the rule was applied regardless of who
initiated the connection.
Action
The action Dr.Web Firewall performed when the
connection attempt was detected:
Block packets
Allow packets
Endpoint
The protocol, IP-address and the port used for the
connection.
User Manual
165
10. Dr.Web Firewall
On this page you can save the information to a file or clear the log.
To save application filter log:
Click Save, then enter the file name where to store the log.
To clear application filter log:
Click Clear. All information will be deleted from the log.
User Manual
166
10. Dr.Web Firewall
10.4.3. Packet Filter Log
The packet filter log stores information on packets transmitted through
all network interfaces installed on you computer, if Log headers or
Entire packet logging mode was set for these packets. If No
logging mode was set for a packet, no information is stored.
Column
Description
Time
The date and time when the packet was processed.
Direction
The packet sender:
– the packet was transmitted from the network
to your computer.
– the packet was transmitted from your
computer to the network.
– the packet sent from the network to your
computer was blocked.
– the packet sent from your computer to the
network was blocked.
User Manual
167
10. Dr.Web Firewall
Column
Description
Rule name
The name of the applied rule.
Interface
The interface used to transmit the packet.
Packet data
Packet details. The Logging mode setting of the rule
determines the amount of stored data.
On this page, you can save the information to a file or clear the log.
To save packet filter log:
Click Save, then enter the file name where to store the log.
To clear packet filter log:
Click Clear. All information will be deleted from the log.
User Manual
168
11. Automatic Updating
11. Automatic Updating
Anti-virus solutions of Doctor Web use Dr.Web virus databases to
detect computer threats. These databases contain details and
signatures for all virus threats known at the moment of the product
release. However, modern virus threats are characterized by highspeed evolvement and modification. Within several days and
sometimes hours, new viruses and malicious programs emerge. To
mitigate the risk of infection during the licensed period, Doctor Web
provides you with regular updates to virus databases and product
components, which are distributed via the Internet. With the updates,
Dr.Web Security Space receives information required to detect new
viruses, block their spreading and sometimes cure infected files which
were incurable before. From time to time, the updates also include
enhancements to anti-virus algorithms and fix bugs in software and
documentation.
Dr.Web Updater helps you download and install the updates during
the licensed period.
11.1. Running Updates
You can run Updater in one of the following ways:
From the command line by running drwupsrv.exe file located in
the Dr.Web Security Space installation folder
By selecting Update in the SpIDer Agent menu
On launching, Updater displays a window with information on
relevance of Dr.Web virus databases and Dr.Web Security Space
components. If necessary, you can start an update process. Update
parameters can be configured on the Update page of Dr.Web
Security Space Main settings.
User Manual
169
11. Automatic Updating
If launching Dr.Web Updater automatically, changes are logged
into dwupdater.log file that is located in the %allusersprofile%
\Application Data\Doctor Web\Logs\ folder (in Windows 7, %
allusersprofile%\Doctor Web\Logs\).
Update Procedure
Before starting an update, Updater checks if you have a key file
registered (license or demo). If no key file is found, Updater suggests
you to obtain a key file on the Internet through the user registration
procedure.
If the key file is found, Updater checks its validity at Doctor Web
servers (the file can be blocked, if discredited, i.e. its illegal distribution
is uncovered). If your key file is blocked due to misuse, Updater
displays an appropriate warning, terminates the update, and blocks Dr.
Web components.
If the key is blocked, contact the dealer from which you purchased Dr.
Web Security Space.
After the key file is successfully verified, Updater downloads and
User Manual
170
11. Automatic Updating
installs all updated files automatically according to your version of Dr.
Web Security Space. If your subscription terms allow upgrade to
newer software versions, Updater also downloads and installs a new
version of Dr.Web Security Space when released.
After an update of Dr.Web Security Space executable files or
libraries, a program restart may be required. In such cases, Updater
displays an appropriate warning.
Scanner, SpIDer Guard and SpIDer Mail
updated databases automatically.
start using the
When the Updater is launched in the command line mode, the
command line parameters can be used (see Appendix A).
User Manual
171
Appendices
Appendices
Appendix A. Command Line Parameters
Additional command line parameters (switches) are used to set
parameters for programs which can be launched by opening an
executable file. This relates to Scanner, Console Scanner and to
Dr.Web Updater. The switches can set the parameters unavailable in
the configuration file and have a higher priority then the parameters
which are specified in it.
Switches begin with the forward slash (/) character and are separated
with blanks as other command line parameters.
The Scanner and Console Scanner Parameters
/AA – apply actions to detected threats automatically. (Only for
Scanner).
/AR – check archives. Option is enabled by default.
/AC – check installation packages. Option is enabled by default.
/AFS – use forward slash to separate paths in archive. Option is
disabled by default.
/ARC:<ratio> – maximum archive object compression. If the
compression rate of the archive exceed the limit, scanner neither
unpacks, not scans the archive (unlimited).
/ARL:<level> – maximum archive level (unlimited).
/ARS:<size> – maximum archive size. If the archive size exceed the
limit, scanner neither unpacks, nor scans the archive (unlimited, KB).
/ART:<size> – minimum size of file inside archive beginning from
User Manual
172
Appendices
which compression ratio check will be performed (unlimited, KB).
/ARX:<size> – maximum size of objects in archives that should be
checked (unlimited, KB).
/BI – show information on Dr.Web virus databases. Option is
enabled by default.
/DR – scan folders recursively (i.e., scan subfolders). Option is
enabled by default.
/E:<engines> – perform scanning in specified number of threads.
/FAST – perform an express scan of the system. (For Scanner only.)
/FL:<path> – scan files listed in the specified file.
/FM:<masks> – scan files matching the specified masks. By default all
files are scanned.
/FR:<regexpr> – scan files matching the specified regular expression.
By default all files are scanned.
/FULL – perform a full scan of all hard drives and removable data
carriers (including boot sectors). (For Scanner only.)
/FX:<masks> – exclude from scanning files that match the mask. (For
Console Scanner only.)
/H or /? – show brief help. (For Console Scanner only.)
/HA – use heuristic analysis to detect unknown threats. Option is
enabled by default.
/KEY:<keyfile> – specify a license key. It is necessary to use this
parameter if your key file is stored outside of the Dr.Web installation
folder where the scanner executables reside (by default, the drweb32.
key or another suitable file from the С:\Program Files\DrWeb\ folder is
used).
/LITE – perform a basic scan of random access memory, boot sectors
User Manual
173
Appendices
of all disks and startup objects. Scanner also runs a check on rootkits.
(For Scanner only.)
/LN – resolve shell links. Option is disabled by default.
/LS – use LocalSystem account rights. Option is disabled by default.
/MA – check e-mail. Option is enabled by default.
/MC:<limit> – set maximum number of cure attempts to 'limit' (
unlimited by default).
/NB – do not backup cured or deleted files. Option is disabled by
default.
/NI[:X] – limits usage of system resources at scanning and priority of
the scanning process (unlimited, %).
/NOREBOOT – cancel system reboot or shut down after scanning.
(For Scanner only.)
/NT – check NTFS streams. Option is enabled by default.
/OK – display the full list of scanned objects showing OK for clean
files. Option is disabled by default.
/P:<prio> – priority of the current scanning task:
0 – the lowest,
L – low,
N – general. Priority by default,
H – high,
M – maximal.
/PAL:<level> – maximum pack level. Value is 1000 by default.
/RA:<file.log> – append the specified file with the current scanning
report. By default, report is not generated.
/RP:<file.log> – rewrite the specified file with the current scanning
report. By default, report is not generated.
User Manual
174
Appendices
/RPC:<secs> – Dr.Web Scanning Engine connection timeout.
Timeout is 30 seconds by default. (For Console Scanner only.)
/RPCD – use dynamic RPC identification. (For Console Scanner
only.)
/RPCE – use dynamic RPC endpoint. (For Console Scanner only.)
/RPCE:<name> –
Scanner only.)
use specified RPC
endpoint. (For Console
/RPCH:<name> – use specified host name for remote call. (For
Console Scanner only.)
/RPCP:<name> – use specified RPC protocol. Possible protocols: lpc,
np, tcp. (For Console Scanner only.)
/QL – list quarantined files on all disks. (For Console Scanner only.)
/QL:<logical_drive_name> – list quarantined files on the specified
drive (letter). (For Console Scanner only.)
/QR[:[d][:p]] – delete quarantined files on drive <d> (letter) that
are older than <p> days (number). If <d> is not specified, then files
are deleted on all drives; if <d> is not specified, then all quarantined
files are deleted regarding of their age (0 days). (For Console
Scanner only.)
/QNA – double quote file names.
/QUIT – terminate Dr.Web Scanner once scanning completes
whenever or not the detected threats are neutralized. (For Scanner
only.)
/REP – follow symbolic links while scanning. Option is disabled by
default.
/SCC – show content of complex objects. Option is disabled by default
.
/SCN – show name of installation package. Option is disabled by
User Manual
175
Appendices
default.
/SILENTMODE – perform a background scan. On threat detection,
the Dr.Web Scanner window opens and dislays the list of detected
threats. Otherwise, the window does not display. (For Scanner only.)
/SPN – show names of packers. Option is disabled by default.
/SLS – show log on the screen. Option is enabled by default. (For
Console Scanner only.)
/SPS – display scan progress on the screen. Option is enabled by
default. (For Console Scanner only.)
/SST – display object scan time. Option is disabled by default.
/TB – check boot sectors including master boot record (MBR) of the
hard drive.
/TM – check processes in memory including Windows system control
area.
/TS – check autorun objects including object in the Autorun folder,
system ini files, and Windows registry.
/TR – check system restore points.
/W:<sec> – maximum time to scan (unlimited, sec).
/WCL – drwebwcl compatible output. (For Console Scanner only.)
/X:S[:R] – set power state shutDown/Reboot/Suspend/Hibernate
with reason 'R' (for shutdown/reboot).
Action for different objects (C - cure, Q - move to quarantine, D delete, I - ignore, R - inform. R is available for Console Scanner
only. R is set by default for all objects in Console Scanner):
/AAD:X – action for adware (R, possible DQIR).
/AAR:X – action for infected archives (R, possible DQIR).
User Manual
176
Appendices
/ACN:X – action for infected installation packages (R, possible DQIR).
/ADL:X – action for dialers (R, possible DQIR).
/AHT:X – action for hacktools (R, possible DQIR).
/AIC:X – action for incurable files (R, possible DQR).
/AIN:X – action for infected files (R, possible CDQR).
/AJK:X – action for jokes (R, possible DQIR).
/AML:X – action for infected e-mail files (R, possible QIR).
/ARW:X – action for riskware (R, possible DQIR).
/ASU:X – action for suspicious files (R, possible DQIR).
Several parameters can have modifiers that clearly enable or disable
options specified by these keys. For example:
/AC- option is clearly disabled,
/AC, /AC+ option is clearly enabled.
These modifiers can be useful if option was enabled or disabled by
default or was set in configuration file earlier. Keys with modifiers are
listed below:
/AR, /AC, /AFS, /BI, /DR, /HA, /LN, /LS, /MA, /NB, /NT,
/OK, /QNA, /REP, /SCC, /SCN, /SPN, /SLS, /SPS, /SST,
/TB, /TM, /TS, /TR, /WCL.
For /FL parameter "-" modifier directs to scan paths listed in specified
file and then delete this file.
For /ARC, /ARL, /ARS, /ART, /ARX, /NI[:X], /PAL, /RPC
and /W parameters "0" value means that there is no limit.
Example of using command line parameters with Console Scanner:
User Manual
177
Appendices
[<path_to_file>]dwscancl /AR- /AIN:C /AIC:Q C:\
scan all files on disk C:, excluding those in archives; cure the infected
files and move to quarantine those that cannot be cured. To run
Scanner the same way, type the dwscanner command name
instead of dwscancl.
Dr.Web Updater Command Line Parameters
Common options:
Parameter
Description
-h [ --help ]
Show this message.
-v [ -verbosity ] arg
Log level. Can be one of following: error, info, debug.
-d [ --data-dir ]
arg
Directory where repository and settings are located.
--log-dir arg
Directory for storing log file.
--log-file arg
(=dwupdater.
log)
Log file name.
-r [ --repo-dir ]
arg
Repository directory, (<data_dir>/repo by default).
-t [ --trace ]
Enable tracing.
-c [ -command ] arg
(=update)
Command to execute: getversions, getcomponents,
getrevisions, init, update, uninstall, exec, download and
keyupdate.
-z [ --zone ] arg
List of the zones that should be used instead of specified in
configuration file.
User Manual
178
Appendices
init command parameters:
Parameter
Description
-s [ --version ] Version name.
arg
-p [ --product ] Product name.
arg
-a [ --path ] arg
-n
[
component
arg
Product directory path. This directory will be used as
default directory for all components included in product.
Dr.Web Updater will search for a key file in this
directory.
-- Component name and installation folder. <Name>, <install
] path>.
-u [ --user ] arg
Username for proxy server.
-k [ --password Password for proxy server.
] arg
-g [ --proxy ] Proxy-server for updating. <Address>:<port>
arg
-e [ --exclude ] Component name that will be excluded from product
arg
during installation.
update command parameters:
Parameter
Description
-p [ --product ] Product name. If specified, only this product will be
arg
updated. If nothing is specified, all products will be
updated. If components are specified, only these
components will be updated.
-n
[
component
arg
-- Components that should be updated to specified version.
] <Name> , <target revision>.
User Manual
179
Appendices
Parameter
Description
-x [ --selfrestart Reboot after updating of Dr.Web Updater. Default value
] arg (=yes)
is yes. If value is set to no, reboot required notification
will appear
--geo-update
--type
(=normal)
Attempt to get list of IP-addresses from update.drweb.com
before updating.
arg One of the following:
reset-all – reset revision to 0 for all components
reset-failed –
components
reset revision to 0 for failed
normal-failed – try to update all components
including failed from current revision to newest or
specified
update-revision – try to update all components of
current revision to newest if exists
normal – update all components
-g [ --proxy ] Proxy-server for updating. <Address>:<port>
arg
-u [ --user ] arg
Username for proxy server.
-k [ --password Password for proxy server.
] arg
--param arg
Pass additional parameters to the script. <Name>: <value>
.
-l [ --progress- Print information about downloading and script execution
to-console ]
to console.
exec command parameters:
Parameter
Description
-s [ --script ] Execute this script.
arg
-f [ --func ] arg
If specified execute this function in the script.
-p [ --param ] Pass additional parameters to the script. <Name>: <value>
arg
.
User Manual
180
Appendices
Parameter
Description
-l [ --progress- Print information about script execution to console.
to-console ]
getcomponents command parameters:
Parameter
Description
-s [ --version ] Version name.
arg
-p [ --product ] Specify product to get the list of components that belong
arg
to this product. If product is not specified, all components
of this version will be listed.
getrevisions command parameters:
Parameter
Description
-s [ --version ] Version name.
arg
-n
[
component
arg
-- Component name.
]
uninstall command parameters:
Parameter
-n
[
component
arg
Description
-- Name of the component that should be uninstalled.
]
-l [ --progress- Print information about command execution to console.
to-console ]
User Manual
181
Appendices
Parameter
Description
--param arg
Pass additional parameters to the script. <Name>: <value>
.
-e [ --add-to- Components to be deleted. Updating of this components
exclude ]
will not be performed.
keyupdate command parameters:
Parameter
Description
-m [ --md5 ] MD5 hash of previous key file.
arg
-o [ --output ] Output file name to store new key.
arg
-b [ --backup ]
Backup of old key file if exists.
-g [ --proxy ] Proxy-server for updating. <Address>:<port>
arg
-u [ --user ] arg
Username for proxy server.
-k [ --password Password for proxy server.
] arg
-l [ --progress- Print information about downloading to console.
to-console ]
download command parameters:
Parameter
Description
--zones arg
Zone description file.
--key-dir arg
Directory where key file is located.
-l [ --progress- Print information about command execution to console.
to-console ]
-g [ --proxy ] Proxy-server for updating. <Address>:<port>
arg
User Manual
182
Appendices
Parameter
Description
-u [ --user ] arg
Username for proxy server.
-k [ --password Password for proxy server.
] arg
-s [ --version ] Version name.
arg
-p [ --product ] Product name.
arg
Appendix B. Computer Threats and
Neutralization Methods
With the development of computer technologies and network solutions
malicious programs (malware) of different kinds, meant to strafe
users, become more and more widespread. Their development began
together with computer science and facilities of protection against
them progressed alongside. Nevertheless, there is still no common
classification for all possible threats due to their unpredictable
development character and constant improvement of applicable
technologies.
Malicious programs can be distributed through the Internet, local area
networks, e-mail and portable data mediums. Some of them rely on
the user’s carelessness and lack of experience and can be run in
completely automatic mode. Others are tools controlled by a computer
cracker and they can harm even the most secure systems.
This chapter describes all of the most common and widespread types
of malware, against which products of Doctor Web are aimed.
Classification of Computer Threats
Computer viruses
This type of malicious programs is characterized by the ability to
User Manual
183
Appendices
implement its code into the executable code of other programs. Such
implementation is called infection. In most cases the infected file
becomes a virus carrier itself and the implemented code does not
necessarily match the original. Most viruses are intended to damage or
destroy data on the system. Viruses which infect files of the operating
system (usually executable files and dynamic libraries) and activate
upon launching of the infected file are called file viruses.
Some viruses infect boot records of diskettes and partitions or master
boot records of fixed disks. Such viruses are called boot viruses. They
take very little memory and remain ready to continue performing their
tasks until a system roll-out, restart or shut-down occurs.
Macroviruses are viruses which infect documents used by the Microsoft
Office and some other applications which allow macro commands
(usually written in Visual Basic). Macro commands are a type of
implemented programs (macros) written in a fully functional
programming language. For instance, in Microsoft Word macros can
automatically initiate upon opening (closing, saving, etc.) a document.
A virus which has the ability to activate and perform the tasks assigned
by the virus writer only when the computer reaches a certain state (e.
g. a certain date and time) is called a memory-resident virus.
Most viruses have some kind of protection against detection.
Protection methods are being constantly improved and ways to
overcome them are developed.
Encrypted viruses, for instance, cipher their code upon every infection
to hamper their detection in a file, boot sector or memory. All copies of
such viruses contain only a small common code fragment (the
decryption procedure), which can be used as a virus signature.
Polymorphic viruses also encrypt there code, but besides that they
generate a special decryption procedure which is different in every
copy of the virus. This means that such viruses do not have byte
signatures.
Stealth viruses perform certain actions to disguise their activity and
thus conceal their presence in an infected object. Such viruses gather
the characteristics of a program before infecting it and then plant
User Manual
184
Appendices
these “dummy” characteristics which mislead the scanner searching for
modified files.
Viruses can also be classified according to the programming language
in which they are written (in most cases it is assembler, high-level
programming languages, scripting languages, etc.) or according to the
affected operating systems.
Computer worms
Worms have become a lot more widespread than viruses and other
malicious programs recently. Like viruses they are able to reproduce
themselves and spread their copies but they do not infect other
programs. A worm infiltrates the computer from the worldwide or local
network (usually via an attachment to an e-mail) and distributes its
functional copies to other computers in the network. It can begin
distributing itself either upon a user’s action or in an automatic mode,
choosing which computers to attack.
Worms do not necessarily consist of only one file (the worm’s body).
Many of them have an infectious part (the shellcode), which loads into
the main memory (RAM) and then downloads the worm’s body as an
executable file via the network. If only the shellcode is present in the
system, the worm can be rid of by simply restarting the system (at
which the RAM is erased and reset). However, if the worm’s body
infiltrates the computer, then only an anti-virus program can cope with
it.
Worms have the ability to cripple entire networks even if they do not
bear any payload (i.e. do not cause any direct damage) due to their
intensive distribution.
Trojan horses (Trojans)
This type of malicious program cannot reproduce or infect other
programs. A Trojan substitutes a high-usage program and performs its
functions (or imitates the programs operation). At the same time it
performs some malicious actions in the system (damages or deletes
data, sends confidential information, etc.) or makes it possible for
another person to access the computer without permission, e.g. to
harm the computer of a third party.
User Manual
185
Appendices
A Trojan’s masking and malicious facilities are similar to those of a
virus and it can even be a component of a virus. However, most
Trojans are distributed as separate executable files (through fileexchange servers, removable data carriers or e-mail attachments),
which are launched by a user or a system task.
Rootkits
It is a type of malicious program used to intercept system functions of
an operating system in order to conceal itself. Besides, a rootkit can
conceal tasks of other programs, registry keys, folders and files. It can
be distributed either as an independent program or a component of
another malicious program. A rootkit is basically a set of utilities, which
a cracker installs on a system to which she had just gained access.
There are two kinds of rootkits according to the mode of operation:
User Mode Rootkits (UMR) which operate in user mode (intercept
functions of the user mode libraries) and Kernel Mode Rootkits (KMR)
which operate in kernel mode (intercept functions on the level of the
system kernel, which makes it harder to detect).
Hacktools
Hacktools are programs designed to assist the intruder with hacking.
The most common among them are port scanners which detect
vulnerabilities in firewalls and other components of the computer’s
protection system. Besides hackers, such tools are used by
administrators to check the security of their networks. Occasionally,
common software which can be used for hacking and various
programs that use social engineering techniques are designated as
among hacktools as well.
Spyware
This type of malicious programs is designed to perform monitoring of
the system and send the gathered information to a third party –
creator of the program or some other person concerned. Among those
who may be concerned are: distributors of spam and advertisements,
scam-agencies, marketing agencies, criminal organizations, industrial
espionage agents, etc.
User Manual
186
Appendices
Spyware is secretly loaded to your system together with some other
software or when browsing certain HTML-pages and advertising
windows. It then installs itself without the user’s permission. Unstable
browser operation and decrease in system performance are common
side effects of spyware presence.
Adware
Usually this term is referred to a program code implemented into
freeware programs which perform forced display of advertisements to
a user. However, sometimes such codes can be distributed via other
malicious programs and show advertisements in internet-browsers.
Many adware programs operate with data collected by spyware.
Joke programs
Like adware, this type of malicious programs does not deal any direct
damage to the system. Joke programs usually just generate message
boxes about errors that never occurred and threaten to perform
actions which will lead to data loss. Their purpose is to frighten or
annoy a user.
Dialers
These are special programs which are designed to scan a range of
telephone numbers and find those where a modem answers. These
numbers are then used to mark up the price of telephoning facilities or
to connect the user to expensive telephone services.
All the above programs are considered malicious because they pose a
threat to the user’s data or his right of confidentiality. Programs that
do not conceal their presence, distribute spam and different traffic
analyzers are usually not considered malicious, although they can
become a threat under certain circumstances.
Among other programs there is also a class of riskware programs.
These were not intended as malicious, but can potentially be a threat
to the system’s security due to their certain features. Riskware
programs are not only those which can accidentally damage or delete
data, but also ones which can be used by crackers or some malicious
programs to do harm to the system. Among such programs are various
User Manual
187
Appendices
remote chat and administrative tools, FTP-servers, etc.
User Manual
188
Appendices
Below is a list of various hacker attacks and internet fraud:
Brute force attack – performed by a special Trojan horse
program, which uses its inbuilt password dictionary or generates
random symbol strings in order to figure out the network access
password by trial-and-error.
DoS-attack (denial of service) or DDoS-attack (distributed
denial of service) – a type of network attack, which verges on
terrorism. It is carried out via a huge number of service requests
sent to a server. When a certain number of requests is received
(depending on the server’s hardware capabilities) the server
becomes unable to cope with them and a denial of service
occurs. DDoS-attacks are carried out from many different IPaddresses at the same time, unlike DoS-attacks, when requests
are sent from one IP-address.
Mail bombs – a simple network attack, when a big e-mail (or
thousands of small ones) is sent to a computer or a company’s
mail server, which leads to a system breakdown. There is a
special method of protection against such attacks used in the Dr.
Web products for mail servers.
Sniffing – a type of network attack also called “passive tapping
of network”. It is unauthorized monitoring of data and traffic
flow performed by a packet sniffer – a special type of nonmalicious program, which intercepts all the network packets of
the monitored domain.
Spoofing – a type of network attack, when access to the
network is gained by fraudulent imitation of connection.
Phishing – an Internet-fraud technique, which is used for
stealing personal confidential data such as access passwords,
bank and identification cards data, etc. Fictitious letters
supposedly from legitimate organizations are sent to potential
victims via spam mailing or mail worms. In these letters victims
are offered to visit phony web sites of such organizations and
confirm the passwords, PIN-codes and other personal
information, which is then used for stealing money from the
victim’s account and for other crimes.
Vishing – a type of Phishing technique, in which war dialers or
VoIP is used instead of e-mails.
User Manual
189
Appendices
Actions Applied to Threats
There are many methods of neutralizing computer threats. Products of
Doctor Web combine these methods for the most reliable protection
of computers and networks using flexible user-friendly settings and a
comprehensive approach to security assurance. The main actions for
neutralizing malicious programs are:
Cure – an action applied to viruses, worms and trojans. It implies
deletion of malicious code from infected files or deletion of a malicious
program’s functional copies as well as the recovery of affected objects
(i.e. return of the object’s structure and operability to the state which
was before the infection) if it is possible. Not all malicious programs
can be cured. However, products of Doctor Web are based on more
effective curing and file recovery algorithms compared to other antivirus manufacturers.
Move to quarantine – an action when the malicious object is moved
to a special folder and isolated from the rest of the system. This action
is preferable in cases when curing is impossible and for all suspicious
objects. It is recommended to send copies of such files to the virus
laboratory of Doctor Web for analysis.
Delete – the most effective action for neutralizing computer threats.
It can be applied to any type of malicious objects. Note, that deletion
will sometimes be applied to certain files for which curing was
selected. This will happen if the file contains only malicious code and
no useful information. E.g. curing of a computer worm implies deletion
of all its functional copies.
Block, rename – these actions can also be used for neutralizing
malicious programs. However, fully operable copies of these programs
remain in the file system. In case of the Block action all access
attempts to or from the file are blocked. The Rename action means
that the extension of the file is renamed which makes it inoperative.
User Manual
190
Appendices
Appendix C. Naming of Viruses
Specialists of the Dr.Web Virus Laboratory give names to all
collected samples of computer threats. These names are formed
according to certain principles and reflect a threat's design, classes of
vulnerable objects, distribution environment (OS and applications) and
some other features. Knowing these principles may be useful for
understanding software and organizational vulnerabilities of the
protected system. In certain cases this classification is conventional, as
some viruses can possess several features at the same time. Besides, it
should not be considered exhaustive, as new types of viruses
constantly appear and the classification is made more precise. The full
and constantly updated version of this classification is available at the
Dr.Web web site.
The full name of a virus consists of several elements, separated with
full stops. Some elements at the beginning of the full name (prefixes)
and at the end of it (suffixes) are standard for the accepted
classification. Below is a list of all prefixes and suffixes used in Dr.
Web divided into groups.
Prefixes
Affected operating systems
The prefixes listed below are used for naming viruses infecting
executable files of certain OS's:
Win – 16-bit Windows 3.1 programs
Win95 – 32-bit Windows 95/98/Me programs
WinNT – 32-bit Windows NT/2000/XP/Vista programs
Win32 – 32-bit Windows 95/98/Me and NT/2000/XP/Vista
programs
Win32.NET – programs in Microsoft .NET Framework operating
system
OS2 – OS/2 programs
Unix – programs in various Unix-based systems
Linux – Linux programs
User Manual
191
Appendices
FreeBSD – FreeBSD programs
SunOS – SunOS (Solaris) programs
Symbian – Symbian OS (mobile OS) programs
Note that some viruses can infect programs of one system even if they
are designed to operate in another system.
Macrovirus prefixes
The list of prefixes for viruses which infect MS Office objects (the
language of the macros infected by such type of virus is specified):
WM – Word Basic (MS Word 6.0-7.0)
XM – VBA3 (MS Excel 5.0-7.0)
W97M – VBA5 (MS Word 8.0), VBA6 (MS Word 9.0)
X97M – VBA5 (MS Excel 8.0), VBA6 (MS Excel 9.0)
A97M – databases of MS Access'97/2000
PP97M – MS PowerPoint presentations
O97M – VBA5 (MS Office'97), VBA6 (MS Office 2000); this virus
infects files of more than one component of MS Office
Development languages
The HLL group is used to name viruses written in high level
programming languages, such as C, C++, Pascal, Basic and others.
HLLW – worms
HLLM – mail worms
HLLO – viruses overwriting the code of the victim program,
HLLP – parasitic viruses
HLLC – companion viruses
The following prefix also refers to development language:
Java – viruses designed for the Java virtual machine
Script-viruses
Prefixes of viruses written in different scrip languages:
VBS – Visual Basic Script
User Manual
192
Appendices
JS – Java Script
Wscript – Visual Basic Script and/or Java Script
Perl – Perl
PHP – PHP
BAT – MS-DOS command interpreter
Trojan horses
Trojan – a general name for different Trojan horses (Trojans).
In many cases the prefixes of this group are used with the
Trojan prefix.
PWS – password stealing Trojan
Backdoor
–
Trojan
with
RAT-function
(Remote Administration Tool
–
a
utility
for
remote
administration)
IRC – Trojan which uses Internet Relay Chat channels
DownLoader – Trojan which secretly downloads different
malicious programs from the Internet
MulDrop – Trojan which secretly downloads different viruses
contained in its body
Proxy – Trojan which allows a third party user to work
anonymously in the Internet via the infected computer
StartPage (synonym: Seeker) – Trojan which makes
unauthorized replacement of the browser’s home page address
(start page)
Click – Trojan which redirects a user’s browser to a certain web
site (or sites)
KeyLogger – a spyware Trojan which logs key strokes; it may
send collected data to a malefactor
AVKill – terminates or deletes anti-virus programs, firewalls, etc.
KillFiles, KillDisk, DiskEraser – deletes certain files (all files on
drives, files in certain directories, files by certain mask, etc.)
DelWin – deletes files vital for the operation of Windows OS
FormatC – formats drive C
FormatAll – formats all drives
KillMBR – corrupts or deletes master boot records (MBR)
KillCMOS – corrupts or deletes CMOS memory
User Manual
193
Appendices
Tools for network attacks
Nuke – tools for attacking certain known vulnerabilities of
operating systems leading to abnormal shutdowns of the
attacked system
DDoS – agent program for performing a DDoS-attack
(Distributed Denial Of Service)
FDoS (synonym: Flooder) – programs for performing malicious
actions in the Internet which use the idea of DDoS-attacks; in
contrast to DDoS, when several agents on different computers
are used simultaneously to attack one victim system, an FDoSprogram operates as an independent "self-sufficient" program
(Flooder Denial of Service)
Malicious programs
Adware – an advertising program
Dialer – a dialer program (redirecting modem calls to predefined
paid numbers or paid resources)
Joke – a joke program
Program – a potentially dangerous program (riskware)
Tool – a program used for hacking (hacktool)
Miscellaneous
Exploit – a tool exploiting known vulnerabilities of an O S or
application to implant malicious code or perform unauthorized
actions.
Generic – this prefix is used after another prefix describing the
environment or the development method to name a typical
representative of this type of viruses. Such virus does not
possess any characteristic features (such as text strings, special
effects, etc.) which could be used to assign it some specific
name.
Silly – this prefix was used to name simple featureless viruses
the with different modifiers in the past.
User Manual
194
Appendices
Suffixes
Suffixes are used to name some specific virus objects:
Origin – this suffix is added to names of objects detected using
the Origins Tracing algorithm.
generator – an object which is not a virus, but a virus generator.
based – a virus which is developed with the help of the specified
generator or a modified virus. In both cases the names of this
type are generic and can define hundreds and sometimes even
thousands of viruses.
dropper – an object which is not a virus, but an installer of the
given virus.
User Manual
195
Appendices
Appendix D. Technical Support
Support is available to customers who have purchased a commercial
version of Dr.Web products. Visit Doctor Web Technical Support
website at http://support.drweb.com/.
If you encounter any issues installing or using company products, take
advantage of the following Doctor Web support options:
Download and review the latest manuals and guides at http://
download.drweb.com/doc
Read the frequently asked questions at http://support.drweb.
com/
Browse Dr.Web official forum at http://forum.drweb.com/
If you have not found solution for the problem, you can request direct
assistance from Doctor Web Technical Support by filling in the
web-from in the corresponding section of the support site at http://
support.drweb.com/.
For regional office information, visit the official Doctor Web website
at http://company.drweb.com/contacts/moscow
User Manual
196
© Doctor Web, 2003-2013