1
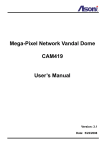
Mega-Pixel Network Vandal Dome
JNC-V2434 / JNC-VIR2434 /
JNC-V2434-PoE
User’s Manual
Date: 7/02/2010
Firmware Version: V3.2.70
Content
Content ........................................................................................................................................ 1
1.
Preface ................................................................................................................................. 2
2.
Product Specifications........................................................................................................... 2
3.
Product Installation ............................................................................................................... 5
A.
Hardware Installation......................................................................................................... 5
B.
Monitor Setting .................................................................................................................. 8
C.
IP Assignment ................................................................................................................... 9
4.
Live Video ........................................................................................................................... 11
5.
Configuration ...................................................................................................................... 16
A.
System ............................................................................................................................ 16
B.
Video/Audio Setting.........................................................................................................23
C. Network Setting ............................................................................................................... 31
D.
6.
7.
Event Handling ................................................................................................................ 37
Network Configuration ........................................................................................................ 51
A.
Intranet Only.................................................................................................................... 51
B.
Internet Only.................................................................................................................... 53
C.
Intranet + Internet............................................................................................................ 56
Factory Default ................................................................................................................... 59
Compatible List of SD Card........................................................................................................ 60
1
1. Preface
This Network Vandal Dome is a CMOS Network Vandal Dome. It builds in web server.
User views real-time video via IE browser.
This camera supports MPEG-4 & M-JPEG video compression which provides smooth and
high quality video. The event video can be stored in the SD card, and can be playback
remotely.
The IR model equips infrared illuminator to provide good image quality, even in darkness.
The PoE model built-in support for Power over Ethernet allows the camera to receive both
data and power over a single Ethernet cable.
2. Product Specifications
z MPEG-4 / MJPEG compression formats. Supports resolution up to SXGA (1280x1024),
1.3Mega pixels.
z MPEG-4 / MJPEG dual streaming.
z Self-Contained HTTP Web Server providing Internet capability for remote access
z Day & Night functionality for 24-hours surveillance, auto activate IR illuminator in low
illumination (IR model)
z Infrared radiant distance up to 12 meters (IR model)
z Unbreakable housing, support IP66 water proof standard
z Built-in PoE splitter, support for Power over Ethernet (PoE model)
z Supports SD card for local event recording
z 2-way audio
z Online firmware upgrade
z Recorded files compatible with Microsoft Windows Media Player
Hardware
CPU / RAM / ROM
ARM 9 ,32 bit RISC / 64MB / 8MB
Image Sensor
1/4" CMOS, 1.3 Mega pixels
Lens
Normal model: Vari-focal 4 ~ 9 mm, F1.5
IR model: Vari-focal 3.7 ~ 12 mm, F1.6
IR Distance (IR model)
12 Meters
2
Illumination
Normal: 1.5 lux, IR On: 0 lux
Audio In
1 Line in (RCA connector)
Audio Out
1 Line out (RCA connector)
Digital I/O
1 In / 1 Relay out
Water Proof
IP-66 standard
Power Supply
Normal model: DC 12V, 1A
PoE model (built-in PoE Splitter):
Use PoE: PoE Injector (IEEE 802.3af)
Or, use Power Adaptor: DC 12V, 1A
Power Consumption
Normal model: Max. 4 Watt
Normal model + Heater: Max. 9 Watt
IR model: Max. 6 Watt
IR model + PoE: Max. 9 Watt
IR model + Heater: Max. 11 Watt
Dimensions
Φ138 x H105 mm
Network
Ethernet
10/ 100 Base-T
Network Protocol
HTTP, TCP/IP, RTP/RTSP, 3GPP, SMTP, FTP, PPPoE, DHCP, DDNS, NTP, UPnP
System
Video Resolution
1280x1024, 640x480, 320x240, 160x120
Compression Format
MPEG-4, MJPEG
Frame Rate
Up to 10 FPS@1280x1024
Dual Streaming
Yes
3GPP
Yes, Live view with 3G mobile phone
Video Bitrate Adjustment
CBR, VBR
Video Adjustment
Brightness, Contrast, Exposure, Sharpness, AGC, Night Mode
Image Snapshot
Yes
Motion Detection
Yes, 3 different areas
Event Trigger
Motion Detection, Digital In
Triggered Action
Send Email, Send to FTP, Save to SD Card, Relay out
Pre/ Post Alarm
Yes, configurable
Security
Password protection
Firmware Upgrade
HTTP mode, can be upgraded remotely
Connection
Up to 10 clients simultaneously
Audio
Yes, 2-way
Up to 30 FPS@640x480
SD card management
Recording Trigger
Motion Detection, Digital In, IP Check, Network Disconnect
3
Video Format
Video (AVI), Snapshot (JPEG)
Video Playback
Yes
Web browsing requirement
OS
Windows 2000, XP, Vista, Windows 7
Web Browser
Microsoft IE V7.0 or above, Mozilla Firefox V5.0 or above, Opera V10 or
above, Safari V4.0.5 or above, Google Chrome V5.0 or above
Suggested Hardware
Intel-C 2.0G, RAM: 512MB
Graphic card: 64MB onboard RAM
* Specifications are subject to change without notice
4
3. Product Installation
A. Hardware Installation
Cable Connections
n Power Jack (DC 12V)
o Digital I/O
p (Pink) Audio Input
q (Green) Audio Output
s
r
Network Connector
n Power Jack:
To connect the included power adapter.
o Digital I/O:
Digital In and Relay Out.
p Audio Input (Pink):
The RCA connector allows connect to a microphone or audio
source, the connected audio will be heard at the remote site.
q Audio Output (Green):
The RCA connector allows connect to an amplified speaker,
you can hear the voice of the remote site from the speaker.
r Network Connector:
The RJ-45 connector allows connect the Ethernet cable.
s SD Card Slot (inside of
Insert a SD card if you want to do the event recording (video
only) in the camera.
the camera):
1. Connect the cable of Digital I/O, Audio output and Audio input if you want to use these
functionalities.
2. Connect Ethernet cable for network connection.
5
3. Connect power adapter to turn on the camera.
4. If the camera is PoE model, the power adapter is not necessary. The camera will get
the power from the Ethernet cable. Please follow the below figure for the connection.
PoE Switch or PoE Injector
PoE Network Camera
To Network
Ethernet Cable
Data only
Ethernet Cable
Mixed data and power
5. Set up the network configurations according to the network environment. For further
explanation, please refer to Network Configuration chapter.
I/O Connections
I/O connector – used in application, for e.g., motion detection, event triggering, alarm
notifications. It provides the interface to:
z
1 set of Digital Input (Alarm + GND) – The digital inputs for connecting devices
that can toggle between an open and closed circuit, such as PIRs, door/window
contacts, glass break detectors, etc. When a signal is received the status changes
and the input becomes active.
z
1 set of Relay Output (N.O. + COM) – The output to Relay switch of the alarm
device such as LEDs, Sirens, etc.
GND
Digital In
ALARM
COM
Relay Out
N.O.
6
Digital Input (Alarm Input)
GND (Ground): Initial status is LOW.
Alarm: Max. 50mA, 12VDC.
Door/Window
Contacts
GND
ALARM
COM
N.O.
Relay Output
COM: Common pin.
N.O. (Normally Open): Max. 1A / 24VDC or 0.5A / 125VAC.
GND
ALARM
COM
N.O.
7
B. Monitor Setting
1. Right-Click on the desktop. Select “Properties”
2. Change color quality to “Highest (32bit)”.
8
C. IP Assignment
¾ Always consult your network administrator before assigning an IP address to your
camera in order to avoid using a previously assigned IP address.
¾ MAC Address: Each network camera has a unique Ethernet address (MAC address)
shown on the sticker of the camera.
¾ One final note, although the IP Search is able to find and configure any network
camera on the LAN except those that are behind a router, it is a good idea to set the
host PC to the same subnet. In order to connect to the Web-based user interface of
the network camera, the host PC must be in the same subnet. For more information
about subnets, please consult your network administrator.
There are 3 kinds of IP configuration:
z
Fixed IP (Public IP or Virtual IP)
z
DHCP (Dynamic IP)
z
Dial-up (PPPoE)
IP Search is a utility that provides an easier, more efficient way to configure the IP
address and network settings of the network camera in Local Network (LAN). It even
provides a convenient way to set the network settings for multiple devices simultaneously.
Moreover, IP Search can save the network settings for all devices as a backup and
restore them when necessary.
The software can be installed from the attached software CD.
1. Once IP Search has been successfully installed on the computer, double click the
“IP Search” icon on the desktop.
p
n
q
r
os
9
t
2. IP Search searches all the network devices which connect to the intranet and lists
on the window. Click [Search] button to search again.
3. From the list, select the device with the MAC Address that corresponds to the
device that is to be configured.
4. Click and select one of the network devices, the network configuration of this device
will show on the bottom, filling in the IP Address, Subnet Mask, Gateway and the
others.
5. Click [Set] button to complete the configuration settings and save into the device.
6. Wait for 1 minute to let the device update the settings, and then click [Search]
button again to re-search the network devices.
7. Click and select the network device listed on the window and click [Open Web]
button. It will open an IE browser and connect to this device directly.
8. You can assign a name to identify the device. Type the name in “Device Name” field,
click [Save] and then click [Search] button, the name will be displayed in the list.
10
4. Live Video
Start the IE browser, type the IP address of the
network camera in the address field:
http://<IP of camera>
If the “Web Page Port” has been changed from
“80”, type the URL as:
http://<IP of camera>:<Web Page Port>
After link to the camera, it will show a dialogue
box. Key-in the user name and password to
log-in and open the web page of camera.
The default user name and password are “admin” and “admin”.
For the first time to view the camera video via IE, it will ask you to install the ActiveX
component.
If the installation failed, please check the security setting for the IE browser.
1. In IE, click on [Tools] t [Internet Options…]
2. Click on [Security] Tab t [Custom Level…]
3. In Security Settings, under [Download unsigned ActiveX controls], select
“Enable” or “Prompt”.
4. In Security Settings, under [Initialize and script ActiveX controls not marked as
safe], select “Enable” or “Prompt”.
5. When pop-up window with warning message, click [Yes] to save the settings.
11
1
2
3
4
5
When popup the following dialogue box, click [Yes].
12
The web page of the device shows as following.
If you are using IE 8.0 or above, please click “Compatibility View” icon to make this web
page works properly:
⑤
①
②
③
④
⑥
n
o
Streaming : Select the streaming 1 or 2 from the pull-down list to display.
Language : Change the display language temporarily.
Note: The display language is changed temporary, and it doesn’t change the default
language. To change the default language, please go to Configuration t
System Information page.
p
q
Configuration : Go into the configuration page to set the parameters if necessary.
Status Bar : Shows system date/time, video resolution and video refresh rate (FPS).
13
r
s
Online Visitor : Shows how many users connect to this network camera.
Function Buttons : Click these buttons will perform the following functions.
Fit to Window : Resize the video to fit the window for view. Click this button
again to back to the original size.
Full Screen : Click this button or double-click the video, the video will change
to full screen mode.
Press [Esc] key or double-click the video again, it will back to normal mode.
Snapshot : Click this button to take snapshot of the video. The image will be
displayed in a pop-up window, click
to save as a jpg picture.
Record : Click this button to record the video into the local PC. It will ask you
where to save the video. To stop recording, click this button again.
The saved video format is AVI. The recorded file can be played by Microsoft
Media Player. Note, MPEG4 decoder must be installed to play the recorded
file. You can install “FFdshow” from the included CD for the decoder.
Chatting : The camera supports 2-way audio. Click this button, then you can
use microphone which connected to the PC to talk to the camera side.
Voice : Click this button to turn on the audio from camera. Click again to turn
off it.
Digital Zoom : Click this
button, a pop-up window
appears. You can enable /
disable the digital zoom, and
adjust the ratio.
Relay Out (ON/OFF Switch) : Click the button to manually turn on / off the
Relay via the built-in Digital Out.
14
Relay Out (Time Switch) : Click the button to manually turn on the Relay via
the built-in Digital Out, after the interval time is passed, the Relay will be
turned off automatically. The interval time can be set up in Configuration t
Event Handling t I/O.
15
5. Configuration
Click [Configuration] button to get into the configuration page. Click
button to back to the Live-View page.
A. System
System Information
Set up the camera name, select language, and set up the camera time.
System Information
16
[Live View]
Server Information
MAC Address: The MAC address of the Ethernet network card in the device.
Server Name: You can type a name into this field to identify this device.
Default Language: Select the default language for the user interface.
OSD Setting
Time Stamp: Enable this option will display the date and time on the video.
Position: Select the display position of Time stamp.
Note: When SXGA (1280x1024) resolution is selected, Top-Center is the only position
for OSD.
Automatic Reboot Timer
By enabling this function, the camera will be rebooted at the scheduled time every day.
This will keep the camera more stable.
Time: Type the time in the field to setup the schedule for reboot.
17
Time Setting
Date Format: Select the format to display the date.
Time Zone: Select the GMT to match your time zone.
Synchronize with NTP Server: Select this option and type the IP address of a NTP
(Network Time Protocol) server, this device will synchronize the time with the NTP
server via network.
z
NTP Server: Type the IP address or URL of the NTP server.
z
Update Schedule: Select the interval for the update time. For example, if
select “6 Hours”, this device will synchronize the date and time with the NTP
server every 6 hours.
Synchronize with PC’s time: Select this option will synchronize the device time with
the PC’s time.
Manually Input Date and Time: Manually input the date and time.
The date and time remain the same: Keep the current date and time without change.
After set up, click [Apply] to save the settings.
18
User Management
You can add, remove and manage the users in this page.
This device supports 3 user groups:
z Administrator: The administrator can view, operate and configure all functions and
settings of this device.
z Guest: The users in Guest group can only view the live video in Live-View page.
z Anonymous: The anonymous user can only view the live video in Live-View page.
The privilege is same as Guest group.
User Management
Anonymous User Login
To allow user visit this device without login, select [Yes] and then click [Setting] to
enable this function.
Add User
To add a new user, type the user name and password, then click [Add/Set] to save
the user.
User List
This table lists the current users.
19
Edit: To change the username and
password, click [Edit] and modify the
administrator or user in the pop-up window.
Remove: To remove the user, click [Remove].
20
System Upgrade
This page allows user to upgrade firmware, restart device and restore the factory default
settings.
System Upgrade
Firmware Upgrade
The firmware can be upgraded online.
To update the firmware, click [Browse…] to select the new firmware file, and then
click [Upgrade] to the procedure.
Reboot System
To restart the device, click [Reboot] and then click [Yes] on the prompted window.
Factory Default
To load the factory defaults, click [Default] and then click [Yes] on the prompted
window. Note, all settings including User account, Network, A/V and Event settings
will be restored to the factory defaults.
21
System Logs
System Logs
System Status Logs
Click the [View] button on the right side to list the logs of system status.
Motion Trigger Logs
Click the [View] button on the right side to list the logs of motion detection.
Digital-In Trigger Logs
Click the [View] button on the right side to list the logs of digital input detection.
All Logs
Click the [View] button on the right side to list all logs.
22
B. Video/Audio Setting
Image Setting
Image Setting
Image Quality
Brightness / Contrast / Exposure / Sharpness: Adjust these parameters to get clear
video.
Automatic Gain Control: Adjust this function according to the environment.
Frame Rate at Night: This function can be set at different Frame rate to increase night
illumination. Set lower frame rate will slower the frame refresh rate, but will enhance
the night illumination. Night mode will be activated automatically depending on lux
illumination, if set at 15 frame rate, when night mode activated at low lux, the frame
rate will not be more than 15FPS.
23
Video Orientation: Change the orientation to display the video.
Default: Click [Default] button will load the default settings for above options.
Outdoor/Indoor: This camera supports “Auto Electronic Shutter” to adjust the image
for outdoor or indoor usage, select this option according to the environment.
24
Video Format
This device supports MPEG4/MJPEG Dual Mode and Dual Streaming, set the video
parameters in this page.
Video Format
Video System
Video System: Select NTSC-60Hz or PAL-50Hz to match your local video system.
25
Streaming 1 Output Setting
Basic / Advanced Mode: Select the mode to configure the parameters. Advanced
mode provides more detail parameters for setting.
Resolution: Select the resolution from the pull-down list.
z
SXGA – 1280x1024 (Up to 10FPS)
z
VGA – 640X480 (Up to 30FPS / 25FPS)
z
QVGA – 320X240 (Up to 30FPS / 25FPS)
z
QQVGA – 160X120 (Up to 30FPS / 25FPS)
Frame Rate Per Second: The video refreshing rate per second. Select the frame rate
from the pull-down list.
Video Compression Format: Choose MPEG4 or JPEG format to compress and
output the video stream.
MPEG4: The video stream will be compressed in MPEG4 format. Choose CBR
(Constant Bit Rate) or VBR (Variable Bit Rate) in Bitrate Control Mode.
z
CBR: Set the Video Bitrate from 32Kbps ~ 2Mbps depend on the upload
bandwidth of network. The data size of video stream will be limited under
the selected bit rate.
z
VBR: Set the Video Quantitative from 1 ~ 10, the higher value will get
better video quality. The data size of video stream is no limitation, if the
upload bandwidth of network is lower than the data size, the video will be
displayed slowly.
z
GOP Size: Set the GOP (Group of Picture) size. If you don’t know what
26
value should be set, please set it to “1XFPS”.
JPEG: The video stream will be compressed in MJPEG format.
z
Quality: 5 levels for select. The higher quality will get bigger file size.
RTSP Path: Assign a name to identify this video stream. When view the video stream
with RTSP connection, the URL should be “rtsp://<Public IP of this device>:<RTSP
port>/<RTSP path>”.
Streaming 2 Output Setting
This device supports Dual Streaming, you can enable and configure the streaming 2.
Note: when the Resolution of streaming 1 is SXGA, it is not allowed to enable the
streaming 2. Please select VGA, QVGA or QQVGA as the Resolution for
streaming 1 first.
Mode: Select the mode to enable or disable the streaming 2.
z
Basic / Advanced Mode: Enable and configure the streaming 2. Advanced
mode provides more detail parameters for setting.
z
3GPP Mode: Enable the streaming 2 as 3GPP mode, it allows a 3G mobile
phone to view the live video.
z
Close: Disable the streaming 2.
Resolution: Select the resolution from the pull-down list.
z
VGA – 640X480
z
QVGA – 320X240
z
QQVGA – 160X120
Frame Rate Per Second: The video refreshing rate per second. The total frame rate
of streaming 1 and 2 is up to 30FPS (NTSC) / 25FPS (PAL). Before set the frame rate
27
of streaming 2, you have to decrease the frame rate of streaming 1, and then set the
frame rate of streaming 2.
Video Compression Format: Choose MPEG4 or JPEG format to compress and
output the video stream.
MPEG4: The video stream will be compressed in MPEG4 format. Choose CBR
(Constant Bit Rate) or VBR (Variable Bit Rate) in Bitrate Control Mode.
z
CBR: Set the Video Bitrate from 32Kbps ~ 2Mbps depend on the upload
bandwidth of network. The data size of video stream will be limited under
the selected bit rate.
z
VBR: Set the Video Quantitative from 1 ~ 10, the higher value will get
better video quality. The data size of video stream is no limitation, if the
upload bandwidth of network is lower than the data size, the video will be
displayed slowly.
z
GOP Size: Set the GOP (Group of Picture) size. If you don’t know what
value should be set, please set it to “1XFPS”.
JPEG: The video stream will be compressed in MJPEG format.
z
Quality: 5 levels for select. The higher quality will get bigger file size.
RTSP Path: Assign a name to identify this video stream. When view the video stream
with RTSP connection, the URL should be “rtsp://<Public IP of this device>:<RTSP
port>/<RTSP path>”.
3GPP (Streaming 2) Output Setting
28
After configure the streaming 2 as 3GPP mode, it will enable this device to send out
the video in 3GPP format, and you can view the live video on the 3G mobile phone.
The frame rate of streaming 1 is up to 15FPS (NTSC) / 12FPS (PAL) when the 3GPP
mode is enabled.
Since the bandwidth of 3G is not fast usually, recommend set to the following
configuration:
z
Resolution – Fixed to QQVGA - 160x120.
z
Bitrate Control Mode – CBR.
z
CBR Bitrate – 128Kbps or lower.
z
Frame Rate Per Second – 5FPS.
z
GOP Size – 1XFPS.
z
Video Compression Format – Fixed to MPEG4.
z
3GPP Path – Assign “3g” as the name.
To view the live video with a 3G mobile phone or PDA, open “Streaming Player” or
web browser in the mobile phone, type the URL as following to link and view the live
video:
rtsp://<Public IP of camera>:<RTSP port>/<3GPP path>
* <Public IP of camera>: The public IP address of the camera.
* <RTSP port>: The RTSP port of the camera. This port is assigned in Configuration
t Network Setting t Network Setting
* <3GPP path>: The name of the 3GPP video stream.
If your 3G mobile phone or PDA does not support the viewing of RTSP streaming, you
can view the camera with http connection. To do this, use a Java compliant browser
such as Opera, and type the URL as following to link and view the live video:
http://<Public IP of camera>:<HTTP port>/Jview.html
* <Public IP of camera>: The public IP address of the camera.
* <HTTP port>: The HTTP port of the camera. This port is assigned in Configuration
t Network Setting t Network Setting
Note: Do not use the IE browser in 3G mobile phone because it doesn’t support Java.
After set up, click [Apply] to save the settings.
29
Audio Setting
This device supports 2-way audio. Note, the audio will not be smooth when enable SD
card recording function simultaneously.
Audio from Device to Local PC
For this device to local PC, select [Enable] and then click [Apply] to start this function.
If set to [Disable], the [Voice] icon on Live View page is not workable.
Audio Setting
Audio from Local PC to This Device
For local PC to this device, click [Chatting] icon on the Live View page.
30
C. Network Setting
Network Setting
Network Setting
IP Assignment
DHCP: If this device behinds a router and the router provides DHCP service, using
DHCP, this device will get all network parameters from the router automatically.
31
Static: Assign IP address, subnet mask, gateway, and DNS manually.
Port Assignment
Set the ports if necessary. If this device will be connected via Internet, configure the
NAT (Network Address Translation) in router to match the port assignment.
HTTP Port: Set the port for HTTP connection. The default is “80”, change the port if
you want to use router’s NAT (Network Address Translation) to make this device can
be linked from Internet.
RTSP Port: Set the port for transfer the video and audio. The default is “554”, change
the port if you want to use router’s NAT (Network Address Translation) to make this
device can be linked from Internet.
RTP Port: Set the port range of RTP port.
In RTSP mode, you may use TCP and UDP for connecting. TCP connection uses
RTSP Port. UDP connection uses RTP Start and End Port.
UPnP Setting
UPnP: Enable or disable the UPnP protocol.
This device supports UPnP, if the UPnP service is enabled on your computer, the
device will automatically be detected and a new icon will be added to “My Network
Places”.
Note: UPnP service must be enabled on your computer.
The Windows Vista and Windows 7 have enabled UPnP service by default. To activate
UPnP service in Windows XP, please follow the procedure:
1. Open the “Control Panel” from the “Start” menu.
2. Select “Add/Remove Programs”.
3. Select “Add/Remove Windows Components” and open “Networking Services”
section.
4. Click “Details” and select “UPnP” to setup the service.
5. The network device icon will be added to “My Network Places”.
6. You may double-click the network device icon to access it via IE browser.
Multicast Setting
Multicast addressing is a network technology for the delivery of streaming to a group
of destinations simultaneously using the most efficient strategy to deliver the
messages over each link of the network only once, creating copies only when the links
to the multiple destinations split. To implement the Multicast, a switch or router that
32
supports Multicast function is necessary in the network.
If your network supports Multicast, you can configure the device to enable this
function by setup the following:
Enable / Disable: Enable or disable the Multicast function.
IP Address: This is the multicast group address the streaming should be sent to. You
should configure each recipient with the same multicast group address and receive
the streaming from this address. The range is 224.3.1.0 ~ 239.255.255.255
Port: The multicast port. The range is 1 ~ 65535
TTL: Time-To-Live (TTL) for Multicast Packets. This value decides how "far" from a
sending host a given multicast packet should be forwarded.
After set up, click [Apply] to save the settings.
33
PPPoE Setting
If this device connects to an ADSL modem directly and want to use PPPoE connection, set
the parameters in this page.
PPPoE Setting
PPPoE Connection
Select [Enable] to use PPPoE. Type in user name and password for the ADSL
connection.
Send E-mail After Dialed
If select [Enable], when connect to the Internet via PPPoE, this device will send a
mail with the Subject to a specific mail account, this mail contains the public IP
address of the ADSL connection.
To set the mail account, please refer to Configuration t Event Handling t Mail&FTP
page.
After set up, click [Apply] to save the settings.
34
DDNS Setting
This device supports DDNS, set the parameters in this page.
DDNS Setting
DDNS Setting
There are several DDNS providers can be selected. Select the provider from the
pull-down list, input Hostname, User name, Password and the Schedule Update time,
and then click [Apply] to connect to the DDNS provider.
Status
This field will display the message to indicate the status of DDNS service.
Updating: Information update.
Idle: Stop service.
http://<hostname (username)>.<provider>.com: DDNS registration successful,
can now link to the camera with this URL address.
Update Failed, the name is already registered: The hostname or username has
already been used. Please change it.
35
Update Failed, check your internet connection: Network connection failed.
Update Failed, please check the account information with you provider: The
input hostname, username or password may be wrong.
36
D. Event Handling
Event Setting
This device supports multiple event settings.
Event
37
This device supports 4 kinds of event detections:
z Motion Detection.
z Digital Input Detection.
z Network Disconnection Detection: This event will be triggered once the wire
network is disconnected.
z Specific IP Detection: This event will be triggered once the network connection
with a specific IP address is disconnected.
Motion Detection
This device allows 3 areas for detect motion. When motion detection is triggered, it
can send the video or snapshot to specific mail address; transmit the video or
snapshot to remote FTP server; trigger the digital out; record video or snapshot into
local SD card.
38
Set the Area: To set up or clear the motion area, click [Draw/Clear Area] button on
“Set Area” row, and then use mouse to drag the area on the video.
Adjust the Sensitivity: To adjust the sensitivity of detection, select the level from the
pull-down list.
Activate Motion Detection: To activate the motion detection, enable the [Detect
Area] check box
Actions when Motion Detection is Trigger: Select what actions will be taken once
the motion detection is triggered in each area.
z
E-mail: When the motion detection is triggered in this area, send the recorded
video or snapshot to the specific mail address.
z
FTP: When the motion detection is triggered in this area, send the recorded
video or snapshot to the specific FTP site.
To set the mail account and FTP site, please refer to Configuration t Event
Handling t Mail&FTP page.
z
Out1: When the motion detection is triggered in this area, turn on the Digital
Output 1.
z
Save to SD Card: When the motion detection is triggered in this area, record
the video or snapshot into the local SD card.
Log: If “Save to SD Card” option has been selected for action, you can determine
whether send a message to the specific mail address or FTP site.
E-Mail Subject: The subject of the E-mail will be sent.
Detection Interval: This option provides two functions:
z
The interval time between multiple detections. For example, if the time set to
10 seconds, when the motion detection is triggered at time 10H:05M:10S, the
next detection will be accepted after 10H:05M:20S. The detections between
10H:05M:10S to 10H:05M:19S will not be accepted.
Note: The interval time for the “Save to SD Card” action is equal to or longer
than 30 seconds.
z
If the “Out” is selected for the action, the Interval means “Digital Output On”
period. For example, if Interval set to 20 seconds, when the motion detection
is triggered, the Digital Output will be “On” and lasting for 20 seconds, and
then “Off” automatically.
Enable Motion Detection in Schedule Time: Enable this option will automatic
activate the motion detection with scheduled time and stop the detection in the other
time. Please refer to Schedule page to setup the schedule time.
39
Recommendation of Motion Detection Area
To ensure the Motion Detection works well, and avoid unnecessary trigger, please
follow the rules to draw the Motion Detection Areas:
z The moving object larger than the 50% of the Motion Detection Area, it will be
detected, and the Motion Detection is triggered.
z The moving object smaller than the 50% of the Motion Detection Area, it will not
be detected, and the Motion Detection will not be triggered.
z Recommend use 3 smaller Motion Detection Areas to replace a large area.
Motion!
The moving object smaller than the 50% of the
The moving object larger than the 50% of the motion
motion area, it will not be detected!
area, it will be detected, and the motion is triggered!
To detect the smaller moving object, use 3 motion areas to replace a large motion
area, refer the figure below:
Motion!
The moving object will be detected when it is in any of
the 3 motion areas, and the motion is triggered!
Record File Setting
There are 3 methods to record the event video in SD card or send out via E-mail, FTP:
40
Video: When an event (Motion Detection or Digital Input Detection) is triggered, the
video will be recorded as still image with AVI format. The beginning and ending time of
the file is depending on the Pre and Post Record Time Setting.
Snapshots: This option is available when the “Video Format” of streaming 1 is set as
“JPEG” in Video Format. When an event (Motion Detection or Digital Input Detection)
is triggered, this device will take a series of snapshot with JPG format. The beginning
and ending time of the snapshot pictures is depending on the Pre and Post Record
Time Setting.
Snapshot (Single): This option is available when the “Video Format” of streaming 1 is
set as “JPEG” in Video Format page. When an event (Motion Detection or Digital Input
Detection) is triggered, this device will take a snapshot with JPG format.
Pre and Post Record Time Setting
Configure the record time for the event recording file. For example, if set “Pre Alarm”
as 3 seconds and set “Post Alarm” as 5 seconds, when an event (Motion Detection or
Digital Input Detection) is triggered at time 10H:05M:10S, the video will be recorded
from 10H:05M:07S to 10H:05M:14S.
Note: Limited by the built-in RAM of this device, when data is too much or video
quality set too high, it will cause recording frame drop or decrease the recording
time of post alarm.
To avoid the “frame drop” situation, please reduce the bitrate of the video. We
recommend connect the device in LAN (Local Network) and set the video as
CBR, and Bitrate less than 1.5Mbps.
Network Disconnection Detect
After enable the check box of “Record Video into SD Card”, when the wire network is
disconnected, it will save the video into local SD card.
Note: When this event is happen, the frame rate of live video and recorded video will
be limited to 5FPS. The interval of two video files recorded on SD card is fixed
with 30 seconds.
41
Specific IP Detection
For the use of recording software, this device supports the detection of the connection
of this device and PC. Whenever the connection is disconnected, it records the video
to local SD card to make sure the video recording is continuous.
Detect IP – Enable / Disable: Select to enable or disable this function.
IP Address: The IP address or URL of the PC which installed the recording software.
Detection Interval: The interval time of the detection.
When Dis-connected: After enable the check box of “Record Video into SD Card”,
when the network connection of PC is disconnected, it will save the video into local
SD card.
Note: When this event is happen, the frame rate of live video and recorded video will
be limited to 5FPS. The interval of two video files recorded on SD card is fixed
with 30 seconds.
After set up, click [Apply] to save the settings.
42
Mail & FTP Setting
To send out the event video via E-mail or FTP, please set up the configuration first.
Mail & FTP
Mail Setting
Login Method: This device provides 2 kinds of mail settings. “Anonymous” for the
mail server which doesn’t need login with user name and password. “Account” for the
mail server which needs login with user name and password.
Send Mail Server: The IP address or URL of the send-mail server.
User Name / Password: The user name and password of the sender to login mail
server and send the mail.
Sender’s Mail: The sender’s mail address.
Receiver’s Mail: The receiver’s mail address.
43
BCC Mail: The mail address to receive the mail also.
Mail Port: The port of the mail service. Default is 25.
FTP Setting
FTP Server: The IP address or URL of the FTP server.
User Name / Password: The user name and password to log in the FTP server.
FTP Port: The port of the FTP service. Default is 21.
Store Path: The path to save the sent video.
FTP Mode: Select “PORT” or “PASV to fit the FTP server. “PORT” is for sending file to
an Active FTP server; “PASV” is for sending file to a Passive FTP server.
After set up, click [Apply] to save the settings.
Test the Settings
You can click [Test] button, this device will send a test mail to receiver’s mail box, or
upload a test file to FTP site, to make sure the settings of mail or FTP are correct.
44
I/O Setting
This device provides Digital Input and Digital Output. When the Digital Input is triggered, it
can send the video or snapshot to specific mail address; transmit the video or snapshot to
remote FTP server; trigger the digital out; record video or snapshot into local SD card.
I/O Setting
Digital Input Setting
Input 1 Sensor Type: Select the type of the sensor which connected to the Digital
Input. [N.O] means “Normally Opened”, this type of sensor will be triggered when it is
closed. [N.C] means “Normally Closed”, this type of sensor will be triggered when it is
opened.
Input 1 Trigger Action: Select the actions when the Digital Input is triggered.
z
E-mail: When the Digital Input is triggered, send the recorded video or
snapshot to the specific mail address.
z
FTP: When the Digital Input is triggered, send the recorded video or snapshot
to the specific FTP site.
To set the mail account and FTP site, please refer to Configuration t Event
Handling t Mail&FTP page.
z
Out1: When the Digital Input is triggered, activate the Digital Output 1.
z
Save to SD Card: When the Digital Input is triggered, record the video or
snapshot into to SD card.
Log: If “Save to SD Card” option has been selected for action, you can determine
45
whether send a message to the specific mail address or FTP site.
E-Mail Subject: The subject of the E-mail will be sent.
Detection Interval: This option provides two functions.
z
The interval time between multiple detections. For example, if the time set to
10 seconds, when the Digital Input is triggered at time 10H:05M:10S, the next
trigger will be accepted after 10H:05M:20S. The triggers between
10H:05M:10S to 10H:05M:19S will not be accepted.
z
If the “Out” is selected for the action, the Interval means “Digital Output On”
period. For example, if Interval set to 20 seconds, when the Digital Input is
triggered, the Digital Output will be “On” and lasting for 20 seconds, and then
“Off” automatically.
Enable Digital Input Detection in Schedule Time: Enable this option will automatic
activate the Digital-Input detection with scheduled time and stop the detection in the
other time. Please refer to Schedule page to setup the schedule time.
Digital Output Setting
This section is for setup the parameters of Digital Output.
Note: The following settings are available when manually turn on the Relay Out on
Live-View page.
Output Switch Type: Select the type of the Digital Output switch. [On/Off Switch]
will be triggered to On or Off constantly. [Time Switch] will be triggered to “On” and
lasting for a period time, and then “Off” automatically.
Output Interval: If the Digital Output switch is a “Time Switch”, the lasting time of the
“On” period can be set here.
After set up, click [Apply] to save the settings.
46
Schedule
This function provides the schedule for the following:
z Send Snapshot with the Scheduled Time: automatic send a snapshot to the E-mail
address or FTP site. The interval time can be set.
z Activate and Stop the Motion Detection with Scheduled Time: if the “Enable
Motion Detection in Schedule Time” option in Configuration t Event Handling t
Event Setting t Motion Detection page is enabled, the motion detection will be
activated with scheduled time and stop the detection in the other time.
z Activate and Stop the Digital Input Detection with Scheduled Time: if the “Enable
Digital Input Detection in Schedule Time” option in Configuration t Event
Handling t I/O Setting page is enabled, the Digital-Input detection will be
activated with scheduled time and stop the detection in the other time.
Schedule
Setup Schedule
Select / Unselect All Time: Click [All] of the top-left of the time table to select or
unselect all time. The square in green means the time is selected; the square in
47
light-grey means the time is unselected.
Select / Unselect Specific Time: Click the square of the time table to select or
unselect the specific time. The square in green means the time is selected; the square
in light-grey means the time is unselected.
Send Snapshot with Scheduled Time
Enable / Disable: To enable or disable the schedule function.
Snapshot: Select the method to send out the snapshot.
z
E-mail: Automatic send the snapshot to the specific mail address, the interval
time of the snapshot pictures is depending on the Interval setting.
z
FTP: Automatic send the snapshot to the specific FTP site, the interval time
of the snapshot pictures is depending on the Interval setting.
To set the mail account and FTP site, please refer to Configuration t Event
Handling t Mail&FTP page.
Interval: The interval time of the snapshot pictures. For example, if the time set to 10
seconds, in the scheduled time, the device will send out snapshot every 10 seconds.
File Name: The header of the filename of the snapshot. For example, if you input
“Camera” in this field, the filename of the snapshot will be
“Camera-yyyymmdd-hhmmss.jpg”, “yyyymmdd” indicates the year, month and date;
hhmmss indicates the hour, minute and second.
After set up, click [Apply] to save the settings.
48
SD Card
In this page, if a SD Card is inserted, you can record the video once an event is triggered,
play back and manage the recorded files in the SD Card.
Note: The recorded video contains video only, it does not record the audio.
The SD card must be formatted as FAT or FAT32 file system.
The use of the SD Card will affect the operation of this device slightly, such as
affecting the frame rate of the video.
Install SD Card
Make sure the direction and pushing SD card into the slot completely.
Record
Enable [Save to SD Card] option in Event Setting or I/O Setting page, the video can
be recorded into the card once the event is triggered. When the SD Card is full, it will
remove the earliest file automatically.
49
Playback
When open this page, the date of recorded files shows.
SD Card
To view the recorded files, just click the date, it will show the list of the recorded files.
The “.avi” extension name of the file means this file is a video file; the “.jpg” extension
name means it is a picture file. Click the file to start Microsoft Media Player to play it. If
the bandwidth is lower for playback directly, please right-click on the file and select
[Save As…] to download it to the PC, and then play the downloaded file with
Microsoft Media Player.
Note: the video format is compressed with MPEG4, the PC must install the MPEG4
decoder. You can install “FFdshow” from the included CD for the decoder.
Delete Recorded File
To delete the recorded file, check the check box of the file, then click [Del] button.
50
6. Network Configuration
A. Intranet Only
Connects to PC Directly
If you want to connect the camera to PC directly for the very first time setup, please refer
to the figure below for the connection.
Ethernet Cable
Camera
This device supports Auto-MDI/MDIX,
PC
IP Address: 192.168.1.200
you can use a straight or cross-over
IP Address: 192.168.1.2
Subnet Mask: 255.255.255.0
cable to connect these two devices.
Subnet Mask: 255.255.255.0
Gateway: (Empty)
Gateway: (Empty)
Http Port: 80
RTSP Port: 554
z Connect the camera to PC with Ethernet cable. The camera equips an
Auto-MDI/MDIX network connector, you can use a straight or cross-over Ethernet
cable.
z Refer to Configuration t Network t Network page to configure the IP settings.
z Please make sure the IP address of PC and camera are in the same subnet. Ex.
192.168.1.2 and 192.168.1.200 have the same subnet.
z Set Subnet Mask of PC and camera.
z Clear the Gateway of PC and camera to empty.
For example, if the IP settings have been configured as the above figure, the cameras can
be linked with following addresses:
Client
Camera
Link Address
PC
Camera
http://192.168.1.200
51
Remark
Connects to an Exist LAN
If the camera will be used in a local network (LAN) and don’t allow to access via Internet,
please refer to the figure below for the connection.
Intranet (LAN)
Camera 1
Switch
IP Address: 192.168.1.200
Router or IP Sharing
Subnet Mask: 255.255.255.0
IP Address: 192.168.1.254
Gateway: 192.168.1.254
Subnet Mask: 255.255.255.0
Http Port: 80
RTSP Port: 554
Camera 2
PC
IP Address: 192.168.1.201
IP Address: 192.168.1.2
Subnet Mask: 255.255.255.0
Subnet Mask: 255.255.255.0
Gateway: 192.168.1.254
Gateway: 192.168.1.254
Http Port: 80
RTSP Port: 554
z Connect the cameras to the Switch.
z Refer to Configuration t Network t Network page to configure the IP settings.
z Please make sure the IP address of Router, PC and camera are in the same subnet.
Ex. 192.168.1.2 and 192.168.1.200 have the same subnet.
z Set Subnet Mask of Router, PC and cameras.
z Set Gateway of PC and cameras with the same IP address. Usually, the Gateway is
the IP address of router.
z Set the IP address of a valid DNS into cameras. An invalid DNS will cause the
domain name can’t be resolved and reached, such as email address.
For example, if the IP settings have been configured as the above figure, the cameras can
be linked with following addresses:
Client
Camera
Link Address
Camera 1
http://192.168.1.200
Camera 2
http://192.168.1.201
PC
52
Remark
B. Internet Only
Connects to ADSL with Fixed Public IP Address
If the camera connects to Internet with an ADSL modem and the public IP address of
ADSL is fixed, please refer to the figure below for the connection.
Internet (WAN)
Camera
PC
3G Mobile Phone
IP Address: 60.220.20.250
Subnet Mask: 255.255.255.0
Gateway: 60.220.20.254
Http Port: 80
RTSP Port: 554
ADSL
z Connect the camera to the ADSL modem.
z Refer to Configuration t Network t Network page, configure the IP address,
Subnet Mask, Gateway and DNS with the settings that ISP provided for ADSL
connection.
For example, if the public IP address is “60.220.20.250”, now the camera can be linked
with following addresses:
Client
PC
Link Address
Remark
http://60.220.20.250
With audio:
3G Mobile
rtsp://60.220.20.250/3g
Phone
Without audio:
rtsp://60.220.20.250/3gx
53
Must enable “3GPP Stream” in
Configuration t Video/Audio
t Video Format page
Connects to ADSL with Floating Public IP Address (PPPoE)
If the camera connects to Internet with an ADSL modem and the public IP address of
ADSL is variable, the camera can use PPPoE function for the connection.
Internet (WAN)
Camera
PC
3G Mobile Phone
Configure the PPPoE Setting
ADSL
z Connect the camera to the ADSL modem.
z Refer to Configuration t Network t PPPoE page to configure the PPPoE settings.
z The camera will automatic dial-up and get the public IP address from ISP.
z If you have enable “Send Mail After Dialed” function, the camera will send an email
to tell you the current public IP address.
For example, if the public IP address is “60.220.20.250”, now the camera can be linked
with following addresses:
Client
PC
Link Address
Remark
http://60.220.20.250
With audio:
3G Mobile
rtsp://60.220.20.250/3g
Phone
Without audio:
rtsp://60.220.20.250/3gx
Must enable “3GPP Stream” in
Configuration t Video/Audio
t Video Format page
Using DDNS Function
Since the public IP address is variable, you can enable DDNS function to get a fixed
URL to instead of the IP address, refer to Configuration t Network t DDNS page to
configure and enable the DDNS function.
54
After enable the DDNS, assume the registered URL is “test.dyndns.org”, now the
camera can be linked with following URLs:
Client
PC
Link Address
Remark
http://test.dyndns.org
With audio:
3G Mobile
rtsp://test.dyndns.org/3g
Phone
Without audio:
rtsp://test.dyndns.org/3gx
55
Must enable “3GPP Stream” in
Configuration t Video/Audio
t Video Format page
C. Intranet + Internet
Connects to Internet with Fixed Public IP Address
If the camera will be added into a local network (LAN), and will be accessed via both
Intranet and Internet, please refer to the figure below for the connection.
Intranet (LAN)
Internet (WAN)
PC1
PC2
3G Mobile Phone
IP Address: 192.168.1.2
Camera 1
Subnet Mask: 255.255.255.0
Gateway: 192.168.1.254
IP Address: 192.168.1.200
Subnet Mask: 255.255.255.0
Gateway: 192.168.1.254
Http Port: 80
Switch
ADSL
RTSP Port: 554
Public IP: 60.220.20.250
To allow the cameras can be linked through Internet, set
the NAT, Port Forwarding or Virtual Server as following:
Camera 2
WAN
IP Address: 192.168.1.201
Subnet Mask: 255.255.255.0
Gateway: 192.168.1.254
Router or IP Sharing
Http Port: 80
IP Address: 192.168.1.254
RTSP Port: 555
Subnet Mask: 255.255.255.0
LAN
Port
IP Address
Port
3081
192.168.1.200
80
554
554
192.168.1.200
3082
192.168.1.201
80
555
192.168.1.201
555
z Assume the local network will be connected to Internet with ADSL connection, first,
configure the router (or IP sharing) with the ADSL connection. Please refer to the
user’s manual of router for the configuration.
z Connect the cameras to the Switch.
z Refer to Configuration t Network t Network page to configure the IP settings.
z Configure the cameras with different IP address. Ex. assign camera1 to
192.168.1.200, and assign camera2 to 192.168.1.201
z Please make sure the IP address of Router, PC and cameras are in the same subnet.
Ex. 192.168.1.2 and 192.168.1.200 have the same subnet.
56
z Set Subnet Mask of Router, PC and cameras.
z Set Gateway of PC and cameras with the same IP address. The Gateway is the IP
address of router.
z Set the IP address of a valid DNS into cameras. An invalid DNS will cause the
domain name can’t be resolved and reached, such as email address.
z Configure the cameras with different RTSP port. Ex. assign camera1 with port 554,
and assign camera2 with port 555.
z To allow the cameras can be linked through Internet, set router’s NAT (Network
Address Translation), Port Forwarding or Virtual Server as following:
WAN Side
LAN Side
Camera
Remark
Port
Protocol IP Address
Port
Protocol
3081
TCP
192.168.1.200
80
TCP
Port for Web page
554
TCP
192.168.1.200
554
TCP
Port for Video and
Audio
3082
TCP
192.168.1.201
80
TCP
Port for Web page
555
TCP
192.168.1.201
555
TCP
Port for Video and
Audio
Camera 1
Camera 2
For example, if the IP settings have been configured as the above figure, the cameras can
be linked with following addresses:
Clients in
Intranet
Camera
Link Address
Camera 1
http://192.168.1.200
Camera 2
http://192.168.1.201
Camera
Link Address
Camera 1
http://60.220.20.250:3081
Camera 2
http://60.220.20.250:3082
Camera 1
With audio:
rtsp://60.220.20.250:554/3g
Without audio:
rtsp://60.220.20.250:554/3gx
Remark
PC1
Client from
Internet
Remark
PC2
3G Mobile
Phone
57
Must enable “3GPP
Stream” in Configuration
t Video/Audio t Video
Format page
Camera 2
With audio:
rtsp://60.220.20.250:555/3g
Without audio:
rtsp://60.220.20.250:555/3gx
Connects to Internet with Floating Public IP Address
If the public IP address of ADSL connection is variable, you can enable DDNS function to
get a fixed URL to instead of the IP address.
Note: only one device can enable the DDNS function in the local network (LAN), multiple
devices use DDNS will update to the DDNS provider too frequently, and the DDNS
provider will block your URL.
If the router has DDNS function, use router’s DDNS function is recommended. Please
refer to the user’s manual of router for the configuration.
If the router doesn’t have DDNS function, use one of the cameras DDNS function is
recommended. Refer to Configuration t Network t DDNS page to configure and enable
the DDNS function.
After enable the DDNS, assume the registered URL is “test.dyndns.org”, now the cameras
can be linked with following URLs:
Client from
Internet
Camera
Link Address
Camera 1
http://test.dyndns.org:3081
Camera 2
http://test.dyndns.org:3082
Camera 1
With audio:
rtsp://test.dyndns.org:554/3g
Without audio:
rtsp://test.dyndns.org:554/3gx
Camera 2
With audio:
rtsp://test.dyndns.org:555/3g
Without audio:
rtsp://test.dyndns.org:555/3gx
Remark
PC2
3G Mobile
Phone
58
Must enable “3GPP
Stream” in Configuration
t Video/Audio t Video
Format page
7. Factory Default
To recover the default password and other settings, please follow the steps:
1. Power off this device.
2. Remove the cover of device.
3. Push the "Factory Default Button" as shown on the picture below, and keeping
push it and don't release.
Factory Default Button
4. Power on the device. Don’t release the button during the system booting.
5. It will take around 30 seconds to boot the device.
6. Release the button when the device finishes proceed.
7. Re-login the device using the default username (admin) and password (admin).
8. The IP address is probably restored to the default, in this case, use IP Search
utility to search the device. The default IP address is 192.168.1.200
59
Compatible List of SD Card
The Compatible List of SD Card
SDHC Card Compatible List
Vendor
Test Result
SanDisk 4G
OK
SanDisk 8G
OK
Transcend 4G
OK
Transcend 8G
OK
Transcend 16G
OK
ADATA 8G
OK
Toshiba 4G
OK
Status
SD Card Compatible List
Vendor
Test Result
Status
SanDisk 128M
OK
Recommend
SanDisk 256M
OK
Recommend
SanDisk 512M
OK
Recommend
SanDisk 1G
OK
Recommend
SanDisk 2G
OK
Recommend
Transcend 128M 80X
OK
Recommend
Transcend 256M 80X
OK
Recommend
60
Vendor
Test Result
Status
Transcend 512M 80X
OK
Recommend
Transcend 1G 80X
OK
Recommend
Transcend 2G 150X
OK
Recommend
Transcend 4G 150X
OK
Recommend
A-DATA 512M
OK
A-DATA 4G
OK
Toshiba 128M
OK
Toshiba 256M
OK
Kingmax 256M
OK
PRETEC 128M
OK
Photofast 256M
OK
Phast 256M
OK
PK 128M
OK
READY 128M
OK
SiliconPower 128M
OK
SiliconPower 256M
OK
TEKQ 128M
OK
TEKQ 256M
OK
TwinMOS 128M
OK
TwinMOS 256M
OK
UMAX 128M
OK
UMAX 256M
OK
Blast 128M
OK
61
Vendor
Test Result
Status
U-TEK 128M
OK
GiGATEK 128M
OK
Kingston 128M
OK
The speed is slower
Kingmax 256M
OK
The speed is slower
Kingston 512M
OK
The speed is slower
Kingston 1G
OK
The speed is slower
AFMC 128M
Fail
Card Reader also Fail
PDA 128M
Fail
Card Reader also Fail
Apacer 128M
Fail
JENOPTIK 128M
Fail
FDC 256M
Fail
62