1
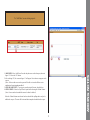
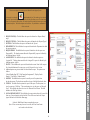
To submit a ‘New Request’, select the
button from the tool bar. The form shown in
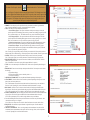
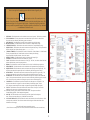
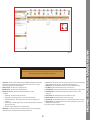
figure 1.0 will appear. Complete the form meeting the required criteria. Field descriptions are listed below. Once completed and submitted, the request will be sent to the system owner for approval and
assignment. The requestor and any additional recipients will receive notice once the request has
been approved. All recipients on the request will continue to receive notices as the request is
processed up until the request is completed and signed off.
1. PRIORITY: Select the priority of the request from the drop down menu (low, medium, high, immediate.)
(Note: If selecting immediate as the priority, a ‘Requested Due Date’ is required.)
2. TYPE: Select the type of request from the drop down menu.
a. General Desktop Support - This request is dedicated to desktop issues and support. Select this
option for requests such as installing a printer, resolving a scanner issue, installing a program for specific
use by a particular employee, etc. This should not relate to any system, or shared folders/programs.
b. Network Support Request - This request is dedicated to network issues and support. Select this
option for requests such as installing shared programs/icons on a computer, gaining access to a “shared
folder”, server related issues, or to reset a username or password in any given system.
c. Product Development Support - This request is dedicated to developing and enhancing any system.
Select this option for requests such as adding forms, updating information or enhancing processes.
d. Technical Service Request - This request is dedicated to any problems or issues in any system.
Select this option for requests such as reporting incorrect information within any system, Cold Fusion
Errors, or any other errors generated by the system.
(Note: The task type’s are paired with systems in which they are associated with. If the required system is not
available, simply select a different task type. If the required system is still not available, contact the system owner.)
3. SYSTEM: Select the ‘System’ in which the problem or change occurs in, from the drop down menu.
(Note: If the required system is not on the drop down menu, contact the Product Support System owner.)
4. REQUESTED DUE DATE: If the request has a due date or deadline, enter it within this field. Utilize the
calendar to the right of the field.
(Note: If ‘Immediate’ is selected as the priority, this ‘Requested Due Date’ is required.)
5. TITLE: Enter a clear and descriptive title within this field. The title needs to explain the problem/change at a
glance.
6. DESCRIPTION: Enter a clear and descriptive description within this field. The description needs to include the following:
a. The problem or change.
b. The steps taken within the system to obtain the problem. -or
c. The reason for the change.
7. ADDITIONAL INFORMATION: Enter any additional information pertaining to the description.
8. ATTACHMENTS: Select the ‘Browse’ button to attach any documents pertaining to the request (ex: screen prints, forms, e-mail correspondence, etc.)
(Note: If the documents to be attached are not available at the time of submission, they can be attached at a
later time. See the ‘Uploading Files’ section of this manual to attach files/documents to a request.)
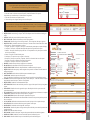
9. MAIL GROUP: Select the ‘View List’ button to choose from the list of mail groups within the Product
Support System. This will notify anyone within the mail group of notes and attachments added to the request.
(Note: If the desired mail group is not available, see the ‘Mail Group’ section to add/modify a mail group.)
10. SEND TO (ADDITIONAL): Select the ‘Employees’ button to choose from the list of users within the Product
Support System. This will notify anyone within this field of notes/attachments added to the request.
(Note: If the required employee is not on the list, simply add the necessary e-mail address.)
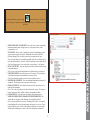
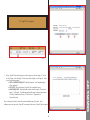
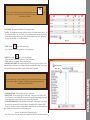
11. Select the ‘Submit Request’ button if the request meets the above criteria and is ready for submission. Once
selected the screen in figure 1.1 will appear.
(Note: If there are too many error to be revised, the ‘Reset Form’ button can be used to clear the form.)
12. REQUEST ID: After submitted, a request id number is assigned to the request. Note this number for
tracking/search purposes.
13. ADD FILE ATTACHMENTS: This is a second opportunity to add an attachment. Select the ‘Add File
Attachments’ button to add attachments to the request such as error messages, forms, e-mail correspondence,
etc. See the ‘Uploading Files’ section for further instruction.
Figure 1.0
NEW REQUEST
1
Figure 1.1