1
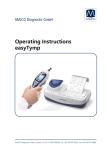
Operation Manual easyTymp Operation Manual easyTymp Contents 1 Introduction ........................................................................................... 3 1.1 Quick Start ...................................................................................... 4 1.2 Description and intended Use easyTymp ........................................ 5 1.3 Features of the easyTymp Pro Version ........................................... 5 1.4 Safety Notes ................................................................................... 6 2 Impedance measurements ................................................................... 8 2.1 Tympanometry ................................................................................ 8 2.2 Acoustic Reflex ............................................................................... 8 2.3 easyTymp Pro Version: Eustachian Tube Function Test ................. 9 2.4 easyTymp Pro Version: Acoustic Reflex Decay .............................. 9 3 Getting started..................................................................................... 10 3.1 PC system requirements ............................................................... 10 3.2 Supported Software ...................................................................... 10 3.3 Unpacking and inspection ............................................................. 10 3.4 System installation ........................................................................ 12 3.4.1 Hardware installation.................................................................................. 12 3.2.2 Software ..................................................................................................... 17 3.5 Preparing the test ......................................................................... 18 3.5.1 Patient Instruction ...................................................................................... 18 3.5.2 Visual inspection of the ear canal............................................................... 18 3.5.3 Handling the eartips ................................................................................... 18 3.5.4 easyTymp Pro Version: Placing and using the Shoulder Box .................... 19 3.5.5 easyTymp Pro Version: Placement of the Contralateral Phones ............... 20 3.6 Cleaning the probe tip ................................................................... 20 4 Operating easyTymp ........................................................................... 22 4.1 Operating Panel ............................................................................ 22 4.2 Getting started .............................................................................. 22 4.3 Probe status indication.................................................................. 22 4.4 Operating easyTymp..................................................................... 23 8111254-6_OM_easyTymp_e_15d 1 05/15 Operation Manual easyTymp 4.4.1 Test ............................................................................................................ 24 4.4.2 Select Test Screen ..................................................................................... 25 4.4.3 Done .......................................................................................................... 26 4.4.4 Advanced Testing: easyTymp Pro Version ................................................ 26 4.4.5 Select Patient & Save ................................................................................ 28 4.4.6 Edit New ..................................................................................................... 28 4.4.7 View Patients ............................................................................................. 29 4.4.8 View Details ............................................................................................... 30 4.4.9 Edit Details ................................................................................................. 30 4.4.10 View Results ............................................................................................ 31 4.4.11 View Results ............................................................................................ 31 4.5 Setup ............................................................................................ 32 4.5.1 Setup Language ......................................................................................... 32 4.5.2 Setup Date & Time ..................................................................................... 33 4.5.3 Setup easyTymp ........................................................................................ 33 4.5.4 Setup Printer .............................................................................................. 34 4.5.5 Setup Clinic Info ......................................................................................... 34 4.5.6 Setup License ............................................................................................ 35 4.5.7 Setup Patient Management ........................................................................ 36 4.5.8 About.......................................................................................................... 36 4.6 easyTymp Pro Version: Shoulder Box button................................ 36 5 Warranty, Maintenance and Service .................................................. 37 6 Disinfection ......................................................................................... 37 7 Safety Regulations .............................................................................. 37 7.1 Electrical safety............................................................................. 37 7.2 Measurement Safety ..................................................................... 37 7.3 Instrument Handling ...................................................................... 37 7.4 Operation ...................................................................................... 38 7.5 Patient Safety ............................................................................... 38 8 Technical Data ..................................................................................... 39 9 Test Protocols ..................................................................................... 44 10 Troubleshooting ................................................................................ 46 11 Appendix A ........................................................................................ 48 8111254-6_OM_easyTymp_e_15d 2 05/15 Operation Manual easyTymp 1 Introduction Thank you for purchasing a quality product from the MAICO product family. The easyTymp is designed and manufactured to meet all quality and safety requirements. When designing the easyTymp we placed particular importance on making it a userfriendly device. The intent was to make its operation is easy to learn, thus making the device simple and easy to operate. This user manual is meant to make it as easy as possible for the operator to become familiar with the operation and functions of the easyTymp when performing tympanometry and acoustic reflex tests. If you have questions or suggestions for further improvements, please do not hesitate to contact us. Your MAICO Team Note: Although almost attention has been given to ensure the accuracy of the operating manual, some minor errors may still exist. We apologize for any inconvenience this may cause. 8111254-6_OM_easyTymp_e_15d 3 05/15 Operation Manual easyTymp 1.1 Quick Start “Select Test“ – Test screen – Choose „Select Test“ (Figure 2) Turning on the unit (Figure 1) Figure 2 Figure 1 Select “easyTymp” (Figure 3) Choose „Language“ in the Setup Menu (Figure 4) Figure 3 Figure 4 Setup language (Figure 5) Adjust language (Figure 6) Figure 6 Figure 5 Save language (Figure 7) Figure 7 8111254-6_OM_easyTymp_e_15d 4 05/15 Operation Manual easyTymp Figure 8 Note: Please note that the battery needs to be charged for a minimum period of approximately 6 hours prior to first use of the easyTymp handheld tympanometer. To charge the battery please place the easyTymp into the cradle and connect the cradle to the mains power with the use of the easyTymp power supply provided. 1.2 Description and intended Use easyTymp The easyTymp is an automatic middle ear analyzer, well suited to perform tympanometry and screen acoustic reflexes on people of all ages. easyTymp provides an optional 1kHz probe tone for testing newborns. The purpose of the easyTymp test system is to provide a rapid tympanometry measurement, document the presence of acoustic reflexes at several frequencies, and determine Eustachian tube function. The easyTymp is intended to be used by hearing healthcare professionals (i.e. ENT doctors, audiologists) and other trained personnel such as medical technicians neonatal and school nurses. The easyTymp cradle serves as a docking and recharging station. The easyTymp docking station is available in two versions, one with the ear tip box and one with an integrated printer. Using the included Software, the handheld unit will transfer data to a PC via USBconnection while in the docking station, or it can also transfer data directly via USB cable when no docking station is available. 1.3 Features of the easyTymp Pro Version The easyTymp Pro Version enables contralateral acoustic reflex measurements, reflex decay and eustachian tube function testing when the optional Contra Probe is purchased and the additional license is activated. 8111254-6_OM_easyTymp_e_15d 5 05/15 Operation Manual easyTymp 1.4 Safety Notes The easyTymp should always be operated in a room with minimal magnetic influence, to ensure that examinations are not disturbed by external noise. Electro-medical instruments that emit strong electromagnetic fields (e.g. microwaves, radiotherapy devices) can affect the operation of the easyTymp. Therefore, the operation of these instruments in close proximity to the easyTymp should be avoided at all times. Note: The examination room should have a normal temperature between 15˚C/ 59˚F and 35˚C/ 95˚F. If the instrument has cooled down during transportation, please wait for it to warm up to room temperature before operation (warm-up time: less than 10 minutes). MAICO easyTymp is specified according to EN 60601-1. Protection against electrical hazard is guaranteed only when the instrument is connected to a grounded safety. Please note that during operation, the instrument should always be connected to a batteryoperated or mains-operated notebook computer that complies with EN 60601-1 or EN 60950-1. In the event that a main cable, connector or wall socket is damaged, please do not use the instrument under any circumstance. Allen key for adjustable feet on the cradle unit: An Allen key is enclosed in the packaging of the ear tip box to enable adjustment of the pair of adjustable feet located on the bottom of the cradle. Please ensure that the Allen key is not permanently stored in the ear tip box, that the Allen key is only used to adjust the setting of the adjustable feet on the cradle and that this tool is not used for any other purpose on the easyTymp unit. ATTENTION: PLEASE READ THE ENTIRE MANUAL CAREFULLY BEFORE OPERATING THIS INSTRUMENT. Please only use this instrument as described in the manual. Please familiarize yourself with the instrument and its operation before using. Should defects or damages be suspected, please do not, under any circumstances, use or attempt to fix the instrument yourself. To guarantee that the tympanometer works properly, the instrument has to be checked and calibrated at least once a year. We propose however to do a daily calibration prior to testing patients. 8111254-6_OM_easyTymp_e_15d 6 05/15 Operation Manual easyTymp The service and calibration must be performed by an authorized service center. In accordance with the regulations of the EU medical directive we will drop our liability if these checks are not done. The use of non-calibrated tympanometers is not recommended, as uncalibrated instruments may lead to faulty measurements and sometimes even damage the patient’s hearing. Take note to ensure that all the accessories have been properly connected. To avoid person-to-person cross contamination of communicable diseases, parts that come in direct contact with the patient (i.e. eartips) should only be used one time. Recycle/Disposal In accordance with the Electronic Equipment Act for disposal of electronic equipment, the customer is obliged to dispose of the used consumables, according to appropriate regulation at own cost. Follow your respective local laws and regulations for the proper deposal of batteries and any other parts of this system. 8111254-6_OM_easyTymp_e_15d 7 05/15 Operation Manual easyTymp 2 Impedance measurements 2.1 Tympanometry Tympanometry is the objective measurement of the tympanic membrane (TM) and middle ear mobility (compliance) and pressure within the middle ear system. During the test, a low-pitched probe tone (226 Hz) is presented to the ear canal by means of the hand-held probe. This tone is used to measure the change in compliance in the middle ear system while the air pressure is varied automatically from a positive value (+200 daPa) to a negative value (-400 daPa max.). Maximum compliance of the middle ear system occurs when the pressure in the middle ear cavity is equal to the pressure in the external auditory canal. This is the highest peak of the curve as it is recorded on the chart. The position of the peak on the horizontal axis and on the vertical axis of the chart will provide diagnostic information regarding the function of the middle ear system. Gradient calculations are reported as the Tympanogram width at half of peak compliance expressed in daPa. A “limits” box is available on both the display and printout to aid in diagnosis. Compliance is measured with respect to an equivalent volume of air, with the scientific quantity milliliter (ml) for 226 Hz and mmho for 1000 Hz. Air is measured in deca-Pascals (daPa). Note: 1.02 mmH2O = 1.0 daPa. 2.2 Acoustic Reflex An acoustic reflex, or contraction of the intratympanic muscles, occurs under normal conditions when a sufficiently intense sound is presented to the auditory pathway. This contraction of the muscle causes a stiffening of the ossicular chain which changes the compliance of the middle ear system. As in Tympanometry, a probe tone is used to measure this change in compliance. When the stimulus presentation and measurement are made in the same ear by means of the probe, this acoustical reflex is referred to as an ipsilateral acoustic reflex. For best results, this reflex measurement is automatically conducted at the air pressure value where the compliance peak occurred during the tympanometric test. Stimulus tones of varying intensities at 500, 1000, 2000 or 4000 Hz are presented as short bursts. If a change in compliance greater than 0.03 ml is detected, a reflex is considered present. Because this is an extremely small compliance change, any movement of the probe during the test may produce an artifact (false response). 8111254-6_OM_easyTymp_e_15d 8 05/15 Operation Manual easyTymp 2.3 easyTymp Pro Version: Eustachian Tube Function Test The Eustachian tube connects the middle ear with the nasopharynx. Its function is to equalize pressure between the middle ear and the atmosphere. The Eustachian tube test can be used to determine if the Eustachian tube is functioning properly in patients with an intact tympanic membrane or in patients who have a perforated TM or pressure equalization tubes. 2.4 easyTymp Pro Version: Acoustic Reflex Decay Acoustic reflex decay, also known as adaptation, is the measurement of the acoustic reflex response during sustained stimulus presentation. 8111254-6_OM_easyTymp_e_15d 9 05/15 Operation Manual easyTymp 3 Getting started 3.1 PC system requirements Processor: Memory: Graphic display: Operating system: Connection: Intel Pentium 4 / Celeron 1.4 GHz 1 GB RAM 1024 x 768 Windows XP Professional (SP3), Windows 7, Professional or Ultimate Version for 32 und 64 Bit Computer USB 1.1 or higher 3.2 Supported Software Measuring module: Patient Management Software: MAICO Impedance Software MAICO database, GDT (Germany), NOAH 3 (up to Windows 7), NOAH 4 3.3 Unpacking and inspection Check the packaging and content for damage. Prior to shipping, the easyTymp was carefully packed and inspected. However, it is good practice to thoroughly inspect the outside of the shipping box for signs of damage. If any damage is noted, please notify the carrier immediately. Please remove the MAICO instrument from the shipping box by lifting the cardboard package on the end flaps. Holding the package securely, fold the side flaps upwards to loosen the tension in the plastic film. The instrument can now be easily removed from the plastic packaging without the use of scissors or other sharp tools. SAVE ALL THE ORIGINAL PACKING MATERIAL AND THE SHIPPING CONTAINER SO THE INSTRUMENT CAN BE PROPERLY PACKED IF IT NEEDS TO BE RETURNED FOR SERVICE OR CALIBRATION. Notify the carrier immediately if any mechanical damage is noted. This will insure that a proper claim is made. Save all packing material so the claim adjuster can inspect it as well. Notify your dealer or MAICO when the adjuster has completed the inspection. Please check that all accessories listed below have been received in good condition. If any accessories are missing or damaged, immediately notify your dealer or MAICO. 8111254-6_OM_easyTymp_e_15d 10 05/15 Operation Manual easyTymp Standard Accessories: (1) easyTymp handheld unit (1) Probe (1) Probe Tip (replacement) (1) 1 Rechargeable battery (1) Power supply unit for easyTymp handheld unit (only when operating without cradle) (1) Eartip box (configuration see below) (1) Test cavity (1) Carrying case (1) Software Kit MAICO Impedance Software (1) Operating manual (1) Short user guide Standard configuration of Eartip box: (10) Eartip flanged 3-5 mm / 10 pieces (red) (10) Eartip mushroom 7 mm / 10 pieces (blue) (10) Eartip mushroom 9 mm / 10 pieces (green) (10) Eartip mushroom 11 mm / 10 pieces (blue) (10) Eartip mushroom 13 mm / 10 pieces (green) (5) Eartip mushroom 15 mm / 5 pieces (blue) (5) Eartip mushroom 19 mm / 5 pieces (yellow) (5) Eartip umbrella 15 mm / 5 pieces (red) (5) Eartip umbrella 19 mm / 5 pieces (blue) (1) MAICO cleaning tool for probe (1) MAICO eartip removal tool Additional accessories for easyTymp: - External probe (35cm) - Wall Mount Kit for cradle with integrated eartip box, power supply unit and additional rechargeable battery - Cradle with integrated printer, power supply unit and additional rechargeable battery Additional accessories for easyTymp Pro Version: - Contra Probe (140 cm) - CIR55 (Contralateral Earphone) - EARtone A3 (Contralateral Earphone) - DD45 (Contralateral Headset) Additional Licenses for the easyTymp: - License for high frequency probe tone of 1 kHz Consumable material: - Printer paper 8111254-6_OM_easyTymp_e_15d 11 05/15 Operation Manual easyTymp 3.4 System installation 3.4.1 Hardware installation 3.4.1.1 Installing the cradle 1 = USB in; 2 = USB out; 3 = USB out; 4 = USB out 5 = Power; 6 = Follow the instructions for use Figure 7 Put the enclosed mains cable into the power connection socket 5 and the mains plug into a power socket. 3.4.1.2 Cradle indication lights Depending on the version (with or without printer) the cradle has up to three indication lights. easyTymp LED shows solid blue when it is placed inside the cradle. The battery, however, will be charged automatically and will be fully charged after approx. three hours. The current battery state of charge may be seen on the easyTymp display. Battery LED shows solid blue when the spare battery in the cradle is fully charged. The LED will flash while the battery is charging. Figure 8 Printer LED is red when a printer problem occurs. See also Figure 8. 3.4.1.3 Installing paper in the thermal printer Step 1 – Push button to open the printer cover (Figure 9). Figure 9 8111254-6_OM_easyTymp_e_15d 12 05/15 Operation Manual easyTymp Step 2 – Pull the blue lever upwards (Figure 10). Figure 10 Step 3 – Insert paper roll into the compartment with its loose end to the front of the printer. Position the loose end into the printer roll and raise it by rotating the printer roll with your finger (Figure 11). Figure 11 Step 4 – Push the blue lever down (Figure 12). Figure 12 Step 5 – Close the printer cover (Figure 13). Figure 13 8111254-6_OM_easyTymp_e_15d 13 05/15 Operation Manual easyTymp 3.4.1.4 Mounting the cradle on the wall In order to mount the cradle on the wall, an optional wall mount kit is available (Figure 14). Figure 14 3.4.1.5 Installing the easyTymp NOTE: Please note that the battery needs to be charged for a minimum of approximately 6 hours prior to first use of the easyTymp hand-held tympanometer. The battery compartment is opened by gently pressing the indentation and pulling the cover downwards (Figure 15). Figure 15 Place the battery inside the compartment. Making sure the battery contacts are correctly placed (Figure 16). Figure 16 The removal-tab, attached to the back of the battery case, should be placed on the top of the battery to remove the battery easily (Figure 17). Figure 17 Replace the lid on the easyTymp and push it upwards to close the battery compartment (Figure 18). It is recommended that the battery is removed from the instrument when it is not in use for extended time periods. Figure 18 8111254-6_OM_easyTymp_e_15d 14 05/15 Operation Manual easyTymp 3.4.1.6 Charging the battery The spare battery is stored and charged in the back of the cradle (Figure 19). Battery LED will show solid blue when the spare battery in the cradle is fully charged. The LED will flash as long as the battery is charging. Figure 19 Please observe the following precautions: - Keep the battery fully charged. - Do not place the battery in fire or apply heat to the battery. - Do not damage the battery or use a damaged battery. - Do not expose the battery to water. - Do not short circuit the battery or reverse the polarity. - Use only the charger provided with the easyTymp - Please see the following section for estimated charging times. 3.4.1.7 Battery life The following table gives an estimate of the charging time (CT) in hours for the battery. Be aware that negative numbers mean that the battery is discharging. Charge times are the same for the spare battery in the cradle and the battery in the cradled easyTymp. CT through cradle up to 80 % CT through CT through CT through USB (PC) up cradle up to USB (PC) up to to 80 % 100 % 80 % Off 1,5 3,8 2,3 5,7 On (pump off) 2,8 -32 4,1 -47 8111254-6_OM_easyTymp_e_15d 15 05/15 Operation Manual easyTymp 3.4.1.8 Changing probes To release the probe, press the circular button on the back of the instrument and pull the probe out (Figure 20). Note: Do not pull on the extension cable as this can damage the tubing connection! Figure 20 Connect the probe to the easyTymp by lining up the red triangles and pushing the probe into the unit (Figure 21). Figure 21 The probe can be attached to the extension cable by correctly lining up the pins and clicking the probe into the end of the extension cable (Figure 22). Figure 22 3.4.1.9 easyTymp Pro Version: Connecting the Contralateral Headphone or Insert Phone To measure contralateral reflexes it is necessary to connect the Shoulder Box to the easyTymp as described previously. 8111254-6_OM_easyTymp_e_15d 16 05/15 Operation Manual easyTymp Find the jack labeled “Contra” on the Shoulder Box. Insert the contralateral transducer into this jack ( Figure 23 Figure 23). The Contra Probe must be calibrated to the selected contralateral transducer type. This calibration is already completed if the Contra Probe and transducer are purchased at the same time. Otherwise the Contra Probe and transducer need to be sent to an authorized service center to perform the calibration. Note: Three different contra phones can be purchased for use with the easyTymp. The contra phones need to be calibrated to the Contra Probe before use. If a new contra phone should be used a recalibration of the Contra Probe is necessary. We strongly advise against using an uncalibrated Contra Phone! Uncalibrated instruments may lead to faulty measurements and possibly damage the patient’s hearing. 3.4.1.10 Calibration cavities The easyTymp comes with a separate test cavity which can be used to quickly check the probe calibration validity. The test cavity includes 0.2 ml, 0.5 ml, 2.0 ml and 5.0 ml cylinders. We strongly recommended calibrating each probe at least once a year. If a probe is handled roughly (e.g. has fallen onto a hard surface) it might need to be calibrated again. Calibration values of the probe are stored in the probe itself. Therefore probes can be exchanged at all times. 3.2.2 Software You can view and store all your measurements with the MAICO Impedance Software Module. Note: For installation and functions see the software manual. 8111254-6_OM_easyTymp_e_15d 17 05/15 Operation Manual easyTymp 3.5 Preparing the test 3.5.1 Patient Instruction Otoscopic examination of the patient’s ear canals should be performed prior to testing. Excessive cerumen or vernix in the ear canals may interfere with the test and give invalid or incomplete results. Patients with excessive cerumen, debris, or foreign bodies in the ear canals should be referred to an audiologist or physician for removal of the blockage prior to testing. Excessive hair may need to be trimmed. Make sure that the patient is comfortably seated in a chair or on an examination table if necessary. Small children may feel more comfortable sitting on a parent's lap. Show the probe to the patient and then explain the following: “The aim of the test is to test the mobility of the eardrum.The tip of the probe will be inserted into and seal the ear canal. A small amount of air will flow through the probe to move the eardrum; it produces a sensation equal to pressing a finger slightly into the ear canal. One or more tones will be heard during the test. No participation is expected from the patient. Coughing, talking and swallowing will interfere with test results.” 3.5.2 Visual inspection of the ear canal Check the external ear canal with an otoscope to ensure that it is clear, as debris such as wax or hair might negatively impact the test results. 3.5.3 Handling the eartips Following otoscopy select an eartip of the appropriate size for the patient’s canal size and shape from the eartip kit, and press the eartip tightly onto the probe tip. Always use eartips from MAICO or Sanibel. Eartips are for single patient use only. 8111254-6_OM_easyTymp_e_15d 18 05/15 Operation Manual easyTymp 3.5.4 easyTymp Pro Version: Placing and using the Shoulder Box A clip is located on the back of the Shoulder Box which can be attached to the patient’s clothing (Figure 24). For most patients it is easiest to clip the Shoulder Box to the patient. Figure 24 Press the button on the Shoulder Box to start or stop/pause the current measurement or switch between right and left when the probe is not inserted to the ear (Figure 25). Figure 25 8111254-6_OM_easyTymp_e_15d 19 05/15 Operation Manual easyTymp 3.5.5 easyTymp Pro Version: Placement of the Contralateral Phones 2 transducers are available for purchase to perform contralateral measurements. If the CIR55 insert phone is used, place the proper eartip on the insert before inserting the phone into the non test-ear. Figure 26 If the DD45 is used, place the head band over the patient’s head. The audiometric headphone is placed over the non test-ear (or contralateral reflex ear). Figure 27 3.6 Cleaning the probe tip In order to secure correct impedance measurements it is important to make sure that the probe system is kept clean at all times. Therefore please follow the illustrated instructions below on how to remove cerumen from the probe tip’s small acoustic and air pressure channels. Never clean the probe tip while the tip is still attached to the probe (Figure 28). Unscrew the probe cap by turning it in a counter clockwise direction. Figure 28 Take the plastic probe tip out of the probe (Figure 29). Figure 29 Take the cleaning tool apart to find the thin brush and thin rigid plastic cord (Figure 30). Figure 30 8111254-6_OM_easyTymp_e_15d 20 05/15 Operation Manual easyTymp Use the plastic cord or brush to push debris out of the probe tip (Figure 31). Always enter the probe tip from the rear to avoid accumulation of debris inside the vents. Figure 31 Place the probe tip back onto the probe (Figure 32). Make sure that the plastic pegs are inserted into the appropriate corresponding cavities. Figure 32 Screw the probe cap back on the probe (Figure 33). The force of tightening the cap will tighten the screw sufficiently. Never use tools to fix the probe cap! If any blockage or damage occurs to the sealing gasket, the probe system can only be serviced by MAICO. Figure 33 8111254-6_OM_easyTymp_e_15d 21 05/15 Operation Manual easyTymp 4 Operating easyTymp 4.1 Operating Panel Function Keys: Top buttons: Function of the keys is related to the functions indicated in the display above the individual function key. (e.g. Select Test, Patient, Stop …) Arrow Keys: Turn on easyTymp by pressing the right or left arrow key. Turn off easyTymp by pressing both keys at the same time. Up and down buttons: Scroll through the different easyTymp settings menu, test protocols or scroll up and down on the display. 4.2 Getting started To get started, take the easyTymp out of the cradle. By default it will turn on automatically. If you don’t store the easyTymp in the cradle, press either the red or blue arrow key to switch the device on. To switch easyTymp off, press both red and blue arrow keys together and hold for one second. easyTymp will always start within the test screen, ready to start a measurement. It will always default to the same protocol as previously used. 4.3 Probe status indication If you use the optional external probe the light at the back of the probe indicates the probe status with the following colors: Red – Right ear is selected. Probe is out of ear. Blue – Left ear is selected. Probe is out of ear. Green – Probe is in the ear and is sealing, test is running. Yellow – Probe is in the ear and blocked or leaking. 8111254-6_OM_easyTymp_e_15d 22 05/15 Operation Manual easyTymp White – The probe has just been attached. Probe status is unknown. The probe status stays white in hand held use if the easyTymp is not monitoring the probe status. If the probe light stays white in any other situation easyTymp might need to be switched off and on again to regain proper probe status. Flashing color – easyTymp is pausing during a protocol and waits for you to press continue. The color in which the probe light is flashing indicates the probe status like above. Flashing green to red/blue – easyTymp just finished the protocol. 4.4 Operating easyTymp Operating the easyTymp is very intuitive. After switching the instrument on, it will usually start in the Test Screen and is ready to test the same protocol as was used last. After disconnecting easyTymp from a PC it will start in the Select Protocol screen and the desired protocol should be selected. The battery status bar will show the current battery power status. If the battery is empty, you will be warned, the measurement will be stopped and all recorded data will be stored. If this occurs shut down the instrument and change the battery to continue testing. The measurement data will be recovered when you start up again, so the measurement can continue without restarting the test. Note: If a white screen appears and the easyTymp does not proceed with the next screen, the battery is almost empty. Please change the battery to proceed. The following paragraphs describe the precise operation of the different screens you will observe during the use of easyTymp. 8111254-6_OM_easyTymp_e_15d 23 05/15 Operation Manual easyTymp 4.4.1 Test Usually the easyTymp starts with the Test Screen. When deleting or saving data after a measurement, you will also return to this screen (Figure 34). The graphics of the ongoing test will also be displayed. The box indicates the normative area where the peak of the tympanogram is expected to fall. The measured curve will be directly shown in the graphic while the measurement is being taken. Below the graphic the measured values (Volume, Pressure, Compliance and Gradient) are shown following the measurement. Figure 34 The header shows the status of the probe. It might show Ready, In Ear, Leaking or Blocked. - In the upper right corner the battery status is indicated . When the easyTymp is placed in the cradle, it will charge the battery and a flashing battery icon will be shown. - In the upper right corner an icon indicates if the easyTymp is testing the left ear or right ear - . When entering the Test Screen, the second line shows the name of the protocol which is in use. As soon as easyTymp detects that the probe is in the ear, the second line will show which test of the protocol is running. Operating from this screen: Putting the probe in the ear and obtaining a seal will automatically start the test. - Select Test: The top left button will bring you to the Select Test screen where you can select a different test protocol. - Patient: The top middle button will bring you to the Patient screen where patient data can be viewed or changed and earlier sessions can be reviewed and/or printed. This function is only displayed if the patient management is activated. - Stop: Top right button will interrupt the test and Done! will appear in the upper left hand corner of the screen. If the measurement is stopped via the top right button (Stop) the function of the top buttons will change to give the option to print or delete. - Right and Left buttons will select respectively right or left ear for testing. - If data on one or both ears is still available, the up and down buttons will bring you back to the Done! screen and allow you scroll through the measurement results. 8111254-6_OM_easyTymp_e_15d 24 05/15 Operation Manual easyTymp When the probe is in an ear the button will interrupt the testing and bring you to the Done! screen, and from there back to the Test screen if it is pressed a second time. If a protocol includes an instruction message, pressing the Shoulder Box button results in continuing the protocol, no matter what the probe status indicates. 4.4.2 Select Test Screen To change the selected protocol press “Select Test” (Left Top Button). The following measurements are available in the standard easyTymp (Figure 35): 01 Tymp 226 Hz 03 Tymp 226 Hz + Auto Reflex 04 Tymp 226 Hz + Reflex 90dB Figure 35 NOTE: Extra licenses for optional measurements are available: - High frequency Probe Tone of 1 kHz - Contra Reflex Measurement - Reflex Decay Measurement and ETF Measurement Operating from this screen: - easyTymp: Leads to the easyTymp Setup. Select: Select a test protocol and return to the test screen. Keyboard operation from this screen: - Top middle button brings you to the Setup screen. - Top right button selects the protocol of your choice and brings you to the Test screen. - Right and left buttons will bring you to the top or bottom of the protocol list respectively. - Up and down buttons allow scrolling up or down to select one protocol. 8111254-6_OM_easyTymp_e_15d 25 05/15 Operation Manual easyTymp 4.4.3 Done easyTymp will automatically go to the Done! screen when it has finished testing (Figure 36). From here, measurements of both ears can be reviewed, printed and/or saved. Of course, you can also directly start a new measurement in the Test screen from here. Figure 36 Operating from this screen: Print: Top left button will print the test results of the left and right ear. Note that there should be a connection to the printer by placing the easyTymp in the cradle. Save: Top middle button will save the measurement of both ears. Delete: Top right button will present a popup message saying “Delete current or both ears?” the Top left button will cancel the process. The Top middle button will delete the data of the currently selected ear and bring you back to the Test screen. The Top right button will delete data for both ears and bring you back to the Test screen. - Right and Left buttons will select respectively right or left ear for testing and bring you back to the Test screen. The existing data of the selected ear will only be deleted after the probe detects that it is in the ear with a proper seal. - Up and down buttons make you scroll through the different test results. When viewing the first or last test of an ear, pressing up or down respectively will bring you to the test results of the other ear. 4.4.4 Advanced Testing: easyTymp Pro Version Acoustic Reflex Testing (Ipsi and Contra) Before performing contralateral reflex testing tympanometry will be performed (Figure 37). Figure 37 8111254-6_OM_easyTymp_e_15d 26 05/15 Operation Manual easyTymp Acoustic Reflex Decay Ipsilateral and Contralateral Reflex Decay Testing can be performed (Figure 38). Figure 38 ETF Testing (Non Perforated) Instructions for testing will be displayed at the top of the screen (Figure 39). (1) Red or Blue: represents test ear (2) Grey: represents “Valsalvation” (3) Green: represents “Swallow” Figure 39 Instruct patient to swallow. (Perforated) Measurement of changing pressure indicates status of Eustachian tube (Figure 40). Figure 40 8111254-6_OM_easyTymp_e_15d 27 05/15 Operation Manual easyTymp 4.4.5 Select Patient & Save From this screen you can either save data to an existing patient uploaded from your database or save data to a new client (Figure 41). New patient will always get the name “New Patient: Number #”, where # is always the next available number. Figure 41 Operating from this screen: - The top left button will bring you back to the Done! screen without saving and without deleting data. - The top middle button opens a screen for editing new patient details. - The top right button will save the data to the selected client. After saving, all data is deleted and easyTymp returns in the Test screen, ready for testing. - Right and Left buttons will bring you to the top or bottom of the client list respectively. - Up and down buttons scroll up or down as one client’s information is viewed. 4.4.6 Edit New With this screen you can input data for a new client before saving the measurement (Figure 42). Figure 42 Operating from this screen: - The top left button saves the patient details and brings you back to Select Patient & Save. 8111254-6_OM_easyTymp_e_15d 28 05/15 Operation Manual easyTymp - The top middle button will select the highlighted. Backspace is an arrow in the top right corner. Space is a bar underneath the keyboard - The top right button will select the next details for editing. - Right and Left buttons will move the selection of the keyboard one character to the left or right. - Up and down buttons will move the selection of the keyboard one character up or down. When editing the birth date the up and down button will change the numerical value. 4.4.7 View Patients This screen shows a list of clients (Figure 43). Some of the clients may be uploaded from your database. When one or more sessions are stored, the square in front of the patient’s name is filled. If there is not session stored yet, this square will be empty. Figure 43 8111254-6_OM_easyTymp_e_15d 29 05/15 Operation Manual easyTymp Operating from this screen: - The top left button brings you back to the Test screen. - The top middle button brings you to the View Details screen where the data of the selected client is shown. - The top right button will bring you to the View Sessions screen where the available sessions of the selected client can be reviewed and printed. - Right and Left buttons will bring you to the top or bottom of the client list respectively. - Up and down buttons scroll up or down as one client’s information is viewed. 4.4.8 View Details This screen shows demographics of the selected client (Figure 44). From here you can either use the top left button to go back to the View Client screen or use the top middle button to edit the client details in the Edit Details screen. With the top right button you can delete either this patient, or all patients. Figure 44 4.4.9 Edit Details This screen shows the client ID, First Name, Last Name and Birth Date (Figure 45). The top left button brings you back to the View Details screen. The top middle button will select the highlighted character and put it where the cursor is placed. Backspace is an arrow in the top right corner. Space is a bar underneath the keyboard. The top right button will select the next details for editing. Figure 45 8111254-6_OM_easyTymp_e_15d Right and Left buttons will move the selection of the keyboard one character to the left or right. Up and down buttons will move the selection of the keyboard one character up or down. When editing the birth date the up and down button will change the numerical value. 30 05/15 Operation Manual easyTymp 4.4.10 View Results For the selected client, the screen shows a list of available sessions (Figure 46). Figure 46 Operating from this screen: - The top left button brings you back to the View Patient screen. - The top middle button will prompt you and ask for confirmation before it deletes the selected session or all sessions. - The top right button will show the selected session in the View Results screen. - Right and Left buttons will bring you respectively to the top or bottom of the result list. - Up and down buttons scroll up or down one session 4.4.11 View Results In this screen the test recordings of the selected session are shown (Figure 47). Operating from this screen: - The top left button brings you back to the View Results screen. - The top middle button will print all results which are stored in the selected session. - The top right button has no function. - Right and Left buttons will show the recordings of the right or left ears respectively, if available. - Up and down buttons scroll through the different tests which are included in the selected session. Figure 47 8111254-6_OM_easyTymp_e_15d 31 05/15 Operation Manual easyTymp 4.5 Setup To change the Setup of the easyTymp navigate from Test screen to Select test and then to easyTymp (Figure 48). Operating from this screen: - Back: The top left button brings you back to the Select test screen. The top middle button has no function. - Select: The top right button selects the highlighted setting to be viewed. Figure 48 Right and Left buttons have no function. Up and down buttons scroll up and down to the next item. 4.5.1 Setup Language Use right and left arrow keys to adjust language (Figure 49). Available languages are English, German, Spanish, French, Italian, Chinese, Japanese and Polish. Figure 49 8111254-6_OM_easyTymp_e_15d 32 05/15 Operation Manual easyTymp 4.5.2 Setup Date & Time Use right and left arrow keys to scroll through the options (Figure 50). Use up and down to adjust Date, Date format and time. Figure 50 4.5.3 Setup easyTymp Use up and down to scroll through the options. Use right and left arrow keys to adjust (Figure 51). The Power Save can be set to ”Never” or 1, 2, 3, 4 or 5 minutes. The Power Off can be set to “Never” or from 1 to 10 minutes. Show Pass/Fail: If On the test result will display with a Pass / Fail symbol depending on Normative Values defined internally Show Calibration Warning: On - you will be reminded to calibrate the device Reflex Presentation: Negative or Positive graphs Figure 51 8111254-6_OM_easyTymp_e_15d 33 05/15 Operation Manual easyTymp 4.5.4 Setup Printer Use up and down to scroll through the options (Figure 52). Use right and left arrow keys to change options. Print Options: automatic or manual. Reflex Presentation: table or graph. Printing: enabled or disabled. Figure 52 4.5.5 Setup Clinic Info Use Up, Down, Right and Left arrow keys to move the cursor over the keyboard (Figure 53). The top middle button will select the highlighted. Backspace is an arrow in the top right corner. Space is a bar underneath the keyboard. The top right button will select the next details for editing. Select the top left button to save and return to the Setup screen. Figure 53 8111254-6_OM_easyTymp_e_15d 34 05/15 Operation Manual easyTymp 4.5.6 Setup License Option to buy licenses measurements (Figure 54): to unlock further Select: By pressing the Top right button you can select the module to view, add or change the license key. Figure 54 Use left, right, up and down arrow keys to move the cursor over the keyboard (Figure 55). Select: The top middle button will select the highlighted character. Backspace is an arrow in the top right corner. Space is a bar underneath the keyboard. Save: The top left button will save and return to the Setup screen Figure 55 8111254-6_OM_easyTymp_e_15d 35 05/15 Operation Manual easyTymp 4.5.7 Setup Patient Management Turns the internal patient data management “on” or “off” (Figure 56). Off will delete all measured and / or stored data. Figure 56 4.5.8 About Here you will find information about the firmware version and calibration dates (Figure 57). Figure 57 4.6 easyTymp Pro Version: Shoulder Box button The Shoulder Box button will change ears as long as the probe detects it is not in the ear. When the probe is in an ear it will interrupt the testing and bring you to the Done! Screen, and from there also back to the Test screen with a second press of the button. If a protocol includes an instruction message, pressing the Shoulder Box button results in continuing the protocol, no matter what the probe status. 8111254-6_OM_easyTymp_e_15d 36 05/15 Operation Manual easyTymp 5 Warranty, Maintenance and Service The easyTymp is guaranteed for 2 years. This warranty is extended to the original purchaser of the instrument by MAICO through the Distributor from whom it was purchased and covers defects in material and workmanship for a period of 2 years from date of delivery of the instrument to the original purchaser. The easyTymp may be repaired only by your dealer or by an authorized service center. We urgently advise you against attempting to rectify any faults yourself or commissioning non-experts to do so. In the event of repair during the guarantee period, please include a copy of your invoice or receipt. In order to ensure that your instrument works properly, the easyTymp should be checked and calibrated at least once a year. This check has to be carried out by your dealer. When returning the instrument for repairs, it is essential to also send the probe and all other accessories, and include a detailed description of the faults. In order to prevent damage in transit, please use the original packing if possible when returning the instrument. 6 Disinfection It is recommended that parts which come in direct contact with the patient be subjected to standard disinfecting procedure between patients. This includes physically cleaning and use of a recognized disinfectant. Individual manufacturer's instruction should be followed for use of this disinfecting agent to provide an appropriated level of cleanliness. To avoid person-to-person cross contamination of communicable diseases eartips should only be used one time. 7 Safety Regulations 7.1 Electrical safety The instrument is not to be used in environments dealing with explosive material or equipment. The easyTymp is constructed to comply with protection class II, Type B of the international standard IEC 60601-1 (EN 60601-1). Protection from an electric shock is ensured even without the system earth connection. The instruments are not intended for operation in areas with an explosion hazard. 7.2 Measurement Safety To guarantee that the tympanometer works properly, the instrument should be checked and calibrated at least once a year. The service and calibration must be performed by an authorized service centre. In accordance with the regulations of the EU medical directive we will drop our liability if these checks are not done. The use of non-calibrated tympanometers is not recommended. 7.3 Instrument Handling The instrument should be checked once a week. 8111254-6_OM_easyTymp_e_15d 37 05/15 Operation Manual easyTymp 7.4 Operation The instrument should only be handled and operated by trained personnel (audiologists, ENT doctors or personnel with similar qualifications). 7.5 Patient Safety Warning: Do not perform a test while charging the device via USB cable. External equipment intended for connection to signal input, signal output or other connector, shall comply with relevant IEC standard (e.g. IEC 60950 for IT equipment and the IEC 60601 series for medical electrical equipment). In addition, all such combinations - systems - shall comply with the standard 60601-1-1, Safety requirements for medical electrical systems. Equipment not complying with IEC 60601 shall be kept outside the patient environment, as defined in the standard (at least 1.5 m from the patient). Any person who connects external equipment to signal input, signal output or other connectors has created a system and is therefore responsible for the system complying with the requirements of IEC 60601-1-1. If in doubt, contact your service technician or local representative for help. The cradle connection provides power for the thermal printer. In order to maintain a high level of safety, it is necessary to have the instrument and its power supply checked according to the medical electrical safety standard IEC 60601-1 on a yearly basis by a qualified service technician. 8111254-6_OM_easyTymp_e_15d 38 05/15 Operation Manual easyTymp 8 Technical Data The easyTymp is an active, diagnostic medical product according to the class IIa of the EU medical directive 93/42/EEC. Approval of the quality system is made by TÜV – identification no 0123. Medical CE-mark Standards: Power, UE24WCP-240100SPA Power, easyTymp Power, Cradle Safety: EMC: Impedance: Normative Box: TÜV identification no. 0123 IEC 60601-1, Class II, Type B IEC 60601-1-2 IEC 60645-5/ANSI S3.39, Type 2 e.g. Appendix A Consumption: 0,6 A Mains voltages 100 – 240 VAC, 50 – 60 Hz and fuses: Fuses: 3 A (5 V) Fuses: 3 A (24V) 15 – 35 C 30 – 90% Temperatures below 0C and above 50C may cause permanent damage on the instrument and its accessories. -20 – 50 C 10 – 95% W x D x H: 80 x 300 x 70 mm 427 g Operation environment: Temperature: Rel. Humidity: Storing/handling: Transport: Dimension and weight Temperature: Rel. Humidity: Dimension Weight Impedance Measuring System Probe tone: Frequency: Level: Air pressure: Control: Indicator: 226 Hz, 1000 Hz 69 dB HL with AGC, assuring constant level at different ear canal volumes. Automatic. Measured value is displayed on the graphical display. -400 to +200 daPa. -750 daPa and +550 daPa. Range: Pressure limitation: Compliance: Range: Test types: Tympanometry 8111254-6_OM_easyTymp_e_15d 0.1 to 8.0 ml at 226 Hz probe tone (Ear volume: 0.1 to 8.0 ml) and 0.1 to 15 mmho at 1000 Hz probe tone. Automatic. 39 05/15 Operation Manual easyTymp Indicators: Graphical display Memory: Tympanometry: Compliance is indicated as ml for 226 Hz and as mmho for 1000 Hz and pressure as daPa. Stimulus level is indicated as dB Hearing Level. 1 curve per ear, per tympanometry test. And theoretically an infinite number of tests per protocol. Reflex Functions Signal sources: Outputs: Tone Ipsi, Reflex: Noise - Ipsi, Reflex: Tone - Contra, Reflex: Noise - Contra, Reflex: Ipsi Earphone: Contra Earphone: Test types: 500, 1000, 2000, 4000 Hz, max. 100 dB HL. Broad-band noise (BBN) 500, 1000, 2000, 4000 Hz, max. 100 dB HL. Broad-band noise (BBN) Probe earphone incorporated in the probe system for Reflex measurements. Probe earphone incorporated in the probe system for Reflex measurements. Connection of the air system to the probe. Automatic reflexes: - Single intensities - Single reflex auto search Air: Automated Reflex Reflex Decay Functions Test method Ipsi- and contralateral Test signals: Test level: 500 Hz, 1000 Hz, 2000 Hz, 4000 Hz each with ± 2% Ipsilateral: 70 to 110 dB HL Pure Tones: Contralateral: 70 to 120 dB HL Control acoustic reflexes: Time range: Volume Range: Graphical display: Ipsi earphone: - Automatic Single intensities Reflex growth 0 to 12 s -0.05 to 0.25 ml - x-axis: Volume in ml - y-axis:Time in ms - Level in dB HL Earphone integreted in probe ETF – Intact Same specification as tympanometry, expect only one test signal (226 Hz). ETF - perforated 8111254-6_OM_easyTymp_e_15d 40 05/15 Operation Manual easyTymp Test signals: Test level: Distorsion: Control tympanometry: Time range: Pressure Range: Accuracy: Graphical display: Pure tone: 226 Hz with ± 1 % 85 dB SPL ±1.5 dB measured in an IEC 60318-5 acoustic coupler. The level is constant for all volumes in the measurement range. Max 5 % THD Automatic 0 to 30 sec. (settings) 0 to 400 daPa Compliance: 5% or 10 daPa, whichever is greater Pressure: 5% or 0.1 ml, whichever is greater - x-axis: Time in sec. - y-axis: Pressure in daPa - General PC connection Memory: Input/output for computer communication. Theoretically an infinite amount of test results can be stored on the PC. The easyTymp hand held unit is delivered with a 2 GB memory card, enough for storing more than a quarter of a million tests. USB: Specification of output connections Outputs: Transducer proprietary, Pin 1: 12-pole Pin 2: Pin 3: Pin 4: Pin 5: Pin 6: Pin 7: Pin 8: Pin 9: Pin 10: Pin 11: Pin 12: USB USB type ”B” CH1 out CH1 GND DGND GND Microphone Microphone – input / Analog balanced in Microphone + input / Analog balanced in Power supply +3/+5V CH2 out CH2 GND I2C CLK I2C DATA I2C Interrupt USB port for communication Calibration properties Calibrated Transducers: Probe system: 8111254-6_OM_easyTymp_e_15d Ipsilateral and Contralateral Earphone: is integrated in the probe system. Probe frequency transmitter and receiver and pressure transducer is integrated in the probe system. 41 05/15 Operation Manual easyTymp Accuracy: General Reflex Frequencies: Ipsilateral Reflex Tone Levels: Contralateral Reflex Tone Levels: Pressure measurement : Compliance measurement: Generally the instrument is made and calibrated to be within and better than the tolerances required in the specified standards: 3% 5 dB for 500 to 2000Hz and +5/-10 dB for 3000 to 4000Hz 5 dB for 500 to 2000Hz and +5/-10 dB for 3000 to 4000Hz 5% or 10 daPa, whichever is greater 5% or 0.1 ml, whichever is greater Impedance calibration properties Probe tone Compliance Pressure Frequencies: Level: Distortion: Range: Temperature dependence: Pressure dependence: Reflex sensitivity: Temporal reflex characteristics: Range: Safety limits: 226 Hz 1%, 1000 Hz 1% 85 dB SPL 1.5 dB measured in an IEC 603185 acoustic coupler. The level is constant for all volumes in the measurement range. Max 5% THD 0.1 to 8.0 ml -0.003 ml/C -0.00020 ml/daPa 0.001 ml is the lowest detectable volume change Initial latency = 35 ms (5 ms) Rise time = 45 ms (5 ms) Terminal latency = 35 ms (5 ms) Fall time = 45 ms (5 ms) Overshoot = max. 1% Undershoot = max 1% - 400 to +200 daPa. -750 daPa and +550 daPa, 50 daPa Reflex calibration standards and spectral properties: Specifications for stimulus signals are made to follow IEC 60645-5 Pure tone: MAICO Standard. Broad-band MAICO Standard noise (BBN): As “Broad-band noise” specified in IEC 606455, but with 500 Hz as lower cut-off frequency. Spectral properties: General about levels: The actual sound pressure level at the eardrum will depend on the volume of the ear. See Table 2 for details. The risk of artifacts at higher stimulus levels in reflex measurements are minor and will not activate the reflex detection system General Ipsi- and Contralateral Earphone 8111254-6_OM_easyTymp_e_15d 42 05/15 Operation Manual easyTymp Reference values for stimulus calibration Table 1 Reference equivalent threshold sound pressure level [dB re. 20 Pa] Hz CIR55 DD45 IOW Probe 125 26 47.5 41.0 250 14 27.0 24.5 500 5.5 13.0 9.5 1000 0.0 6.0 6.5 1500 2.0 8.0 5.0 2000 3.0 8.0 12 3000 3.5 8.0 11 4000 5.5 9.0 8.0 6000 2.0 20.5 5.5 8000 0.0 12.0 -0.5 WB -5.0 -8.0 -5.0 LP -7.0 -6.0 -7.0 HP -7.0 -10.0 -8.0 Coupler types used by calibration IOW Probe (easyTymp) and CIR55 are calibrated using an IEC60380-5 (2cc) acoustic coupler made in accordance to IEC 60318-5. DD45 are calibrated using a 6cc acoustic coupler made in accordance to IEC60318-3. 8111254-6_OM_easyTymp_e_15d 43 05/15 Operation Manual easyTymp 9 Test Protocols 01 226Hz (Standard) Tympanometry, Frequency: 226 Hz Earside: Ipsilateral 02 1kHz (License “1 kHz”) Tympanometry, Frequency: 1 kHz Earside: Ipsilateral 03 226Hz + Ipsi Reflex Auto (Standard) Tympanometry, Frequency: 226 Hz Number of Reflexes tested = 4, Frequencies: 0.5, 1.0, 2.0, 4.0 kHz Intensity Reflex Min (Intensity in dB HL) = 70 Intensity Reflex Max (Intensity in dB HL) = 100 Earside: Ipsilateral 04 226Hz + Ipsi Reflex 90dB (Standard) Tympanometry, Frequency: 226 Hz Number of Reflexes tested = 4, Frequencies: 0.5, 1.0, 2.0, 4.0 kHz Intensity Reflex (Intensity in dB HL) = 90 Earside: Ipsilateral 05 1kHz + Ipsi Reflex Auto (License “1 kHz”) Tympanometry, Frequency: 1 kHz Number of Reflexes tested = 4, Frequencies: 0.5, 1.0, 2.0, 4.0 kHz Intensity Reflex Min (Intensity in dB HL) = 70 Intensity Reflex Max (Intensity in dB HL) = 100 Earside: Ipsilateral 06 1kHz + Ipsi Reflex 80dB BB (License “1 kHz”) Tympanometry, Frequency: 1 kHz Number of Reflexes tested = 1, Test signal: Broadband noise Intensity Reflex (Intensity in dB HL) = 80 dB Earside: Ipsilateral 07 226Hz + Ipsi-Contra Auto (License “Pro Version”) Tympanometry, Frequency: 226 Hz Number of Reflexes tested = 8, Frequencies: 0.5, 1.0, 2.0, 4.0 kHz Intensity Reflex Min (Intensity in dB HL) = 70 Intensity Reflex Max (Intensity in dB HL) = 100 Frequency during Reflexes: 226 Hz Earside: Ipsi- and Contralateral Tympanometry, Frequency: 226 Hz Number of Reflexes tested = 8, Frequencies: 0.5, 1.0, 2.0, 4.0 kHz Intensity Reflex (Intensity in dB HL) = 90 Earside: Ipsi- and Contralateral 08 226Hz + Ipsi-Contra 90 dB (License “Pro Version”) 8111254-6_OM_easyTymp_e_15d 44 05/15 Operation Manual easyTymp 09 1kHz + Ipsi-Contra Auto (License “Pro Version”) Tympanometry, Frequency: 1 kHz Number of Reflexes tested = 8, Frequencies: 0.5, 1.0, 2.0, 4.0 kHz Intensity Reflex Min (Intensity in dB HL) = 70 Intensity Reflex Max (Intensity in dB HL) = 100 Earside: Ipsi- and Contralateral 10 1kHz + Ipsi-Contra 80dB BB (License “Pro Version”) Tympanometry, Frequency: 1 kHz Number of Reflexes tested = 2, Test signal: 80 Broad-band noise Intensity Reflex (Intensity in dB HL) = 80 dB Earside: Ipsi- and Contralateral 11 Decay Ipsi (License “Decay”) Number of Reflexes tested = 4, Frequencies: 0.5, 1.0, 2.0, 4.0 kHz Intensity Reflex Min (Intensity in dB HL) = 70 Intensity Reflex Max (Intensity in dB HL) = 100 Duration of Signal: 10 s Earside: Ipsilateral 12 Decay Contra (License “Decay”) Number of Reflexes tested = 4, Frequencies: 0.5, 1.0, 2.0, 4.0 kHz Intensity Reflex Min (Intensity in dB HL) = 70 Intensity Reflex Max (Intensity in dB HL) = 100 Duration of Signal: 10 s Earside: Contralateral 13 ETF Intact (License “Decay”) Tympanometry, Frequency: 226 Hz Number of Measurements = 3 Earside: Ipsilateral 14 ETF Perforated (License “Decay”) Frequency during Testing: 226 Hz Duration of Signal: 30 s Earside: Ipsilateral 8111254-6_OM_easyTymp_e_15d 45 05/15 Operation Manual easyTymp 10 Troubleshooting Issue White Screen Solution Frozen Display If the display freezes try If the device shows white screen after turning on, make sure battery is fully charged. o to restart the unit o to shut off the system and change the battery Note: Please do not take out the battery before turn off. Always turn off the device and then take out the battery. Battery cavity Probe - Please check that the battery is properly inserted into the compartment. - Please check that the battery connector (spring contacts) inside the compartment is clean and working properly. Make sure the probe tip is inserted correctly into the probe. Otherwise, follow the suggestions in Probe tip. Probe tip 1. Please clean the probe tip as described in the manual. If the system still does not run proceed with step 2. 2. Use a new probe tip. If the system still does not run proceed with step 3. 3. Change the complete probe and check if the system is running. Extensional cable If the device shows leaking, please 1. Follow the suggestions for probe tip/ Probe. 2. If step 1 is not helpful, please change the extension cable. If the problem persists follow the suggestions for Probe tip/Probe. Battery slot 1. If the spare battery is not charging, please, check if the battery is properly inserted and the terminals are in contact (springs in cradle). 2. Please make sure the battery contacts are clean in the case. Connection in cradle 1. Make sure the handheld is properly inserted after the test. Improper docking may lead to no connection between device and the cradle. 2. Please make sure battery contacts are clean in the case. Printer problem 1. Please check if the cradle is connected with power supply. 2. Please check if the printer function is activated in the device. 3. Please check if the printer paper is properly inserted. 4. Properly place the handheld on the cradle. 5. When during printing process the 2nd battery is charged also, take the 2nd battery out of cradle and try again. 8111254-6_OM_easyTymp_e_15d 46 05/15 Operation Manual easyTymp PC Connections 1. Make sure the Patient database and the printer is deactivated from handheld. 2. Handheld: a. Please check the USB connection in the PC and the system. b. Use another USB cable. 3. Cradle: a. Make sure the device is properly placed into the Cradle. b. Make sure the Cradle is powered while transferring the result to PC. 4. Make sure the easyTymp option is selected in the PC software (for detail contact your distributor). 5. Try to reinstall the PC software. Check the device manager in the PC. If the easyTymp does not appear in the list install the driver again using the installation CD. 8111254-6_OM_easyTymp_e_15d 47 05/15 Operation Manual easyTymp 11 Appendix A 1 kHz L. Macedo de Resende; J. dos Santos Ferreira; S. Alves da Silva Carvalho; I. Oliveira; I. Barreto Bassi, „Tympanometry with 226 and 1000 Hertz tone probes in infants” Braz. j. otorhinolaryngol. vol.78 no.1 São Paulo Jan./Feb. 2012 Carvallo RMM, „Medida de imitância acústica em crianças de zero a oito meses de idade.” São Paulo: Universidade Federal de São Paulo - Escola Paulista de Medicina; 1992 Lu JS, Zhang J, Tang L, Ding W, Zhang L, Guo XP, Zai NL. “Analysis of the 1000 Hz tympanometry in normal hearing neonates“, Zhonghua Er Bi Yan Hou Tou Jing Wai Ke Za Zhi. 2011 Nov;46(11):905-8 Rafidah Mazlan,, Joseph Kei,, Louise Hickson,, Asaduzzaman Khan,, John Gavranich,, Ron Linning, „High Frequency (1000 HZ) Tympanometry Findings in Newborns: Normative Data Using a Component Compensated Admittance Approach” Australian and New Zealand Journal of Audiology, Volume 31, Issue 1, May 2009, pages 15-24 DOI: 10.1375/audi.31.1.15 Kei J, Allison-Levick J, Dockray J, Harrys R, Kirkegard C, Wong J, “High-frequency (1000 Hz) tympanometry in normal neonates.” J Am Acad Audiol. 2003;14(1):20-8 226 Hz Shanks, J., & Shohet, J (2009), “Tympanometry in clinical practice.” In J. Katz, L. Medwetsky, R. Burkard, & L. Hood (Eds.), Handbook of clinical audiology (6th ed.) (pp. 157-188) Baltimore: Lippincott, Williams & Wilkins Mrowinski, D., Scholz, G., “Audiometrie Eine Anleitung für die praktische Hörprüfung.” 2006, 3. Auflage, Thieme Verlag Jerger, J., Norhtern, J.,“Clinical impedance audiometry” 1980, Thieme Verlag 8111254-6_OM_easyTymp_e_15d 48 05/15 Operation Manual easyTymp Specifications are subject to change MAICO Diagnostics GmbH Sickingenstr. 70-71 10553 Berlin Germany Tel.: + 49 30 / 70 71 46-50 Fax: + 49 30 / 70 71 46-99 E-mail: [email protected] Internet: www.maico.biz 8111254-6_OM_easyTymp_e_15d 49 05/15