1
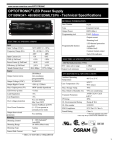
OT Programmer OPTOTRONIC® LED Power Supply Configuration Tool User Manual V2.4.1 March 2015 Page | 2 Contents 1. Introduction .......................................................................................................................................... 4 1.1. Compatible OPTOTRONIC Programmable LED power supplies ................................................ 4 1.2. PC system requirements ........................................................................................................... 5 1.3. Hardware requirements............................................................................................................ 5 2. Installing the OT Programmer ............................................................................................................... 6 3. Connecting the hardware ................................................................................................................... 14 4. OT Programmer interface at a glance ................................................................................................. 17 5. Working with OT Programmer interface ............................................................................................ 18 5.1. Design Mode ........................................................................................................................... 18 5.1.1. File tab:.................................................................................................................................... 18 5.1.2. Configuration of OPTOTRONIC® Programmable LED Power supply parameters.................. 18 5.1.3. Programming the OPTOTRONIC LED Power Supply................................................................ 36 5.1.4. Read Operation ....................................................................................................................... 46 5.1.5. Tools tab:................................................................................................................................. 47 5.1.5.1. Define Part numbers: .............................................................................................................. 48 5.1.5.2. Default Profile folder............................................................................................................... 52 5.1.5.3. Data Log .................................................................................................................................. 53 5.1.5.4. Startup in Barcode mode ........................................................................................................ 54 6. 5.1.6. Help tab ................................................................................................................................... 55 5.2. Production Mode .................................................................................................................... 56 Trouble-shooting................................................................................................................................. 58 Page | 3 1. Introduction The OPTOTRONIC LED power supply configuration tool is a graphical user interface that allows the user to program and configure the operating parameters of the OPTOTRONIC Programmable LED power supplies. The interface helps to set the desired output current of the power supply within its range of output current. It gives the flexibility to enable/disable the features like “Dimming”, “AstroDIM”, “LEDset”, “Auxiliary output”, “LED Thermal Protection”, “Constant lumen module” & “End-of-life indicator”. Custom part numbers for a given OPTOTRONIC LED driver model can also be defined. The user can save the profile for a particular power supply & recall when necessary. The interface will also allow the user to program same profile for the desired number of power supplies by connecting one after other with just one click. The user interface is capable of supporting the bar code scanner inputs to program the parameters of an OPTOTRONIC LED power supply. It also provides an option to either enable or disable logging of the parameters of power supplies to an excel file. Note: The programming of the LED power supplies does not need a connection to AC power source. The OT Programmer and the driver during programming mode are powered through the USB port of a computer. 1.1. Compatible supplies Page | 4 OPTOTRONIC Programmable LED power NAED Ordering Abbreviation NAED Ordering Abbreviation 79441 OT40W/PRG1400C/UNV/DIM-1/J 79399 OT48W/PRG2000C/UNV/DIM/L AUX 79442 OT40W/PRG1400C/UNV/DIM-1 79632 OT48W/PRG2000C/UNV/DIM/L 79448 OT40W/PRG1400C/UNV/DIM 79467 OT50W/PRG1400C/UNV/DIM-1/L AUX 79449 OT40W/PRG1400C/UNV/DIM/J 79398 OT50W/PRG1400C/UNV/DIM/L AUX 79403 OT25W/PRG1250C/UNV/DIM 79631 OT50W/PRG1400C/UNV/DIM/L 79404 OT25W/PRG1250C/UNV/DIM/J 79370 OT50/UNV/800C/2DIMLT2/P6 79405 OT25W/PRG1250C/UNV/DIM-1 79371 OT50/UNV/1250C/2DIMLT2/P6 79406 OT25W/PRG1250C/UNV/DIM-1/J 79368 OT100/UNV/800C/2DIMLT2/P6 79466 OT30W/PRG1050C/UNV/DIM-1/L AUX 79369 OT100/UNV/1250C/2DIMLT2/P6 79397 OT30W/PRG1050C/UNV/DIM/L AUX 79366 OT180/UNV/800C/2DIMLT2/P6 79630 OT30W/PRG1050C/UNV/DIM/L 79367 OT180/UNV/1250C/2DIMLT2/P6 79468 OT48W/PRG2000C/UNV/DIM-1/L AUX NAED Ordering Abbreviation NAED Ordering Abbreviation AA68626 OT 50/120-277/800 2DIMLT2 P 79470 OTi 85 Linear 2000mA AA68629 OT 50/120-277/1A2 2DIMLT2 P 79471 OTi 85 Linear 2600mA AA68630 OT 100/120-277/800 2DIMLT2 P AA68631 OT 100/120-277/1A2 2DIMLT2 P 1.2. PC system requirements The minimum PC requirements to install and run OT Programmer tool are: 1GHz processor 512MB RAM 1 USB Port (v2.0) Microsoft Windows XP or higher® .NET framework version 4.0 or higher* FTDI drivers* Adobe Reader 9.5* or higher Microsoft Excel 2000 or higher ( for logging feature) * Available for download here under downloads section on the right of the webpage. 1.3. Hardware requirements 51645 OT Programmer (Includes USB Type A to B cable & Programming cable) 51646 OT Programming nest (OPTIONAL) (Includes Programming cable) 51647 OT LINEAR Hand-Held PRG TOOL (OPTIONAL) (Includes Programming cable) 51648 OTLinearAutoPRGTool (OPTIONAL) (Includes Programming cable) 51360 OTOutdoorPGRMTool (OPTIONAL) (Includes Programming cable) Driver(s) from the compatible LED power supplies list Linear Image Barcode Scanner (OPTIONAL) The OT Programmer OPTOTRONIC LED power supply configuration tool can be downloaded from the following address under downloads section. Page | 5 http://www.sylvania.com/en-us/tools-and-resources/Pages/LED_power_supply_configuration.aspx 2. Installing the OT Programmer Step 1: Download the OPTOTRONIC LED Power supply configuration tool and save the file at desired location. Step 2: Download the FTDI Driver for windows and save the file at a desired location Step 3: Open the folder where the FTDI driver for windows is saved. Right click on the setup file to Run as administrator/ Install (Depending upon the Windows operating system) & click it Note 1: During some installation instances on Windows XP or Windows Vista there might be some additional windows pop-up messages depending upon the User accessibility. Please select the appropriate options depending upon user agreeability. Page | 6 User Account Control message for FTDI driver installation on a Windows Vista operating system Installation of the FTDI driver on a Windows XP operating system may pop-up messages as below. Select the appropriate user account and uncheck the box to continue with the installation. Step 4: Click “Extract” on the installation window Page | 7 Step 5: After the extraction process the Device Driver Installation Wizard is opened. Click next to continue Step 6: Installation will be completed & click finish to proceed. Page | 8 By finishing the above steps you are ready to install the OT Programmer Tool setup file. Step7: From the package downloaded for installation of the tool, identify the “OTProgramToolSetup.msi” & either do a double click or right click options & install. Read the License Agreement and if you agree to the terms and conditions select the “I Agree” & click “Next” Note 2: In addition to Note 1 explained earlier some OT Programmer installation instances on different Windows Operating systems there might be some additional windows pop-up Page | 9 messages depending upon the User accessibility. To continue to allow installation of the program, please allow access to the User Access Control prompt User Account Control message for OT Programmer driver installation on a Windows Vista operating system Step 8: Click ‘Next’ to proceed Step 9: Select the desired Software operation mode. Click the radio button next to the operation mode and Click ‘Next’ Design Mode- allows to create, modify and saving LED driver settings & profiles Page | 10 Production mode allows only programming and reading the memory or the settings of the LED power supply Step 10: Select the destination folder if different from automatic location selected by the installer. Select the permissions to install this program only for the user or everyone. Click Next Page | 11 Step 11: Confirm installation by Clicking Next Step 12: Installation is complete. Click close Page | 12 Now the OT Programmer tool for OPTOTRONIC Programmable LED power supplies is successfully installed and ready to use. To launch the program go to the start button & expand all programs. A new folder named OSRAM SYLVANIA is created. Expand the folder to find the “OT Programmer” shortcut. Click to launch the application. OR A desktop short-cut is also created to launch the OT Programmer application. Page | 13 3. Connecting the hardware Follow the steps below: Step 1: Connect “B” end of USB cable to the USB port of the OT Programmer tool & the “A” end to the USB port of the PC B A Step 2: Connect one end of programmer cable to the PROGRAM port on OT Programmer tool and the other open ended wires to the programming ports on the compatible OPTOTRONIC LED power supply The programmer cable has 2 wires on open ends- “RED” & “BLACK”. The BLACK wire should be connected to ‘LED-‘ on the OPTOTRONIC LED power supply and the RED wire should be connected to ‘PRG/NTC’ on the OPTOTRONIC LED power supply. Page | 14 If using an OT Programming nest (51646) - please follow the steps below: Step 1: Connect “B” end of USB cable to the USB port of the OT Programmer and the “A” end to the USB port of the PC Step 2: Connect the programming cable from OT Programming nest to the PROGRAM port of the OT Programmer Step 3: Place the OPTOTRONIC LED power supply in the nest (can be done only in one direction) If using an OT LINEAR Hand-Held PRG TOOL (51647) - please follow the steps below: Step 1: Connect “B” end of USB cable to the USB port of the OT Programmer and the “A” end to the USB port of the PC Step 2: Connect the programming cable from OT LINEAR Hand-Held PRG TOOL to the PROGRAM port of the OT Programmer Step 3: Insert the Hand-held piece with 2-pins into the ports of the LED driver (can be done only in one direction) Page | 15 If using an OTLinearAutoPRGTool (51648) - please follow the steps below: Step 1: Connect “B” end of USB cable to the USB port of the OT Programmer and the “A” end to the USB port of the PC Step 2: Connect the programming cable from OTLinearAutoPRGTool to the PROGRAM port of the OT Programmer Step 3: Place the OPTOTRONIC LED power supply in the slot for the driver (should be done only in one direction with driver facing upwards) If using an OTOutdoorPGRMTool (51360) - please follow the steps below: Step 1: Connect “B” end of USB cable to the USB port of the OT Programmer and the “A” end to the USB port of the PC Step 2: Connect the programming cable from OTOutdoorPGRMTool to the PROGRAM port of the OT Programmer Step 3: Place the appropriate leads of the OPTOTRONIC LED power supply in the slots provided for ‘BLUE WIRE’ and ‘ORANGE WIRE’ Page | 16 4. OT Programmer interface at a glance Title bar Menu bar Model info bar Main Window Status bar Page | 17 5. Working with OT Programmer interface 5.1. Design Mode 5.1.1. File tab: The File tab on the OT Programmer Tool will allow the user to create, open, save a profile. New Profile: This command creates a new profile that allows the user to input a new set of values for all the parameters Open Profile: This command opens an existing OT Profile file (*.otprofile) from desired location Save Profile: This command will save the desired parameter setup (Profile) as an OT Profile file (*.otprofile) Save As... : This command is standard windows function Save As... for a given OT Profile Exit: This commands exits from the application. 5.1.2. Configuration of OPTOTRONIC® Programmable LED Power supply parameters Once the OT Programmer application is launched the user is directed to the interface as shown below. Page | 18 If the OT Programmer is detected the status button on the Status bar will be GREEN as shown in Figure below and it is indicated that the ‘Programming tool ready’ Since the OPTOTRONIC LED power supply is also connected as explained in the “Connecting the Hardware” section the LED power supply status is also green as shown in Figure below Make sure that both these indicator lights are GREEN to program the LED power supply properly. Page | 19 Follow the steps below to successfully program the desired profile on to OPTOTRONIC LED Power supply Step 1: Make sure that the OPTOTRONIC LED power supply model that needs to be programmed has been automatically detected by the interface. This field grays out once the power supply is connected and detected. The corresponding NAED(s)/EAN are displayed in the NAED/EAN field. Only the features corresponding to a particular power supply are available for configuring and are available in the Main Window. Figures below highlights the features available for the selected LED power supplies. Page | 20 Page | 21 Step 2: Make sure the required output current to be set is within the minimum & maximum limits. Page | 22 Step 3: Select the desired output current from the drop- down list. If a custom value is desired – check the “Custom Set Current” and enter the desired output current value. Page | 23 Some OPTOTRONIC LED drivers are compatible with LEDset Gen 2 capable LED modules. Drivers with this capbility, when detected by the interface, will provide an option to enable/ disable this feature. If the LEDset is enabled the output current cannot be set manually but is determined by the LEDset interface of the LED module. Also, the LED Thermal protection feature is disabled when the LEDset feature is enabled. Page | 24 For detailed information on LEDset interface please refer to Technical Application guide LEDset interface (LED 409) Note 3: Models 79405, 79406 & 79466 have a minimum output current value of 150mA. From 150mA to 349mA the output current of the LED driver will be in PWM mode. In this window of operation, the minimum dimming level is 10%. From 350mA to maximum current operation the minimum dimming level is 1%. Page | 25 Step 4: Dimming feature is by default “Enabled”. If not required uncheck the box for “Enable Dimming”. Set the required “Minimum Dimming level”. Dimming profile can be viewed by clicking ‘View Dimming Curve” button. Double click the graph to copy onto clipboard. Page | 26 The outdoor rated programmable drivers are capable of working in ‘AstroDIM’ mode. This feature is available for configuration when they are selected for programming. When the ‘AstroDIM’ mode is selected the 0-10V dimming option is disabled. To configure the ‘AstroDIM’ profile click the ‘Config Astro Dim’ button available in the window. A new window pops up where different parameters can be set for the driver in AstroDIM mode. The ‘Power On Level’ determines the fixture output when it is turned ON. This field accepts inputs between 10 and 100. The ‘Dim Start time’ determines the time from which the fixture starts dimming. The ‘Dim Start Time’ is limited by the location/city chosen. The fixture can be set in 4 different DIM levels during the total ON time. Input ‘DIM level’ as required and set the ‘Dim Duration’ for each Dim level (HH:MM). The max duration of any Dim level is 8 hours. For detailed information on AstroDIM please refer to Technical Application guide 2DIM feature (LED 408) Page | 27 4 DIM levels DIM durations Drop down list of cities The 2.4 version AstroDIM is updated with additional features such as o Fixed on time of 12 hrs removed o Dropdown list of cities added to upgrade from fixed 12 hr on time to city specific DIM start time o Location data in AstroDIM is not stored and could cause deviation between the set data and data read back from the ECG (min resolution capability of the timing durations is 2 mins) o Max and Min for sunset and sunrise added for each city o Estimated annual energy savings added Step 5: If the driver is capable of providing an Auxiliary output, the ‘Auxiliary output’ window is available for programming in the interface. Drivers capable of this feature have the default selected to be 24V DC. If a different output value is required select from the options available on by clicking on the radio button next to the value. Page | 28 Step 6: LED Thermal protection is enabled by default in the software and on the power supply with Default values. To use custom values for NTC resistances select the radio button for “Use custom values”. Input the values for “Temperature Derating Start” & “temperature Derating End”. The maximum value that can be input for ‘Temperature Derating Start’ is 25kΩ and the ‘Temperature Derating End’ is always less than ‘Temperature Derating Start’ value and greater than or equal to 1kΩ. Set the minimum output level between 1-100% for 1%DIM power supply and 10-100% for 10% DIM power supply. The variation of output with NTC resistance can be viewed using the ‘View Derating Curve’ button. Double click on the graph will copy the graph in clipboard. To disable the LED Thermal protection feature uncheck the box next to LED Thermal Protection on the interface. Page | 29 Page | 30 Page | 31 Step7: Constant Lumen Module: The feature adjusts the output current from default over time. User defines a look-up table for as time (k-hours) and %-change of current. The function is passive – pre-defined. Disabled by default in the GUI and the power supply. To enable the feature check the box next to ‘Constant Lumen Module’. Input the required values in the respective fields for percentage of current and the duration of running. ‘View graph’ button can be used to view the variation of Output Vs Running time (kHours). Double click on the graph will copy the graph in clipboard ‘Operating time’ in hours can be read from the power supply as explained in the Step 10 below Note 4: A max of 8 set points can be input on the GUI for the % of current output and time in kHours. The maximum percentage of output current that can be input is 150% and minimum is 50%. The maximum kHrs that can be input is 254 and minimum is 1. By default the kHours for first set point is ‘0’ (zero). The 100% current output value is displayed in the window for which the power supply is programmed. The percentage of output current cannot exceed the maximum current of the LED driver. Inputs resulting in an output level outside the output current range allowed for the power supply a message is popped out ‘Output current cannot exceed device maximum level’. If user changes the set current after constant Lumen profile is defined, any %-output values that result in the driver exceeding the max output current are automatically reduced to an acceptable number and a message is displayed: “Percentages are adjusted to stay within valid output range” Page | 32 Page | 33 Step8: End-of Life indicator is by default disabled in the LED power supply. To enable this feature, check the box next to ‘End-of-Life’ indicator and input the ‘Set LED end-of-life time to’ to desired value. The values should be between 1 & 254. Page | 34 Step9: Check all the parameters & make sure the values are as required. Once confirmed, save the profile to the desired location. A file with “filename”.otprofile will be created at the indicated location. To create multiple profiles for multiple power supplies repeat steps 1 to 9. . Page | 35 5.1.3. Programming the OPTOTRONIC LED Power Supply Step 1: Click the “Load Profile” icon in the main window. A new window will prompt to ‘Scan barcode or type profile name’. Make sure the OTprofile that needs to be used is in the same directory as specified in the settings tab. Note 5: If using a Barcode scanner, the Barcode should contain the profile name that it is created earlier as directed in Section 5.1.2. As soon as the profile name is found the window is closed automatically and the OTprofile is opened. If entering the profile name manually it is important to match the name exactly including spaces (if any). After typing in the profile name click ‘open profile’ in the window. Page | 36 Page | 37 Step 2: Make sure that the Title Bar is updated with the intended profile name to be programmed. Page | 38 Step 3: Click ‘Program’ button to start programming the driver. A new window ‘Auto Programming’ prompts with the status of programming. If the LED driver is already connected a windows message prompts ‘LED driver is programmed successfully’. If the LED driver is not connected a windows message prompts ‘Waiting for LED driver’ Page | 39 Page | 40 Page | 41 Step 4: If multiple LED power supplies are to be programmed connect the next LED power supply that needs to be programmed. The status signal for LED driver turns green once connected. A windows message pops out with “LED driver is programmed successfully” The “Success” count is automatically incremented when the LED power supply is programmed successfully. In case of unsuccessfully programmed LED power supplies the “Failure” count is increased. Any subsequent programming attempts will only increase the failure counter. Click OK to clear the condition and continue with programming as described. Page | 42 Page | 43 Step 5: If a new profile is to be programmed on to a LED power supply during programming, click the ‘Load Profile’ button in the Auto Programming window and follow steps 1 to 4 in this section Page | 44 Step 6: Once finished Click the Cancel button to exit the Programming Mode Note 6: In case of an incorrect driver connection during programming a windows message is prompted saying ‘Incorrect LED driver detected’. Connecting a correct LED driver as per the profile will result in clearing the window and programming back to normal. Page | 45 5.1.4. Read Operation The Read operation will help the user to read the parameters/profile of the LED driver and use the information as needed. This is a manually activated feature. To Read the profile of a compatible LED driver follow the steps below Step 1: Connect the LED driver as explained in Section 3 of this document Step 2: Make sure that the user interface has detected the LED driver and status bar indicates ‘LED driver ready’ Step 3: Click the Read button on the interface and a pop-up opens indicating ‘LED driver settings have been successfully loaded from the device.” Page | 46 5.1.5. Tools tab: The Tools tab will help the user to create custom Part numbers, set a default profile folder and enable or disable the Data log. Settings: This command will allow the user to define part numbers for the compatible OPTOTRONIC LED power supplies. It allows the user to display the custom defined part numbers instead of output currents in the “Select Output Current” section of the user interface. Also, it helps to set the default profile folder for saving and restoring the Otprofile files. The end user can even enable or disable the data logging for the programming sequence which will be discussed under individual sections below. Page | 47 5.1.5.1. Define Part numbers: Step1: Select the LED driver model that needs to have custom defined part number from the drop down list Page | 48 Step2: In the “Part number column” define the required part number. Input the required current in the “Current (mA)” column. For example- input OT48/1000C for 1000mA. Click “Save” to save the defined part number & close. Page | 49 Check the box on the settings dialogue box to display the custom part numbers in the drop down list of “Select Output Current” as shown in below Page | 50 Page | 51 5.1.5.2. Default Profile folder Setting the Default Profile folder enables the user to save the OTprofiles and retrieve them directly. The loading of a profile will be successful when it is available in this folder directory. Either a manual entry of profile name or using a Barcode scanner the path is set to this directory. Page | 52 5.1.5.3. Data Log Enabling the Data logging will help the user track the list of all the power supplies that have been programmed and export the data to a Microsoft Office Excel Comma Separated Values File (.csv). The path for the .csv file should be directed using the ‘Browse’ feature of the windows. The exported file has all the parameters related to a particular driver. The log has the following fields and will be populated according to the profiles used. – – – – – – Page | 53 Timestamp - (date and time – per PC clock) Status – “Success” or “Fail” Serial number – LED Driver datecode per ZDD3019796 or N/A if can not be read or doesn’t exist on the driver. NAED used for product identification and ordering Device Name = Product name as in 2.7.1 Profile Name – empty when profile was not specified. – Programmed Characteristics: output Current, Dimming Enabled, Dim Min Level, Aux Output, Thermal Protection, Derating parameters, Constant Lumen Activated, End of Life, AstroDIM) 5.1.5.4. Startup in Barcode mode Enabling the ‘Start up in Barcode mode’ will launch the user interface where it prompts to scan bar code or type profile name during startup and load the OTProfile for quick access to programming the drivers with existing profiles. Page | 54 5.1.6. Help tab The help tab allows identifying the software version, tool firmware version, LED power supply firmware version, link to the Osram website & the license information for end user. Page | 55 5.2. Production Mode Production mode allows only programming an already saved configuration file and reading the memory / settings of the LED power supply The following screen appears when the OPTORTONIC LED Power Supply Configuration Tool application is launched. Make sure that the Programming tool is connected and is GREEN in the status bar of the interface. Even if the LED driver is connected or not connected the status of the LED driver is RED until the configuration file is selected. Until the configuration file is selected the status of the LED driver is either LED driver not detected – if no driver is connected Incorrect LED driver detected- if a driver is connected Follow steps below to configure the LED power supplies Page | 56 Step1: An OTprofile can be opened in 2 different possible ways. In the Menu bar under File tab use ‘Open Profile’ (or) Click the ‘Load Profile’ in the Main window and input the profile name manually or using a barcode scanner. Make sure the otprofiles exist in the path provided as defined in the section ‘Default Profile folder’. Step2: Connect the appropriate LED driver. On detection of correct LED driver, the LED driver status turns GREEN in the Status Bar. The options of ‘Program’ and ‘Read’ are available for execution. Step3: Proceed to section 5.1.3. ‘Programming the OPTOTRONIC LED power supply’ for next steps. Page | 57 6. Trouble-shooting Fault Programming tool not detected Cause No connections to the PC No connections to the OT Programmer Remedy Connect the USB cable to a port of the PC Connect the USB cable to a port of the OT Programmer No connections to the OT Programmer Make sure the connections to the LED driver/ OT Nest/Handheld tool are made Non programmable driver Make sure the LED driver is a programmable OPTOTRONIC LED driver LED driver programming failed If the connection to LED driver is aborted during Program mode Make sure that the LED driver is connected to the programming cable/pins for the duration of programming Incorrect LED driver If the LED driver connected doesn’t match the selected LED driver model in Program mode Make sure that the LED driver matches the selected model during program mode Error while reading If the connection to LED driver is aborted during Read mode Make sure that the LED driver is connected to the programming cable/pins for the duration of READ is completed Error Codes Other Contact Osram Technical Support. LED Driver not detected OSRAM and OPTOTRONIC are registered trademarks of OSRAM GmbH. 1-800-LIGHTBULB (1-800-544-4828) Page | 58