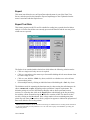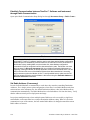
1
Data Analysis Software
TRAKPRO™
Data Analysis Software
User’s Guide
1980581, Revision D
July 2009
Part Number
1980581 / Revision D / July 2009
Copyright ©
TSI Incorporated / 2008-2009 / All rights reserved.
Address
TSI Incorporated / 500 Cardigan Road / Shoreview, MN 55126 / USA
Phone No.
1-800-874-2811 (USA) or (651) 490-2811
Fax No.
(651) 490-3824
E-mail Address
[email protected]
Limitation of Warranty and Liability (effective July 2000)
Seller warrants the goods sold hereunder, under normal use and service as described in the operator's manual, shall
be free from defects in workmanship and material for twenty-four (24) months, or the length of time specified in
the operator's manual, from the date of shipment to the customer. This warranty period is inclusive of any statutory
warranty. This limited warranty is subject to the following exclusions:
a. Hot-wire or hot-film sensors used with research anemometers, and certain other components when indicated in
specifications, are warranted for 90 days from the date of shipment.
b. Parts repaired or replaced as a result of repair services are warranted to be free from defects in workmanship
and material, under normal use, for 90 days from the date of shipment.
c. Seller does not provide any warranty on finished goods manufactured by others or on any fuses, batteries or
other consumable materials. Only the original manufacturer's warranty applies.
d. Unless specifically authorized in a separate writing by Seller, Seller makes no warranty with respect to, and
shall have no liability in connection with, goods which are incorporated into other products or equipment, or
which are modified by any person other than Seller.
The foregoing is IN LIEU OF all other warranties and is subject to the LIMITATIONS stated herein. NO OTHER
EXPRESS OR IMPLIED WARRANTY OF FITNESS FOR PARTICULAR PURPOSE OR
MERCHANTABILITY IS MADE.
TO THE EXTENT PERMITTED BY LAW, THE EXCLUSIVE REMEDY OF THE USER OR BUYER, AND
THE LIMIT OF SELLER'S LIABILITY FOR ANY AND ALL LOSSES, INJURIES, OR DAMAGES
CONCERNING THE GOODS (INCLUDING CLAIMS BASED ON CONTRACT, NEGLIGENCE, TORT,
STRICT LIABILITY OR OTHERWISE) SHALL BE THE RETURN OF GOODS TO SELLER AND THE
REFUND OF THE PURCHASE PRICE, OR, AT THE OPTION OF SELLER, THE REPAIR OR
REPLACEMENT OF THE GOODS. IN NO EVENT SHALL SELLER BE LIABLE FOR ANY SPECIAL,
CONSEQUENTIAL OR INCIDENTAL DAMAGES. SELLER SHALL NOT BE RESPONSIBLE FOR
INSTALLATION, DISMANTLING OR REINSTALLATION COSTS OR CHARGES. No Action, regardless of
form, may be brought against Seller more than 12 months after a cause of action has accrued. The goods returned
under warranty to Seller's factory shall be at Buyer's risk of loss, and will be returned, if at all, at Seller's risk of
loss.
Buyer and all users are deemed to have accepted this LIMITATION OF WARRANTY AND LIABILITY, which
contains the complete and exclusive limited warranty of Seller. This LIMITATION OF WARRANTY AND
LIABILITY may not be amended, modified or its terms waived, except by writing signed by an Officer of Seller.
Service Policy
Knowing that inoperative or defective instruments are as detrimental to TSI as they are to our customers, our
service policy is designed to give prompt attention to any problems. If any malfunction is discovered, please
contact your nearest sales office or representative, or call TSI's Customer Service department at (800) 874-2811
(USA) or (001 651) 490-2811 (International).
iii
Software License
(effective March 1999)
1. TSI INCORPORATED TRAKPRO™ SOFTWARE LICENSE AGREEMENT. TRAKPRO™ Software has been developed by
TSI Incorporated to support its instruments. It is available free of charge to all users of TSI instruments for use in conjunction
with TSI instruments. The user may freely copy the software and install it on multiple computers. Updates are available for
download on TSI’s web site: www.tsi.com.
2. OTHER RESTRICTIONS. You may not rent or lease the SOFTWARE, but you may transfer the SOFTWARE
and accompanying written material on a permanent basis, provided you retain no copies and the recipient agrees to
the terms of this Agreement. You may not reverse-engineer, decompile, or disassemble the SOFTWARE.
3. DUAL MEDIA SOFTWARE. If the SOFTWARE package contains multiple types of media, then you may use
only the media appropriate for your single-user computer. You may not use the other media on another computer
or loan, rent, lease, or transfer them to another user except as part of the permanent transfer (as provided above) of
all SOFTWARE and written material.
4. U.S. GOVERNMENT RESTRICTED RIGHTS. The SOFTWARE and documentation are provided with
RESTRICTED RIGHTS. Use, duplication, or disclosure by the Government is subject to the restrictions set forth
in the “Rights in Technical Data and Computer Software” Clause at 252.22C-7013 and the “Commercial Computer
Software - Restricted Rights” clause at 52.22C-19.
5. LIMITED WARRANTY. TSI warrants that the SOFTWARE will perform substantially in accordance with the
accompanying written materials for a period of ninety (90) days from the date of receipt.
6. CUSTOMER REMEDIES. TSI’s entire liability and your exclusive remedy shall be, at TSI’s option, either (a)
return of the price paid or (b) repair or replacement of the SOFTWARE that does not meet this Limited Warranty
and which is returned to TSI with proof of payment. This Limited Warranty is void if failure of the SOFTWARE
has resulted from accident, abuse, or misapplication. Any replacement SOFTWARE will be warranted for the
remainder of the original warranty period or thirty (30) days, whichever is longer.
7. NO OTHER WARRANTIES. TSI disclaims all other warranties, either express or implied, including, but not
limited to implied warranties of merchantability and fitness for a particular purpose, with regard to the
SOFTWARE and the accompanying written materials.
8. NO LIABILTY FOR CONSEQUENTIAL DAMAGES. In no event shall TSI be liable for any damages
whatsoever (including, without limitation, special, incidental, consequential or indirect damages for personal
injury, loss of business profits, business interruption, loss of information or any other pecuniary loss) arising out of
the use of, or inability to use, this SOFTWARE.
iv
CONTENTS
Part One—Introduction............................................................................................................. 1
Acknowledgements and Trademarks ................................................................................... 1
System Requirements .......................................................................................................... 2
TRAKPRO™ Software Structure............................................................................................. 3
Backward Compatibility ........................................................................................................ 4
New Features........................................................................................................................ 5
Software Configuration ......................................................................................................... 8
Part Two—Menus and Toolbars ............................................................................................11
TRAKPRO™ Software Help Index ........................................................................................11
File Menu Commands.........................................................................................................12
Graph Menu Commands ....................................................................................................12
Reports Menu Commands..................................................................................................12
View Menu Commands.......................................................................................................13
Instrument Setup Menu Commands...................................................................................13
Options................................................................................................................................ 13
Help Menu Commands .......................................................................................................14
Open Command (File Menu) ..............................................................................................14
File Open Dialog Box..........................................................................................................14
Close Command (File Menu)..............................................................................................14
Save Command (File Menu)...............................................................................................15
Save As Command (File Menu)..........................................................................................15
File Save As Dialog Box .....................................................................................................15
1, 2, 3, 4 Command (File Menu) ......................................................................................... 15
Exit Command (File Menu) .................................................................................................16
Toolbar Command (View Menu)......................................................................................... 16
Toolbar................................................................................................................................ 16
Status Bar Command (View Menu) ....................................................................................17
Status Bar ........................................................................................................................... 17
About Command (Help Menu) ............................................................................................ 17
Title Bar............................................................................................................................... 17
Scroll Bars........................................................................................................................... 18
Size Command (System Menu).......................................................................................... 18
Move Command (Control Menu) ........................................................................................18
Minimize Command (Application Control Menu) ................................................................ 19
Maximize Command (System Menu) .................................................................................19
Close Command (Control Menus) ......................................................................................19
Restore Command (Control Menu) ....................................................................................19
Part Three—Communications................................................................................................21
Overview ............................................................................................................................. 21
Communications Setup.......................................................................................................21
Testing Communications ....................................................................................................21
v
Changing Comports ............................................................................................................25
Changing Baud Rate...........................................................................................................26
Instrument Parameters .......................................................................................................26
Instrument Setup | Logging Setup ......................................................................................34
Instrument Setup | Logging Control ....................................................................................38
Instrument Setup | Calibration ............................................................................................39
Set User Calibration Factor.................................................................................................42
Apply New Aerosol Calibration Factor ................................................................................44
Receiving Data....................................................................................................................44
Communications Error Messages.......................................................................................50
Auto-configuration ...............................................................................................................51
Enabling / Disabling Auto-configuration..............................................................................53
Part Four—Sampling Pump....................................................................................................55
Pump Setup Dialog .............................................................................................................55
Intermittent Sampling ..........................................................................................................56
Pump Setup Driving and Driven Parameters......................................................................60
Valid and Invalid Programs .................................................................................................61
Pump Template Editor ........................................................................................................61
The Pump Template Editor Menu .......................................................................................65
Attaching Pump Test Data to a Template File ....................................................................66
Part Five—Data ........................................................................................................................69
View Test Data....................................................................................................................69
P-TRAK™ Tilted Data ..........................................................................................................70
Q-TRAK™ Plus Invalid Data ................................................................................................70
View Test Statistics .............................................................................................................70
View Test Data and Statistics .............................................................................................71
View Report.........................................................................................................................72
Multiple Tests Summary Report..........................................................................................73
Delete Test Data .................................................................................................................74
Export ..................................................................................................................................75
Export Test Data .................................................................................................................75
Export Single Point Data .....................................................................................................76
Part Six—Graphing..................................................................................................................79
Overview .............................................................................................................................79
Creating a New Graph ........................................................................................................80
Opening an Existing Graph.................................................................................................82
Closing the Current Graph ..................................................................................................82
Renaming a Graph..............................................................................................................83
Storing a New Graph ..........................................................................................................83
Deleting a Stored Graph .....................................................................................................83
Exporting Graph Images .....................................................................................................83
Annotating Graphs ..............................................................................................................84
View Graph .........................................................................................................................85
vi
Graph Options..................................................................................................................... 85
Graph Templates ................................................................................................................93
Graph Screen...................................................................................................................... 95
Graph Cursor ...................................................................................................................... 96
Graph Statistics Report.......................................................................................................97
Zooming a Graph ................................................................................................................98
Part Seven—Printing............................................................................................................. 101
Print Command (File Menu)..............................................................................................101
Print Dialog Box ................................................................................................................ 101
Print Progress Dialog........................................................................................................102
Print Preview Command (File Menu)................................................................................102
Print Preview Toolbar .......................................................................................................102
Print Setup Command (File Menu) ...................................................................................102
Print Setup Dialog Box......................................................................................................103
Printing Single Point Data Tables .....................................................................................103
Part Eight—Troubleshooting Guide ....................................................................................105
Introduction ....................................................................................................................... 105
File Saving/Reading..........................................................................................................105
Graph Problems................................................................................................................105
Printing.............................................................................................................................. 105
Communications ...............................................................................................................105
No Graph Annotations ......................................................................................................105
Graph Statistics................................................................................................................. 106
Graph Colors..................................................................................................................... 106
Graph Options Channels are Disabled.............................................................................106
Graph Alarms are not Visible............................................................................................106
Graph Not Plotted .............................................................................................................106
Timeout Errors .................................................................................................................. 107
Serial Communication Errors............................................................................................107
USB Communications.......................................................................................................107
Un-Install TRAKPRO™ Software and FTDI Driver .............................................................108
Sales and Customer Service ............................................................................................109
Part Nine—Appendix.............................................................................................................111
Radio Modem Operation (This option is only available for DUSTTRAK™ II or
DUSTTRAK™ DRX with radio modem accessory) ......................................................111
vii
Part One—Introduction
TRAKPROTM Data Analysis Software is an instrument control and data acquisition program for
a range of monitoring equipment manufactured by TSI Incorporated. Since the functionality of
the instruments varies with model type, the software should be configured for the required
instrument before use. This may be done by the Software Configure option. The software
provides the facility for setting up the instruments, programming in measuring sequences,
reading and saving the resulting test data to a file, and displaying the results graphically and in
tables. Statistics are available on discrete test data and graphical data and all results can be
sent to a printer.
Acknowledgements and Trademarks
TRAKPRO™ software is a product of TSI Incorporated, 500 Cardigan Road, Shoreview, MN
55126, USA.
DUSTTRAK™, P-TRAK®, AEROTRAK™, SIDEPAK™, PROTECTAIR™, and VELOCICALC® are
trademarks and registered trademarks of TSI Incorporated.
All rights to this product are reserved and invested in TSI Incorporated.
TRAKPRO v4 was compiled using Microsoft Visual C++® V8.
Windows® XP, Windows Vista®, and Visual C++® are registered trademarks of Microsoft
Corporation.
Graphing functions created using ProEssentials V5 from Gigasoft, Inc. / 696 Lantana / Keller,
TX 76248.
Diamond Stealth is a trademark of Diamond Computer Systems, Sunnyvale CA 94086.
FTDI is a manufacturer of the USB interface chip used in the SIDEPAK™
Future Technology Devices International Ltd.
93 - 97 St George's Road,
Glasgow G3 6JA
Scotland U.K.
File extensions used by TRAKPRO™ software consist of the *.TKP extension which is the new
native format, and *.DF1 which is the format used by TRAKPRO v2.0 and has been retained
for backward compatibility. New data files should always be given the TKP extension.
Exported data files default to *.TXT so they can be easily viewed by ASCII file readers e.g.,
NotePad. The *.TXT extension can be changed if so desired before the file is saved.
Data Report file generated by TRAKPRO v4 is in html format.
1
Support for the following TSI products is provided in TRAKPRO™ software:
•
AEROTRAK™ 9000 Nanoparticle Aerosol Monitor
•
AEROTRAK™ Optical Particle Counter
•
P-TRAK® Ultrafine Particle Counter
•
Q-TRAK™ IAQ Monitor
•
DUSTTRAK™ Aerosol Monitor
•
DUSTTRAK™ II Aerosol Monitor
•
DUSTTRAK™ DRX Aerosol Monitor
•
SIDEPAK™ Aerosol Monitor
•
SIDEPAK™ Sampling Pump
•
VELOCICALC® Air Velocity Monitor
Other extensions used by TRAKPRO are *.CAL (the DUSTTRAK™ calibration file), and *.TPL
the graph template file - neither of these extensions are under direct control of the user.
A View is a Microsoft MFC concept and is a child window within the application’s main
window that is dedicated to displaying a particular aspect of the program’s data. The
program’s data are often referred to as a Document and together with views form the basis of
the Document/View Architecture of Microsoft MFC.
A DLL or Dynamic Link Library is a program containing functions that may be shared by a
range of applications. These functions are accessible after loading the DLL at run time rather
than being statically incorporated into the application.
A tooltip control is a small pop-up window that displays a descriptive text giving the purpose
of tools in an application. A tool is either a window or an application-defined rectangular area
within a window's client area.
USB stands for Universal Serial Bus and is an external bus standard for communicating with
a wide range of devices including mice, scanners, digital cameras, printers, etc. without the
addition of specialized cards. Up to 127 devices may be daisy-chained to a single bus which
can support data rates of up to 12 Mbps (USB 1.1 specification) or 480 Mbps (USB 2.0
specification). Devices are hot-swappable and can be connected and disconnected while the
computer is still on using a simple cable that may be up to 5 meters long.
System Requirements
TRAKPRO® v4 is designed to run on a PC having an 800 MHz Pentium processor or better and
at least 512 MB of RAM.
2
TRAKPROTM Data Analysis Software—Part One
Other Requirements
•
Video card and monitor capable of at least VGA 256 colors
•
Mouse or other pointing device
•
At least one free serial port or USB port (the type of port depends on the instruments) for
communication with instruments
•
A printer if hard copies are required
TRAKPRO® v4 is a full 32-bit application written using Microsoft © Visual C++ V8. It
requires a 32-bit environment—e.g., Windows® XP or Vista®, with Microsoft .Net 2.0
framework.
TRAKPRO™ Software Structure
The program takes the form of seven main screens or views. Four of the views are called form
views and are based on a dialog box format, the third and fourth views are reserved for
displaying the graphs and graph related data. The form views serve to give an overall view of
the contents of a data file. The four form views differ to accommodate the differences between
instrument types.
The most significant feature of the form view is the ListView boxes which display the current
file’s data.
In the case of IAQ data files, provision is made to display Single Sample Data from the
Q-TRAK™ Plus, DUSTTRAK™ II, or DUSTTRAK™ DRX instruments, along with Single Point
Data acquired by the P-TRAK™ particle counter, hence this view contains two ListView boxes,
one for Logged Test Data and one for Single Sample Data. This view contains another
ListView box for the statistics of each channel.
Logged Test Data
Each test is identified by the Test ID, the Start Date, the Serial Number of the instrument that
recorded it, and notes that may be added by the user. The test id is not unique, since the file
may contain several tests called Test 001, but the other details identify it more closely.
Each ListView column may be sorted. Clicking on one of the column headers will cause the
display to be sorted in accordance with the data in that column—e.g., the Notes column will
cause the list of tests to be sorted with respect to the ASCII representation of each test’s note,
and the Start Date column will cause sorting with respect to the date.
User’s Manual
3
Clicking on the test ID in the Test column selects this test and causes the channel statistics
ListView box on the form to be filled in with appropriate details. The blue tick that used to
indicate selection test in TRAKPRO 3.10 has now been replaced with a full length highlight
that spans all the columns (see Features New to Version 3.20). Certain features will not be
accessible until a test has been downloaded from instrument or a test data file has been loaded,
e.g., the Test Statistics Report.
Single Sample Data
TRAKPRO™ software provides a ListView box to display the Single Sample Data (SSD) that
may be acquired by the Q-TRAK™ Plus/P-TRAK™/DUSTTRAK™ II/DUSTTRAK™ DRX
instruments. Before display, the samples are sorted first by the ID field and then by date/time
and demarcated from each other by alternate row color. Clicking the Restore Default Sorting
button re-displays the samples in their original sorted order.
Editing Data Notes
Both Logged Data and Single Point Data ListView boxes contain Notes fields that may be
edited. To edit a note, select an item, test or single data point in the ListView and click with
the right mouse button. A dialog pops up which enables editing the notes field, and in the case
of Single Point Data, also the Location field.
Saving and Storing Data
TRAKPRO™ software draws a distinction between Saving and Storing data. Graphs are held in
a store within TRAKPRO™ software, basically a list of graphs with their associated properties
held in memory. When a graph is stored, the graph is added to this list. At this point no data
are written to disk. To save the graph to disk, the file containing the test(s) from which the
graph was derived must be saved. Saving a data file always saves any graphs associated with
it. The user is warned at stages throughout TRAKPRO™ software to store the graph or save the
data file if changes to a graph have been made.
Backward Compatibility
TRAKPRO Version 4 is compatible with earlier versions of TRAKPRO™ software. Both the test
data and graphs may be read from files created by previous versions of TRAKPRO.
Graph Translation
TRAKPRO v2.xx drew each graph component discretely, while TRAKPRO v4 makes calls to a
third party graphics utility DLL (Pegrp32C.dll from ProEssentials ™). This has resulted in
considerable enhancement of existing features and many new ones, but with inevitable
changes in approach to some functions that were possible with earlier TRAKPRO™ versions
(e.g., when zooming the graph, the shift key needs to be held down, and the zoom facility is
not accessible as a function from the graph tool bar.)
Some of the enhanced features include:
•
™
4
Fully trackable graph annotations that stick to the data points irrespective of how the
graph is zoomed. They may be also easily edited and repositioned using the mouse.
ProEssentials a trademark of Gigasoft, Inc.
TRAKPROTM Data Analysis Software—Part One
•
A range of plot styles including bestfit lines and curves and cubic spline fits
•
A range of fonts that may be applied to the graph title, subtitle, axis labels etc.
•
Ability to change color of the graph background and graph desktop
•
Ability to create a graph based on a previously defined template of properties
•
Graph Print Preview feature
•
Dynamic graph cursor for reading data points
•
Ability to copy a graph to the Windows clipboard in the form of a bitmap.
Features that do not translate well are:
•
The zoomed state saved in a graph is restored for single channel graphs only. The graph
may contain several plots, but must have only a single Y-axis for it to be represented as a
zoomed graph.
•
Notes could be placed anywhere in the graph’s client window in earlier versions of
TRAKPRO™ software, while in TRAKPRO 3.6.0 and above, the notes (graph annotations)
may only be placed on the graph itself, and not on the graph’s desktop which is reserved
for axis labels, etc. The main disadvantage to the early TRAKPRO™ software approach is
that notes added to points of interest on the graph became detached and irrelevant if the
graph were zoomed or re-ranged. Coordinate information stored in the old *.df1 files was
in the form of percentage of client window which has no direct relationship to actual data
points. The relationship varies, for instance, when a subtitle or axis is added or removed.
As a result, although notes may be read from old *.df1 files and placed on the graph, their
position will be inaccurate. The user must be aware of this and should re-position the
notes where required before saving the graph in the new *.tkp format.
New Features
Features New to Version 3.20
There are several enhancements that have been made for the transition of TRAKPRO™
software version 3.10 to version 3.20
•
Addition of support for the new Q-TRAK™ Plus monitor
•
Support for the DUSTTRAK™ Analog Output and DUSTTRAK™ Alarm Setting
Enhanced styles for ListView boxes giving gridlines to visually separate the data
Improved selection—items can be selected in any column, not just the first column
User’s Manual
5
Header drag&drop re-ordering of columns in the Single Sample ListView box. Columns may
be re-arranged by clicking on the column heading with the mouse cursor and dragging it
sideways to another location.
The user may scroll through both ListView boxes on the IAQ main screen using the arrow
keys, and can select Tests in the Logged Tests ListView by placing the mouse cursor over the
test without having to click on it (the hover selection feature).
Features New to Version 3.33
The main additional feature is the support for the SIDEPAK™ Aerosol Monitor; however, there
are several other changes:
•
Multi Test Summary Report Printing. A new item has been added to TRAKPRO™
software’s menu entitled Reports and the most significant item in this menu is the new
Multi Test Summary Report.
•
The Set DUSTTRAK Calibration dialog of TRAKPRO v3.20 has been replaced with a
newly designed Set User Calibration Factor dialog.
•
The 8-hr TWA value is now reported in the Test Statistics and Graph Statistics dialogs for
all aerosol, CO, and CO2 channels.
•
The TRAKPRO™ software installation now uses InstallShield v3.5x instead of v2.12. This
utilizes the Microsoft Windows Installer engine which gives enhanced features such as:
1. Roll-Back—Restore the previously existing state of the PC to abort an installation
part way.
2. Manufacturer Information—Contact details for TSI are available in the
Add/Remove Programs applet in Windows 2000 and above.
3. Installation repair—The installation may be repaired at a later date replacing
damaged files.
4. Upgrades—Better control of future TRAKPRO™ software upgrade versions.
Features New to Version 3.40
The main addition to version 3.40 is support for the new SIDEPAK™ Sampling Pump.
TRAKPRO™ software provides a separate main screen for displaying the tests and the test
details, and has two new associated features, the Pump Setup dialog and the Template File
Editor.
•
TRAKPRO™ Data Analysis Software has been enhanced to accommodate additional
auxiliary sensors used with the Q-TRAK™ Plus IAQ Monitor. The displayed and logged
data from auxiliary sensors is shown as a fifth parameter on the 8554 model and as a
fourth parameter on the 8552 model (without a CO sensor) Data from auxiliary sensors
may be measured in the usual manner by logging at preset logging interval, or may be
logged manually by user interaction. In certain situations, measurements may be taken that
do not have a meaningful time component. Consequently, such data are expressed only as
6
TRAKPROTM Data Analysis Software—Part One
data points expressed in appropriate units of measure but without a time component in
both graphs and tables.
•
The ProEssential Graphic DLL from GigaSoft has been updated to include bug fixes and
allow for the addition of new features in future releases of TRAKPRO™ software. As a
consequence of this, small numbers are now represented in the graph y-axis using power
symbols rather than the exponential notation - that is:
p (pico e-12),
n (nano e-9),
u (micro e-6),
m (milli e-3),
K (kilo e3),
M (mega e6),
B (billion e9),
T (tera e12).
•
The Set User Calibration dialog has been enhanced to allow the user to set the current
calibration in SIDEPAK™ Aerosol Monitors with firmware versions of 1.02 and above
using radio buttons.
•
The date format used in TRAKPRO™ software has been made more flexible. Previously the
date format was chosen automatically by TRAKPRO™ software based on the user system’s
language ID code, but that did not allow the user to select a preferred format over and
above the default for the selected country. TRAKPRO now uses the Short Date format and
its separator as specified in the Windows Control Panel | Regional Settings applet, thus
allowing the MM/dd/yyyy, dd/MM/yyyy, or yyyy/MM/dd. Since it is possible to specify
a range of separators, you may also have yyyy-MM-dd (the internationally accepted ISO
8601 format).
Features New to Version 3.6.0
The main addition to version 3.6.0 is support for the AEROTRAK™ instruments.
The AEROTRAK™ 9000 test ids may be simple names, they do not have to be test numbers as
in other instruments.
The AEROTRAK™ OPC comes with a new form view look.
The 8 hour TWA calculation changed for tests with sample times greater than 8 hours. In
previous versions TRAKPRO stopped calculating once it reached the 8 hour mark. TRAKPRO™
software now calculates the 8-hour TWA over the entire test time.
Where the TWA value is displayed the start and end times are also displayed.
Features New to Version 4.0.0
The main addition to version 4.0.0 is support for TSI VELOCICALC® instruments.
User’s Manual
7
The main form view of version 4.0.0 is Microsoft Office 2003-like GUI. Note that the
Microsoft Office 2003-like GUI is only visible if end user’s computer uses Windows ® XP
Style appearance scheme.
Features New to Version 4.1.0
The main addition to version 4.1.0 is support for Windows® Vista® operating system.
Features New to Version 4.2.0
The main addition to version 4.2.0 is support for TSI DUSTTRAK™ II and DUSTTRAK™ DRX
instruments.
The addition of the support of wireless radio communications for DUSTTRAK™ II and
DUSTTRAK™ DRX instruments.
Features New to Version 4.2.2
Version 4.2.2 is a maintenance release that fixed several bugs dealing with DUSTTRAK™ II
and DUSTTRAK™ DRX instruments.
•
The instrument serial number is now correctly read from the instrument.
•
TRAKPRO™ software can automatically detect an instrument connected via USB cable to
a computer running a non-English version of Windows® operating system.
•
More robust connection to an instrument when using the receive data function.
One new feature is the Logging Control dialog.
Features New to Version 4.3.0
Version 4.3.0 adds support for new data types received from a VELOCICALC® meter. The new
data types include leakage test application data.
Software Configuration
The configuration of TRAKPRO™ software can be changed by four methods:
First, when reading a data file into TRAKPRO™ software that contains no previous data, the
instrument configuration is automatically changed to make the program acceptable to the new
file. This occurs when files are read by File | Open, by clicking on a data file in Windows®
Internet Explorer® through association with the file extensions, or by dragging and dropping a
file from Windows® Internet Explorer® browser.
®
Windows is a registered trademark of Microsoft Corporation.
8
TRAKPROTM Data Analysis Software—Part One
Note
If the program already contains data from a different instrument type, the
configuration will be changed to that of the new data file, unless this change is
between IAQ, SIDEPAK™ sampling pump, or AEROTRAK™ OPC instruments, in
which case the file will not be loaded, and the user will be warned appropriately.
Second, the software configuration can be viewed and changed by the combo box situated at
the far right end of the toolbar. This feature is not available if the toolbar was made invisible
from the View Toolbar menu.
Third it may be changed explicitly from the Options | Software Configure menu item. This
item provides a dialog box containing a screen in which all the instruments recognized by
TRAKPRO™ software are displayed in the form of icons.
Clicking on an icon selects the instrument and gives a brief description of its capabilities in the
description panel. Finally, clicking on OK will put TRAKPRO™ software into the correct
software mode for the selected instrument.
Finally, the Auto-configuration feature will automatically change the software configuration
to that of the currently attached instrument.
User’s Manual
9
Part Two—Menus and Toolbars
TRAKPRO™ Software Help Index
How To ...
• Check communications with instrument
•
Set logging times
•
View raw data
•
View statistics
•
Create a graph
•
Graph options
•
Print data
•
Troubleshooting
Commands
• File menu
•
Graph menu
•
Reports menu
•
View menu
•
Instrument setup menu
•
Options menu
•
Help menu
11
File Menu Commands
The File menu offers the following commands:
New
Open
Close
Save
Save As
Receive
Export
Delete Test
Print
Print Preview
Print Setup
Exit
Opens a new pump template file (for SIDEPAK™ Sampling Pump).
Opens an existing data file (either test data, template file, or report file).
Closes an opened data file.
Saves an opened data file using the same file name.
Saves an opened data file to a specified file name.
Receives data from the TSI logging instrument.
Exports a data file in ASCII format suitable for reading by a spreadsheet.
Deletes an individual test from the program’s data set.
Prints a document, i.e., a table, report or graph.
Displays the document on the screen as it would appear printed.
Selects a printer and printer connection.
Exits TRAKPRO™ software.
Graph Menu Commands
The Graph menu offers the following commands concerned with graph management:
New
Open
Store
Delete
Creates a new graph from a range of tests.
Opens a graph that has been stored in the program or saved in the data file.
Stores the current graph in the program’s graph list.
Deletes a graph from the program’s storage.
For more information on graphs see Graphing - Overview and Graph Screen.
Reports Menu Commands
The Reports menu offers the following commands concerned with graph management:
Data Statistics
Report
Test Data
Report
Test Statistics
Report
View Saved
Report
Multiple Tests
Summary
12
Provides a report of raw data and statistics for the currently selected test.
Provides a report of raw data for the currently selected test.
Provides a report of the statistics on the currently selected test data.
View a saved report.
Summarize tests from a range of different instruments on a single table.
TRAKPRO™ Data Analysis Software—Part Two
View Menu Commands
The View menu offers the following commands:
Graph
Test Data
Test Statistics
Toolbar
Status Bar
Views current graph, or stored graph if present.
Provides a table of raw data for currently selected test.
Provides statistics on currently selected test data.
Shows or hides the toolbar.
Shows or hides the status bar.
Instrument Setup Menu Commands
The Instrument Setup menu offers the following commands, which enable reading and
programming settings in the currently connected instrument:
Communications
Radio Comm
Parameters
Logging Setup
Logging Control
Calibration
Pump Setup
Configures and tests communications with attached instrument.
Configures radio and establishes communications with an attached
wireless radio and DUSTTRAK™ II or DUSTTRAK™ DRX instrument.
Reads and changes parameters associated with measurement.
Reads and sets the attached instruments logging parameters.
Allows limited control of a DUSTTRAK™ II or DUSTTRAK™ DRX
instrument attached via USB or Ethernet.
Reads the instrument’s sensor calibration dates.
Programs the SIDEPAK™ Sampling Pump.
Options
The Options menu allows configuring the program for the different instruments that it
supports and in the case of the DUSTTRAK™ instrument, allows the setting of the mass
calibration:
Software Configuration
Auto-Configuration
Apply New Cal Factor
User’s Manual
Configure software based on instrument type.
Automatically change the software configuration to that of the
currently attached instrument.
Changes DUSTTRAK™ calibration and clones a test having the
new calibration.
13
Help Menu Commands
The Help menu offers the following commands, which provide assistance with this
application:
Help Topics
Troubleshooting
About TRAKPRO
Displays this help document.
Displays this help document.
Displays the version number of this application and TSI web address.
You may also review the software license agreement from this screen.
Open Command (File Menu)
Use this command to open an existing data file. More than one data file can be opened, but the
tests in each additional file are added to the current test list and the resulting data file assumes
the name of the last file opened. There is no New command for test data files, since opening a
data file or reading data from an instrument effectively provides a new document.
Shortcuts
Toolbar
Keys
Ctrl+O
File Open Dialog Box
The following options allow specifying which file to open:
File Name
Type or select the filename to open. This box lists files with the
extension you select in the Files of Type list box.
Files of Type
Select the type of file to open: TRAKPRO 3.xx and above files (*.tkp)
or TRAKPRO 2.11 files (*.df1).
Look in
Select the drive and directory in which TRAKPRO™ software stores
the file you want to open.
Close Command (File Menu)
Use this command to close the current data file. TRAKPRO™ software suggests saving changes
to your file before closing it. If a file is closed without saving it, all changes made since the
last time it was saved, will be lost. Before closing an untitled file, TRAKPRO™ software
displays the Save As dialog box and suggests naming and saving the file.
Shortcut
Toolbar
14
TRAKPRO™ Data Analysis Software—Part Two
Save Command (File Menu)
Use this command to save the active data file to its current name and directory. When
saving a file for the first time, TRAKPRO™ software displays the Save As dialog box. If you
want to change the name and directory of an existing file before it is saved, choose the
Save As command.
Shortcuts
Toolbar
Keys
Ctrl+S
Save As Command (File Menu)
Use this command to save and rename the active file.
To save a file with its existing name and directory, use the Save command.
File Save As Dialog Box
The following options allow specifying the name and location of the file to save:
File Name
Type a new filename to save a data file with a different name.
Although TRAKPRO™ software will read *.tkp or *.df1 files, it will
only save in tkp format (*.tkp files).
Save in
Select the drive and directory in which TRAKPRO™ software will
store the file.
Save As Type
Select the type of file to save: TRAKPRO 3.xx and above files (*.tkp)
or All files (*.*)
1, 2, 3, 4 Command (File Menu)
Use the numbers and filenames listed at the bottom of the File menu to open the last four files
closed. Choose the number that corresponds with the file to open.
User’s Manual
15
Exit Command (File Menu)
Use this command to end TRAKPRO™ software session. You can also use the Close command
on the application Control menu. TRAKPRO™ software prompts to save a file with unsaved
changes.
Shortcuts
Double-click the application's Control menu button.
Mouse
Or click on the “X” box at the right side of the window.
Keys
Alt+F4
Toolbar Command (View Menu)
Use this command to display or hide the Toolbar, which includes buttons for some of the most
common commands in TRAKPRO™ software, such as File Open. A check mark appears next
to the menu item when the Toolbar is displayed.
Note
Since the current Instrument Combobox is displayed in the form screen toolbar,
use the Software Configure option to change instruments if the toolbar has
been hidden.
See Toolbar for help on using the toolbar.
Toolbar
The toolbar is displayed across the top of the application window, below the menu bar. The
toolbar provides quick mouse access to many tools used in TRAKPRO™ software.
For details of the toolbar associated with the Graph Screen see Graph Screen.
To hide or display the Toolbar, choose Toolbar from the View menu (Alt+V+T).
16
TRAKPRO™ Data Analysis Software—Part Two
Status Bar Command (View Menu)
Use this command to display and hide the Status Bar, which describes the action to be
executed by the selected menu item or depressed toolbar button, and keyboard latch state. A
check mark appears next to the menu item when the Status Bar is displayed.
Note
The status bar is important in the Graph Screen, since its panel displays the
coordinates of the graph cursor as controlled by the mouse or arrow keys.
See Status Bar for help on using the status bar.
Status Bar
The status bar is displayed at the bottom of the TRAKPRO™ window. To display or hide the
status bar, use the Status Bar command in the View menu.
The left area of the status bar describes actions of menu items as the arrow keys are used to
navigate through menus. It also shows messages that describe the actions of toolbar buttons
when depressing them, before releasing them. If after viewing the description of the toolbar
button command, you wish not to execute the command, move the pointer off the toolbar
button before releasing the mouse button.
The right areas of the status bar contain the cursor coordinates when the Graph Screen is being
displayed and the latched keyboard keys (NUM).
About Command (Help Menu)
Use this command to display the license information and version number of your copy of
TRAKPRO™ software.
Title Bar
The title bar is located along the top of a window. It contains the name of the application and
the currently opened data file.
To move the window, drag the title bar.
Note
Move dialog boxes by dragging their title bars.
User’s Manual
17
A title bar may contain the following elements:
•
Application Control-menu button
•
Name of the application
•
Maximize button
•
Name of the data file
•
Minimize button
•
Close button
Scroll Bars
Displayed at the right and bottom edges of the document window. The scroll boxes inside the
scroll bars indicate your vertical and horizontal location in the document. You can use the
mouse to scroll to other parts of the document. When a graph is displayed and put into zoom
mode, the horizontal scroll bar enables scrolling to areas outside the initial zoomed region
while maintaining the same magnification.
Size Command (System Menu)
Use this command to display a four-headed arrow so you can size the active
window with the arrow keys.
After the pointer changes to the four-headed arrow:
1. Press one of the DIRECTION keys (left, right, up, or down arrow key) to move the
pointer to the border you want to move.
2. Press a DIRECTION key to move the border.
3. Press ENTER when the window is the size wanted.
Notes
This command is unavailable if you maximize the window.
Only the graph screen is proportionally sized with respect to the window size.
Shortcut
Drag the size bars at the corners or edges of the window.
Mouse
Move Command (Control Menu)
Use this command to display a four-headed arrow for moving the active window or
dialog box with the arrow keys.
Note
This command is unavailable if the window is maximized.
Shortcut
Keys
18
Drag the title bar to move the window.
TRAKPRO™ Data Analysis Software—Part Two
Minimize Command (Application Control Menu)
Use this command to reduce the TRAKPRO™ window to an icon.
Shortcut
Click the minimize icon on the title bar.
Mouse
Maximize Command (System Menu)
Use this command to enlarge the active window to fill the available space.
Shortcut
Click the maximize icon
on the title bar; or double-click the title bar.
when the active window is already maximized.
This icon changes to
Mouse
Close Command (Control Menus)
Use this command to close the active window or dialog box.
Double-clicking a Control-menu box is the same as choosing the Close
command.
Shortcuts
Keys
Ctrl+F4
Alt+F4
Closes a document window.
Closes the TRAKPRO™ window or dialog box.
Restore Command (Control Menu)
Use this command to return the active window to its size and position before choosing the
Maximize or Minimize command.
User’s Manual
19
Part Three—Communications
Overview
The communications in TRAKPRO™ software is via the serial ports COM1 to COM15 and
USB ports that are managed by Windows.
For IAQ instruments, the baud may be set to any of the following: 1200, 2400, 4800,
9600, 19200.
The user may conduct a simple test at each of the baud to establish the highest rate that is still
reliable, depending on computer performance, cable length, etc., see Testing Communications.
The other port settings are fixed and are:
Parity:
Data bits:
Stop bits:
NONE
8
1
For SIDEPAK™, AEROTRAK™, DUSTTRAK™ II, and DUSTTRAK™ DRX instruments,
communications is described in Testing Communications.
Communications Setup
The Instrument Setup | Communications dialog box allows the following actions:
•
Test instrument communications
•
Set serial port
•
Set baud rate
•
Set IP address
Testing Communications
The user may check that communication can be established between the computer and
instrument by selecting Instrument Setup | Communications and clicking on Test. This
sends an instruction to the instrument requesting its identification. If communication is
successful, the user is informed and told the instrument’s model number. If unsuccessful, an
appropriate communications error message is given.
Note
In the case of older IAQ instruments where the baud rate can be changed, the test
operation is performed at the selected baud rate, while the new Q-TRAK™ Plus
and the P-TRAK™ instruments only communicate at a fixed baud of 9600 and are
thus tested at this setting.
21
Comport Auto-detection
The Find Port button may be used to identify which comport has an attached instrument.
TRAKPRO™ software attempts to open each comport in turn and where successful, tries to
identify the attached instrument. If the program is currently configured for an IAQ instrument,
TRAKPRO™ software searches for IAQ instruments first (using the instruments’ default baud
of 1200) and if no instrument is found, it searches for a Q-TRAK™ Plus or a P-TRAK™
instrument using 9600 baud. The converse procedure is used where the program is configured
for PROTECTAIR™ Multi-Gas Monitor.
IAQ Communications Port Setup (not Q-TRAK™ Plus or P-TRAK™)
or
Q-TRAK™ Plus and P-TRAK™ Communications Port Setup
22
TRAKPRO™ Data Analysis Software—Part Three
SIDE PAK™ and AEROTRAK™ Instrument Communications
The following dialog box is shown to indicate correct communication with SIDEPAK™ and
AEROTRAK™ instruments.
The SIDEPAK™ instrument uses USB communications, so port number and baud rate, etc., are
not applicable. The current implementation of USB communication is by virtual comport, and
so in fact, a comport is used, although this is transparent.
The AEROTRAK™ instruments use the USB mass storage drivers supplied by Windows to
emulate a drive on your PC.
VELOCICALC® Instrument Communications
The following dialog box is shown to indicate correct communication with VELOCICALC®
instruments.
The VELOCICALC® instruments use the USB communications, so port number and baud rate,
etc., are not applicable.
User’s Manual
23
DUSTTRAK™ II / DUSTTRAK™ DRX Instrument Communications
The DUSTTRAK™ II and DUSTTRAK™ DRX instruments use the USB, Ethernet, and wireless
radio communications.
The following dialog box is shown to indicate correct communication using the USB and
Ethernet communication methods with a DUSTTRAK™ II or a DUSTTRAK™ DRX instrument.
Ethernet communications require that the IP address be entered prior to selecting the Test
button to connect to the instrument. When working with TRAKPRO™ software and a
DUSTTRAK™ II or a DUSTTRAK™ DRX instrument, make sure that the active screen on the
instrument display is the Main screen. Also, do not change the instrument display screens
during the software operation.
For wireless radio communication with a DUSTTRAK™ II or a DUSTTRAK™ DRX instrument,
see the Radio Modem Operation section of Part Nine—Appendix of this manual.
24
TRAKPRO™ Data Analysis Software—Part Three
Changing Comports
To change the comport, select Instrument Setup | Communications from the main menu and
select the required comport from the drop-down combo box in the resulting Communications
Port Setup dialog box.
IAQ Communications Port Setup (not Q-TRAK™ Plus or P-TRAK™)
or
Q-TRAK™ Plus and P-TRAK™ Communications Port Setup
User’s Manual
25
Changing Baud Rate
To change the baud rate, select Instrument Setup | Communications from the main menu
and click on the required radio button in the resulting Communications Port Setup dialog box.
Note
Only IAQ instruments have the ability to change baud rates. The Q-TRAK™ Plus or
P-TRAK™ instruments’ baud rate cannot be changed, since this is fixed at 9600.
Instrument Parameters
This menu option provides the sub options for applicable instruments:
•
Clock Setup (IAQ)
•
Logging Intervals (IAQ)
•
Time Constants (IAQ [not Q-TRAK™ Plus or P-TRAK™ instruments])
•
Others (Q-TRAK™ Plus and P-TRAK™ instruments)
•
Analog Output (DUSTTRAK™, DUSTTRAK II™, and DUSTTRAK DRX™ monitors)
•
Alarm Setpoint (DUSTTRAK™, DUSTTRAK II™, and DUSTTRAK DRX™ monitors)
Parameters | Clock Setup
26
TRAKPRO™ Data Analysis Software—Part Three
The dialog box displays the date and time read from the instrument along with the current
system time as read from the computer. The instrument date and time are displayed using
Windows DateTime Picker controls.
The required date may be changed by a variety of means. Each component of the date may be
selected and edited by typing in the new value, or incremented and decremented by the use of
the keyboard arrow keys. The date may also be selected from a drop-down calendar that
appears if the control’s down arrow button is pressed.
The required time may be changed by selecting a component part and editing it via the
keyboard or incrementing/decrementing it by use of the keyboard arrow keys or the control’s
spin buttons.
The current system time as read from the PC may also be transferred directly into the date and
time controls using the >> buttons. Pressing the Send button sends the new clock data to the
currently connected instrument.
The required date format is indicated and is dependent on the Regional / International settings
in the Windows control panel.
Parameters | Logging Intervals
This option allows programming the available logging intervals for log mode 1 of the
instrument. Intervals for log modes 2 and 3 are set in the Logging Setup screen.
TRAKPRO™ software retrieves the current logging intervals from the connected instrument,
and the user may enter up to five (5) logging intervals. The first interval will be used for log
mode 1 which is the manual logging function.
The user is only allowed to enter times within the range quoted in the dialog box. Times may
be entered as mm:ss or mmss. Pressing Send sends the new logging intervals to the
instrument and closes the dialog box.
The first time interval in the list will become the interval adopted by the instrument. The
remaining values in the list may be selected as required from the instrument keypad rather
than by TRAKPRO™ software. Selecting logging mode 1, and holding down the logging
Interval key causes the instrument to cycle through the list of programmed intervals.
Selection is made by releasing the key when the required logging interval is displayed.
The diagram below shows how time constants and logging intervals are related to one another.
The instrument digitizes and stores sensor information once a second. The time constant
dictates how many of the last 1 second measurements will be averaged as a sliding average
into a value that will be displayed on the instrument. The logging interval dictates how often
the raw data (averaged over the logging interval) is written into the log memory.
User’s Manual
27
Note
For detailed information on logging intervals, refer to the manual that accompanies
the logging instrument.
Parameters | Time Constants
This option allows the user to read and change the instrument’s 5 time constants applicable to
logging modes 1, 2, and 3.
Time constants are the averaging period over which a mean of the data will be calculated and
displayed on the instrument. The average is a sliding one and always contains the mean of the
most recent data points spanned by the time constant.
The user is only allowed to enter times within the range quoted in the dialog box. Times may
be entered as mm:ss or mmss. Pressing Send sends the new logging intervals to the
instrument and close the dialog box.
The first time constant in the list will become the constant adopted by the instrument for all
logging modes. The remaining values in the list may be selected as required from the
instrument keypad rather than by TRAKPRO™ software. Selecting a logging mode, and
holding down the Time Constant key causes the instrument to cycle through the list of
programmed time constants. Selection is made by releasing the key when the required time
constant is displayed.
Note
Each logging mode uses the same time constant list and the selected time
constant will be applied to all logging modes. This is in contrast to the logging
interval which is programmed separately for logging modes 2 and 3 and hence
allows each mode to have a separate logging interval.
The diagram below shows how time constants and logging intervals are related to one another.
The instrument digitizes and stores sensor information once a second. The time constant
dictates how many of the last 1 second measurements will be averaged as a sliding average
into a value that will be displayed on the instrument. The logging interval dictates how often
the raw data (averaged over the logging interval) is written into the log memory.
28
TRAKPRO™ Data Analysis Software—Part Three
Notes
There is no feature to set the time constant for the Q-TRAK™ Plus, VELOCICALC®,
P-TRAK™, or AEROTRAK™ instruments.
For detailed information on time constants, refer to the manual that accompanies
the logging instrument.
The time constant for DUSTTRAK™ II or DUSTTRAK™ DRX instruments is set
through the logging parameters setup.
Parameters | Others
This dialog box allows the setting of miscellaneous parameters concerned with the P-TRAK™
and Q-TRAK™ Plus instruments.
Click on the dialog controls below for a description of each control’s function.
P-TRAK™/Q-TRAK™ Plus Dialog
The backlight duration for the P-TRAK™ counter may be set to any of the following:
•
No Backlight
•
5 seconds
•
10 seconds
•
30 seconds
User’s Manual
29
The backlight duration for the Q-TRAK™ Plus monitor may be set to any of the following:
•
No Backlight
•
10 seconds
•
30 seconds
•
10 minutes
Currently, in this version of TRAKPRO™ software, only the P-TRAK™ counter’s and
Q-TRAK™ Plus monitor’s backlight setting may be changed from this dialog. It is anticipated
that several other parameters will be added in the future.
Parameters | DUSTTRAK™ Analog Output
DUSTTRAK™ instruments with serial numbers greater than #21959, as well as desktop
DUSTTRAK™ II and DUSTTRAK™ DRX instruments have an analog output feature whereby a
voltage output is supplied that corresponds to the particle concentration being measured. For
the DUSTTRAK™ monitor, the voltage range is always 0 to 5 volt DC, but this can be made to
correspond to one of four different concentration ranges selected by radio buttons.
30
TRAKPRO™ Data Analysis Software—Part Three
For the DUSTTRAK™ II monitor, the size fraction is always AEROSOL. The output setting
can be set to 0 to 5 Volts DC or 4 to 20 mA. The upper limit is restricted by the maximum
concentration value of the instrument. The analog out may be enabled or disabled by
clicking on the ON or OFF radio buttons and pressing the Send button. The default setting
for new DUSTTRAK™ II instruments is analog out disabled. When working with TRAKPRO™
software and a DUSTTRAK™ II instrument, make sure that the active screen on the
instrument display is the Main screen. Also, do not change the instrument display screens
during the software operation.
For the DUSTTRAK™ DRX monitor, the size fraction can be set to any instrument channel. The
output setting can be set to 0 to 5 Volts DC or 4 to 20 mA. The upper limit is restricted by the
maximum concentration value of the instrument. The analog out may be enabled or disabled
by clicking on the ON or OFF radio buttons and pressing the Send button. The default setting
for new DUSTTRAK™ DRX instruments is analog out disabled. When working with
TRAKPRO™ software and a DUSTTRAK™ II instrument, make sure that the active screen on the
instrument display is the Main screen. Also, do not change the instrument display screens
during the software operation.
User’s Manual
31
Parameters | DUSTTRAK Alarm Setpoint
DUSTTRAK™ instruments with serial numbers greater than #21959, as well as DUSTTRAK™ II
and DUSTTRAK™ DRX instruments have an alarm feature whereby a solid state switch is
triggered if a predefined aerosol concentration is exceeded. For the DUSTTRAK™ monitor, the
Alarm setpoint may be set anywhere within the particle concentration range of 0.002 to
100 mg/m3. The switch is rated at 15V and 1A and stays triggered until the aerosol
concentration falls by 5% of the setpoint value. The alarm may be enabled or disabled by
clicking on the checkbox and pressing the Send button. The default setting for new
DUSTTRAK™ instruments is alarm disabled.
For the DUSTTRAK™ II monitor, the Alarm setpoint may be set anywhere within the particle
concentration range of 0.001 to the maximum concentration of the instrument in mg/m3 units.
The relay switch is rated at 15V and 1A and stays triggered until the aerosol concentration
falls by 5% of the setpoint value. An alarm may be enabled or disabled by clicking on the ON
or OFF radio buttons and pressing the Send button. The default setting for new DUSTTRAK™
II instruments is all alarms disabled.
The STEL alarm is available for desktop DUSTTRAK™ II instruments only.
32
TRAKPRO™ Data Analysis Software—Part Three
When working with TRAKPRO™ software and a DUSTTRAK™ II or a DUSTTRAK™ DRX
instrument, make sure that the active screen on the instrument display is the Main screen.
Also, do not change the instrument display screens during the software operation.
For the DUSTTRAK™ DRX monitor, the Alarm setpoint may be set anywhere within the
particle concentration range of 0.001 to the maximum concentration of the instrument in
mg/m3 units. The relay switch is rated at 15V and 1A and stays triggered until the aerosol
concentration falls by 5% of the setpoint value. An alarm may be enabled or disabled by
clicking on the checkbox and pressing the Send button. The default setting for new
DUSTTRAK™ DRX instruments is all alarms disabled.
The Audible, Relay and STEL alarms can be active on only a single program channel of the
instrument. The Visible alarm may be active on multiple program channels of the instrument.
The STEL alarm is available for desktop DUSTTRAK™ DRX instruments only.
When working with TRAKPRO™ software and a DUSTTRAK™ DRX instrument, make sure that
the active screen on the instrument display is the Main screen. Also, do not change the
instrument display screens during the software operation.
User’s Manual
33
Instrument Setup | Logging Setup
This dialog allows setting up logging parameters for VELOCICALC®, IAQ, AEROTRAK™ 9000,
DUSTTRAK™ II, and DUSTTRAK™ DRX instruments.
VELOCICALC® Dialog Box
Both Program 1 and Program 2 may be programmed from this dialog box.
34
TRAKPRO™ Data Analysis Software—Part Three
IAQ Dialog Box
Both Log mode 2 and 3 may be programmed from this dialog box.
SIDEPAK™ Dialog Box
User’s Manual
35
AEROTRAK™ 9000 Dialog Box
DUSTTRAK™ II / DUSTTRAK™ DRX Dialog Box
36
TRAKPRO™ Data Analysis Software—Part Three
For the AEROTRAK™ 9000 instrument the Available Memory calculation is based upon disk
space available divided by total disk space available.
totalDiskSapce = totalClusters * sectorsPerCluster * bytesPerSector
freeDiskSpace = freeClusters * sectorsPerCluster * bytesPerSector
Mem% = freeDiskSpace / totalDiskSpace * 100.0
The Percent Memory Required is calculated thus:
Mem% = 100 * (NS * ((SL / LI * DB) + HB) / TB);
Where: NS = number of tests
SL = test length in seconds
LI = logging interval in second
DB = bytes per data point (8)
HB = bytes in the header (1000)
TB = total memory bytes (measured).
For the DUSTTRAK™ II and DUSTTRAK™ DRX instruments the following values are used with
the above Percent Memory Required calculation.
DB = bytes per data point (1)
HB = bytes in the header (0)
TB = total memory bytes (65000).
The Auto Zero feature is available only for desktop DUSTTRAK™ II and DUSTTRAK™ DRX
instruments that are running with the optional auto zero module. A minimum log interval of
two minutes is required on a logging program with the auto zero feature enabled. When
working with TRAKPRO™ software and a DUSTTRAK™ II or a DUSTTRAK™ DRX instrument,
make sure that the active screen on the instrument display is the Main screen. Also, do not
change the instrument display screens during the software operation.
On the left of the Logging dialog is the Select protocol to edit list box. It shows all possible
protocols even if Empty. The user can select any protocol and the controls to the right will be
changed to show the selected protocols settings. Editing the protocol does NOT save it to the
instrument. Click the Send button to write all the logging protocols to the instrument. The
current set of logging protocols can be read or re-read from the instrument by selecting the
Read button.
Note
In the case of the Q-TRAK™ Plus, DUSTTRAK™ II, and DUSTTRAK™ DRX monitor all
channels are recorded while logging, and there are no channel selection
checkboxes in the dialog.
User’s Manual
37
Instrument Setup | Logging Control
This dialog allows the user to start, stop, and choose a logging program on a DUSTTRAK™ II
and DUSTTRAK™ DRX instrument that is attached via USB or Ethernet cable. The menu will
only be enabled if DUSTTRAK™ II and DUSTTRAK™ DRX instrument is selected in the
instrument dropdown.
The first step is to discover the instrument. If the instrument is connected to the computer via
USB cable, simply click the Discover Instrument button to search for the instrument. If the
instrument is connected via Ethernet, fill in the IP address of the instrument then click the
Discover Instrument button.
Once TRAKPRO™ software detects the instrument, it will try to communicate to the instrument
and display the model number, serial number, and status of the instrument.
In order to communicate to an instrument with a different IP address, simply enter the new IP
address and then click the Discover Instrument button again. Please note that only one
connection can be established at one time.
Once the connection is established, the Logging Programs that are currently available on the
instrument will be shown in the “Logging Program” dropdown list. A new Logging session
can be started by selecting the appropriate Logging Program and clicking the Start Logging
button. Once a new logging session is started, it can be stopped by clicking the Stop Logging
button.
38
TRAKPRO™ Data Analysis Software—Part Three
The Stop Logging button stops any logging data session on the connected instrument. The
instrument must be stopped to download data or adjust the instrument setup. An instrument
status of “Running” signifies that the instrument is logging data.
Instrument Setup | Calibration
This section consists of:
•
VELOCICALC® Calibration
•
IAQ Calibration
•
AEROTRAK™ 9000 Dialog Box
•
DUSTTRAK™ II/DUSTTRAK™ DRX Dialog Box
VELOCICALC® Calibration
This primarily lists the calibration dates for the instrument and the sensor connected to the
instrument. The last calibration date edit box shows the date when factory calibration was last
carried out for the instrument, along with the recommended due date for the next calibration.
User’s Manual
39
IAQ Calibration
This primarily lists the calibration dates for each sensor connected to the instrument. The
factory calibration group box shows the date of the last factory calibration, along with the
recommended date due for the next calibration. If the current date is later than the date due,
the date due flashes as a warning that the instrument is due for calibration.
In the case of the DUSTTRAK™ monitor, the user calibration date refers to the last time the
calibration factor was changed in the instrument. This calibration factor may be changed using
the DUSTTRAK™ keypad, or it may be changed using TRAKPRO™ software. The DUSTTRAK™
user calibration date does not refer to the last time the DUSTTRAK™ monitor was zeroed.
If TRAKPRO™ software has been set to SIDEPAK™ or DUSTTRAK™ mode, the Set User
Calibration Factor button will be enabled, otherwise it is grayed out. See also Set User
Calibration Factor.
Note
In the case of the P-TRAK™ monitor, no user calibration of sensors is possible,
therefore only the Factory Calibration information is displayed.
40
TRAKPRO™ Data Analysis Software—Part Three
AEROTRAK™ 9000 Dialog Box
The factory calibration group box shows the date when factory calibration was last carried out,
along with the recommended date due for the next calibration. If the current date is later than
the date due, the date due flashes as a warning to that the instrument requires calibration.
DUSTTRAK™ II / DUSTTRAK™ DRX Dialog Box
The factory calibration group box shows the date when factory calibration was last carried out,
along with the recommended date due for the next calibration. If the current date is later than
the date due, the date due flashes as a warning to that the instrument requires calibration.
If TRAKPRO™ software has been set to DUSTTRAK™ II or DUSTTRAK™ DRX mode, the Set
User Calibration Factor button will be enabled, otherwise it is grayed out. See also Set User
Calibration Factor.
User’s Manual
41
Set User Calibration Factor
This dialog box is only accessible from the IAQ Instrument Setup | Calibration dialog box.
For the DUSTTRAK™ or SIDEPAK™ instruments a list of calibration factors are saved in the
file DUSTTRAK.CAL for the DUSTTRAK™ and SIDEPAKA.CAL for the SIDEPAK™
instruments.
When the dialog opens, the existing calibration factor(s) are read the calibration file and from
the instrument. The factors held in the file are displayed as a list on the left side of the dialog,
while the instrument factors are shown in the right hand column of text boxes. The currently
selected calibration factor and its identifying name are shown in the Current Cal Factor pair
of boxes.
Add new names and calibration factors to the list by entering these in the New Cal Factor
boxes and pressing the button Add New Cal Factor. The Factor Name is restricted to 8 alpha
characters and the numeric range of factors is also controlled to within acceptable limits.
Factors may be transferred from the left hand list into the instrument text box by selecting a
factor in the list and pressing the appropriate >> button.
Note
The example shown here is for the SIDEPAK™ instrument. This instrument has up
to four factors:
• The first is the Factory setting and is always fixed at 1.00
• The second is the User calibration that can only be changed from the
instrument panel
• The third and fourth are customizable names and factors that can be changed
from this dialog
42
TRAKPRO™ Data Analysis Software—Part Three
In the case of a DUSTTRAK™ instrument, only a single factor may be programmed, and this
becomes the current Cal Factor.
Data in the instrument text boxes is sent to the instrument by pressing the Send>> button.
Exiting the dialog box via the Close button saves any changes made to the Cal Factor list,
whereas pressing Cancel discards these changes.
The calibration factors allow the SIDEPAK™ and DUSTTRAK™ data to be accurately
represented in terms of mass after an independent total mass measurement has been taken.
For the DUSTTRAK™ II or DUSTTRAK™ DRX instruments up to 10 user calibrations may be
programmed to the instrument. The photometric calibration factor is restricted to 10.0. The
size calibration factor is restricted to 10.0 and is not available with a DUSTTRAK™ II
instrument. Only a single user calibration may be active on the instrument. The factory
calibration is the default active calibration on the instrument.
When working with TRAKPRO™ software and a DUSTTRAK™ II or a DUSTTRAK™ DRX
instrument, make sure that the active screen on the instrument display is the Main screen.
Also, do not change the instrument display screens during the software operation.
Data in the instrument text boxes is sent to the instrument by pressing the Send>> button.
The calibration factors allow the DUSTTRAK™ II and DUSTTRAK™ DRX monitor to
accurately measure the aerosol of interest.
User’s Manual
43
Apply New Aerosol Calibration Factor
This dialog box is accessible from the Main menu Options | Apply New Cal Factor and only
after a test containing SIDEPAK™ or DUSTTRAK™ data is present and selected in the main
screen’s ListView box. The dialog box serves as a calculator to determine the required factor
based on a known mass measurement.
To perform a calibration, the user should take a measurement with the SIDEPAK™ or
DUSTTRAK™ instrument over a period of time while simultaneously measuring the aerosol
concentration by an absolute means, for example a filter sampler. This instrument
measurement should be selected in the ListView box before opening the dialog box, which
allows the dialog to read the total mass from the instrument test measurement. The current
average mass concentration and factor are displayed, along with an edit box to allow entering
the correct mass concentration obtained by the independent means. The new calibration factor
is then displayed in response to the user input.
If the user clicks on OK, the dialog box is closed and a new test is created identical to the one
used for calibration, but having the new calibration factors inserted. Closing the dialog box
using Cancel inhibits the production of a cloned test.
The new calibration factor obtained from this dialog box may be used to create a new
calibration and downloaded to the SIDEPAK™ or DUSTTRAK™ instrument so that subsequent
measurements will use this new calibration—see Set User Calibration Factor.
Receiving Data
To receive data, first ensure that the instrument is correctly connected to the computer via the
supplied cable, and that the instrument is turned on and not currently logging data. Test data
transfer may then be initiated by selecting Receive from the File menu or using one of the
short cuts.
Shortcuts
Toolbar
Keys
44
Ctrl+R
TRAKPRO™ Data Analysis Software—Part Three
The following dialog box will appear on the screen showing that communication is taking
place with the progress bar reflecting the proportion of data received.
When the data has been received, a dialog will appear presenting a list of logged tests you may
download.
VELOCICALC® Dialog Box
Select an individual test by clicking on it with the mouse, a range of tests by holding the Ctrl
key and clicking on each test individually. Transfer of test data is then affected by clicking on
the Receive button.
To remove a test from the instrument memory, select the Delete button. Before deleting a test,
TRAKPRO™ software will ask for confirmation.
Progress in receiving individual tests is given by a further dialog box which indicates the
number of tests received, etc.
User’s Manual
45
Tests received are then added to the programs list and appear in the front screen ListView box.
IAQ Dialog Box
The IAQ dialog box allows downloading of logged test data from all IAQ instruments and
contains a feature for retrieving Single Sample Data in the case of Q-TRAK™ Plus and
P-TRAK™ instruments. A ListView box shows the Single Sample Channel Data (Q-TRAK™
Plus) or the single channel Single Point Data (P-TRAK™). A range of check boxes allows
seeing which channels types are available for downloading and to select the channel types
required by checking the boxes. Channels types not present in the instrument are indicated by
disabled check boxes.
46
TRAKPRO™ Data Analysis Software—Part Three
AEROTRAK™ 9000 Dialog Box
Select an individual test by clicking on it with the mouse, a range of tests by holding the Ctrl
key and clicking on each test individually, or select all tests by pressing the Select All button.
Transfer of test data is then affected by clicking on the Receive button.
To remove a test from the instrument memory, select the Delete button. Before deleting a test,
TRAKPRO™ software will ask for confirmation.
Progress in receiving individual tests is given by a further dialog box which indicates the
number of tests received, number of bytes, etc.
User’s Manual
47
Tests received are then added to the programs list, and appear in the front screen ListView
box.
DUSTTRAK™ II / DUSTTRAK™ DRX Dialog Box
When working with TRAKPRO™ software and a DUSTTRAK™ II or a DUSTTRAK™ DRX
instrument, make sure that the active screen on the instrument display is the Main screen.
Also, do not change the instrument display screens during the software operation.
To remove a test from the instrument memory, select the test that is to be deleted. Then select
the Delete button. Before deleting a test, TRAKPRO™ software will ask for confirmation.
48
TRAKPRO™ Data Analysis Software—Part Three
To remove all the tests from the instrument memory, there is no need to select any tests, just
select the Delete All button. Before deleting the tests, TRAKPRO™ software will ask for
confirmation.
A test with a name that ends with a “_SPD” signifies single point data. Tests with a name that
ends in a “_A” to “_Z” signify data recorded during a STEL Alarm condition.
When working with radio modem communications to a DUSTTRAK™ II or a DUSTTRAK™
DRX instrument, a test with a name that begins with “!!_!!_” may be displayed in the above
dialog. This signifies that the test heading was read improperly from the instrument.
TRAKPRO™ software will attempt to download the data associated with the displayed test
number. Adjusting the radio modem for an improved signal may be necessary to receive data
from the DUSTTRAK™ II or a DUSTTRAK™ DRX instrument.
Select an individual test by clicking on it with the mouse, a range of tests by holding the Ctrl
key and clicking on each test individually, or select all tests by pressing the Select All button.
Transfer of test data is then affected by clicking on the Receive button.
Progress in receiving individual tests is given by a further dialog box which indicates the
number of tests received, number of data points, etc.
User’s Manual
49
Tests received are then added to the programs list, and appear in the front screen
ListView box.
Communications Error Messages
During communications, errors may occur. The most likely error on initial attempts at
connection would be: Unable to establish communications on COMx:.
This error may occur for the following reasons:
•
The instrument did not respond to TRAKPRO™ software due to an instrument fault.
•
The instrument may be turned off or disconnected.
•
The instrument may be busy acquiring a sample.
The second most likely error messages are: handshaking Error (no DSR) or Error
encountered when reading instrument!
These errors occur chiefly when:
•
No instrument is connected to the PC.
•
The cable connecting the instrument is faulty.
•
The communication link has been disrupted. Re-establish communications to the
instrument through the Instrument Setup | Communication menu item.
50
TRAKPRO™ Data Analysis Software—Part Three
Less likely errors that may be reported by TRAKPRO™ software during communications are:
Error Message
Cause
Unable to open port COMx
Comport non-existent or in use.
Break condition detected
Hardware break detected.
Framing error detected
Error caused through loss of data bits.
I/O error detected
A general I/O error.
Character-buffer overrun - a character is lost
Next character is lost - typically from the
UART FIFO.
Input buffer overflow
No room in input buffer - comm buffer
not being read quick enough by
TRAKPRO™ software
Parity error
Data failed parity check (unlikely).
No transmission, output buffer still full
Character not sent.
Unspecified Communications Error
General catch all error.
Auto-configuration
This feature allows the software configuration to be selected automatically in accordance with
the attached TSI instrument. This is useful for users that are new to TRAKPRO™ software and
also to users with a variety of instruments.
To enable the Automatic Software Configuration, click on the menu item shown to ensure that
it displays a check mark thus:
In TRAKPRO v4.2.0, each time the user tries to communicate with an instrument, a search is
first made for an AEROTRAK™ 9000 or AEROTRAK™ OPC instrument on a USB mass storage
drive. If none is found, a search is made for a USB connected DUSTTRAK™ II or DUSTTRAK™
DRX instrument. If neither is found then a search is made for a USB connected Q-TRAK™
Model 7565 or a VELOCICALC® Model 9555. If neither is found, a search is made for a
SIDEPAK™ instrument on the USB virtual comport and if one is found, the configuration is set
accordingly and the search is terminated. If not, TRAKPRO™ software looks for a Q-TRAK™ or
DUSTTRAK™ instrument at the basic setting of 1200 baud on the currently configured
comport. If no instrument of this type is found, a search is made for a P-TRAK™ instrument at
9600 baud. If this also fails, the next likely comport is tried and the process repeated. If no
instrument is found after all four (4) comports have been checked, an error message is given.
User’s Manual
51
If an instrument is found, TRAKPRO™ software checks the instrument’s model number and
makes decisions based on the compatibility of the attached instrument with the existing
software configuration.
Although TRAKPRO™ software is able in many cases to change the software configuration
automatically, some consideration needs to be given to the possibility of wrongly set
configuration excluding specific operations with the attached instrument. For example if the
user has TRAKPRO™ software configured for a P-TRAK™ particle counter, the Time Constants
are not available from the menu, likewise DUSTTRAK™ monitor specific operations are not
available to non-DUSTTRAK™ monitor configurations. In those cases, the user intent on
performing such operations should manually select the appropriate software configuration. It
is also possible to have TRAKPRO™ software configured for an instrument that does not
support the command being attempted. In these cases, a warning message is given asking to
select functions from the revised menu now associated with the new configuration.
When working with an Ethernet connected DUSTTRAK™ II or DUSTTRAK™ DRX instrument,
the user should manually select either the DUSTTRAK™ II or DUSTTRAK™ DRX software
configuration. Select Instrument Setup | Communications, enter the IP address of the
instrument then click on the Test button to establish communications to the instrument.
The following table summarizes the effect of selecting menu items for various software
configurations and attached instruments. Cases of inappropriate commands are shown as N/A
warning.
Menu Item
Receive Data
Comport Setup
Clock
Time Constants
Other
52
S/W Configuration
All
All
All
Q-TRAK™ or
DUSTTRAK™
monitor
P-TRAK™ counter
Attached
Instrument
Result
All
All
All
P-TRAK™ counter
changes config.
changes config.
changes config.
N/A warning.
P-TRAK™ counter
changes config.
TRAKPRO™ Data Analysis Software—Part Three
Menu Item
Other
Calibration
S/W Configuration
Attached
Instrument
Result
P-TRAK™ counter
All
SIDEPAK™ monitor
All
N/A warning.
changes config.
Note
If more than one TSI instrument is connected to your computer, TRAKPRO™
software will only find the first one based on the search order, USB, com1, com2,
com3, com4“ (if com1 is currently selected) or com2, com1, com3,com4 (if com2
is currently selected). See also Enabling / Disabling Auto-configuration, Testing
Communications, and Changing Comports.
Enabling / Disabling Auto-configuration
When TRAKPRO™ software is first installed, the auto configuration feature is enabled by
default. However, this causes each communication dialog box to delay a few seconds while
searching for the instruments.
To communicate with only one instrument and one configuration, it is possible to disable the
auto configuration and select the appropriate configuration manually. To do this, TRAKPRO™
software will no longer search other ports for an instrument and only looks for the instrument
configured on the port that is selected. If no instrument is found, an error message is given.
One possible approach when working with a single instrument is to initially let auto
configuration set the software configuration, and then disable that option to give maximum
performance.
To enable the Auto-configuration, click on the menu item shown to ensure that it displays a
check mark thus:
To disable Auto-configuration, ensure that the check mark is invisible.
User’s Manual
53
Part Four—Sampling Pump
Pump Setup Dialog
The Instrument Setup | Pump Setup dialog allows programming the SIDEPAK™ Sampling
Pump with preset programs that control when it is to start sampling, for how long, and at what
flow rate. The pump is capable of storing 5 programs, numbered 1 to 5. Program 5 has special
properties in that it can perform intermittent sampling. Programs can be saved as a *.pgm disk
file, and sent to the pump to set its behavior. They may also be read back from disk or from
the instrument.
There are three Program Modes that can be used to enter program details:
Total Volume Mode
Here the user supplies a value in liters corresponding to the total volume that the pump should
sample. It is also possible to specify the Start Date and Start Time in this mode. Since the
volume is the driving parameter, other parameters will adjust accordingly and will be shown in
grayed out text.
Total Time Mode
Here the user supplies the total duration of the sample. The Total Volume is calculated from
the Flow Rate and the Total Time and is updated in grayed-out text. If the Start Date and Start
Time have been specified the Stop Date and Stop Time are also updated to reflect the Total
Time. See also Intermittent Sampling.
Date and Time Mode
In this mode the user specifies the start and stop date and times and other dependent
parameters are updated accordingly. Ideally both date and time should be specified, although
it is possible to have a valid program that has only the Stop Date and Stop Time specified.
Such a program starts once the pump has been turned on and stops at the prescribed stop date
and time.
Note
It is not possible to set the stop date and time earlier than the start date and time,
which also cannot be earlier than the now date and time read from the PC clock.
In the example below, program 2 is shown as the selected program in a program mode of
Total Volume.
All cells in a selected program are primarily colored pale blue, however cells that require an
input are colored in green. Any cell that has been selected for change is colored yellow, and
any text that cannot be changed is colored gray.
55
Intermittent Sampling
Sometimes a user may require the SIDEPAK™ Sampling Pump to sample over a long period of
time, but to collect only a limited sample. In such cases it is possible to program the pump to
sample and then turn off for a while before sampling again. The on to off ratio is adjusted
automatically to make the appropriate sample over the required duration. This sampling mode
is only allowed in Program 5, and is controlled by specifying a Pump On time in minutes. For
example, the user may wish to sample air for a period of 5 hours throughout a total period of
20 hours. To achieve this, the Total Time mins would be set to 1200 and the Pump On mins
to 300.
The pump is set such that the minimum period it may take a sample is 5 minutes. 5 hours of
sampling would cause the pump to take 60 samples of 5 minutes each. This would give a total
off time of 15 hours. To ensure that we end the overall period with an active sample, we
would require 59 off periods of 15 minutes 15 seconds each.
56
TRAKPRO™ Data Analysis Software—Part Four
Note
There is a slight rounding error in this calculation since: (60 * 5 mins) + (59 *
15.25 mins) = 1199.75 rather than 1200 mins, a rounding error of 15 seconds in 20
hours. This is because for each active sample, the pump can only time to an
accuracy of a whole second.
The file menu has the following items:
Load Program File
Save Program File
Close
Pump Sampling Protocol
The Pump Programs Table contains a list of 5 pump programs. This list may be sent to the
pump or read from the pump, and may also be saved to or read from file.
The Selected Program | All Programs radio buttons dictate whether only the selected
program or all the programs are considered when the Read from Pump or Send to Pump
buttons are pressed.
The Read from Pump button reads a single selected program or all five programs from a
SIDEPAK™ Sampling Pump depending on the selection of the radio buttons.
The Send to Pump button sends a single selected program or all 5 programs to a SIDEPAK™
Sampling Pump depending on the selection of the radio buttons.
Note
If a program is invalid, it will not be sent and a warning message appears.
The first column specifies the program number.
The figure above shows that program 2 has been selected (cell shown in pale blue).
The second column shows the Flow Rate for each program. The value can be between 10 and
5000 cc/min and is adjustable via the spin button in 5 cc/min steps. This control is primary and
is not influenced by the changing of any other parameters, although it may itself influence the
total volume display.
The third column indicates the Start Date for each program. In Program 2 it is shown in
yellow because this is the selected cell (last clicked on by the mouse). Its contents may be
edited from the keyboard, or by changing the date on the calendar control.
The fourth column indicates the Start Time for each program. In Program 2 it is part of the
selected program but is not itself selected, therefore it is shown in pale blue. Its contents may
be edited from the keyboard, or the Digital Time Picker control/Analog Clock.
The fifth column indicates the Stop Date for each program. Note that in Program 2 the text is
in gray showing it is a driven parameter and cannot be changed. This is because Program 2 is
in Total Volume mode. You may specify when the pump may start, but since it has to run until
User’s Manual
57
it acquires a specified volume, you may not provide a stop date. Note that for Program 2 in
this example, there is no difference between the stop and start date/times because the Total
Volume and hence the Total Time is zero.
The sixth column indicates the Stop Time for each program. Note that in Program 2 the text is
in gray showing it is a driven parameter and cannot be changed. This is because Program 2 is
in Total Volume mode. You may specify when the pump may start, but since it has to run until
it acquires a specified volume, you may not provide a stop time.
The seventh column indicates the Total Time for each program. In Program 2 it displays zero
because the Total Volume has been specified as zero. It is shown in gray because it is a driven
parameter and cannot be directly changed.
The eighth column indicates the Pump On Time for each program. It takes on the value of the
Total Time for all programs except Program 5 (see Intermittent Sampling).
The ninth column indicates the Total Volume for each program. In Program 2 it is shown in
green indicating that a valid number must be entered because Program 2 is in Total Volume
program mode. In this case the value of zero is not allowed so the program has become
invalid. This cell indicates that Program 2 has an invalid status. If the mouse cursor is placed
over this cell in a selected program, a ToolTip appears to indicate the reason for this program
status. In this case the status is invalid because Program 2 is in Total Volume program mode,
and the Total Volume cell is zero.
The word Manual typed in a date cell effectively means no-date. It means that the pump has
to be manually started or stopped instead of using a supplied date.
The word Manual typed in a time cell effectively means no-time. It means that the pump has
to be manually started or stopped instead of using a supplied time.
The Start Date is used in conjunction with the Start Time to define a time when the pump will
commence sampling. The Start Date may be edited from the keyboard, or by changing the date
on the calendar control.
The Start Time indicates the time that the pump will start sampling. Its value may be set
either from the keyboard or via the Digital Time Picker control / Analog Clock. Note that the
Start Time cannot be earlier than the current time if the Start Date is today.
Stop Date is used in conjunction with the Stop Time to define the time when the pump will
stop sampling. The Stop Date may be edited from the keyboard, or by changing the date on
the calendar control. Note that the Stop Date/Time must be later than the Start Date/Time.
The Stop Time indicates the time that the pump will stop sampling. Its value may be set either
form the keyboard or via the Digital Time Picker Control/Analog Clock.
Total Time is the duration for which the pump will try to sample before stopping.
Pump On allows entering the total time that the pump will be actively sampling. For
programs 1 to 4 this always the same as the Total Time, however for program 5 it may be set
58
TRAKPRO™ Data Analysis Software—Part Four
to a smaller duration—see Intermittent Sampling. The Total Volume is the volume that the
pump will try to sample before stopping.
Valid Program indicates that the program has a valid or invalid status. Selected programs that
are valid are shown as Valid in green text, selected programs that are invalid are shown as
Invalid in flashing red text.
The Program Mode radio buttons specify the program mode. Change the program mode for
any selected program, and its current mode is shown by the radio buttons when it is selected.
The Clear Program button clears an entire program and returns each cell to the factory
default, this being:
Flow Rate:
1000 cc/min
Start Date:
Manual
Start Time:
Manual
Stop Date:
Manual
Stop Time:
Manual
Total Time:
480 minutes (i.e. 8 hours)
Pump On Time: 480 minutes
Total Volume:
480 Liters
Program Mode: Total Volume
Since the Total Volume is specified, this is a valid program.
The Clear Entry button clears the selected cell of a program returning it to the factory default,
this being:
Flow Rate:
1000 cc/min
Start Date:
Manual
Start Time:
Manual
Stop Date:
Manual
Stop Time:
Manual
Total Time:
480 minutes (i.e., 8 hours)
Pump On Time: 480 minutes
Total Volume:
480 Liters
The Calendar control allows navigation through the days, months, and years using the mouse,
arrow keys, and the dropdown month and year combo boxes. Selecting a date on the calendar
when a date cell has been selected first, copies the calendar date into that cell. Likewise, the
calendar shows the date that is contained in a date cell when it is selected.
The Today button automatically sets the Calendar control to today’s date as read from the
computer’s clock.
The Analog Clock is a representation of the time setting in the Digital Time Picker control.
Clicking on this clock transfers the displayed time to the selected time cell in the same manner
as clicking on the Digital Time Picker control. Likewise, the clock shows an analog
representation of the time held in a selected time cell when it is selected.
User’s Manual
59
Digital Time Picker control below the Analog Clock allows entering a time from the keyboard
or by selecting the hours or minutes field and using the control’s spin buttons. Clicking on this
control transfers the displayed time to the selected time cell and likewise the time contained in
a newly selected time cell is shown. This control is mirrored by the Analog Clock display.
The Pump Clock Time text box displays the date and time read from the clock of an attached
SIDEPAK™ Sampling Pump every second. If no instrument is attached, or the communication
fails, an error message is given and the clock reading is disabled. This is shown by the Enable
checkbox being cleared. Reading of the real-time clock may also be done from TRAKPRO™
software’s Instrument Setup | Parameters | Clock menu item.
The Enable check box allows TRAKPRO™ software to read the date and time of the attached
SIDEPAK™ Sampling Pump real-time clock. If no pump is connected, the enable check is
cleared thus releasing CPU time. If an instrument is reconnected, re-check the checkbox to
allow TRAKPRO™ software to read the date/time once more.
Pressing the Update Date/Time button sets the SIDEPAK™ Sampling Pump real-time clock to
the current date and time as read from the computer. Note this button is disabled if the Enable
check box is cleared. Setting of the real-time clock may also be done from TRAKPRO™
software’S Instrument Setup | Parameters | Clock menu item.
Pump Setup Driving and Driven Parameters
Depending on the Program Mode, some cells require data input and may be considered as the
driving parameters. These in turn determine the values of cells that are dependent on them, the
driven parameters.
Program Mode
Total Volume
Total Time
Start/Stop Date/Time
Driving
Driven
Total Volume
Total Time (Pump On Time
for all but Prog 5)
Start Date/Time [optional]
Stop Date/Time
Total Time
Total Volume (Pump On
Time for all but Prog 5)
Pump On Time for Prog 5
[Total Time must be greater
than or equal to Pump On
Time]
Start Date/Time [optional]
Stop Date/Time
Stop Date/Time
None [stops manually]
Start Date/Time [optional]
Total Time
Total Volume
Note
The Flow Rate is always a driven parameter in all modes—it is set by the user and
no other parameters affect it.
60
TRAKPRO™ Data Analysis Software—Part Four
The significance of driving versus driven parameters is seen when the pump executes the
program. It will always try to achieve the driving parameter at expense of the driven
parameters. For example, if the program mode was total volume and 100 liters were specified,
the pump should be able to achieve this in 100 minutes at 1000 cc/min. But if the pump was
running against an excessive load or the inlet was slightly blocked, the pump may in fact run
for longer than 100 minutes to enable it to sample exactly 100 liters.
Valid and Invalid Programs
The requirements for a valid program are:
if Total Volume Program Mode selected
Total Volume must be greater than zero
Total Time as a driven parameter must not be less than 5 minutes
if Total Time Program Mode selected
Total Time must not be less than 5 minutes
Pump On time must not be greater than Total Time
Pump On time must not be less than 5 minutes
if Start / Stop Date / Time Program Mode selected
Stop Date and Time must be specified
Start Time/Date must be earlier than Stop Time/Date
Total Time as a driven parameter must not be less than 5 minutes
Stop Date and Stop Time specified alone forms a valid program that will continue from when
the pump is turned on manually until that set date and time.
The File | Save Program File menu item allows all the programs in the Program List to be
saved to disk file as a *.pgm file. The user is encouraged to save the data in the subdirectory
.\PROGRAMS.
Pump Template Editor
This feature applies only to test data acquired from the SIDEPAK™ Sampling Pump.
TRAKPRO™ software allows the user to pre-define a range of details in a template file (*.tpt)
and to later combine these with sample data read from the pump. Subsequently, laboratory
analysis results for filter samples etc may be added to the file to form a overall report which is
saved as a report file (*.rpt).
The Template Editor takes the form of a 3 page property sheet. The sheet control is
“modeless” allowing execution of other commands in TRAKPRO™ software while the editor
is open. To access the editor, use the menu File | New | Template File or File | Open |
Template File. These menu actions are only available when TRAKPRO™ software is
configured for a SIDEPAK™ Sampling Pump.
User’s Manual
61
Each page has a range of fields and labels. Some of the labels are in blue and these are
customizable. All editable text is displayed in blue and fixed text in black.
The fields are served by edit boxes, some single lined, some multi-lined. The multi-lined edit
boxes respond to the <Enter> key to allow typing on the next available line. Since the pages
contain a large number of fields, each page is re-sizeable vertically and is scrollable by a
scrollbar on the right hand side of the editor.
Page 1
This contains Personnel and Sampling Location & Description information. It has five
customizable fields and multi-line edit boxes.
Since the page is scrollable, some fields are not shown in the above picture. Those fields are:
•
PPE/Engineering Controls
•
Address
•
City
•
State
•
Country
•
Workshift
•
Custom fields (3)
62
TRAKPRO™ Data Analysis Software—Part Four
Page 2
This page contains Sampling and Analysis Method Information. It has two customizable
fields with multi-line edit boxes.
User’s Manual
63
Page 3
This page contains the Sample Data and Results. Most fields on this page may be filled in
manually (except the Logged Flow Rate field which has to be filled in from pump data).
Since the page is scrollable, some fields are not shown in the above picture. Those fields are:
•
Concentration
•
Custom
•
Notes
Several of the fields on this page are filled in automatically when pump history data are
attached to the file. The file then becomes a Report File rather than a Template File because
it contains attached data.
64
TRAKPRO™ Data Analysis Software—Part Four
The Pump Template Editor Menu
The template editor has a File and Edit menu.
The File Menu
New Template
Load
Create a new blank template file.
Save
Saves an existing file in its current file type.
Save As
Saves the existing file as a template file or a report file.
Extract Pump Data
This allows the test data that has been attached to a report file to be
copied into the Logged Test ListView box for further examination
and saving as a *.tkp file.
Print Preview
Allows the pages 1 to 3 pages of the template file or report file to be
viewed on the screen as though they were printed.
Print Setup
Configures the page layout and printer.
User’s Manual
Loads a template file or report file into the editor.
65
Print
Prints pages 1 to 3 pages of the template file or report file.
Close
Closes the editor without saving (the same as the “Cancel” button).
The Edit Menu
This menu contains Cut, Copy, and Paste functions. These act on selected text in the edit
boxes in the same manner as the traditional Ctrl-X, Ctrl-C, and Ctrl-V, transferring the text
between the Windows clipboard and other edit boxes.
Attaching Pump Test Data to a Template File
After a sample has been taken by the pump, it may be downloaded into TRAKPRO™ software
using the Receive function and saved if wished using Save. The downloaded data contains the
three channels Flow, Temperature, and Pressure, along with start and stop times and overall
logged flow rate. This data may be attached to a Template File to create a Report File. There
are two ways to attach the data:
1. Select a test in the Logged Tests ListView box and select Merge Test with Template
from the File menu. If the Template Editor is already open, the currently selected test data
will be merged with the template data to create a Report File. If the Template Editor is not
already opened, the user will be prompted for a template file name and the Editor will be
opened. Merging will then take place.
2. The Template Editor may be opened and the test data merged with the template file by a
drag&drop action. Select the correct test data from the Logged Tests ListView box and
drag&drop the test onto the Template Editor. As crossing the Template Editor, the mouse
cursor changes to a and at this stage release the mouse button.
66
TRAKPRO™ Data Analysis Software—Part Four
In both cases, the user will be prompted to save the existing template data before the merge
takes place. A message then appears at the top of the editor This File Contains Attached
Data and the following fields will be filled in automatically:
•
Pump Model
•
Pump S/N
•
Pump Start Date/Time
•
Pump Stop Date/Time
•
Pump Sample ID
•
Logged Flow Rate (cc/min)
•
Duration of Sample (mins)
•
Total Volume Sampled (l of Air)
The Pump Sample ID will be initially set to the Test ID number that contained the attached
data, however, the field is editable and can be changed.
User’s Manual
67
Part Five—Data
View Test Data
This feature displays the raw data from a selected test within a data file. The test must first be
selected in the form view’s ListView box or the message No tests were selected will be
displayed.
Shortcuts
Toolbar
The Test data appears in the form of a table report as shown below:
The number of columns of data depends on the number of channels present within the selected
test. The format of the date depends on the system’s international / country setting.
The full range of data may be viewed with the aid of the scroll bar. Clicking on the scrollbar’s
top and bottom buttons scrolls the data a line at a time, while clicking on the scroll bar
between the thumb and the end buttons scrolls the data a page (15 lines) at a time.
69
When this report is visible, clicking on the Print
or Print Preview
toolbar buttons
will provide a printout or print preview, respectively. When printing the report, if there are
more than 5 channels, the printer orientation is automatically set for landscape. If there are 5
or less channels, portrait mode is selected. TRAKPRO™ software will prompt the user to
manually change printer orientation to have the best printout.
P-TRAK™ Tilted Data
The P-TRAK™ particle counter contains a tilt sensor that is triggered when its incline exceeds
an acceptable level. A momentary tilt could result in a burst of counts leading to erroneous
data being measured. To prevent this, the P-TRAK™ instrument marks data acquired during a
tilted condition as invalid and this is indicated as empty entry in the Test Data report.
Although tilted data points feature in the total number of points recorded by TRAKPRO™
software in logging mode, they do not enter into the statistical calculations. Tilted data points
are also not plotted on graphs since they are seen as NULL points and appear as breaks in the
plot trace.
Q-TRAK™ Plus Invalid Data
The Q-TRAK™ Plus monitor may have up to five sensors attached, however the instrument is
capable of running without an auxiliary sensor and sometimes the carbon monoxide sensor
may be missing. In cases where sensors are missing, faulty, or absent for part of the
measurement duration, invalid data are acquired. These data are indicated as empty entry in
the Test Data report and printouts and is not able to be plotted. Single Sample Data (SSD)
points that are invalid may not be exported, printed, or plotted.
View Test Statistics
This feature allows seeing, at a glance, the simple statistics for the currently selected test. The
data appears in a number of columns depending on how many channels have been recorded in
the selected test.
Shortcuts
Toolbar
70
TRAKPROTM Data Analysis Software—Part Five
When this report is visible, clicking on the Print
or Print Preview
toolbar buttons
will provide a printout or print preview, respectively. When printing the report, if there are
more than 5 channels, the printer orientation is automatically set for landscape. If there are 5
or less channels, portrait mode is selected. TRAKPRO™ software will prompt the user to
manually change printer orientation to have the best printout.
View Test Data and Statistics
This feature allows viewing of the raw test data and statistics for the currently selected test.
The data appears in a number of columns depending on how many channels have been
recorded in the selected test. This feature can be accessed by main menu Reports → Data
Statistics Report.
User’s Manual
71
When printing the report, if there are more than 5 channels, the printer orientation is
automatically set for landscape. If there are 5 or less channels, portrait mode is selected.
TRAKPRO™ software will prompt the user to manually change printer orientation to have the
best printout.
View Report
This feature allows viewing previously saved reports (in .html format). This feature can be
accessed by main menu Reports → View Report.
The Windows File Open dialog appears for selecting which report to view.
72
TRAKPROTM Data Analysis Software—Part Five
When printing the report, if there are more than 5 channels, the printer orientation is
automatically set for landscape. If there are 5 or less channels, portrait mode is selected.
TRAKPRO™ software will prompt the user to manually change printer orientation to have the
best printout.
Multiple Tests Summary Report
This feature allows tests from a range of different instruments to be summarized on a single
table. This table may be Print-Previewed or Printed in either portrait or landscape
orientation. Where possible, TRAKPRO™ software will size the table’s fonts such that all the
columns are visible.
The selection dialog contains a ListView box which shows all the tests currently loaded into
TRAKPRO™ software. To sort the tests, click on the column headings and then drag and drop a
selection of tests onto the right hand listbox for the purpose of printing. Tests in the right hand
listbox may be re-ordered by dragging them vertically, or may be deleted by using the
<Del> key.
User’s Manual
73
Clicking on the Print or Print PreView produces an output typical of that shown below.
Delete Test Data
Select this menu item to delete an individual test from the form screen’s ListView box. A test
must be selected in the ListView box before any deletion may take place.
Graphs are held in TRAKPRO™ software as a set of attributes and rely on the associated test
data for their generation. Consequently, a graph cannot exist without its test data. If the user
tries to delete a test that has graphs associated with it, the user will be given the warning:
Deleting this test will delete graphxxx also. Do you wish to continue? (where graphxxx is
the name of the graph). The test will only be deleted if the user answers yes to every
connected graph.
74
TRAKPROTM Data Analysis Software—Part Five
Export
This menu item allows the user to Export Data when the menu is part of the Form View
Screen, and also provides the function to Export Graph Images to the Clipboard when the
menu is associated with the Graph Screen.
Export Test Data
This feature prepares an ASCII * text file suitable for reading into a spread sheet for further
analysis. A list box lists all the tests currently present in the data file and the user may select
which tests are exported.
The listbox is an extended multi-selection box which allows the following selection modes:
•
Click on a single test if only one test is required.
•
Click on a test and move the mouse up or down while holding the left mouse button down
to select a range of tests.
•
Click on a test, hold the <Shift> key down, and click on a further test to select all tests
between these points.
•
Select multiple tests by clicking on individual tests while holding the <Ctrl> key down.
The delimiters used for separating the data items may be chosen using the radio buttons to be
either: comma, tab, or space, depending on the spreadsheet’s import requirements. The
delimiter settings are saved in the Windows Registry and are hence persistent between
sessions. To export the data, click on the Export button which brings up the SaveAs dialog
box with the current filename having the default file extension of txt. The data file is then
saved by clicking on the Save button. Since a large number of tests containing many data
points may take some time to write to disk, a progress bar appears to indicate the proportion of
data saved while the file is being written.
*
ASCII (American standard code for information interchange) A standard character encoding scheme introduced
in 1963 and used widely on many machines. It is a 7-bit code with no parity recommendation, providing 128
different bit patterns.
User’s Manual
75
See also Exporting Graph Images.
Export Single Point Data
Single Point data may be selected for export in ASCII form from the following dialog.
Data must be selected in the left hand ListView box and dragged and dropped onto the right
hand list box before attempting to export data (see Graph Options | Data Points or Printing
Single Point Data Tables for a description of the left and right list boxes).
The delimiters used for separating the data items may be chosen using the radio buttons to be
either: comma, tab, or space, depending on the spreadsheet’s import requirements. The
delimiter settings are saved in the Windows Registry and are hence persistent between
sessions. To export the data, click on the Export button which brings up the SaveAs dialog
box with the current filename having the default file extension of txt. The data file is then
saved by clicking on the Save button. A progress bar appears to indicate the proportion of data
saved while the file is being written.
76
TRAKPROTM Data Analysis Software—Part Five
Notes
Although each Single Point has a Point ID, it is identified uniquely in TRAKPRO™
software by its date/time stamp. You may have several points with the same Point
ID that may have come from other instruments or the same instrument after the
data have been cleared. These will be seen by TRAKPRO™ software as separate
data points because the date/time stamps will differ. If, however, you download a
data point twice and try to drag and drop the duplicate, TRAKPRO™ software will
see the two points as identical and only one of the points will appear for selection
in the right hand List Box.
Data from the Q-TRAK™ Plus instrument may sometimes contain a Single Sample
Data (SSD) channel with an invalid data point due to a faulty or missing sensor. In
this case the point is shown in the Downloaded Samples ListView box as Invalid.
It is not possible to export this point, and the drag and drop of invalid data points
into the Exported Data Points List Box is forbidden.
User’s Manual
77
Part Six—Graphing
Overview
TRAKPRO™ software supports two types of graphs, the graphs produced from Logged Data,
and a new type of graph to display Single Sample Data recorded by the Q-TRAK™ Plus,
P-TRAK™, DUSTTRAK™ II, and DUSTTRAK™ DRX instruments.
Logged Data Graphs
TRAKPRO™ software can display your data for up to 32 selected channels in a variety of
plotting styles and formats. The graph may be annotated with text using the Graph
Annotations feature to mark significant events, and then printed using TRAKPRO™ software’s
print feature. Graphs may be stored in the program’s graph list, and retrieved at a later date.
Note
The term store is used rather than save, since the graph data is not saved to file
unless the file is saved by the user, and hence closing TRAKPRO™ software
without saving the file will discard any stored graphs.
Graph Screen
The view that displays the TRAKPRO™ graphs.
New
Creates a new graph from a range of tests.
Open
Opens a graph that has been stored in the program or saved in the data file.
Store
Stores the current graph in the program’s graph list.
Delete
Deletes a graph from the program’s storage.
Single Sample Data Graphs
Single Sample Data graphs (previously called Single Point Data graphs in TRAKPRO™
Version 3.10) have many similarities to the Logged Data graphs having associated features
such as printing, annotations, export of bitmaps etc. but they have a more limited range of
properties that may be changed using the Graph Options property sheet since many of the
properties of the logged data graphs are not applicable to the format of these graphs. The
Single Sample Data graphs are plotted in a horizontal bar graph style with the vertical axis
displaying the data point labels and the horizontal axis showing the magnitude of each data
point. A Tooltip feature allows the user to quickly see the magnitude of any data point by
moving the mouse cursor across the graph’s data bar.
Because of the complexity of adequately expressing a variety of units and channel types
simultaneously on the same plot. Single Sample graphs are restricted to one channel type. For
example, you may plot Particle Conc of the P-TRAK or CO2 concentration from the Q-TRAK
Plus, but on separate plots, and not on the same graph.
79
Creating a New Graph
Selecting this option opens a dialog box which gives basic details about the graph and the data
to be plotted.
The Graph name defaults to Graph, but should be given something more unique if the user
intends to store the graph data, since all stored graphs must have unique names.
The Title and sub title to the graph may also be entered at this stage. The Title and subtitle has
a limit of 255 characters.
Entering of the above data is common to both Logged Data and Single Sample Data graphs,
however the layout of the dialog box is noticeably different for each type of graph
Logged Data Graph
A TreeView box displays the tests present within the currently loaded data file, and clicking
on the tree’s button will expand the tree to show the individual data channels within each
test.
will select it for plotting, and clicking on the parent test will select
Clicking on any channel
all channels beneath it in that branch, with the proviso throughout that a maximum of 32
channels may be selected in any combination from any test(s).
Tests that contain only partially selected channels have a dull tick box , whereas tests with
all contained channels selected have bright ticks . This allows the user to know if a
collapsed branch contains only partial selections.
Note
Data from the Q-TRAK™ Plus instrument may sometimes contain a channel with
totally invalid data due to a faulty or missing sensor. In this case it is not possible
which cannot
to plot the channel, and the channel is shown as a black filled box
be selected.
The user may select graphs to be single channel or multi-channel plots. For single channel
plots, the user is only allowed to select channels of the same type.
Shortcuts
Toolbar
Keys
80
Ctrl+G
TRAKPRO™ Data Analysis Software—Part Six
Single Sample Data Graph
Since it is only possible to plot data from the same channel type on a Single Sample Graph,
initially check that the desired channel has been selected in the drop-down combobox. The
dialog then displays all the available data points for that channel that have been loaded into
TRAKPRO™ software in the left hand ListView box. The right hand list is a drag-listbox
showing the points that have been selected for graphing. The left hand list (Downloaded Data
Points) is a multi-selection ListView control and as such allows sorting of its columns into
numerical ascending or descending order. The right hand list (Graphed Data Points) is a
drag-listbox which allows individual items to be moved up and down the box by dragging
them with the mouse. Items may also be deleted from this list.
Points are chosen for plotting by selecting points in the left-hand list and dragging them onto
the right-hand list. Once satisfied that the right-hand list contains all the necessary points
arranged in the correct order, these points may be plotted by clicking on the OK button.
Note
Although each Single Sample Channel has a Sample ID, it is identified uniquely
in TRAKPRO™ software by an internal ID created from a combination of its
date/time stamp, channel number, and sample number. You may have several
points with the same Sample ID that may have come from other instruments or the
same instrument after the data have been cleared. These will be seen by
TRAKPRO™ software as separate data points because the date/time stamps will
differ. If, however, you download a data point twice and try to drag and drop the
duplicate, TRAKPRO™ software will see the two points as identical and only one of
the points will appear for selection in the right hand List Box.
Shortcuts
Toolbar
Keys
User’s Manual
Ctrl+G
81
Both forms of dialog box allow the graph to be based on a previously saved template.
See also: Graph Options | Channels and Graph Options | Data Points.
Opening an Existing Graph
This allows viewing a previously stored graph. The chosen graph becomes the current graph,
and the previous current graph is overwritten. If a current graph is already present and has not
already been stored when this command is invoked, the option of storing the existing current
graph is given.
The user is presented with a dialog box containing a list of stored graphs, identified by their
graph name. Clicking on a graph then pressing OK opens the selected graph for viewing,
alternatively, the user may simply double-click on the required graph which affects the same
process. Graphs based on Single Sample Data are shown prefixed by an asterisk
Shortcut
Toolbar
Closing the Current Graph
The graph may be closed by selecting Close from the file menu associated with the graph
screen. This action returns the user to the form screen for the current instrument. If the current
graph has not been saved, after it has been closed, it is still possible to save it by selecting
Store Graph.
Shortcut
Toolbar
82
TRAKPRO™ Data Analysis Software—Part Six
Renaming a Graph
This allows renaming the current graph. A list of current graph names is displayed so that a
unique name can be chosen that has not been used before in the current data file.
Shortcut
Toolbar
Storing a New Graph
Storing the current graph simply adds the graph to the storage list, however, since the graph
names must be unique for identification purposes, if a graph has been already stored under the
name of the current graph, the user is asked to choose to rename or replace the existing graph.
If the user selects replace, then the new graph replaces the old graph having the same name in
the store. If Rename (the default) is chosen, Graph Rename function is called to allow
changing the current graph’s name before storage. If OK is selected, the graph is added to the
storage list.
Shortcut
Toolbar
Deleting a Stored Graph
This feature allows removing a graph from the graph store. Select the graph name in the dialog
box’s list box and click on the Delete button or alternatively double-click on the selected
graph name. This deletes the graph from the listbox display. Several graphs may be deleted
from the list by repeatedly selecting a graph and clicking the delete button or using the
double-click method.
When the correct graphs have been deleted from the list, pressing OK closes the dialog box
and deletes the graphs from TRAKPRO™ software’s store. Pressing Cancel closes the dialog
box and leaves the graphs unchanged.
Note
Graphs based on Single Sample Data are shown prefixed by an asterisk.
Exporting Graph Images
This feature allows making a copy of a graph other than by sending it to the printer. Examples
of this would be to include the graph image in a report or another program.
TRAKPRO™ software offers the facility to export a graph to the Windows clipboard so it may
be used in other programs. The Copy Graph to the Clipboard dialog box allows copying the
graph as a bitmap.
User’s Manual
83
The Object Size edit boxes default to the size of the graph, in pixel units. This size is directly
applicable to the export of bitmaps.
Restrictions:
When exporting bitmaps, the size values must not be less than 32 or greater than 2000.
See also Export Test Data.
Annotating Graphs
This feature allows adding annotations and comments to the graph. These annotations remain
associated with the specific graph and are saved with the graph when file data are saved, and
printed when the graph is printed.
Shortcut
Toolbar
Up to 10 annotations may be added each of which may be up to 48 characters long. The
annotations can be positioned anywhere on the graph to emphasis a particular aspect
of interest.
Clicking on the toolbar shortcut brings up a dialog box on the screen where the required text
may be entered. The text is initially positioned on the graph by clicking on the required
position with the left mouse button.
Clicking with the right mouse button on existing annotation brings up the dialog box
containing the existing text. The user may edit this text and close the dialog box by clicking
on the Close button, or delete the annotation by clicking on the Delete button.
To move an existing annotation, click on it with the left mouse button and drag it to a new
location keeping the left mouse button down. The mouse cursor changes to an hour-glass
during the dragging process. Releasing the mouse button at the required location places the
annotation at this point.
84
TRAKPRO™ Data Analysis Software—Part Six
View Graph
This menu option returns the current graph displayed in the graph screen if one has already
been plotted, or allows opening an existing graph if the test data file already contains
stored graphs.
Graph Options
The graph options feature allows the currently displayed graph to be customized in many
ways. The Logged Data Graph Options consists of a property sheet containing eight (8)
property pages that may be selected through tabs.
The Single Sample Data Graph Options property sheet has only five pages, distinguished in
the following list by an asterisk.
Shortcut
Toolbar
The following pages are selectable:
General*
Main and subtitles, Viewing Style, Font size, Gridlines, Enable annotations.
Plot Style
Plot Styles, Line styles, Marking data points, 3-D shadow effect.
X-axis*
Start and stop date ranges, channel overlaying.
Y-axis
Auto or manual scaling, tick marks, log/lin axis, Y-axis range, multi-or
single channels, overlapping of channels.
Legends
Changing of graph legends, enabling/disabling graph cursor.
Channels
Re-selection of new / de-selection of existing graph channels.
Data Points*
Selection of Single Point data for plotting (comparable to the Logged Data
Channels).
Fonts*
Title and sub-title fonts, axis fonts, font styles (bold, italic, underlined) and
sizes.
Colors*
Graph colors and channel colors, color defaults and preference setup.
TWA/STEL
Controls the extended plots of the derived data TWA or STEL.
User’s Manual
85
Graph Options | General
This property page is part of a property sheet that may be accessed by selecting Graph
Options from the Graph Screen Graph Menu or the
shortcut button on the Graph
Screen’s toolbar.
The Single Sample Data version of this property page is similar except that the Monochrome
+ Symbols Viewing Style and the Large Font Size are unavailable.
86
TRAKPRO™ Data Analysis Software—Part Six
Graph Options | Plot Style
This property page is part of a property sheet that may be accessed by selecting Graph
Options from the Graph Screen Graph Menu or the
shortcut button on the Graph
Screen’s toolbar.
User’s Manual
87
Graph Options | X-axis
This property page is part of a property sheet that may be accessed by selecting Graph
Options from the Graph Screen Graph Menu or the
shortcut button on the Graph
Screen’s toolbar.
Single Sample Data Graphs
The X-axis on the Single Sample Data graph corresponds to the Y-Axis on a normal Logged
Data graph. Since the Single Sample Data graph is a horizontal bar graph it behaves similar to
a vertical bar graph that has been rotated through 90 degrees. Thus, the magnitude of the data
points is expressed on the X-Axis rather than the Y-Axis.
88
TRAKPRO™ Data Analysis Software—Part Six
Graph Options | Y-axis
This property page is part of a property sheet that may be accessed by selecting Graph
Options from the Graph Screen Graph Menu or the
shortcut button on the Graph
Screen’s toolbar.
Graph Options | Legends
This property page is part of a property sheet that may be accessed by selecting Graph
Options from the Graph Screen Graph Menu or the
shortcut button on the Graph
Screen’s toolbar.
User’s Manual
89
Graph Options | Channels
This property page is part of a property sheet that may be accessed by selecting Graph
Options from the Graph Screen Graph Menu or the
shortcut button on the Graph
Screen’s toolbar.
The purpose of this page allows modifying the selected channels within an existing graph
created by New Graph or Open Graph. Channels may be added or subtracted from tests
already associated with the graph or from new tests.
Note
Data from the Q-TRAK™ Plus instrument may sometimes contain a channel with
totally invalid data due to a faulty or missing sensor. In this case it is not possible
which cannot
to plot the channel, and the channel is shown as a black filled box
be selected.
90
TRAKPRO™ Data Analysis Software—Part Six
Graph Options | Data Points
This property page is part of a property sheet that may be accessed by selecting Graph
Options from the Graph Screen Graph Menu or the
shortcut button on the Graph
Screen’s toolbar.
This page is only available for graphs that contain Single Sample Data and is somewhat
equivalent to the Channels page of the Logged Data graphs.
Notes
Because of the complexity of adequately expressing a variety of units and channel
types simultaneously on the same plot. Single Sample graphs are restricted to one
channel type. Therefore, only points that are associated with the channel type of
the existing graph are presented for addition to that plot. Although each Single
Point has a Sample ID, it is identified uniquely in TRAKPRO™ software by an
internal ID created from a combination of its date/time stamp, channel number, and
sample number. You may have several points with the same Sample ID that may
have come from other instruments or the same instrument after the data have
been cleared. These will be seen by TRAKPRO™ software as separate data points
because the date/time stamps will differ. If, however, you download a data point
twice and try to drag and drop the duplicate, TRAKPRO™ software will see the two
points as identical and only one of the points will appear for selection in the right
hand List Box.
Data from the Q-TRAK Plus instrument may sometimes contain a Single Sample
Data (SSD) channel with an invalid data point due to a faulty or missing sensor. In
this case the point is shown in the Downloaded Samples ListView box as Invalid.
It is not possible to plot this point, and the drag and drop of invalid data points into
the Graphed Data Points List Box is forbidden.
User’s Manual
91
Graph Options | Fonts
This property page is part of a property sheet that may be accessed by selecting Graph
Options from the Graph Screen Graph Menu or the
shortcut button on the Graph
Screen’s toolbar.
Graph Options | Colors
This property page is part of a property sheet that may be accessed by selecting Graph
Options from the Graph Screen Graph Menu or the
shortcut button on the Graph
Screen’s toolbar.
92
TRAKPRO™ Data Analysis Software—Part Six
Graph Options | TWA/STEL
This property page is part of a property sheet that may be accessed by selecting Graph Options
from the Graph Screen Graph Menu or the
shortcut button on the Graph Screen’s toolbar.
Note
TWA graphs of data having a duration of less than 15 minutes are not available,
and the TWA checkbox is grayed out for these graphs.
Graph Templates
If you will be creating a range of graphs from data having very similar properties, it may be
desirable to use a graph template that holds many of the properties that you would want to set.
Properties that are exclusively dependent on the test data and channels, etc., are not saved
since it is unlikely that these will be appropriate to another graph.
To prepare a template, create a new graph using Graph | New or open an old graph using
Graph | Open and customize the graph using the Graph Options property pages. Once the
graph is set up, go to Graph Options | General page and click on the Save button. This saves
a binary template file called Graph.tpl for Logged Data graphs, or SpdGraph.tpl for Single
Sample Data Graphs in the default directory. These settings remain saved in this file until you
save new settings, or delete the template file. Currently TRAKPRO™ software supports only
one template file per major type of graph.
To create a new graph using your saved settings, use the Graph | New facility and ensure that
the Use template check box is ticked. The state of the Use template check box is saved from
session to session in the system Registry. If no template file exists, the Use template check
box is grayed out, and if for some reason the file cannot be opened, a warning appears asking
to create a graph without the template. The template file may then be re-created from the
Graph Options | General page.
User’s Manual
93
The properties saved to the template file for Logged Data Graphs are as follows:
General Page
Plot Style Page
X-axis Page
Viewing Style
Font Size
Show Annotations
X-axis & Y-axis Grid
Grid in Front
3D Shadow
Mark Data Points
Plot Style
Line Style
Overlay Channels
Manual Start Time
Manual Stop Time
Y-axis
Legends Page
Fonts Page
Log / Lin state
Single or Multi Channel
Overlapped Channels
Tick Marks
Automatic or Manual
Ranges (min & max)
Enable Graph Cursor
Main Title Font
Main Title Style
Sub Title Font
Sub Title Style
Label Font
Label Style
Colors
Alarms Page
All color settings
for graph
Alarms Enabled
Alarm Levels
Note
Single Sample Data Graphs have the following differences:
•
•
•
•
•
•
•
•
The graph style is fixed as a horizontal bar graph therefore Plotstyle is not
relevant.
The X-axis is the numerical axis to which tick marks, range scaling etc applies.
Logarithmic scaling is not currently available for Single Sample data graphs.
The Y-axis contains the data point labels for each bar of the bar graph.
It is best to use a non-proportional font e.g., Courier to display data point
labels (see Graph Options | Fonts).
Legends are not relevant since there is only one data set.
There is no cross-hair cursor, this is replaced by a customizable Tooltip, see
Graph Options | X-axis.
The Font Size is restricted to small or medium (see Graph Options | General).
A parameter that specifies the components of the point label is saved in the
template (see Graph Options | Data Points).
94
TRAKPRO™ Data Analysis Software—Part Six
Graph Screen
This screen is the View in which the graph is drawn. It has its own menu and tool bar for
graph-specific commands.
Graph Screen Toolbar:
Close
Closes the current graph screen and returns the user to the front form
screen.
New
Creates a new graph from a range of tests.
Open
Opens a graph that has been stored in the program or saved in the
data file.
Store
Stores the current graph in the program’s graph list.
Rename
Renames the current graph. If graphs have been stored, a list of graph
names already in use is displayed to allow choosing a unique name.
Options
Allows many features of the graph to be customized.
Annotate
Allows up to 10 persistent textual annotations to be placed anywhere on
the graph.
Graph Statistics
Presents a dialog box giving statistics for the currently visible graph
channels.
Print Preview
Allows the graph to be viewed as it would appear when printed. If the
printer is a black & white printer, the display is in monochrome with
symbols added to distinguish traces.
Print
Prints the current graph.
User’s Manual
95
Graph Cursor
The graph cursor provides a means of reading coordinates for any position on the graph. This
feature is enabled by default for each new graph, but may be turned on and off by the Enable
Graph Cursor checkbox in the Graph Options | Legends property page—see below:
When enabled, the cursor coordinates of any point on the graph may be measured by moving
the mouse pointer to the desired location and reading the results in the Status Bar window at
the bottom of the Graph Screen.
The Logged Data graph also has a cross hair cursor which may also be “locked on” to a data
plot by positioning the mouse arrow on one of the plot’s data points. If the data points are not
visible (see Graph Options | Plot Style) their position is indicated by the changing of the
mouse pointer from an arrow icon to a hand icon. Clicking the left mouse button once
connects the graph cursor to this point.
The left and right arrow keys may then be used to step forward or backwards along the plot, in
steps of a data point at a time, with the coordinates of each data point being displayed in the
status bar.
An example of the status bar is shown below.
Logged Data Graph Status Bar
96
TRAKPRO™ Data Analysis Software—Part Six
Single Point Data Graph Status Bar
Graph Statistics Report
Graph statistics are based on the data currently in view on the current graph. This means that
unlike the Test Statistics report, the graph statistics may encompass a range of tests, and may
involve only parts of some of the data if data points have been excluded owing to zooming, or
restricting the test time range from Graph Options | X-axis. The graph statistics are not
available for certain graphs (see Troubleshooting.)
Shortcut
Toolbar
When this report is visible, clicking on the Print
or Print Preview
will provide a printout or print preview, respectively.
toolbar buttons
Notes
The TWA (8 hr) is blank when the channel is not appropriate for TWA calculations.
When printing the graph statistics, if there are more than 5 channels, the printer
orientation is automatically set for landscape. If there are 5 or less channels,
portrait mode is selected. TRAKPRO™ software will prompt the user to manually
change printer orientation to have the best printout.
User’s Manual
97
Zooming a Graph
Zoom-in to an area of the displayed graph by dragging a rectangle while the <Shift> key is
held down. To return to a non-zoomed state, press the <Z> key. Although zooming-in can be
done in progressive steps, zooming out cancels all zoom stages, and it is not possible to zoom
out incrementally. The graph’s Status Bar indicates the current zoom state of the graph, with
the word Zoomed appearing whenever the graph is zoomed.
Zooming is acknowledged in Printing and Print-Preview, and in the calculation of Graph
Statistics.
The zoomed state of a graph may be stored or saved, however restoring of the zoomed state
from *.df1 files is only possible for cases of single channel plots (see also Backward
Compatibility).
Dragging is the process by which the mouse or other pointing device is used to position the
screen cursor over a specific point. The left mouse button is held down while the cursor is
moved to another position on the screen. When attempting to zoom into a graph, the resulting
rectangle marks the boundaries of the area to be zoomed to full size.
A font (typeface) that appears in a printed document exactly the way it appears on the screen.
TrueType fonts are scalable to any size. Several of these fonts are installed automatically
when you install Windows.
A bitmap is an array of bits that contains data describing the colors found in a rectangular
region of screen or paper.
STEL is the Short Term Exposure Limit and is one of the Threshold limit values (TLVSTEL). This is defined as the 15 minute time weighted average exposure limit that a user may
be safely exposed to over a period not exceeding fifteen minutes, without any irritation,
chronic or irreversible damage, or effects that may increase the likelihood of accidental injury
or reduce efficiency. Exposure to STEL levels should not occur more than 4 times in a day
and must be separated by at least 1 hour. STELs are recommended only where toxic effects
have been reported from high short-term exposures in either humans or animals.
LEL is the Lower Explosive Limit. This is the limit above which the gas mixture is likely to
be explosive if brought into contact with an ignition source. Two alarms are set for this
parameter a lower LEL and an upper LEL which express alarm limits as percentages of the
LEL value.
TWA is the Time Weighted Average and is one of the Threshold limit values (TLV-TWA).
It is the averaged measurement taken over the test sampling period equating to the safe limit of
exposure within an 8-hour working day.
An Extended plot refers to a plot of TWA or STEL. These plots consist of only a single
channel and also display the TWA or STEL Alarm limits as set by Graph Options | Alarms
Single Point Data consists of a series of discrete data points measured by the P-TRAK or
similar TSI instrument with that capability and associated with TRAKPRO™ v3.10 or later. The
user may take a single measurement and enter an appropriate sampling location and note
98
TRAKPRO™ Data Analysis Software—Part Six
associated with that point. The instrument assigns it a data point number and stores the details
of the point in its memory. These data may be retrieved at a later date using TRAKPRO™
software’s Receive dialog.
Single Sample Data is the term now used by TRAKPRO™ software to apply to a collection of
discrete data points that may be sampled using the Q-TRAK Plus or similar TSI instrument.
Unlike the Single Point Data associated with TRAKPRO™ v3.10 or later and the P-TRAK,
Single Sample Data contains up to 5 channels from 5 different sensors that are sampled
simultaneously for an interval of time. The collection of channels forms a single sample which
is assigned a number and can be downloaded from the instrument into TRAKPRO™ software
using the Receive Dialog. P-TRAK Single Point Data are now treated as Single Sample Data
having only one channel, which is the Particle Concentration channel.
Logged Data consists of a series of data points connected by a common time interval and
relating to a single measurement period. These data are produced by a wide range of TSI
instruments concerned with logging and may be displayed in a range of graphical formats
within TRAKPRO™ software. These data are retrieved from the logging instrument using
TRAKPRO™ software’s Receive dialog.
User’s Manual
99
Part Seven—Printing
Print Command (File Menu)
The Print command is available whenever there is a display available that TRAKPRO™
software can print. If more than one item is selected, printing proceeds as follows:
Test data table displayed
Test statistics displayed
Test data and statistics both
displayed
Graph only displayed
Graph and graph statistics displayed
Prints table
Prints statistics
Prints the selected, or most recently selected,
window
Prints graph
Prints graph statistics
The command first presents a Print dialog box, where you may specify the range of pages to
be printed, the number of copies, the destination printer, and other printer setup options. In the
case of the test data tables, there may be a choice of many pages to print, while the test
statistics, graph statistics, and graph are set to fill only one page.
Shortcuts
Toolbar
Keys
Ctrl+P
Print Dialog Box
The following options allow specifying how the document should be printed:
Name
Select the printer you want to use. Choose the Default Printer; or choose the Specific Printer
option and select one of the current installed printers shown in the box. Install printers and
configure ports using the Windows Control Panel.
Print Range
Specify the pages you want to print:
All
Selection
Pages
Prints the entire document.
Prints the currently selected text.
Prints the range of pages you specify in the From and To boxes.
Copies
Specify the number of copies you want to print for the above page range.
Collate Copies
Prints copies in page number order, instead of separated multiple copies of each page.
101
Properties
Displays a dialog box for making additional choices about printing, specific to the type of
printer selected.
Print Progress Dialog
The Printing dialog box is shown during the time that TRAKPRO™ software is sending output
to the printer. The page number indicates the progress of the printing.
To abort printing, choose Cancel.
Print Preview Command (File Menu)
Use this command to display the active document as it would appear when printed. When this
command is chosen, the main window will be replaced with a print preview window in which
one or two pages will be displayed in their printed format. The print preview toolbar offers
options to view either one or two pages at a time, move back and forth through the document,
zoom in and out of pages, and initiate a print job.
Shortcuts
Toolbar
Print Preview Toolbar
The print preview toolbar offers the following options:
Print
Next Page
Prev Page
One Page /
Two Page
Zoom In
Zoom Out
Close
Bring up the print dialog box, to start a print job.
Preview the next printed page.
Preview the previous printed page.
Preview one or two printed pages at a time.
Take a closer look at the printed page.
Take a larger look at the printed page.
Return from print preview to the editing window.
Print Setup Command (File Menu)
Use this command to select a printer and a printer connection. This command presents a Print
Setup dialog box, to specify the printer and its connection.
102
TRAKPRO™ Data Analysis Software—Part Seven
Print Setup Dialog Box
The following options allow selecting the destination printer and its connection.
Name
Orientation
Paper Size
Paper Source
Properties
Network...
Select the printer you want to use. Choose the Default Printer; or choose
the Specific Printer option and select one of the current installed printers
shown in the box. Install printers and configure ports using the Windows
Control Panel.
Choose Portrait or Landscape.
Select the size of paper that the document is to be printed on.
Select the size of paper that the document is to be printed on.
Some printers offer multiple trays for different paper sources. Specify the
tray here.
Displays a dialog box with additional choices about printing, specific to
the type of printer selected.
Choose this button to connect to a network location, assigning it a new
drive letter.
Printing Single Point Data Tables
This dialog box is accessible from the toolbar button
screen’s Single Data Points ListView box.
or by double-clicking on the main
The Print and Print Preview buttons execute the appropriate commands.
User’s Manual
103
Notes
The format of the printing is dictated by that set up in the Print Setup dialog box,
with certain exceptions. If any one of the selected data points contains a note, and
the print format has been set to Portrait, a warning is presented to give the option
of changing to Landscape format for printing the table. You may accept or reject
this change, if accepted then the change is persistent only for as long as this
dialog is on the screen. If rejected, printing will still proceed, but notes will not be
printed. Single Point Data notes are limited to 50 characters in length.
Although each Single Point has a Point ID, it is identified uniquely in TRAKPRO™
software by its date/time stamp. You may have several points with the same Point
ID that may have come from other instruments or the same instrument after the
data have been cleared. These will be seen by TRAKPRO™ software as separate
data points because the date/time stamps will differ. If, however, you download a
data point twice and try to drag and drop the duplicate, TRAKPRO™ software will
see the two points as identical and only one of the points will appear for selection
in the right hand List Box.
Data from the Q-TRAK Plus instrument may sometimes contain a Single Sample
Data (SSD) channel with an invalid data point due to a faulty or missing sensor. In
this case the point is shown in the Downloaded Samples ListView box as Invalid.
It is not possible to print this point, and the drag and drop of invalid data points into
the Printed Data Points List Box is forbidden.
The Printed Data Points control is a Drag-ListBox. This control allows each item in the box
to be selected singly and moved up and down the list to rearrange the data into the desired
order. Items may also be deleted by selecting the data point and pressing the <Del> key.
Note
Data points may not be dragged to a position below the last data point on the list.
104
TRAKPRO™ Data Analysis Software—Part Seven
Part Eight—Troubleshooting Guide
Introduction
The following information is a compilation of known problems that may occur while
operating TRAKPRO™ software. Please review the list to see if problem has been answered
before contacting TSI for help.
File Saving/Reading
NONE
Graph Problems
•
Unable to see a Graph Annotation
•
Unable to View Graph Statistics
•
Graph colors are not correct or cannot be changed
•
Graph Options Channels are disabled
•
Graph Alarms are not visible
•
Graph Not Plotted
Printing
NONE
Communications
•
Timeout Errors
•
Communications Errors
No Graph Annotations
Sometimes the Annotations added may not be visible. Check that the Show Annotations
option is checked in the Graph Options | General property sheet, since this controls the
display of both Notes added as Annotations and Alarm lines for PROTECTAIR™ Multi-gas
Monitor graphs which are also treated as Annotations.
Note that there is a further reason why graph annotations may not be visible. This problem
occurs on graphs that have large value y-axis co-ordinates (in excess of 100,000). In such
cases if TRAKPRO™ software is allowed to automatically scale the y-axis, it will choose
exponential notation (e.g., xxx [e5]). Graphs scaled in exponential notation are currently
unable to display annotations - this is the fault in the graphics package and we are awaiting a
fix from the third party vendor (GigaSoft Inc). A way to work round this is to select manual
scaling and specify a range similar to that chosen by the automatic scaling (see
105
Graph Options | Y-axis). The y-axis will then be scaled in normal numbers and the graph will
be able to display annotations.
Graph Statistics
Sometimes you may have loaded, or created, a graph but are unable to view the graph
, and menu item is grayed out. This is because the graph has
statistics. The toolbar button
Overlayed Channels feature enabled on the Graph Options | X-Axis property page. Since the
graph statistics page displays data with respect to valid date and time ranges, it is not possible
to do this if the dates and times have been normalized by overlaying the channels.
Graph Colors
On some computers, notably those using Diamond Stealth graphics cards, the TRAKPRO™
software graphs may not be displayed correctly. This usually takes the form of colorless
legend markers, no data shadows, and the inability to set the graph background or graph
desktop colors correctly. This problem may be remedied by ensuring that the Windows
Display Driver has the Graphics Accelerator option disabled. These changes are made from
the Windows Control Panel | Display option.
Graph Options Channels are Disabled
The Graph Options | Channels tree display is disabled whenever an Extended Plot is
selected. This is necessary because the user must not be able to deselect a channel that is
currently being displayed as an Extended Plot. To return to the normal plotting mode, click on
the Graph Options | TWA/STEL property page and deselect the TWA or STEL plot by
clearing the check mark in the Derived Plots box. After pressing APPLY, the standard plot
appears and the channels option is enabled.
Graph Alarms are not Visible
This may be due to the following:
• The alarm lines are present but are too small to see clearly. Try selecting a larger font size
from the Font Size box on the Graph Options | General property page.
• The Annotations have been disabled see: No Graph Annotations.
• The Alarm lines refer to an Extended Plot graph and are only visible once this plot has
been selected via the Graph Options | TWA/STEL property page.
Graph Not Plotted
There may be several reasons, but first check that you have more than one data point.
If you have only a single data point, make sure that you have selected points as your plot style
and not line since TRAKPRO™ software cannot plot a line having only a single point.
106
TRAKPRO™ Data Analysis Software—Part Eight
Timeout Errors
Problems may occur when attempting to download data into TRAKPRO™ software while the
PC is executing other processor intensive applications or has run short of resources. In such
cases it is possible for the Windows serial driver to become corrupted in memory which
results in TRAKPRO™ software experiencing frequent timeout errors. This problem is more
likely to occur on slower computers. If repeated timeout difficulties are encountered, re-boot
the PC and run TRAKPRO™ software as the sole application until you have downloaded your
required tests. This is necessary since it is not possible to restore the Windows serial driver
without re-booting Windows.
Serial Communication Errors
This message indicates that TRAKPRO™ software has been unable to communicate with your
attached instrument. Initially check the items mentioned in the error message:
•
The instrument is turned on.
•
The instrument is connected to a serial port.
•
The instrument is not currently taking a sample.
If you receive this error and have disabled Auto-configuration to maximize performance, it is
likely that you have either the wrong software configuration for the attached instrument or you
have selected the incorrect comport. It is advised to either re-enable the Auto-configuration or
run the Find Port Facility which will tell you the Instrument type and the comport number to
which it is attached. If still unable to detect the instrument, there may be a fault in the serial
cable, the instrument, or the PC serial card.
USB Communications
In the case of SIDEPAK™ instruments, please check that the instrument is firmly connected to
the USB cable and that it is switched on. Note that it may take up to 7 seconds for Windows to
recognize the presence of the SIDEPAK™ instrument and to establish a virtual comport. Please
wait at least 10 seconds after connecting the instrument to your computer before attempting to
communicate with it.
Note also that the SIDEPAK™ will not respond to commands from TRAKPRO™ software if it is
currently logging data or if the instruments screen is set to a menu item other than the Survey
Mode display.
If you still cannot connect to your SIDEPAK™ instrument you may need to uninstall the driver
and TRAKPRO™ software then re-install TRAKPRO™ software.
In the case of AEROTRAK™ instruments, check that the instrument is firmly connected to the
USB cable and that it is switched on. Note that it may take up to 7 seconds for Windows to
recognize the presence of the instrument. Wait at least 10 seconds after connecting the
instrument to your computer before attempting to communicate with it.
See also Serial Communication Errors.
User’s Manual
107
Un-Install TRAKPRO™ Software and FTDI Driver
To uninstall TRAKPRO™ software, open the Add/Remove Programs area of the Windows
Control Panel. When the list of currently installed programs appears, find and select
TRAKPRO™ software, then select Remove to run the un-installer. The following dialog
appears.
Select Yes. The following dialog appears.
This is the FTDI driver that allows communications with your SIDEPAK™ instrument. Click
Continue to uninstall the FTDI driver. The following dialog displays to show the progress of
the un-installation.
Click Finish. The un-installer will finish the un-installation.
To re-install TRAKPRO™ software simply insert your CD and follow the instructions.
Refer to the TRAKPRO™ Data Acquisition Software User’s Installation Guide located on the
installation CD if you have any questions.
108
TRAKPRO™ Data Analysis Software—Part Eight
Sales and Customer Service
The following contact numbers at TSI Incorporated are available for customers requiring help
or product support.
Mailing Address
TSI Incorporated
500 Cardigan Road
Shoreview, MN 55126
U.S.A.
Within America
Telephone
(Service): (800) 874-2811
(Sales): (800) 874-2811
(651) 490-2811
Fax:
(651) 490-3824
International
Telephone:
(001 651) 490-2811
Fax:
(001 651) 490-3824
E-mail address:
Web site:
[email protected]
http://www.tsi.com
User’s Manual
109
Part Nine—Appendix
Radio Modem Operation (This option is only available for
DUSTTRAK™ II or DUSTTRAK™ DRX with radio modem accessory)
Please refer to TRAKPRO™ software installation guide for steps to install drivers and the Digi X-CTU
software for radio modem. In order to use TRAKPRO™ software to communicate with the instrument
through radio, one radio modem needs to be connected on the base station computer, and one radio
modem needs to be connected through the Flat (Host) USB connector on the Instrument. It is
recommended to power the radio modem connected to the Instrument through the power adapter
provided. The radio modem connected to the base station computer can be powered through the USB
connection.
Configure Radio Modem Settings
The following Radio Modem settings must be updated from the factory defaults (or verified to match
the settings outlined below) to ensure that TRAKPRO™ and the DUSTTRAK™ II/DRX communicate
properly to the Radio Modems, and to improve the robustness of communication over the Radio
Modem wireless link. These settings must be identical in all Radio Modems in the wireless link –
so make sure to update both the remote and base station Radio Modems with these settings prior
to connecting to a DUSTTRAK™ II/DRX or TRAKPRO™.
1. Connect the Radio Modem to the USB port of a PC.
2. Run the X-CTU software and select the COM port for the Radio that is connected.
3. Click Modem Configuration tab.
4. Click Read to display the current settings stored in the Modem.
5. Update each of the following Radio Modem settings by clicking on the setting and making an
entry in the box provided, or selecting the proper setting from the drop-down list.
Note
Changing settings other than those listed below are not recommended, and may
result in loss of communication. Leave all other Radio Modem settings at their
default values during the configuration process.
111
RN-Delay Slots: Set this to “0”.
112
TRAKPRO™ Data Analysis Software—Part Nine
FF-Retries: Set this to “FF”.
User’s Manual
113
RT-DI2 Configuration: Set this to “0 – DISABLE”.
6. Once all settings have been updated, click Write so the new settings are saved to the Radio
Modem.
114
TRAKPRO™ Data Analysis Software—Part Nine
Configure Radio Modem Address (if necessary)
In order for Radio Modems to communicate to each other, they must have matching Destination
Addresses. For a simple point-to-point configuration, where there is one Radio Modem at the base
station and one at the instrument site, the default Destination Address value in the Modem allows
communication automatically. The Radio Modems have a default address of 0 from the factory. Verify
that the addresses match prior to deployment and usage.
In a point-to-multipoint setup, where multiple remote Radios are to be accessed by a single base
station Radio, each remote must have a unique Destination Address setting. When it is desired to
communicate to one of the remotes, the base station Radio address is changed to match the remote
Radio address of interest. This switching can easily be done using TRAKPRO™ software, as described
later in this document.
The Destination Address value can be set as a hexadecimal (base-16) value between 0000 and FFFF.
Set the modem address using the Digi X-CTU software on your PC.
1. Connect the Radio Modem to the USB port of a PC.
2. Run the X-CTU software and select the COM port for the Radio that is connected.
3. Click Modem Configuration tab
4. Click Read to read current status of modem.
5. Select the Destination Address entry box, and enter the desired address for that Radio Modem.
6. Click Write so the new settings are saved in the Radio Modem.
Note
Leave all other Radio Modem settings at their default values during the configuration
process. Changing the default settings are not recommended, and may result in loss of
communication.
Any time Radio Modem settings are written, make sure that the RT-DI2 Configuration is set
to “0”. Any other setting will result in a loss of communication to a Modem connected to a
DUSTTRAK™ II/DRX monitor or TRAKPRO™ software.
When attempting to communicate to a particular instrument using TRAKPRO™ software, simply enter
the desired Destination Address in the TRAKPRO™ Radio Address entry box, and click Set Radio
Address. This step will change the Destination Address in the base station Radio Modem, and allow it
to communicate to the Instrument Radio Modem which has the same Destination Address. These
TRAKPRO™ screens are described in more detail later in this document.
User’s Manual
115
116
TRAKPRO™ Data Analysis Software—Part Nine
Radio Modem Range Test
Connect a Radio Modem to a USB port on your PC. Make sure both the DUSTTRAK™ II/DRX Aerosol
Monitor and Environmental Enclosure Radio Modems are turned on and connected. Run the X-CTU
software on your PC. Select the COM port from the list for the Radio Modem which is connected. The
Test/Query button can be used to verify that communications from the PC to Radio Modem connected
to the PC are okay.
User’s Manual
117
Click the Range Test tab to enable the range test functionality. Check the RSSI box, which will
indicate the signal strength between radio modems during the range test. Type rangetest into the text
box as shown below, and make sure to hit Enter, to enter the necessary test string. Hit the Start button
to start the test.
118
TRAKPRO™ Data Analysis Software—Part Nine
The test command will be looped between the PC Radio Modem and Instrument Radio Modem, and
the signal strength is measured and displayed. With this information, the user can adjust the
Instrument location and antenna direction, to provide the most reliable communication link. Having a
clear line of sight between Radio Modems is critical for achieving the best possible signal.
Note
Any time a Range Test is performed with the “RSSI” check box enabled, the X-CTU
software updates the RT-DI2 Configuration parameter to “1”, which can cause
DUSTTRAK™ II/DRX monitor or TRAKPRO™ software communication issues. Make sure that
the RT-DI2 Configuration is set to “0” and written to Modem memory prior to connection to
a DUSTTRAK™ II/DRX or TRAKPRO™ software.
User’s Manual
119
Establish Communication between TRAKPRO™ Software and Instrument
through Radio Communication
Open up the Radio Communication Setup dialog box through Instrument Setup -> Radio Comm…
Note
When using the Radio Communications Set Radio Address or Discover Instrument
functionality, TRAKPRO™ software needs to read or write base station Modem configuration
parameters prior to establishing communications to an Instrument over the wireless link. If
the Modem is busy sending data over the wireless link, these Modem configuration
commands will not be recognized until the data transmission ends. The Modem can enter
this busy state if a Discover Instrument fails due to Modem Destination Addresses not
matching, causing the Modem to attempt automatic retries of the commands sent. The red
LED in the lower-left corner of the Modem flickers when data transmission is occurring,
and is constant on when the Modem is idle. To avoid possible issues, make sure the red
LED has stopped flickering and the Modem is idle before using the Set Radio Address or
Discover Instrument commands.
Set Radio Address (if necessary)
In order for Radio Modems to communicate to each other, they must have matching Destination
Addresses. For a simple point-to-point configuration, where there is one Radio Modem at the base
station and one at the instrument site, the default Destination Address value in the Modem allows
communication automatically. The Radio Modems have a default address of 0 from the factory. Verify
that the addresses match prior to deployment and usage.
In a point-to-multipoint setup, where multiple remote Radios are to be accessed by a single base
station Radio, each remote must have a unique Destination Address setting. When it is desired to
communicate to one of the remotes, the base station Radio address is changed to match the remote
Radio address of interest.
120
TRAKPRO™ Data Analysis Software—Part Nine
To update the base station Radio Modem address to match the remote Radio Modem address of
interest, use the Set Radio Address button. Simply enter the Radio Modem address in the “Radio
Address” entry box, and select Set Radio Address. This will update the Destination Address
parameter stored in the base station radio.
Discover Instrument
Use the Discover Instrument button to open the communications channel between TRAKPRO™ and
the remote instrument, using the wireless link.
The TRAKPRO™ software attempts to communicate to the Instrument over the wireless link using the
Radio Address that is currently set on the base Radio Modem. When Discover Instrument has
finished, the currently stored base station Radio Modem Destination Address will be displayed in the
Radio Address box. After the Instrument is discovered, model number, serial number, and status of the
Instrument will be displayed. Please note that only one connection can be established at a time.
Once the connection is established, the Logging Programs that are currently available on the
Instrument will be shown in the “Logging Program” dropdown list. A new Logging session can be
started by selecting the appropriate Logging Program and clicking the Start Logging button. Once a
new logging session is started, it can be stopped by clicking the Stop Logging button.
The Stop Logging button will stop any logging data session on the connected instrument. The
instrument must be stopped to download data or adjust the instrument setup. An instrument status of
“Running” signifies that the instrument is logging data.
Additionally, after this connection has been established, data downloading and all other TRAKPRO™
functionality can be utilized. For complete TRAKPRO™ functionality and instructions, refer to the
earlier sections of this document.
User’s Manual
121
TSI Incorporated – 500 Cardigan Road, Shoreview, MN 55126 U.S.A
Website: www.tsi.com
USA
Tel: +1 800 874 2811
E-mail: [email protected]
Website: www.tsiinc.co.uk
UK
Tel: +44 149 4 459200 E-mail: [email protected]
France Tel: +33 491 11 87 64 E-mail: [email protected] Website: www.tsiinc.fr
Germany Tel: +49 241 523030
E-mail: [email protected] Website: www.tsiinc.de
India
Tel: +91 80 41132470 E-mail: [email protected]
China
Tel: +86 10 8260 1595 E-mail: [email protected]
Contact your local TSI Distributor or visit our website www.tsi.com for more detailed specifications.
P/N 1980581 Rev D
Copyright © 2009 by TSI Incorporated
Printed in U.S.A.