1
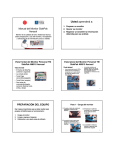
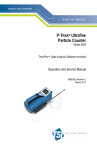
You will learn how to:
1) Prepare your monitor
2) Operate your monitor
3) Record and transfer data collected for
an analysis
SidePak Aerosol Monitor Manual
Air Quality Monitor: Technical Assistance
on monitor preparation and use; and
collecting and extracting data for analysis
1
2
Version 1.0 (October 2009)
TSI SidePak AM510 Personal Aerosol
Monitor front view
TSI SidePak AM510 Personal Aerosol
Monitor side view
Front view
• The front face of the
SidePak features:
• The inlet
• Page key (on/off)
• Enter key
• Two toggle/scroll keys
(up and down arrows)
Side view
• All plugs (USB port and
Power Plug) are located on
the side of the SidePak
under a rubber plug cover
• The Inlet is fitted with a 2.5
µm impactor. This enables
it to measure the very small
particles found it cigarette
smoke.
3
EQUIPMENT PREPARATION
Step 1 - Charging you monitor
There are 3 important steps that the you will perform to
prepare the SidePak for operation:
1)
2)
3)
4
Charge your monitor
Clean and grease the impactor
Zero calibrate right before you use it
1) Attach the supplied power cord to
the SidePak power adapter.
2) Lift the rubber gasket that
protects the power plug
receptacle on the SidePak.
5
3) Insert the power cord into
the power plug receptacle.
4) The screen display will
indicate when the device is
fully charged
6
Step two – Cleaning and
greasing the impactor
Step 1 -Charging you monitor
NOTE:
• The SidePak will be fitted with a 2.5 µm
impactor that requires cleaning and
greasing prior to use.
• Make sure you have an adaptor for your cord
• Charge the batteries for at least 5 hours prior to taking
measurements for an extended period.
7
8
Remove the inlet assembly
(cont).
Remove the inlet assembly
1) Remove the inlet
assembly. Use the
supplied screwdriver to
loosen screws that attach
the inlet assembly.
2) The screws should only be
loosened. they should extend
out from the inlet assembly
without being fully removed (as
pictured).
4) Hold the inlet assembly and
gently wiggle it until it
dislodges from the SidePak
unit.
b)
a)
3) When the screws can be
extended, they have been
loosened enough to remove
the entire inlet assembly.
c)
Hint
You can use the supplied
screwdriver to gently dislodge
the assembly.
9
Next, remove the impactor from the
inlet assembly
1) The impactor is located
inside the inlet assembly.
10
Once the impactor is removed, clean
and grease the impactor
1)
Wipe off the end of the
impactor with a tissue or
towel.
2)
Using the High Vacuum
Grease supplied with your
kit.
2) Remove the impactor from the
inlet assembly by gently
pushing it out with the
screwdriver.
Take care not to scratch the inside of the inlet assembly housing.
11
3) Smear a very small amount of
the supplied grease on the end
(tip) of the impactor.
12
Clean and grease the impactor
(cont).
1) Use your finger to remove excess
grease, leaving only a thin layer of
grease on the impactor tip.
Next, reassemble the impactor
2) As shown, leave only a thin
layer of grease on the
impactor.
1) Carefully slide the cleaned
and greased impactor back
into the inlet assembly.
Gently push the impactor in
with your finger until it is
fully seated.
2) Reattach the inlet assembly to the
SidePak with the two screws
previously loosened.
13
Preparation Step 3 –
Zero Calibrate the SidePak
14
Preparation Step 3 –
Zero Calibrate the SidePak
• Zero calibration is an important step in preparing the SidePak
monitor to take accurate readings. Complete this task RIGHT
BEFORE each monitoring session. After the zero calibration
is complete, do not turn the machine off again before the
monitoring session. One session may include the monitoring
of several locations before stopping at the end of the day or
evening and downloading data.
To zero calibrate your unit:
1) Press PAGE key to turn
monitor on.
2) Wait about 1 minute for
pump to start up and
readings to stabilize.
Display will read “SURVEY
MODE”. .
15
Preparation Step 3 –
Zero Calibrate the SidePak
3) Press PAGE key
5) Press ENTER
4) Then press down
arrow until “Zero Cal”
is displayed.
6) Attach Zero Filter.
16
Preparation Step 3 –
Zero Calibrate the SidePak
7) With the Zero Filter
attached, Press ENTER
again.
17
8) Wait until zero calibration is
finished, this will take 60
seconds. The display will
countdown.
18
Preparation Step 3 –
Zero Calibrate the SidePak
9) After the countdown is
complete, you may
need to press the page
key one or more times
to return to survey
mode.
One-Time Setup Items
10) With the Zero Filter still
attached verify that the reading
stays near 0.000 mg/m 3 or
below 0.003 mg/m3. If the
reading is not near 0.00 mg/m3
then repeat the zero calibration
until it is.
11) Remove the Zero Filter.
• It is important to set the
“Logging Interval” on the
SidePak to 1-minute and
to set the correct time on
the internal clock
• These important steps do
NOT need to be done
every time you use the
SidePak.
• The logging interval will
stay set at 1-minute
unless it is changed by
the user.
• The time should be
checked periodically
(monthly) to make sure it
still accurate
• The following slides will
go through the steps to
set these two items.
.
.
19
Set the Logging Interval
The Logging Interval is the time
interval between data points
recorded by the SidePak.
It is important to make sure the
logging interval is set to 1-minute.
20
Set the Logging Interval (cont.)
2) Once in “Survey Mode” press
PAGE key again to get to Main
Menu.
To set the logging interval:
1) Press PAGE key to turn monitor
on.
4)
You will now be in the
SETUP MENU.
Press the Down Arrow
until you get to “Log Interval”
and press ENTER
5)
You will now be in the “LOG
INTVL” Menu.
Press the Down Arrow until
you get to “1 min” and press
ENTER
3) Press Down Arrow
to get to Setup and press ENTER
6) The logging interval is now
set to one minute. You can
press the PAGE key
repeatedly to return to Survey
Mode.
21
22
Set the Time
It is very helpful to set the clock on
the SidePak to your local time.
Set the Time (cont.)
2) Once in “Survey Mode” press
PAGE key again to get to Main
Menu.
4)
You will now be in the
SETUP MENU.
At “Time/Date” press ENTER
5)
You will now be in the
TIME/DATE Menu.
At “Time” press ENTER.
To set the time on the SidePak:
1) Press PAGE key to turn monitor
on.
3) Press Down Arrow
to get to Setup and press ENTER
23
6) The display will show the
current time set on the
SidePak. Use the Up and
Down Arrow keys to change
to the correct hour and
press ENTER
7) Use the Up and Down Arrow
keys to change to the correct
minute and press ENTER
8) The time is now set on the
SidePak. Press the PAGE
key repeatedly to return to
Survey Mode.
NOTE: The time is in a 24-Hour format.
(for example 4:00PM should read 16:00)
24
Setting up the SidePak to log (record
into memory) measurements
OPERATING THE SIDE PACK
1)
This section will outline the steps for you to:
•
•
•
•
After zero calibrating the
machine, the screen
should say survey mode
Start Logging Data
Record your start time
Lock the device
Pack the SidePak for
sampling
2) Press PAGE key.
3) At “Data Log” press the ENTER
key.
25
26
Setting up the SidePak to log (record
into memory) measurements
1)
Press down arrows until
“Run Manual” is displayed.
3) The screen should now display
“Logging Data ”. It is now
recording measurements to
memory.
IMPORTANT!
•
•
2) Press ENTER key.
4) Make note of the time at
which you started logging
data.
•
Record the time that you
started logging data. This is to
ensure that that we can sync
your observations with data
from the SidePak.
Be sure to use the same
timekeeping device throughout
your day or evening of
sampling. We recommend that
you use an easy-to-read wrist
watch or mobile phone.
Use the Field Notes sheet to
record the time you started
logging data along with the
other sampling observations.
27
28
Locking the device
Lock the SidePak
Field Notes Sheet
1)
2) and then press ENTER while
holding the UP ARROW key.
Press and hold the UP
ARROW key
3) This will lock the device and
prevent accidentally pressing
any of the buttons during
logging.
29
30
Attach tubing
1)
Attach the clear plastic tubing to
the inlet.
Place in a carrying case
3) Make sure the exhaust port, the
small outlet hole on the left side of
the SidePak, is unobstructed.
4) Place SidePak in a bag or
soft briefcase with the end
of the plastic tubing
protruding from bag. Make
sure the small outlet hole on
the side of the machine is
also unobstructed.
5) Make sure the end of the
plastic tubing is
unobstructed.
6) You are now ready to begin
visiting locations
2) If the tubing is loose on the inlet,
you may need to cut no more than 2
cm from the end of the tubing
for a tighter seal.
31
32
Visiting venues and recording
observations
How to measure the volume of
the room
•
After preparation and while you are taking air quality
measurements, you need to make and write down a number of
observations, including the dimensions of the room that you
are sampling.
•
The following sections will help to guide you through the room
measurement and observational process.
1)
Use a sonic measuring
device for easy and accurate
measurements.
33
Calculate and write down room
measurements
2) Measure carefully. Point the
device at a 90-degree angle
(straight on) to the wall or
ceiling in question when
measuring. Do not angle the
device. You will need to take
readings to the ceiling, floor,
and 4 walls.
34
Visiting venues and recording observations:
Important things to remember
NOTE This device does not save the measurements you make. So, each
measurement must be calculated and recorded by hand on a sheet of paper.
• Spend at least 5 minutes
outside before and after
visiting each venue. This
provides adequate baseline
measurements.
• Spend at least 30 minutes
inside each location
• At restaurants and bars,
buy something in each
place you visit (be a
patron).
35
36
Visit venues and record observations
Using Field Notes
Where to place the SidePak when taking measurements
DO
•Keep the bag with you or over
your shoulder.
•You may also place the bag on a
table, chair or bar.
•You can stay in one location, or
circulate around the room. Take
notes on what you do.
•Try to remain discrete so as not to
disturb occupants normal behavior.
DO NOT
The Field Notes
sheet allows for
discrete and
compact note taking.
Make sure to fill
out the required
fields for each venue
visited.
•Do not place the SidePak on the
floor. This is not the normal
breathing zone and this prevents
damage to the equipment.
•Do not leave the SidePak
unattended.
•Do not obstruct the tube. Be sure
that it is attached to the inlet on the
SidePak and is protruding from the
bag.
Field notes
37
38
OBSERVATIONS NEEDED IN EACH
LOCATION
Be sure to make and write down the following
observations for each location
– Location name
Field Notes Sheet
– Times of entry and exit.
– The dimensions of the room
– Upon entry and then every 15 minutes (record the time),
count the number of people in the room.
– Upon entry and then every 15 minutes (record the time),
count the number of burning cigarettes.
– Include a few descriptive sentences on each place. Be
sure to record observations that may be unique to this
location like: Large windows opened, or most people
smoking in the back room area, lit candles, lots of cooking
fumes.
39
40
Complete measurements, unlock and
shutdown
When visiting multiple locations
• Remember to spend at least 30 minutes in each
location (you can spend additional time there, but 30
minutes is the minimum).
1)
• Complete your observational notes before leaving
the location. Make sure to write down the time you
exit.
When air monitoring is complete,
remove the SidePak from the bag.
2) Unlock the device: Press and hold
the UP ARROW key (these are
the same steps used to lock the
device)
• Spend at least 5 minutes outside before entering
another location
3) Press ENTER while still holding the
UP ARROW key
• Repeat taking notes in the new location (starting
with the time you enter)
• Keep the machine running the entire time – do not
turn it off in between locations
You will do these steps after you
have completed your session
for the day or night.
4) The device is now unlocked and
should say “LOGGNG DATA” on
the screen
41
42
Complete measurements, unlock and
shutdown
..continued
5) Press the ENTER key
6) It will say “Enter = Stop”, Press ENTER
again
7) It will briefly say on the screen
“LOGGING STOPPED DATA SAVED”
8) Make note of the time the machine
stopped logging data
Complete measurements, unlock and
shutdown
…continued
9) Press the PAGE repeatedly until
the device returns to SURVEY
MODE.
10) To turn off the SidePak hold down
the PAGE key for 3 seconds to
shut down.
43
Additional shutdown notes
44
Preparing your data for analysis
1) You will need to download software to
capture your results.
• Record your "Time Stop
Logging" using your
observation sheet.
– A CD-rom of the software is available in your SidePak kit or
download using the web link on the next slide.
– Please note: If you have Vista, you will need to download
software version 4.0 or greater. If you do not have this
version in your kit, then you will have to download the
software online (see next slide for the link).
• Shutting off the SidePak
will not delete the data
that you have collected.
Your data remains in
memory until it has been
intentionally deleted by
the user.
2) Be sure to gather data from:
– Your monitor
– Your observational log
45
46
Download data to your system connect your SidePak to your computer
Install TRAKPRO software
• Download the TrackPro Software.
• If the CD-rom is missing from your kit, you
can dowload the TrakPro online from main
software website at http://test.tsi.com/en1033/contact_tsi/TSI_Software_and_Firmwar
e.aspx (under TrakPro™ Data Analysis
Software)
47
Turn on the PC and make sure that
the TrakPro software verson 3.40 or
later is installed. If TrakPro is not
installed see the SidePak manual for
step by step instructions. You can
download the software online.
1)
If not already on, press PAGE
key to turn the SidePak on.
2)
Take the larger end of the USB
cable and insert it into an
available USB port on the PC.
3) Take the small (miniUSB) end of
the USB cable and insert it into
the USB port on the side of the
SidePak.
4) Your system is now connected
USB cable
48
Download data to your system select and load the test
Download data to your system
1) Open the TrakPro software
3) a. Select the "Receive Data" Icon
2) Make sure “SidePak Aerosol
Monitor” is selected from the dropdown menu.
4) Once you select Receive Data, the
PC will communicate with the
SidePak. A dialog box will appear:
"Communicating with Instrument"
b. OR Go to the “File” menu and
select “Receive”.
6) Select the test or tests that you wish to
download and press Receive.
7) If there are a large number of tests
approximately 6 or more, Select "More
Tests" one or more times to see and
download all of the necessary tests.
5) If receive an error message, check
your cable connections, check that the
SidePak is turned on. We recommend that
you consult the User Manual for support,
Make recommended changes, and then
try to Receive Data again.
c. Or use the Ctrl+R shortcut
49
Receive measurement data from the
SidePak
50
Saving the TrackPro File
8) The test or tests that you have downloaded will appear in the
Logged Tests window.
9) Save your new data file.
10) The file will be saved as a
TrakPro file with a .tkp extension.
11) E-mail your saved
TrakPro (.tkp) files
containing your tests
along with the
corresponding
observational data to
Mark Travers as soon
as possible.
Mark Travers
Roswell Park Cancer Institute
[email protected]
(716) 845-5881
(716) 845-8487 fax
51
Collecting good AQM data
• Use this
manual for your
reference (See
file)
53
52