Transcript
USER MANUAL
INTRODUCTION
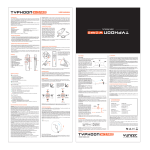
The CGO SteadyGrip™ is a ground handle designed to extend the CGO3 3-axis gyro
stabilized camera from the sky to the ground. The camera pitch controller allows
precise camera angle control on the go using your mobile device as a display. The
SteadyGrip's ergonomic design is capable of holding up to a 6.4 inch mobile device.
CGO3 (available separately) is an innovative combination of 3-axis brushless
gimbal, camera and digital video downlink.
The Self-Stabilizing gimbal makes it possible to capture amazing photographs and
video footage for an array of uses. And the built-in digital video link delivers
streaming video to 5.8GHz WiFi compatible iOS® and Android™ equipped devices
including smart-phones and tablets as well as YUNEEC Personal Ground Stations.
WINDOWS SYSTEM
REQUIREMENTS
MAC SYSTEM
REQUIREMENTS
Windows XP (Service Pack 2 or later)
or Vista
3.2GHz Pentium 4 or faster
Minimum 4GB of system RAM
Mac OS® X 10.4.11 or later
2.0GHz Intel Core Duo or faster
Minimum 4GB of system RAM
CGO3 APP COMPATIBLE DEVICES
Android:
Mobile Devices with 5.8GHz Support
Apple iOS:
iphone 5/5c/5s/6/6 Plus
ipad mini/mini+/3/4
compatible LiPo battery charger. Failure to do so may result in a fire causing
property damage and/or serious injury.
If at any time the LiPo battery begins to balloon or swell, discontinue charging or
discharging immediately. Quickly and safely disconnect the battery, then place it in
a safe, open area away from flammable materials to observe it for at least 15
minutes.
Continuing to charge or discharge a battery that has begun to balloon or swell can
result in a fire. A battery that has ballooned or swollen even a small amount must be
removed from service completely.
Do not over-discharge the LiPo battery. Discharging the battery too low can cause
damage to the battery resulting in reduced power, flight duration or failure of the
battery entirely. LiPo cells should not be discharged to below 3.0V each under load.
Store the LiPo battery at room temperature and in a dry area for best results.
When charging, transporting or temporarily storing the LiPo battery the temperature range should be from approximately 40–120°F (5–49°C). Do not store the
battery or aircraft in a hot garage, car or direct sunlight. If stored in a hot garage or
car the battery can be damaged or even catch fire.
WARNING: All instructions and precautions must be read and followed exactly and
you must follow instructions of the battery manufacturer.
WARNING: Procedures, which if not properly followed, create the probability of
property damage, collateral damage and serious injury or create a high probability
of superficial injury.
Failure to exercise care while using this product and comply with the following
conditions and guidance could result in product malfunction, excessive heat, fire,
property damage, and ultimately injury.
Lithium lon batteries are not toys. For the purpose of the document Li-lon, Li-Po,
Li-Fe, NiCd or NiMH batteries will be described as "Batteries".
Handling and Storage:
SPECIFICATIONS
Lithium Polymer (LiPo) batteries are significantly more volatile than alkaline, NiCd
or NiMH batteries. All instructions and warnings must be followed exactly to
prevent property damage and/or serious injury as the mishandling of LiPo batteries
can result in fire. By handling, charging or using the included LiPo battery you
assume all risks associated with LiPo batteries. If you do not agree with these
conditions please return the complete product in new, unused condition to the
place of purchase immediately.
STEADYGRIP™
Dimensions: 230 X 70 X 190 mm (9.06 X 2.76 X 7.48 in)
Weight (without gimbal/batteries): 350 g (12.35 oz)
Angle Control Range (Pitch): 30° - 85°
Required Batteries: 11.1 V 1400 mAh 3C
Runtime: 90 min (depending on usage)
CHARGING THE BATTERY
CGO3
There are two ways to charge the battery.
Dimension: 4.2 x 5.0 x 3.1 in (106x128x80 mm)
Weight: 7.05oz (200g)
Sensor: 1/2.3” CMOS
Effective Pixels: 12 Megapixels
Camera lens: 0.6in (14 mm)/F2.8(1.4 in/35 mm)
FOV: 115 Degree
Electronic Shutter: 1/30 —— 1/8000
Power Consumption: 18 W
Video Transmission Range: Up to 500 m (1640 ft)
Transmission System: 5.2 Ghz — 5.8 Ghz
Video UHD: 4K 30FPS
Power the SteadyGrip™ from a 100-240V AC outlet using the 12.6V 1A
adapter/power supply as illustrated. The red solid LED on the adaptor indicates the
battery is being charged. It will take approximately 2 hours to charge a fully
discharged (not over-discharged) battery. The LED will glow solid green when fully
charged..
NOTICE: The AC plug type will vary depending on the region in which the product
was imported/purchased (AU = Australian; EU = European; UK = United Kingdom;
US = United States).
NOTICES AND WARNINGS
The following special language terms are used throughout the product literature to
indicate various levels of potential harm when operating this product:
ON
WARNING: This is a sophisticated consumer product. It must be operated with
caution and common sense, and requires some basic mechanical ability. Failure to
operate this product in a safe and responsible manner could result in damage to the
product, property and/or cause serious injury. This product is not intended for use
by children without direct adult supervision. Do not use with incompatible
components or alter this product in any way outside of the instructions provided by
Yuneec. The instruction manual contain instructions for safety, operation and
maintenance. It is essential to read and follow all the instructions and warnings
prior to assembly, setup and/or use in order to operate the product correctly and
avoid damage or serious injury.
AGE RECOMMENDATION: NOT FOR CHILDREN UNDER 14 YEARS. THIS IS NOT
A TOY.
GENERAL SAFETY PRECAUTIONS AND WARNINGS
WARNING: Failure to use this product in the intended manner as described in
instruction manual can result in damage to the product, property and/or cause
serious injury. This product is not a toy! If misused it can cause serious bodily harm
and damage to property.
WARNING: As the user of this product you are solely and wholly responsible for
operating it in a manner that does not endanger yourself and others or result in
damage to the product or the property of others.
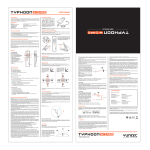
Always allow CGO3 and SteadyGrip™ to initialize properly by setting the SteadyGrip™ on a flat and stable surface prior to switching it on and allowing the SteadyGrip™ and CGO3 to initialize properly which sometimes takes about 4-8 seconds.
Always operate your SteadyGrip™ in a respectful and safe manner.
Step 1) Switch the OPEN with slight force and the LiPo battery will be ejected, then it
can be taken from the battery compartment.
Step 2) Insert the Battery with the side attached a label facing downward.
Step 3) Power the Charger from a 100-240V AC outlet using the 12.6V 1A
adapter/power supply, the red solid LED on the adaptor indicates the battery is being
charged. It will take approximately 2 hours to charge a fully discharged (not
over-discharged) battery. The LED will glow solid green when fully charged.
Install the LiPo Battery in the battery compartment with the side attached a label
facing to the battery compartment. Once you've heard and felt a noticeable "click",
it indicates the battery has been installed securely.
2) To start/stop recording videos, slide the Mode button to Video Recording, then
press the red button to start. You’ll hear an audible indication from the APP each
time the recording starts/stops. During recording, the LED indicator on CGO3
front will flash in blue and green. There will be recording time length display on the
APP Screen.
10
1. CGO3
2. Main Status LED
3. Pitch Control Roller Wheel
4. Mode Switch Botton
5. Rubberized Ergonomic Grip
6. Charging Port
7. On/Off Switch
8. 11.1V 1400mAh 3C LiPo Battery
9. Mode LED
10. Charger
11. Adapter
12. Battery LED Status Indicator
BATTERY WARNINGS AND USAGE GUIDELINES
WARNING: Lithium Polymer (LiPo) batteries are significantly more volatile than
alkaline, NiCd or NiMH batteries. All instructions and warnings must be followed
exactly to prevent property damage and/or serious injury as the mishandling of
LiPo batteries can result in fire. By handling, charging or using the included LiPo
battery you assume all risks associated with LiPo batteries. If you do not agree with
these conditions please return the complete product in new, unused condition to
the place of purchase immediately. You must always charge the LiPo battery in a
safe, well-ventilated area away from flammable materials.
Never charge the LiPo battery unattended at any time. When charging the battery
you must always remain in constant observation to monitor the charging process
and react immediately to any potential problems that may occur.
After flying/discharging the LiPo battery you must allow it to cool to
ambient/room temperature before recharging.
To charge the LiPo battery you must use only the included charger or a suitably
TAKING PHOTOS AND RECORDING VIDEOS
IMPORTANT NOTE: You cannot take still photos while recording video. You MUST
stop recording video in order to take still photos.
9
ON
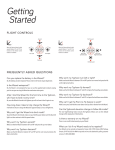
The SteadyGrip™ features a camera pitch controller that allows precise camera
angle control on the go. Simply roll the pitch control wheel forward to move the
camera pitch/angle downward and
roll the pitch control wheel
backward to move the camera
pitch/angle upward. Please review
these instructions along with the
illustrations to familiarize yourself
on how to control the CGO3 with
your SteadyGrip™.
QUICK TIP: Make sure you have your microSD card with enough space for photos
and videos handy.
SteadyGrip™ Action Ground Handle for CGO Series Camera.
11
Step 2) Connect your Mobile
Device to the CGO3’s WiFi by
selecting CGO3’s SSID and by
entering the WiFi Key / Password:
1234567890.
WARNING: Before switching on the SteadyGrip™ , it is highly recommended to
first securely attach the CGO3 to your SteadyGrip™.
OVERVIEW
8
Step 1) Press the curved lip at the
top front of the SteadyGrip™ as
illustrated and fit your Mobile
Device with the screen facing
toward the Main LED and Pitch
Control Wheel.
1) To take a still photo press the red Photo Taking/Video Recording button on your
APP You’ll hear an audible shutter sound from the APP and the LED indicator on
CGO3 front will flash in blue and green. It will take approximately 5 seconds to
capture the photo and before you can take another still photo.
ATTACHING THE CGO3 TO THE STEADYGRIP™
Do not attempt to operate your equipment in areas with potential magnetic and/or
radio interference including areas nearby broadcast towers, power transmission
stations, high voltage power lines, etc.
12
N/A
USING THE CAMERA PITCH CONTROL WHEEL
INSTALLING THE LiPo BATTERY
STEP 1) Remove the protective cover for the contactor as illustrated.
STEP 2) Carefully slide the top part of the CGO3 (that also attaches below the nose
of the TYPHOON) onto the mount below the front part of the SteadyGrip™. A
corresponding ‘click’ will be noticed once the CGO3 has securely been installed
into the slide-in mount on the SteadyGrip™.
STEP 3) Insert a microSD card into the corresponding slot on the bottom of the
CGO3. You can use the included 16GB card (from your RTF package) or any Class
10 microSD card up to 128GB.
STEP 4) Powering on and initialization. Place your
SteadyGrip™ on a flat and stable surface, then switch on
the SteadyGrip™ and it will initialize after 4-8 seconds of
no movement or vibration.
ON
OFF
NOTICE: The CGO3 can be supplied with power through SteadyGrip™ by the
Lipo Balance Connetor Charge Lead (sold seperately) when the contact is
damaged.
SteadyGrip™ LED STATUS:
Main Status LED:
Upon Powering on: Green LED blinking for twice and
then solid GREEN
Low Voltage Warning: RED LED blinking
Power Cut-off: LED solid red
Mode LED:
Pitch Follow Function on: GREEN LED solid
Pitch Follow Function off:GREEN LED off
NOTE: When SteadyGrip™ is in Pitch Follow status, the gimbal camera
tracks SteadyGrip™ in pitch direction, and the gimbal pitch control
roller wheel on SteadyGrip™ is disabled.
FCC STATEMENT:
WB
ISO 32
1/250s
ATTACHING A MOBILE DEVICE TO THE STEADYGRIP™
The other way is:
OPEN
WARNING: Read the ENTIRE instruction manual to become familiar with the
features of the product before operating. Failure to operate the product correctly
can result in damage to the product, property and/or cause serious injury.
17:24:12
CGO3 APP COMPATIBLE DEVICES
Apple iOS:
iphone 5/5c/5s/6/6Plus ipad
mini/mini+/3/4
Android:
Mobile Devices with 5.8GHz Suport
NOTICE: Procedures, which if not properly followed, create a possibility of property
damage and/or little to no possibility of injury.
WARNING: Procedures, which if not properly followed, create the probability of
property damage, collateral damage and/or serious injury or create a high probability
of superficial injury.
Download the free APP named as
CGO3 to smart device at the APP
Store or Google Play Store.Install
the APP to your 5.8GHz WiFi
capable device.
NOTICE: Please be sure to enter
the CGO3 WiFi first before
entering the APP.
IMPORTANT NOTE: All safety precautions and warnings, instructions, warranties
and other collateral information is subject to change at the sole discretion of
Yuneec. For the most up-to-date information please visit the corresponding
product page at www.Yuneec.com or contact the nearest Yuneec office or
authorized distributor.
CAUTION: Procedures, which if not properly followed, create the probability of
property damage and/or a possibility of serious injury.
CGO3 APP
This equipment has been tested and found to comply with the limits for Part 15
of the FCC rules. These limits are designed to provide reasonable protection
against harmful interference in a residential installation. This equipment
generates, uses and can radiate radio frequency energy and, if not installed and
used in accordance with the instructions, may cause harmful interference to radio
communications.
However, there is no guarantee that interference will not occur in a particular
installation. If this equipment does cause harmful interference to radio or
television reception, which can be determined by turning the equipment off and
on, the user is encouraged to try to correct the interference by one or more of the
following measures:
• Reorient or relocate the receiving antenna.
• Increase the separation between the equipment and receiver.
• Connect the equipment to an outlet on a circuit different from that to which the
receiver is connected.
This device complies with part 15 of the FCC rules. Operation is subject to the
following two conditions:
(1) This device may not cause harmful interference, and (2) this device must
accept any interference received, including interference that may cause undesired
operation.
NOTE: This equipment has been tested and found to comply with the limits for a
Class B digital device, pursuant to part 15 of the FCC Rules. These limits are
designed to provide reasonable protection against harmful interference in a
residential installation. This equipment generates, uses and can radiate radio
frequency energy and, if not installed and used in accordance with the instructions, may cause harmful interference to radio communications. However, there
is no guarantee that interference will not occur in a particular installation. If this
equipment does cause harmful interference to radio or television reception,
which can be determined by turning the equipment off and on, the user is encouraged to try to correct the interference by one or more of the following measures:
—Reorient or relocate the receiving antenna.
—Increase the separation between the equipment and receiver.
—Connect the equipment into an outlet on a circuit different from that to which
the receiver is connected.
—Consult the dealer or an experienced radio/TV technician for help.
RF EXPOSURE WARNING
• This equipment must be installed and operated in accordance with provided
instructions and the antenna(s) used for this transmitter must be installed to
provide a separation distance of at least 20 cm from all persons and must not be
co-located or operating in conjunction with any other antenna or transmitter.
End-users and installers must be provide with antenna installation instructions
and transmitter operating conditions for satisfying RF exposure compliance.
IC RADIATION EXPOSURE STATEMENT FOR CANADA
This device complies with Industry Canada licence-exempt RSS standard(s).
Operation is subject to the following two conditions: (1) this device may not cause
interference, and (2) this device must accept any interference, including interference that may cause undesired operation of the device.
Le présent appareil est conforme aux CNR d'Industrie Canada applicables aux
appareils radio exempts de licence. L'exploitation est autorisée aux deux
conditions suivantes : (1) l'appareil ne doit pas produire de brouillage, et (2)
l'utilisateur de l'appareil doit accepter tout brouillage radioélectrique subi, même
si le brouillage est susceptible d'en compromettre le fonctionnement.
3) To start/stop recording video, simply press the red button located on the APP.
You’ll hear an audible indication from the APP each time the recording
starts/stops. And while video is recording, the LED indicator on the front of GCO3
will flash blue and green, and there will be an indicator showing time length of the
recording on the APP screen.
This equipment complies with IC RSS-102 radiation exposure limit set forth for
an uncontrolled environment.
Cet équipement respecte les limites d'exposition aux rayonnements IC définies
pour un environnement non contrôlé
IMPORTANT NOTE: You can choose to record video at 48, 50 (PAL) or 60 (NTSC)
frames per second by tapping the corresponding button near the upper left-hand
corner on main screen of the APP. Keep in mind that the delay in the live video
stream will be lowest at 48 and 50 as compared to 60 frames per second.
Any information above might be changed due to the software update. For the
latest documents, please check the official website.
SWITCHING THE MODE
There are two modes of SteadyGrip: Pitch Follow Mode and Angle
Mode.
Pitch Follow Mode allows the gimbal to track SteadyGrip™in pitch
direction. The Pitch Follow Mode LED status indicator will be solid
green.
In Angle Mode, the gimbal sticks to a fixed direction instead of following the movement of the SteadyGrip. The user can control the Pitch
Direction through pitch control roller wheel.
NOTICE: The default mode of SteadyGrip™is Pitch Follow Mode.
To Enter Angle Mode:
Press the Mode Switch Button on the top of the SteadyGrip™to exit
the Pitch Follow mode. The Pitch Follow Mode LED status indicator will
be off. The SteadyGrip™will enter Angle Mode.
To Enter Pitch Follow Mode:
Press Mode Switch Button again to enter Pitch Follow Mode. The Pitch
Follow Mode LED status indicator will be solid green.
CUSTOMER SERVICE
http://yuneec.com/support
YUNEEC USA
YU N EEC HK
5555 Ontario Mills Parkway,
Ontario, CA91764, USA
1 855 2848888
[email protected]
2/F, Man Shung Industrial Building,
7 Lai Yip Street, Kwun Tong,
Kowloon, Hong Kong
852 3616 6071
[email protected]
YUNEEC EU
Y U NE EC AU
24568 Kaltenkirchen, Germany
+49 4191 932620
[email protected]
53 Ellemsea Circuit, Lonsdale
South Australia 5160
+61 (0) 8 8186 3301
[email protected]
This device complies with part 15 of the FCC Rules. Operation is subject to the following two
conditions: (1) This device may not cause harmful interference, and (2) this device must accept any
interference received, including interference that may cause undesired operation.