1
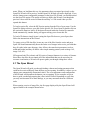
of buttons for managing them, and an additional area for the display of their properties.
Shortcut buttons for these measurements and annotations are also available in the main
toolbar. They can be made to appear on the Application Toolbar by going to the Window
drop down menu, selecting Toolbars and then Measurement.
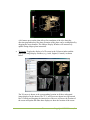
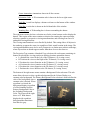
The Measurement/Annotation list displays the type of
measurement/annotation performed, its main value, its
visibility, its color, and a comment area for adding a text
description. Visibility of an entry in the list can be modified
by clicking on the toggle button and color can be modified
by double clicking on the color square and modifying the
color selection popup window. The list shows the currently
selected measurement/annotation highlighted in blue. All
measurements and annotations performed on image windows
remain visible when the slice displayed is changed.
Measurements and annotations for 2D images include linear
measurement, bi-dimensional measurement, angle
measurement, contour measurement, and arrow annotation.
When the active viewing window is a 3D volume display, all
forms of measurement are disabled except for arrow
annotation.
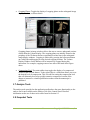
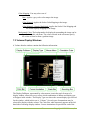
Buttons that allow the user to place and manage measurements and annotations are
provided directly below the list area. The buttons, listed in left to right order, perform the
following operations:
•
•
•
•
•
•
Linear: Place a linear measurement on the selected 2D window.
Bi-dimensional: Place a bi-dimensional measurement in the selected 2D window.
Angle: Place an angle measurement in the selected 2D window.
Contour: Place a contour measurement in the selected 2D window.
Arrow: Place an arrow in the selected 2D or 3D window.
Delete: Delete the currently selected measurement/annotation.
8.3.1 Linear Measurement
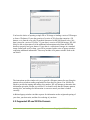
Clicking on the linear distance measurement icon and then clicking inside the active
image display window will place the first point of a linear measurement. Moving the
mouse will interactively draw a linear measurement widget. Clicking a second time in the
image display window will place the second point of the measurement widget. The
handles of the linear measurement widget, identified by white crosshairs, may be
modified interactively by using the mouse to click and drag the end widget points. The
linear measurement value will be displayed as a label next to the linear measurement and
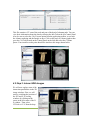
will be shown in the value column for the measurement in the measurement list. In the
Figure shown below one of each measurement and annotation type was applied to the
38
Copyright © 2009 Kitware, Inc.