1
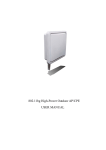
, M KL 4 S[Q V I ;
3 YX
- ) ) K HS V
; M PI V
W I
% 4
' 4)
User’s Manual
Table of Contents
Unpacking Information ··········································1
Introduction ···························································2
General Description················································································2
Key Features ··························································································2
Connecting This Client to Your Network. ················3
Management ·······················································4
Configuring the IP address of your computer···········································4
Starting the WEB-Based Management Interface ······································6
Status ····································································································8
Items ·····························································································8
Information····················································································8
LAN Interface Setup ···············································································9
System Log ··························································································10
Password Setup····················································································11
Basic Settings·······················································································12
Advanced Settings ················································································14
Security································································································16
WEP Encryption············································································16
WPA Encryption ············································································17
WPA2 Encryption ··········································································18
WPA2 Mixed Encryption ································································19
Access Control····························································
!
Statistics ······························································································21
Upgrade Firmware ················································································22
Save and Reload Settings ·····································································23
Log out·································································································23
Product Specifications·········································· 24
Unpacking Information
Thank you for purchasing ALFA Outdoor AP/CPE. Before you start, please
check all the contents of this package.
The pro duct package should include the following:
1.
2.
3.
4.
5.
One
One
One
One
One
AWAP06O -R2
PoE power adapter
User Manual (CD)
Mounting kits
12VDC Power Adapter
- RX V SHYGX
M SR
General Description
Easily constructing your W LAN, this w ireless Outdoor AP/CPE offers a
wireless interface and eliminates to connect your wireless Internet
provider.
With being compliant to IEEE 802.11g specification, this wireless
Outdoor AP/CPE supports data rate up to 54Mbps and hence help to
construct your high-speed wireless connection from your wireless
internet provider.
This wireless Outdoor AP/CPE equips one POE RJ45 LAN port and one
embedding 12dBi Panel antenna for you to easy to install and setup.
The wireless security mechanism is provided over 64/128-bit WEP, WPA
(TKIP with IEEE 802.1x), WPA2 and AES.
This device supports WEB-based user interface that helps users to
configure this device easily.
Key Features
R
Complies with IEEE 802.11b/g wireless standards
R
High speed transfer data rate up to 54Mbps
R
Supports turbo mode for 72Mbps data transfer
R
Supports wireless data encryption with 64/128-bit WEP, WPA (TKIP with
IEEE 802.1x), WPA2 and AES functions
Connecting Outdoor AP/CPE to Your Network.
This AWAP06O-R2 provides a step-by-step guide to the installation and
configuration of this wireless Outdoor AP/CPE
¼
Use RJ45 cable to connect Outdoor AP/CPE POE port and the o ther end
connect to the APOE02 , the APOE02 connect to the Notebook or PC. And
12VDC Power Adapter. To get the signal from the Wireless Internet
Provider.
Management
Configuring the IP address of your computer
In order to manage with this Wireless Outdoor AP/CPE, you have to
configure the IP addresses of your computer to be compatible with this
device.
Note:
1.
The default network setting of the device:
IP address:
192.168.1.1
Subnet Mask:
255.255.255.0
Default Gateway:
192.168.1.254
2.
3.
In the following TCP/IP configuration guide, the IP address
“192.168.1.2 ” is assumed to be your IP address. Please DO NOT
choose 192.168.1.1 for the IP address (192.168.1.1) has been set as
the default IP for this device.
The following TCP/IP configuration guide uses windows XP as the
presumed operation system.
Procedures to configure IP addresses for your computer
1. If you are in Classic Start menu view, click StartÄ SettingsÄ Control
PanelÄ Network Connections.
If you are in Start menu view, click StartÄ Control PanelÄ Network
Connections.
2. Double click “Local Area Connection”
3. Choose Internet Protocol (TCP/IP) and click Properties.
4.
Choose “Use the following IP address” to specify IP addresses manually.
Fill in the IP addresses in each column. Please click the OK button after your
configuration.
Starting the WEB-Based Management Interface
The device uses WEB as the management interface. You can use a
browser to access the management interface easily. Please follow up
the steps listed below.
1.Double click the Internet WEB browser icon on your desktop screen
(NetscOutdoor AP/CPEe Communicator 4.0 and Internet Explorer
3.0 or update version)
2.Type 192.168.1.1 into the URL WEB address location and press Enter.
3.The Username and Password Required window Outdoor AP/CPEpears.
Enter admin in the User Name location (default value).
Enter admin in the Password location (default value).
Click “OK” button
The GrOutdoor AP/CPEhic User Interaface
After the password authorization, the Setup Wizard shows up as the home
page of the GrOutdoor AP/CPEhic User interface. You may click on each
folder on left column of each page to get access to each configuration
page.
Status
The Status page shows the following information of the device.
Items
Uptime
Firmware version
Mode
Band
SSID
Channel Number
Encryption
BSSID
Attain IP Protocol
IP Address
Subnet Mask
Default Gateway
MAC Address
Information
The period that you turn the device on.
The current firmware version of the device.
Shows if the device is ope rating in client.
The band that the wireless client operating.
The name of this wireless network.
The channel that the wireless network using.
The security encryption type that the wireless network
using.
The Basic Service Set Identity of this OUTDOOR
AP/CPE(This parameter is the same as the MAC address of
LAN port)
The way for this client to get a IP address.
The current IP address of this client
The current subnet mask of this client
The current default gateway of this client
The current MAC address of this client
LAN Interface Setup
This page allows users to configure the LAN network settings.
Configuration
IP address
The IP of Outdoor AP/CPE LAN port (Default 192.168.1.1)
Subnet Mask
Subnet Mask of you LAN (Default 255.255.255.0)
Default Gateway The default gateway of this OUTDOOR AP/CPE.
DHCP
Server
Select “Enable” to enable the DHCP server, which gives your
LAN Client an IP.
DHCP Client
Range
Specify the DHCP Client IP address range. You can also click
the “Show Client” button to list those connected DHCP clients.
DNS Server
The DNS (domain name server) of this OUTDOOR AP/CPE.
Domain Name
The name that the OUTDOOR AP/CPE is going to be
recognized in LAN.
802.1d Spanning To prevent from network loops and preserve the quality of
tree
bridged network
MAC cloning feature allows the MAC address reported by WAN
side network interface card to be set to the MAC address
already registered with the ISP eliminating the need to
Clone MAC
register the new MAC address with the ISP. This feature does
Address
not change the actual MAC address on the NIC, but instead
changes the MAC address reported by this device to client
requests. To Change the MAC address, enter it in the text box.
System Log
This System Log page shows the information of the current activities on the
OUTDOOR AP/CPE.
To enable system log function:
1. Mark the “Enable Log” checkbox.
2. To see all information of the system, select the “system all”
checkbox.
To see wireless information only, select the “wireless” checkbox.
To send the log information to a certain note, select the “Enable
Remote Log” checkbox and fill in the IP address in the “Log Server
IP Address ” box.
3. Click the “Outdoor AP/CPEply Changes” button to activate
You could also click the “Refresh” button to refresh the log information or click
the “clear” button to clean the log table.
Password Setup
This page allows users to configure the userna me and password for getting
accessed to this WEB based user interface.
To change the username/password, please fill in the username, New password
and click the “Outdoor AP/CPEply Changes ” button after confirming the
password.
You may also cancel the password authentication by leaving those blanks
empty then clicking the “Outdoor AP/CPEply Changes” button.
Basic Settings
This page provides setting up the wireless configuration and monitoring the
Wireless Clients that associate with this OUTDOOR AP/CPE.
Configuration
Disable
Wireless To Disable interface of Wireless LAN
LAN Interface
Band
To select a band for this device to match 802.11b,
802.11g or both.
CLIENT Mode Type
Configure
this
device
as
OUTDOOR
AP/CPE,
Infrastructure or Ad -Hoc.
SSID
The name of the wireless network
Wireless Site Survey Click the "Show Site Survey" button, then an " Wireless
Site Survey" will pop up. You can see the status of all
wireless stations that are able to connecting
Wireless Site Survey
This is the window that pops up after clicking the “wireless site survey”
button.
SSID
Show the all SSID of in range Access Point
BISSID
Show the Mac address of in range Access Point
Channel
The channel of in range Access Point active channel
Type
The type of AP
Encrypt
Encrypt method of in range Access Point
Signal
Signal strength of in range Access Point
Select
Select in range Access Point to connect
Advanced Settings
You can set advanced wireless LAN parameters of this OUTDOOR
AP/CPE. The parameters include Authentication Type, Fragment
Threshold, RTS Threshold, Beacon Interval, Data Rate, Preamble
Type, Broadcast SSID, IOUTDOOR AP/CPEP and 802.11g
Protection.
Configuration
Open System Allow communication with no security.
mode
Authentication
Type
Shared Key
mode
Allow communication with devices with the
same WEP key only.
Auto
The wireless client can associate with this
OUTDOOR AP/CPE by using any one of these
two Modes.
Fragment
Threshold
RTS Threshold
To specifies the maximum size of packe t during the data
transition. The lower values you set, the worst performance
it will be.
If the packet size is smaller the RTS threshold, the
OUTDOOR AP/CPE will not send this packet by using the
RTS/CTS mechanism.
Beacon Interval The period of time how long a beacon is broadcasted.
Data Rate
The "Data Rate" is the data packets limitation this wireless
OUTDOOR AP/CPE can transmit. The wireless OUTDOOR
AP/CPE will use the highest possible selected transmission
rate to transmit the data packets.
Preamble Type
It defines the length of CRC block in the frames during the
wireless communication. "Short Preamble" is suitable for
heavy traffic wireless network. "Long Preamble" provides
much communication reliability
If you enable "Broadcast SSID", every wireless station
located within the coverage of this wireless OUTDOOR
AP/CPE can discover this wireless OUTDOOR AP/CPE easily.
Broadcast SSID
If you are building a public wireless network, enabling this
feature is recommended. Disabling "Broadcast SSID" can
provide better security.
IOUTDOOR
AP/CPEP
To enables multiple OUTDOOR AP/CPE to communicate and
pass information regarding the location of associated
Stations.
802.11g
Protection
Some 802.11g wireless ad Outdoor AP/CPEters support
802.11g prote ction, which allows the ad Outdoor AP/CPEters
searches for 802.11g singles only. Select the “Disabled” to
disable supporting 802.11g protection or select “enable ” to
support this function.
RF Output
power
Select the RF (Radio Frequency) power. The RF output power
has positive correlation with signal strength.
Turbo Mode
Some of our wireless adOutdoor AP/CPEters supports turbo
mode, which provides a better connection quality. Select
“Always ” to support turbo mode or select “off” to turn it off .
Select “Auto” turns it on or off automatically.
Security
At the page, you can set up the WEP, WPA Encryption to ensure the security of
your Wireless. You will have to do different configurations to each encryption
modes. Click on the Encryption drop list to select an encryption mode or select
“Disabled” to transmitting data without encryption.
WEP Encryption
Configuration
Encryption
To enable WEP, WPA, WPA2 and WPA2 Mixed
encryption modes, select the option in the drop
list. If you select none, any data will be
transmitted without Encryption and any station
can access the OUTDOOR AP/CPE
Key Length
Select a key length as 64-bit or 128-bit.
Key Format
Select a key format as Hex or ASCII
Default Tx Key
Select a default key for transmitting data.
Use 802.1x
Authentication
Mark this check box. Fill in the RADIUS server IP
address, Port Number, and Password to enable
802.1x authentication.
Click <Apply Change> at the bottom of the screen to save the above
configurations. You can now configure other advance sections or start
using the OUTDOOR AP/CPE.
WPA Encryption
Configuration
Encryption
To enable WEP, WPA, WPA2 and WPA2 Mixed
encryption modes, select the option in the drop
list. If you select none, any data will be
transmitted without Encryption and any station
can access the OUTDOOR AP/CPE.
WPA Cipher Suite
Select the WPA Cipher Suite to be TKIP or AES
WPA Authentication
Mode
Select the WPA mode as “Enterprise
(WPA-Radius)” or “Personal (Pre -Shared Key)”.
Pre-Shared key
Format
Click on the dro p list to select an Pre -Shared
Key Format as Passphrase or Hex
Pre-shared Key
Enter the Pre -shared Key according to the
pre -shared key format you select.
Click <Apply Change> at the bottom of the screen to save the above
configurations. You can now configure other advance sections or start
using the OUTDOOR AP/CPE.
WPA2 Encryption
Configuration
Encryption
To enable WEP, WPA, WPA2 and WPA2 Mixed
encryption modes, select the option in the drop
list. If you select none, any data will be
transmitted w ithout Encryption and any station
can access the OUTDOOR AP/CPE.
WPA2 Cipher Suite
Select the WPA2 Cipher Suite to be TKIP or AES
WPA Authentication
Mode
Select the WPA mode as “Enterprise
(WPA-Radius)” or “Personal (Pre -Shared Key)”.
Pre-Shared key
Format
Click on the drop list to select an Pre -Shared
Key Format as Passphrase or Hex
Pre-shared Key
Enter the Pre -shared Key according to the
pre -shared key format you select.
Click <Apply Change> at the bottom of the screen to save the above
configurations. You can now configure other advance sections or start
using the OUTDOOR AP/CPE.
WPA2 Mixed Encryption
Configuration
Encryption
To enable WEP, WPA, WPA2 and WPA2 Mixed
encryption modes, select the option in the drop
list. If you select none, any data will be
transmitted without Encryption and any station
can access the OUTDOOR AP/CPE.
WPA Cipher Suite
Select the WPA Cipher Suite to be TKIP or AES
WPA2 Cipher Suite
Select the WPA2 Cipher Suite to be TKIP or AES
WPA Authentication
Mode
Select the WPA mode as “Enterprise
(WPA-Radius)” or “Personal (Pre -Shared Key)”.
Pre-Shared key
Format
Click on the drop list to select an Pre -Shared
Key Format as Passphrase or Hex
Pre-shared Key
Enter the Pre -shared Key according to the
pre -shared key format you select.
Click <Apply Change> at the bottom of the screen to save the above
configurations. You can now configure other advance sections or start
using the OUTDOOR AP/CPE.
To restrict the Number of Access authentication of Stations, Set up the
control list in this page.
Configuration
Wireless Access
Control Mode
Click on the drop list to choose the access control
mode. You may select “Allow listed” to allow those
allowed MAC addresses or select “Deny Listed ” to ban
those MAC addresses from accessing to this device.
MAC Address &
Comment
To set up the Value of MAC Address & Comment; enter
the MAC Address and Comment of station and click
Outdoor AP/CPEply Changes to save.
Current Access
Control list
To Delete the station on the list, Click the check box in
the select item and click the “Delete Selected”. If you
want to delete all stations on the list, click “Delete All”
to remove all of them.
Click <Outdoor AP/CPEply Change> button to save the above configurations.
You can now configure other advance sections or start using the OUTDOOR
AP/CPE.
Statistics
On this page, you can monitor the sent & received packets counters of
wireless, Ethernet LAN, and Ethernet WAN. To see the latest report,
click refresh button.
Upgrade Firmware
To Upgrade Firmware,
STEPS
1.
Click “browse…” button to select the
firmware you want to upgrade.
2.
Click Upload to start the upgrade process.
Please don’ t close the WEB-browser and
wait for the process to be completed.
Save and Reload Settings
To save setting to file, click “Save...” button.
To load setting from file,
1. Click “Browse…” on the to select the file
2. Click upload to start the process and wait for it to complete
To reset setting to Default, click the Rese t button to start the process.
Log out
Click the “Outdoor AP/CPEply Change” button to log out the system
and save your changes simultaneously.
Product Specifications
Standard
Interface
Cable Connections
Network Data Rate
IEEE802.3, 10BASE-T
IEEE802.3u, 100BASE -TX
IEEE802.3x full duplex ope ration and flow control
IEEE802.11b wireless LAN infrastructure
IEEE802.11g wireless LAN infrastructure
34 ) 0% 2 VST
X
RJ-45 (10BASE-T): Category 3,4,5 UTP
RJ-45 (100BASE-TX): Category 5 UTP
802.11b: 1, 2, 5.5 and 11Mbps
802.11g: 6, 9, 12, 18, 24, 36, 48, and 54Mbps
Transmission Mode
Auto-Negotiation (Full-duplex, Half-duplex)
Security
64/128-bit WEP,
WPA(TKIP with IEEE 802.1x), WPA2, AES
Receiver Sensitivity
54Mbps OFDM, 10%PER, -68dBm
11Mbps CCK, 10%PER, -86dBm
1Mbps BPSK, 10%PER, -93dBm
Memory
Flash : 2MB, SDRAM : 8MB
Transmit Power
23dBm
Emission
FCC CLASS B, CE
Environmental
Operating Temperature: 0 ° ~ 40°C (32° ~ 104°F)
Storage Temperature: -10° ~ 70°C (-14° ~ 140°F)
Humidity: 10 ~ 95% RH non-condensing
Power Supply
PoE 12VDC