1
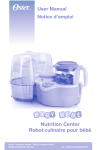
Third-generation new concept hygienic toothbrush sterilizer If you use a toothbrush sterilizer “PRISCHE”, Sterilization You will be happy to mouth. Drying Cleanliness Name of each part & Components Door UV lamp cap UV lamp Stainless toothbrush holder • Components Super mirror stainless plate Main body User manual Pedestal of stand 3M tape Toothpaste holder Bracket Screws LED lamp Gutters Pedestal of stand Toothpaste holder 1 Key features & method of use Key features • UV sterilization - After door opening and closing, UV sterilization is operated while 10 minutes. • Drying - After finished UV sterilization, Drying is operated while 90 minutes repeating the behavior and stop. • Checking of door opening and closing - When door opening and closing , It indicates whether the behavior through the melody. • Notice to change UV lamp - If UV lamp is not operate after door opening and closing, Melody is sound and UV LED indicator is flashing while 1minute. In that case please replace the UV lamp. • Tooth brushing time notified - After 3 minutes after door opening and closing, Melody sounds for the correct brushing habits. • LED display - Will display the current status of the toothbrush sterilizer through the white LED indicator. Method of use • After plugging the power cord completely, Please use the door is fully closed. • Using a toothbrush have to wash with clean water. Then after the water is removed completely, please hang on a toothbrush rack. • Toothpaste holder is used by inserting it into hole in the right of the product. 2 How to install Wall Type ① Please clean the walls thoroughly installed. ( If possible, please install away from the shower. ) ② After removing one side cover the double-sided tape, please paste on the wall exactly leveled. ③ Please insert products from from 11 o'clock to 12 o'clock. Examples of horizontal ④ After plugging in power, to check for normal operation. Stand Type ① The pedestal of stand is inserted at holes in the bottom of the products. And please concluded by pushing back. ② After selecting the desired location and set to be horizontal. Disassemble and Cleaning & UV Lamp Changing Disassemble and Cleaning UV Lamp Changing Warning signal for replace UV-Lamp (Melody, LED) Disassemble Cleaning inside (No Water-clean) Disassemble UV-Lamp CAP Cleaning outside • Toothbrush holder would better to be inserted a position deeply at first and then b position • Cleaning is strictly forbidden in operated condition. Detach the power-cord first, and UV-Lamp, toothbrush holder, accessories etc. Clean with soft fabric and dry off completely before operating • Toothbrush holder and accessories are disassembled easily for cleaning Disassemble UV-Lamp Replace UV-Lamp •UV-Lamp is expendables. Must be replaced after a period of time. (about 6,000 Hours) • When UV-Lamp operate abnormal, Warning Melody for replacement is ringing for 1 minute and UV-Lamp LED is blinking. In this case replace the UV-Lamp. -> Push the UV-Lamp CAP both inside direction, and Press the up and downside of UV-Lamp CAP. then disassemble them easily -> Disassemble UV-Lamp. Turn it as a drawing -> Replace the UV-Lamp in reverse order. -> Plug in the Power-cord and check the operating status normally. * When replace the UV-Lamp, Heat sink might be hot, should be careful. Notice When Door is open or close not completely don’t sterilization. Check the door condition. When door is closed completely then melody is ringing and LED is on. Percolating water might is reason of disorder. Be careful not to wet. Operate AC 220V only Don’t touch to the heat-sink in operated condition. There might be danger of burns. UV-Lamp is expendables. When UV-Lamp operate abnormal, must be replaced it. Adhesive tape for hanging is very strong. Only once sticking is cause non-reusable. Attach the tape considering horizontal position Operation of sterilizing is automatically, Keep the power-cord plugged-in When child use this should be careful.