1
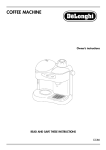
GB
17-05-2002
14:43
Pagina 4
ENGLISH
Please read this instruction booklet carefully
before installing and operating the appliance.
This is the only way to ensure the best results and
maximum safety for the user.
DESCRIPTION OF THE APPLIANCE
The following terminology is used repeatedly on
the following pages.
A
Cover
B
Filter holder for drip coffee
C
Carafe for drip coffee
Control panel mechanical models
D
O/I button
Control panel electronic models
E
"PROG" button
F
"AUTO" indicator light
G
“ON” indicator light
H
“HOUR” button
I
“ON/AURO/OFF” button
L
Display
M “MIN” button
N
Power cable
O
Water tank
P
Measure
SAFETY WARNINGS
• This machine is designed to “make coffee” and
to “heat drinks”: be careful to avoid scalding
from the water and steam jets or by using the
machine incorrectly.
• Do not touch hot parts (steam and hot water
tube, boiler outlet, areas in contact with the filter holder and the warming plate).
• After having removed the packaging, make
sure that the product is complete. If in doubt,
do not use the appliance and contact qualified
personnel only.
• This appliance is for home use only. All other
uses are considered improper and thus dangerous.
• The manufacturer cannot be held responsible
for any damage caused by improper, erroneous and unreasonable use.
• Do not touch the appliance with wet or damp
hands or feet.
• Never allow the appliance to be used without
supervision by children or unfit persons.
• Children must be supervised at all times to
ensure that they do not play with the appliance.
• In the event of failures or malfunction, switch
off the appliance and do not tamper with it in
any way. For repairs, contact an authorized
Service Centre only and request original spare
parts. Failure to observe the above points may
affect the safety of the appliance.
• The power cable must not be replaced by the
user as this requires the use of special tools. If
the power cable is damaged or needs replacing, contact an authorized Service Centre.
• Remove the plug from the mains socket and
turn off the main switch when the appliance is
not in use. Do not leave the appliance switched
on unnecessarily.
• Do not immerse the appliance in water.
4
GB
17-05-2002
14:43
Pagina 5
INSTALLATION
• Place the appliance on a working surface
away from water taps and sinks.
• Check that the mains supply corresponds to the
voltage on the appliance rating plate. Connect
the appliance to a correctly-earthed power
socket (minimum rating 10A) only. The manufacturer declines all liability for any accidents
due to the incorrect earthing of the appliance.
• Never install the machine in environments
where the temperature may reach 0°C or
lower (the appliance may be damaged if the
water freezes).
• If the power cable is longer than the distance
required to reach the power socket, the extra
length may be stored inside the machine by
pushing the cable inside the corresponding
opening.
SETTING THE CLOCK (electronic models
only) (FIG. 1)
Plug the appliance in; when switched on for the
first time, the display will show “12:00”.
To set the exact time, proceed as follows:
- Press the "PROG" button The word "CLOCK"
appears on the display.
- Press the “HOUR” button repeatedly until setting the current hour.
- Press the “MIN” button repeatedly until setting
the current minutes.
Keeping the buttons pressed scrolls the hours and
minutes much more quickly.
- To return to the current time, press the "PROG"
button twice or wait 10 seconds.
The time can be set whenever desired.
HOW TO PREPARE THE DRIP COFFEE
• Lift the cap (Fig. 2).
• Fill the tank (the carafe gives an indication of
the levels) with fresh clean water up to the mark
corresponding to the number of cups of coffee
to be prepared (fig. 3).
• Position the #4 paper filter in the filter holder
(fig. 4).
• Place the ground coffee in the filter, using the
measuring spoon supplied, and level evenly
(Fig. 5). As a general rule, use a level measuring spoon of ground coffee for each cup (for
example, 10 spoons to make 10 cups). The
quantity of ground coffee used may, however,
be varied according to personal taste. Use
good quality, medium ground coffee, packaged for drip coffee makers.
• Close the cover and place the carafe with the
cover in place, on the hot plate.
Mechanical models only:
• Press the luminous switch into the "I" position:
the switch lights up (fig. 6).
• The coffee will start to come out after a few seconds. It is completely normal for the appliance to release a little steam while the coffee
is percolating.
• If the switch is left in the "I" position after percolation, the hot plate keeps the coffee at the ideal
temperature.
Electronic models only:
• Press the "ON/AUTO/OFF" switch (fig. 7).
The "ON" indicator light above the switch indicates operation of the filter coffee maker.
To activate the AUTO mode, press the
"ON/AUTO/OFF" button twice. The "AUTO"
indicator light comes on and the appliance will
start operating at the time set on the timer.
• The coffee will start to come out after a few seconds. It is completely normal for the appliance to release a little steam while the coffee
is percolating.
• If the “ON/OFF” switch is left in the ON position after percolation, the warming plate will
keep the coffee at the ideal temperature.
PROGRAMMING START-UP (ELECTRONIC MODELS ONLY) (BUTTON E)
Check that the current time is set correctly.
To set the time to start preparing the coffee (fig. 8)
• Press the "PROG" button twice: the word
"TIMER" appears on the display;
• Press the “HOUR” and “MIN” buttons repeatedly until reaching the desired start time;
• Press button (7) again.
Keeping the buttons pressed scrolls the hours and
minutes much more quickly.
• To return to the current time, press the "PROG"
button twice or wait 10 seconds.
The start-up time is now programmed.
To operate in AUTO mode, prepare the appliance to
make the coffee then press the ON/AUTO/OFF button twice until the AUTO indicator light comes on.
5
GB
17-05-2002
14:43
Pagina 6
CLEANING AND MAINTENANCE
Before performing any cleaning or maintenance
operations, turn the machine off, unplug it from the
power socket and allow it to cool down.
1. When cleaning the coffee maker, do not use
solvents or abrasive detergents. A soft, damp
cloth is sufficient.
2. Never immerse the coffee maker in water: it is
an electrical appliance.
CLEANING THE FLAVOUR SAVER
To clean the Flavour Saver more efficiently, it can
be removed from the filter holder cone by pressing
it lightly inwards (Fig. 12). To replace it, simply
slide it in from above Fig. 13).
• fill the carafe with four cups of water;
• dissolve two spoonfuls (about 30 grams) of citric acid (available in chemist's or drug stores)
and pour the solution into the water tank;
• place the carafe on the hot plate and the filter
holder without ground coffee;
• press the ON/OFF coffee button (electronic
models) or the O/I button (mechanical models), percolate the equivalent of two cups then
turn the appliance off;
• leave the solution to act for an hour;
• turn the appliance on again and allow the rest
of the solution to percolate;
• rinse by operating the appliance with water
only at least three times (a full carafe at a time).
DESCALING
If the water in your local area is hard, lime scale
will form over time. These deposits may affect the
correct operation of the appliance.
The appliance should be descaled every 40 cycles.
To descale, always use the special descaling products for filter coffee machines available on the
market. Alternatively, citric acid can be used. Proceed as follows:
TROUBLESHOOTING
Problem
Probable cause
Solution
The drip coffee takes longer The drip coffee maker needs to be
descaled
to percolate
Perform the descaling procedure as
described in the paragraph “Descaling”
The coffee maker has not been
rinsed sufficiently
Rinse the appliance as described in the
chapter “Descaling”
The coffee has an acid
flavour
6