1
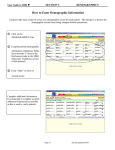
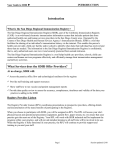
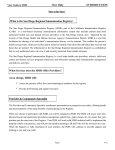
Your Guide to SDIR ► SPECIAL SECTION FOR SCHOOL USERS Special Section for School and Child Care Users This special section for school and child care users covers the registry software application functionality that is only available to these kinds of users. Most school and child care providers may view record which is known as “Read-only” access to SDIR. That is, users can search for records, view the records and print out certain forms and reports. However, some schools may be given access to SDIR to enter student health information once they obtain parent or the individual student (if adult or emancipated) written consent. Sections 1 & 2 of the Read-only User Manual explain how to login and search for records in the registry, this section covers the following functionality: How to enter disease history, How to enter waivers/exemptions, How to print out the California School Immunization Record (CSIR) also known as the Blue Card, How to produce a School Roster Report, How to enter CHDP Annual School Exam date and result, How to enter the Oral Health Exam date and result. Then, after creating the School Roster, the guide explains how to print: - the Kindergarten Immunization Assessment Work Sheet and the Immunization Assessment of Kindergarten Students-Annual Report, School Summary Sheet (PM 236 5/07) - the Worksheet for the Annual Immunization Report on Children enrolled in Child Care Center and the Annual Immunization Report on Children enrolled in Child Care Centers (CDPH 8018 5/07) Page 1.1 Section updated 9/09 Your Guide to SDIR ► SPECIAL SECTION FOR SCHOOL USERS Table of Contents for School Section Section 1: How to Add Disease History………………………………………………………....1.3 Section 2: How to Document a Vaccine Waiver (Exemption………………………...……...1.4 Section 3: How to View and Print the School Immunization Record (Blue Card)…...…..1.6 Section 4: How to use the School Roster Report……………………………………...…..…1.10 Steps to create and use the school roster report………………………………………..…...1.10 Method 1: Search and enter individual names and immunization information .1.11 Method 2. Upload an Excel file with student names and other information…....1.12 Section 5: How to Produce the CHDP Annual School Report …………………...……...…1.25 Section 6: How to Produce the Oral Health Report …………………………………….....…1.28 Page 1.2 Section updated 9/09 Your Guide to SDIR ► SPECIAL SECTION FOR SCHOOL USERS How to Add Disease History ① ① Click on the IMMUNIZATION tab ② ② Click on “Disease History” ③ Click on “Add New” ④ Select “Disease” ③ ⑤ Edit date and/or add Comment (Today’s date will automatically be entered in the Comment section. Click in the Comment section to edit the date. If you change the date, make certain you don’t change its format. If you need to make additional comments, begin typing after the date.) ④ ⑥ ⑤ ⑥ Click on “Insert” If disease history has been entered, you will see a check mark next to the word “Disease History” Page 1.3 Section updated 9/09 Your Guide to SDIR ► SPECIAL SECTION FOR SCHOOL USERS How to Document a Vaccine Waiver (Exemption) Vaccine waivers are allowed for medical, religious and philosophical reasons. The waivers can be permanent or temporary. There are two ways to select waivers: by vaccine group (e.g., MMR) or by a specific vaccine (Varicella). If a specific vaccine is selected and it is part of a combination vaccine (e.g., measles), the remaining vaccines of the group can still be forecasted. ① Click on the “Waivers” link ② Clink on “Add New” (this will only appear if you are working on a home record.) ② ③ Click on the drop-down box to select the list of VACCINES you want to waive. Note: if a specific vaccine is selected and it is part of a combination vaccine (e.g. measles), the remaining vaccines of the group can still be forecasted. ③ Page 1.4 Section updated 9/09 Your Guide to SDIR ► ④ SPECIAL SECTION FOR SCHOOL USERS Select the type of waiver or exemption that is appropriate: -Medical -Philosophical* -Religious* Check the box next to “Permanent” if the ⑤ waiver is not temporary. If the waiver is temporary, enter in a “Start Date” and an “End Date”. You may also enter any notes in the comment box. * “All immunizations” can be selected. ⑤ Click “Insert”. You will then return to the Immunization screen and see a green check mark next to the word “Waiver”. Page 1.5 Section updated 9/09 ④ Your Guide to SDIR ► SPECIAL SECTION FOR SCHOOL USERS How to View and Print the School Immunization Record (Blue Card) California School Immunization Record or Blue Card: Now school users can print out a copy of the California School Immunization Record, commonly known as the “Blue Card”. School users should go to the bottom of the Immunization Screen and click on the “print to blue card” button. Page 1.6 Section updated 9/09 Your Guide to SDIR ► SPECIAL SECTION FOR SCHOOL USERS This will open the following screen: Important: The list of immunizations that the child had in the immunization screen will be transferred over to the blue card once the user click to “print to blue card” button. Only the total number of immunizations (which may be valid and invalid shots) that the CA school law* requires will be printed out of the blue card, no matter how many list of individual immunizations that the child has on the CIR. For example: If the child had 6 IPV’s indicated in the immunization screen, only 4 IPV’s will be transferred over to the blue card. *California Immunization Handbook for Schools and Child Care Providers: http://www.dhs.ca.gov/ps/dcdc/ izgroup/pdf/HandbookText.pdf Page 1.7 Section updated 9/09 Your Guide to SDIR ► SPECIAL SECTION FOR SCHOOL USERS Blue Card Printing Guidelines & Tips: The blue card should be printed on a light blue paper. The blue card can be a two pages or double-sided document. Printer set-up: To make a two page blue card: Place the blue paper in the manual tray. Select “Manual Feed” for the source tray. To make a double-sided blue card— There are two options: a) If your printer can do double sided pages. Set the printer properties for document options to “print on both sides” Page 1.8 Section updated 9/09 Your Guide to SDIR ► SPECIAL SECTION FOR SCHOOL USERS c) Double-sided but printed one page at a time. To print out one page at a time: click on printer and select current page. Print it and then turn it over and reinsert in the printer. Print the other page. Page 1.9 Section updated 9/09 Your Guide to SDIR ► SPECIAL SECTION FOR SCHOOL USERS How to use the School Roster Report The purpose of the school roster is that it will group together in a report format, children’s records in the registry and then display their immunizations that are in the SDIR. New entries (patient records and their immunizations) to the registry can be entered manually by the school user. The childcare/school roster report has dual functionality: that is, the data can be entered by the user by either searching for and selecting or entering a new student in the roster. The 2nd way that the roster report can be used is through childcare/school users using an import batch file function that will accept common text, tab, or comma delimited files which the registry will review and then identify an existing patient immunization records group them into the roster. Rosters can be named by indicating the school, grade, and teacher. There are two ways to use the school roster report, the instructions are therefore separated into two sections 1)Searching and entering names and immunizations, 2)Uploading a batch file of names and have the registry automatically compile the roster report A question and answer section addressing the functionality of the school roster follows the detailed instructions. Steps to create and use the school roster report: Start here for either of the methods 1. Go to the Utility Tab, click on Reports and then click on Immunization. 2. Find and click on School Roster. Page 1.10 Section updated 9/09 Your Guide to SDIR ► SPECIAL SECTION FOR SCHOOL USERS Method 1: Search and enter individual names and immunization information: 1. Click on the New Roster under the Roster List. 2. Start entering names and information in each row . Note: you can avoid having to enter names individually if you have a .tab delimited file* already created. Simply enter a roster name and upload the file using the browse button. This is Method 2 and is explained starting on the next page (4.11). 1. When finished entering new names, click on Save. 2. Then to create the Roster Report, click on Merge Patients. The application will check the registry for the records of immunizations for those students. If you do not want to run the Roster Report, then click on the ‘Done’ button. Page 1.11 Section updated 9/09 Your Guide to SDIR ► SPECIAL SECTION FOR SCHOOL USERS 6. You can go back to this roster report to enter or edit names by clicking on the appropriate roster name. Method 2. Upload an Excel file with student names and other information If you have an Excel or other “flat” file (a file made up of multiple records each one with on its own line or row) list of names and demographic information, you need to follow these steps: 1. Below is an example of a tab delimited file using Excel which organizes the information in a column and row format. Note that there are header names at the top of each column. Save the Excel file as .tab (tab delimited) file on your computer with a file name and in a folder that you will be able to locate later. Page 1.12 Section updated 9/09 Your Guide to SDIR ► SPECIAL SECTION FOR SCHOOL USERS Click on the New File Format link in the File Format section to the right of your screen. The Roster File Configuration screen will appear. This screen is used to create a template that can be used for the tab delimited file that contains the list of student names. The next step is to fill in the blanks to create the new configuration file that matches the tab delimited file. Give the file format a configuration name. The example is SD High School for the configuration name. Leave the column separator and row separator blank for now. If there are headers (column names) in your Excel file, click the “Use Headers” box. Look at your tab delimited file and match the columns in your tab delimited file with the column names on the roster screen. For example, Column 1 in the sample tab delimited file is Last Name so in the roster screen for Last Name enter the number 1 and so on until all of the entries in the roster screen have been filled by the appropriate number on the file columns that will be uploaded. Note: the tab delimited file may contain additional fields that do not need to be uploaded. Only number the fields that will be uploaded. Click on the Save button to save the new configuration file. Page 1.13 Section updated 9/09 Your Guide to SDIR ► SPECIAL SECTION FOR SCHOOL USERS The new SD High School configuration file format will be found in the file formats table (left of the screen). This file format will be used later in uploading/creating a new roster. Select New Roster (See the words on the upper left under Roster List) and the screen below will appear. Page 1.14 Section updated 9/09 Your Guide to SDIR ► SPECIAL SECTION FOR SCHOOL USERS On the Roster Edit screen, the drop-down list on the top right field contains the new configuration file that was created and will be used for this upload. (If you do not see the new configuration file wanted, click on the drop-down menu’s button and select it from the list). Fill in the Roster name with what the name of the school or class that is appropriate. At this point, close the tab delimited file. If the file is still open on your computer even if it’s minimized, the file cannot be uploaded.. Now click on Browse and select the file. Now the Roster Edit screen will look like this. You have chosen a name for the roster, navigated to the delimited file with all the student information that you wish to upload (If you have an Excel file that contains your student data, you can select Save AS from the file menu and save as a tab delimited file.) and selected the configuration that was created earlier. Now press the save button at the top of the screen. Page 1.15 Section updated 9/09 Your Guide to SDIR ► SPECIAL SECTION FOR SCHOOL USERS Your data from the tab delimited file have how populated the Roster Edit screen. You may now review the data and press save to save the roster at the bottom of the screen or you may press “Done” to cancel the save. If you save the new roster will be added to the roster list and is available for selection. Page 1.16 Section updated 9/09 Your Guide to SDIR ► SPECIAL SECTION FOR SCHOOL USERS Once the roster is complete, go to the bottom and click on “Merge Patients”. This will make any shots in the registry that match the student information appear below or next to the student’s name. Note: If any ‘new’ student records have never been entered in the registry, those records will be locked (closed to sharing) until a the student visits a provider that is using the registry and is informed that their record is in the registry. For students that already have a record in the registry, the sharing status of their record will not change. Whether the student roster has been uploaded or entered manually, merged shots will appear associated with the student. Immunizations that are not in the registry can be added manually. Page 1.17 Section updated 9/09 Your Guide to SDIR ► SPECIAL SECTION FOR SCHOOL USERS State worksheets and forms can be generated out of the Roster List. When you click on the Child Care link in the” worksheets” column, it will generate this form. You have the option to open in PDF or EXCEL and then be able to save the form. Page 1.18 Section updated 9/09 Your Guide to SDIR ► SPECIAL SECTION FOR SCHOOL USERS PDF Format. If you chose to “OPEN AS EXCEL” it will give you this option. You can Open, Save, Cancel or More info. Page 1.19 Section updated 9/09 Your Guide to SDIR ► SPECIAL SECTION FOR SCHOOL USERS View of “EXCEL” Format When you click on the Kindergarten link in the” worksheets” column, it will generate this form. Page 1.20 Section updated 9/09 Your Guide to SDIR ► SPECIAL SECTION FOR SCHOOL USERS When you select the Child Care Form or Kindergarten Summary under the “Forms” field the appropriate State forms are generated. To “Delete” a roster. Simply click the delete option. To add or edit a saved roster: 1) Select the Roster Name- for this example, choose chargers2 Page 1.21 Section updated 9/09 Your Guide to SDIR ► SPECIAL SECTION FOR SCHOOL USERS 2) To add new immunizations simply click on the “ Add new Immunizations” drop down menu and add the date. Then click on the “+” button. A vaccine dose of varicella has been added to the student record for Last name: Nanee, First name: Legedu . Now that child has an MMR and a varicella recorded in the registry. Note: To satisfy FERPA, the school must have a written consent to release student information prior to entering any personal or immunization data in the SDIR. Click on Save. To exit the Roster Edit screen, click on Done. Note: If this individual’s record is new to the registry, you should click on the Merge button at the bottom of the page, to put this record into the registry database. The next time you search for the person, the record will be appear listed in the search results. Page 1.22 Section updated 9/09 Your Guide to SDIR ► SPECIAL SECTION FOR SCHOOL USERS This will input the immunizations you just updated to the record in SDIR. Search for patient in SDIR and verify that IZ has been updated. Notice that the varicella vaccine dose added in the student roster also updates the patient record in SDIR. Also, note that the new record is “locked” to sharing with other providers using the registry until the parent receives the disclosure information. Page 1.23 Section updated 9/09 Your Guide to SDIR ► SPECIAL SECTION FOR SCHOOL USERS Here’s a sample of a child’s record that was entered through the school roster report and now is “Locked” or confidential. See the red Lock on the right of the name. Click on “Change:” to edit the status. Click “Yes” to change the patient confidentiality status The ‘lock’ will be removed and thereby, all authorized users when a successful search is made for this record, will be able to see the demographic information and the immunization record. Page 1.24 Section updated 9/09 Your Guide to SDIR ► SPECIAL SECTION FOR SCHOOL USERS How to Produce the CHDP Annual School Report Parents or guardians of children entering school are required by California State law to provide their child’s school with documentation of a health examination (HE). Schools are required to collect forms for each child, and then place the form in the child’s permanent record. Schools track the number of students who received a HE and report these numbers to the County of San Diego CHDP Program and the San Diego County Office of Education, respectively. Note: The CHDP Health exam results can be entered in the school roster format in the same way that immunizations are entered into the roster. This section presents the 2nd option for entering results. This option for entering the date and results of the CHDP Annual Health Exam is to search for a child’s record. If no record is found, then create a new record. Enter demographic information and save. Click on the Screenings Tab and then on the Health Exam. Click on “Add New Health Exam” to enter new information. Page 1.25 Section updated 9/09 Your Guide to SDIR ► SPECIAL SECTION FOR SCHOOL USERS Enter the Exam date. If appropriate, click on the waiver. Enter any additional notes. Click on the insert button. The information will be saved on the main Health Exam page. Page 1.26 Section updated 9/09 Your Guide to SDIR ► SPECIAL SECTION FOR SCHOOL USERS Once the health exam results have been entered for a group of children, then go to the Utility Tab and click on the Report Tab. Select the Report Type: CHDP Annual School Report. Enter the correct School Year Start Date. Look at the Roster list to see if the Roster file for that class already exists. If the correct roster is on the list. Click once to highlight that specific roster. Then click on the “Get Report” button. Be patient! It may take a minute or two for the report to be generated. Click in a box that is not pre-filled to type in and complete form. Remember that the data that was typed-in, cannot be saved on the form, so print out a copy for your records. Page 1.27 Section updated 9/09 Your Guide to SDIR ► SPECIAL SECTION FOR SCHOOL USERS How to Produce the Oral Health Report Note: The Oral Health exam results can be entered in the school roster format in the same manner as immunizations are entered. This section presents the 2nd option for entering results. Under Health Screenings, select Oral Health Exam. Enter the information in the Results and Recommendations. Note: If entering “No Obvious Problem” in the Results, then enter “Early Care Needed” under Recommendations. When completed, click on “Insert”. The summary screen will show the entered results. Note that the Results summary also contains the Recommendation. Page 1.28 Section updated 9/09 Your Guide to SDIR ► SPECIAL SECTION FOR SCHOOL USERS Once all the results of the Oral Health exam are entered, a Oral Health Report can be produced. Go to Utility Tab, and Click on Reports. Scroll down to the School Roster. Select the Report Type: Oral Health Report. Click once on the Roster name to highlight the report. Page 1.29 Section updated 9/09 Your Guide to SDIR ► SPECIAL SECTION FOR SCHOOL USERS The Oral Health Report will compile data —counts of exams and the results as well as the rates, needed for reporting to the State. Page 1.30 Section updated 9/09 Your Guide to SDIR ► SPECIAL SECTION FOR SCHOOL USERS School Report Questions and Answers: Q. What happens in the data entry or upload of batch records for schools when two or more records have the same names and birth dates? A. As with any new patient records that will be added to the registry, the most important activity is to make sure that a record for this individual does not already exist in the SDIR. So, when the registry matches records with same first name, last name, and DOB, the application would handles the process by linking the records together. Any records that the application cannot match because it does not have enough information will be put into the Manual Verification section of the registry which is only open to Administrative users. Call the SDIR Help Desk at (619) 692-5656 for assistance. Q. Why is a new immunization record in SDIR marked as confidential (not to be shared with other providers on the registry) when they are entered through the school roster report functionality? A. When a new record is entered in the registry through the school roster report, the SDIR will automatically mark the record as confidential so safeguard student personal health information. If the user has obtained a signed parental consent, then the user will be able to change the child’s confidentiality status in SDIR. The default confidential date is 1/1/1900 so that if the record matches one already in the system which is not marked confidential, the confidentiality status of the existing record in SDIR will not be changed. Q. Why won’t my tab delimited file upload into the School Roster Report? A. First, make sure that the tab delimited file that you want to upload into SDIR is closed on your computer screen. If it is open, it can’t be imported. Then, check the order of the tabs in the file and make sure that fields are numbered corrected in the Roster File Configuration. Q. Why won’t the child’s information appear on either the CHDP or the Oral Health reports? A. The Record Date for the Health or Oral Exam must fall between the start and end dates for the roster. Call the SDIR Help Desk at (619) 692-5656 if you have other questions, need more information or assistance. Page 1.31 Section updated 9/09