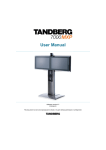
Download Tanberg 880 Videoconferencing System User Manual
Transcript
User Manual
Software version B4
D12788-01
This document is not to be reproduced in whole or in part
without permission in writing from:
1
TANDBERG Videoconferencing System
2
TANDBERG Videoconferencing System
Introduction
This User Manual is provided to help you make the best use of your TANDBERG system. The TANDBERG
system offers superior quality audio and video in a fully-featured unit.
Main Features:
• Supports videoconferencing via both IP and ISDN networks.
• Selection of up to 768 kbps call quality.
• Built-in MultiSiteTF *- a maximum of 5 sites including a minimum of 1 telephone call can participate in joint
meetings, each benefiting from the same superb audio and video quality. Both Continuous Presence and Voice
Switched mode is supported. A combination of ISDN and IP participants is possible. The TANDBERG
videoconferencing system can also be used purely as an audio-bridge (with an ISDN connection).
• Embedded encryption for call privacy and security.
• Natural Presenter Package* consisting of:
Duo VideoTF - allows participants at the far end to simultaneously watch a presenter on one screen and a
live presentation on the adjoining screen.
Digital ClarityTF - participants enjoy presentations of exceptionally high quality resolution video.
PC PresenterTF - an easily accessible PC connection plug.
PC SoftPresenterTF - show PC images via your LAN connection.
• Natural VideoTF - 60 fields per second true interlaced picture.
• DownspeedingTF - if channels are dropped during a videoconferencing session, the connection is automatically
maintained without interruption.
• Streaming – allows broadcasting of audio/video via an IP network.
• Web-interface for streaming, text chat/closed captioning, system management, diagnostics and software
uploads.
• Worldwide compatibility with other standards-based videoconferencing systems.
TIP
* - option. To check which options are installed, press MENU and the Quick key ‘System Info’.
TF- TANDBERG first.
7
IN THIS GUIDE, WE’VE INCLUDED
HELPFUL TIPS AND NOTES. THEY APPEAR
LIKE THIS ONE.
TANDBERG Videoconferencing System
Menu structure
The on-screen menu structure is shown below.
Press the MENU key on the remote control to enter/leave the Main Menu.
Main Menu
Call Quality
Presentations
Utilities
MCU Services
Audio
Settings
Video
Settings
Terminal
Settings
Diagnostics
Exit
Focus
Advanced
Settings
Inputs
Brightness
Level Settings
Whitebalance
Outputs
Video Name
Echo Control
VGA Settings
AGC Settings
Quick Menu
Terminal
Names
Floor to
Site #
View Site #
Rel. Floor to
site #
End View
Disconnect
Site #
Chair Control
OK
Take Chair
Release
Chair
Call Status
Test
Subsystem
Restore Audio
Defaults
Release Floor
Channel
Status
VNC Settings
Tones&Volume
Request Floor
System Info
ISDN-BRI
Settings
ISDN Switch
Type
System
Selftest
LAN
Settings
Line 1 Setup
View Current
Settings
Call
Settings
Line 2 Setup
Network
Profiles
Restore
Defaults
Line 3 Setup
Data Port 1
Adv. ISDN
Settings
Language
Software
Options
Terminate
Meeting
Streaming
Settings
H.323
Settings
Press UP/DOWN/LEFT/RIGHT to navigate.
Press OK to select.
Adv. H.323
IP Settings
SNMP
8
TANDBERG Videoconferencing System
The TANDBERG 880
Videoconferencing System
At a glance — the TANDBERG 880 system
Camera
Remote Control
Microphone
9
Codec
TANDBERG Videoconferencing System
Camera
The built-in camera includes a high quality colour camera with a fast pan/tilt/zoom action. The camera is
controlled by the system’s infra-red remote control and operates pan/tilt, focus and zoom.
Codec
The Codec is the heart of the system. The main task for the Codec is the compression of outgoing video, audio
and data, the transmission of this information to a remote site and the decompression of the incoming
information. Hence the name Codec. Intelligent Call Management (ICM) and the SoftMux are features built into the
Codec.
Remote control
The remote control is used to control all functions of the system. There is a separate remote control for operating
the monitor.
Table microphone
The high quality table microphone is specially designed to be used on a table during a video conference.
The ideal location for the microphone is on a flat surface at least 2m (6.5 ft) from the front of the system. The
microphone cable should always point towards the system.
The system will automatically equalize sound levels. Loud and soft voices are picked up and transmitted to the far
end at approximately the same level.
10
TANDBERG Videoconferencing System
Getting started
Getting started
System start-up
Your system should be in standby mode. When in standby mode, pressing any key or picking up the remote
control will wake up the system. An incoming call will also wake up the system.
If the system does not respond, make sure the system is switched on by using the On/Off switch located at
the rear of the Codec. After a few seconds you should see a ‘Welcome’ menu on the monitor.
If this does not help, verify that your monitor is switched on. To switch the monitor on you normally push the
power button on the front of the monitor (depending on monitor type).
Welcome menu
After a user-definable boot-up logo is shown, the following menu is shown. This menu should provide you with the
most important system information. For further system information, select the Quick key ‘System Info’.
17
Getting started
TANDBERG Videoconferencing System
Basics
The system’s most commonly used functions are accessible directly from the remote control by single key
presses. In addition, the user interface is represented by on-screen menus. Individual items within the menus and
lists can be selected by moving a white highlighter bar to the desired option.
Quick Keys
The three buttons on top of the remote control refer to the blocks at the bottom of the
screen. The text inside the blocks will change depending on which menu is selected.
The three Quick Keys have different colors.
Preset keys
Activate pre-stored camera positions.
Video source keys
Activate connected video sources.
Camera control and menu navigation keys
Frequently used keys allowing you to control your own camera and the far end camera,
control your volume, select and move self-view, switch your microphone off and navigate
in the menu system.
Dialing keys / Preset keys
Used to make a call. The twelve number keys, (0-9), #, * operate in the same way as
on a modern push-button telephone. These buttons are also used when entering a name
into a text field.
18
TANDBERG Videoconferencing System
Getting started
Making and ending calls
Making a call
connect
To make a call, enter the number or the IP-address of the unit you wish to call using the Dialing keys and
press CONNECT.
ISDN call
The system will, by default, try to connect using Quality: Auto (see table overleaf). If the requested quality
(bandwidth) cannot be established, the system will establish a connection on as high quality as possible.
The SoftMux ensures high reliability and includes the unique Downspeeding feature. If channels are dropped
during a meeting, Downspeeding automatically maintains the connection without interrupting the call in progress.
The SoftMux also enables you to dial to other videoconferencing equipment, phones and mobile phones in the
same way and provides you with on-screen, real-time feedback on the progress of a call.
LAN call
To make a call via a LAN, enter an IP-address by using a * as the ‘dot’ in the IP-address, e.g. 123*3*0*12 will be
interpreted as 123.3.0.12. If a gatekeeper is present, you may place IP-calls using “telephone-style” numbers (an
E.164 alias), according to the numbering plan implemented in the gatekeeper. The dialed number will then be
translated into an IP-address by the gatekeeper.
19
Getting started
TANDBERG Videoconferencing System
Access Code
If the system requires an Access Code, enter the code and press OK to proceed making a call:
Using sub-address / extension address / MCU password
To specify an ISDN sub-address or its LAN equivalent extension address (TCS-4), add a star (*) after the number
and then enter the sub-address/extension address.
Example:
12345678*10 ( <number>*<Sub-address/extension address/MCU password>)
When calling to external MCU’s requiring a password (TSC-1), this password can be added after the star (*). If no
password is specified, a menu will prompt you to enter the password (after connected to the MCU).
TIP
SUB-ADDRESS IS USED TO ADDRESS DIFFERENT SYSTEMS ON THE SAME ISDN LINE.
TCS-4 IS USED TO ADDRESS DIFFERENT SYSTEMS ON A LAN, WHEN DIALING IN VIA A GATEWAY.
20
TANDBERG Videoconferencing System
Getting started
Selecting / setting default quality (bandwidth)
The default call quality setting ‘Auto’ will be used if no specific
quality is selected.
To select quality (bandwidth):
• Press the ‘Quality’ Quick Key when you are in the dial menu. The
Quality menu will then be displayed:
TYPE OF CALLS
Auto
Max
768
512
384
320
256
192
128
64
Teleph
384kbps on ISDN/768kbps on LAN
384kbps on ISDN/768kbps on LAN
768 kbps (12B)
512 kbps (8B)
384 kbps (6B)
320 kbps (5B)
256 kbps (4B)
192 kbps (3B)
128 kbps (2B)(Bonding/H.221)
64 kbps (1B)(H.221)
Telephone Call
NOTE SOME SOFTWARE VERSIONS AND NETWORKS
DO NOT SUPPORT ALL CHANNEL SELECTIONS.
• Move the indicator to the desired bandwidth, then press the ‘Select’ Quick Key.
• You may also press the ‘Set as Default’ Quick Key in order to make the selected bandwidth the default
bandwidth for subsequent calls.
• Press ‘Set Restrict (56k)’ to make a restrict call. An indicator ‘(56k)’ will be shown behind the number.
TIP
RESTRICTED CALL A RESTRICTED CALL IS A CALL TO A 56 KBPS NETWORK. BY DEFAULT THE SYSTEM WILL DIAL AN UNRESTRICTED CALL (A CALL TO A
64 KBPS NETWORK) AND DOWNSPEED TO 56KBPS IF NECESSARY. TO FORCE A RESTRICTED CALL, SELECT ‘SET RESTRICT (56K)’
TIP
DIALING TWO NUMBERS
SOMETIMES (ESPECIALLY WHEN CALLING TO AND WITHIN NORTH AMERICA) IT IS NECESSARY TO DIAL BOTH ISDN NUMBERS WHEN MAKING A VIDEO
CALL USING 2X64 KBPS OR 2X56 KBPS. SELECT ‘128’ IN THE QUALITY MENU. WHEN YOU RETURN TO THE DIAL MENU, BOTH ‘NUMBER:’ AND
‘2ND:’ ARE DISPLAYED. ENTER THE SECOND NUMBER.
21
Getting started
TANDBERG Videoconferencing System
Selecting / setting default network
To select a specific network, press ‘Net’ when you are in the dial menu.:
• Highlight the network to be used in your call.
• Press ‘Select’ to select network or press ‘Set as Default’ to set the selected network as your preferred choice
for this and all subsequent calls.
If ‘Auto’ is selected, the system will select a network based upon the following criteria:
• If an IP-address (e.g. 123*3*0*12 ) is entered, ‘LAN’ (H.323) is selected.
• If the first digits in the number match those set in ‘H.323 Prefix’ under ‘H.323 Settings’, ‘LAN’ is selected.
• In other cases, ‘ISDN’ (H.320) is selected.
If you want to assign a specific prefix to the network selection or if you want to define your own network
configuration, see ‘Network Profiles’ in ‘Call Settings’, ‘Terminal Settings’.
22
TANDBERG Videoconferencing System
Getting started
Answer a call
connect
To answer a call, press the CONNECT key.
Manual answer of a call is needed if the autoanswer facility is switched off. See ‘Utilities’ in
‘Advanced use’.
End a call
disconnect
TIP
To end a call, press the DISCONNECT key.
ENDING A CALL: SWITCHING OFF THE MONITOR(S) WILL
NOT DISCONNECT A CALL. TO DISCONNECT A CALL YOU
SHOULD PRESS THE DISCONNECT KEY.
Correcting keying mistakes
delete
To delete the last digit (or character) entered, press the DELETE key.
23
Getting started
TANDBERG Videoconferencing System
Directory
The directory is a local phone book that stores up to 100 directory entries including the last number dialed. The
entries are sorted alphabetically. The entries can be point-to-point entries or MultiSite entries (see menu below).
The MultiSite entries will not be displayed when you are in a call.
By using the dataport file system or external management systems like the TANDBERG Management Suite, it is
possible to store 200 additional entries. These entries can only be changed from the dataport or the management
system.
When the system receives an incoming call and the calling party’s number is found in the directory, the calling
party’s name will be displayed instead of the number on the status line.
directory
Press DIRECTORY to bring up the following menu:
TIP
WHEN LAST NUMBER DIALED IS
HIGHLIGHTED, THE SECOND QUICK KEY
STATES ‘STORE ENTRY’. THIS MAKES IT
POSSIBLE TO STORE LAST DIALED
NUMBER.
To find an entry, key in the first letter, for example T, and scroll with the up/down arrows.
TIP
connect
THE LEFT/RIGHT ARROWS WILL MOVE ONE PAGE UP/DOWN.
To dial the selected entry press CONNECT. To edit the selected number before dialing, press OK (only
point-to-point entries).
24
TANDBERG Videoconferencing System
General use
Add New Entry
When selecting ‘Add New Entry’, an empty directory entry is displayed:
Move to ‘Name’ and enter characters using the number keys on your remote control (as on mobile phones).
Use ‘0’ to enter ‘space’, use ‘#’ to switch between upper- and lower case.
1
2 Move to ‘Number’, key in the number and press OK. Specify only one number. If two numbers are required,
both numbers should be specified (2x64 or 2x56 calls).
3
Select ‘Quality’ to specify call rate to be used.
4
Select ‘Net’ to specify the network profile to be used. See ‘Selecting / setting default network’.
5
Select ‘Previous Menu’ to return to the Directory menu.
Delete Entry
When ‘Delete Entry’ is pressed, the selected entry is deleted.
Edit Entry
To edit an entry, highlight the entry you want to edit and press ‘Edit Entry’. Edit the entry and select ‘Previous
Menu’ to return to the Directory menu.
Delete Entry
To delete an entry, highlight the entry and press DELETE.
25
General use
TANDBERG Videoconferencing System
Add MultiSite Entry
When selecting ‘MultiSite Entry’, an empty MultiSite directory entry is displayed:
1
Move to ‘Name’ and enter the MultiSite meeting name.
2 Select ‘Add Site’ to add a site to the meeting by searching for point-to-point entries in the directory list. See
below for details.
3
Select ‘Quality’ to override the suggested bandwidth per site.
TIP
4
QUALITY PER SITE: AUTO, FUNCTIONALITY
EXAMPLE: THE SYSTEM HAS MAXIMUM CAPACITY 512KBPS. TWO ENTRIES ARE ADDED, ONE WITH 384KBPS AND ONE WITH 128KBPS.
1) SINCE ALL SITES MUST USE THE SAME BANDWIDTH, QUALITY PER SITE WILL BE 128KBPS.
2) IN ADDITION, MAXIMUM BANDWIDTH PER SITE CANNOT EXCEED THE TOTAL BANDWIDTH AVAILABLE DIVIDED BY THE NUMBER OF SITES. IN THIS CASE,
THE MAXIMUM BANDWIDTH PER SITE CANNOT EXCEED 512/2=256KBPS. IF THE BANDWIDTH IN 1) IS HIGHER THAN THIS BANDWIDTH, THE ‘QUALITY
PER SITE’ SETTING MUST BE REDUCED TO CORRESPOND WITH THE TOTAL CAPACITY OF THE SYSTEM.
When finished, select ‘Previous Menu’.
Add Site
Highlight the entry you want to add to the meeting and press OK. If you do not find the entry you need, select
‘Add New Entry’ to add an new point-to-point directory entry.
NOTE GLOBAL ENTRIES WILL NOT BE AVAILABLE FOR FOR MULTISITE ENTRIES.
26
TANDBERG Videoconferencing System
General use
General use
Adjusting volume
+
Press the VOLUME keys to adjust the volume level. An on-screen indicator will show the current level.
-
View outgoing video (selfview)
selfview
Press the SELFVIEW key to view your outgoing video.
To change the image being viewed on the monitor during a call press SELFVIEW until the desired
image is shown (far end/selfview/still image or Duo Video).
move pip Press MOVE PIP to move your selfview as a Picture-in-Picture to different corners of the screen or to
switch it off.
Microphone on/off
mic off
To mute your microphone during a call, press MIC OFF. An on screen indicator will appear when the
microphone is off. Pressing MIC OFF one more time will activate the microphone again.
NOTE PRESSING MIC OFF WILL MUTE AUDIO INPUTS MIC1-2. IT WILL NOT MUTE AUDIO FROM AUDIO INPUT 3&4.
27
General use
TANDBERG Videoconferencing System
Do Not Disturb / Sleep Mode
Press any Quick key when not in a call to activate the Quick Menu.
When Do Not Disturb is activated, the system will not accept any incoming calls. The caller will hear a busy
tone when calling this unit. A status line will indicate when Do Not Disturb is active.
When Sleep Mode is selected, the following quick-keys are displayed:
Pressing ‘Sleep Now’ puts the monitors in sleep mode. The system will still accept incoming calls.
Pressing ‘60 Minutes’ or ‘3 Hours’ will delay entering sleep mode accordingly.
Pressing any key or picking up the remote control will deactivate Do Not Disturb/Sleep Mode.
To see numbers, line status etc., select ‘System Info’. For further information see ‘Diagnostics’ in ‘Advanced
use’.
28
TANDBERG Videoconferencing System
General use
Controlling the Main Camera
Moving / zooming camera
To control the Main Camera use the keys below:
for pan/tilt and
zoom
for zooming.
OK
IF THE MENU SYSTEM IS ACTIVE, THE ARROW KEYS WILL NAVIGATE IN THE MENUS.
Focusing camera
The Main Camera is set for autofocus by default. If the Main Camera is moved (pan/tilt/zoom), autofocus will be
switched On automatically for 5 seconds.
To manually focus the Main Camera, see ‘Video Settings’ in ‘Advanced use’.
Selecting video sources
Press:
main cam
aux
doc cam
vcr
pc
to select the video source to be transmitted to the far end.
29
General use
TANDBERG Videoconferencing System
Voice Activated Camera Positioning
Through Voice Activated Camera Positioning and the use of two microphones, the camera will automatically view
the speaker.
Setup
Before using camera tracking, the camera positions used must be stored at presets P7 (Mic1) and P8 (Mic2).
EXAMPLE: THE CAMERA POSITION STORED AT P7 MUST BE RELATED TO MIC1, THEREFORE ALL PARTICIPANTS WHO ARE LOCATED CLOSEST TO MIC1
SHOULD BE INCLUDED IN THE P7 CAMERA POSITION ETC. WHEN CAMERA TRACKING IS ACTIVATED AND A PERSON CLOSE TO MIC1 SPEAKS, P7 WILL BE
AUTOMATICALLY SELECTED.
Activating
presets Enable Camera Tracking by pressing ‘CamTrack On’ in the ‘Preset 0-9’ menu, which is activated by
pressing the P button on the remote control. An on-screen indicator ‘CamTrackOn’ will appear.
P
When activating another video source (e.g., document camera), camera tracking will be temporarily
disabled until you re-select MainCam or a MainCam preset.
mic off
Pressing MIC OFF will temporarily disable camera tracking.
A Voice Detector makes the system more tolerent of noise and ensures the camera will not be moved by
noise such as paper shuffling, etc.
Deactivating
Disable Camera Tracking by:
• moving the camera manually.
• activating a MainCam preset when MainCam is already activated.
• disconnecting the call.
An on-screen indicator ‘CamTrackOff’ will appear.
TIP
THE CAMERA TRACKING SPEEDS MAY BE ALTERED IN THE ‘VIDEO SETTINGS’ MENU. SEE ‘ADVANCED USE’ FOR FURTHER DETAILS.
30
TANDBERG Videoconferencing System
General use
Presets
The preset buttons enable you to pre-store up to ten different settings. Each preset is able to store:
• Video source
• Camera position, pan/tilt/zoom/focus/brightness (if Main Camera)
• Audio source selection (see ‘Audio Settings’ in ‘Advanced use’)
Selecting presets
To select a pre-stored camera position, audio and video source, use the keys P1 P2 P3 or press P until the onscreen indicator ‘Preset 0-9’appears and use 0-9 to activate P0-P9 presets. To exit ‘Preset’ mode, press OK.
P2
P1
P3
P1-P3 are the same presets as when pressing P and then a number key 1-3.
Storing presets
To store the current camera position, audio and video source:
store
•
Press STORE once and wait for the on-screen indicator to appear.
•
Then press one of the keys P1 P2 P3 or a number key 0-9.
31
General use
TANDBERG Videoconferencing System
Far end camera control (FECC)
far end
Press the FAR END key until the ‘FarEndCamera’ on-screen indicator is displayed.
For this feature to operate the far end must support ‘Far end camera control’ (H.281).
Whilst activated you will be able to control the far end’s camera (pan/tilt/zoom/focus) and presets.
To control the far end camera use the keys below:
for pan/tilt and
OK
zoom
for zooming.
Far end presets can be activated by pressing the keys P1 P2 P3 or the number keys 0-9 to activate presets P0P9.
Selection of far end videosources is achieved by pressing the buttons below when in FarEndCamera mode:
main cam
TIP
aux
doc cam
vcr
pc
IF YOU PRESS DOC CAM, IT IS NOT CERTAIN THAT THE FAR END DOCUMENT CAMERA WILL BE DISPLAYED. THIS DEPENDS ON SYSTEM CONFIGURATION
AT THE FAR END.
To prevent others controlling your camera, select ‘Far End Camera Control:Off’ in ‘Utilities’.
32
TANDBERG Videoconferencing System
General use
Sending/receiving still images
When a still image is sent, received or requested, it will be stored in the graphics memory. When a new image is
sent or received, the old image will be erased. When disconnecting the call, the image will be erased.
Sending a still image
snapshot
• Press SNAPSHOT.
• To send a still image from another video source (e.g. the document camera), select source:
main cam
aux
doc cam
vcr
pc
TIP
SEE ‘PRESENTATIONS’ MENU FOR AUTOMATIC SETUP OF THIS OPERATION.
• Press SNAPSHOT.
Viewing a still image
The last sent or received still image will automatically be displayed on your screen.
• Press SELFVIEW to return to normal view.
NOTE REQUIRES ‘AUTO-DISPLAY STILL IMAGE: ON’ IN ‘PRESENTATIONS’
Receiving a still image
A received still image will automatically be displayed on your screen.
• Press SELFVIEW to return to normal view.
NOTE REQUIRES ‘AUTO-DISPLAY STILL IMAGE: ON’ IN ‘PRESENTATIONS’
Requesting a still image
• Press FAR END until the ‘FarEndCamera’ on screen indicator is displayed.
• Press SNAPSHOT . A still image from the far end is automatically displayed.
33
General use
TANDBERG Videoconferencing System
Duo Video *
Duo Video is useful if you want to display live video from your document camera or another camera in addition to
live video of yourself.
Add Duo Video
• Alt.1: Press any other video source than MainCam during a call. This will open Duo Video directly if the far end
supports the automatic Duo Video functionality (requires also ‘Duo Video Mode: Auto’ in ‘Presentations’).
• Alt.2: To open Duo Video (also older versions of Duo Video), press CONNECT during a call. This will bring up the
following menu:
• Select ‘Add Duo Video’. The following menu will be displayed:
• Select video source to transmit on Duo Video.
• Press CONNECT to add Duo Video.
NOTE AUTOMATIC DUO VIDEO HANDLES DUO VIDEO WITHIN THE SAME CALL. IT IS NOT NECESSARY TO MAKE A NEW CALL AND THE CONNECT TIME
DECREASES A LOT. DUO VIDEO BORROWS BANDWIDTH FROM THE MAIN CONNECTION. WHEN DUO VIDEO IS CLOSED, THE BANDWIDTH IS RETURNED
TO THE MAIN CONNECTION. THIS DUO VIDEO IS ALSO UNI-DIRECTIONAL AND HENCE, EASIER TO USE. WHEN IN AN MULTISITE CALL, THE MULTISITE
CAN TRANSMIT THIS DUO VIDEO TO THE OTHER PARTICIPANTS SUPPORTING THIS DUO VIDEO VERSION.
NOTE IF THE FAR END SUPPORTS DUO VIDEO, BUT NOT THE AUTOMATIC DUO VIDEO, PRESS ‘QUALITY’ TO SELECT EXTRA BANDWIDTH TO BE USED BY DUO
VIDEO. AN EXTRA CALL WILL BE MADE AND DUO VIDEO WILL NOT BORROW BANDWIDTH FROM THE MAIN CONNECTION.
* - Optional feature.
34
TANDBERG Videoconferencing System
General use
End a Duo Video call
disconnect
To end a Duo Video call, press DISCONNECT. Select if you want to disconnect only the Duo Video
connection or the whole connection.
Controlling camera, changing video source, presets in a Duo Video call
The main monitor will always display incoming video. The 2nd monitor will display outgoing video (Duo Video in full
screen / Main connection in PIP).
Pressing SELFVIEW will toggle Duo Video full screen / Main source in PIP and vice versa. Pressing SELFVIEW will
not change anything on the main monitor.
Pressing MOVE PIP will move PIP only on the 2nd monitor.
Controlling the camera, changing video source, using presets will affect the video source currently displayed in full
screen mode.
EXAMPLE IF DUO VIDEO IS SHOWN IN FULL SCREEN ON THE 2ND MONITOR, PRESSING ANY OF THE VIDEO SOURCE BUTTONS WILL CHANGE DUO
VIDEO SOURCE. IF THE MAIN CONNECTION IS SHOWN IN FULL SCREEN, PRESSING ANY OF THE VIDEO SOURCE BUTTONS WILL CHANGE THE MAIN
CONNECTION SOURCE.
If both connections are selected to display the same video source, Duo Video will be closed.
35
General use
TANDBERG Videoconferencing System
PC Presenter
Plugging a PC into the system is made extremely simple through the PC Presenter, avoiding the need for any
additional hardware such as a projector, PC/Video converter or extra cables.
• Connect a VGA-VGA cable from your PC (VGA Output) to ‘VGA In’ on your system.
• Start your PC.
• Press PC on your remote control.
• Press SELFVIEW until the indicator ‘Selfview‘ is displayed on your main monitor (single monitor system) or until
you see the PC image on the second monitor.
If no PC image is displayed on your monitor, make sure that your PC transmits the image to the VGA Output, and
that the PC transmits a supported VGA-format (see tip below). Consult your PC-operating manual to see how to
transmit a VGA image from your PC (typically: Fn+F5).
VGA-FORMATS SUPPORTED (VESA COMPLIANT)
·640X480
60,72,75,85 HZ
·800X600
56,60,72,75,85 HZ
·1024X768
60,70,75 HZ
3. Doc
4
3
2
1
4. VCR
1
VCR
Video out
I
1
Mic 1
1. Single
O
2. Single
ISDN BRI
2
Ethernet
3
VGA out
Mic 2
2
Audio out
3. Dual
DC in
PC Presenter input
(VGA In)
VGA Output
PC SoftPresenter *
PC SoftPresenter is used to display PC images on your system. The system and your PC must be connected to
a LAN. In addition, VNC (Virtual Network Computing) server software must be installed on the PC.
To show the PC image:
NOTE ‘PC: VNC’ MUST BE SET IN ‘VIDEO SETTINGS’.
• Start the VNC software on your PC.
• Press PC on your remote control. Use UP/DOWN to activate PAGE UP/PAGE DOWN on the PC.
For setup information and details, see ‘VNC Settings’ in ‘Advanced use’.
* - Optional feature.
40


