1
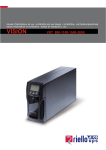
1 GB 36 USER MANUAL GB CONTENTS INTRODUCTION 40 PRESENTATION 41 CHARACTERISTICS 41 FRONT VIEW 42 REAR VIEW 43 INSTALLATION 45 OPENING THE UPS PACKAGING AND CHECKING THE CONTENTS 45 OPENING THE BATTERY BOX PACKAGING AND CHECKING THE CONTENTS 46 CHECKING THE EQUIPMENT 47 PLACING THE UPS 47 INSTALLING THE UPS 47 VERTICAL INSTALLATION OF THE DVD MODELS 47 VERTICAL INSTALLATION OF THE DVD MODELS WITH BATTERY BOX 48 POSITIONING THE FRONT PANEL LCD 49 FOR DVD MODELS INSTALLING DVR AND DVD MODELS IN A RACK CABINET 51 CONNECTION 52 CONNECTION TO THE NET/TEL PROTECTION DEVICE 52 POWERSHARE 52 INSTALLING THE EMERGENCY POWER OFF (EPO) 53 INSTALLING AN ADDITIONAL BATTERY BOX 53 START-UP/SHUTDOWN 54 START-UP FROM BATTERY 54 RECHARGING 54 SYSTEM DESCRIPTION 55 FRONT PANEL 55 LCD 55 LCD INDICATORS 57 FAULT SIGNALLING 59 SETTING THE VALUES ON THE FRONT PANEL LCD 59 ACOUSTIC SIGNALS 61 BATTERY TEST 61 COMMUNICATION PORT 62 37 CONTENTS RS232 INTERFACE 62 USB PORT 62 COMMUNICATION SOCKET 62 SOFTWARE 63 MONITORING AND CONTROL SOFTWARE 63 CONFIGURATION SOFTWARE 63 ALARMS AND INDICATORS 64 REPLACING THE BATTERY 65 DIALOG VISION TOWER 65 DIALOG VISION RACK 66 DIALOG VISION DUAL 67 SPECIFICATIONS 38 68 INTRODUCTION Thank you for choosing our Uninterruptible Power Supply (UPS). Our company is highly specialised in the development and production of uninterruptible power supplies (UPS). The UPS in this range are high quality products, designed and built with care to ensure optimum performance. This equipment can be installed by anyone, subject to a CAREFUL AND THOROUGH READING OF THIS MANUAL. This manual contains detailed instructions on how to use and install the UPS. For information on using and getting the best performance from your UPS, this manual should be kept safely near the UPS and CONSULTED BEFORE TAKING ANY ACTION. © Reproduction of any part of this manual, partial or in full is strictly prohibited without the manufacturer’s prior consent. The manufacturer reserves the right to modify the product described herein, in order to improve it, at any time and without notice. Microsoft, Windows, and the Windows logo are trademarks or registered trademarks of Microsoft Corporation in the United States and/or other countries. 39 PRESENTATION This manual describes the Dialog Vision UPS family (DVT, DVR, DVD) and their related battery box. The Dialog Vision is a line-interactive UPS. The UPS protects equipment connected to it from: a) mains power supply failures b) surges c) sags and brownouts The UPS automatically corrects its output for small fluctuations in the mains power supply. In the event of larger fluctuations or a complete mains power supply failure, its output is powered from the inverter drawing energy from the internal battery set The UPS can operate from a mains power supply even if there is no battery available. In this instance all other functions (AVR, start-up or shutdown and overload protection) are available. CHARACTERISTICS Sinusoidal output voltage Front panel LCD Microprocessor control for high reliability High frequency technology Automatic correction of input voltage fluctuations by the built-in Automatic Voltage Regulator (AVR). The AVR, compensates for input voltage variations within a defined input voltage window and maintains a stable output, without resorting to batteries. Using the batteries less frequently ensures that they are at full capacity when they are actually needed and helps them to last longer. Selectable output range Cold start Integrated volt-free contacts/RS-232/USB port Back-up time can be increased by adding a battery box (DVD 2200VA/3000VA models only) Overload, short-circuit and overheating protection Configurable as Rack or Tower (DVD models only) Models DVR and DVD suitable for installation in 19” rack cabinets The various versions of the product are shown below: 40 PRESENTATION Dialog Vision Tower Dialog Vision Rack Dialog Vision Dual DVT 50 DVT 80 DVT 110 DVT 150 DVT 200 DVR 50 DVR 50 DVR 50 DVD 150 DVD 220 DVD 300 Nominal power [VA] 500 800 1100 1500 2000 500 800 1100 1500 2200 3000 Nominal power [W] 350 540 740 1050 1350 350 540 740 1050 1540 2100 Nominal output voltage [Vac] Dimensions LxHxD [mm] 200/208/220/230/240 110X240X395 160X240X435 438X44X460 (19”x1Ux460) 438X88X582 (19”x2Ux582) FRONT VIEW DVT 50/80/110 DVT 150/200 DVR 50/80/110 DVD 150/220/300 Dialog Vision Battery Box 41 PRESENTATION REAR VIEW DVT 50/80/110 DVT 150/200 DVR 50/80/110 DVD 150 42 PRESENTATION DVD 220/300 Dialog Vision Battery Box 1. RS232 serial interface 2. Cooling fan 3. Net/Tel protection 4. Input thermal protection 5. IEC network input plug 6. IEC output plug (max 10A) 7. Expansion slots for interface cards 8. Battery expansion connector 9. IEC output plug (max 16A) 10. Output thermal protection 11. USB port 12. EPO 13. Fuse 14. Powershare socket 43 INSTALLATION OPENING THE UPS PACKAGING AND CHECKING THE CONTENTS After opening the packaging, check the contents. The packaging should contain the following: UPS IEC 10A power cable (IEC 16A for DVD models 220/300 only) Guides for rack installation + handles kit (models DVR and DVD only) 2 IEC 10 A connection cables IEC 16A loose plug (DVD 2200/3000 VA models only) USB cable 44 Plastic supports (DVD model only) User manual + CD-ROM software + Warranty card INSTALLATION OPENING THE BATTERY BOX PACKAGING AND CHECKING THE CONTENTS After opening the packaging, check the contents. The packaging should contain the following: Battery Box Guides for rack installation + handles kit UPS – Battery Box connection cable User manual + Warranty card Plastic supports + extensions 45 INSTALLATION CHECKING THE EQUIPMENT Check the UPS carefully. If the UPS has been damaged during transit, keep the box and the packaging. Let the carrier and the supplier know immediately. PLACING THE UPS This UPS must have an adequate airflow. It must be placed in a clean indoor environment with no humidity, away from flammable liquids and direct sunlight. A space of at least 4” / 100 mm must be left around the UPS. The ambient temperature must be between 0°C and 40°C (32°F and 104°F), and the humidity level during operation must be between 20% and 80% (without condensation). Warning: A long period of use in an environment with a temperature over 25°C will shorten battery life. The UPS should be placed at least 20 cm away from a monitor in order to avoid interference. INSTALLING THE UPS The Dialog Vision family comprises: DVT models designed for vertical installation and the DVR models which must be installed in 19” rack cabinets. The DVD models can be positioned vertically (using the supports) or installed in 19” rack cabinets. VERTICAL INSTALLATION OF THE DVD MODELS The DVD models are provided with supports to stabilise the UPS when it is positioned vertically. 1. Assemble the supports as shown in the figure. 2. Put the UPS in a vertical position and place the supports close to it. Carefully insert the UPS in the two supports. 46 INSTALLATION VERTICAL INSTALLATION OF THE DVD MODELS WITH BATTERY BOX 1. Assemble the supports and the extension as shown in the figure. 2. Put the UPS and the battery box in a vertical position and place the two supports close to them. 3. Carefully insert the UPS and the battery box in the two supports. 47 INSTALLATION POSITIONING THE FRONT PANEL LCD FOR DVD MODELS The DVD LCD can be rotated to suit the kind of installation (rack or tower). The information below explains how to rotate the display: A. From Rack to Tower 1. Place the UPS flat and press the key shown B. From Tower to Rack 1. Place the UPS flat and press the key shown 2. Rotate the LCD display 90° 2. Rotate the LCD display 90° 3. Reinsert the display in its housing 3. Reinsert the display in its housing 48 INSTALLATION INSTALLING DVR AND DVD MODELS IN A RACK CABINET The DVR and DVD models can be installed in a 19” rack cabinet. The installation procedure is described below 1. Align and screw the handles onto the sides of the UPS. 2. Secure the guides onto the rack cabinet supports with the screws. 3. Insert the UPS on the mounted guides and secure it to the cabinet using the screws. 49 INSTALLATION CONNECTION Connect the UPS to the mains power supply using the input supply cable. Connect the loads to the UPS sockets with the IEC-IEC cables or with a similar cable with a maximum length of 10 metres. Note: do not connect loads that draw more than 10A, to the 10A IEC sockets. These loads can only be connected to the 16A IEC socket (where fitted). CONNECTION TO THE NET/TEL PROTECTION DEVICE A telephone/modem/network line can be connected to the modular RJ-45/RJ-11 connectors (located on the rear of the UPS) to protect against surge voltages. A telephone extension cable is required for this type of connection. N.B.: This connection is optional. The Net/Tel protection is active even when the UPS is switched off or disconnected from mains power Warning: The device that protects against overvoltages on the telephone line may not work if it is not installed correctly. Ensure that the telephone line from the wall is inserted in the connector marked “IN” and that the cable of the device to be protected (telephone, modem, network card, etc.) is inserted in the connector marked “OUT”. N.B.: This protection device limits the effects of an overvoltage but does not guarantee absolute protection. POWERSHARE All the models of the Dialog Vision range are provided with an auxiliary output socket that can be configured via UPSTools. The Powershare socket can be configured in five different ways (refer to the UPSTools manual) as described below: ALWAYS: (standard configuration), the Powershare socket is always active; the load is powered, as if it were connected to one of the other output sockets. BATTERY LOW: the Powershare socket is normally active, but after 10 seconds from the start of the battery low signal, the Powershare socket is deactivated. BATTERY WORKING: the Powershare socket is active if the UPS is powered from the mains power supply, if the UPS is working in battery mode; the Powershare socket is deactivated. BATTERY WORKING DELAYED: the Powerashare socket is always active, but after 1 minute of operation in battery mode or after 10 seconds in a battery low condition, the Powershare socket is deactivated. BUZZER: when the UPS is working in battery mode, the Powershare socket is activated and deactivated in the same way as the buzzer. 50 INSTALLATION INSTALLING THE EMERGENCY POWER OFF (EPO) The DVR and DVD range are provided with an EPO contact. This allows the UPS to be shut down immediately without having to wait for the shutdown procedure to be completed. Note: When the UPS has been switched off using this input, it is not be possible to switch the device back on again (even if the EPO contact is closed) until the UPS has been restarted manually. If the EPO contact is open, the UPS will not restart even if the ON key is pressed. Follow the procedure below to install the EPO switch: 1. Check that the UPS is switched off. 2. Disconnect the EPO input terminal from the UPS. 3. Remove the jumper fixed to the terminal. 4. Apply a volt-free contact signal (isolated and normally closed Vmax: 60 Vdc, 30 Vac RMS; Imax: 20mA), between Pin 1 and 2 of the terminal, using an unshielded wire of diameter 18-22 AWG (0.75 mm2 – 0.3mm2). 5. Reconnect the terminal to the EPO input. 6. Ensure that the switch connected to the EPO contact cannot be activated by a device powered by the UPS. 7. Connect the UPS to the mains power supply and switch it on using the ON key. 8. Activate the EPO contact by means of the external switch to ensure the UPS shuts down. 9. Deactivate the EPO contact by means of the external switch and restart the UPS. INSTALLING AN ADDITIONAL BATTERY BOX The DVD 220 and DVD 300 models are provided with a connector that allows an external battery box to be connected to the UPS to increase the back-up time available. Note: When connecting additional batteries a small spark may occur within the connector when the cable is connected. Follow the procedure below to install the additional battery box. 1. Connect the cable to the battery connector at the back of the battery box. 51 INSTALLATION 2. Then connect the other end of the cable to the battery connector at the back of the UPS. 3. To add further battery boxes (up to a total maximum capacity of 120Ah), repeat the previous steps. Note: When a battery box is installed, the UPS must be configured for the correct total capacity of the batteries (using UPSTools software) in order to calculate correctly the remaining back-up time and the battery charge. The configuration must be done with the UPS switched on or in stand-by mode. For this kind of battery box the value to be added is “9”[Ah]. For the DVD 220/300 models whose total battery capacity has not been increased, the recharge current is 2 A. After setting the nominal battery capacity with the UPSTools software, if the value set is greater than 14 Ah, the recharge current automatically increases to 6 A. START-UP/SHUTDOWN To start up and shut down the UPS, press the ON and OFF switch for at least three seconds. Starting up for the first time: after about 30 seconds, check that the UPS is working properly: 1. Simulate a mains power supply failure by unplugging the input power cable 2. The load must continue to receive power, the battery mode indicator should light up and the UPS should beep every 4 seconds. 3. Reconnect the power cable. Normal mains power operation should be restored. START-UP FROM BATTERY The UPS can be switched on even when no mains power supply is available and the battery is fully charged. Just press ON for at least three seconds to start the UPS. RECHARGING The UPS is supplied with fully charged batteries. During shipping, however, they can lose some of their charge and so the batteries must be recharged before use. Connect the UPS to the mains power supply and leave the UPS to recharge for at least 8 hours before discharging it. 52 SYSTEM DESCRIPTION FRONT PANEL The front panel consists of a display and “ON”, “OFF” and “SELECT” keys. Front panel LCD ON button OFF button SELECT button LCD Part A Part B Part D Part C 53 SYSTEM DESCRIPTION The display can show two values at the same time, which can be selected from those available in part A and part B of the display. Detailed description for Part A (on the left): Part A ① ② ③ ④ ⑤ INPUT-VAC : input voltage (unit: Volt) INPUT-Hz: input frequency (unit: Hz) BATTERY-V: total battery voltage (unit: Volt) BATTERY-%: estimated back-up time (as a percentage) of the battery charge BATTERY-MIN: estimated battery back-up time (unit: Minutes) Note: The estimated back-up time in minutes is also provided when the UPS is working in mains mode. Detailed description for Part B (on the right): Part B ① OUTPUT-VAC: output voltage (unit: Volt) ② OUTPUT-Hz: output frequency (unit: Hz) ③ LOAD-%: load applied in output (as a percentage) Part C and Part D show the status of the UPS (see section “LCD indicators” for details). 54 SYSTEM DESCRIPTION LCD INDICATORS This chapter provides a detailed description of all the display indicators. ICON STATE DESCRIPTION Steady on Indicates a fault (see table 3) Flashing The UPS is in stand-by mode Steady on The UPS is operating in mains mode Steady on The UPS is operating in battery mode. In this state it will beep at regular 4-second intervals. Flashing When operating in battery mode, the UPS signals that it is about to switch off due to end of discharge. In this state it beeps at regular 1-second intervals. Steady on Indicates that the battery is faulty Steady on The AVR function is active Steady on The Powershare socket is active Active Represents the estimated percentage of battery charge (see table 1) Active Indicates the % of load applied to the UPS in relation to the nominal value (see table 2) Flashing The UPS is in an overload condition 55 SYSTEM DESCRIPTION Table 1 Battery level 0%~20% 20%~40% 40%~60% 60%~80% 80%~100% Table 2 Applied load level 0~5% 5~25% 25%~50% 50%~75% 75%~102% flashing >102% In the event of an overload, the UPS will continue to power the load for a set period of time. The UPS will emit an alarm to signal that it can no longer support the overload (a beep at regular one-second intervals). Once the load has been reduced to within the 100% threshold, the UPS will return to normal operating mode. Warning: If the overload is too high, the protection device will be activated and the UPS will shut down. To restore normal operation following failure due to an overload (continuous beep and load not powered); reduce the load so that it falls within the 100% threshold. Hold the OFF button down until the continuous beep stops and then release it. Wait until the UPS has completely shut down and then switch on again using the ON key. 56 SYSTEM DESCRIPTION FAULT SIGNALLING All Dialog Vision models are provided with a self-check system that can indicate any faults or failures on the display. The symbols are shown below, together with a description and the possible solutions to rectify the problem. Table 3: List of faults Symbols in Part A of the LCD Description The UPS has failed due to an overload The UPS has overheated The UPS output has shortcircuited Possible solution Check the level on the display and reduce the load 1. Ensure that the ambient temperature is lower than 40°C 2. Switch the UPS off and wait until it cools down 1. Disconnect all loads and ensure that there is nothing short-circuiting the output 2. Ensure that the loads are not short-circuiting internally Fan failure Contact the reseller to check or replace the fan Output voltage out of range (inverter failure) Contact the reseller UPS internal error Contact the reseller SETTING THE VALUES ON THE FRONT PANEL LCD The LCD has two parts, left (Part A) and right (Part B). The left side displays the following parameters: “Input voltage”, “Input frequency”, “Voltage battery”, “Capacity as a percentage of battery” and “Estimated back-up time in minutes”. The parameters available on the right side are: “Output voltage”, “Output frequency” and ”Load as a percentage”. The displayed values can be set using the ON and SELECT keys. The “SELECT” key is used to choose the field to be set, while the ON key is used to confirm the selection. The first time the “SELECT” key is pressed (for 3 seconds, then the keys should be pressed for about 1 second), the left part will start to flash. The second time this key is pressed the right part will start to flash, and if pressed for a third time nothing will flash. When a field is flashing press “ON” to confirm. Press “SELECT” to choose the required value. Press “ON” to confirm the selected value. When the UPS is on, in both mains and battery mode, it will show the following default values respectively: 57 SYSTEM DESCRIPTION Shown below is an example of the procedure to set the display to show the “Input voltage” on the left side of the display (Part A) and “Capacity as a percentage of the battery” on the right side (Part B). Configuration example: Press SELECT to change the field Press SELECT for 3 seconds Press ON to confirm the field Press SELECT to change the value to be monitored Press SELECT to change the value to be monitored Press ON to confirm the value to be monitored 58 SYSTEM DESCRIPTION ACOUSTIC SIGNALS DESCRIPTION BEEP BUZZER STATUS 1 a) Fault (e.g. due to overheating or fan failure) Continuous 0 1 2 3 4 5 6 7 8 9 10t 1 b) Battery overcharged Continuous 0 1 2 3 4 5 6 7 8 9 10t c) Overload d) UPS in battery mode e) UPS in battery mode with battery flat f) Battery disconnected after the battery test g) The UPS is performing the battery test h) If none of the events in the previous points has occurred Intermittent (1s on/1s off) 1 Intermittent (1s on/4s off) 1 Intermittent (1s on/1s off) 1 Intermittent (1s on/1s off) 1 Intermittent for 3 times (0.5s on/0.5s off) 1 0 1 2 3 4 5 6 7 8 9 10t 0 1 2 3 4 5 6 7 8 9 10 t 0 1 2 3 4 5 6 7 8 9 10t 0 1 2 3 4 5 6 7 8 9 10t 0 1 2 3 4 5 6 7 8 9 10t 1 Not active 0 1 2 3 4 5 6 7 8 9 10t In battery mode the acoustic signal can be silenced by holding the “ON” key down for 3 seconds. This will only remain inhibited if none of the events in points b), e) and f) has occurred. BATTERY TEST In mains mode, hold the “ON” key down for more than 5 seconds (a beep will sound) to run a battery test lasting 5 seconds (default time). During the battery test, the “Line” and “Battery function” icons will both light up. The battery test process 59 COMMUNICATION PORT RS232 INTERFACE With the RS232 serial interface the UPS can be connected to a PC (COM interface) by means of a pin-to-pin serial cable (if a different cable is used, this must be of the pin-to-pin type with a maximum length of 3 metres). The interface (with factory settings) has the following characteristics: RS232 CONNECTOR 6 7 8 9 1 2 3 4 PIN 1 2 3 4 5 6 7 8 9 5 SIGNAL (factory settings) Contact closed: UPS Failure/Alarm(d) TXD RXD / SD (remote shutdown) (a) Programmable input (e) GND +12Vdc (80mA) PNP signal Contact closed: battery low pre-alarm (c) Contact closed: battery mode (b) a) SD: With the UPS in battery mode, if +5~15Vdc is applied for at least 20 seconds (between PIN 3 and PIN 5), the UPS will shut down completely b) B.W. = contact closed in battery mode (values max:25mA +35Vdc Vce sat max: 1.5V @ 25mA) c) B.L. = contact closed when battery is flat (values max:25mA +35Vdc Vce sat max: 1.5V @ 25mA) d) UPS Failure/Alarm = contact closed in the event of failure or signalling of alarms by the UPS (maximum values: 25mA +35Vdc Vce sat max: 1.5V @ 25mA) e) Input programmable via RS232: +(5 - 15) Vdc. USB PORT The USB port is used to establish communication between the UPS and a PC. When the communication cable is installed, the management software (Powershield3) can exchange information with the UPS. The software can provide detailed information on the UPS operating status. In the event of a mains power supply failure, the software can save the data and shut down the computer. Note: The USB port and the RS232 serial interface, located on the rear of the UPS, cannot be used at the same time, as the use of one excludes the other. COMMUNICATION SOCKET All UPS are provided with an expansion slot for optional communication cards so that the unit is compatible with the main communication standards. Some examples: • Serial port duplexer • Ethernet network agent with TCP/IP, HTTP and SNMP protocol • RS232 + RS485 port with JBUS / MODBUS protocol For more information on the options available, please visit the manufacturer’s website. 60 SOFTWARE The CD-Rom provided includes two programs that enable the user to carry out monitoring, control and configuration operations on the UPS. MONITORING AND CONTROL SOFTWARE 3 The Powershield software provides UPS management, control and application shutdown, it ensures effective and intuitive UPS management by displaying all the necessary data values, such as input voltage, applied load, battery capacity. The software can also automatically perform programmed shutdown/start-up operations, shutdown the operating system of the PC or file server it is running on, and send alarm e-mails, SMS and network messages when specific user-defined events occur. Installation Operations: • Connect the USB communication port on the UPS to a USB communication port on the PC using the cable provided. • Insert the CD-Rom and select the operating system required. • Follow the installation instructions. • For more detailed information on installing and using the software, refer to the software manual in the Manuals folder on the CD-Rom provided. Visit the manufacturer’s website to check whether a more recent version of the software is available. CONFIGURATION SOFTWARE UPSTools software allows the user to configure the UPS and provides a full view of the UPS parameters and status through the USB port. Refer to the UPS Configuration section in the UPSTools manual for a list of the possible configurations available. Installation operations: • Connect the USB communication port on the UPS to a USB communication port on the PC using the cable provided. • Follow the installation instructions given in the software manual in the UPSTools folder on the CD-Rom provided. Visit the manufacturer’s website to check whether a more recent version of the software is available. 61 ALARMS AND INDICATORS UPS ACOUSTIC SIGNAL TABLES Signal 1 beep every 4 seconds 1 beep per second Continuous beep Cause The UPS is operating in battery mode The battery is discharging Overload in output The UPS has a fault Solution Check the input voltage Save your work and switch off the equipment Check the charge level indicator and remove some loads Check the indicators table and contact the reseller if necessary UPS ALARMS TABLE Problem The UPS does not start up when “ON” is pressed The UPS is not powering the loads Cause The power cable is not connected correctly The wall socket may be faulty The UPS output may have short-circuited or be overloaded An internal fuse may have blown There may be no output voltage in the socket used There is no output voltage on the sockets Solution Check the power cable connection Please contact a trustworthy electrician 1. Disconnect all the loads and ensure that there is nothing short-circuiting the output 2. Ensure that the loads are not isolated or short-circuited internally Please contact the reseller Check the output fuse (if present) 1. Check the connection cable 2. Ensure that the load does not exceed the UPS’s maximum capacity Recharge the battery for at least 4 hours 1. Recharge the battery for at least 8 hours 2. Replace the battery The battery has reduced its back-up time The UPS fault indicator is on The battery fault The battery is not charged It may not be possible to fully recharge the battery. The UPS has a fault Save your work and stop the equipment. See the LCD INDICATOR PANEL for details. is indicator on The equipment connected to the UPS switch off The UPS emits a continuous beep The buttons do not work The battery is faulty 1. Check the battery connection 2. Please contact the reseller to order a new battery to replace the faulty battery. 62 The UPS may be overloaded The UPS may be faulty Check the load status Please contact the reseller The UPS is in a fault state Check the UPS acoustic signals table The button is broken Please contact the reseller REPLACING THE BATTERY When the battery fault indicator illuminates and the UPS emits an intermittent beep (one second on/ one second off), the battery may need to be replaced. Check the battery connection or contact the reseller to order a new battery. Warning: A battery is dangerous since it can generate an electric discharge or a short-circuit. The following precautions must be followed carefully before replacing the batteries. 1. Though the batteries can be replaced with the UPS on, it is recommended to switch the UPS off and unplug the power cable from the wall. 2. Remove any rings, watches and other metal objects. 3. If the battery replacement kit is damaged in any way or shows signs of leakage, contact the reseller immediately. Recycle the used batteries. Never throw batteries into a fire as they may explode. Do not open or damage the batteries. The electrolyte contents are harmful to the skin and eyes and may be toxic. For correct recycling, do not throw the UPS, the battery box or the batteries into the rubbish. Contact the nearest waste recycling centre for information on how to dispose of the UPS, the battery box and the batteries. Follow the points and the table below to replace the batteries: DIALOG VISION TOWER 1. Remove the front panel of the UPS by pulling with both hands. 2. Disconnect the UPS battery cable. Remove the plate securing the battery to the UPS. 3. Take hold of the plastic battery tab and pull the battery out of the UPS. 4. Insert the new battery in the UPS. 5. Reinsert the plate and reconnect the battery cable 6. Replace the front panel of the UPS. 63 REPLACING THE BATTERY DIALOG VISION RACK 1. Remove the front panel of the UPS by pulling with both hands. 2. Disconnect the UPS battery cable. 3. Undo the screws securing the support to the UPS and remove the plate securing the batteries. 4. Remove the batteries on a flat surface. 5. Insert the new batteries in the UPS. 6. Screw the battery support and reconnect the cable. 7. Replace the front panel of the UPS. 64 REPLACING THE BATTERY DIALOG VISION DUAL 1. Remove the front panel of the UPS by pulling with both hands. 2. Undo the screws securing the support to the UPS and remove the plate securing the batteries. 3. Disconnect the cable. 4. Remove the batteries on a flat surface. 5. Insert the new batteries in the UPS. 6. Reconnect the battery cable and secure the support. 7. Replace the front panel of the UPS. 65 SPECIFICATIONS Dialog Vision Tower MODEL NOMINAL POWER DVT 50 DVT 80 DVT 110 DVT 150 DVT 200 VA 500 800 1100 1500 2000 Watt 350 540 740 1050 1350 Nominal voltage INPUT 230 VAC 160VAC ± 3% (2) Voltage range 294VAC ± 3% Frequency (2) 50/60Hz Automatic selection Voltage stability ( in battery mode) 230V +5% ,-10% Frequency OUTPUT (1) (1) 50/60Hz Automatic selection (As selected for the input) Frequency stability (in mains mode) ±0.1Hz Waveform Sinusoidal >110% alarm and failure after 3 minutes From mains power >150% failure after 5 cycles OVERLOAD >110 % alarm and failure after 30 seconds From battery power >120% failure after 5 cycles TRANSFER TIME Typical 4-msec. (6-msec.max.) Nominal battery voltage 12V 24V 24V 48V 48V BATTERY Recharge time UPS DIMENSIONS Less than 6 hours at 90% Dimensions (LxHxD) mm Weight (kg) Battery box Work environment 110X240X395 7 9 160X240X435 9 16 16 Not available 0- 40°C, from 20 to 80% relative humidity (without condensation) ENVIRONMENT Noise Less than 50dBA RS-232 Yes USB Yes Expansion slot Yes INTERFACE EPO OTHER Protection devices Excessive battery discharging – overcurrent – short-circuit – overvoltage – undervoltage – overheating Safety certification GS-TUV / CE EMC compliance Safety 66 Not available EN60240-2 EN62040-1-1 SPECIFICATIONS Dialog Vision Rack MODEL NOMINAL POWER Dialog Vision Dual DVR 50 DVR 80 DVR 110 DVD 150 DVD 220 DVD 300 VA 500 800 1100 1500 2200 3000 Watt 350 540 740 1050 1540 2100 Nominal voltage 230 VAC (1) 160VAC ± 3% INPUT (2) Voltage range 294VAC ± 3% Frequency (2) 50/60Hz Automatic selection Voltage stability ( In battery mode) 230V +5% ,-10% Frequency OUTPUT (1) 50/60Hz Automatic selection (As selected for the input) Frequency stability (In mains mode) ±0.1Hz Waveform Sinusoidal >110% alarm and failure after 3 minutes From mains power >150% failure after 5 cycles OVERLOAD >110 % alarm and failure after 30 seconds From battery power >120% failure after 5 cycles TRANSFER TIME Typical 4-msec. typical 6-msec.max. Nominal battery voltage 12V 18V 24V 48V 96V 96V BATTERY Recharge time UPS Dimensions (LxHxD) mm Weight (kg) DIMENSIONS Battery box ENVIRONMENT INTERFACE Less than 6 hours at 90% 438X44.3X460 (19”x1Ux460) 12 13 438X87.9X582 (19”x2Ux582) 15 25 32 33 Nominal voltage 96 V Capacity 9 Ah Number of batteries 8 Dimensions (LxHxD) mm 438X87.9X582 Weight (kg) 30 Work environment 0- 40°C, from 20 to 80% relative humidity (without condensation) Noise Less than 50dBA RS-232 Yes USB Yes Expansion slot Yes EPO Yes Protection devices Excessive battery discharging – overcurrent – short-circuit – overvoltage – undervoltage – overheating Safety certification GS-TUV / CE OTHER EMC compliance Safety EN60240-2 EN62040-1-1 Notes: (1) (2) can be changed with UPSTools (200/208/220/230/240VAC) some parameters can be changed with UPSTools 67 165