1
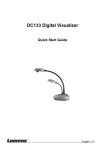
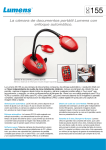
DC155 Digital Visualizer
Quick Start Guide
English - 0
1. Package Content
DC155 & Remote
Quick Start Guide &
User Manual
Soft Bag (Big, Small)
Power Cord
VGA Cable
USB Cable
C-Video Cable
RS232 Adapter
DVI Adapter (Optional)
2. Product Overview
1. Auto Focus
3. Gooseneck
2. Lens
4. Lamp
5. I/O ports
6.Power/Control keypad
7. Infrared rays area
9. Auxiliary Stand
8.DIP Switch
English - 1
3. I/O Connection
3.1 Connecting VGA out to Monitor or Projector
Monitor
VAG Out
Projector
3.2 Connecting DVI out to Monitor or Projector
DVI Out
Monitor
Projector
3.3 Connecting C-Video to TV
C-Video
TV
DIP Switch (PAL)
DIP Switch (NTSC)
on
on
off
off
【Notice】NTSC Setting: USA、Taiwan、 Panama、Philippine、Canadian、Chile、
Japan、Korea、Mexico
PAL: Besides above listed countries
3.4 Connecting VGA in to Computer
VGA in
PC
Notebook
English - 2
【Notice】DVI to VGA adapter (optional) cable must be used.
No VGA output once C-Video output is turn on.
3.5 Connecting USB to Computer
Connect to USB port then install the supplied queue program. Please refer to
Software user’s manual.
USB
PC
Notebook
【Notice】Don’t connect the Digital Visualizer to PC until USB Driver has been
installed properly.
3.6 RS232 to Computer
Connect to RS232 port then execute RS232 command.
PC
Notebook
3.7 Plug in the power outlet
AC In
AC Outlet
English - 3
4. Start to use
4.1 Turn on the Digital Visualizer
Keypad
Remote
4.2 Auto-adjust the optimum image
English - 4
5. Major Functions
5.1 Select Input Source
The default input source is set as "Digital Visualizer", press 『Source』to switch.
Keypad
Remote
5.2 Zoom in / out
5.3 Auto Focus
Goose-head
Remote
English - 5
5.4 Brightness Adjustment
5.5 Capture & Play Image
Capture Live Image or Play the captured image
5.6 OSD Menu
Keypad
Remote
* More detail functions of full Control Menu (OSD Menu), please read the user manual..
English - 6