1
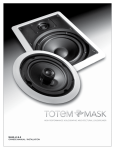
HIGH PERFORMANCE HOLOGRAPHIC ARCHITECTURAL LOUDSPEAKER SERIES
MASK 4, 6.5 & 8
OWNERS MANUAL / INSTALLATION
1
Discover yours.
CONGRATULATIONS
We sincerely thank you for having granted Totem the special place in your living environment. These
speakers are designed to redefine your musical understanding and open up corridors of new experiences.
We hope you not only enjoy but experience Totem as your guide to a new and rewarding listening
environment! You will without a doubt experience a Totem moment.
OUR VISION
Totem Acoustics’ mission is to develop loudspeakers capable of reproducing a truly musical and involving
performance. Our goal is to provide designs that are both affordable and real ‘soul movers’ for the music
lover and surround lover. Music of any period, country or style is accurately and emotionally rendered with
a powerful focus that is yet soul stirring.
Each speaker is a ‘piece de resistance’ that attests to the profound sound staging that can be reproduced
by flexible and innovative engineering. Listen and believe...
2
TOTEM LIMITED WARRANTY
Please register online at www.totemacoustic.com within two weeks of the purchase date.
The Totem speakers must be purchased from a TOTEM AUTHORIZED DEALER.
Keep your original bill or receipt obtained from your Totem Authorized Dealer.
All Totem products are created with the utmost care and quality in mind. If ever a problem should arise,
Totem’s speaker are covered by a five (5) year limited warranty, (excluding subwoofers) starting from
the date of purchase. The Totem limited warranty applies to products in normal home use only. The
warranty is void if serial numbers have been altered or removed. The warranty is void if products show
signs of abuse. The warranty is void if the speakers have been tampered with.
The speakers require at least 85-90 hours of actual music playing time as a minimal break-in period. During
this time, refrain from playing them at very loud levels. You will notice a definite gradual improvement in
the cohesiveness of the music reproduction as this occurs.
Retain the sturdy carton and all packing material; if needed, it will prove invaluable for damage-free
transport or storage and upgrade purposes.
We reserve the right to any future change or modification without notice. If you have any further queries
or require any classifications, feel free to contact your Totem Authorized Dealer.
For further assistance contact your TOTEM AUTHORIZED DEALER
or visit the Support Section of the Totem website at www.totemacoustic.com.
3
USER MANUAL
MASK IN-WALL / MASK IN-CEILING / MASK STEREO
High performance holographic architectural speakers
MASK IN-WALL 6.5 AND 8
MASK IN-CEILING 4, 6.5 AND 8
MASK STEREO 6.5
Thank you for choosing the Totem Acoustic MASK Architectural series. Please take the time to fully read
this manual prior to beginning set-up. The manual will clearly guide you to achieve the best possible
sound that these newly acquired Totem speakers are capable of providing. If you have further questions,
contact your Totem Authorized Dealer.
Beyond sonic performance, Totem has placed tremendous consideration to the home integrator. New
construction or retro-fit, the MASK Architectural speakers incorporate one of the shallowest closed box
designs. Accompanied by a “completely flat” paintable grill, the mounting system allows for remarkable
flexibility.
For further assistance, contact our tech support at [email protected].
UNPACKING
Totem Acoustic keeps to a strict quality control regimen and all factory-sealed products leave our facility
in perfect condition. If there are any damages visible or concealed they have occurred in handling and
must be reported immediately to your Totem Authorized Dealer.
Carefully remove the speaker(s) from the box(es); take caution as the size often deceives the actual weight.
Save all custom cartons and packaging foam for future use. They are rather expensive and may come in
handy for future upgrades.
WARNING / IMPORTANT TECHNICAL NOTE
_______________________________________________________________________________________________
PLEASE READ BEFORE OPERATING SPEAKERS. THE WARRANTY ON SPEAKERS IS VOID IF THE VOICE COILS ARE
BURNED OR DAMAGED AS A RESULT OF OVERPOWERING OR CLIPPING.
OVERPOWERING: The volume control of most amplifiers and receivers is a logarithmic type, which means that full rated
power may be reached with the volume control at as little as the halfway point. In addition, operating the loudness feature
or boosting the treble or bass controls increases power output well beyond rated levels. AS A RESULT OF THE ABOVE
FACTORS, A 30-WATT AMPLIFIER CAN PRODUCE DISTORTED OUTPUT LEVELS OF OVER 100 WATT AND MAY DAMAGE
YOUR LOUDSPEAKERS.
CLIPPING: Clipping refers to the power level at which an amplifier begins to distort a waveform by flattening its top and
bottom into a square wave-shape. When fed to tweeters and/or midrange speakers, this may result in exceeding their
maximum power handling capacity, causing damage to the speaker voice coil. CLIPPING CAN BE IDENTIFIED BY FUZZ
OR DISTORTED SOUND. IF THIS IS HEARD, LOWER THE VOLUME IMMEDIATELY TO AVOID DAMAGE TO YOUR SYSTEM.
CONTINUOUS CLIPPING WILL DAMAGE OR BURN OUT THE SPEAKERS.
4
PRODUCT FEATURES / SPECIFICATIONS
•
•
•
•
•
•
•
•
In-wall infinite Baffle loudspeaker
Totem’s unique holographic voicing
Integral mounting-feet system
Proprietary crossover design
Solid twin-pair gold-plated terminals
Black polypropylene cone woofer with a rubber surround
Totem’s superior on-and off-axis performance
Pivoting soft dome with neodymium magnet and Ferrofluid™ cooled voice coil
MASK IN-WALL 6.5
MASK IN-WALL 8
MASK STEREO 6.5
Overall Exterior Dimensions
Overall Exterior Dimensions
Overall Exterior Dimensions
Height
Height
Height
Width
236 mm / 9.3”
Depth
82 mm / 3.2”
321 mm / 12.6”
Width
271 mm / 10.7”
Depth
93 mm / 3.7”
371 mm / 14.6”
Cut-out Dimensions
Cut-out Dimensions
Height
Height
Width
189 mm / 7.4”
276 mm / 10.9”
Width
224 mm / 8.8”
326 mm / 12.8”
Dia
246 mm / 9.7”
100 mm / 3.9”
Cut-out Dimensions
Dia
207 mm / 8.2”
Frequency Response
Frequency Response
Frequency Response
MASK IN-CEILING 4
MASK IN-CEILING 6.5
MASK IN-CEILING 8
Overall Exterior Dimensions
Overall Exterior Dimensions
Overall Exterior Dimensions
Height
Height
Height
50 Hz - 20 kHz ± 3 dB
Dia
165 mm / 6.5”
79 mm / 3.5”
40 Hz - 20 kHz ± 3dB
Dia
246 mm / 9.7”
100 mm / 3.9”
50 Hz - 20 kHz ± 3 dB
Dia
290 mm / 11.4”
117 mm / 4.6”
Cut-out Dimensions
Cut-out Dimensions
Cut-out Dimensions
Frequency Response
Frequency Response
Frequency Response
Dia
137 mm / 5.4”
65 Hz - 20 kHz ± 3 dB
Dia
207 mm / 8.2”
50 Hz - 20 kHz ± 3dB
Dia
240 mm / 9.4”
40 Hz - 20 kHz ± 3 dB
5
SPEAKER POSITIONING
Before installing your speakers you should consider the placement carefully, taking into effect the location of
electrical, plumbing and other fixtures. Contact your dealer for assistance if you are not sure of the best location in
your particular room environment.
PLACEMENT IN CEILING
When placing your speakers in the ceiling, they should ideally be located above the primary listening area. In a room with low
ceilings, it may be necessary to place additional speakers throughout the room to get the desired spaciousness. Contact your
Totem Authorized Dealer for assistance.
PLACEMENT IN WALL
When placing your speakers in the wall, optimal sound will be achieved when your speakers are mounted at ear level or slightly
above and the listening distance is no closer than the distance between the speakers themselves.
MOUNTING SURFACE PREPARATIONS / FINISHED CEILINGS AND WALLS
Prior to the actual installation of the speakers, it will be necessary to run cables to the speaker locations. See your dealer for
more information on cable installation. After the cable has been properly installed, you are ready to mount the speakers.
Following the simple steps listed below will result in a professional looking installation.
1. Determine the best area to mount your speakers. This area of the ceiling or wall should be free of obstructions such as
electrical conduit, HVAC ducts, or water lines. This can best be determined by noting the placement of fixtures and gaining
access to an attic or crawl space for further analysis of the location of such obstacles.
2. Find the studs / joists nearest the desired speaker mounting location. We highly recommend using a good stud-finder
tool for this procedure. If you are lining up the speakers to some other object or molding in the room, make sure you consider
the size of the baffles flange, which extends beyond the mounting hole.
3. Mark the hole. A punch out template for setting the hole is provided in the box. Position the template in the desired
position and pencil an outline on the wall or ceiling.
4. Cutting the hole. Caution: This is the most important part of the entire installation. lf you are uncertain about obstructions in the
mounting area, you should start by cutting a small hole within the penciled area with a drywall saw. Cutting at a 45 degree angle
will make drywall repair much easier should you need to patch the hole due to obstructions. Once you have determined there are
no obstructions in your desired mounting location, start cutting the finished hole at a 90-degree angle to the wall surface.
5. Add insulation. If the area in the ceiling or wall is not already insulated, add an adequate amount of insulation material to fill the
cavity. If the insulation material used is faced with foil or paper, position the foil or paper away from the speaker.
6
INSTALLATION INSTRUCTIONS
Flange
The integral mounting-feet system incorporated into your Mask
speaker allows for a quick installation by following these easy steps.
1. Remove the grill and set aside in a clean dust-free environment.
2. Attach the speaker cable (observing the proper polarity with your
amplifier; + to +, - to -). Make sure the left channel of the amplifier
channel is connected to the left speaker channel and the right
amplifier channel to the right speaker channel.
3. Make sure the mounting feet are turned inward to clear the
opening and insert the speaker into the ceiling or wall. Position the
speaker into the hole.
Note: The flange of the speaker is designed to flex and conform to
any small imperfections in the wall surface. Tighten the 6 screws on
the front of the baffle only enough to make the flange become snug
against the ceiling or wall. As you tighten the screws, the feet will
automatically flip into an outward position, thereby clamping the
drywall between the feet and the flange.
Caution: Over-tightening may warp the baffle, crack the wall, cause
the flange to distort, and make the grill difficult to install.
4. Secure the grill into place.
Note: The speaker flange incorporates high strength magnets to
secure the grill into place. Simply line the grill with the speaker flange.
Mounting Feet
PAINTING INSTRUCTIONS
If you plan on paint your grills, we recommend that it be done prior
to installation. The scrim cloth backing must be removed prior to
painting the grills. The surface should be cleaned with a light solvent
to remove any dust or residue. Totem Acoustic recommends a light
spray-painting using 5 parts thinning agent to 1-part paint. Do not
paint the grills while they are attached to the speaker.
Totem Acoustic offers a variety of accessories to make your
installation of the speakers and other Totem Acoustic products easy,
economical and professional. For more information, contact your
Totem Authorized Dealer or visit www.totemacoustic.com.
In our attempt to constantly improve, our products features and
specifications are subject to change without notice.
The grills can be painted. However, great care
should be taken not to clog the holes, as this will
greatly reduce the sound quality of the speakers.
7
CONNECTIONS
All connections should be made with the equipment turned off.
Totem delivers all speakers with jumpers installed. For a standard single wire connection simply leave the
jumpers in place. Be certain to connect the positive red (+) terminal of the speaker to the positive red (+)
output terminal on the amplifier. Be certain to connect the negative black (-) terminal of the speaker to
the negative black (-) output terminal on the amplifier. The speakers will sound out of phase (bass loss and
image distortion) if there is an error in your connection. Totem speakers can be bi-amped and bi-wired,
please consult your amplifier manual for detailed instructions or contact your Totem Authorized Dealer.
Caution: For a bi-amp connection jumpers MUST be removed.
Single wire
Bi-wire
Remove jumpers
8
TROUBLESHOOTING GUIDE
No sound: Verify that your pre-amp and/or amplifier, and receiver are plugged into the AC PLUG and are
turned on. Verify that the wall AC outlet is functional and that your system is not on mute.
Sound from one speaker only: Verify the balance control on your system. Swap speaker sides to verify
if speaker is functional. Verify power cords on all sources. (Amplifier, preamp, receiver, CD, DVR)
Lack of bass or image: Verify the polarity of speaker connections.
AMPLIFIER DISTORTION
The most common source of speaker damage results from amplifier distortion. Your amplifier may run out
of clean power upon listening at loud levels. A direct consequence of such an overuse is distorted power,
producing a greater quantity of distortion than its rated output power. This provides a threat of damage
to any loudspeaker.
The greater the amplifier power, the safer the loudness potential. A 50 watt/channel amplifier, if driven
above this 50 watt/channel limit, will naturally produce multiplicatively more distortion than at 50 watts.
A 120 watt/channel amplifier will have substantial distortion above 120 watts, but will not allow any
significant distortion below 100 watts. To conclude, more amplifier power provides cleaner power and
less possibility for damage.
VOLUME
Volume controls on the amplifier/ receiver/preamplifier are very misleading. Please note that the volume
control does not address power-output, but simply adjusts the audible level of music. It is the type of music
being played that has an incidence on the amount of power used at a given volume level. Less dynamic
music utilizes lesser amplifier power than more dynamic music does. With most music, the amplifier
reaches its maximum power between the 11 and 1 o’clock position on the volume dial.
Distortion is inevitable when the amplifier is pushed above its rated output level, which may result in
speaker damage. This occurs with any type of speaker. This type of damage constitutes abuse and may
not be covered by warranty. Be attentive to the instant distortion commences, turning the volume control
down to prevent speaker and/or amplifier damage.
LIMITS
Be wary of providing more power than is appropriate for your speakers and damaging them. Although
a more powerful amplifier may provide better sound, it is very important to utilize speakers within their
power-range rating to prevent damage.
ENVIRONMENTAL INFORMATION
All Totem products are designed to comply with international Restriction of Hazardous Substances (RoHS)
and CARB certification.
9